Blend Delicata Inks to Make a Beautiful Fall Florals Wedding Card

By Jessica Lin

Skill: Intermediate
Time: 1 hour

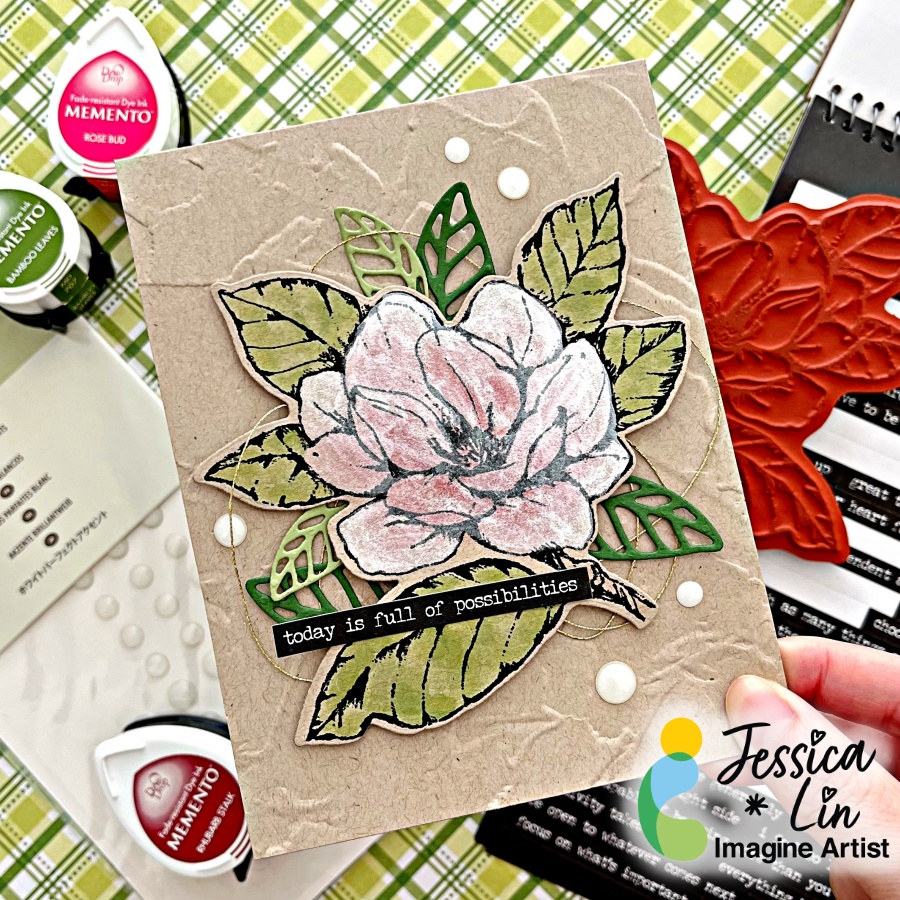
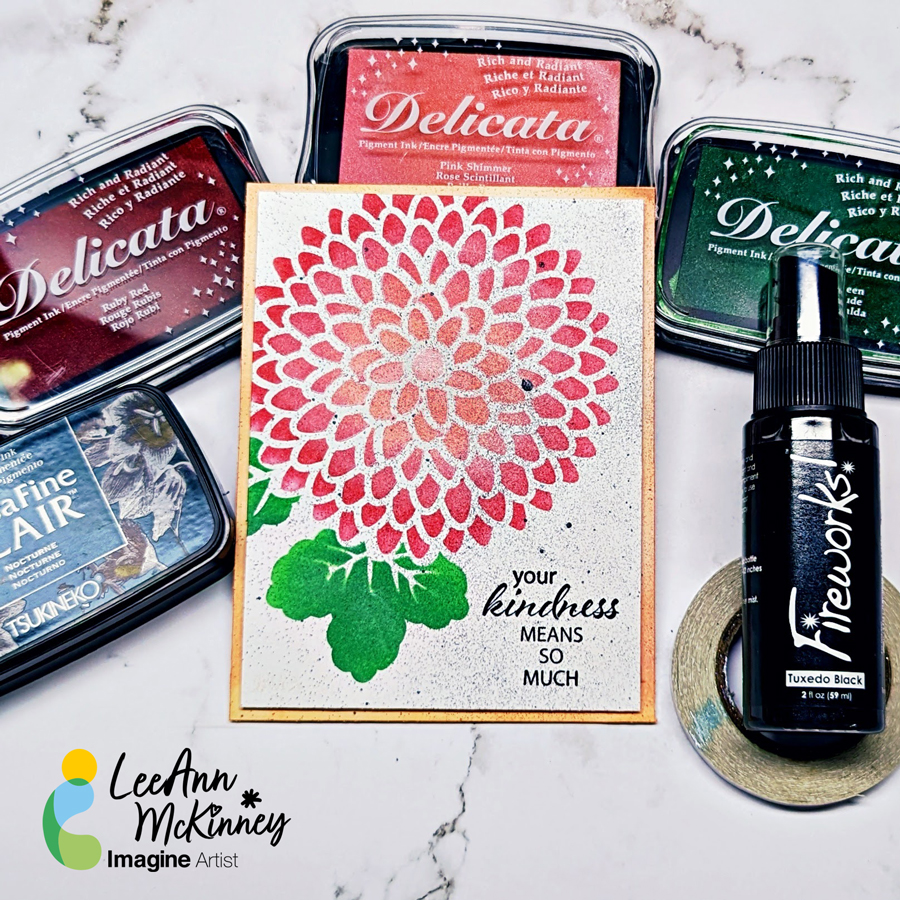
Hi everyone! It’s Jessica here. Fall is right around the corner and I have a fall floral card to share with you today. I decided to do some layered ink blending using shimmery Delicata ink pads. They are pigment-based and mostly used for stamping. However, they ink blend beautifully, too! Be sure to check out the shimmery effects of these ink pads at the end of this post.

Step 1:
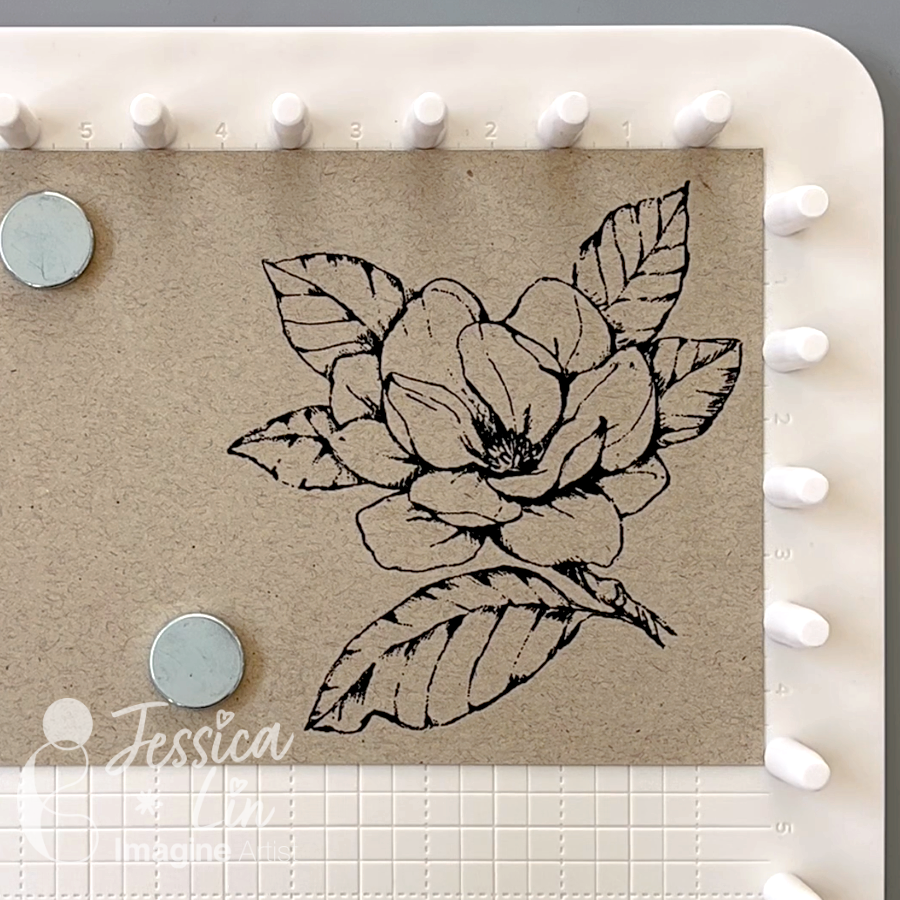
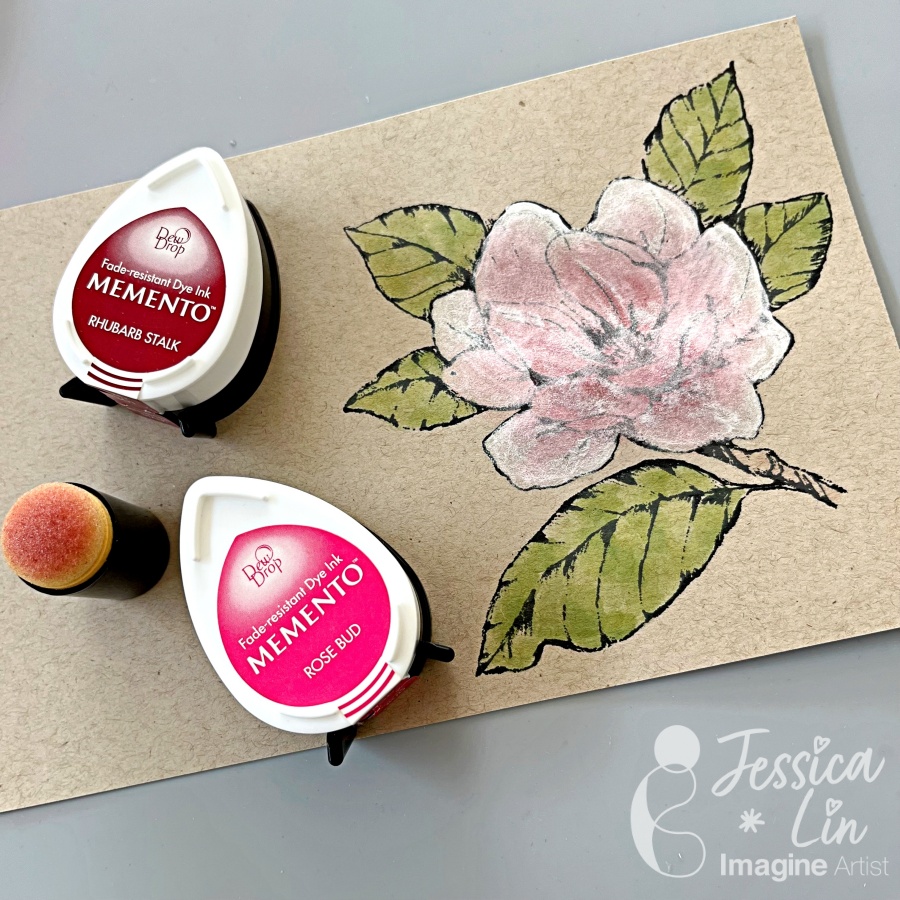
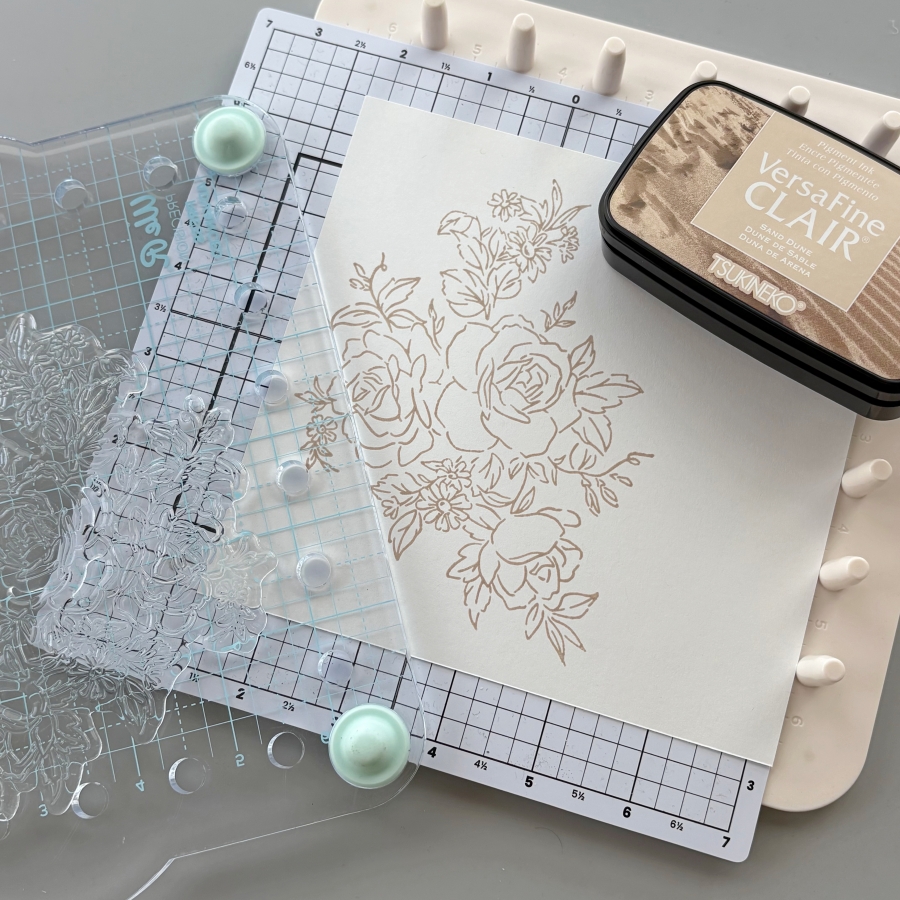
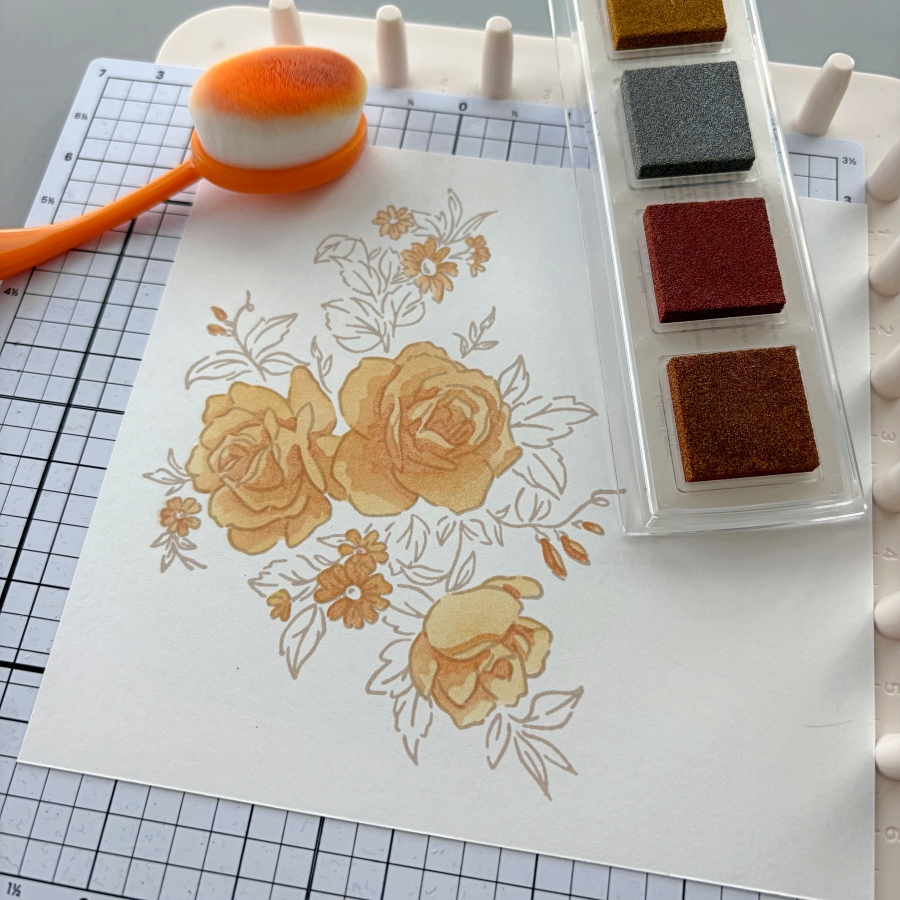
Stamp the large floral image from Stampin’ Up’s Layers of Beauty set with VersaFine Clair Sand Dune ink pad. This color is becoming my favorite for stamping outlines. The soft, neutral tone creates an entirely different feel compared to black image outlines.

Step 2:
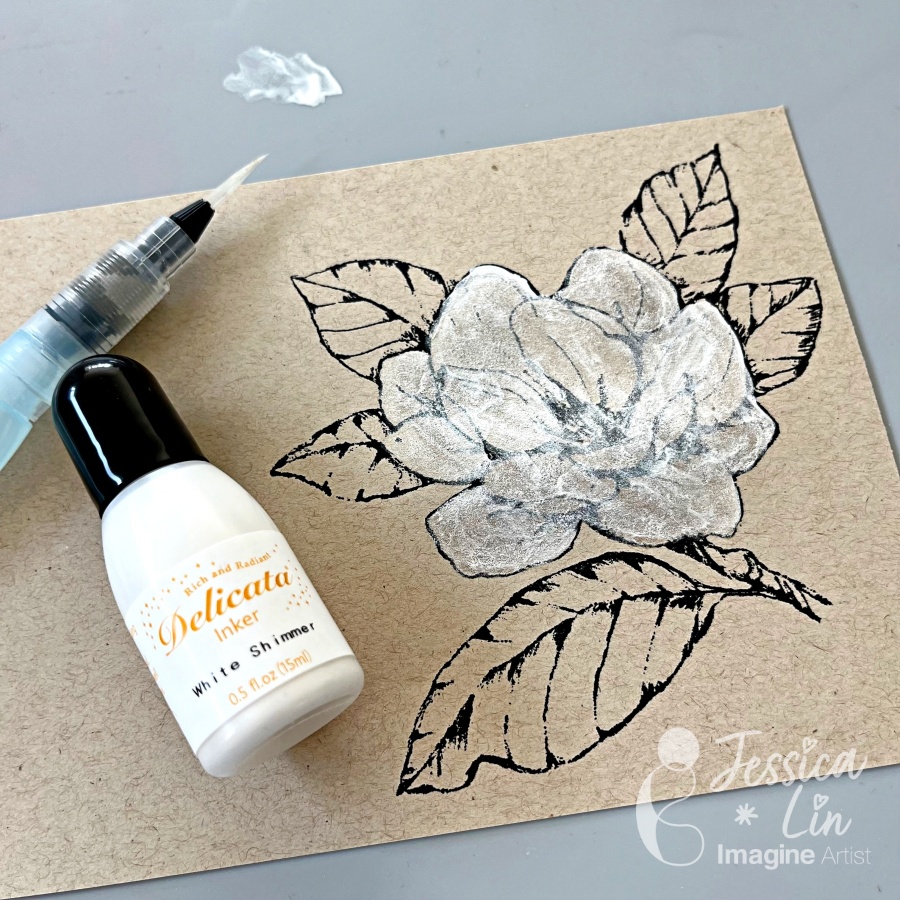
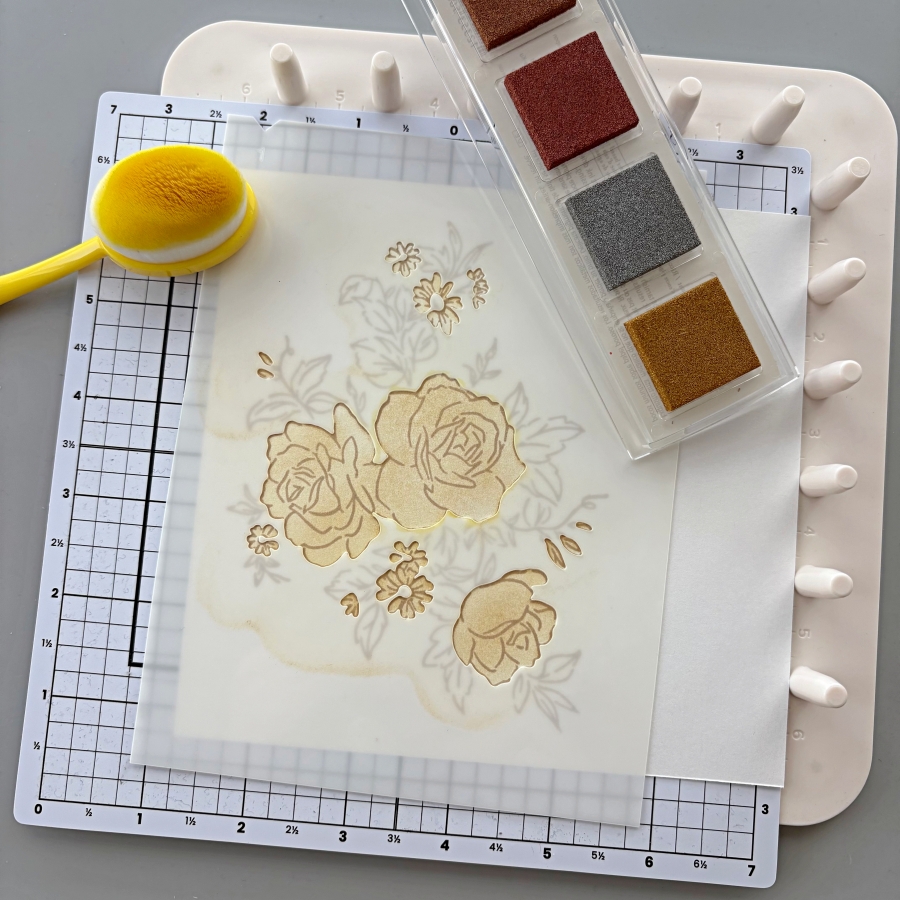
This particular stamp set coordinates with the Layers of Beauty decorative masks. I started with stencil 1 and ink blended with Delicata Golden Glitz. You could use the full size ink pad or the Quartet ink pad, which includes Golden Glitz, Silvery Shimmer, Celestial Copper, and Bronze Burst.

Step 3:
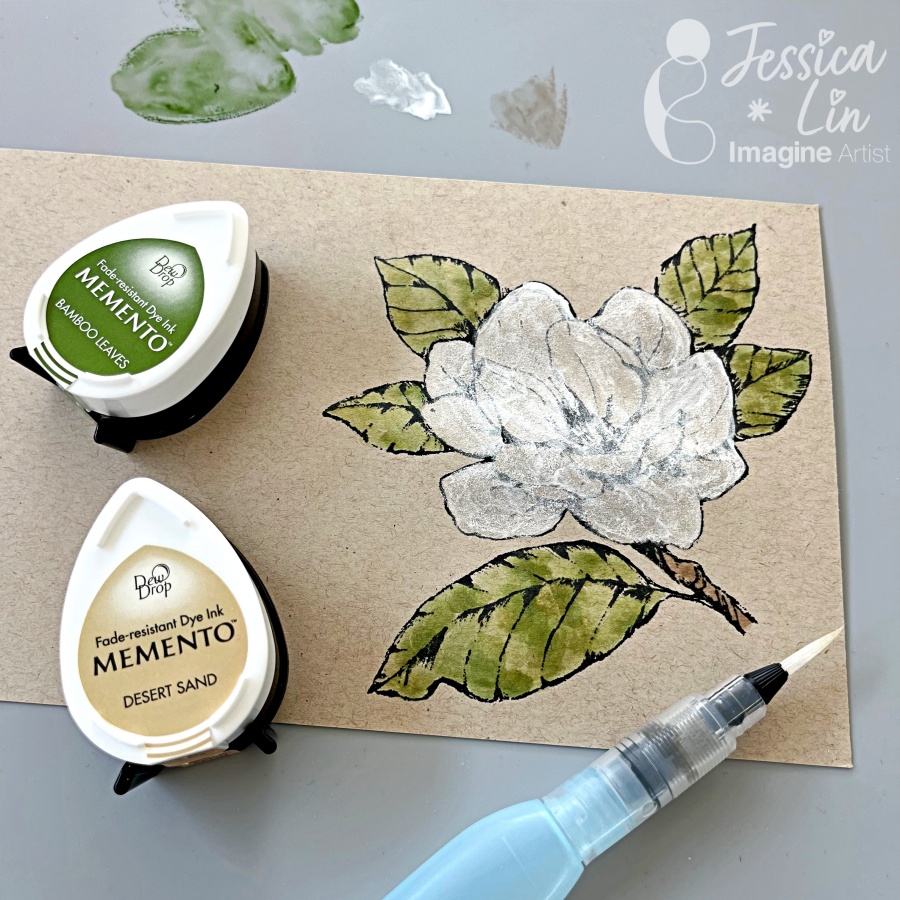
For stencil 2 and 3, I ink blended Bronze Burst and Celestial Copper. These two shades are similar, with Celestial Copper having a redder hue. I thought they contrasted too strongly against the golden base layer, so I ink blended Bronze Burst lightly to the base layer as well.

Step 4:
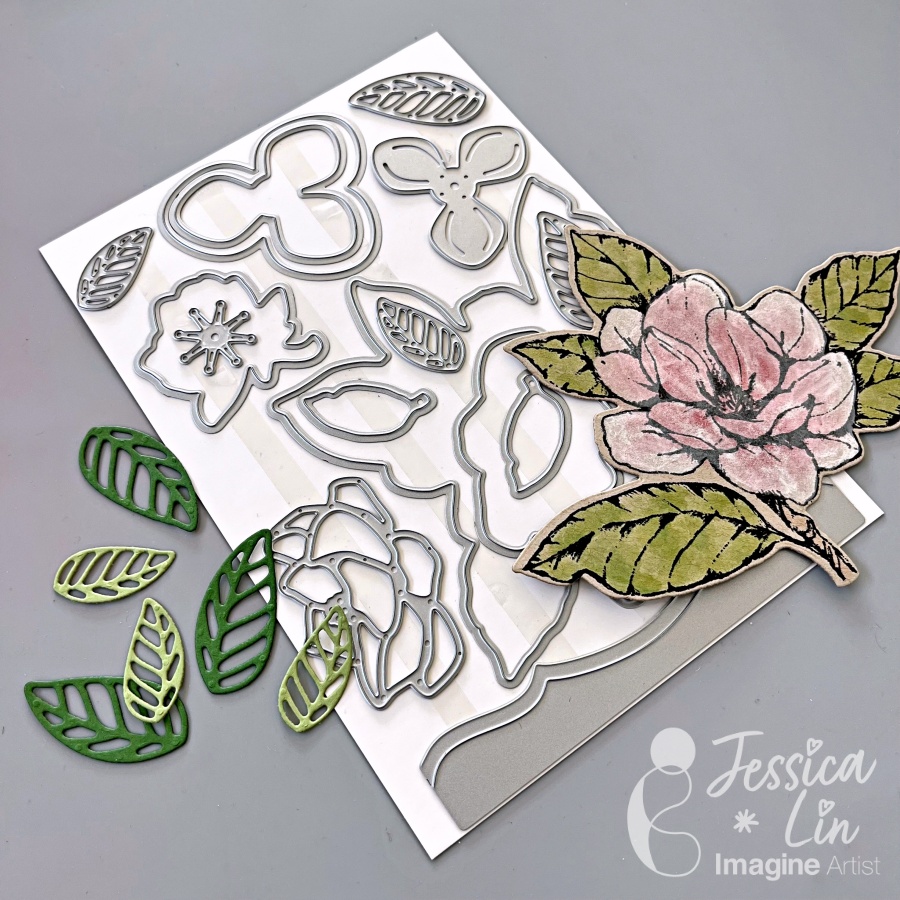
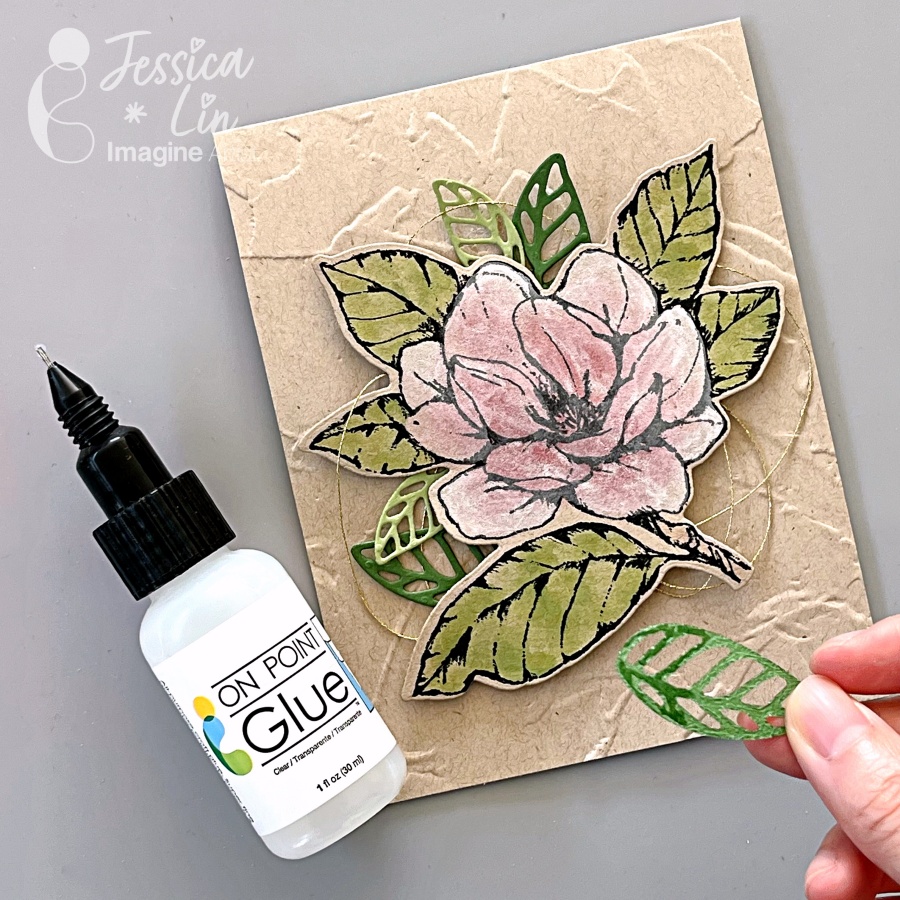
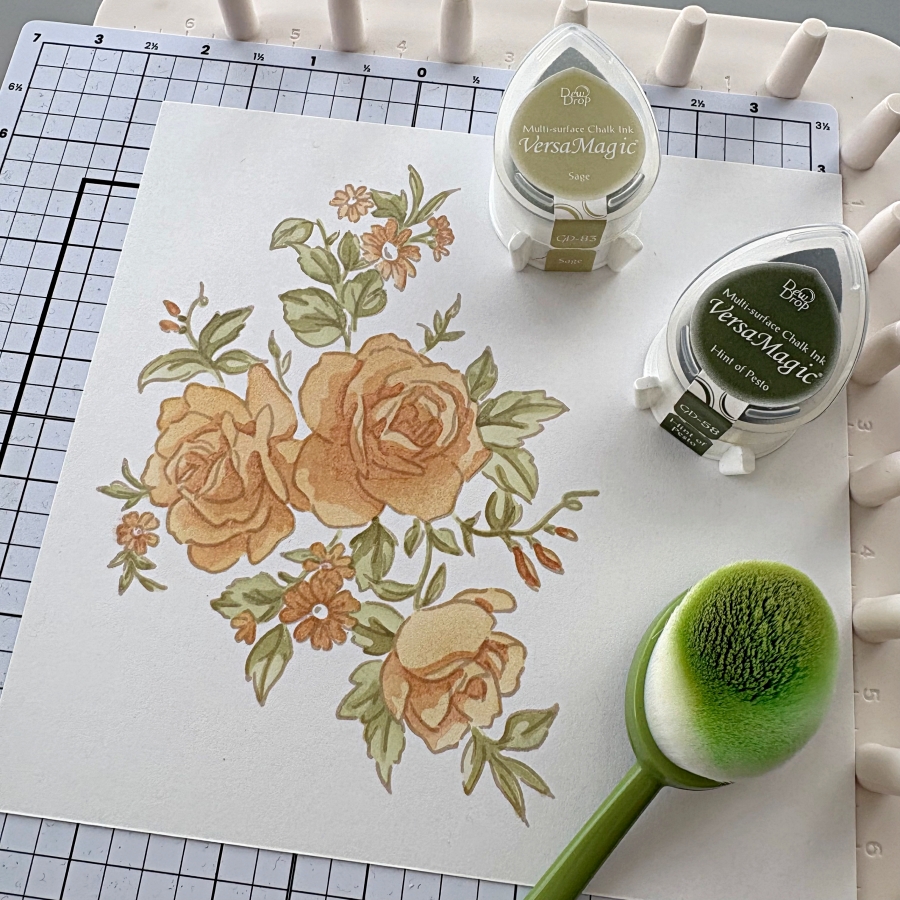
For the leaves, I ink blended VersaMagic Sage for stencil 4 and Hint of Pesto for stencil 5. Once the ink blending is completed, I die cut the floral image and mounted the back with foam tape.

Step 5:
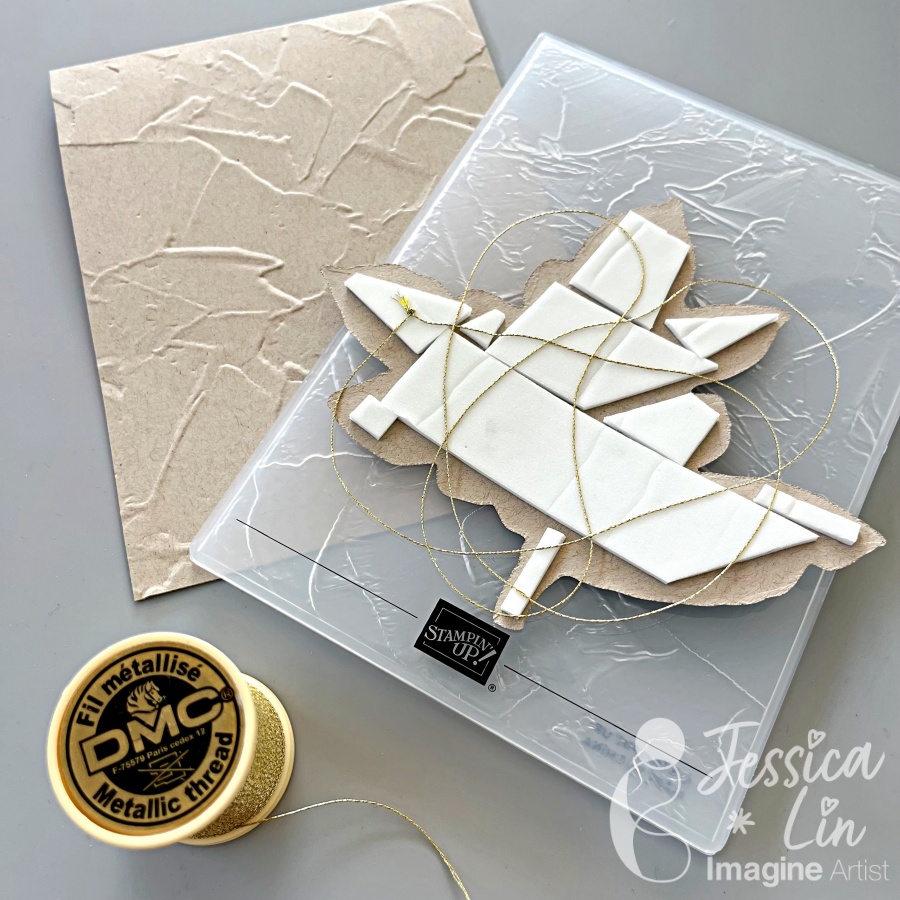
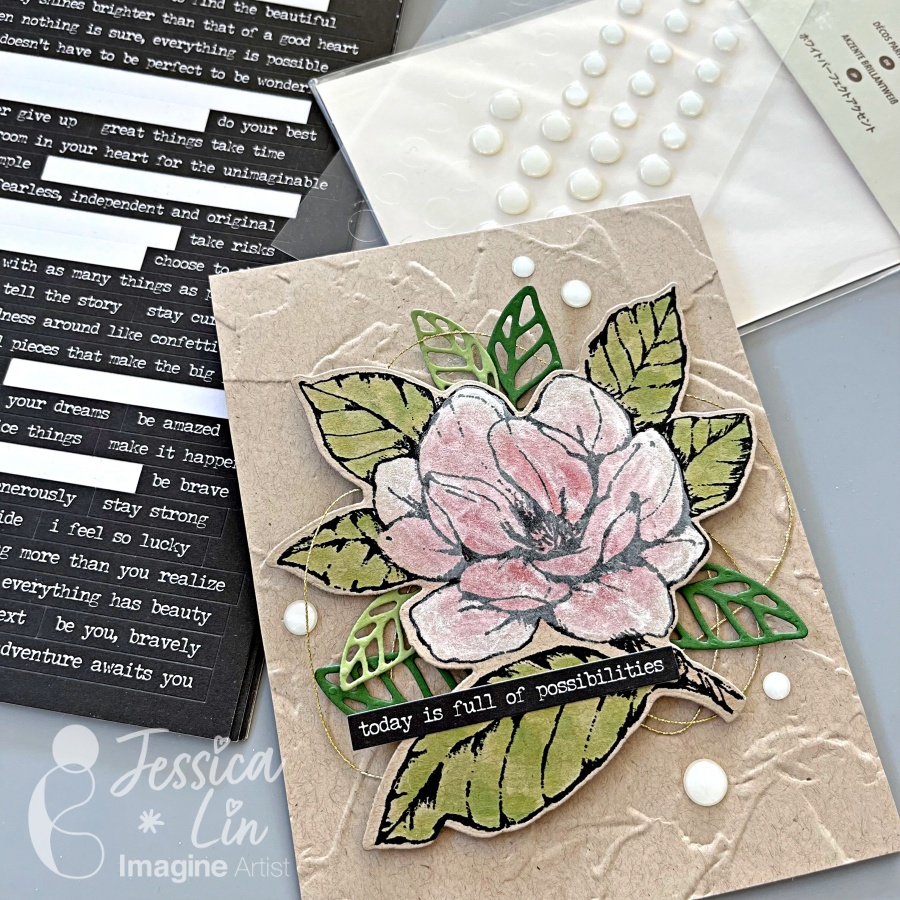
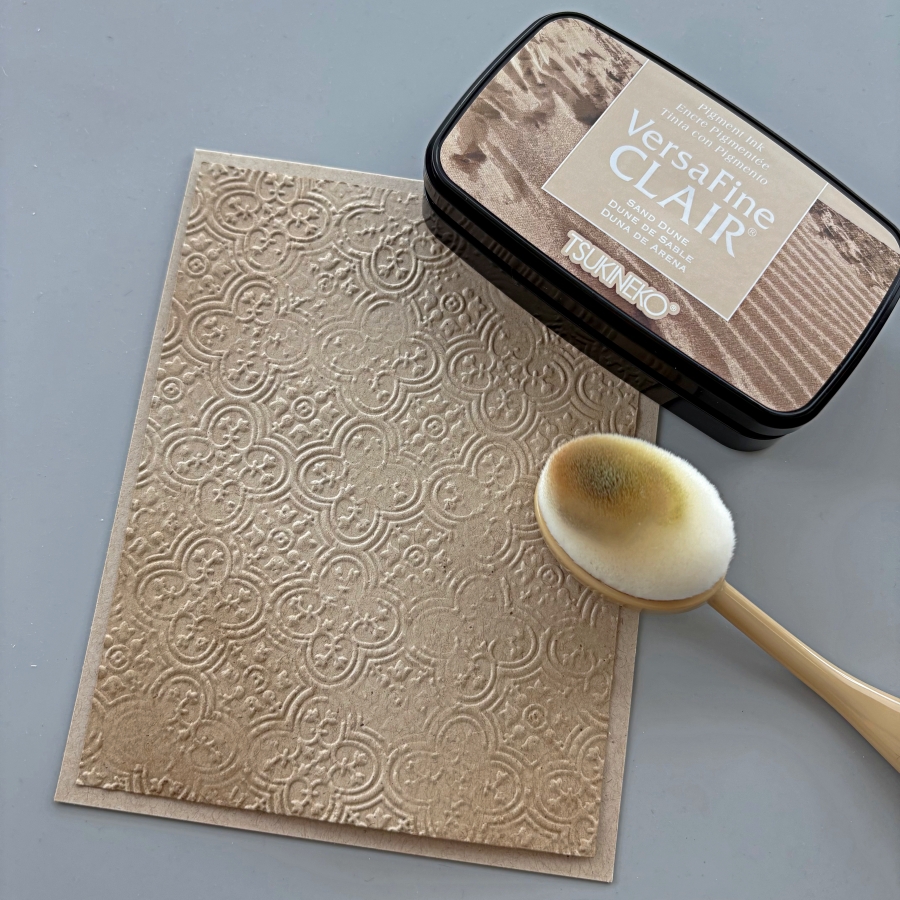
I prepared a card base using Neenah Desert Storm cardstock. Then I embossed a 4’’ x 5 ¼’’ panel with Stampin’ Up’s Distressed Tile embossing folder. To create some background depth, I ink blended the corners of the embossed panel with VersaFine Clair Sand Dune ink pad.

Step 6:
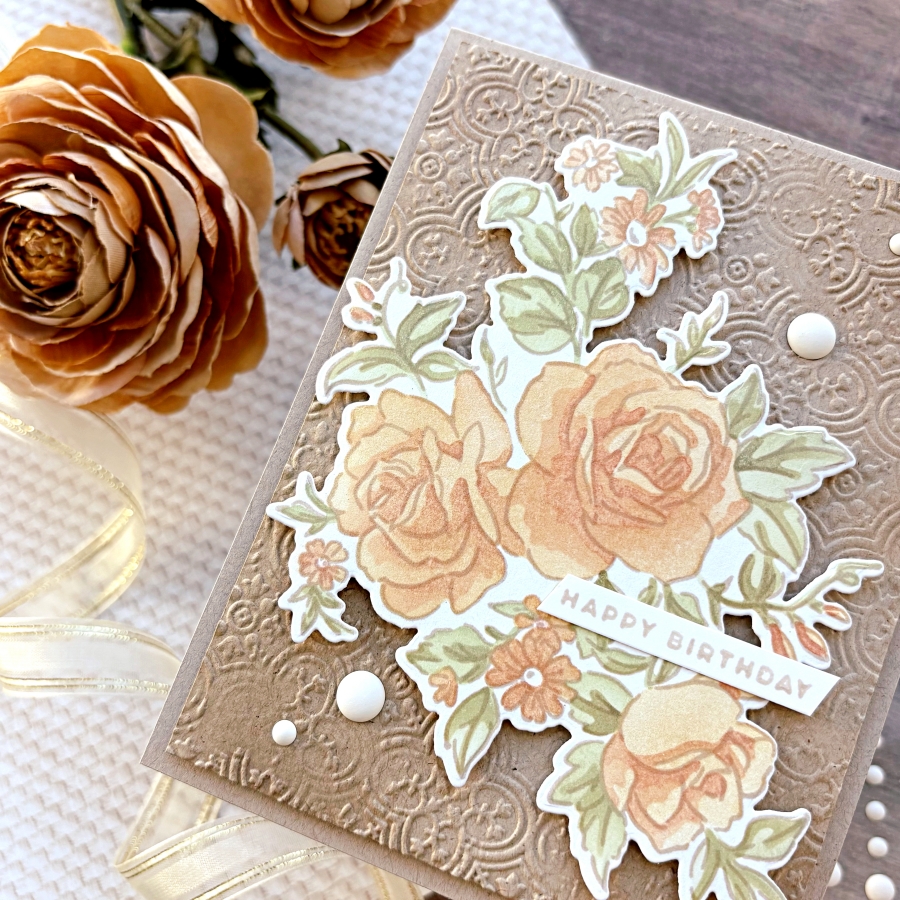
Finally, I stamped the sentiment with VersaFine Clair Sand Dune ink pad and added matte white enamel dots from The Rabbit Hole Designs.

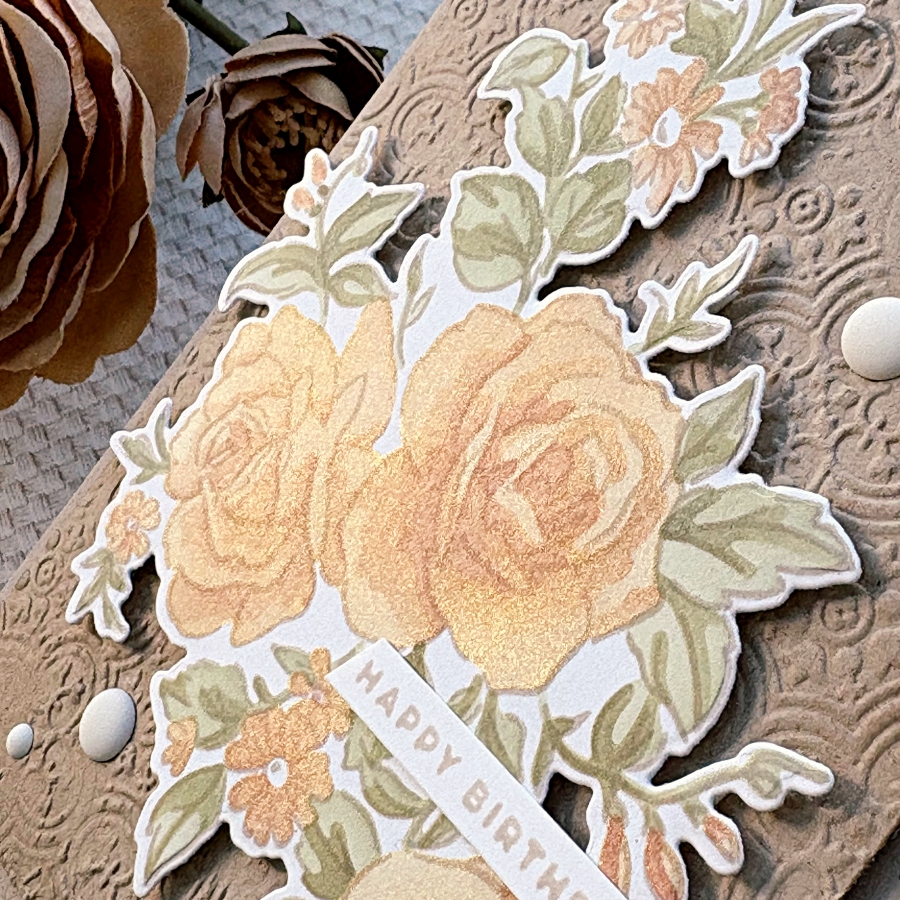
Here’s the finished card! I tried to capture the shimmery effects of the Delicata ink pads but the photo does not do it justice. It’s mesmerizing and so pretty in real life, I hope you will give ink blending with Delicata ink pads a try!

Craft Supplies:

Imagine Supplies:

Other Supplies:

  • Stampin’ Up! – Stamps, Die, Mask bundle – Layers of Beauty
  • Stampin’ Up! – Embossing Folder – Distressed Tile
  • Neenah – Paper – Desert Storm
  • Foam Tape

White Wash Technique Using Delicata Reinkers

By Jessica Lin

– Have you ever tried coloring on colored cardstock? The white washing technique is great for
creating a blank canvas for your coloring, making the colors pop against navy, kraft, or even black cardstock.

There are many white reinkers to choose from for this technique. I picked Delicata White Shimmer reinker and was surprised with how luscious the pearl shimmer looks!

Skill Level: Intermediate
Time: 45 minutes

Directions:

Step 1:
The white wash technique works well with large stamps containing big, open areas. I chose this floral image from Stampin’ Up!’s Good Morning Magnolia set and stamped it with VersaFine Clair Nocturne ink. You may use any waterproof black ink pad in your stash, but the VersaFine Clair Nocturne has been my go-to. Look at how crisp the lines are!

Step 2:
Using a waterbrush, color the center flower with Delicata White Shimmer ink from the reinker. I used the Craft Mat as my watercolor palette. Repeat this step a few times until you achieve a good coverage. Don’t worry if the black lines are covered by the white pigment ink; we will restamp the image at the end. 

Step 3:
Color the leaves with Memento ink pads in Bamboo Leaves and the branch with Desert Sand.

Step 4:
Use a sponge dauber to quickly apply color to the flower image. I dabbed on Memento Rose Bud and used Memento Rhubarb Stalk scarcely to create some shadows.

Step 5:
Restamp the floral image with VersaFine Clair Nocturne ink once again to darken the outline. Die cut the floral image and some leaves using the Magnolia Memories dies from Stampin’ Up!. 

Step 6:
Emboss the front of your A2 card with Painted Textures embossing folder to create a textured background. Mount the floral piece with foam tape to add even more dimension. I also decided to add some gold thread as a finishing touch.

Step 7:
Apply On-Point Glue partially on the bottom of the leaves die cuts, and tuck them behind the center floral image. Press down and hold for 30 seconds to create a tight bond.

Step 8:
Embellish the card with some white enamel dots and sentiment strip stickers and that’s the finished card!

I hope you enjoy this creation and give the whitewashing technique a try. It’s so simple to paint with the Delicata White Shimmer reinker, and I just love the pearly shine.

Imagine Supplies:

Other Supplies:

https://www.stampinup.com/products/water-painters?demoid=2164794

  • Gold thread
  • Foam Tape
  • Embellishment

How to Stencil a Kindness Card

By LeeAnn McKinney

Hi there friends and fellow crafters, LeeAnn here with a fairly easy, beginner level card that anyone can do with a stencil, some inks and a few blender brushes. 

Skill Level: Easy, Beginner

Time: 15 minutes

Art Supplies:

Imagine

• Delicata Ruby Red

• Tear It! Tape

• VersaFine Clair Nocturne

• Delicata Emerald Green Ink Pad

• Delicata Pink Shimmer  Green Ink Pad

• Fireworks! Craft Spray Tuxedo Black

Other Supplies used:

• GinaK Designs White Heavy Weight Cardstock – 

• Gina K Designs Zinnia Stencil