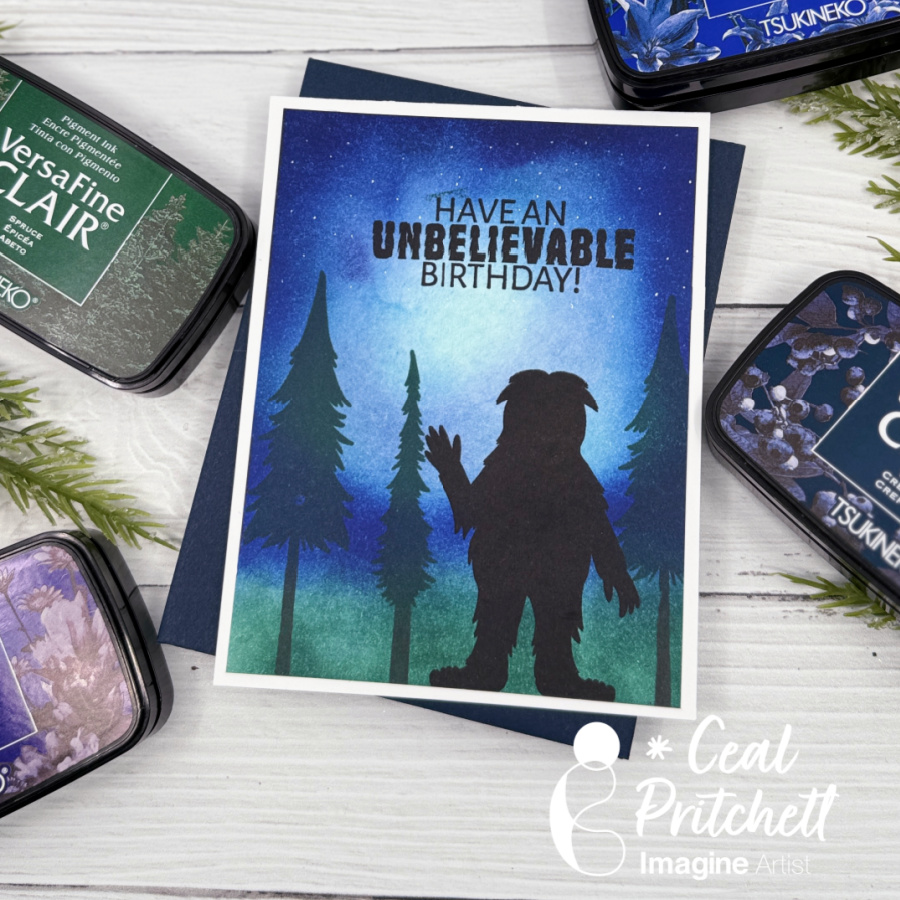
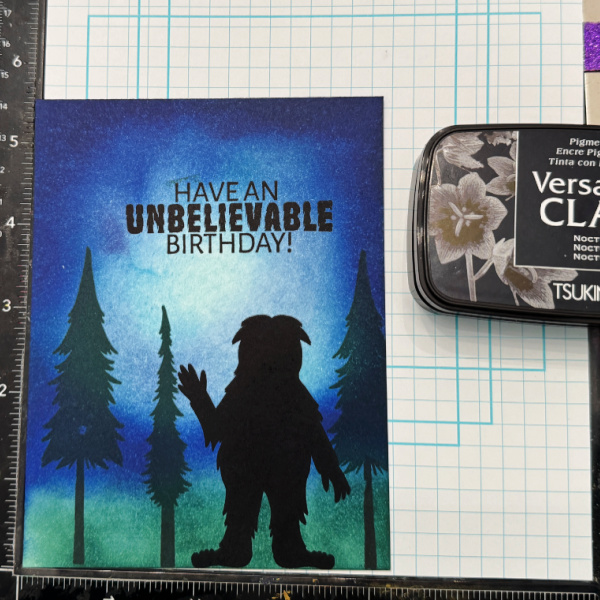
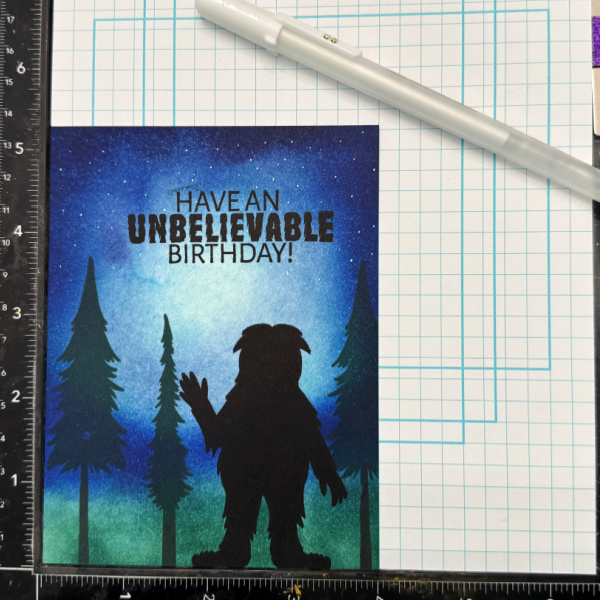
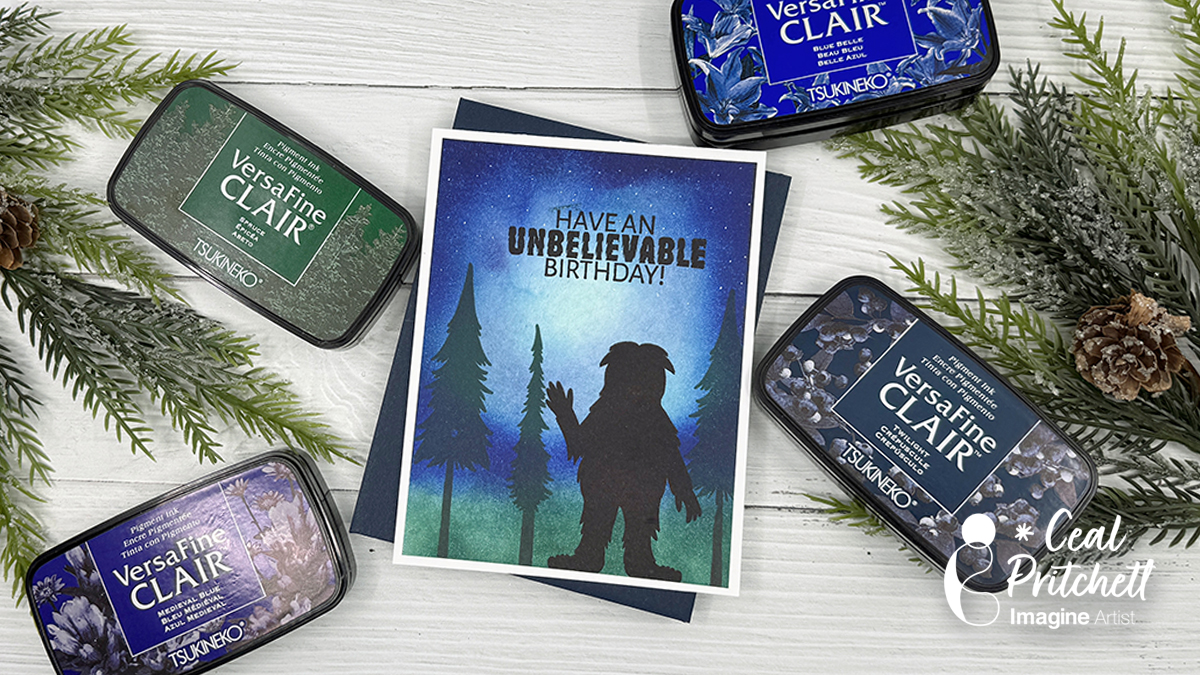
Hello crafty friends!, It’s Ceal, here. Today I am going to show you how to create this “Unbelievable” Big Foot birthday card using some VersaFine Clair inks.
Skill Level: Intermediate Time: 30 to 45 minutes
Directions:
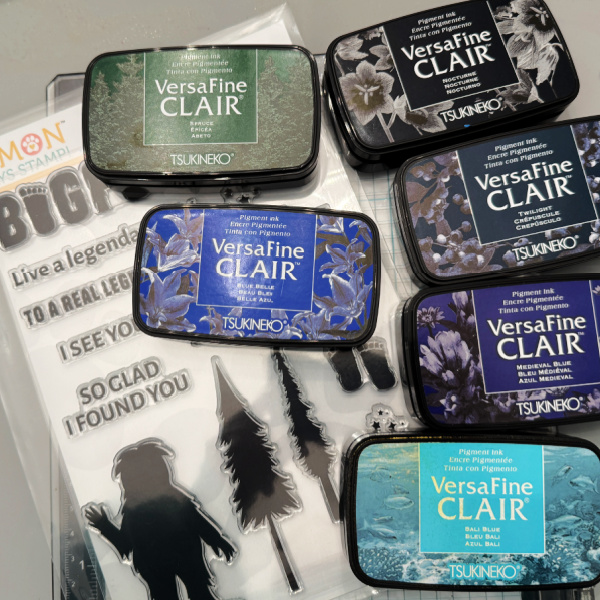
Gather your supplies, you will need a masculine stamp set and several colors of blue inks along with a green, brown and black. You will also need a white gel pen.
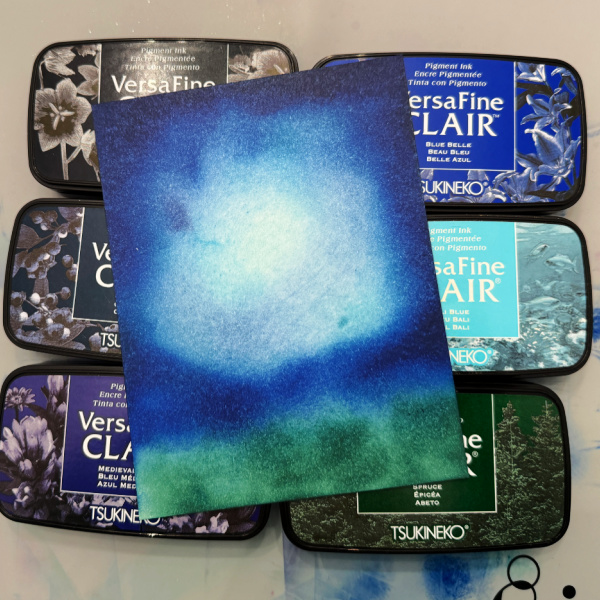
Step 1: Using a sponge dauber or ink blending tool, blend green ink across the bottom of a white panel cut 4 x 5.25. Next starting with the lightest blue blend a circle in the middle of the panel working your way out, then use the medium blue and the darkest blue last around the outside of the panel.
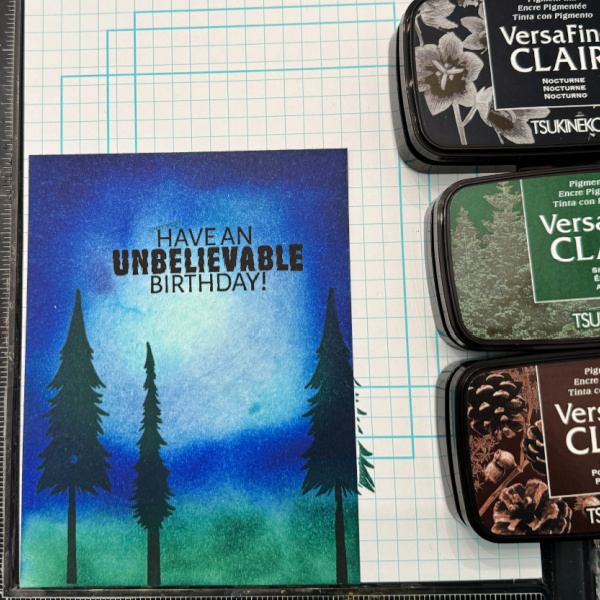
Step 2: Stamp the tree tops in green, the trunk in brown and the sentiment in black on the panel.
Step 3: Stamp the bigfoot (sasquatch) in black. I stamped the sentiment when I stamped the trees, but you could actually stamp both the sentiment and bigfoot here since they are both in black.
VersaFine Clair Nocturne is the absolute best back. The bigfoot was only stamped once, and he covers the background perfectly.
Step 5: Use a white gel pen to add some stars to the night sky and then adhere this panel on the card base.
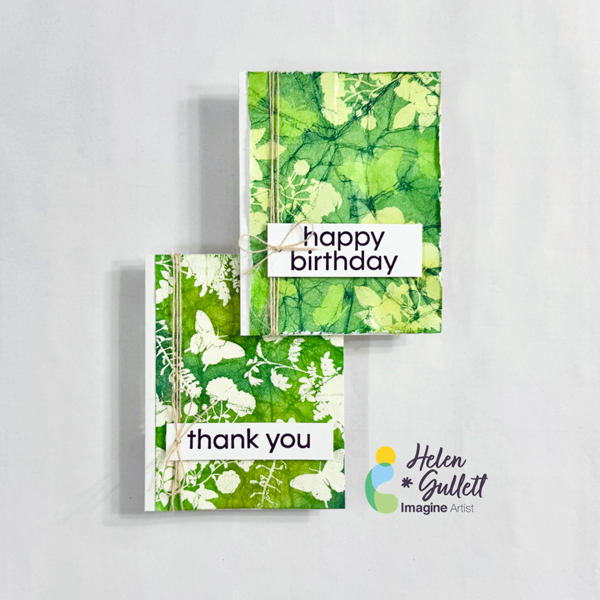
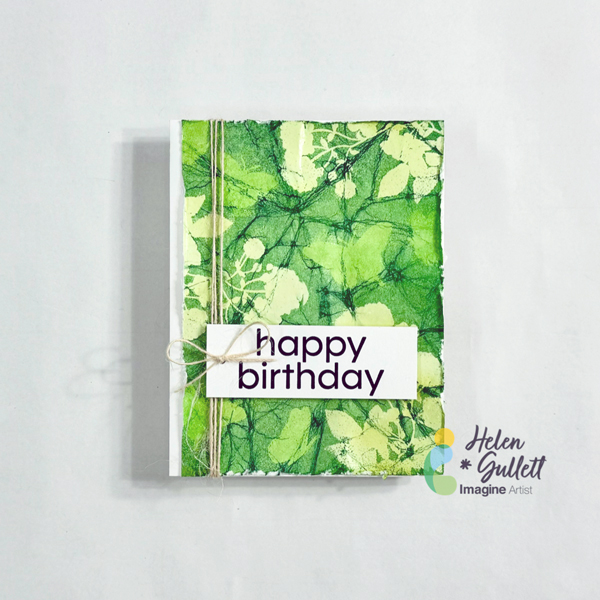
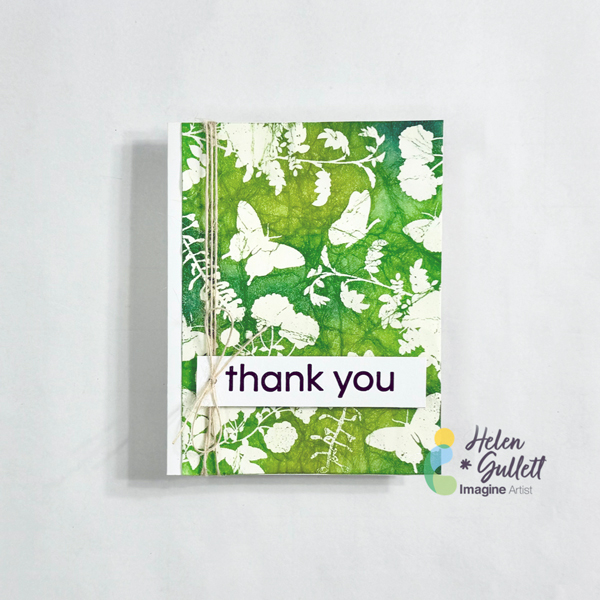
Hello crafty friends! One of my favorite cardmaking techniques is heat-embossing resist. Today, I want to share with you how to make these Batik cards using this technique. It is a technique you can use to create fun and colorful backgrounds with heat embossing and ink blending.
Let’s get crafting!
Skill: Beginner Time: 20 minutes
Direction:
Step 1 Cut out a piece of 8.5 inch x 11 inch white cardstock into 4 panels of 4.25 inch x 5.5 inch.
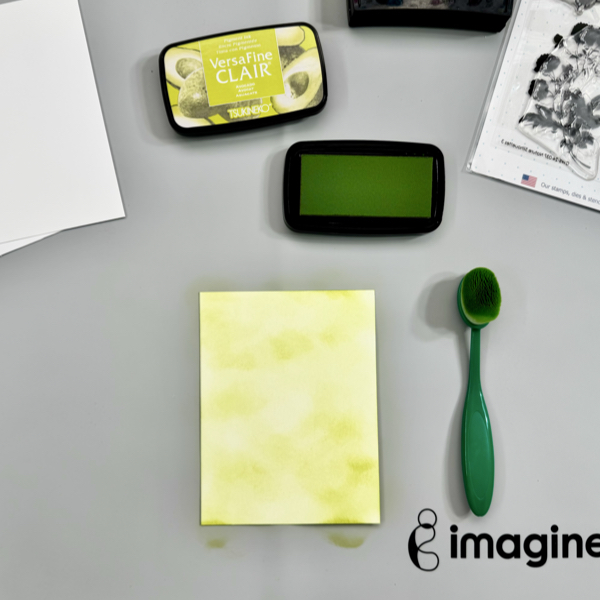
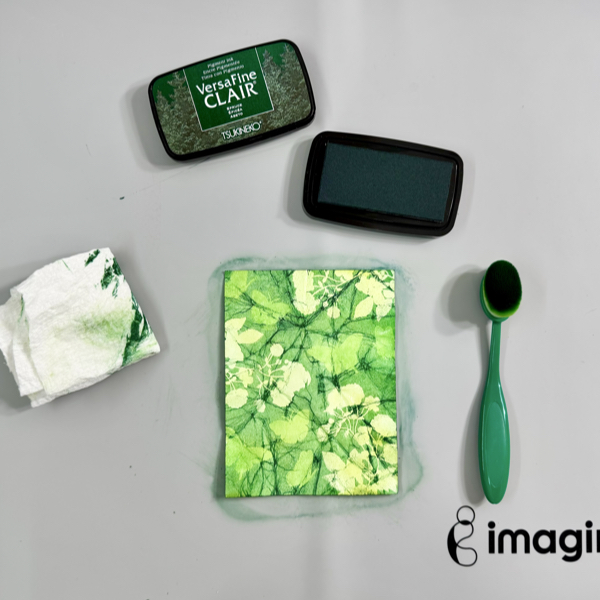
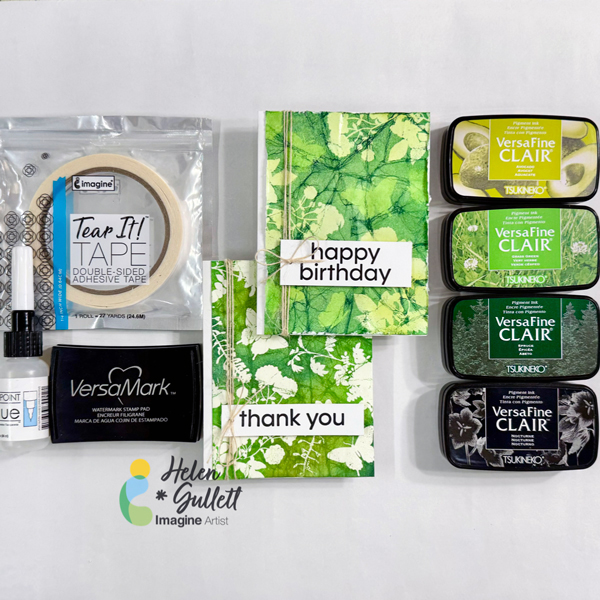
Using a blending brush, add some of the VersaFine Clair Avocado ink to one of the white cardstock panels.
Dry the ink on the cardstock with a craft heat gun.
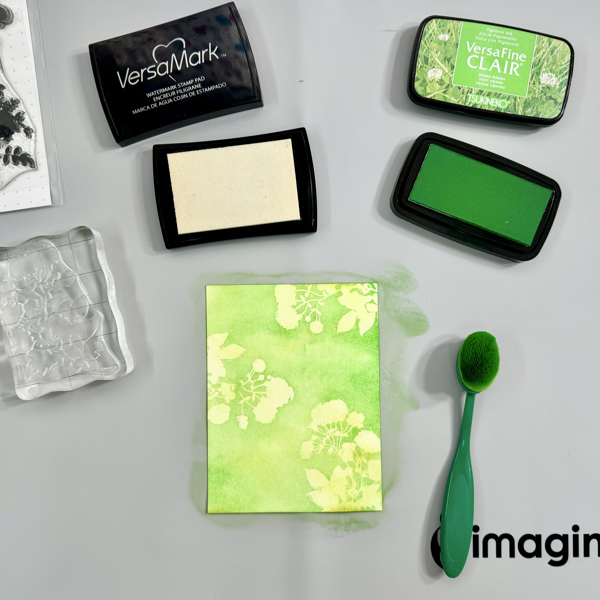
Step 2 Add some of the anti-static powder all over the inked panel.
Stamp the images with VersaMark ink and add some of the clear embossing powder. Heat the embossing powder with a craft heat gun.
Using a blending brush, add some of the VersaFine Clair Grass Green ink on the panel.
Carefully dry the ink on it, not to make the embossed images melt too much. Let it cool down before touching it. Gently wipe off the extra ink with paper towel.
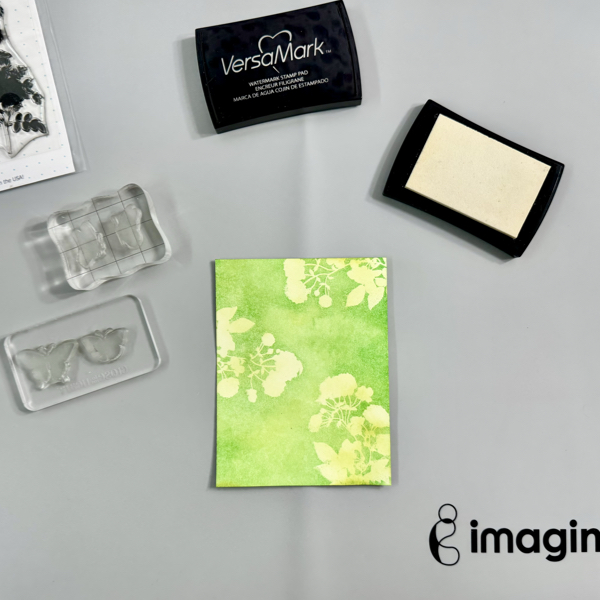
Step 3 Add again the anti-static powder on the panel.
Stamp the next images with VersaMark ink and add some of the clear embossing powder. Heat the embossing powder with a craft heat gun.
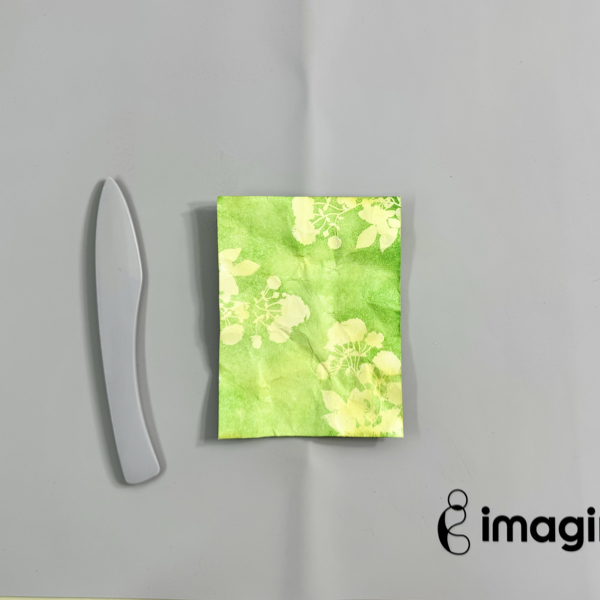
Step 4 After heating up the embossing powder, crumble the cardstock. Depending on the cardstock you use, you can spray the back of the cardstock lightly with water and then crumble it.
Flat it back on the craft mat and use the bone folder to smooth it down. You won’t get perfectly smooth cardstock back but the crumble lines are the one that will give the texture that we need for the batik look.
Step 5 The next step is adding more color to the panel!
Use the blending brush, add some of the VersaFine Clair Spruce ink on the panel.
You will start to see the pattern. Add more ink if needed to get more contrast between 3 colors.
Use a paper towel to wipe off the extra ink off the embossed images.
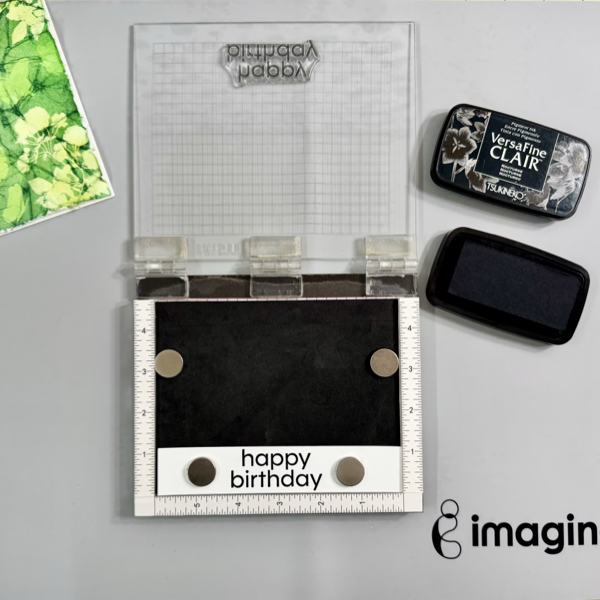
Step 6 On a piece of white cardstock, stamp the sentiment with VersaFine Clair Nocturne ink.
Dry the inked sentiment with a craft heat gun.
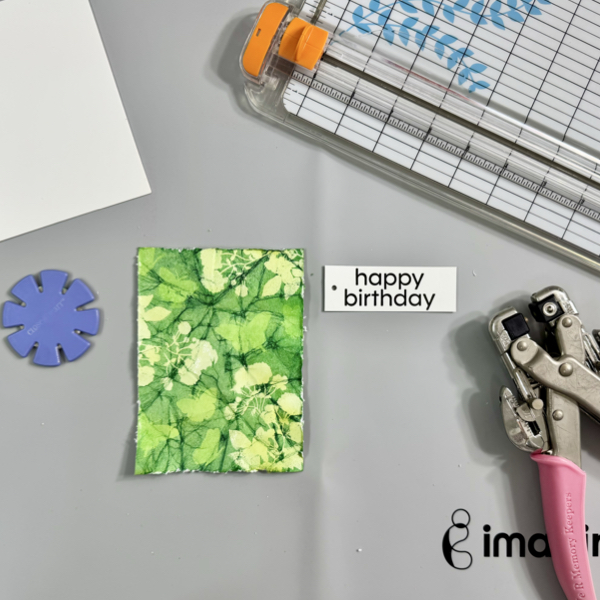
Step 7 Use a paper trimmer to trim the sentiment into a label size and punch a hole on one of the side.
Use a paper distress tool or a knife to distress all the edges of the background panel.
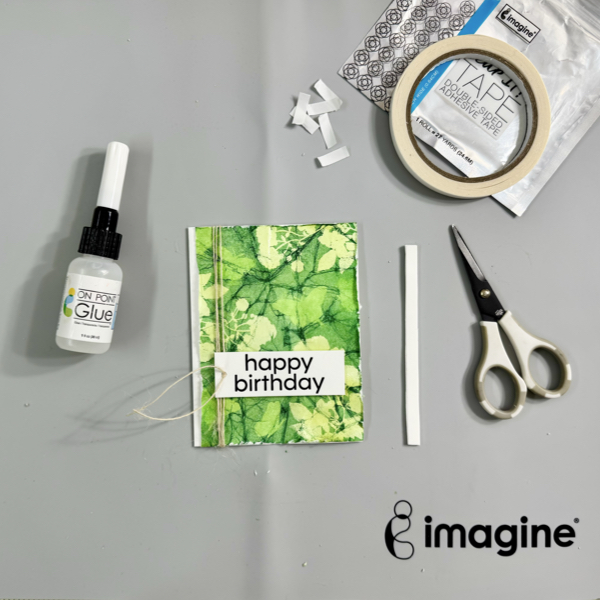
Step 8 Add the background panel on the card base using On Point Glue.
Wrap around some of the burlap twine on the card, before tie it up, add the sentiment label on the card. Put the tail of the burlap twine through the label hole. Glue the sentiment on the card with some white foam and Tear It! Tape.
Tie up the burlap twine into a bow.
This Batik cardmaking technique works well with solid images because of the heat embossing resist effect. You can pick any 2-3 colors of inks you can use that compliment each other.
Here’s the different look of the Batik card I made using the same heat embossing technique but simpler. So, instead of multiple times heat-embossing the images and blending the inks, this one is only once. Here’s the simpler steps:
First, heat emboss the image directly to the white cardstock panel.
Second, crumble the cardstock, flat it out back using a bone folder.
Third, using blending brush add the ink on the cardstock starting with the light color, medium color, then dark color.
I hope you will give this Batik technique a try and play around with different colors. Thanks so much for stopping by our blog today.
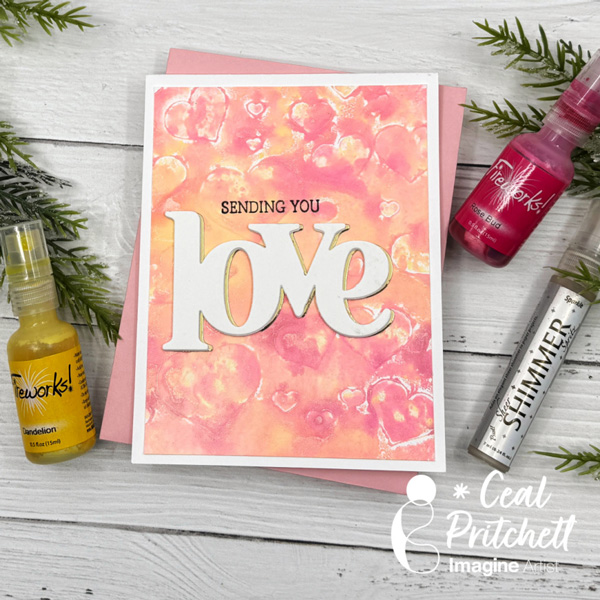
Hello Everyone, it’s Ceal, here. Today I am sharing how to create a background using our Fireworks spray using a Gel Press plate.
Skill Level: Beginner to Advanced Time: 45 minutes to an hour
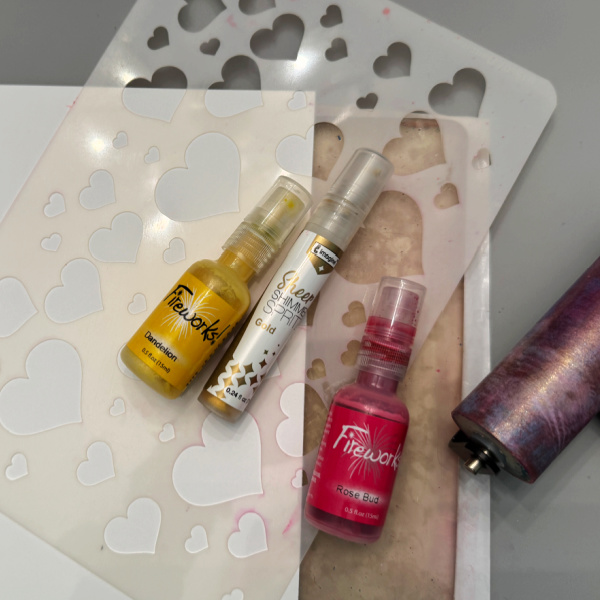
Directions: Gather your supplies. You will need some Fireworks! sprays, some shimmer spray (I used gold), a stencil, a Gel Press plate, a rubber brayer, some copy paper or cardstock (I used copy paper) A word die or any other die ad some VersaFine Clair Nocturne ink.
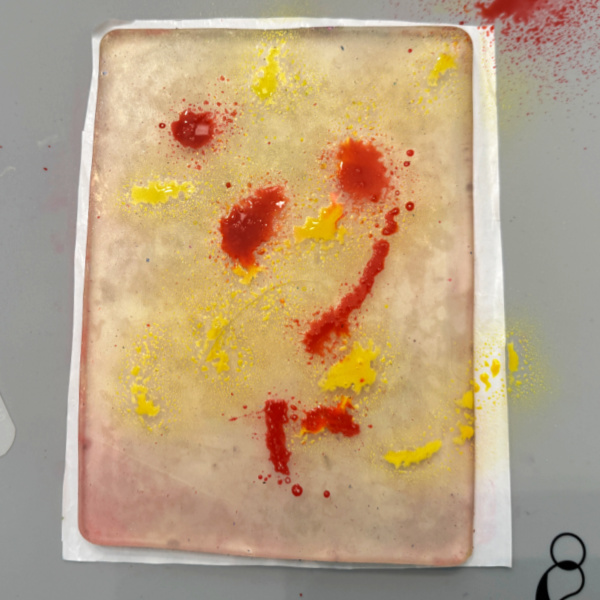
Step 1: Spray Fireworks! spray directly on the Gel Press plate.
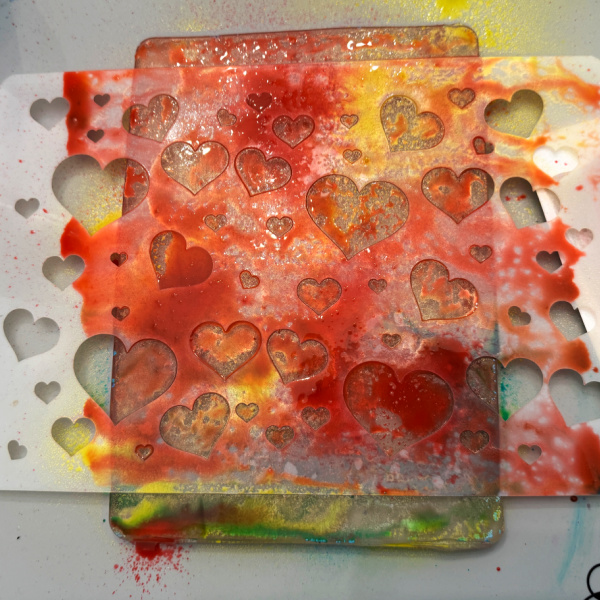
Step 2: Lay stencil over the Gel Press plate and roll the brayer over it to distribute and then spray again with Fireworks! spray.
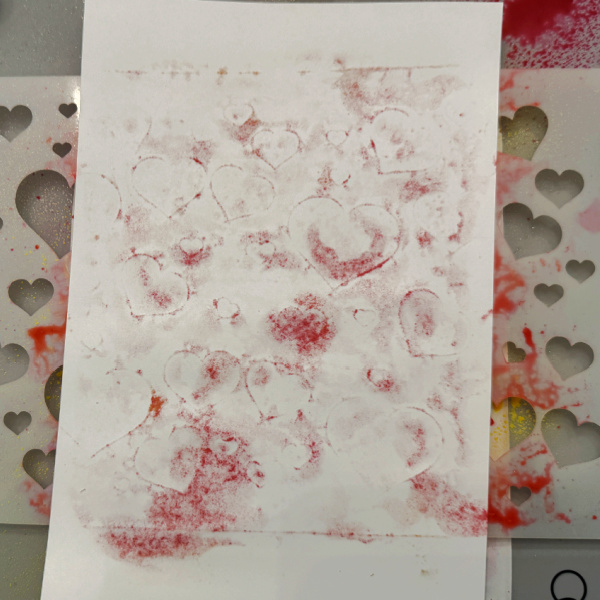
Step 3: Lay the copy paper (I used Hammermil 60lb) on top and rub your hand over the entire piece several times until you see the medium come through the paper.
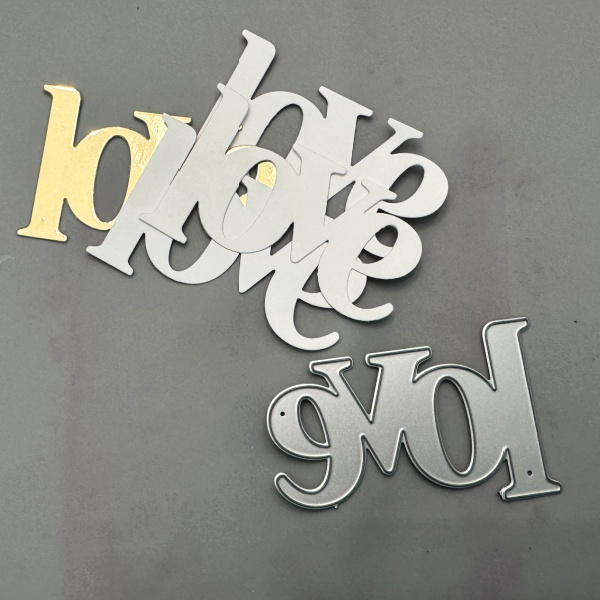
Step 4: Die cut several pieces of the word die. I cut three out of whit and one out of gold to tie in with the gold shimmer on the background. I glued the altogether offsetting the gold one on the bottom.
Step 5: Glue the background on a card base and add the word die to the front. Stamp the coordinating message directly on the background.
• Classic Crest Solar White card base -Neenah • Gold Foil cardstock – Simon Says Stamp • Gel plate – Gel Press • Heart Stencil – A Colorful Life Designs • Love die – Hero Arts • Stamped sentiment – hero Arts
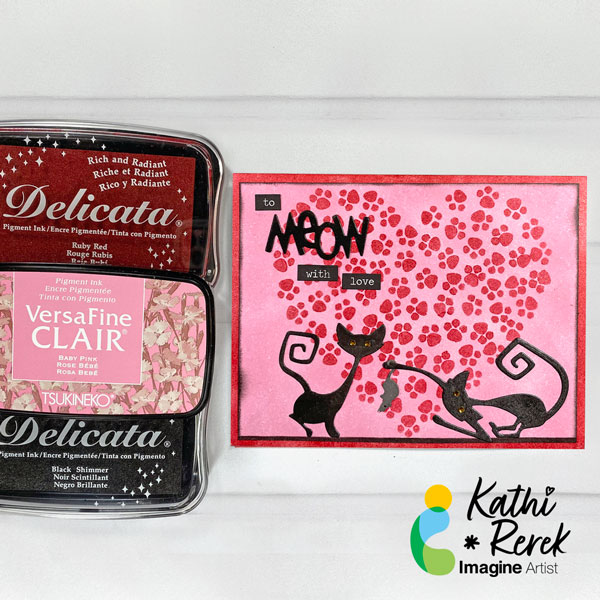
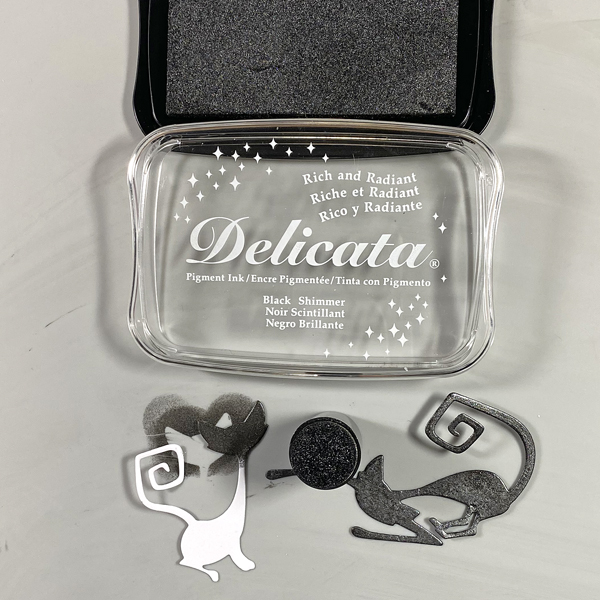
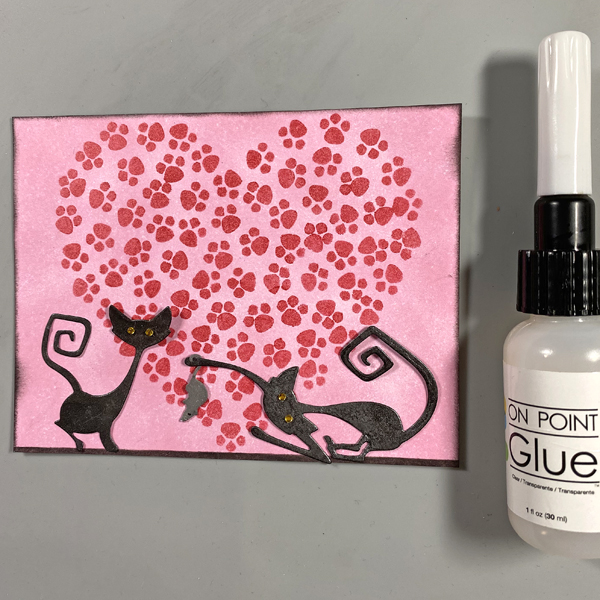
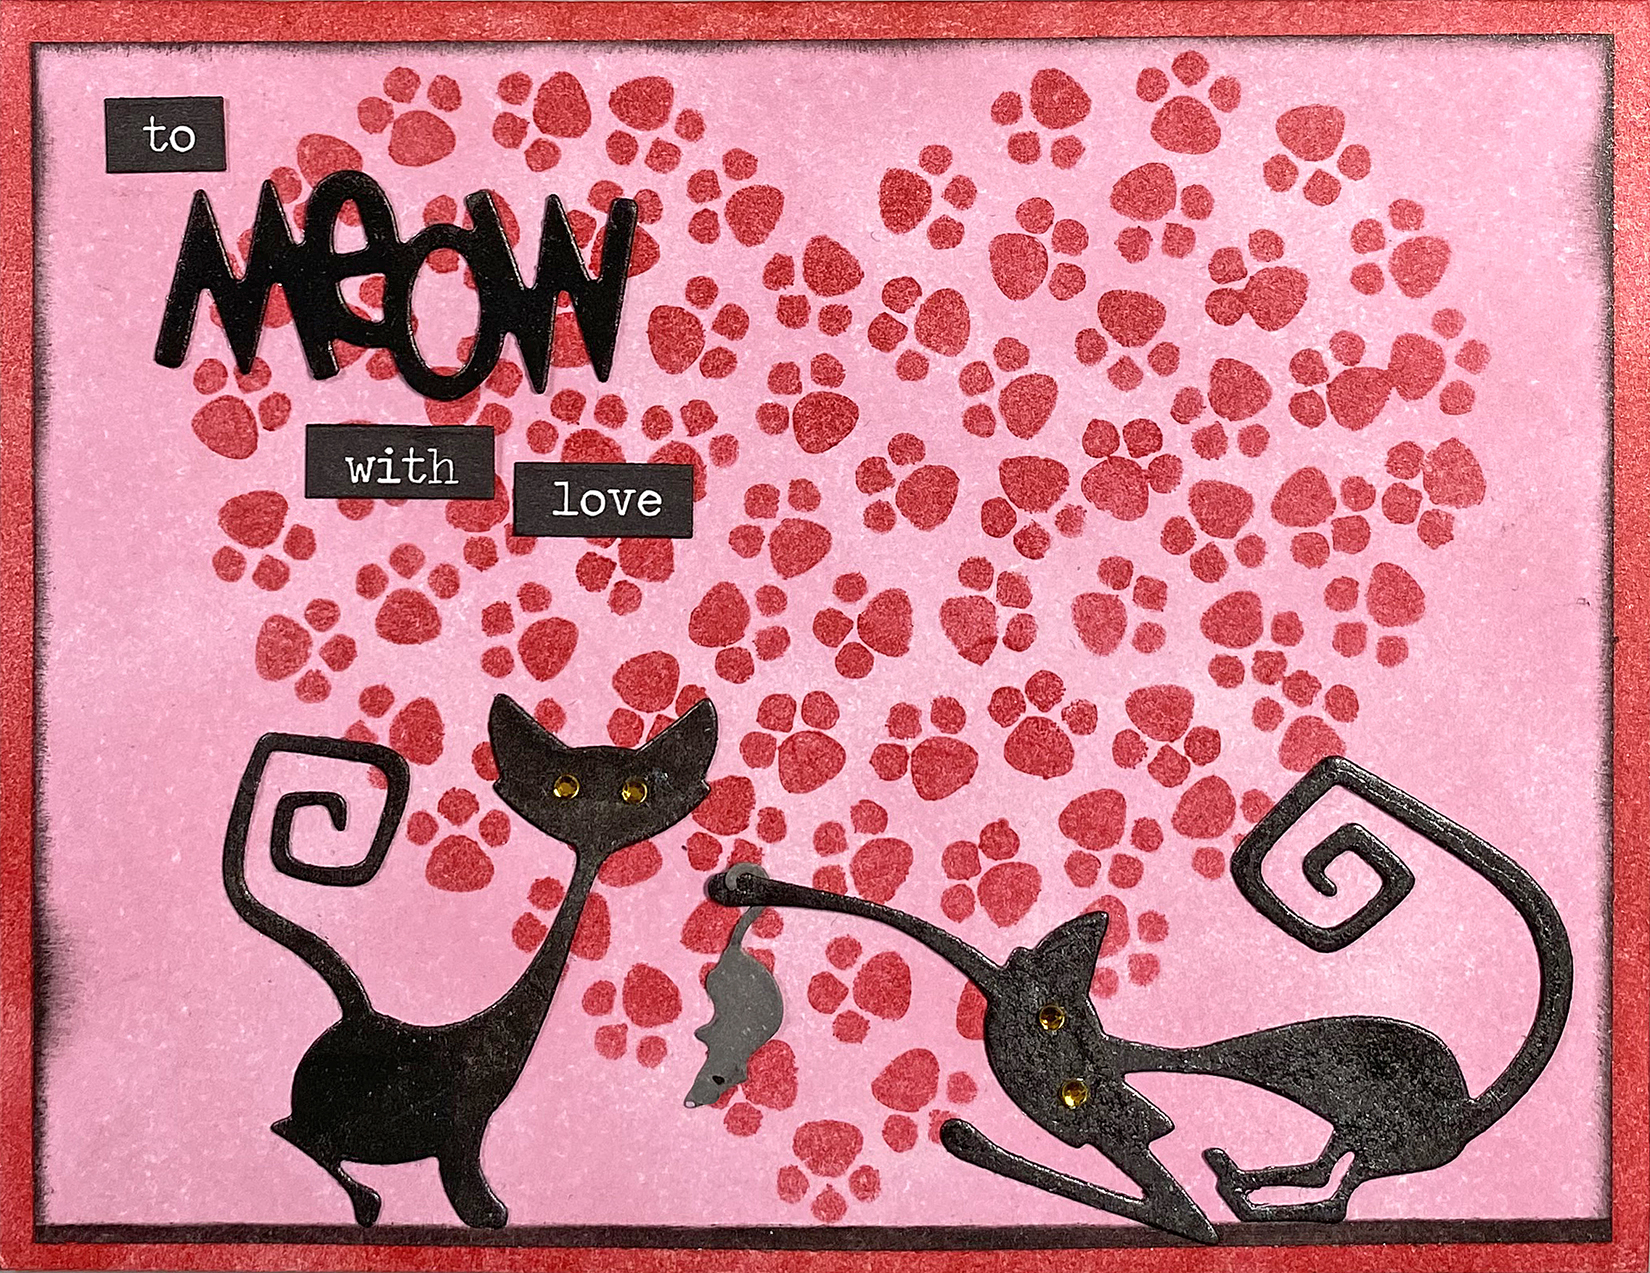
As a certified crazy cat lady, I had to make another another cat-themed Valentine’s Day Card! This one uses Baby Pink VersaFine Clair Ink with a shimmery Delicata die-cuts and a stenciled heart. It was quick, easy, and fun to create.
Skill Level: Beginner Time: 45 minutes
Instructions:
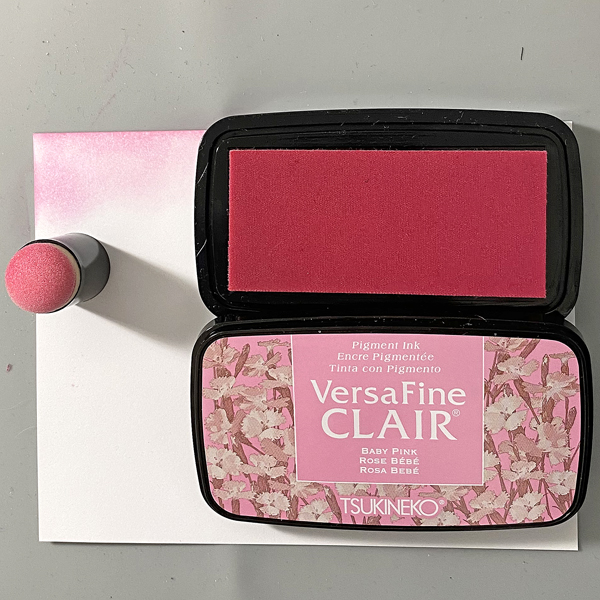
Step 1: Use a Sponge Dauber to apply Baby Pink VersaFine Clair Ink to a 4” x 5.25” piece of white cardstock. Heat set.
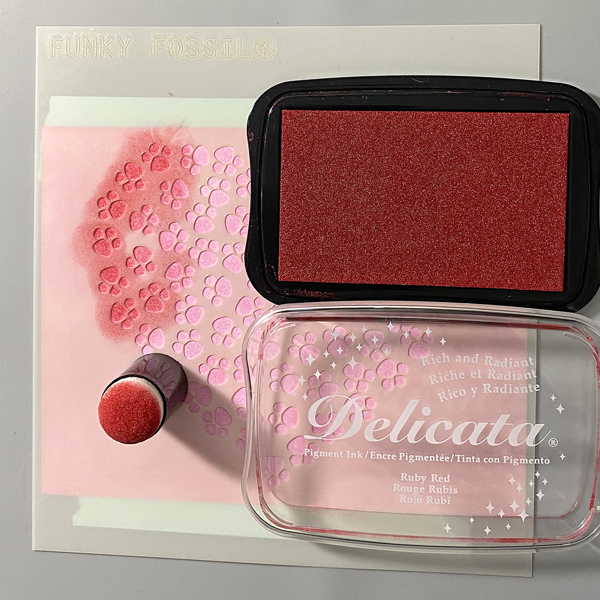
Step 2: Use low-tack tape to secure the inked image panel to the back of the Pawsome Heart Stencil. Use a Sponge Dauber to apply Ruby Red Delicata Ink over the stencil onto the image panel. When done, remove the stencil and heat set the stenciled heart.
Use a Sponge Dauber and Black Shimmer Delicata Ink to edge the image panel. Sorry that there’s no photo.
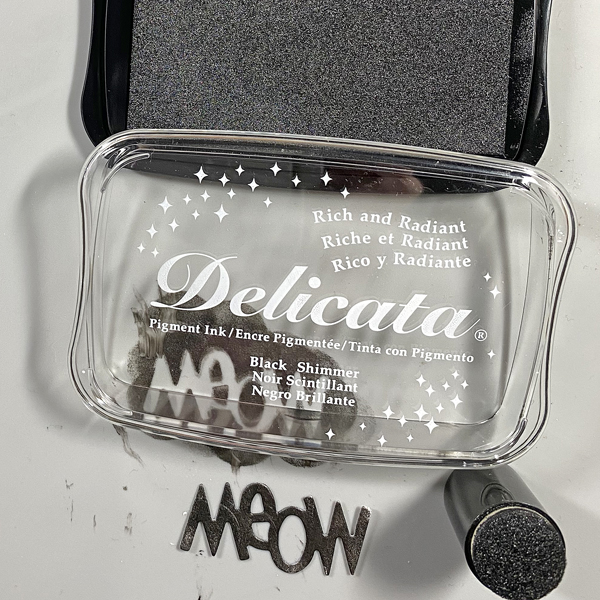
Step 3: Use two of the cat dies from the Mischievous Thinlits Die Set to cut white cardstock. Use a Sponge Dauber to apply Black Shimmer Delicata Ink to both sides of each cat die-cut. Heat set.
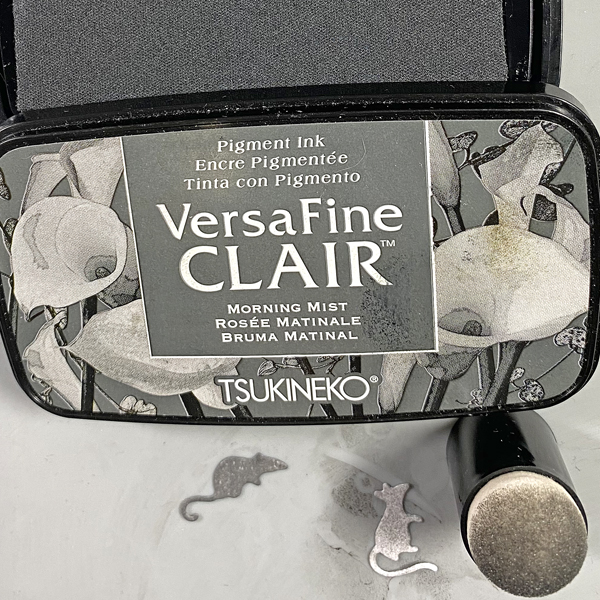
Step 4: Use the Little Mice Die to cut white cardstock. Use a Sponge Dauber to apply Morning Mist VersaFine Clair Ink to the mouse. Heat set. Use a black pen to add an eye to the mouse and a Pink Uni-Posca Paint Pen to color its nose.
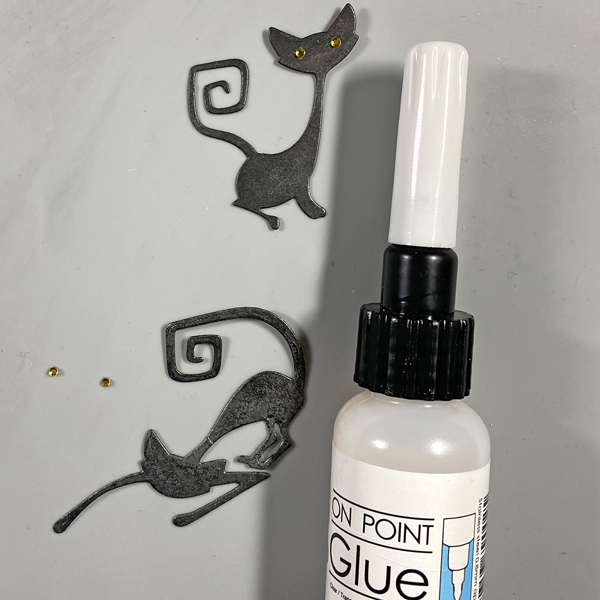
Step 5: Use On Point Glue to add tiny gemstone eyes to the cats.
Step 6: Use On-Point Glue to adhere the mouse to the outstretched paw of one of the cats. Use On Point Glue to adhere both cats to the image panel as shown.
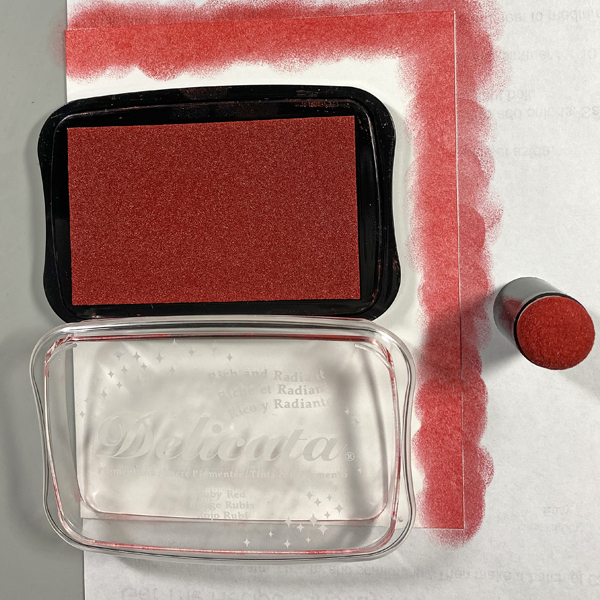
Step 7: Use a Sponge Dauber to apply Ruby Red Delicata Ink to the outside .5” of a white A2 card. Heat set. Repeat application of the Ruby Red Delicata Ink to deepen the color and shimmer. Heat set.
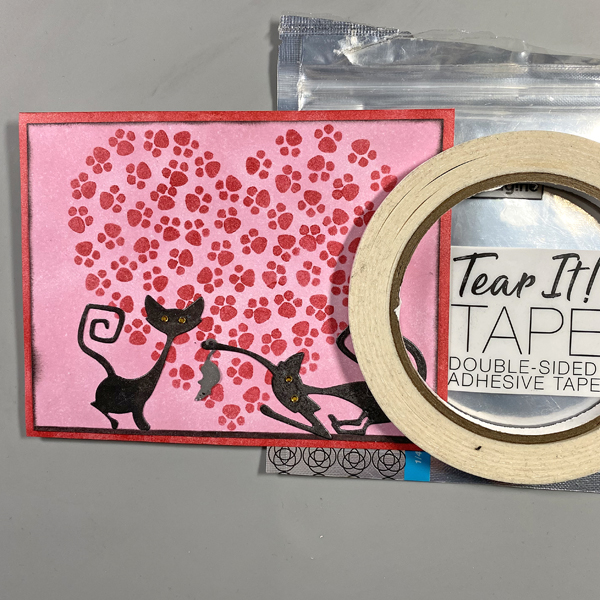
Step 8: Use Tear It! Tape to mat the image panel with the Ruby Red Delicata inked card.
Step 9: Use the “Meow” die to cut white cardstock. Use a Sponge Dauber to apply Black Shimmer Delicata Ink to both sides of the die-cut. Heat set.
Use On-Point Glue to adhere the “Meow” die-cut to the card.
Adhere the “to”, “with”, and “love” Chit Chat Verbiage Stickers to finish the card.
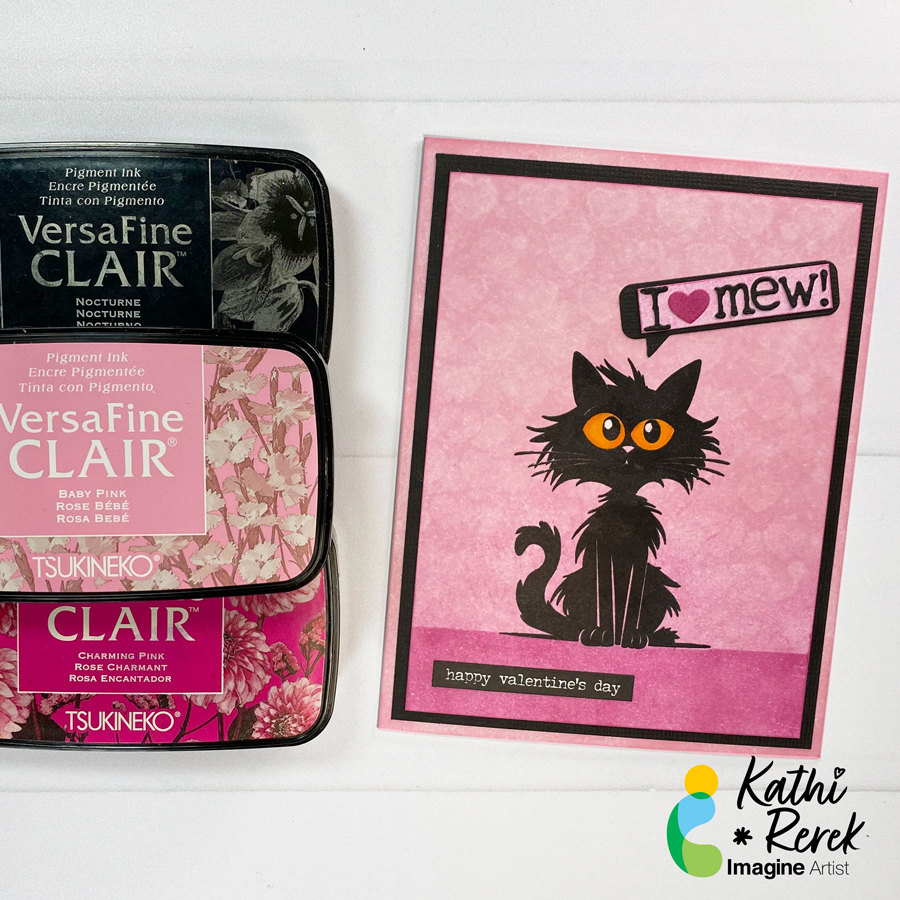
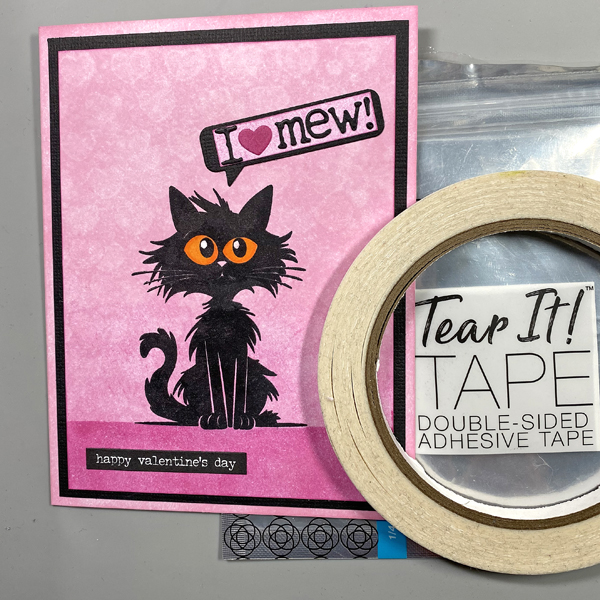
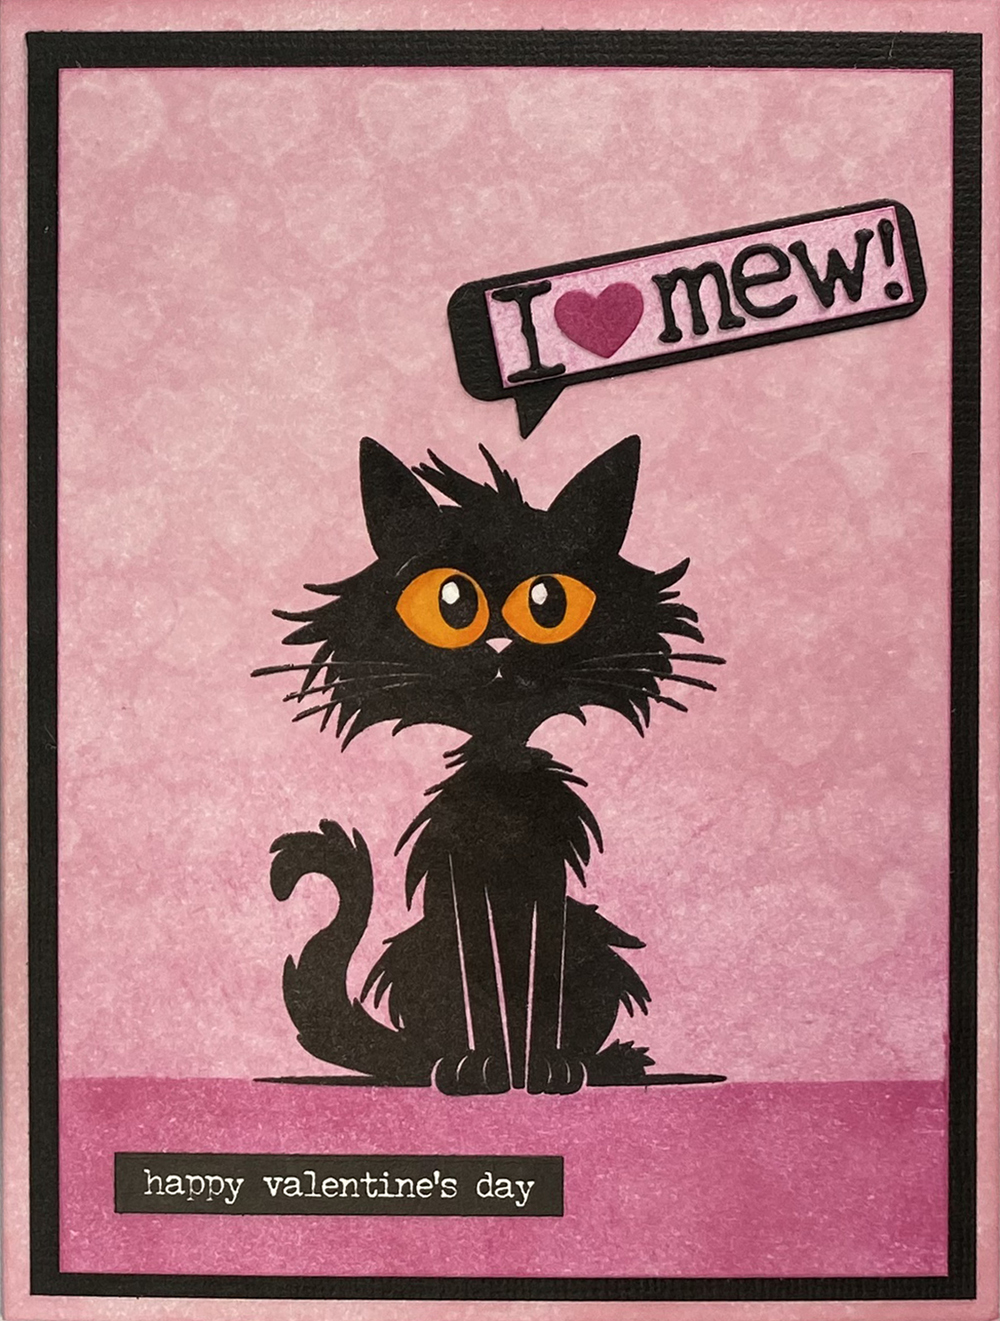
Here’s a punny Valentine’s Day card that showcases the blending of the new Baby Pink VersaFine Clair Ink with the Charming Pink VersaFine Clair Ink. I also used Purell to create a fun ghosting technique!
Skill Level: Beginner Time: 45 minutes
Instructions:
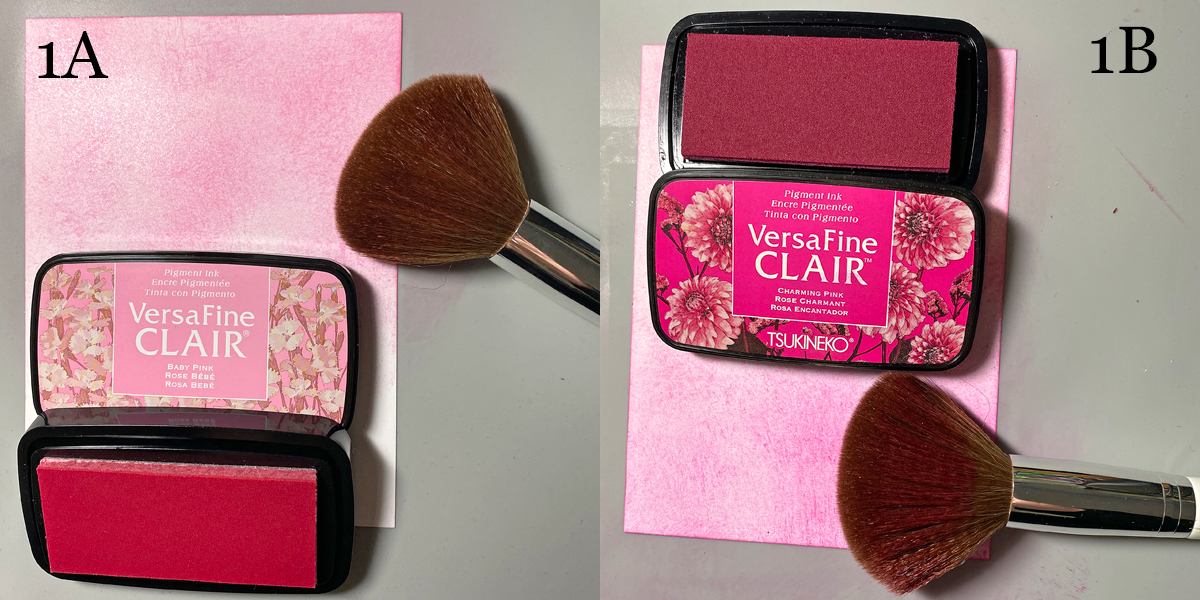
Steps 1A and B:
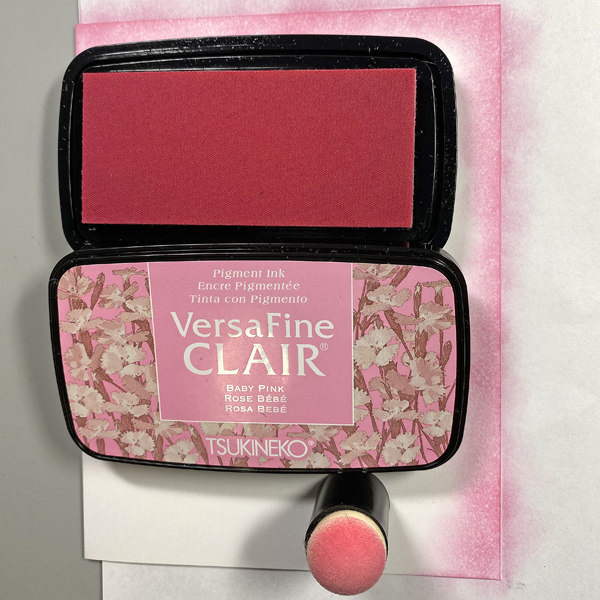
Use a make-up brush to apply Baby Pink VersaFine Clair Ink to a piece of white cardstock. Start at the top of the panel and work downwards. The make-up brush creates soft textured look on the cardstock. Continue to brush downwards until the brush doesn’t put ink onto the cardstock (1A)
Use the same make-up brush to apply Charming Pink VersaFine Clair Ink from the base of the cardstock panel, blending as you go. (1B)
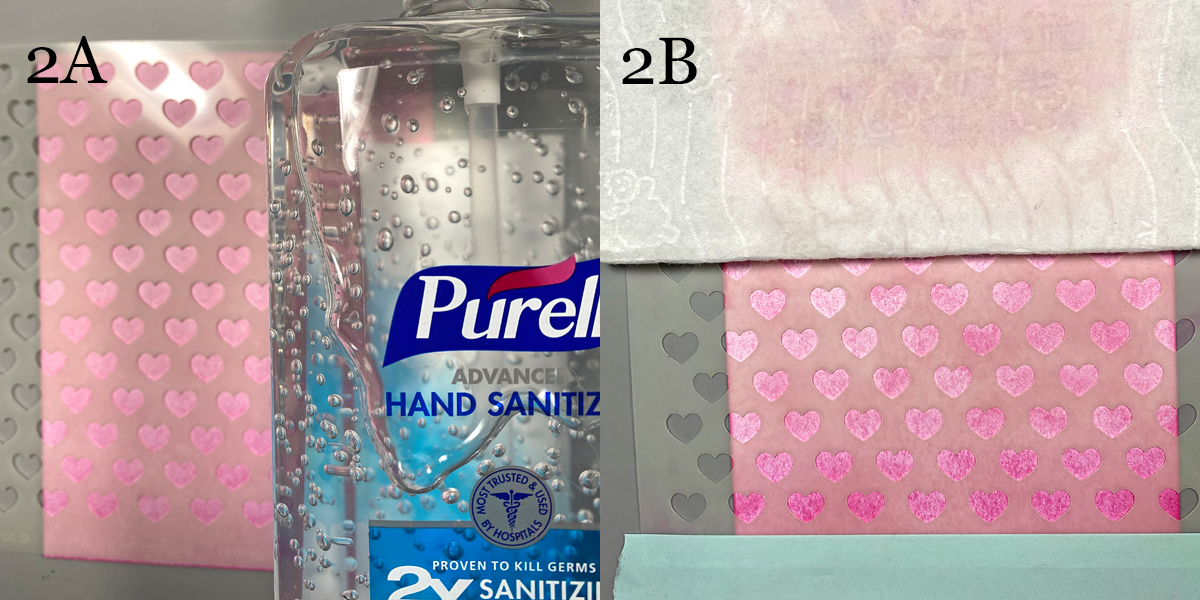
Steps 2A and B:
Place the Staggered Hearts stencil over the inked panel. (2A)
Add Purell to a dry baby wipe until it’s saturated then use the wipe to apply the Purell over the stencil onto the cardstock. The Purell will lift the VersaFine Clair Ink, creating ghosted hearts on the background. Heat setting will accentuate the ghosted effect while setting the ink. (2B)
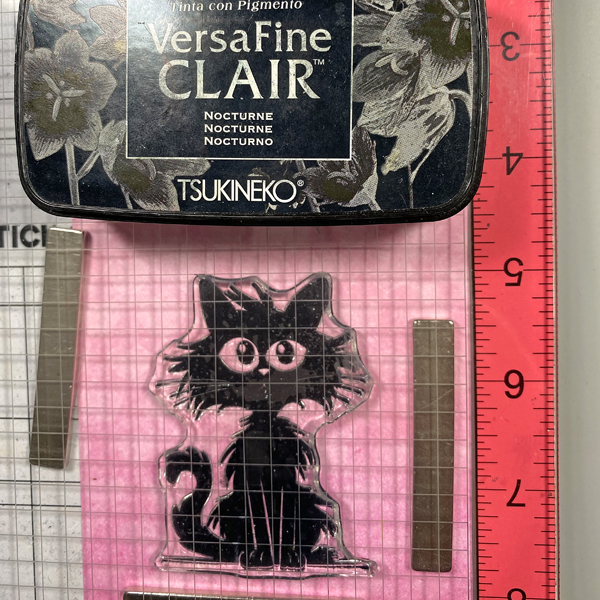
Step 3:
Place the inked cardstock panel onto a stamping platform. Use Nocturne VersaFine Clair Ink to stamp the cat. Re-ink and stamp again if necessary for a crisp image. Remove the image panel and use a paint brush dipped and the ink pad to do any necessary touch ups to the image. Heat set.
Step 4:
Use Prismacolor markers to color the cat’s eyes, taking care to avoid the black ink and contaminate your markers. Use a white gel pen to add highlights to the cat’s eyes. No photos. Sorry.
Step 5:
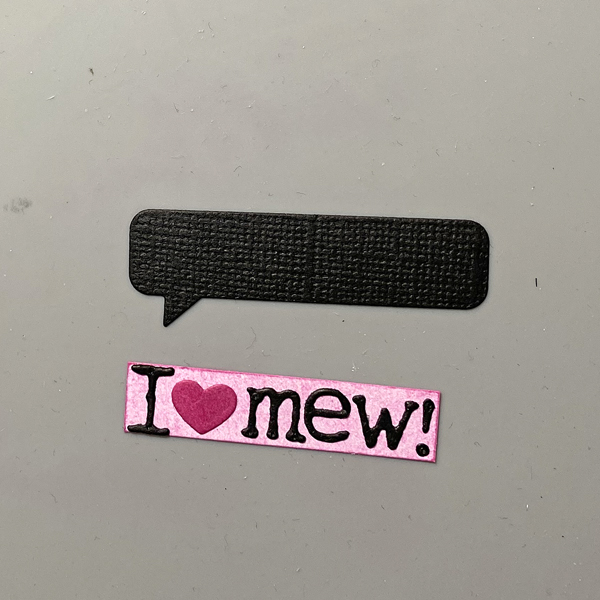
Use alphabet dies and a speech bubble die to cut black cardstock. Use a flag and a heart die to to cut to cut extra inked cardstock from Step 1. Smoosh the heart die-cut onto the Charming Pink VersaFine Clair inkpad. Trim the ends off of the flag die-cut and edge with Charming Pink VersaFine Clair Ink. Adhere the letter die-cuts and the heart to the pink strip, then adhere to the black speech bubble die-cut.
Step 6:
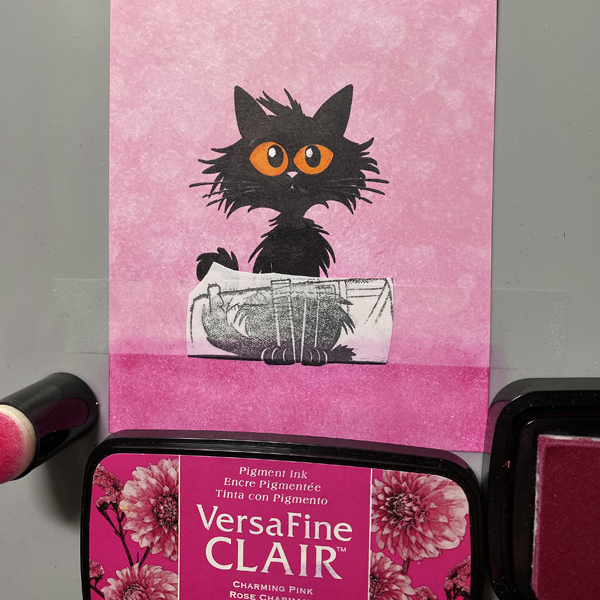
Use Nocturne VersaFine Clair Ink to stamp the cat onto the scrap of repositionable sticker paper. Fussy-cut the sticker paper along the bottom and place it over its counterpart as a mask. Place a strip of repositionable Scotch Tape across the image panel. Use a Sponge Dauber to apply Charming Pink VersaFine Clair Ink over the tape and the masked cat paws to the bottom of the image panel.
Remove the tape and the mask over the cat. Use Use a Sponge Dauber to edge the image panel with Charming Pink VersaFine Clair Ink.
Step 7:
Use a Sponge Dauber to apply Baby Pink VersaFine Clair Ink to the outside .5” perimeter of an A2 card. Heat set.
Step 8:
Cut a panel of black cardstock to 4” x 5.25”. Use Tear It! Tape to mat the image panel with the black cardstock, adhere the matted image panel to the card, and adhere the speech bubble die-cut as shown. Use the sentiment sticker to finish the card.
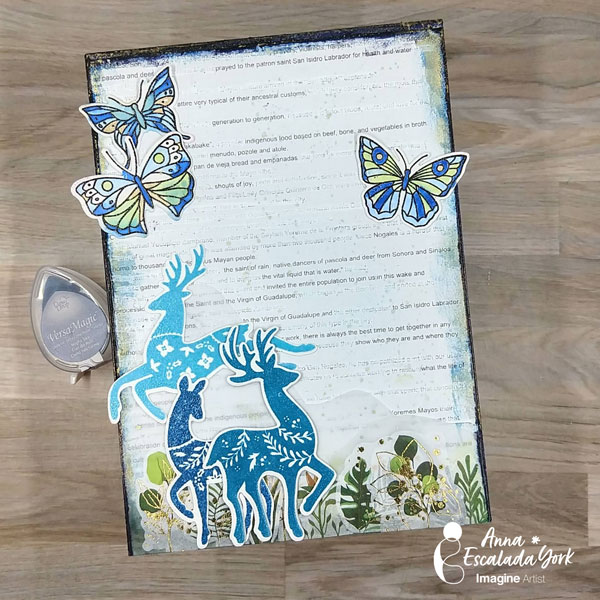
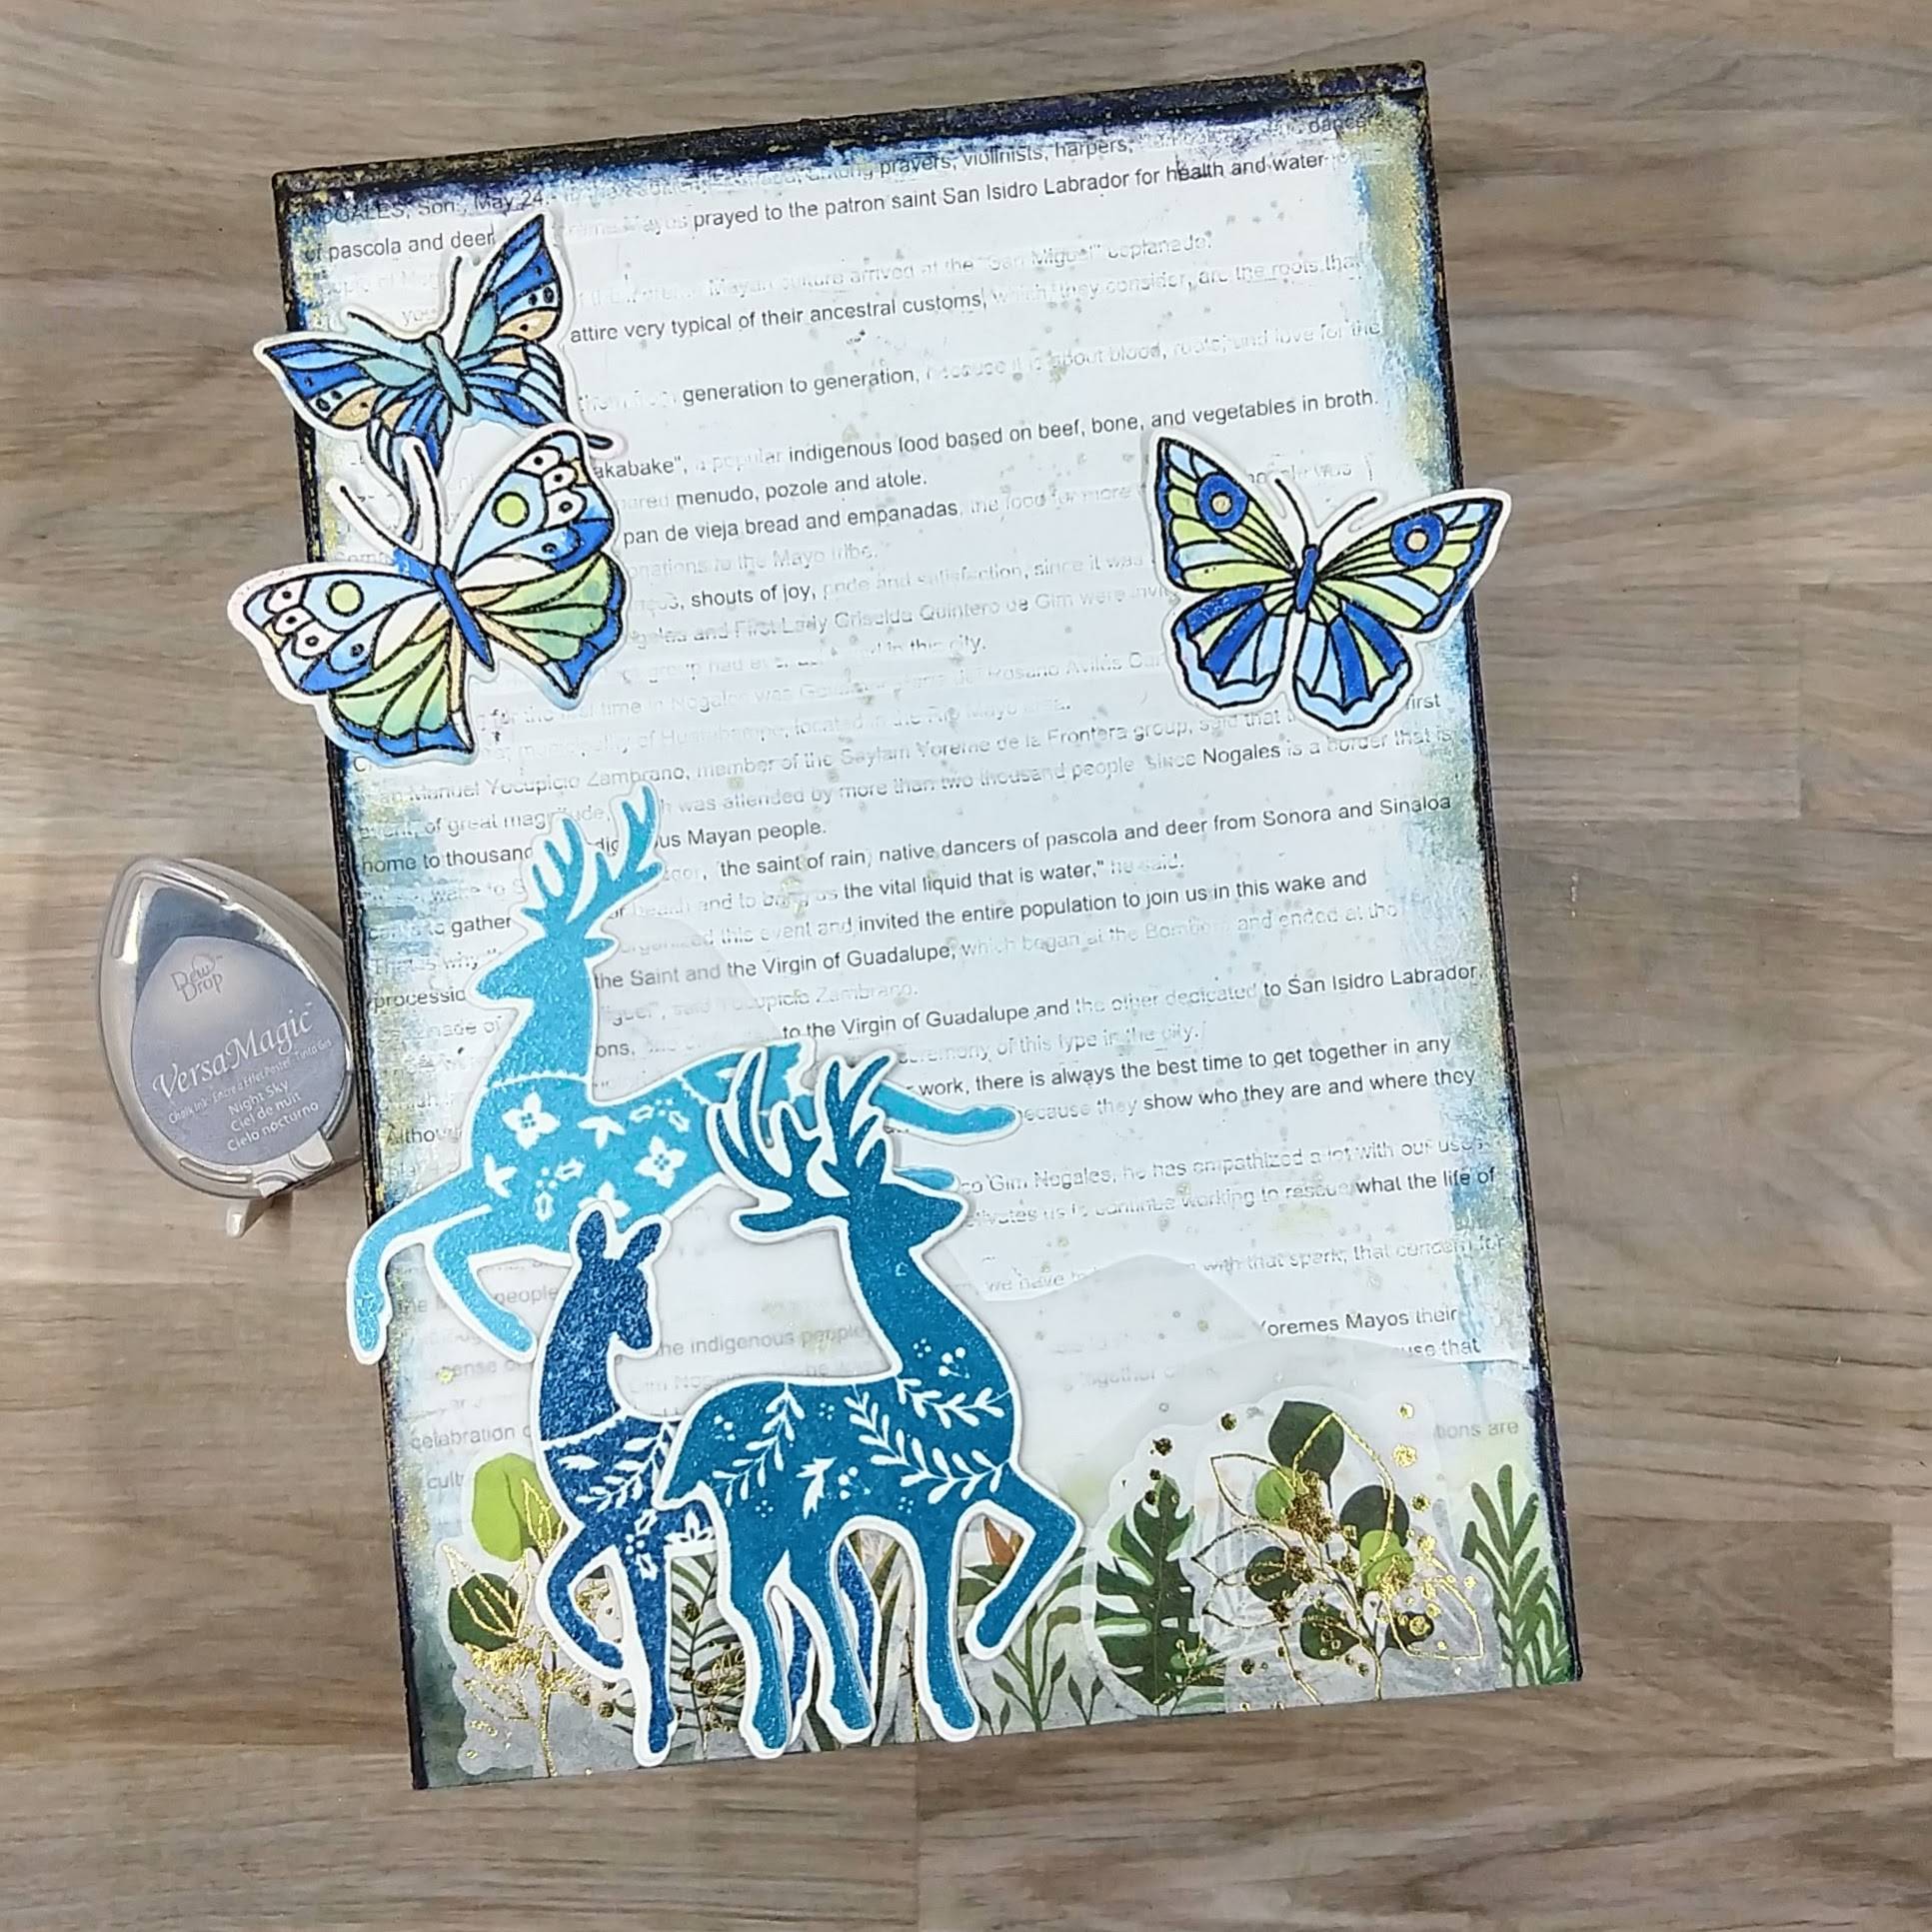
When I’m not making cards, I am a high school teacher and graduate student. I made something way out of my comfort zone for the final project for my graduate school class, and wanted to share it here as well. I created a blackout poem from a copy of a text related to my project and then added some stamped images related to it over the poem. I had a lot of fun making it, so I may have to start making more blackout poems in the future….
Skill: Intermediate
Time: 3 hours
Directions:
Step 1: Paint a thin layer of white gesso onto a 5” by 7” medium density fiberboard (MDF) panel.
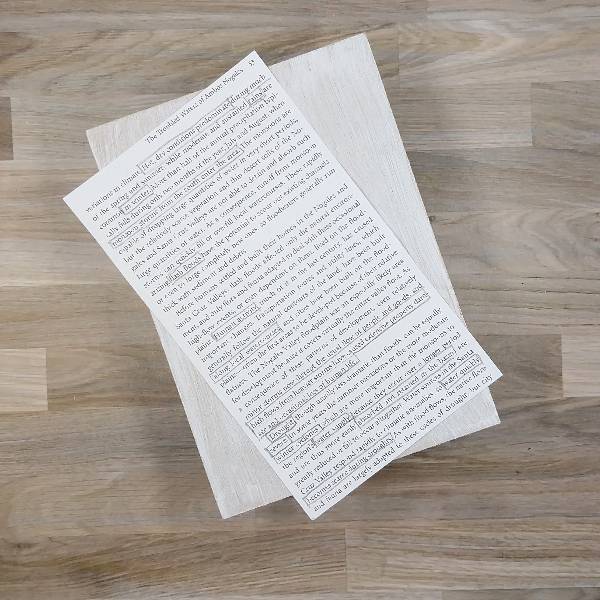
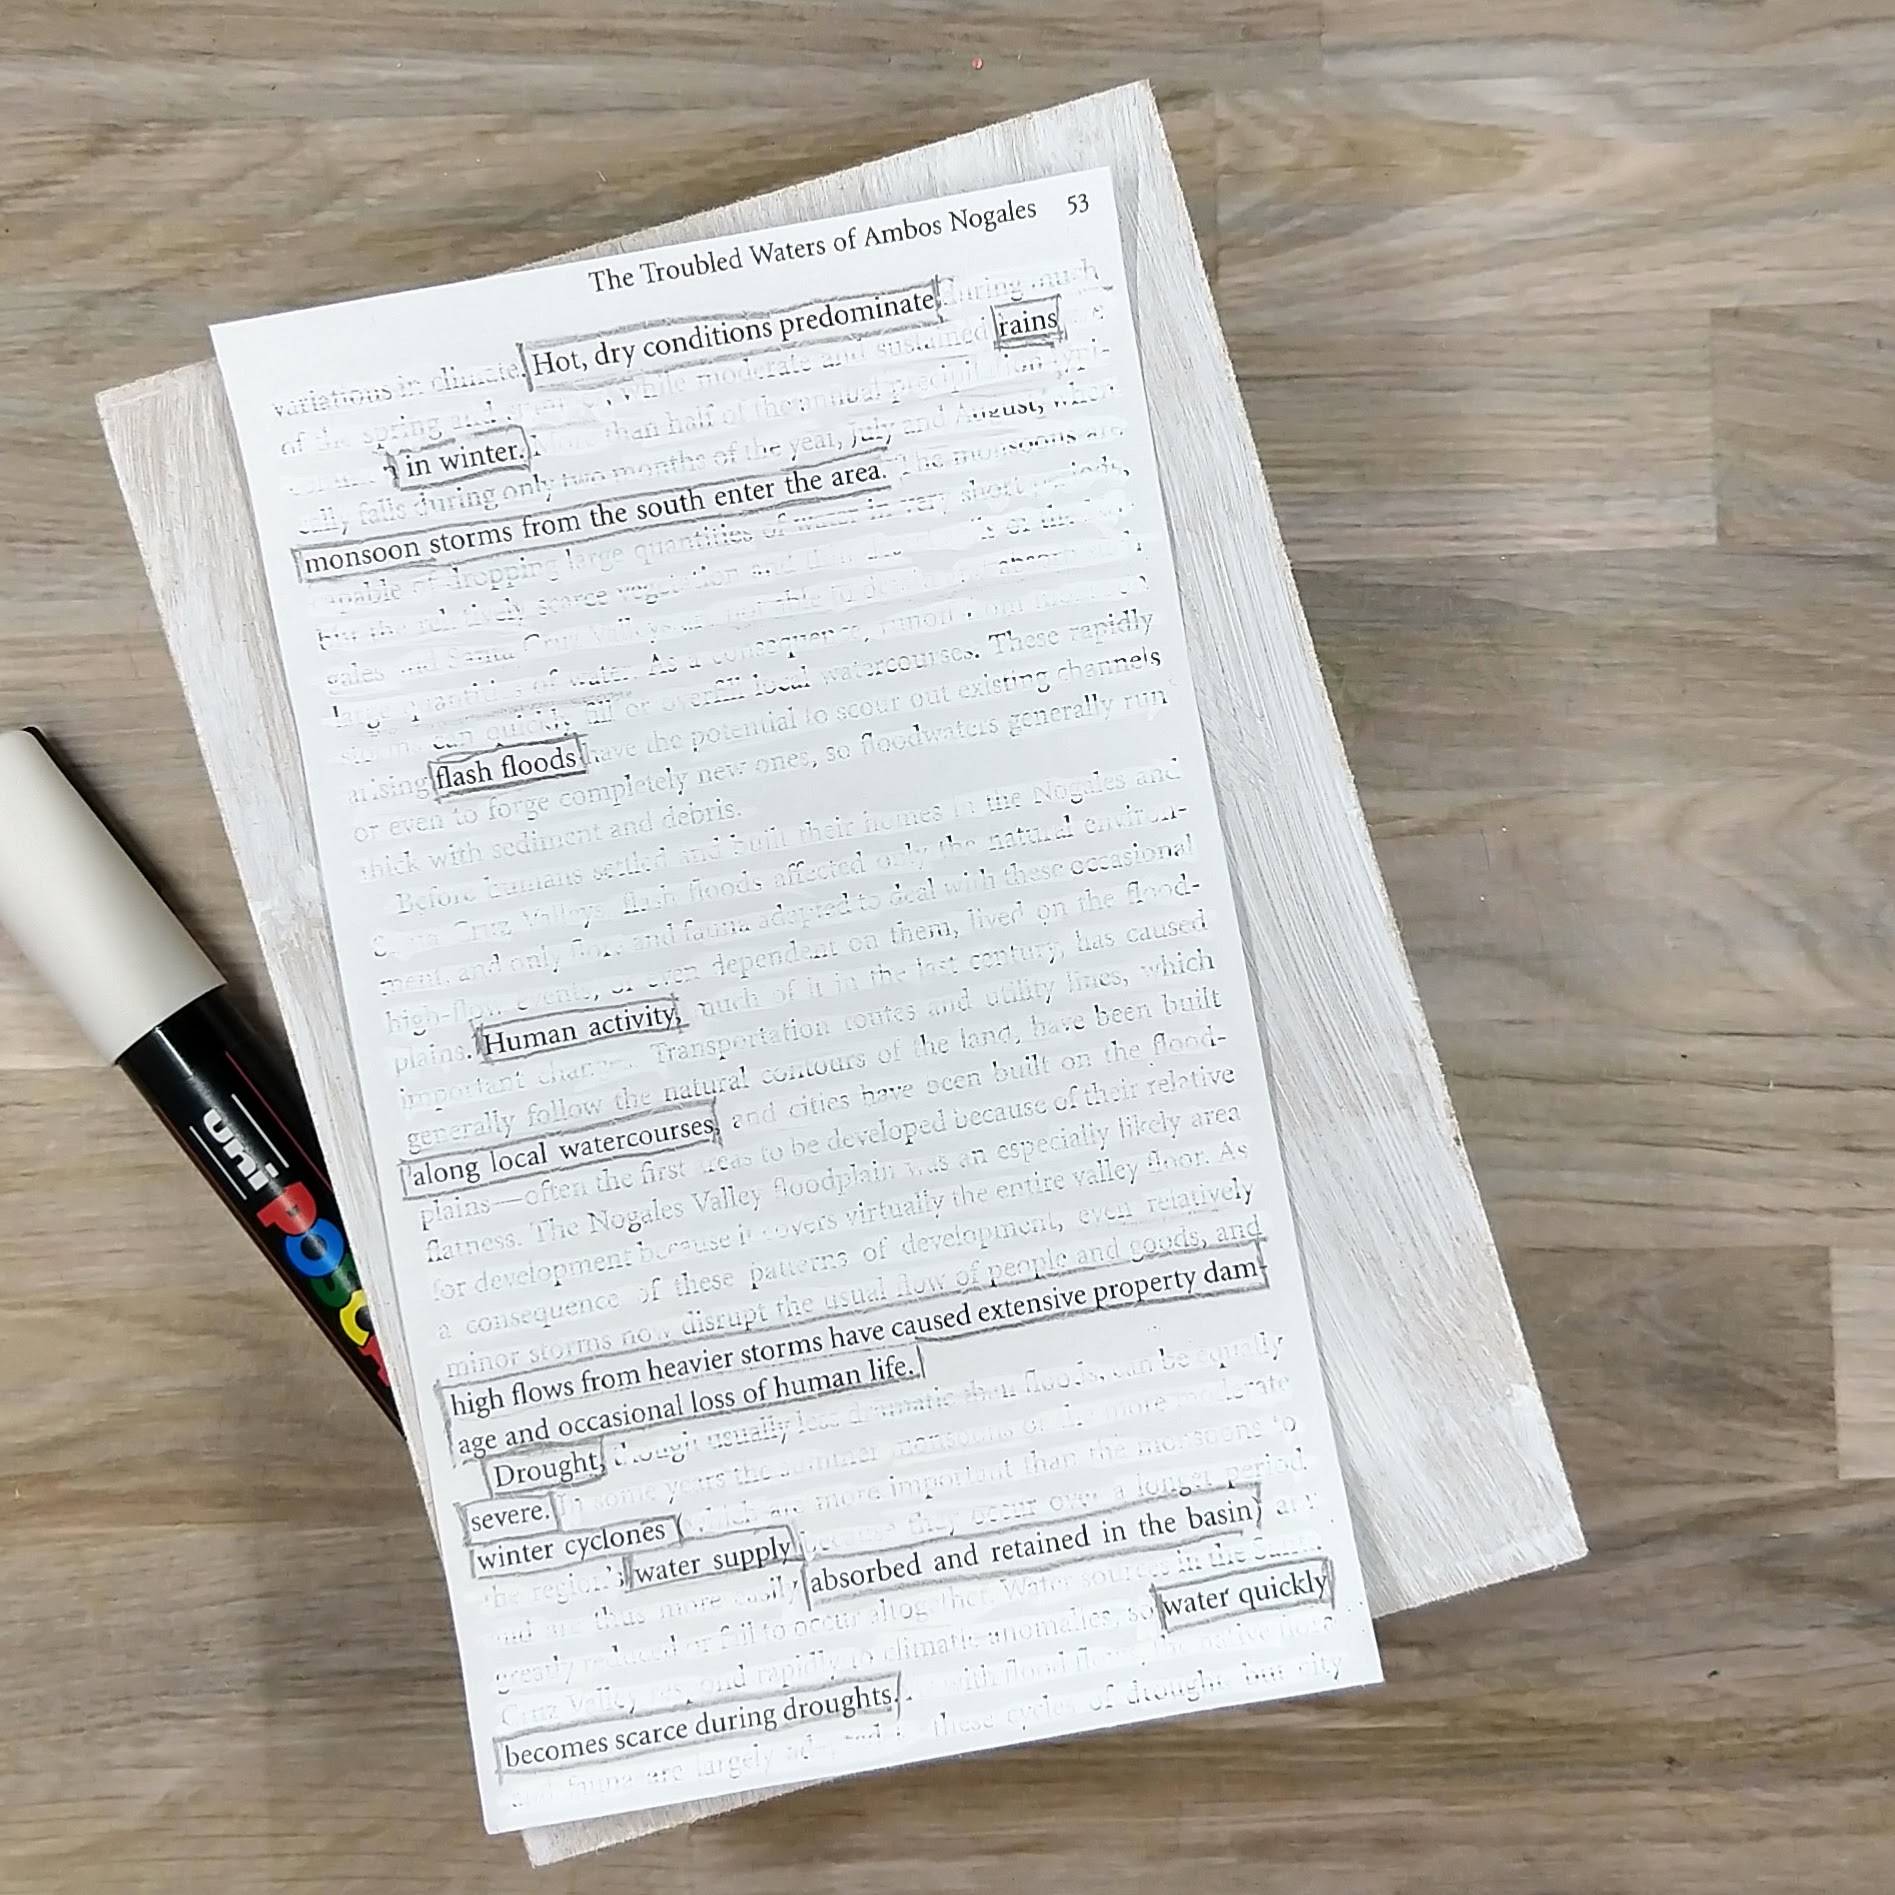
Step 2: Identify words that you want to keep by underlying them or drawing boxes around them in pencil (the other words will be crossed out).
Step 3: Using a white marker, cross out the other words, leaving the underlined words as the only words that we can see on the page. Erase the pencil marks.
Step 4: Stamp two deer using Warm Breeze and Bali Blue VersaFine Clair Ink and then heat emboss both of them with clear Mboss powder. Die cut them with their corresponding dies. If desired, die cut the additional layers of scrap cardstock to fit behind the Warm Breeze buck (the deer that is standing rather than jumping) and glue them behind the stamped and embossed layer for dimension.
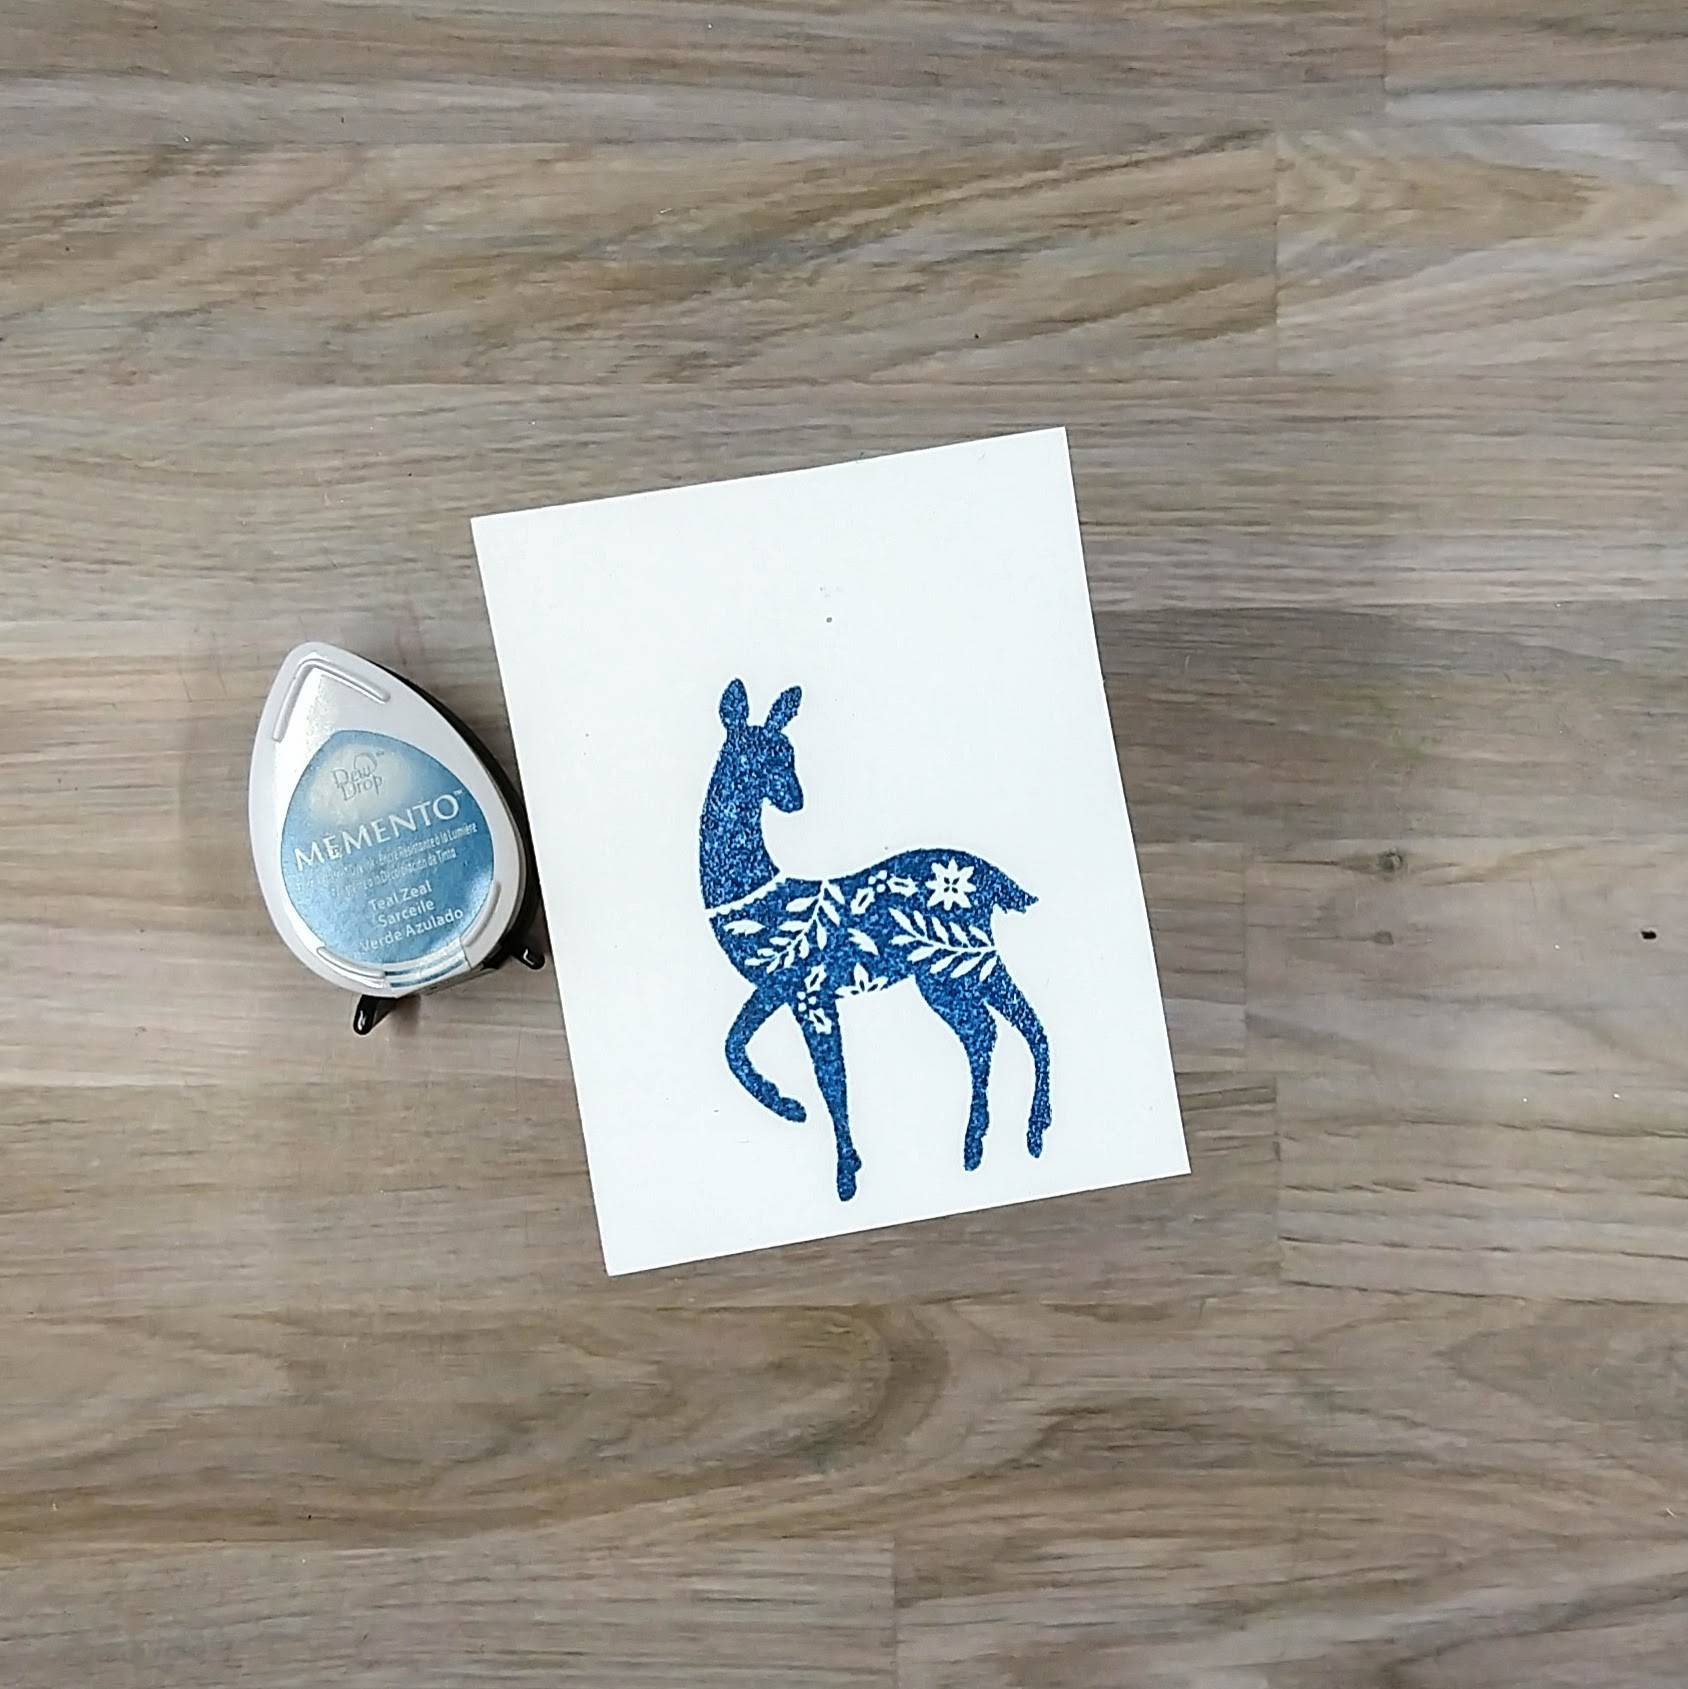
Step 5: If you are very quick and add embossing powder onto die ink immediately, you can emboss it! I decided to stamp and die cut one more deer for the panel and so repeated the process from step 4 with Teal Zeal Memento ink and more clear Mboss powder.
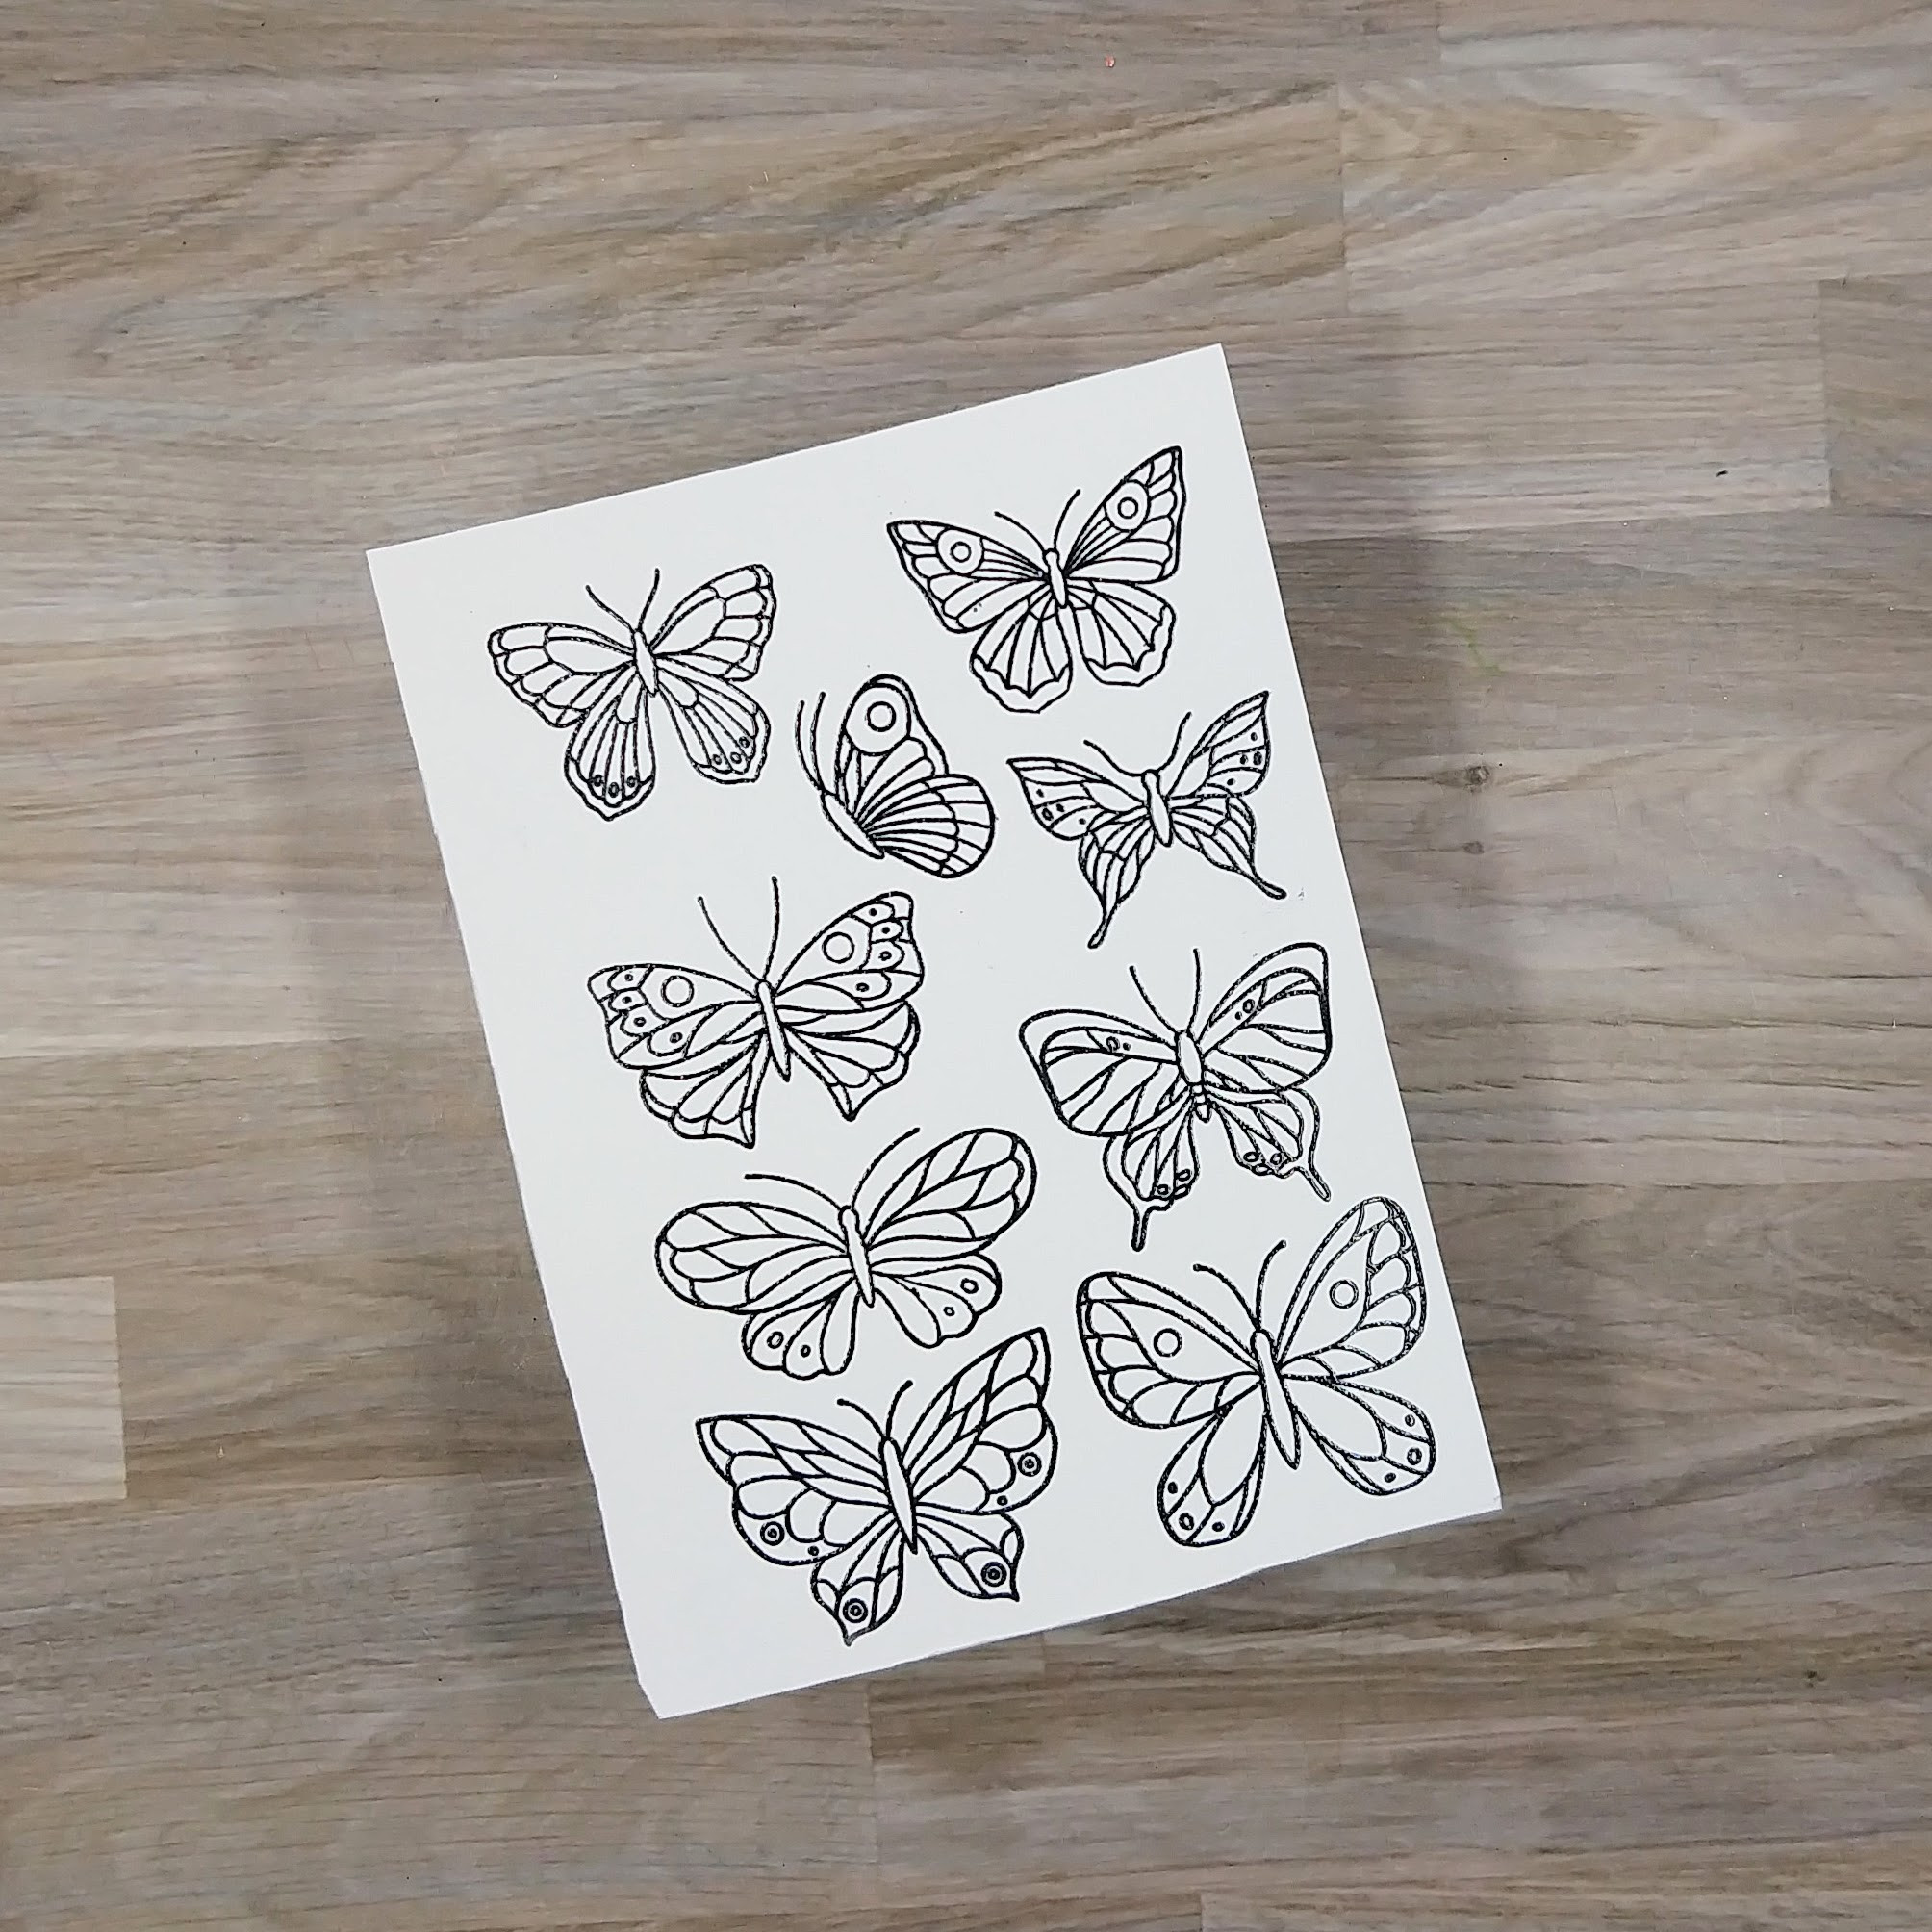
Step 6: Stamp butterflies onto another piece of watercolor paper with Nocturne VersaFine Clair ink. Heat emboss again with more clear Mboss powder.
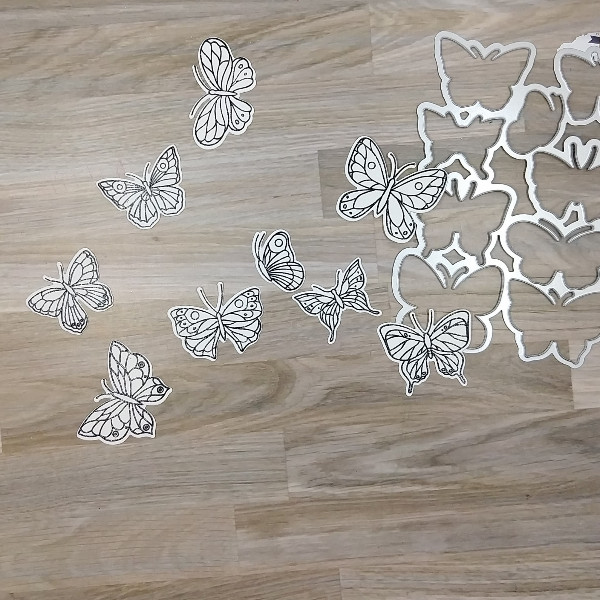
Step 7: Die cut the butterflies with their corresponding die. Not pictured: Color in the butterflies with New Sprout, Summer Sky and Danube Blue Memento Dual Markers and spray them with water to make the color blend into each other. After the water dried, color parts of the butterflies with a gold pen.
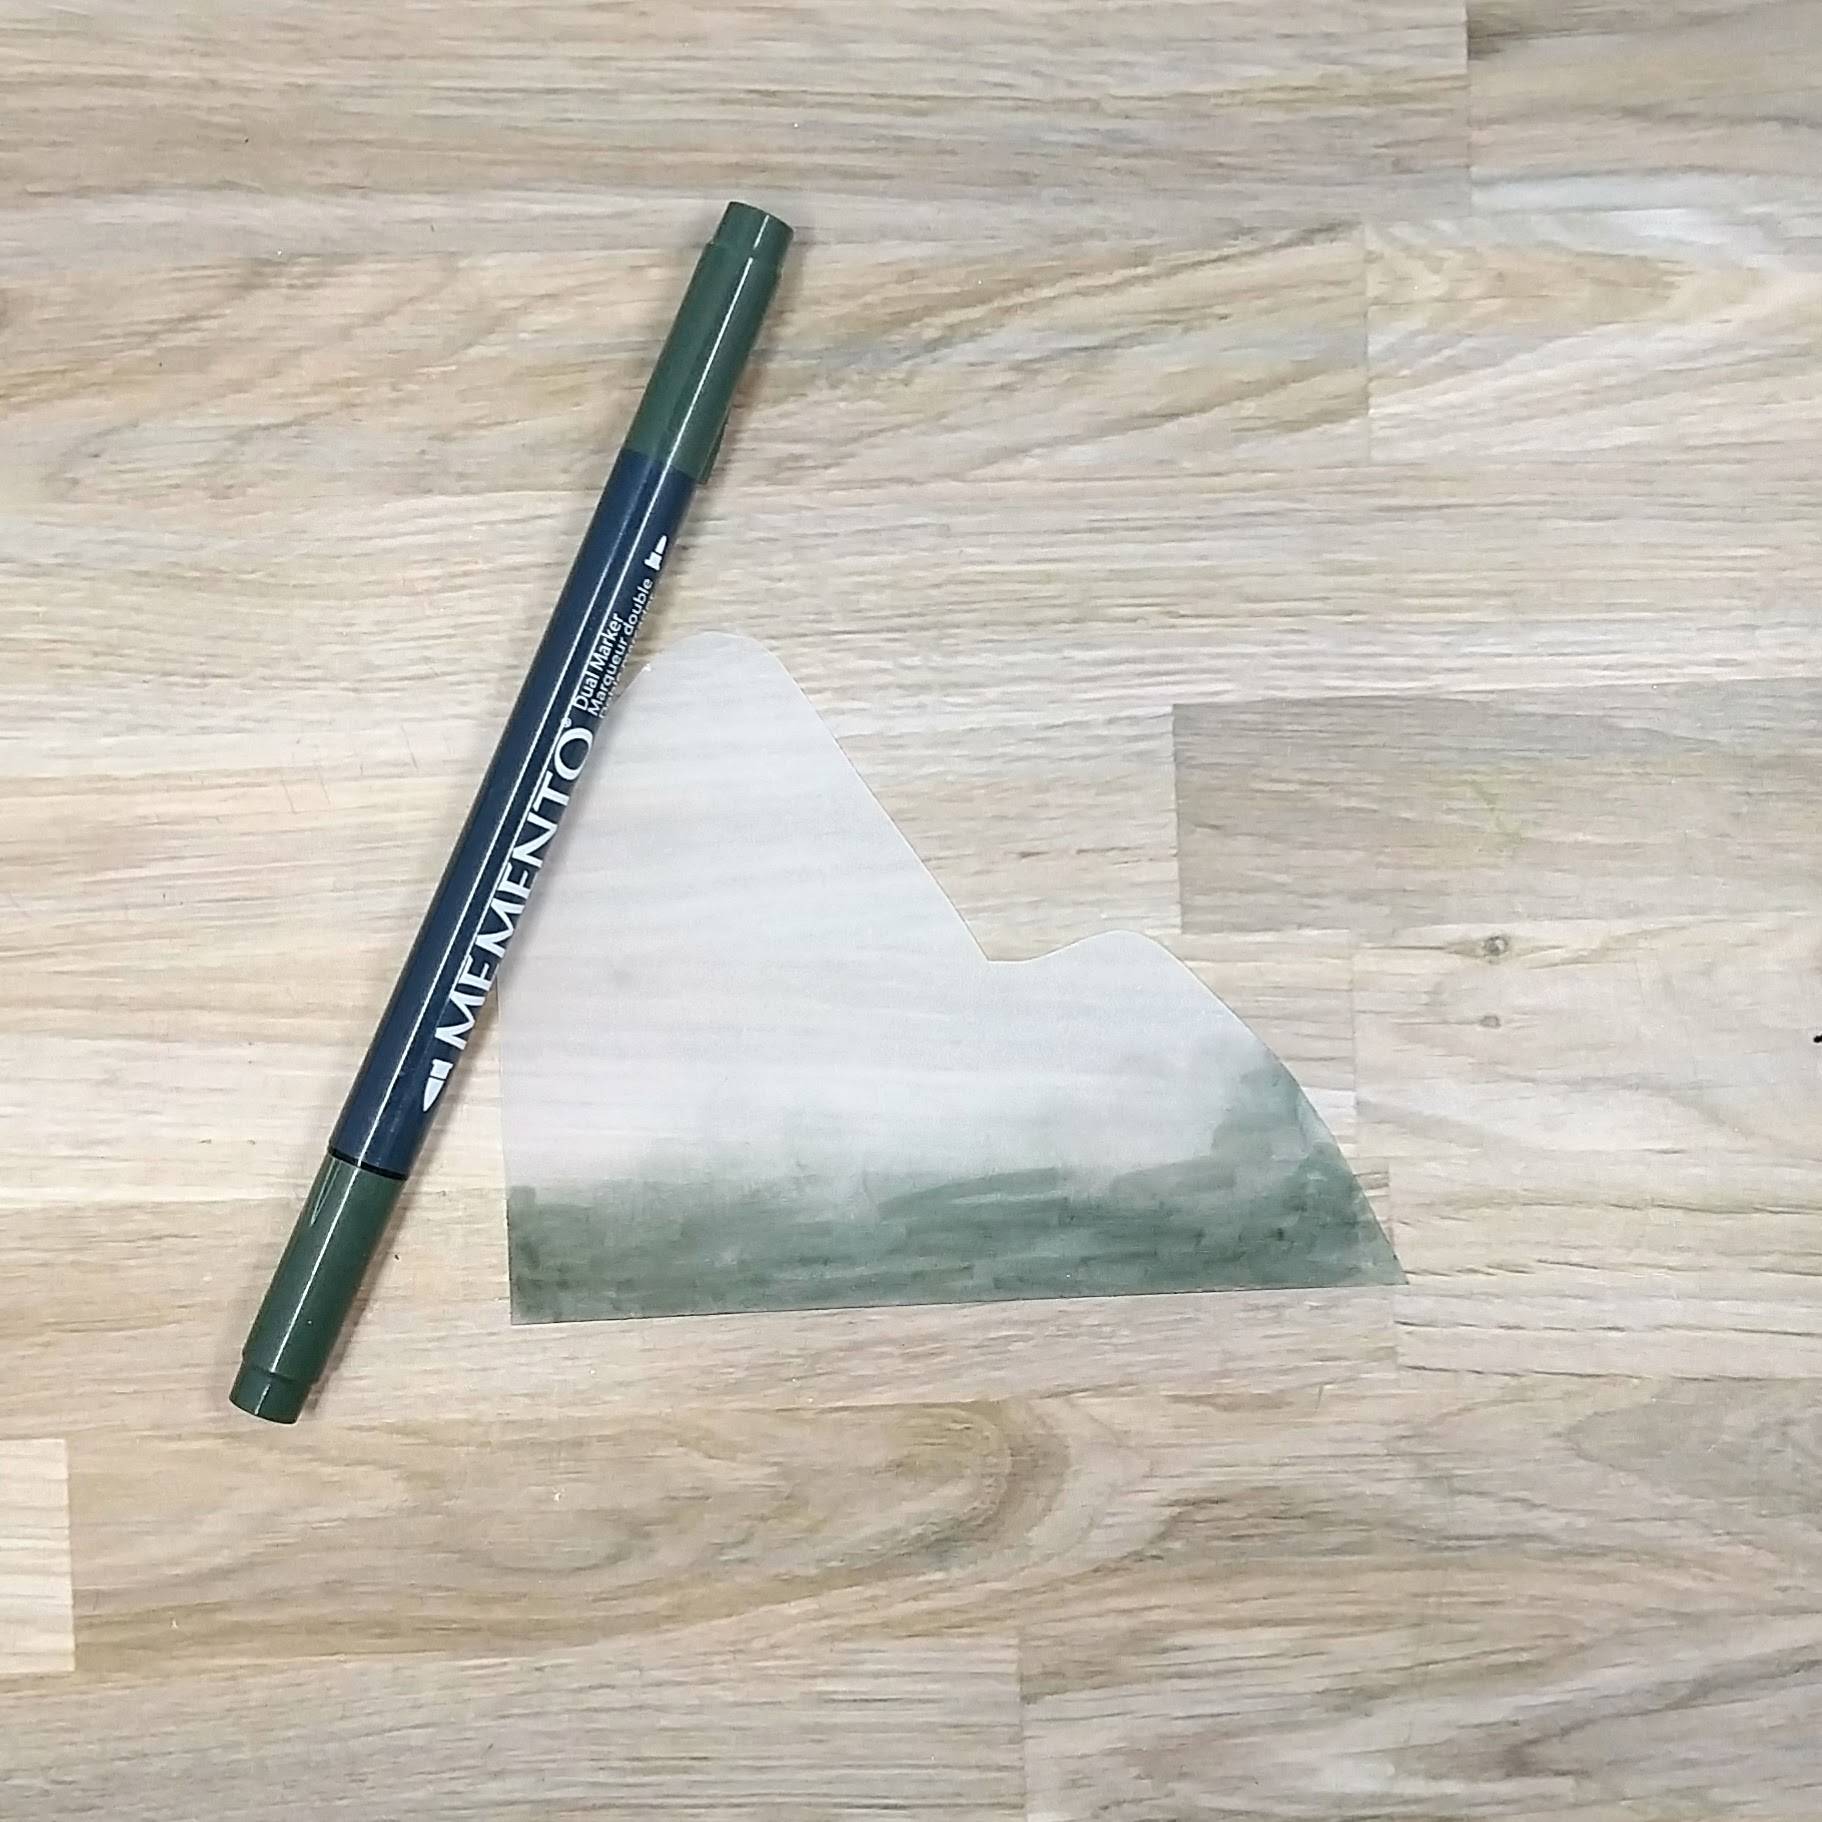
Step 8: Cut a piece of vellum with scissors to look like a mountain. Color the bottom of the vellum with Northern Pine Memento Dual Marker and then use your finger to smudge the marker color.
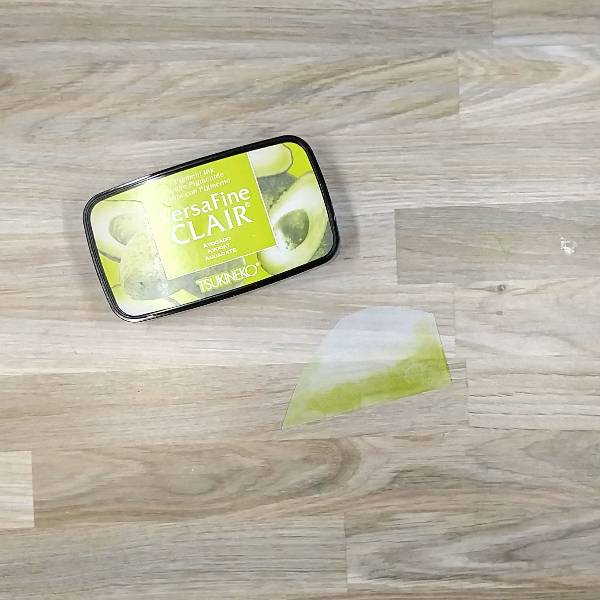
Step 9: Cut another smaller hill shape out of vellum and then smudge Avocado VersaFine Clair ink along the bottom and allow it to dry.
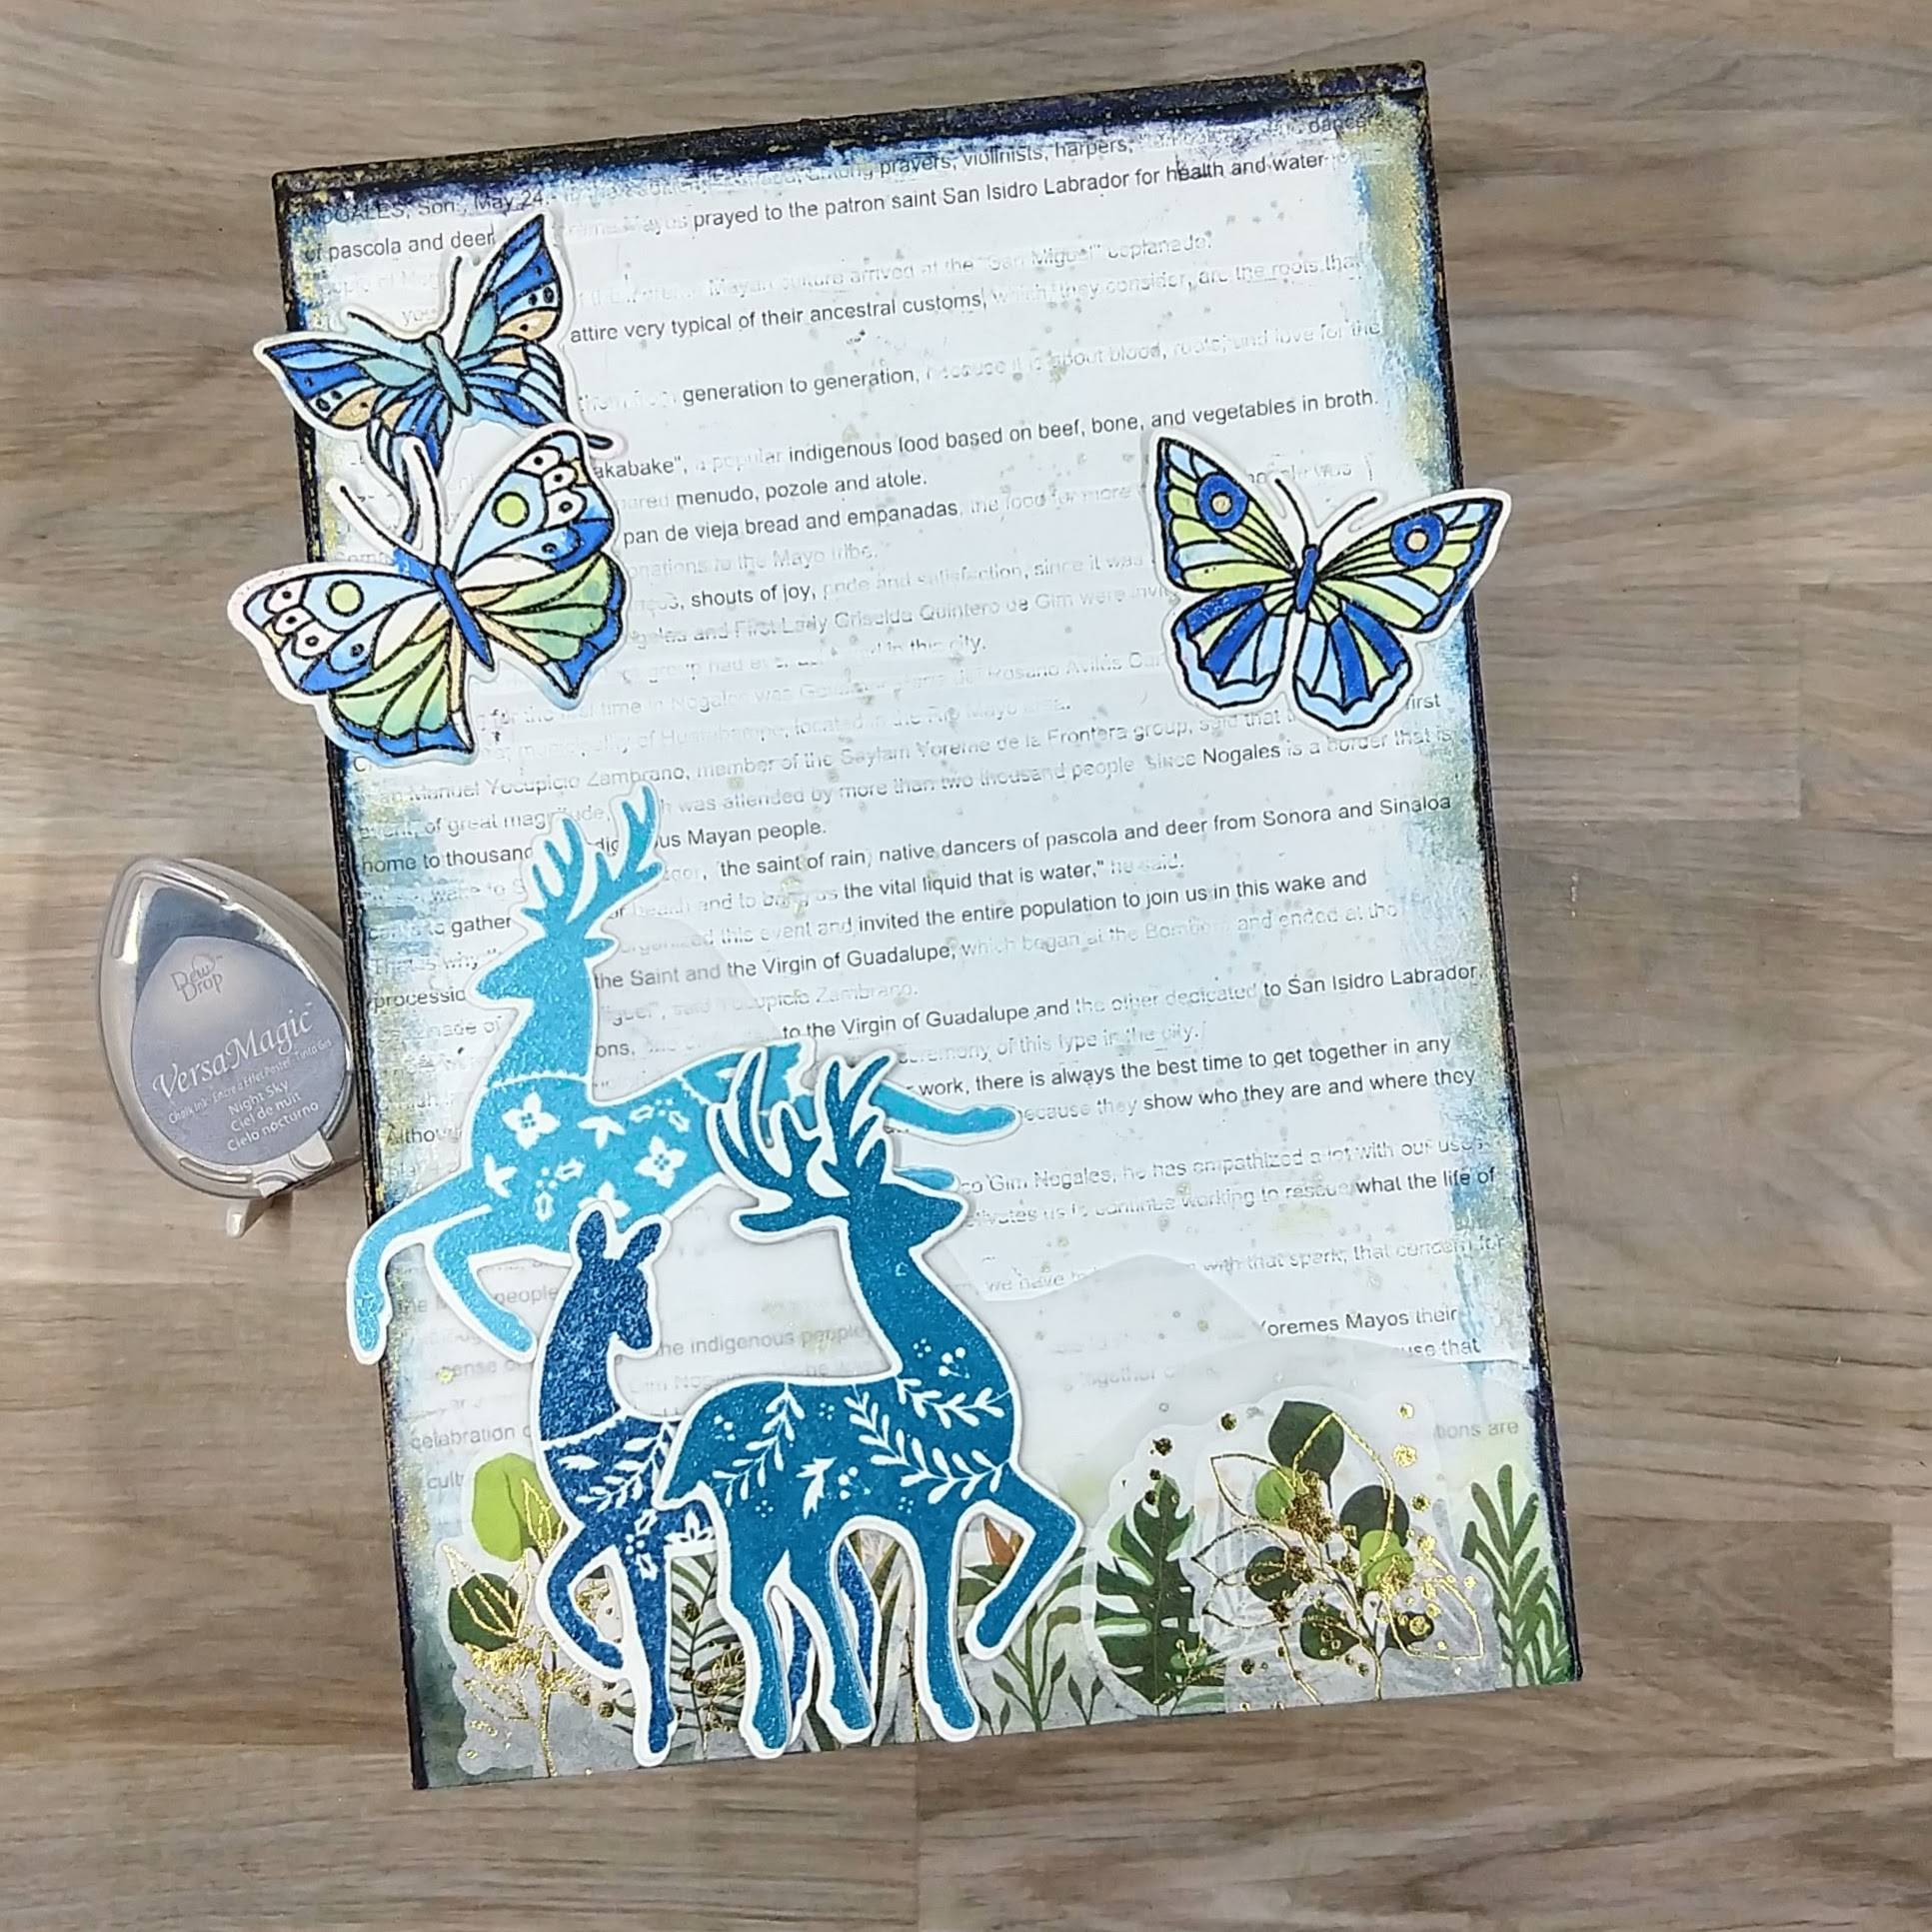
Steps 10-12: My decided not to save the pictures of steps 10-12. This picture was taken the next day after I realized that my camera betrayed me! Here are the steps that I took to get to finish the panel:
Step 10: Glue the blackout poem onto the backing panel. Then press the Night Sky VersaMagic ink pad onto the top and sides of the panel (to help cover up the fact that the blackout poem didn’t quite meet the edges of the panel) and heat emboss with clear Mboss powder. Repeat the process three times to help build up the amount of embossing powder on the side of the panel (and obscure the edges of the paper). Using a brush (or in my case my finger), smudge some Danube Blue Memento Dual Marker mixed with water on a piece of acetate around the top and
sides of the panel. Then press a Gold Sheer Shimmer Stix Dauber onto a piece of acetate packaging and add it to the sides and top edges of the panel as well. Allow to dry.
Step 11: Glue down the two vellum mountains on the bottom edge of the panel, making sure to have the glue hiding behind the deer and other elements on the panel as well as the butterflies. Add washi tape stickers across the bottom of the panel.
Step 12: Glue the deer onto the panel to finish the piece.
Other • Art Alternatives – MDF Panel (5” x 7”) • Catherine Pooler – die set – Peaceful Deer • Catherine Pooler – stamp set – Peaceful Deer • Golden – Gesso Semi-Opaque Acrylic Primer • Pinkfresh Studios – die set – Small Butterflies • Pinkfresh Studios – stamp set – Small Butterflies • The Washi Tape Shop – washi tape stickers – Green Oasis Gold pen • Copied book page (for the blackout poem) White marker • Watercolor paper Vellum • Pencil Paintbrush • Die cutting machine Paint brush • Paper trimmer Scissors • Glue



 Imagine Blog