See a Stamping Technique Inspired by Impressionism

by Lori Warren

See a Stamping Technique Inspired by Impressionism

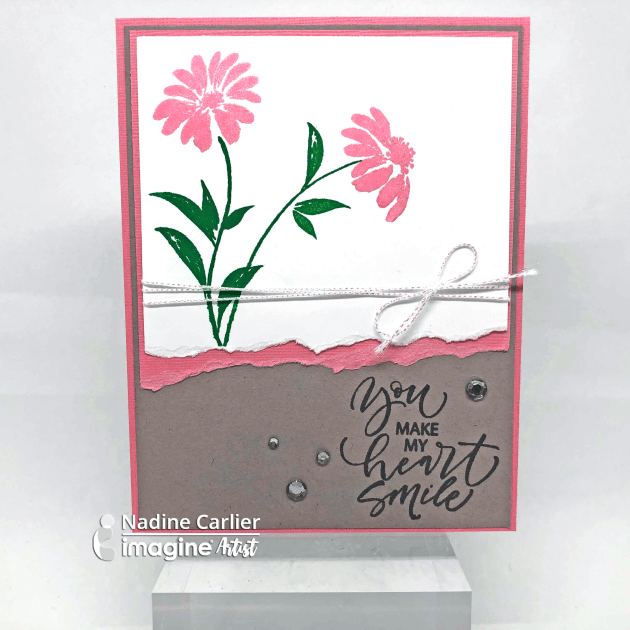
We all need a little inspiration sometimes and, for this project, I took my inspiration from the Impressionism style of paintings from the 1860s.  It resulted in a fun project using the All-Purpose inks and other Imagine products to create a miniature floral scene on a 4”x4” flat panel canvas.

Skill: Beginners
Time: 1 hour

Directions

Directions


Step 1

Apply Cool Grey ink to the canvas with a bullet-shaped Fantastix.


Step 2

Stipple on Sky Mist ink with Fantastix to the upper portion of the canvas.


Step 3

Stipple on Celadon ink to lower portion of canvas with Fantastix.


Step 4

Stipple Blue Bayou onto the upper portion of the canvas, sparingly.


Step 5

Place Celedon ink onto craft mat, ink stamp, & stamp stems onto the lower portion of the canvas.


Step 6

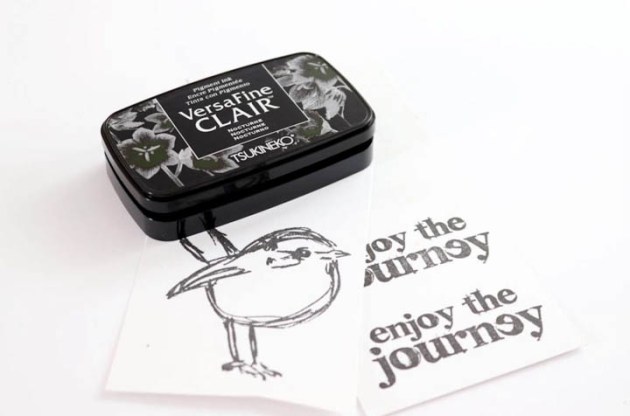
Stamp roses with VersaFine Clair in Medieval Blue & Monarch across canvas above the stems.


Step 7

Stamp saying with VersaFine Nocturne onto the canvas.


Step 8

Edge panel with Blue Bayou ink.


Step 9

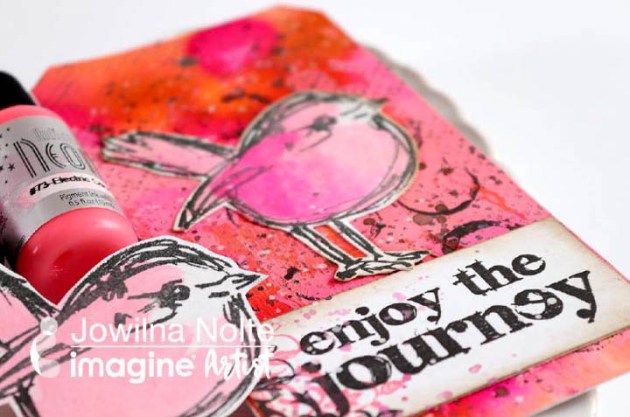
Add black paint splatters.


Step 10

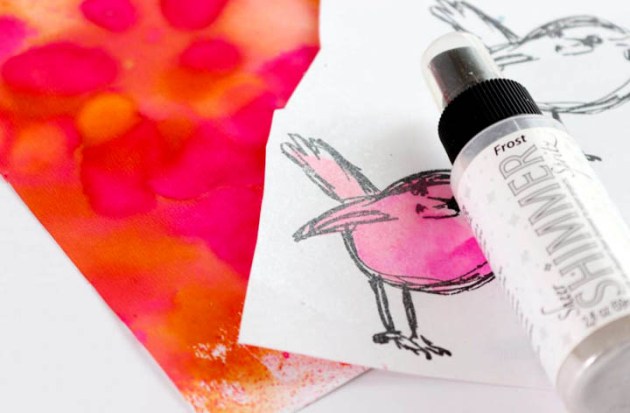
Spray canvas with Sheer Shimmer Craft Spray in Sparkle.


Step 11

Edge canvas with Sheer Shimmer Stix in Gold.

Supplies

Imagine  
Other
  • The Angel Company stamps
  • Mini canvas
  • Acrylic block
  • Paint brush

Create a Rainbow Background with Memento Markers and Shimmer Stix

by Lindsay Adreon

I LOVE anything and everything rainbow in cardmaking, and if it sparkles, that’s even better! Making a rainbow watercolor background is pretty simple, but adding a good amount of sparkle without making mud can be more tricky. The Shimmer Stix are the PERFECT applicator to make a fun background that keeps its bright and vibrant colors without sacrificing any of the sparkle! I was so excited that the Shimmer Stix worked for this technique and can’t wait to try them with an ombre background, next!! I made two cards today, a birthday and hello card, plus check out the inside, too!!

Skill: Beginner/Intermediate
Time: 20 minutes

Directions

Supplies

Imagine
Other
  • Watercolor Paper
  • Joy Clair Stamps Hello Sentiments
  • Tonic Mixed Rectangle Die Set
  • Die Cutting Machine
  • MISTI Stamping Tool

Quick & Easy Card Plus A Sneak Peek

by Nadine CarlierYoure perfect card by Nadine Carlier IC


Happy Valentine’s Day!
To see how I created this quick and easy card and what new Imagine product I share a sneak peek of watch my video below. Enjoy!

Skill: Beginner
Time: 15 minutes

Supplies

Imagine
Other

Visit our YouTube Channel for more inspirational videos and subscribe to get updates when we post new videos.

See How to Use Inkers for a Mixed Media Tag

by Jowilna Nolte

See How to Use Inkers for a Mixed Media Tag

This month’s color, Coral offers so many possibilities. I pulled out all my products in those shades and created a bright and beautiful gift tag perfect for tying around a gift. I love making tags instead of cards – so quick and easy and just the right size to experiments and create some fun effects.

Skill: Beginner
Time: 30 minutes

Directions


Step 1

Add a few drops of dye ink refill ink onto watercolor paper and mist with water. Keep adding drops of ink and mist with water until you are happy with the look.


Step 2

Use a tag template and cut your colored paper into a tag shape.


Step 3

Stamp birds and sentiment onto smooth white cardstock using VersaFine Clair Nocturne ink.


Step 4

Add a few drops of re-inker ink onto your craft mat. Mist water next to the ink. Pick up a small amount of water and mix with the ink and then paint your bird images.


Step 5

Mist your tag and painted birds using Shimmer Spray in Frost. It gives the end product a beautiful shimmer.


Step 6

Trim your sentiment strip and adhere it to the bottom of your tag. Adhere to the painted birdie above the sentiment. Add additional stamped detail to the left of the tag and the background. Use inks to add splatters over the tag for some interest.

Supplies

Imagine

Other

  • Watercolor paper
  • Cardstock – white
  • Stampers Anonymous – stamp
  • Paint brush
  • Watercolor paint

Learn How To Make Your Own Beads Using Light Weight Clay

by Kyriakos Pachadiroglou

Make bead pearls out of lightweight clay to use in jewelry pieces. The pearls have a marble-like effect that was made using the Radiant Neon Electric Coral ink pad and the help of Imagine Craft Mat. The intense of the coral color can lighter or darker by allowing the clay to absorb the relative amount of ink when it is rolled on the Craft Mat.

Skill: Beginner
Time: 45 minutes + drying time

Directions


Step 1

Heavily stamp with the Radiant Neon in Electric Coral ink pad on Imagine’s Craft Mat.


Step 2

Roll on the inked surface a piece of lightweight clay formed into cord-like shape. Form a ball/large pearl in your palms. Continue making more large pearls.


Step 3

When you finish forming the pearls, and before the clay dries, use a piercing tool to open holes through the pearls. Make sure that they are well opened to allow easy access to the cord.


Step 4

When the clay dries, pass the pearls and the metallic beads in alternate order on the waxed cord. Add end clasps and lobster hook at the ends of the cord.


Step 5

For the earrings pass a bead and a pearl in flat head jewelry pin and using the round nose pliers attached on the earring hook.

Supplies

Imagine
Other
  • Lightweight clay
  • Jump rings, lobster hook
  • Earring hooks
  • Metallic beads
  • Waxed cord
  • Piercing tool
  • Pliers

How To Make A CAS Layered Card

by Nadine Carlier

CAS Layered Card by Nadine Carlier IC

Brillance Pearlescent Coral was the perfect ink for the delicate flowers on my CAS layered card. Watch my video below to see how easy it was to create. Enjoy!

Skill: Beginner
Time: 15 minutes

Supplies

Imagine
Other
  • Gina K Designs Watercolor Flowers Stamp Set
  • Misti
  • String
  • Gemstones
  • Cardstock – White, Gray, Pink

Visit our YouTube Channel for more inspirational videos and subscribe to get updates when we post new videos.