See How to Use Acrylic Paint and Embroidery on a Birthday Card

by Elina Stromberg

See How to Use Acrylic Paint and Embroidery on a Birthday Card with Memento Inkpad and Craft Paints

Whenever you want to create interesting, bit grungy textures on a card background, I suggest you use acrylic paints for stamping! For this technique, you can use any pattern stamp you have in your stash and choose any colors to match to your main images. 

Skill: Intermediate
Time: 1.5 hours + drying time

Directions


Step 1

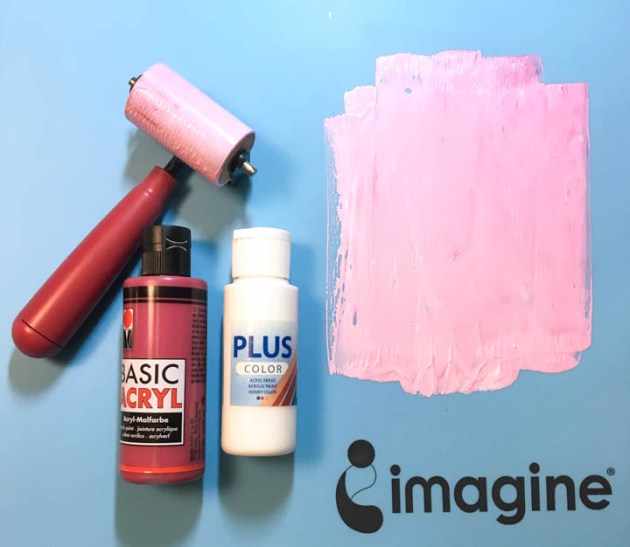
In this technique your Imagine craft mat will become handy: First, you use it as your palette for mixing the paints. Then you brayer the paint to a thin layer, add a hint of water should the paint be too heavy and then use the mat as your stamping pad. Simple and easy! The only thing to remember is to clean your stamp right after stamping. If the paint dries on your stamp it will be very difficult to remove. However, cleaning your craft mat you can do later; even if the paint is sticking to it, just mist the paint with water and wipe the mat clean with a baby wipe. Should there still be some paint left, just use a drop of hand sanitizer and your mat will look as good as new! Apply acrylic paint of your choice on the craft mat. I mixed white and red to get a beautiful light pink. Brayer the paint to a thin layer. Use the paint as your stamping pad. Keep the stamp in your hand, bend it, and stamp random patterns on the white paper. Let dry.


Step 2

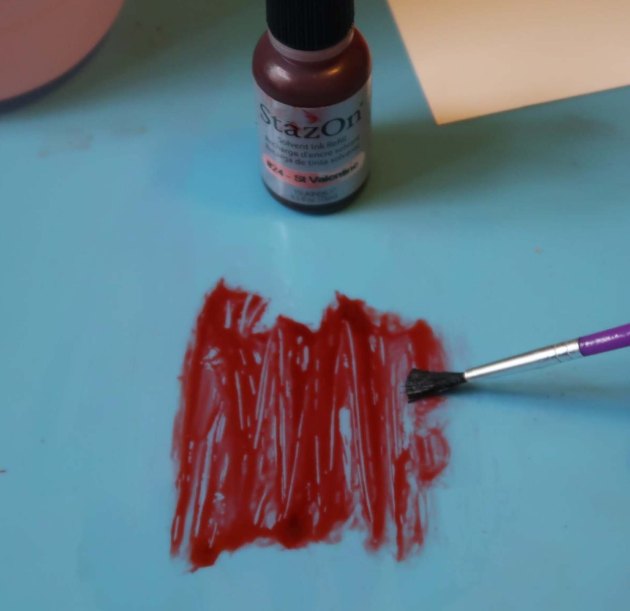
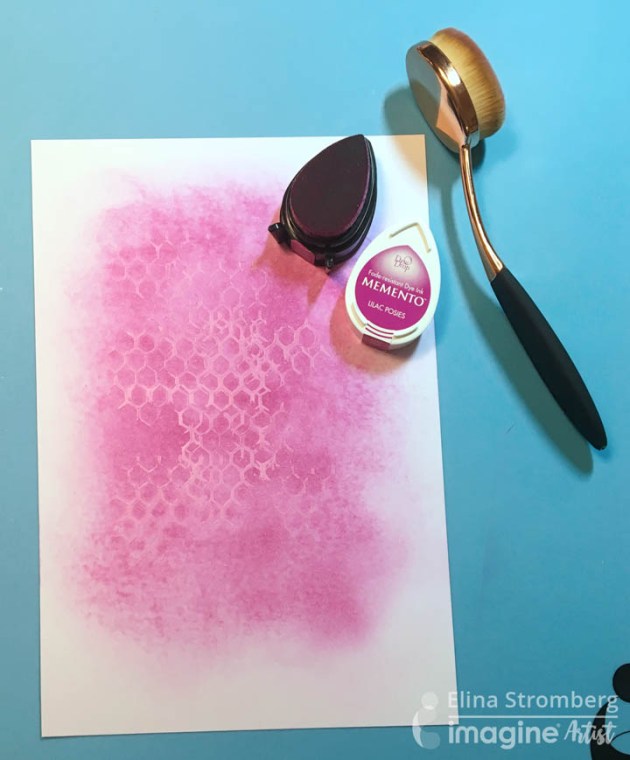
Ink the background with a matching ink color. If you used a light acrylic paint color, use a darker ink. On a darker paint, a lighter ink color will best highlight the stamped pattern.


Step 3

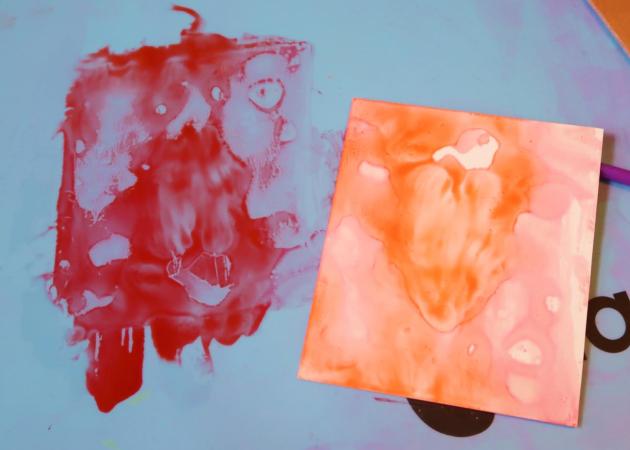
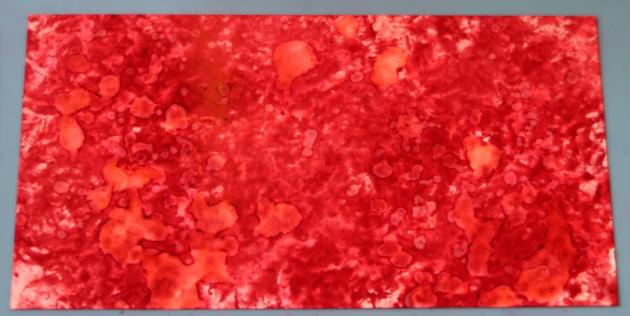
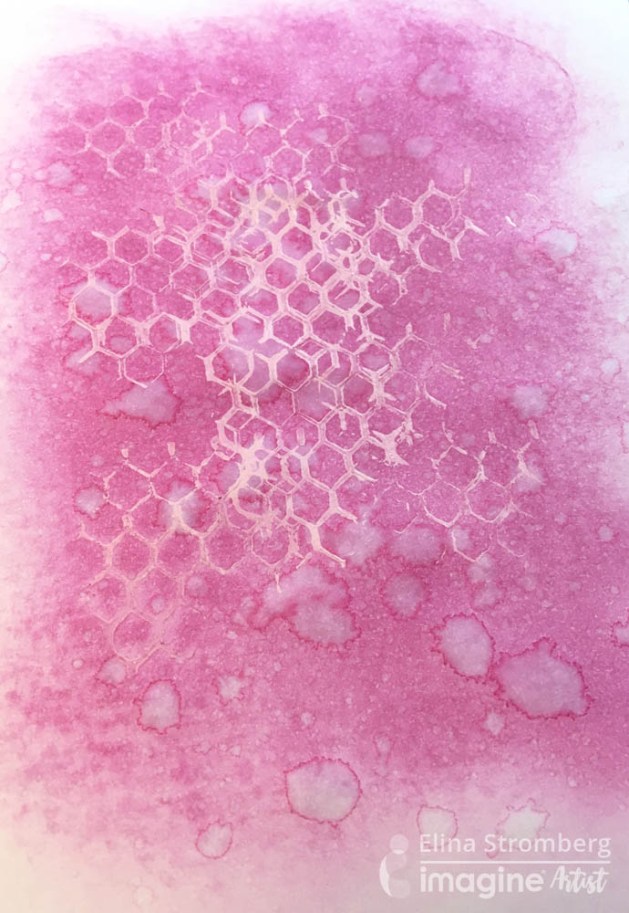
Mist the inked pattern with water. Press the wet paper with a paper towel to pick up the excess ink. Let dry.


Step 4

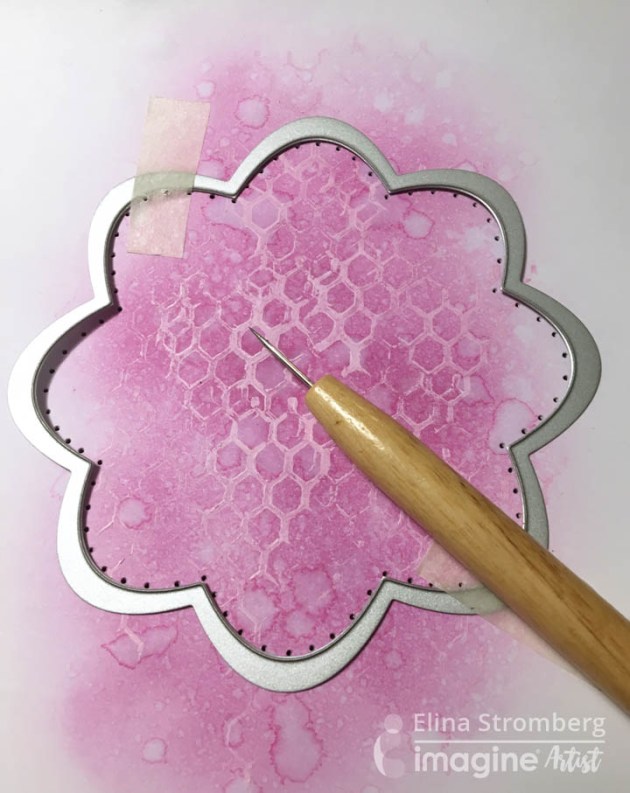
Use a plastic stencil or a nesting metal die as your stencil and create a punched frame in the middle of your background. Secure the stencil with masking tape before starting. 
For punching, use a paper piercing tool or a darning needle. Place paper on an old mouse pad for easy punching and for protecting your crafting table.


Step 5

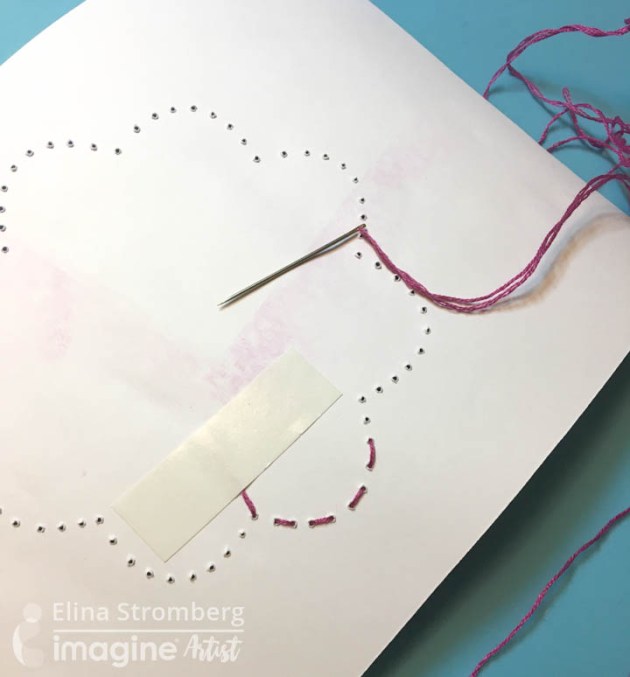
Sew a frame on the background using a straight stitch and three strings of embroidery yarn. Secure the end of the yarn on the back with double-sided tape.


Step 6

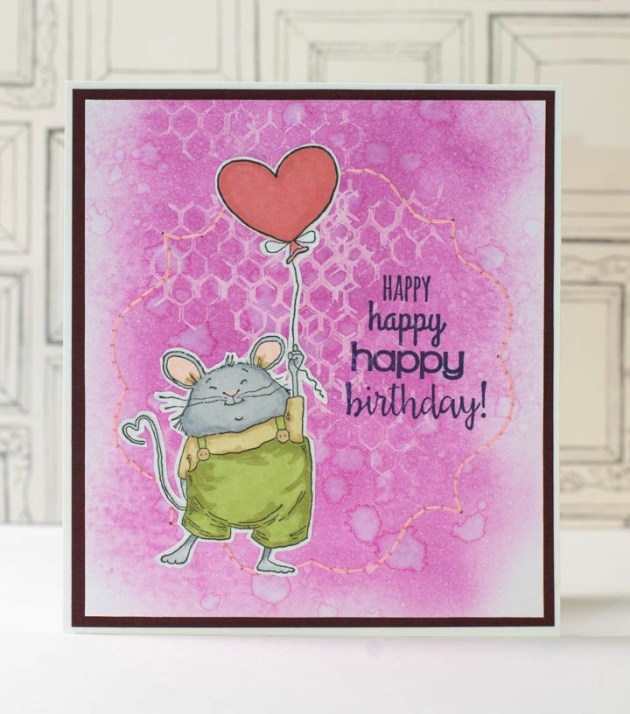
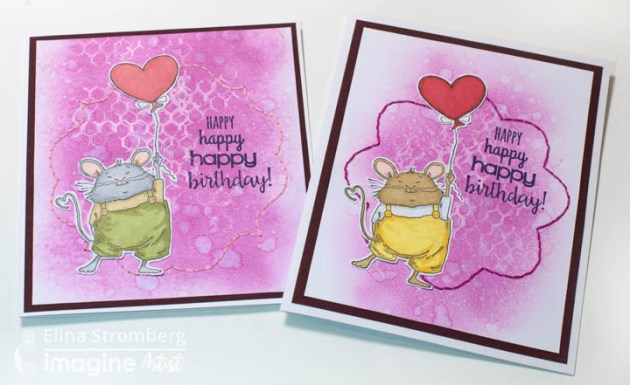
Stamp, color, and cut out your main image. Glue on the card front. Trim card to size, mat on a white card base. I used the same technique also for an ATC background; I think it looks quite nice, too!

Supplies

Imagine
Other
  • Acrylic paint – White, Red 
  • Brayer
  • Water mister
  • Ink blending tool
  • Honeycomb pattern stamp

  • Stamping Bella: Milton (Mouse) Stamp cgr 135

  • Carabelle Studio: Simple Elegance
  • Promarkers for coloring
  • Cardbase – white
  • Cardstock – White mixed media 
  • Dark purple paper
  • Metal nesting dies: Sizzix
  • Embroidery yarn, needle, paper piercing tool, old mouse pad

How to Use Many Types of Ink on Yupo Paper

by Roni Johnson

Completed love art piece on Yupo paper made with many types of Tsukineko inks.

Yupo is a polypropylene medium that can take all sorts of abuse and still come out looking great. Today I wanted to show you how easy it is to use with StazOn, Memento and VersaFine Clair inks with a couple of other mediums thrown in for fun. Today’s technique is only one of many different ways to use inks on Yupo paper. Experiment, have fun and if you don’t like it simply wipe it off and start over! This is a truly forgiving medium to work with.

Skill: Advanced
Time: 45minutes – 1-hour +dry time

Directions

Step 1

Use a paint brush to paint a layer of rubbing alcohol onto the craft mat.

Step 2

Add one drop of St. Valentine StazOn ink to the rubbing alcohol and slightly blend.

Step 3

Press a piece of Yupo paper into the ink mixture and lift. Repeat this step with additional pieces of Yupo or plain cardstock to pick up the excess ink.

Step 4

Mix a drop of Rhubarb Stalk and rubbing alcohol on the craft mat.

Step 5

Pounce a piece of wadded up plastic into the ink mix.

Step 6

Pounce the inky plastic over the Yupo paper to create a variety of patterns.

Step 7

Repeat steps 4 – 6 until you achieve the desired look. Try adding other ink colors for a bolder look. For my final result I used StazOn St Valentine, Claret and a touch of Gothic Purple as well as Memento Rhubarb Stalk Ink.

Step 7b (optional)

Flick rubbing alcohol over the Yupo to create additional depth and dimension.

Step 8

Spread Gold Metallic Creative Medium through a stencil using spatula palette knife.

Step 9

After the Creative Medium has dried, scribble around the heart and edge with a Marabu Art Crayon.

Step 10

Smudge the art crayon markings with your finger. Affix letters to the Yupo with On Point! Glue.

Step 11

Randomly stamp text and hearts over the Yupo canvas with VersaFine Clair Morning Mist ink.

Supplies

Imagine
Other
  • Yupo Paper
  • Rubbing Alcohol
  • Marabu Art Crayon
  • Rinea – Text Stamp
  • Joy Clair – Heart Stamp
  • Simon Says Stamp – Heart Stencil
  • Sizzix – Letters

Learn How To Color Glass For A Valentines Gift

by Iris Rodriguez

The idea of sending a message in a bottle has been around since 310 B.C. The Greek philosopher Theophrastus used to plop sealed bottles in the sea to prove that the Mediterranean was formed by the inflowing Atlantic. In the 16th century, Queen Elizabeth I of England believed that some bottles might contain secret messages sent home by British spies or fleet. As a result, she appointed an “Uncorker of Ocean Bottles”; making it a capital crime for anyone else to open one.

Today the idea of message in a bottle is more of fun romantic notion, thanks to literature and Hollywood movies. Show some love with this heart shaped glass bottle containing a custom stamped message, on a ribbon, using StazOn ink. Embellish the bottle with StazOn Studio Glaze and other adornments.

Skill: Intermediate
Time: 1 Hour

Directions


Step 1

Begin by selecting a heart shaped bottle. I found this wonderful bottle at my local craft store. Working on glass can be a little tricky. For instance, getting some things to stick, getting an even texture (e.g. brush strokes) and color. It helps to prime the glass. For this project the glass is primed with on GlazOn. It is added to the glass; and in between the StazOn Studio Glaze layers. The Studio Glaze is a pigment ink medium. Start by brushing the GlazeOn onto the bottle. Brush using a crosshatch pattern; create X patterns without washing the brush. By doing a crosshatch pattern, allows you build up the GlazeOn evenly and eliminates brushstrokes. Brush on a section at a time. Let the glass dry completely. This product dries fast. Wash your brush in water right away. Dry the brush before using with the GlazeOn again. If you have water, it will active the GlazeOn or Studio Glaze and you will remove any medium you may have on the glass and get uneven surface.


Step 2

Squeeze out a small drop of the St. Valentine Studio Glaze on your grey craft mat. Using an Inkblusher sponge on the StazOn Studio Glaze, sponge one section at a time. Only place a few drops of the Studio Glaze at a time, then sponge. To increase color intensity, keep adding layers. Sponge one layer at a time, and allow each layer to completely dry. Brush on a thin layer of the GlazeOn in a crosshatch pattern. Ensure your brush is dry. Allow this layer to completely dry.


Step 3

Sponge on the Jet Black StazOn Studio Glaze on the sides and bottom of the heart. This adds dimension and interest. Allow the layer to completely dry. Brush on a thin layer of the GlazeOn in a crosshatch pattern. Ensure that the brush is dry. Allow this layer to completely dry.


Step 4

Squeeze a few drops of the Shimmer IrRESISTible Pico Embellisher, then sponge. This gives the bottle a slight shimmer. If not adding the Shimmer brush on a final layer of GlazeOn. Allow the layer to completely dry.


Step 5

The bottle is complete at this point. For added measure, once all layers have dried, seal the glass with a final sealer to protect the beautiful finish. Brush on a thin layer of Indoor water based Polyurethane. Any brand will do. Polyurethane is great for sealing art work on just about any surface. It comes in matte, satin, and gloss. It has a nice strong, but soft finish (does not have that plastic feel, looks natural.


Step 6

Stamp the message on the ribbon. This can be done while you wait for the products to dry on the glass. First a little about ribbons. Recommend using a Grosgrain ribbon. I tried stamping on satin and polyester ribbons, but the ink bled. The Grosgrain ribbon performed better due to its design; it’s heavy and tightly woven. This type of ribbon is widely available and comes in many colors and widths. Choose a size that will fit your alphabet stamps. I liked the one inch ribbon; it filled up the glass nicely and it fit my larger alphabet stamps as well.

This sounds silly to even say it, but before you begin to stamp your message, write it out on a piece of paper. There is something about concentrating on the stamping that makes you miss a letter here and there, if you’re not careful. You don’t want to send the wrong message (pun intended, lol!). Stamp the message while the ribbon is on the roll, you don’t know exactly how much ribbon your will need. Cut the ribbon after you finish stamping the message; leave a little extra ribbon at the end of the message.Singe the end of the ribbon with a cigarette lighter or it will unravel over time. The ribbon is flammable; singe by quickly running a cigarette lighter across the edge.


Step 7

Using heavy clear glue, adhere the ribbon to the center of the cork. Glue about ¼ inch of the ribbon.


Step 8

Allow the glue to dry. Use a piece of piece of tape or place something light on the cork to hold it in place while the glue dries.


Step 9

Place the cork and ribbon in the bottle and embellish.

Supplies

Imagine
Other
  • Heart shaped glass bottle
  • Embellishments
  • Grosgrain red ribbon- between ½ to 1 inch width
  • Alphabet rubber stamp
  • Varathane indoor water based Polyurathane

Simple Card Background Using Imagine Craft Mat

by Nadine Carlier

together card by nadine carlier ic

The new Imagine Craft Mat is great for creating all kinds of backgrounds for cards. This one was created using Memento Dewdrop Inks and the grid side of the craft mat.  Watch my video below to see how I did it. Enjoy!

Skill: Beginner
Time: 15 minutes

Supplies

Imagine
Other

Visit our YouTube Channel for more inspirational videos and subscribe to get updates when we post new videos.

See How to Make Layers of Hearts for Valentines

by Kyriakos Pachadiroglou

See How to Make a Layers of Hearts for Valentines

Make a layered dimensional love frame using a 5 x 7 deep picture frame and a bold red colored heart painted with All-Purpose Ink Poppy Red. This project centers around a simple concept—create layers of hearts and floating like sense with a background that allows light to pass through too. The Vertigo sheets create a blur effect without dominating the picture. The bold red heart stands out from all decorations used, enhancing the purpose of the frame.

Skill: Intermediate
Time: 1 hour

Directions


Step 1

Make the hearts with a heart shaped mold and paper clay. After you cast the heart and let dry fully, color with the All-Purpose in Ink Poppy Red color. All-Purpose Ink works beautifully on all types of surfaces such as fabric and wood, so it is a natural fit for the paper clay.


Step 2

Cut a 2 ½ x 7-inch long piece of the white cardstock and fold in a border about ½ inches on the short edges. Adjust the folding to the inner dimension of your frame if different.


Step 3

Stamp the Valentine theme words from the stamp set with the VersaFine Clair Nocturne.


Step 4

Die cut Vertigo sheets in heart shapes (or cut with scissors).


Step 5

Place Tear It! Tape on the folded edges of the cardstock piece at the non-stamped side.


Step 6

Set the cardstock piece in the frame with the Tear It! Tape previously placed on the top and bottom sides of the frame.


Step 7

Glue the red heart in place as shown in the photo above.


Step 8

Twist pieces of wire (as springs) to use holders for the Vertigo hearts.


Step 9

Glue on the side to the inner bottom of the frame and place the Vertigo heart.


Step 10

Stamp the cupid design with the VersaFine Clair Nocturne on a piece of Vertigo sheet and set it on a heart inside the frame.


Supplies

Imagine
Other
  • Lightweight clay
  • Heart shaped mold
  • Heavy white cardstock
  • Penny Black – All about love stamp set
  • 5 x 7 deep white frame
  • Craft wire
  • Hot glue gun
  • Heart shape dies (optional)
  • Die cutting machine (optional)

Create A Valentine’s Day Card Using Dewlets

by Nadine Carlier

Valentine's Day Card by Nadine Carlier IC

Not only are the Dewlet dies great to use with DewDrop ink pads they also make perfect hearts.  Watch my video below to see how I created the hearts with the Dewlet dies and how I used Delicata and VersaFine Clair for the stamped images. Enjoy!

Skill: Intermediate
Time: 30 minutes

Supplies

Imagine
Other

Visit our YouTube Channel for more inspirational videos and subscribe to get updates when we post new videos.