Create a Beautiful Icy Blue Holiday Card

by Kyriakos Pachadiroglou

Create a Beautiful Icy Blue Holiday Card

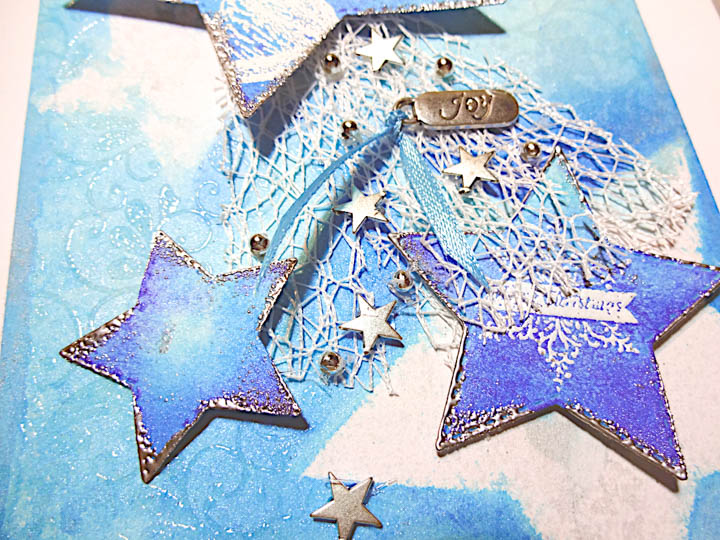
Although red, green and gold colors are the most representative ones of Christmas, the last couple of years, I am quite fun of blue that combines so nicely with the silver and contrasts the white. Stars are favorite shapes of this season and using Delicata Sapphire Blue on lighter shades of blue, using MEMENTO bahama blue, give more depth on the card.

Skill: Advanced
Time: 30 minutes

Directions


Step 1

Die-cut 3 different sized star shapes.


Step 2

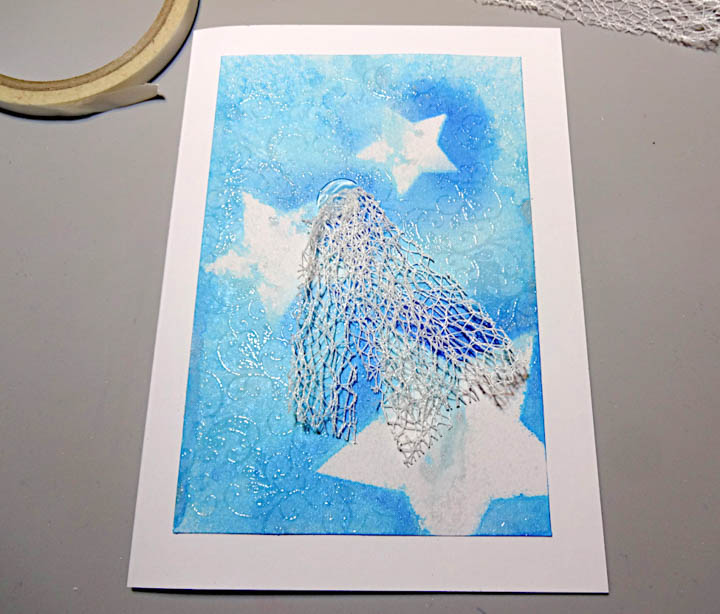
Place the star shapes on a piece of 4×6 card stock and spray first with the Fireworks! Bahama blue and then with Ink Potion No9. Remove the stars and dry the card stock with a heat tool.


Step 3

Lightly cover areas with MEMENTO Bahama blue ink pad.


Step 4

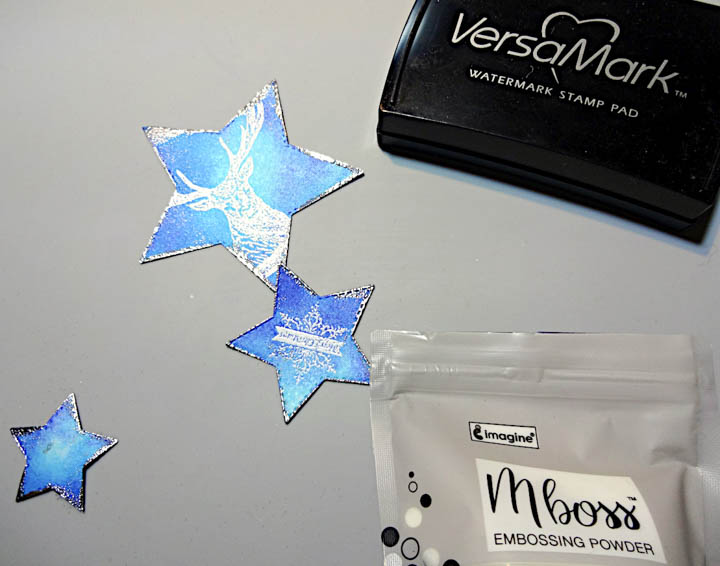
Place the star shapes, white side up, stamp with VersaMark the swirls stamp, cover with Mboss clear embossing powder and heat set.


Step 5

Distress the stars with Delicata Sapphire Blue.


Step 6

Stamp design on the stars, cover with Mboss white embossing powder and heat set. When finished, lightly press the edges of the stars on the VersaMark watermark ink pad, and heat set Mboss silver embossing powder.


Step 7

Set the card stock piece on the card with Tear It! Tape and start placing the ribbon.


Step 8

Continue adding the stars and the rest of the embellishments

Supplies

Imagine
Other
  • Star shape dies
  • Metal stars and beads
  • Mesh ribbon
  • Heat tool
  • Hot glue gun
  • White card stock
  • Viva decor – Peacock feather stamp set

Get Inky with VersaColor, Fireworks Sprays and Joy Clair Stamps

by Melissa Andrew

Get Inky with VersaColor, Fireworks Sprays and Joy Clair Stamps

Today, I create a fun card using Fireworks Sprays with a stencil to create a fun background for this adorable sloth from Joy Clair Stamps. Join me for a masking technique cardmaking tutorial. Also, learn how to make simple coffee rings on your cards with Fireworks in Rich Cocoa!

Skill: Advanced
Time: 1 hour

Directions

Supplies

Imagine

Fireworks Spray – Rich Cocoa, Desert Sand
VersaColor – Cyan
• VersaFine Clair – Nocturne
Imagine Craft Mat
Brushstix

Other

• Joy Clair – Feeling Slothly – https://www.joyclair.com/collections/clear-stamps/products/feeling-slothly-clear-stamps
• Circle Die Cut
• Stencil – La La Land Crafts
• White Cardstock
• Heat Tool
• Paper Trimmer

See How to Double Stamp to Create a “Give Thanks” Card

by Martha Lucia Gomez

See How to Double Stamp to Create a "Give Thanks" Card

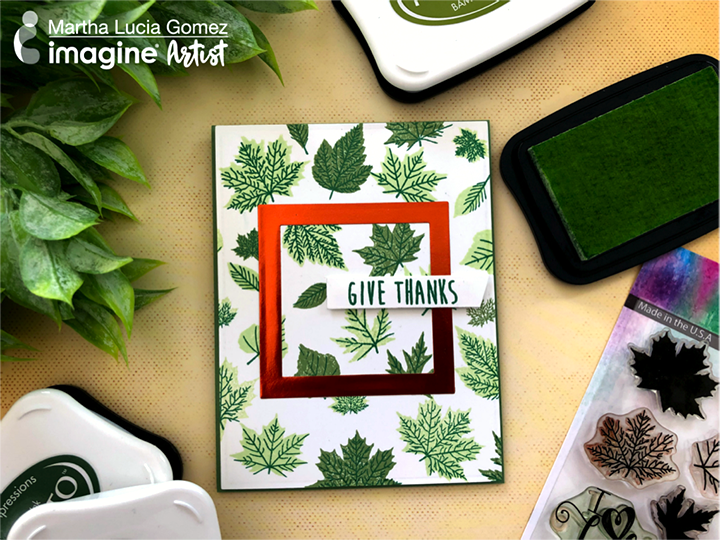
Hello crafty friends, Martha Lucia here! Today, I am sharing the double stamping with Memento Ink. One of the most versatile inks are Memento, they come in multiples shades and you can easily coordinate and found colors in between. I am featuring the stamp set Fall Leaves from Joy Clair. This month we are working together and you can find a lot of inspiration with the two brands in our corresponding blogs.

Directions

Bamboo Leaves and Cottage Ivy Memento colors inkpads

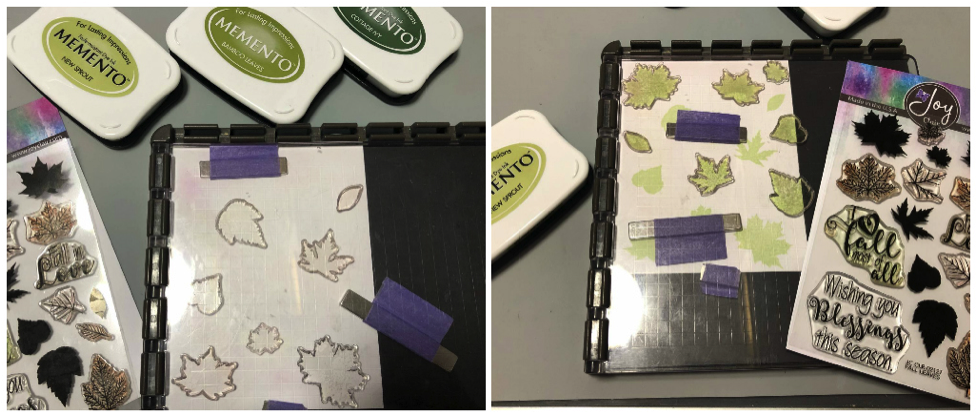
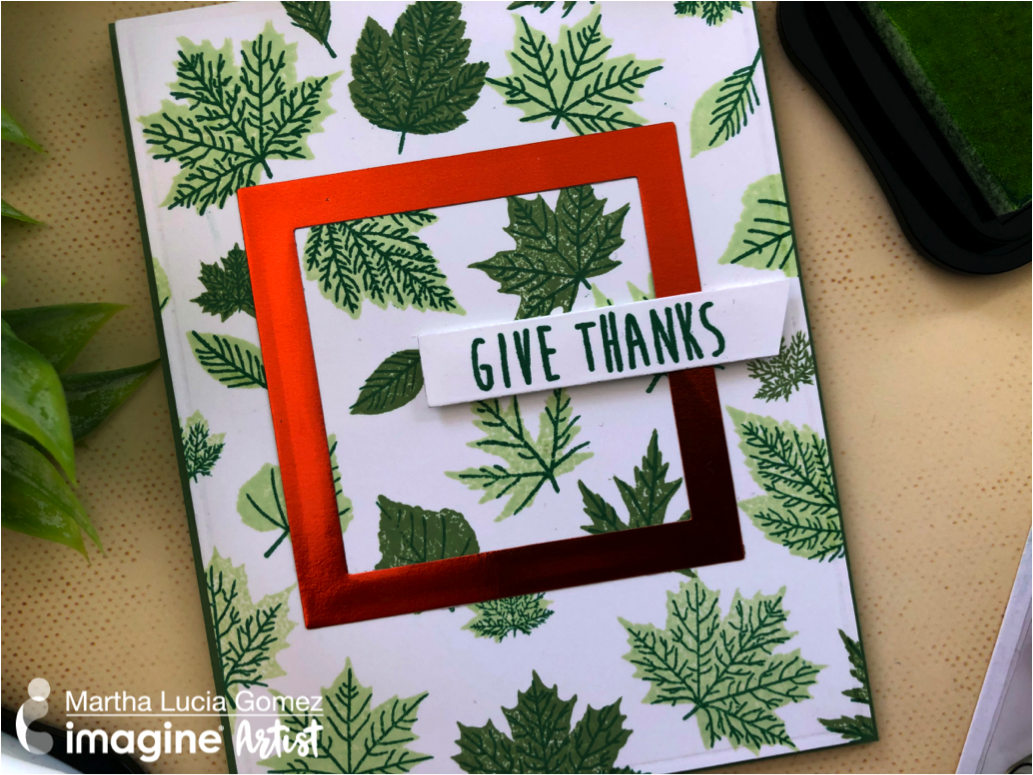
Stamp the solid image of the leaves with the lightest color of your Memento Ink. I used New Sprout and a stamping tool to stamp several images at once, but you can use an acrylic block to make the same. With the two darker colors of Memento Ink stamp the lines inside of the first images stamped. I used Bamboo Leaves and Cottage Ivy Memento colors.

stamp the sentiment, "Give Thanks"

Resize your layer and paste it with double-sided foam tape over your card base. To cut mine, I used the large Embossed Edge Square Frame from Kat Scrappiness. In a separate piece of paper, stamp the sentiment, “Give Thanks”. I used one sentiment included on the stamp set Fall Greetings from Joy Clair and Cottage Ivy Memento Ink. Finalize your card adding a colorful frame. I used Marigold/Gold Glossy Rinea Foiled Paper and embossed edge square die cuts from Kat Scrappiness to create mine.

Thank you for stopping by and see you soon!

Supplies

Imagine
Other
  • Joy Clair Stamps – Fall Leaves, Fall Greetings
  • Kat Scrappiness – Embossed Edge Rectangle Dies, Embossed Edge Square Dies
  • Marigold/Gold Glossy Rinea Foiled Paper
  • Stamping Tool
  • Double-Sided Foam Tape

See How to Make a Tattersal Background Pattern for a Card

by Lindsay Adreon 

See How to Make a Tattersal Background Pattern for a Card

One of my favorite things to do is create patterned backgrounds. I have wanted to find a way to create a pattern that I am always seeing on men’s shirts. In my research, I found it had an actual name, Tattersall!! You could use line stamps, but I found using markers made this pattern super quick and easy!

Skill: Intermediate
Time: 1 hour +

Directions

Supplies

Imagine
Other

Color and Stamp on Fabric with Waffle Flower Stamps and All-Purpose Ink

by Jessica Lin

Color and Stamp on Fabric with Waffle Flower Stamps and All-Purpose Ink

Hi everyone! I hope you are excited about the collaboration between Imagine and Waffle Flower because I have an easy and fun project to share with you! Today’s video is about stamping on fabric. It may seem intimidating at first, but with the right tools, tips, and tricks you will surely fall in love into making this simple craft. I’ve shared a lot of my thought process, and even mistakes, so that you can get a better understanding of using Fantastix and the All-Purpose Inks. I hope you will give this idea a try, and feel free to comment below if you did!  

Skill: Beginner
Time: 30 – 40 minutes

Directions

Supplies

Imagine
Other 

Create a Watercolor Effect for a Thank You Card

by Elina Stromberg

Create a Watercolor Effect for a Thank You Card

This easy background technique can be used for creating beautiful soft backgrounds for various paper crafting projects. I used it for decorating a simple one-layer card, embracing our lovely color of the month ‘Fern Green’. The technique is quick and easy, and it requires only a very limited amount of supplies. Just take out your favorite Memento ink pad, any pattern stencil, a sponge dauber, and you’re good to go!

Skill: Beginner
Time: 1 hour

Directions


Step 1

Place card base flat on your Craft Mat, inside facing down. Wipe the Craft Mat with the ‘Bamboo Leaves’ green ink pad, mist the ink gently with water. Using a Jumbo dauber apply a soft layer of ink on the card base, both on the card front and on the backside. Do not ink the entire card but leave some areas blank. Let dry for a few minutes.


Step 2

Stencil random text patterns on the inked areas. Use the same green Memento ink and a small Sponge dauber.


Step 3

Die-cut the ‘Thank You’ sentiment twice, once from white cardstock and once from dark green. Layer the die-cut words letting the white layer partly show underneath. Glue on the card front. Die cut a branch from dark green cardstock and glue on the card front. If you don’t have a die-cutting machine decorate the card with letter stickers and hand-cut leaves, branches, or flowers.

Supplies

Imagine
Other
  • Card base
  • Cardstock – White, Dark Green
  • The Crafter’s Workshop – Art Is Stencil
  • Sizzix – Skeleton Leaves
  • Die-Versions – Everyday
  • Water Mister
  • Glue