See How to Use these Unique Card Making Supplies

by Martha Lucia Gomez

See How to Use these Unique Card Making Supplies

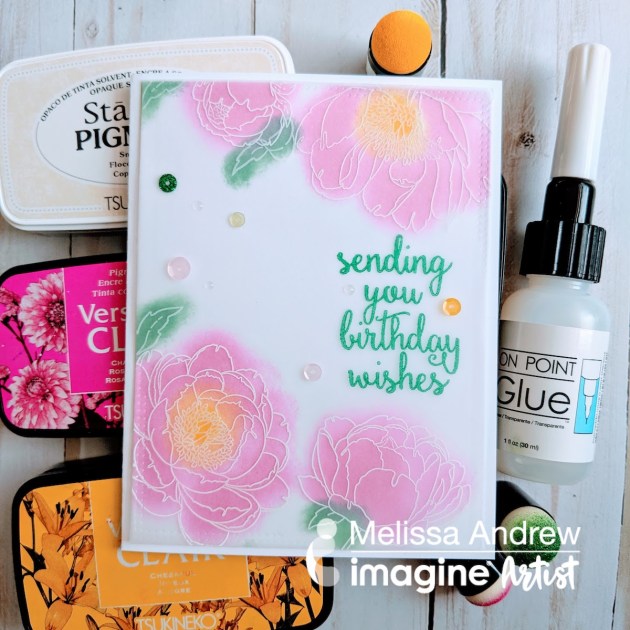
Hello friends! Today, I would like to share with you a quick and easy way to create an inspiring card with clear Vertigo Sheets and VersaFine Clair.

Skill: Beginner
Time: 30 minutes

Directions


Step 1

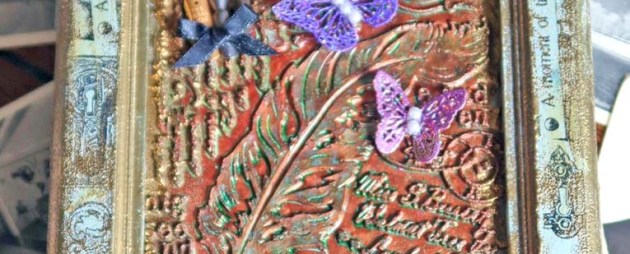
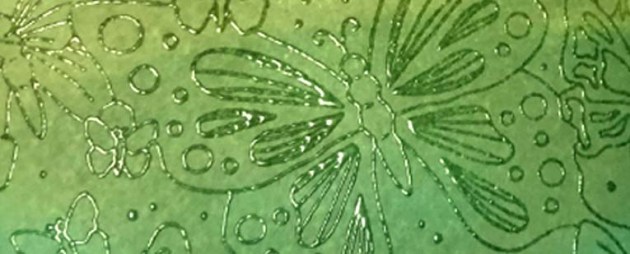
If you are not familiar with Vertigo Sheets it is a plastic product from Imagine that adds unique depth to cards and mixed media projects. It comes in different designs and you can create visual effects with these depending on the design and colors of ink that you use. You can also stamp over the sheets, die cut and emboss it.


Step 2

To make my card, I used a strip of Vertigo Taffeta design, that is the most simple design and VersaFine Clair ink in three different colors: Verdant, Shady Lane and Green Oasis. I applied the ink over the Vertigo Piece using a sponge or dauber and let the ink dry naturally.

I stamped with VersaFine Clair Nocturne the images that I wanted over the strip and also let the strip dry well before pasting it over my card base. I used Tear It Tape to paste the decorated layer over my card and finalized it by stamping a sentiment from the Boss Babe stamp set of Joy Clair with VersaFine Clair Nocturne Ink. The photos don’t do justice to this card because of the Vertigo’s refracting. In person it is really clear and lovely!

Supplies

Imagine
Other
  • Cardstock – Whisper White
  • Joy Clair – Boss Babe set
  • Simon Says Stamp – Floral Mix Background

How to create Gelli Printed backgrounds with Memento Luxe inkers

by Jowilna Nolte

How to create Gelli Printed backgrounds with Memento Luxe inkers

I love using my inkers as an extension of my crafting. It’s so easy to pick up an inkpad and create fun effects and stamp with, but the inkers are so vibrant and intense and are perfect for mixed media effects and art journaling. I basically created a fun background in my art journal and loved it so much that I used the extras to create a few quick and quirky cards. Take a look at how easy it is to do.

Skill: Intermediate
Time: 1 hour

Directions


Step 1

Add a small amount of Memento Luxe inker onto a Gelli plate.


Step 2

Use a brayer to roll out the ink to a thin even layer.


Step 3

Place a sheet of white cardstock over the plate and smooth it out with your hand. Lift the paper to pull the print.


Step 4

Add another color of inker and roll out to an even layer with your brayer. Pull another print onto the same piece of paper. I overlapped my prints for a colorful background.


Step 5

Ink the Gelli plate with Memento Dew Drop ink pad and pull a print again.


Step 6

Keep on printing different colors onto your paper until it is completely covered in ink. TIP: you can even add some paint layers in between the ink pulls to give a different texture and effect. Trim the background into a piece to fit onto the front of your card. Stamp a script image using VersaFine in the center of the background.


Step 7

Stamp an image onto white cardstock and add color.


Step 8

Then cut it out and add to your background for a quick and quirky card.

Supplies

Imagine
Other
  • Gelli Plate – Gelli Arts
  • Cardstock – Antalis
  • Stamps – Carabelle, AALL & Create Watercolour
  • Paint – JoviBrayer

Learn Beginner Stamping on Vellum with an Easy Coloring Trick

by Melissa Andrew

Learn Beginner Stamping on Vellum with No Line Coloring

Today I show you how to avoid coloring, just in case it’s not your thing. Beautiful floral stamps are available everywhere, and I’ll show you how to use VersaFine Clair under a vellum overlay to get the gorgeous pop of color, without all the detailing usually required of coloring in stamps. Stamping with the new StazOn Pigment allows you to use a simple technique to create beautiful color on your cards quickly and easily.

Skill: Beginner
Time: 20 – 30 minutes

Directions

Supplies

Imagine

StazOn Pigment Inkpad – Snowflake, Shamrock Green
VersaFine Clair – Charming Pink, Green Oasis, Cheerful
Sponge daubers
irRESISTible Pico – Shimmer
On Point Glue
Tear It! Tape
Imagine Craft Mat 

Other

• Mama Elephant – Peonies In Bloom
• White Cardstock
• Vellum
• Sequence
• Stamping Platform – Misti
• Paper Towels

Learn An Elegant Embossing Resist And Blending Technique

by Martha Lucia Gomez

Learn An Elegant Embossing Resist And Blending Technique

Hello crafty friends! Today, I want to share a “Hello” greeting card using the technique of color blending and emboss resist. I have always enjoyed mixing different techniques together and emboss resist is one of the most versatile. What I show in this card making tutorial is with this option you can create a rich color background before embossing and then apply extra layers of color to enhance the effect. See how I created this elegant card below.

Skill: Intermediate
Time: 30 minutes

Directions


Step 1

To make this card, I used three different green colors of Memento Ink. I started with the lightest New Sprout, continue with Bamboo Leaves and finalized with Cottage Ivy.


Step 2

Over a whisper white piece of card stock, I applied the ink directly with the ink pad, just rub it softly and blend the colors. When I was totally satisfied with the colors, I let the paper dry very well before to continue with the next step. I used my heat tool to speed up the process.


Step 3

I stamped a background stamp over the inked layer using the embossing buddy or anti-static pad, VersaMark Ink and Clear Embossing Powder.


Step 4

After heat embossing and using an InkBlusher, I applied Delicata Pigment Ink in White Shimmer directly over the heat embossed background. At this stage, you will notice how the embossed butterflies fine lines did not absorb the pigment ink and the background color looks softer.


Step 5

To finalize the card, I resized the layer, pasted it over the mat and card base and stamped one sentiment using VersaFine Clair Green Oasis and embossed it with clear embossing powder.


Step 6

You can use this technique using a single color of ink for the background or mixing different colors. The most important is that you use white pigment ink to make the color tones soft and enhance the embossing.

Thank you for stopping by!

Supplies

Imagine
Other
  • Cardstock – Whisper White, Dark Brown
  • Stamp Sets – Blossom & Butterflies, Friendship Greetings
  • Stamparatus or Misti Stamping Tool
  • Embossing Buddy
  • Heat Tool

Learn How To Use Yupo Paper In A New Way

by Roni Johnson

Learn How To Use Yupo Paper In A New Way

Fern Green…a cool, relaxing shady spot on a hot summer’s day…sounds wonderful, doesn’t it? Well, that’s what June’s color of the Month brings to mind. I thought I’d run with that theme and play around with a few different colors of green from the Fireworks Craft Spray and VersaFine Clair. I use these lovely Fern stamps, fern dies, and a special technique with Yupo paper to create this fun card.

Skill: Intermediate
Time: 1 hour

Directions


Step 1

Trim a piece of Yupo paper to 4 x 4.75” and select desired colors of Fireworks spray you’d like to use.


Step 2

Spritz the inks onto the Yupo paper.


Step 3

Use a heat tool to dry the inks, continue heating until the paper begins to shrink and wrinkle. Turn the paper over part way through heating, continue to heat and shrink. The Yupo paper is now about 45% of its original size.


Step 4

Turn your heat tool on to preheat so it gets nice and hot.


Step 5

Pounce one edge of the wrinkled Yupo onto a VersaMark ink pad.


Step 6

Dip the inked edge into Mboss embossing powder in Gold and use a pre-heated heat tool to melt the powder. Since the heat tool has been pre-heated melting should occur almost immediately thus causing no further shrinking to the Yupo.


Step 7

Repeat step 6 until all 4 edges have been embossed.


Step 8

Cut a piece of white cardstock 4” x 5.25”. Stamp a trio of fern branches over the entire panel using Rain Forest, Shady Lane, and Verdant VersaFine Clair inks.


Step 10

Flick Gold Sheer Shimmer Spritz over the panel and let dry.


Step 11

Sponge the same inks onto a scrap of white cardstock. Die-cut ferns from the various colors.


Step 12

Stamp the sentiment “sending hugs your way” on black cardstock using VersaMark ink. Sprinkle with white Mboss embossing powder, shake off excess and return it to the bag. Use a heat tool to melt the powder and trim.


Step 13

Mount the fern panel onto a black card base; affix the Yupo paper to the card and embellish.

Supplies

Imagine
Other
  • Yupo Paper
  • White & Black Cardstock
  • Rubber Stamp Tapestry – Fern
  • Spellbinders – Ferns
  • Heat Tool
  • Gold Thread

Color of the Month for June is Fern Green

Color of the Month for June is Fern Green. We love this soft green color because it reminds us of the beautiful plants that come bursting forward into the lushness of Summer. Some of the inks we recommend for this color are StazOn Cactus Green, VersaColor Fresh Green, VersaFine Clair in Green Oasis and Verdant.

Here is a sneak peek for what we have coming up this month…

Green Eyes Art Canvas by Kyriakos Pachadiroglou

Mixed Media by Roni Johnson

Resist Embossing by Martha Lucia Gomez