See How to Make Great Wedding Crafts for a Beautiful DIY Wedding

We are wrapping up a week of Wedding Craft inspiration and thought we would do a little recap. Please pin this page as a reference or share on facebook. We encourage you to pull from these design ideas and mix and match them to create what you need. For example, Kyriakos table decor almost matches Kassy’s banner perfect. With a little tweaking on each design, you could easily create a full array of decor for a wedding.
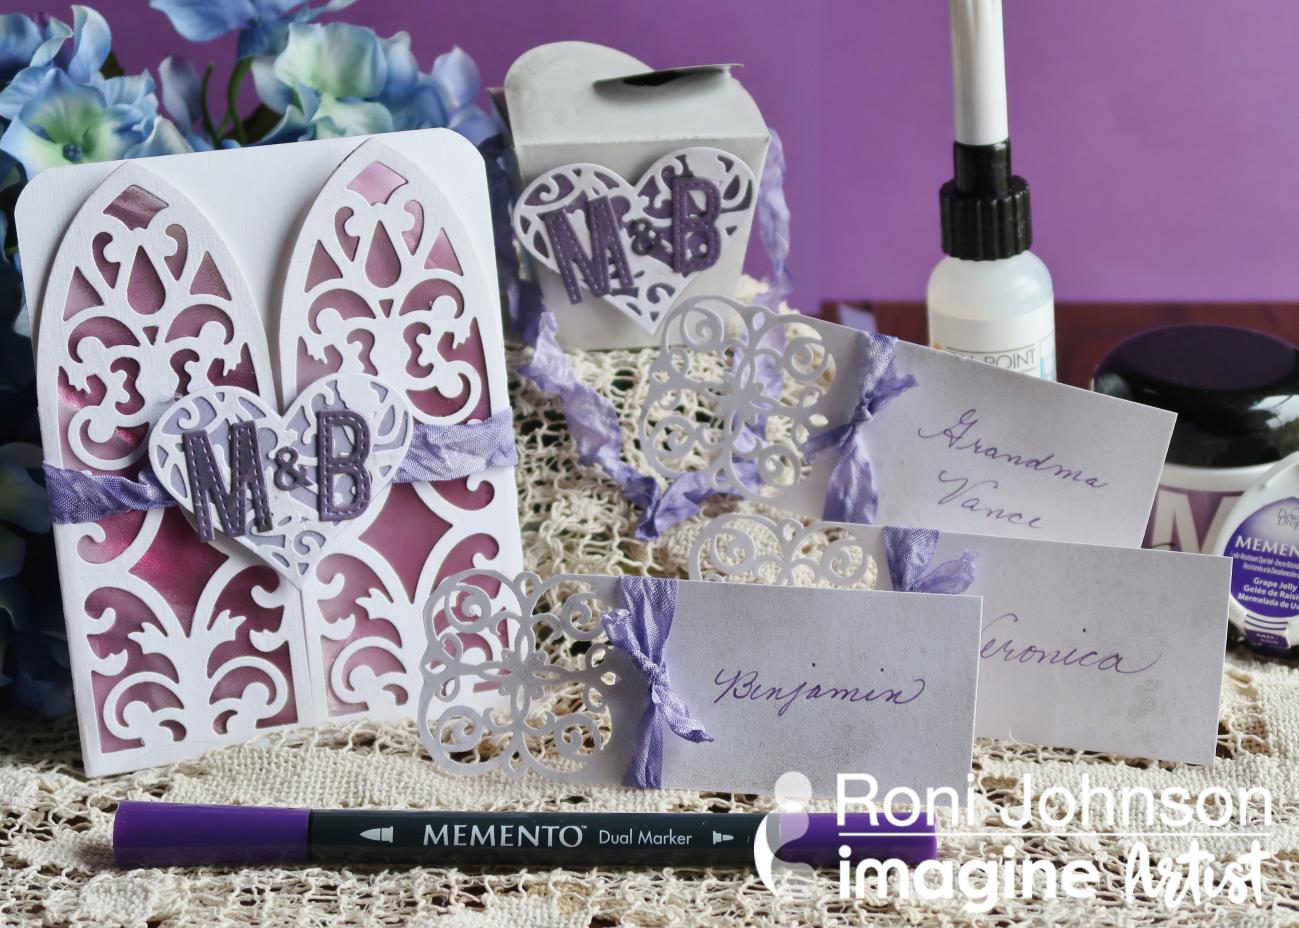
 

Create a Matching Wedding Set – the Invitation, Favor Box & Placecards by Roni Johnson.

As always, Roni outdid herself by creating three dynamic matching papercraft projects featuring a free download for a favor box. Using the Imagine’s Color of the Month (and Pantone’s color of the year) Ultraviolet as inspiration for the color scheme.
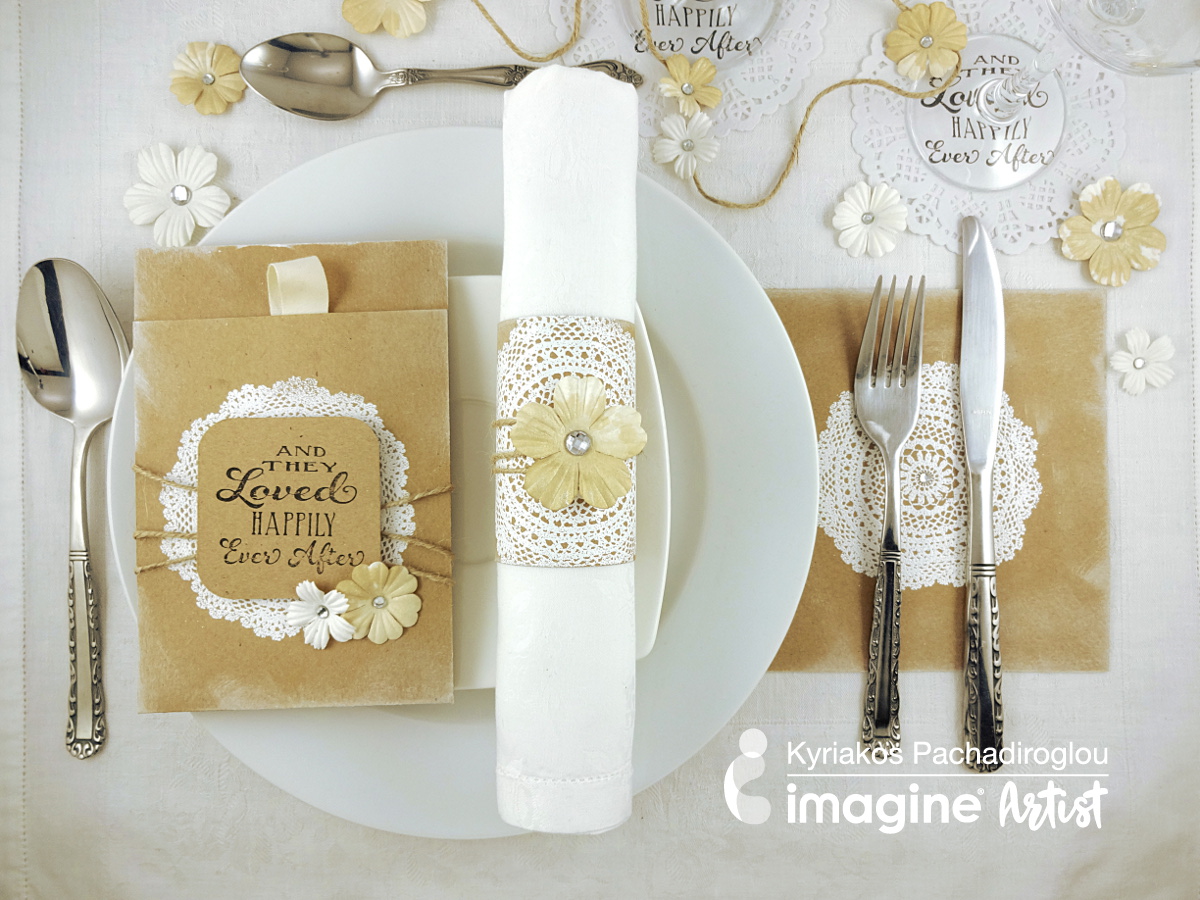
A Simple, Elegant and Inexpensive Wedding Table Setting by Kyriakos Pachadiroglou

Kyriakos has a knack for jewelry and table decor. He certainly shows off this knowledge in this post where he creates a pull tab card, napkin ring, cutlery placeholder and wine glass placeholder for a lovely DIY shabby chic style. One super fun element we love in this design is the doily stamp. Yes.. that is a stamp not as an actual paper doily.
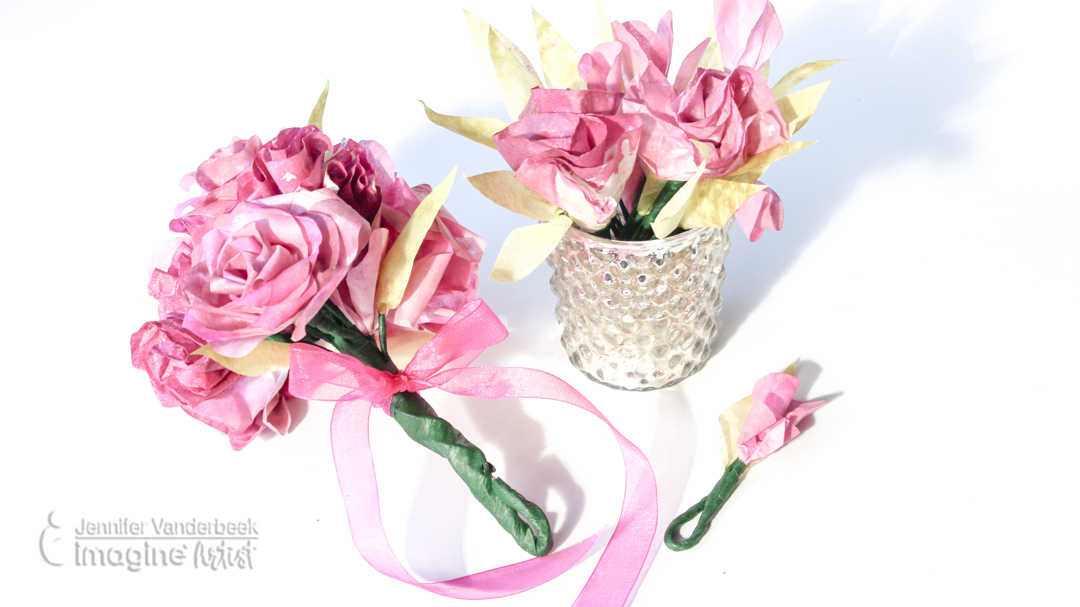
How to Make Wedding Flowers from Coffee Filters by Jennifer Vanderbeek

We are so impressed with how these paper flowers turned out! Since Jennifer is one of our video artists, you will have the luxury of seeing for yourself how these are handcrafted. Take a minute to watch this YouTube video to see how she designed these bouquets.
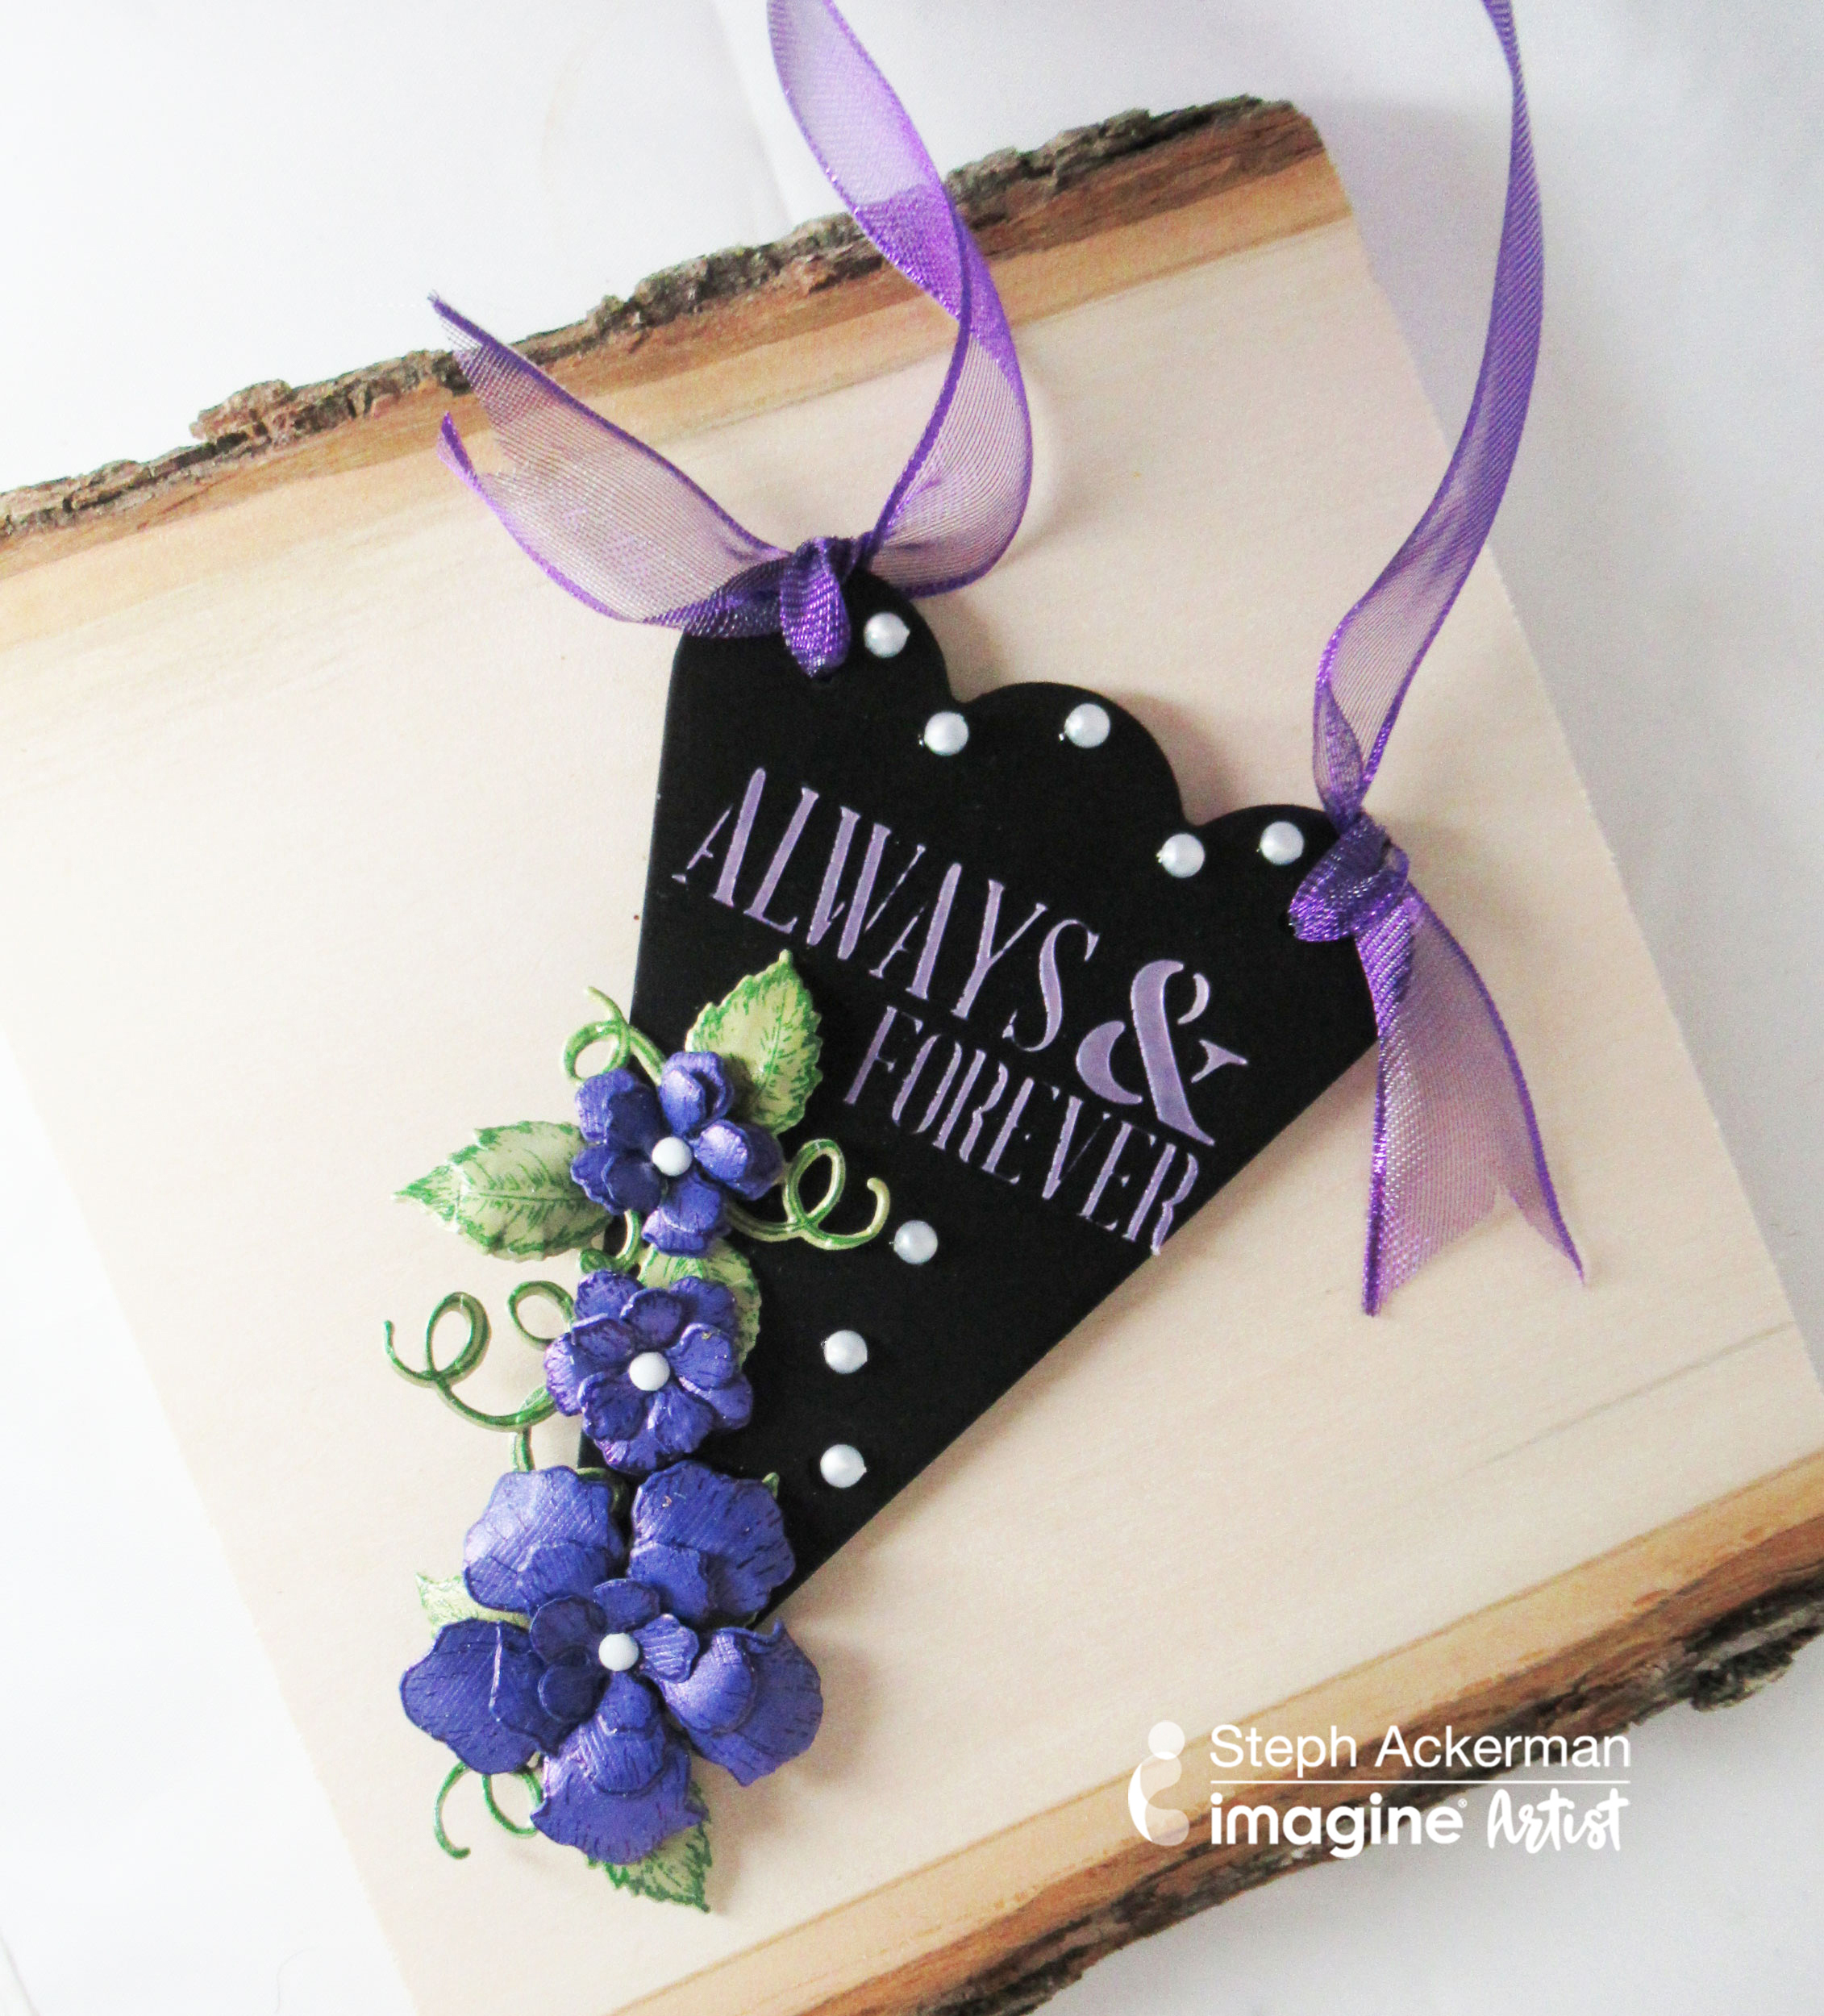
Create An Elegant “Always & Forever” Wedding Sign by Steph Ackerman

We like the rich purple flowers that literally pop off this banner style sign. See how Steph used Creative Medium in Iridescent Purple to match flowers to “Always & Forever” text.
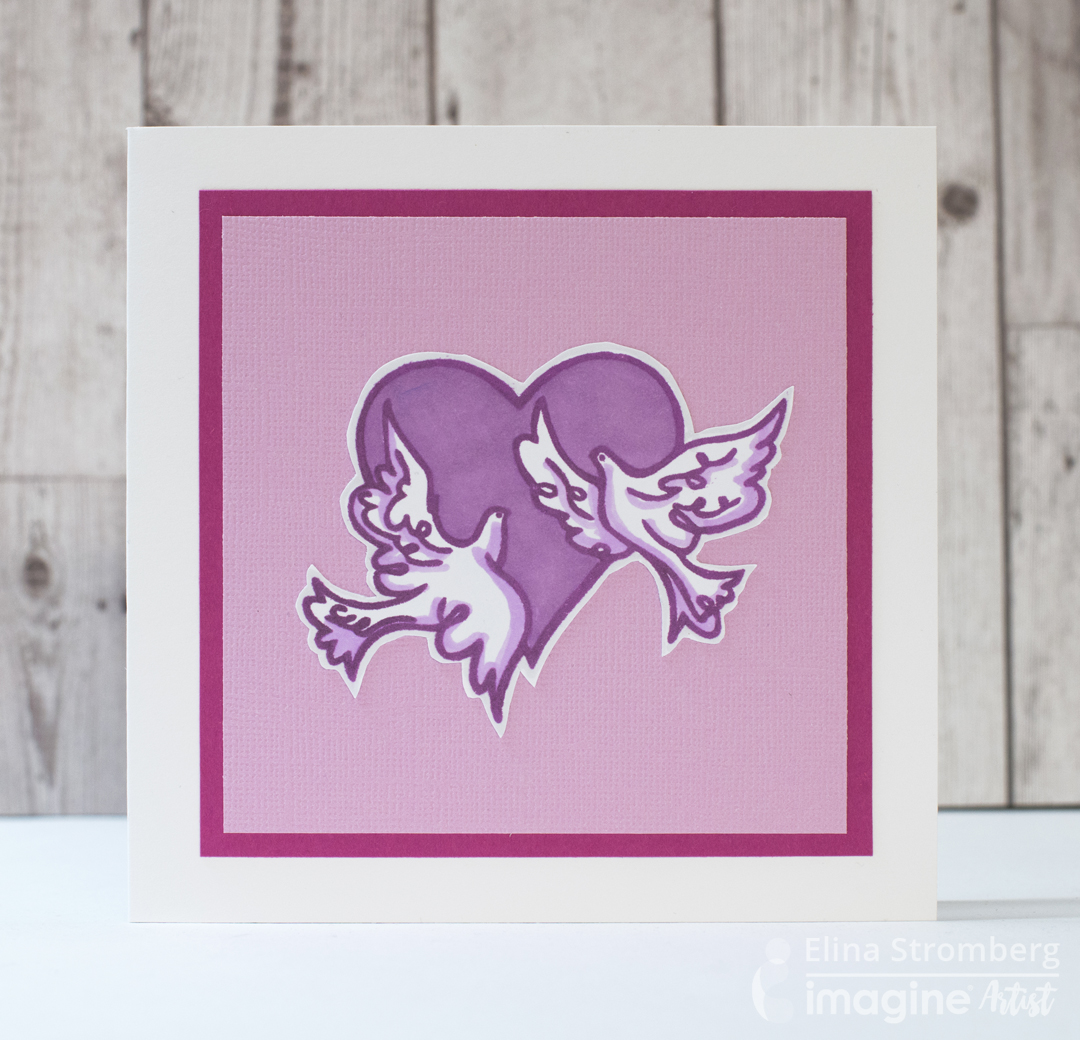
Use a Cute Lovebirds Theme in Wedding Decor by Elina Stromberg

We appreciate this lovebird design as a theme for a wedding. Elina goes through a couple different color schemes and design ideas to show off how to use one stamp in a variety of ways.
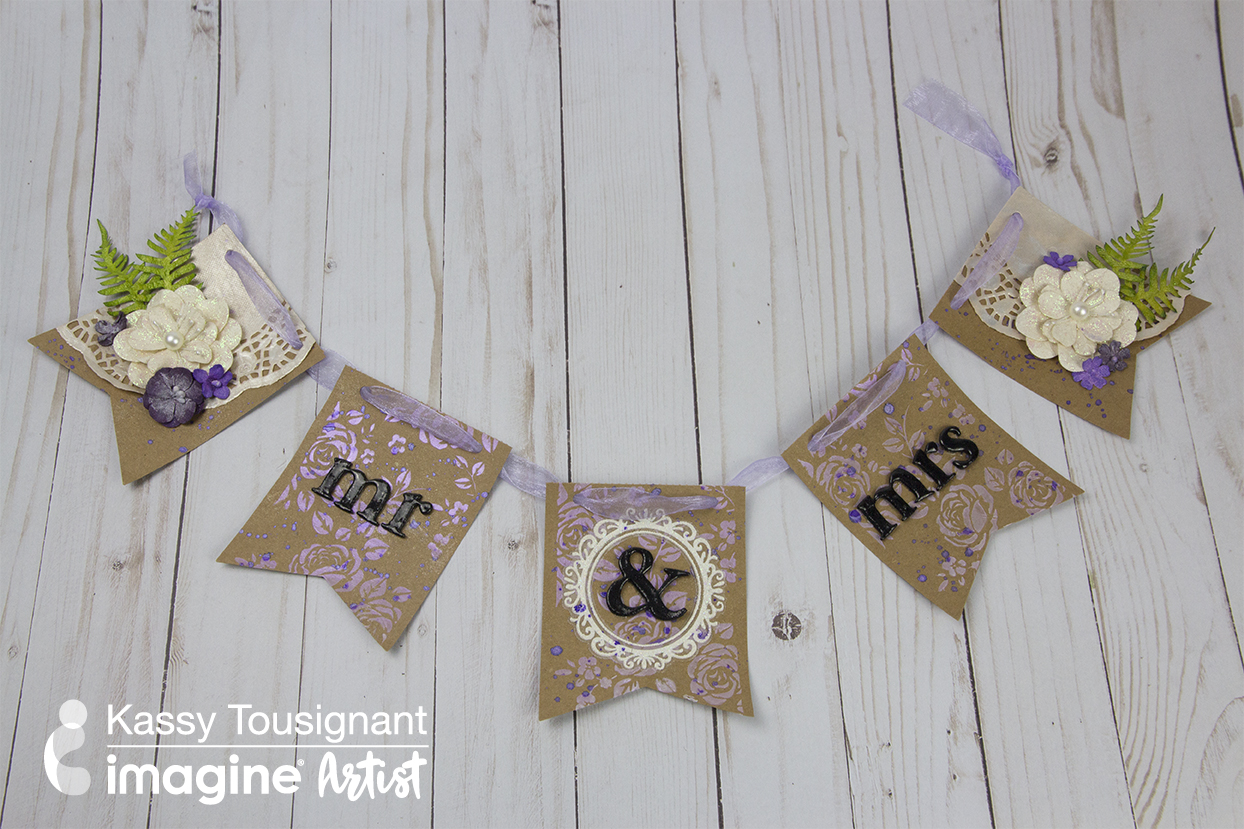
Learn How to Make a Shabby Chic Wedding Banner by Kassy Tousignant

And if you have not watched this video yet then please do! Kassy goes through all the steps of creating this Shabby Chic Mr. & Mrs. Banner.

Learn How to Make a Shabby Chic Wedding Banner

by Kassy Tousignant

Learn How to Make a Shabby Chic Wedding Banner by Kassy Tousignant. VersaMark Embossing Powder - Black Fireworks! Shimmery Craft Spray - Desert Sand, Grape Jelly, London Fog

Shabby chic wedding decor is very hot right now! Today I used kraft banner pendants with doilies and gorgeous flowers to create a beautiful wedding banner. My favorite part is the delicate rosebuds created with Creative Medium in Iridescent Purple. Against the kraft paper, it pops just enough to create a wonderful background. It has a gorgeous finish that is delicate enough for wedding decor, yet bold enough to catch your attention. This banner would be a lovely decoration on the front of the wedding party table, near the gift table, or where ever a bride might find it is needed!

Supplies

Imagine
Other
  • 3-in-1 glue
  • American Crafts – Thickers alphabet stickers, kraft banner pendants
  • 49 and Market – flowers
  • Tim Holtz – Rose stencil
  • Decorative border sticker
  • Purple organza ribbon
  • White paper doilies
  • Glue gun

A Simple, Elegant and Inexpensive Wedding Table Setting

by Kyriakos Pachadiroglou

Planning to make wedding table decorations? I’ve planned out an idea for this that is based on easy-to-find supplies, not requiring crafting machines or things that would be difficult to use after this project is complete. I also was interested in it being easy to prepare but still elegant. By creating several easy-to-make matching pieces, the cost of the basic crafting supplies is still quite low per setting.

Using the kraft cardstock as the background, you have the option to play with more color choices on the embossing powder or the dyed flowers with the Fireworks! Simmery Craft Sprays.

Instead of using the Imagine white embossing powder, you could stamp the design with Brilliance Moonlight White that gives a good result on the kraft paper and reduces the process time. However, the result with the Imagine’s white embossing powder is brighter and the embossed texture on the surface is more impressive. I estimate of the cost for 100 place-settings is about $150. One A3 kraft page makes an entire setting.

Skill: Beginner
Time: 20 min

Directions


Step 1

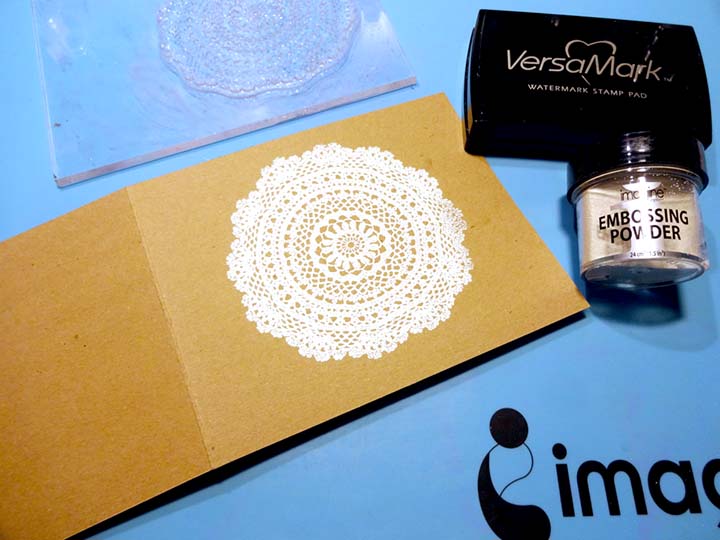
Cut a 6 x 3 inch piece of kraft carstock (for the napkin ring) and a 6 x 8 inch piece (for under the cutlery). Stamp both pieces with the doily image with VersaMark, cover with the white Imagine Embossing Powder and heat set.


Step 2

Distress the edges of the above pieces with Brilliance Moonlight White inkpad. TIP: Step 1 could be completed using Brilliance Moonlight White under the embossing powder if you do not already own a VersaMark inkpad. VersaMark is the best ink to use for embossing, but the Brilliance pigment ink would work as well.


Step 3

Set a piece of the Tear It Tape on the edge of the napkin ring card piece and bend the card to make the ring.


Step 4

Cut a 12 x 4 inch piece from the kraft paper and score on 6 ½ inch mark. Stamp and heat emboss the doily design as previously done.


Step 5

Turn to backside and set Tear It! Tape on the left and right sides of the shorter part. Fold and secure. This makes a pocket to use for a thank you card or as a favor; glue a bit loose to allow more space if you place something thick.


Step 6

Spay some of the white paper flowers with the Fireworks Shimmery Craft Spray in Desert Sand. Let them dry.


Step 7

Cut a 2 ¼ x 2 ¼ inch kraft paper piece. Stamp the sentiment stamp with Brilliance Graphite Black. Let dry before stacking, or use heat tool to speed up the drying time. For extra elegance, use a corner punch to round the corners. TIP: Later you will use StazOn Jet Black ink for another piece. You could use that ink for this step as well, but the Brilliance pigment ink will show up more solid or opaque on the kraft cardstock which is why I recommend it here.


Step 8

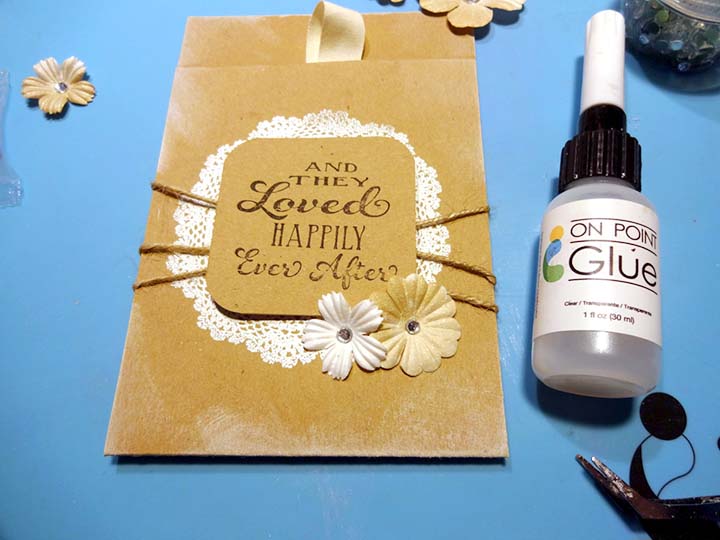
Wrap some burlap cord around the pocket card, add a piece of the foam tape and place the quote card piece. TIP: For a little less volume, you could secure the sentiment with Tear It Tape as well.


Step 9

Add paper flowers and rhinestones gluing with the On Point Glue. Fill this simple envelope with a small favor or the menu.


Step 10

Wrap burlap cord around the napkin ring, add a large a flower and a rhinestone in the center of it using On Point Glue.


Step 11

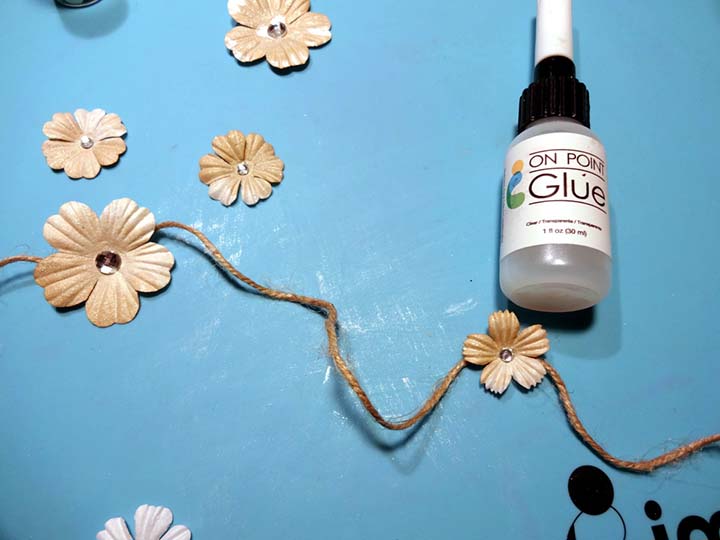
Glue paper flowers on a large cutting of burlap cord to create garlands for the table decoration.


Step 12

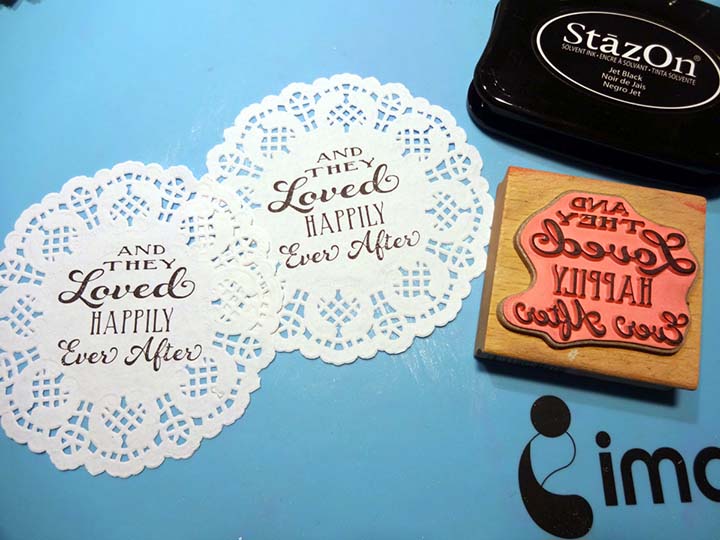
Stamp paper doilies with sentiment stamp and the StazOn Jet Black inkpad. The StazOn ink will stay put on the doilies when they are used as coasters and won’t bleed if they get wet. It also dries very quickly, so the stamping for these pieces can go very quickly.

The time to make all of these pieces can be reduced with preparation. Cut all the papers in advance (or even have them cut and scored to specification), estimate the flowers you will need to color and spray all at once so they are all dry before using them, and cut the cords you need in advance to reduce the time of pulling it all together at the end.

Supplies

Imagine
Other
  • A3 kraft card page (one per setting)
  • Paper flowers
  • Studio G – sentiment rubber stamp
  • Finnabair – doily stamp
  • Paper doilies
  • Rhinestones
  • Burlap cord
  • Corner punch
  • Paper trimmer or scissors & ruler
  • Scoring tool
  • Double-sided foam tape
  • Craft knife or scissors
  • Heat tool