Create a Winter Card with Minimal Supplies 

By Jessica Lin 

Skill: Beginner 
Time: 15 minutes 

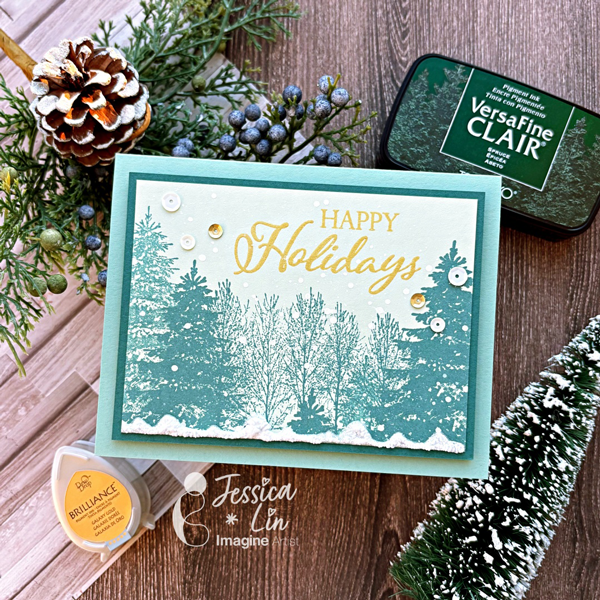
Hi everyone! It’s Jessica here. Today I have a beginner-friendly project to share with you. If you are just starting out and don’t have many ink pads, this tutorial is for you. I will be sharing some stamping techniques to help you create shades of color with just one ink pad. So let’s get started!

Step 1:
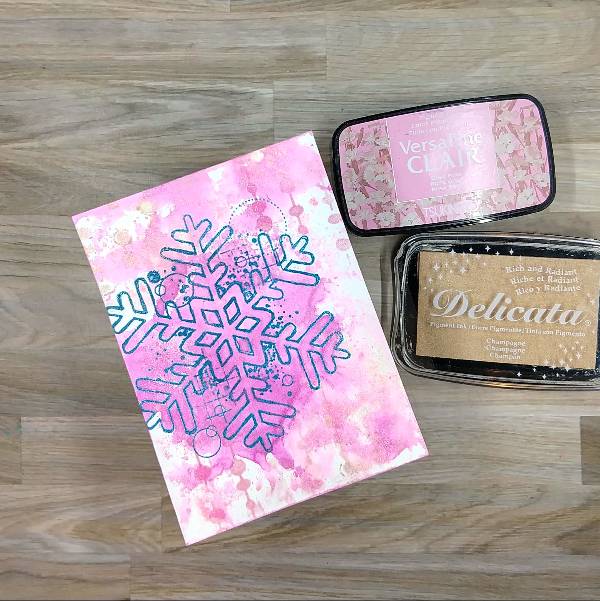
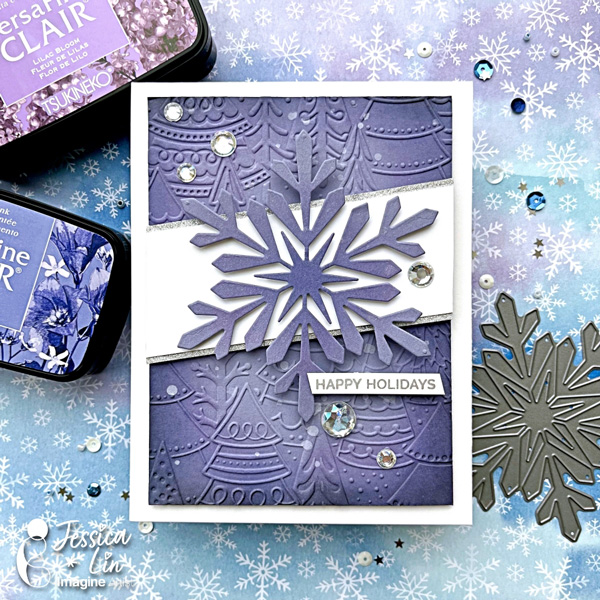
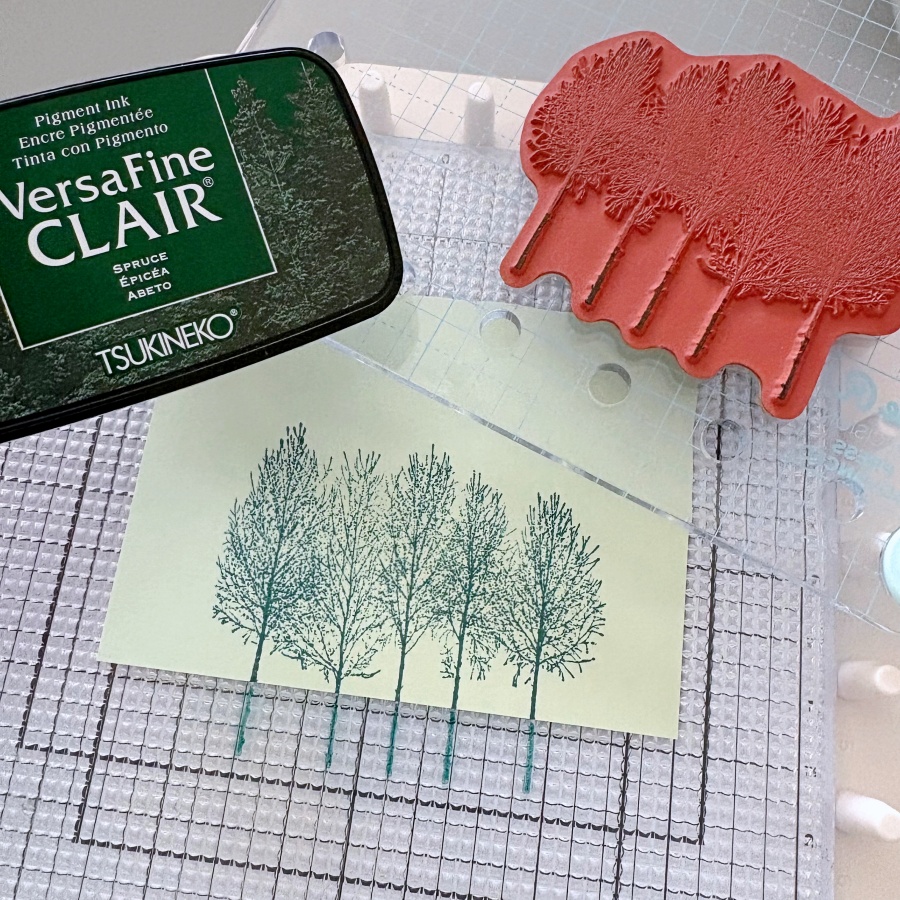
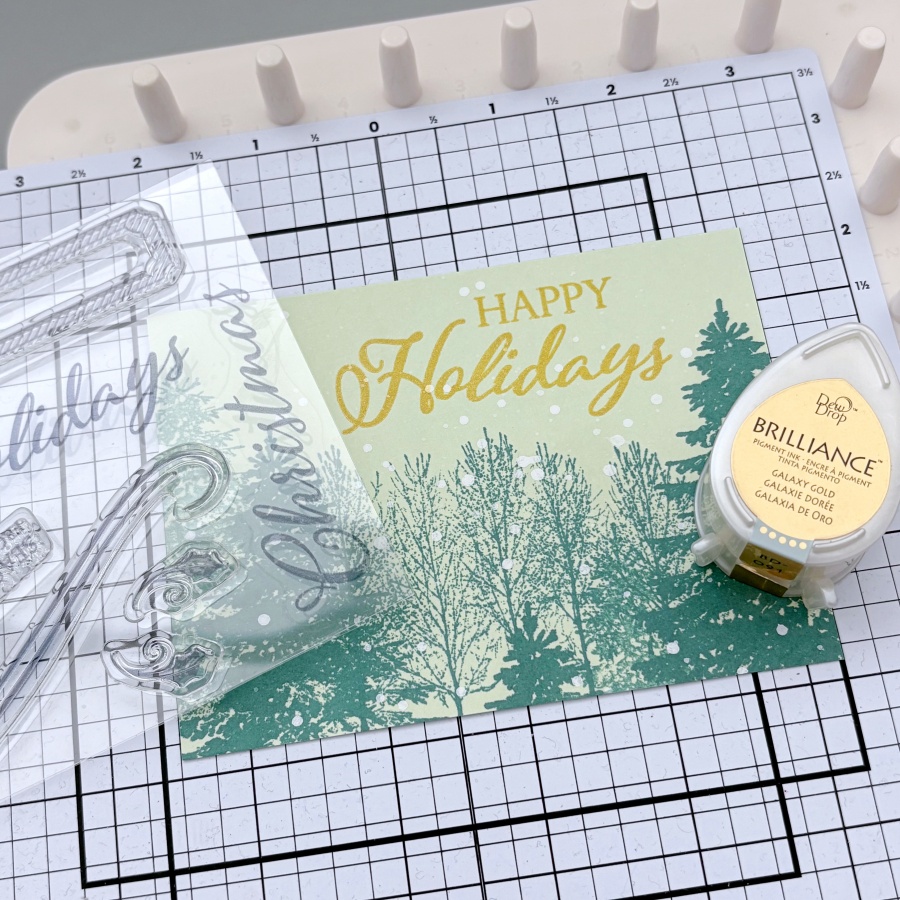
The ink pad I will be using today is VersaFine Clair Spruce. It is perfect for stamping the pine tree images from Stampin’ Up’s Winter Woods set. I stamped the image in the center on a piece of 3 ½’’ x 4 ¾’’ Soft Seafoam cardstock. 

Step 2:
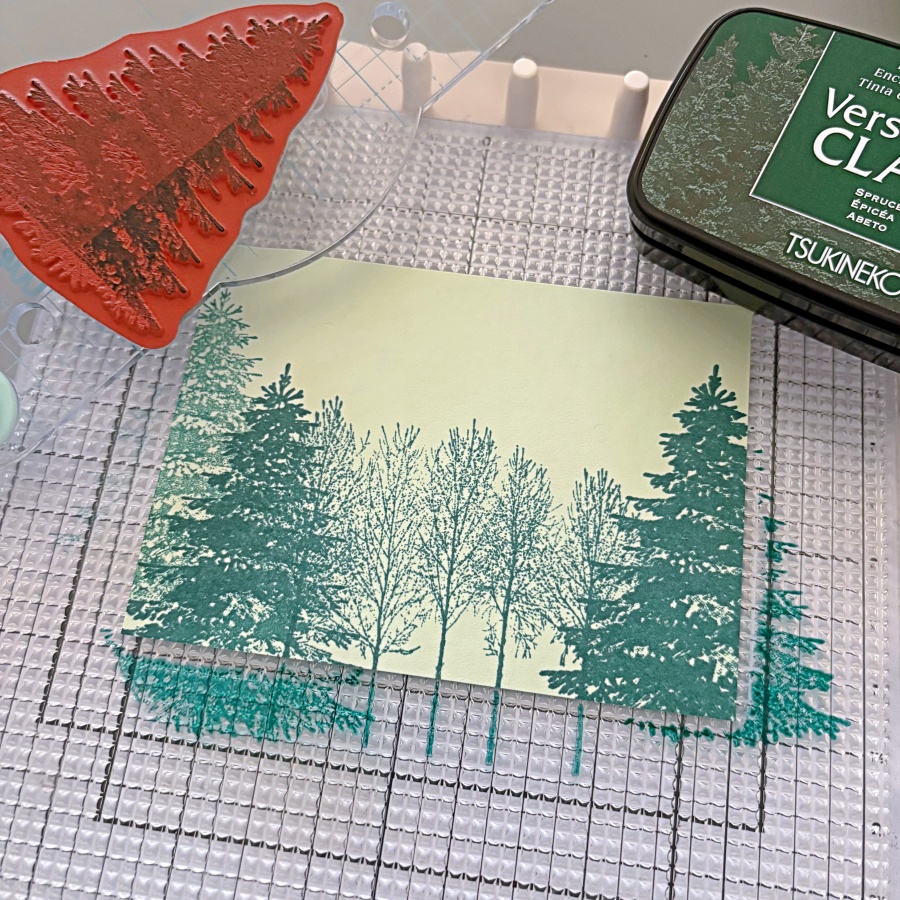
Then I stamped a different pine tree image on the left and right at various heights. You might notice that some of the pine trees appear darker; that is because I stamped the image twice. By using a stamp positioning tool, you can restamp an image at the same spot. In this case, it creates a darker shade of color even though you are using the same color ink pad. On the very left, there is a pine tree that looks lighter in color. To achieve this effect, you can stamp lightly on a piece of scrap paper first. Then, using the leftover ink, stamp on the cardstock to create a lighter shade. 

Step 3:
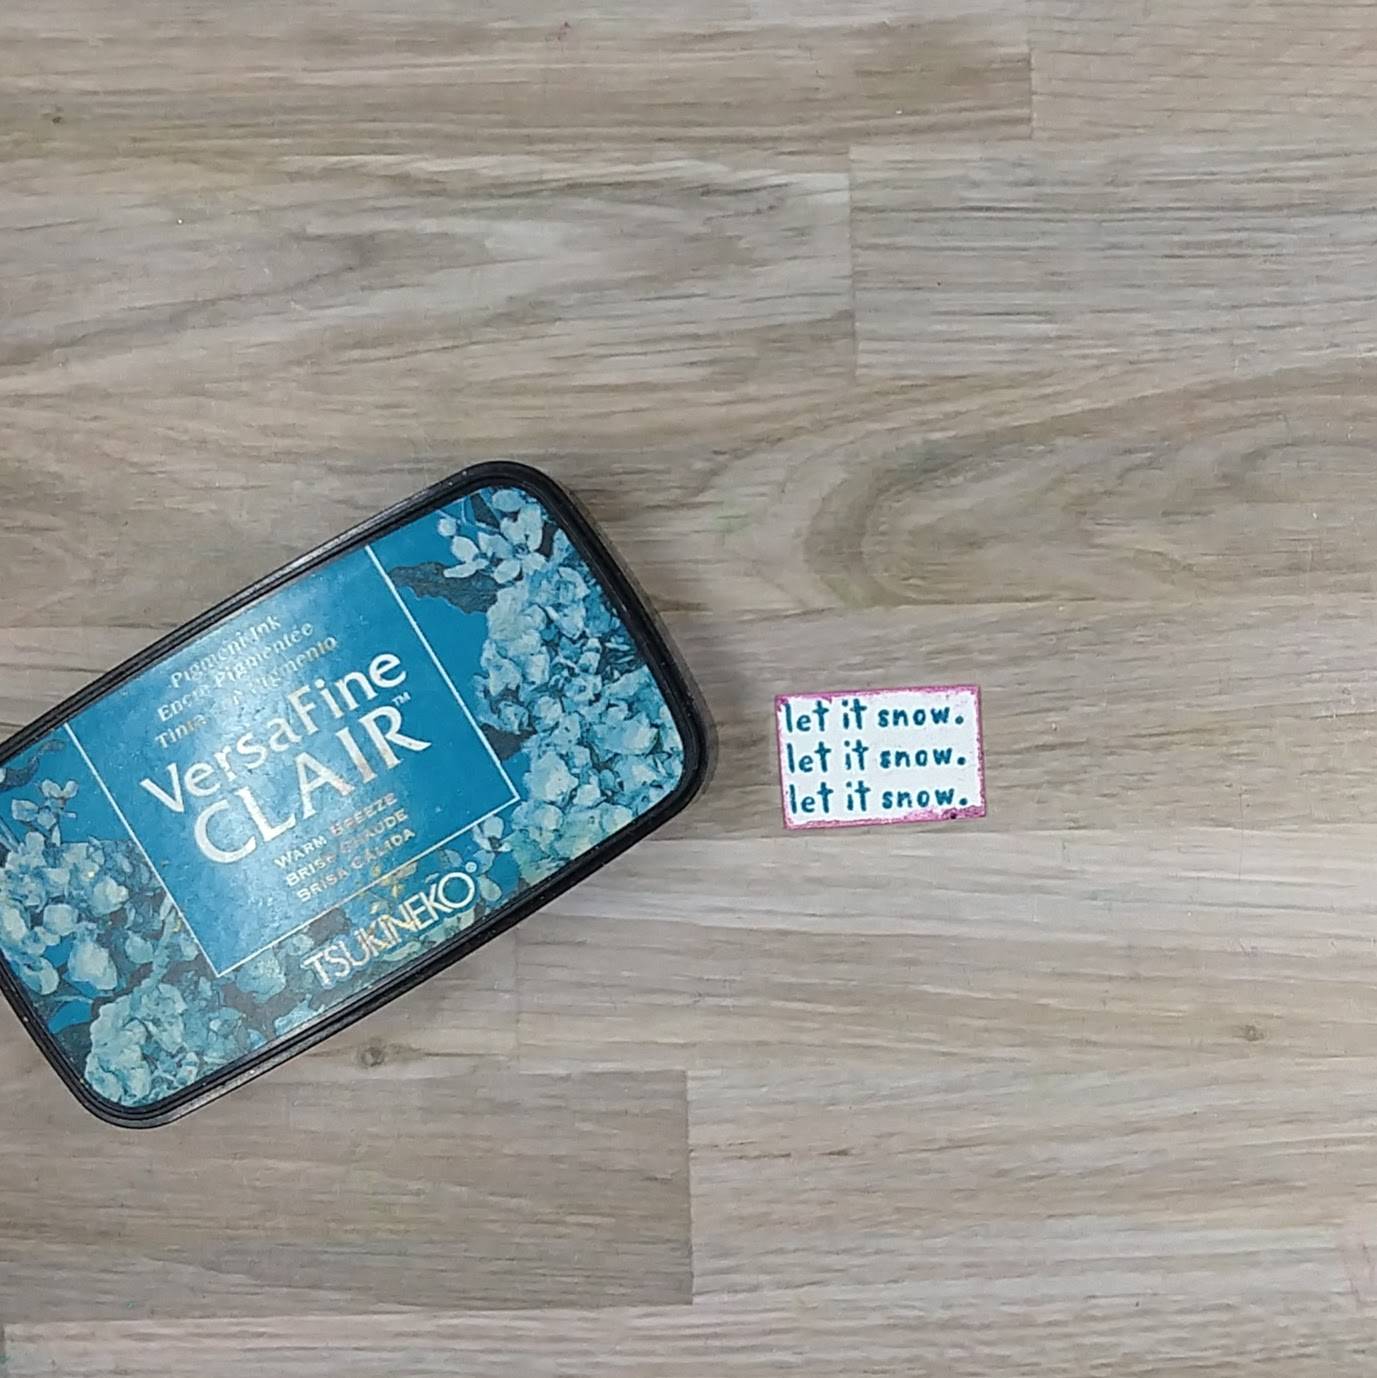
I then sprinkled some diluted white acrylic paint for a snowing effect. Once the acrylic paint is dried, you can stamp the sentiment. I decided to use Stampin’ Up’s Merry Christmas to All stamp set and stamped it with Brilliance Galaxy Gold ink pad. 

Step 4:
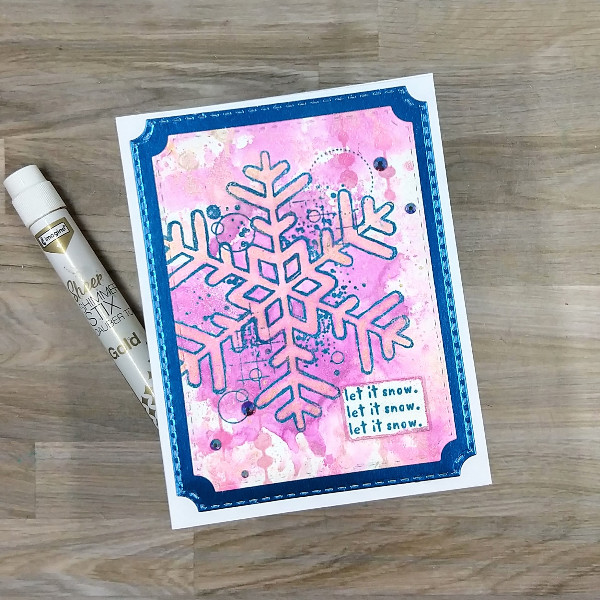
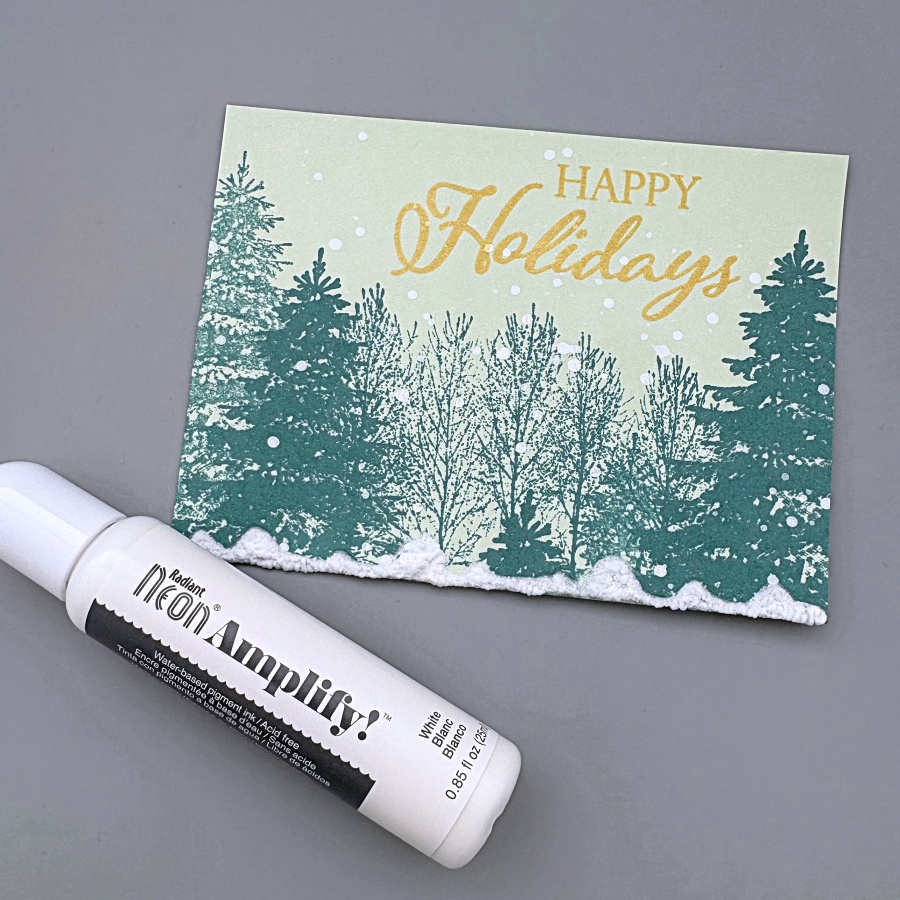
For an even more dramatic snow effect, you could add white Neon Amplify to the bottom edge of the cardstock. I drew a wavy pattern that mimics the looks of piles of snow. You don’t have to wait for the puff paint to dry, you can heat set it with a heat gun immediately and the paint will puff up! 

Step 5:
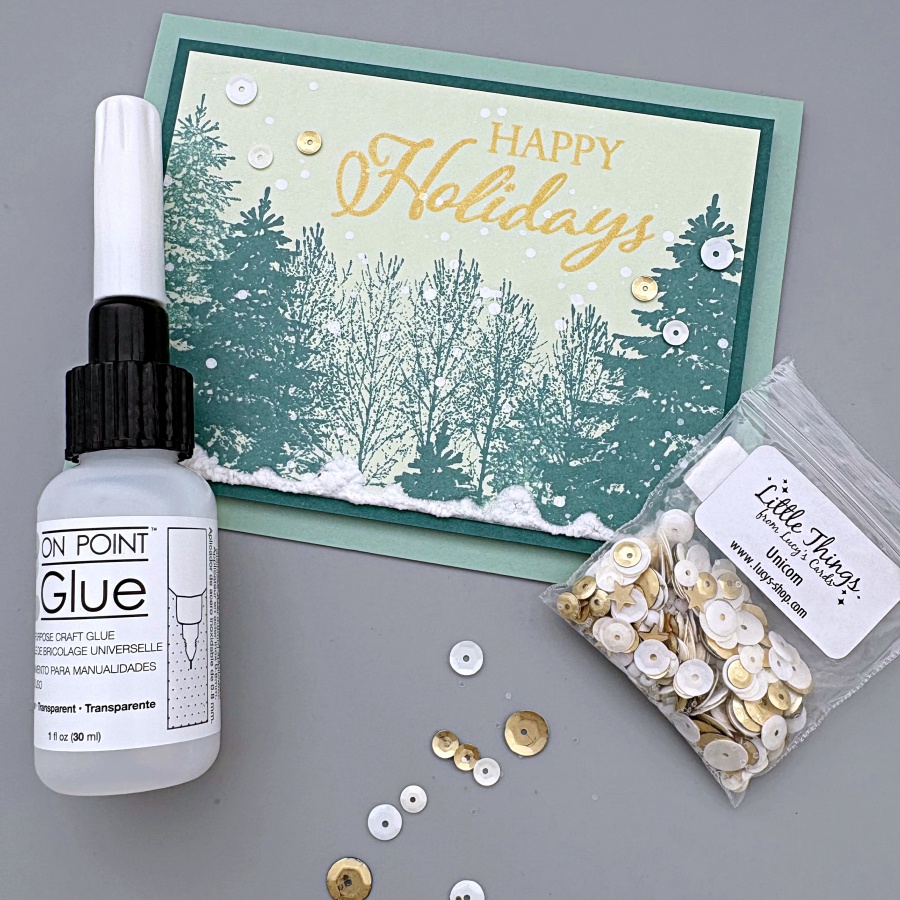
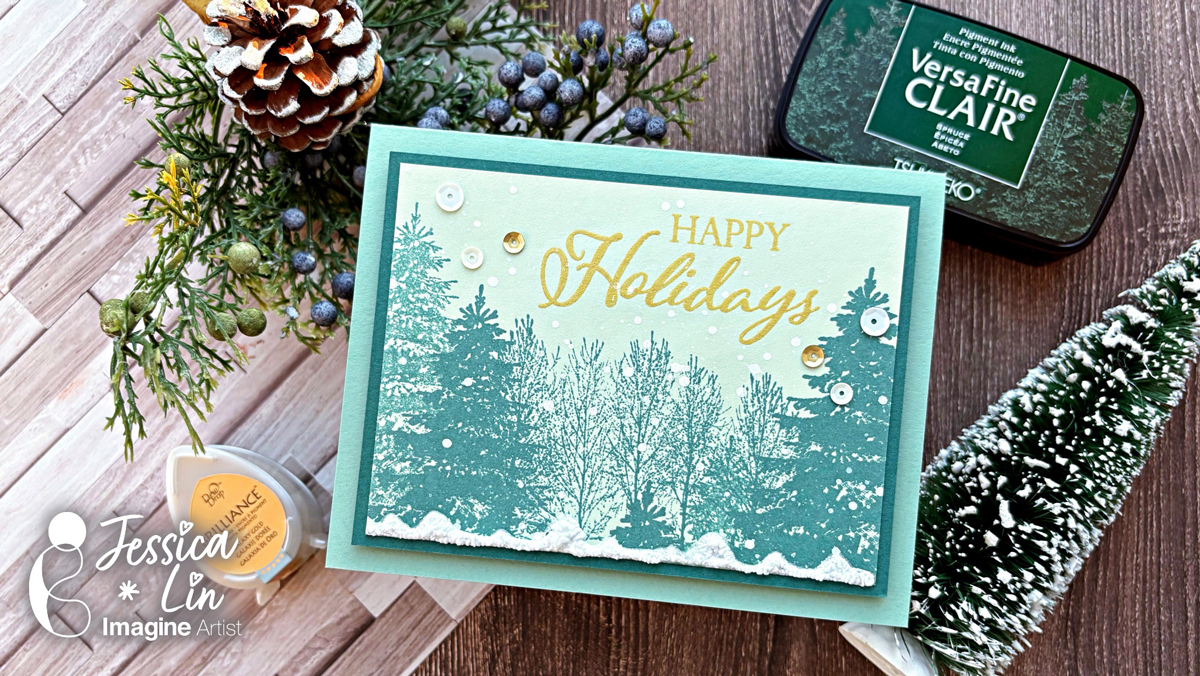
Then I adhered the stamped panel to a piece of Shaded Spruce cardstock that measures 3 ¾’’ x 5’’. After that, mount the cardfront to an A2 Mint Macaron cardbase. For some finishing touches, I adhered some white and gold sequins with On-Point Glue, and this holiday card is complete! 

Imagine Supplies: 

● VersaFine Clair – Spruce 
● Brilliance – Galaxy Gold 
● Neon Amplify – White 
● On-Point Glue 
● StazOn Cleaner 
● Tear It! Tape 
● Craft Mat 

Other Supplies: 

● Stampin’ Up! – Stamps – Winter Woods 
● Stampin’ Up! – Stamps – Merry Christmas to All 
● Stampin’ Up! – Cardstock – Soft Seafoam, Shaded Spruce, Mint Macaron 
● Heat gun 
● Gold and white sequins 

Shimmering Snowflakes Card with All-Purpose Inks

By Katy Ingram

Hello Friends! Katy here with another quick project using All-Purpose Inks. I used my simple swiping technique for the background and then used Vegas Gold All-Purpose Ink to stamp my snowflakes.I kept things even simpler by using a kitchen sponge to ink up my stamps.

Video has all the details. Thanks for watching.

Skill: Beginner
Time: 15 minutes

Art Supplies

Imagine Products
• All-Purpose Ink Tropical Lagoon https://www.imaginecrafts.com/all-purpose-ink
• All-Purpose Ink Frost White https://www.imaginecrafts.com/all-purpose-ink
• All-Purpose Ink Vegas Gold https://www.imaginecrafts.com/all-purpose-ink

Other Products Used
• Affiiate links used at no additional cost to you. Thank you for your support
• Simon Says Stamp Snowflake Stamp Options https://ldli.co/e/1pldn15
• Thin Rectangle Frames https://ldli.co/e/6l92ryl
• Kitchen Sponge https://amzn.to/4f72Ka4
• Double Sided Adhesive 5 inch wide https://amzn.to/455H6OS
• Double Sided Adhesive 1/2 inch https://amzn.to/4m9cKlc
• Matte Gold Cardstock https://amzn.to/4f3H5zn
• Altenew Hot Press Watercolor Paper https://ldli.co/e/nqgeq6m

Let’s Make a Holiday Card!

By Anna Escalada York

It’s July, so bring on the holiday cards! I personally love non-traditional colored holiday cards and so created one in pink, blue and purple.

Skill: Intermediate
Time: 1.0 hour

Directions:

Step 1:
Stamp a large snowflake stamp on watercolor paper with Warm Breeze VersaFine Clair ink and heat emboss with clear embossing powder.

Step 2:
Watercolor smoosh the watercolor panel with alternating layers of Lilac Pansies Fireworks! Craft Spray and Champagne Delicata Ink mixed with Sparkle Sheer Shimmer Craft Spray on scrap acetate.

Step 3:
Ink blend a combination of Champagne Delicata Ink and

Step 4:
Stamp the sentiment on a small scrap of watercolor paper with more of the Warm Breeze VersaFine Clair ink. Heat emboss with more clear embossing powder. Trim the sentiment down to the desired size with scissors. Then press the edges of the sentiment strip into the remaining mix of colors from step 2’s watercolor smooshing to color the edges.

Steps 5 and 6:

Press the Gold Sheer Shimmer Stix Dauber Top onto another piece of scrap acetate to create a liquid gold medium. Watercolor the gold liquid inside the snowflake to make it shiny. Watercolor smoosh the remaining gold watercolor onto the card panel.

After everything dried, die cut the watercolor panel with the second-largest die from an A2-sized nesting die set and a piece of blue metallic cardstock with the largest die from the same

A2-sized die set. Glue both die cut layers together. Attach the sentiment with foam tape. Glue sequins around the snowflake. Finally, glue the whole thing onto an A2-sized white cardbase.

Art Supplies

Imagine
• Delicata ink – Champagne
• Fireworks! – Lilac Posies
• Sheer Shimmer Craft Spray – Sparkle
• Sheer Shimmer Stix Dauber Top – Gold
• VersaFine Clair ink – Baby Pink
• VersaFine Clair ink – Warm Breeze
• Sponge dauber

Other
• Altenew – foam tape
• Crafty Meraki – embellishments – Meraki Sparkle Prismatic Blue
• Idea-ology and Tim Holtz – 6 x 9 cardstock – blue (from the Metallic Colors collection)
• Pink and Main – die set – Notched Corners
Scrapbook.com – stencil – String Lights
• A2-sized white card base
• Clear Embossing Powder
• Watercolor paper
• Thin paint brush
• Die cutting machine
• Scissors
• Glue

Stunning Monochromic Winter Snowflake Card

By Jessica Lin

Skill: Advanced
Time: 45 minutes

Hi everyone, it’s Jessica here. Have you seen the latest addition of colors for the VersaFine Clair ink line? I am a big fan of the VCF inks and am swooning over the new pastel colors. There are some really gorgeous shades of purples and blues, which are perfect for today’s wintery themed card. Let’s get started!

Step 1:
Emboss a piece of purple cardstock with Stampin’ Up!’s Whimsical Woodland embossing folder. This is one of my favorite embossing folders to use to create any christmas or winter themed cards. It looks great on both white and colored cardstock.

Step 2:
Ink blend the edges of the embossed panel with Lilac Bloom VersaFine Clair ink. I like to dab off excess ink on my craft mat before blending onto the cardstock so that there would be no harsh lines. I also tried to ink blend in a circular motion to create a spotlight effect.

Step 3:
Then ink blend Very Peri VersaFine Clair ink to create a color gradient. This beautiful dusty blue complements Lilac Bloom nicely. I just love the blended look of these two colors.

Step 4:
I ink blended a small amount of Nocturne VersaFine Clair ink to add a dramatic feel to this forest scene.

Step 5:
Using the same VersaFine Clair inks (Lilac Bloom and Very Peri), ink blend the center of a square piece of cardstock. Then die cut a large snowflake with Hero Art’s Snowflake die. If your snowflake die does not have thin, intricate lines, you could die cut the shape before ink blending.

Step 6:
Spritz a generous layer of Sheer Shimmer Spray in Sparkle to add a shimmery look to the snowflake die cut. Make sure you shake well before spritzing! I spritzed several layers, letting one layer dry briefly before applying the next, to get a thick coat of shimmer. The photos don’t do it justice! I wish you could see the amount of sparkle in person.

Step 7:
I also splattered on some white acrylic paint droplets to the embossed background by flicking the paint brush. After that is dry, I adhered the snowflake onto a strip of white cardstock and mounted the center piece onto the background with foam tape. For some finishing touches, I adhered a couple of rhinestones as well using On Point Glue.

Step 8:
To complete the card, I stamped the sentiment using the Silvery Shimmer Delicata ink pad. This sentiment stamp is from My Favorite Things’ Hand Lettered Holiday set.

Imagine Supplies:

Other Supplies:

  • Stampin’ Up! – Embossing Folder – Whimsical Woodland
  • Hero Arts – Die – Snowflake
  • My Favorite Things – Stamps – Hand Lettered Holiday
  • Die Cutting Machine
  • Blending brushes
  • Stampin’ Up! – Cardstock – Wisteria Wonder

Create A Holiday Tree Ornament Using Creative Medium, Memento and Brilliance Inks 

By Katy Ingram

Hello Friends! Katy here and for todays project I thought I would used a variety of products with some die cuts to create an ornament for the Christmas tree. 

In todays video tutorial I explain each layer of the ornament starting with the snowy background which uses the Creative Medium with a snowflake stencil, once dried I applied the Brilliance Ink in Pearlescent Orchid, Pearlescent Purple, Pearlescent Lavender and Pearlescent Sky Blue and was blown away. Check out the video for all the details on how this ornament came together. 

I hope you enjoy and thanks for stopping by. 

Skill Level: Beginner, Intermediate, Advanced

Time: 10 minutes 

Art Supplies

Imagine Products

Poinsettia

– Memento Ink Angel Pink, Love Letter, Lady Bug, Rhubarb Stalk

– Delicata Ruby Red

– Pico Embellisher-Shimmer

Greenery

– Memento Ink Bamboo Leaves, Northern Pine

– Pico Embellisher-Shimmer

Woodland Wreath

– Memento Ink Toffee Crunch, Rich Cocoa, Espresso Truffle

Back Panel

– Delicata Ruby Red

– VersaFine Clair Nocturne

Snowflake Background

– Brilliance Inks

– Creative Medium-Shimmer

On Point Glue

Tear It! Tape

Multi-Purpose Squeegee

Other Products:

Spellbinders Poinsettia Die

Spellbinders Woodland Wreath with Feathered Friends Die

Spellbinders Blizzard Stencil

The Greetery Botanicuts Pine Bough Die

Simon Says Stamp The Magic of Christmas Stamp Set

Kat Scrappiness Holiday Village Slimline Border Die

Honey Bee Stamps Simple Alpha Stamp Set

Lawn Fawn Acetate

How to Make A Holiday Gift Tag

By LeeAnn McKinney –

Hi there friends and fellow crafters, LeeAnn here with a fun Holiday tag that I have made that can also double as a Christmas Ornament.

Skill Level Medium

Time to make: 25 minutes

Imagine Supplies Used

• Imagine Craft Mat –

• On Point Glue –

• MBoss – Gold and Emerald Green

• Imagine Tear It! Tape –

• VersaFine Clair Nocturne

• StazOn Stamp Cleaner –

• VersaMark Ink Pad –

OTHER PRODUCTS USED:

Gina K Designs Sparkle & Shine Stamp Set

Gina K Designs Stitched Tag

Dies Gina K Designs Holiday Tapsetry Stamp Set

Red Mulberry Cardstock

Accent Opaque 120 lb card stock

Judikins Heat Resistant Acetate