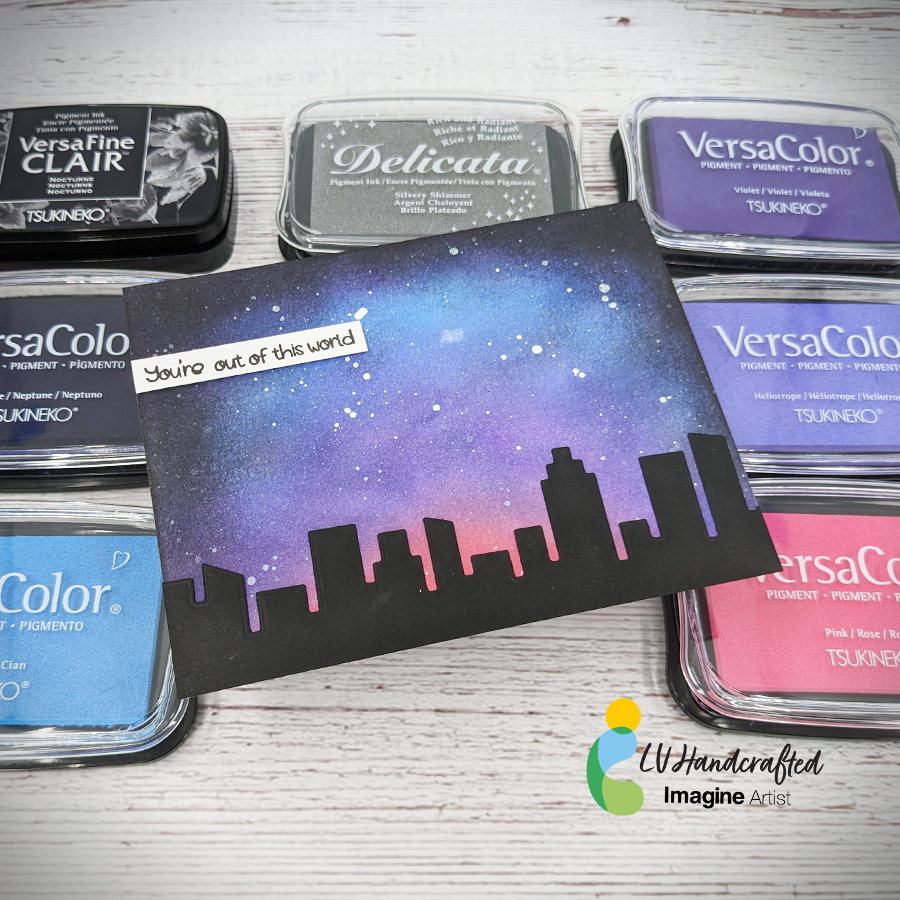
Quick and Easy Ink Blending to Create a Cool Galaxy Card

By LV Handcrafted

Hello friends! This is Linh (or LV Handcrafted on all the socials). In today’s video I’m showing how to create a fun galaxy with a combination of different inks! It’s so fast and easy to do!

Skill: Beginner

Time: 15 minutes

Supplies Used

Imagine

Other Products Used

  • Mama Elephant – Slim Film City
  • Scrappy Boy Stamps – Future Family

Learn How to Make a Multi-Colored Easter Card


By Neva Cole 

In today’s crafting tutorial, I will show you how to use a single stamp image and stamp each line with a different ink color. I will also share how to blend VersaMagic inks for a background and take it up a notch by dry embossing.  


Skill: Intermediate

Time: 1 hour


Directions:

Step 1

Place image on stamp positioner and use a post-it to cover the bottom three lines of the image.  I used a sentiment stamp from Unity Stamp Co. titled “Everything Easter” with four lines of text.  Use a paper piercer to tuck the post-it securely in place. Ink the top line with VersaMagic in Aloe Vera.  Remove post-it and stamp image on cardstock. Clean ink off of the post-it so you can use it for subsequent steps.  Clean image after stamping and moving to Step 2. Repeat this after each step through Step 4.


Step 2

Use two post-its to cover lines 1,3 and 4 and ink image with VersaMagic in Spring Pansy. 


Step 3

Use two post-its to cover lines 1,2, and 4 and ink image in VersaMagic Sea Breeze.


Step 4

Use a post-it to cover lines 1,2, and 3 and ink image in VersaMagic in Spring Pansy.


Step 5

Clean the entire image and ink in VersaMark and stamp image over the colored lines.  Heat emboss with Iridescent Embossing Powder.


Step 6

Using ink blushers ink a section of 4″ x 5.25″ cardstock in VersaMagic Aloe Vera, Spring Pansy, and Sea Breeze and blend into each color.  Use an ink blusher to ink over the heat embossed sentiment image with VersaMagic Pixie Dust.


Step 7

Pressure emboss 4″ x 5.25″ blended color cardstock with Lifestyle Crafts Tide embossing folder.


Step 8

Use a sanding block or sandpaper to gently remove the color from the raised areas of the embossed cardstock.  The white color of the cardstock will show through.


Step 9

Die-cut sentiment image and use and ink blusher to in the edges in VersaMagic Spring Pansy.


Step 10 

Ink the edges of an A-2 (4.25″ x 5.5″) card base in VersaMagic Spring Pansy.


Step 11

Adhere layers together with foam adhesive.  Adhere pearl embellishments in curly- ques of the embossed background.  Adhere pearl embellishments to the center of small flower sequins and adhere with On Point Glue.  Tie a triple looped bow from sheer ribbon and adhere with On Point Glue.


Art Supplies

Imagine
Other
  • Unity Stamp Co.  Everything Easter
  • Post-it notes
  • Paper piercer
  • Lifestyle Crafts Tide embossing folder
  • Sanding block
  • SpiegelmomScraps 50’s Sock Hop sequins
  • Foam adhesive

Watercolor and Ink Blending Spring Cards with VersaMagic

By Jessica Lin

Hi everyone, it’s Jessica here and today I have two spring cards to share with you. They feature some cute critters watercolored by VersaMagic ink pads. Those ink pads are my favorite when it comes to creating pastel-themed cards. I hope you like these Easter projects!

Skill level: Medium


Art Supplies:

Imagine

• VersaFine Clair – Nocturne

• VersaMagic:

Squirrel: Sahara Sand, Jumbo Java, Thatched Straw, Ocean Depth, Pink Grapefruit, Tea Leaves

Rabbit: Sea Breeze, Ocean Depth, Wheat, Pumpkin Spice, Pink Grapefruit (Pixie Dust, Spring Pansy)

• VersaMark Dazzle – Champagne

• Mboss – Clear

• Brilliance Dew Drop Ink Pad – Galaxy Gold

• Tear-It Tape

• Craft Mat

Other

Stampin’ Up Fable Friends stamp set

Stamping tool (Stamparatus)

Ranger watercolor cardstock

Waterbrush

EK Success anti-static powder tool

Stampin’ Up A Wish for Everything bundle

See How to Use Ink Blending Tools for a Fun Halloween Witch Card

by Lisa Mensing

flying witch halloween card with a glowing moon background made with memento inks in a how to tutorial on ink blending

In this card making lesson, Lisa shares how to create this very quick and simple ink blended night sky, perfect for Halloween cards. Learn how to do ink blending for a flying witch Halloween greeting card. Use Memento dye inks in black, a light green, yellow, grey, and purple to create moon glow effects. Lisa walks you through each step in the process.

Skill: Intermediate
Time: 20-30 minutes

Directions

Supplies

Imagine

Other

  • Background Blender Brushes | Set of 2 | Honey Bee Stamps
  • Silver Brush Black Velvet Brush – Round, Size 8 | BLICK Art Materials
  • Strathmore 300 Series Bristol Board Pads | BLICK Art Materials
  • CLASSIC CREST Avalanche White Card Stock – 8 1/2 x 11 in 100 lb Cover Smooth 250 per Package
  • Shapeabilities Witch on Broom Holiday 2017 Etched Dies
  • Simon Says Clear Stamps IF THE HAT FITS SSS101758
  • Gem Stickers | 300 Count | Black
  • Double-Sided Adhesive Foam – Large and Small Squares
  • Journey Platinum Machine w/Plates