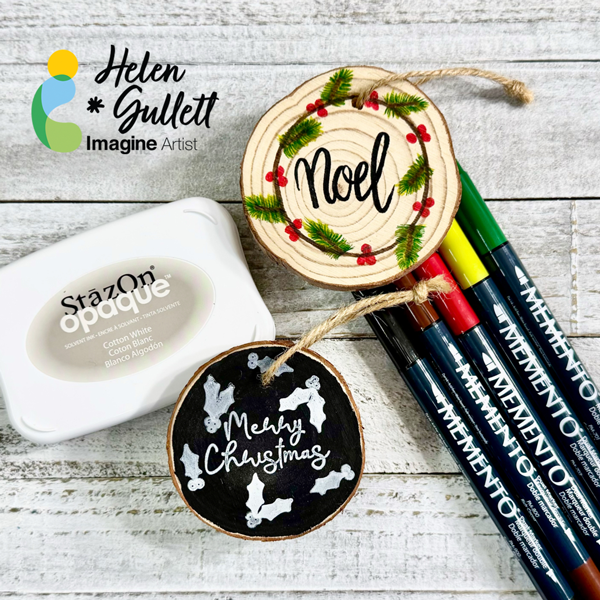
By Helen Gullett
Hello crafty friends… Can you believe it? The holiday season is here!!! Making Christmas ornaments is one of my favorite things to do. Today let’s make some handmade ornaments together. These ornaments can be additions to your own Christmas tree or you can give them to your families and friends.
Skill: Easy
Time: 15-30 minutes
Ornament #1 – Holiday Evergreen Wood Slice Ornament
Directions:
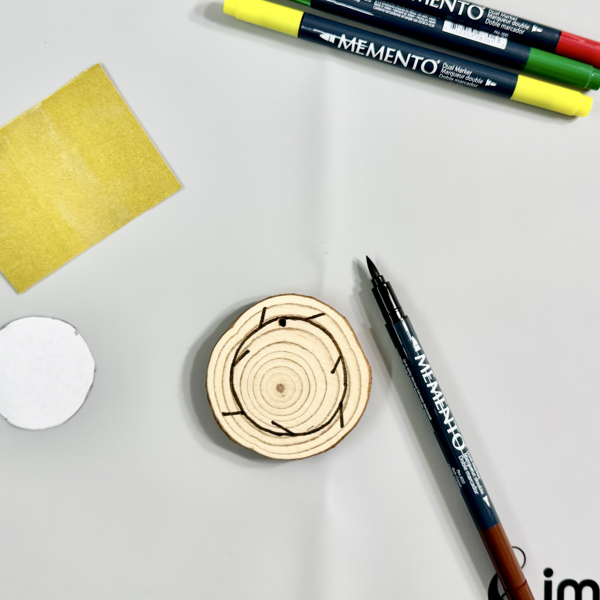
Step 1
First, make sure your wood slice surface is smooth and clean. There are pre-sanded wood slices available online, too. If your wood slices were not sanded yet, you can sand it with sanding paper. Use a dry paper towel to clean the surface well.
Draw a circle and branches with the Rich Cocoa Memento Marker brush tip. You also can use a circle template to draw the circle.
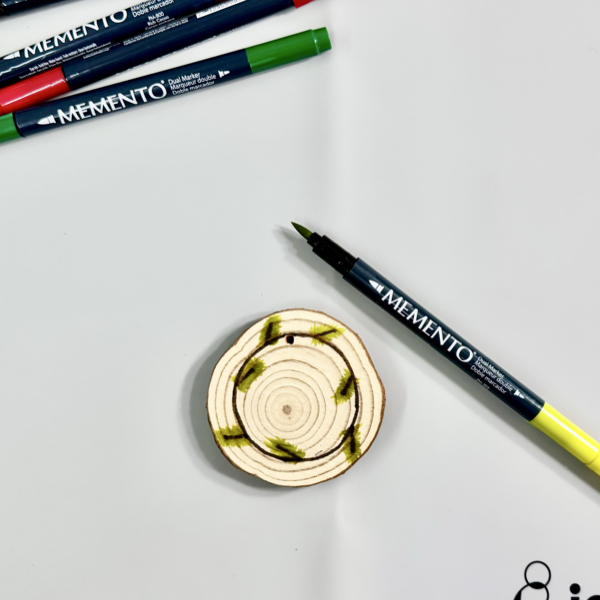
Step 2
Use the brush tip of the Pear Tart Memento Marker to draw the layer of pine needle leaves with outward flicking motion on each branch.

Step 3
Draw the second layer of the pine needle leaves on each branch using the fine tip of Cottage Ivy Memento Marker.
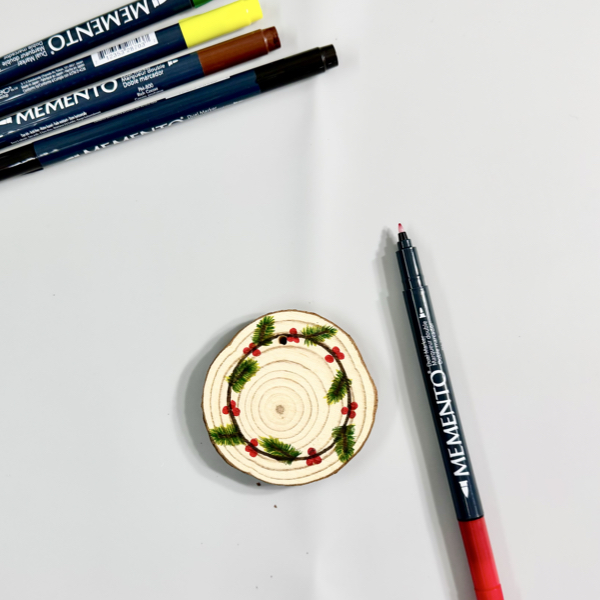
Step 4
Draw the berries on the wreath using the fine tip of the Lady Bug Memento Marker. Simple doodle 3 little circles.
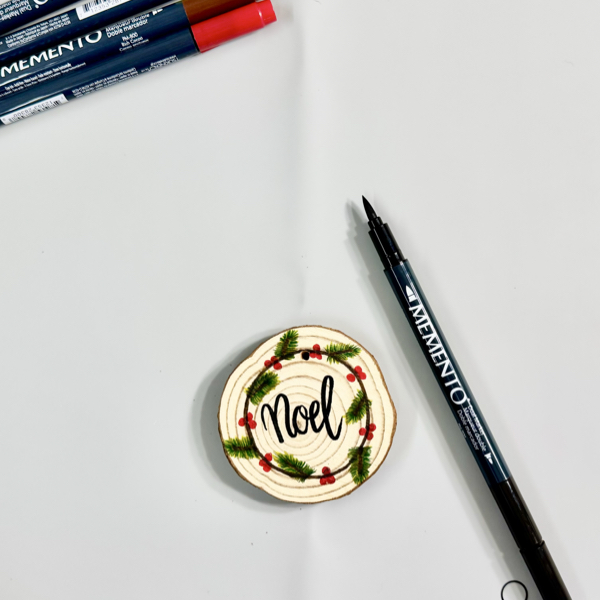
Step 5
Write lightly the word “Noel” (or any word you want on your ornament) with pencil and then trace it with the Tuxedo Black Memento Marker brush tip. You can skip the pencil if you can do handlettering directly with the marker.
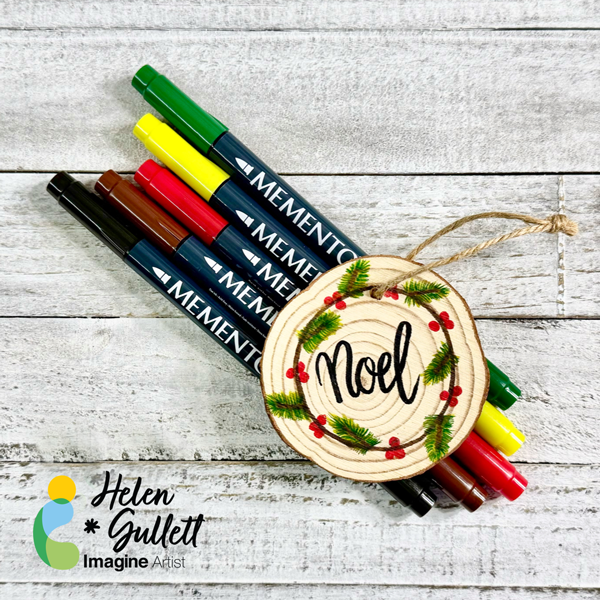
These Memento Markers dry quickly and the ink won’t smudge on the wood surface. Add a piece of burlap twine to the ornament and tie it up as the hanger.
Ornament #2 – Faux Chalkboard Wood Slice Ornament
Directions:
For the second ornament we are going to make today is a faux chalkboard wood slice ornament. There are a couple ways to do a faux chalkboard look on a wood slice, today we are going to do simply just painting and stamping.
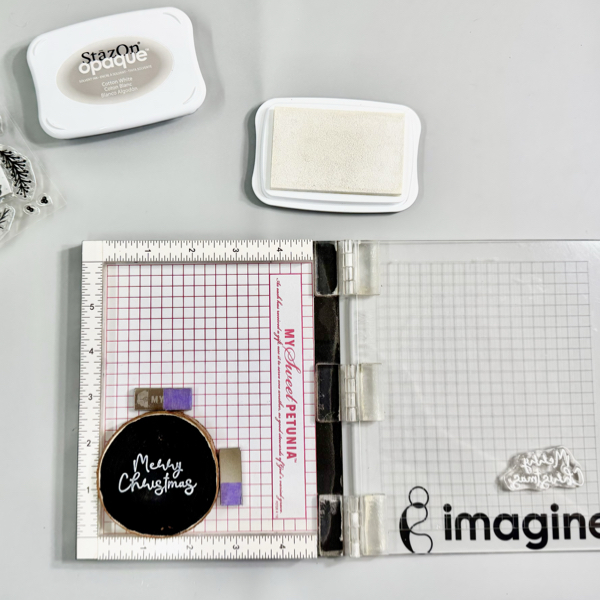
Step 1
Paint the wood with chalkboard paint or multi-surface black acrylic paint. Usually one layer of paint will be enough. Make sure the paint dries well before you do the stamping.
On the wood on a stamping tool and use the magnets to keep it in place or you can use tape on the back of the wood slice and place it on the stamping tool.
On the dried painted surface, stamp the sentiment using StazON Opaque – Cotton White ink.
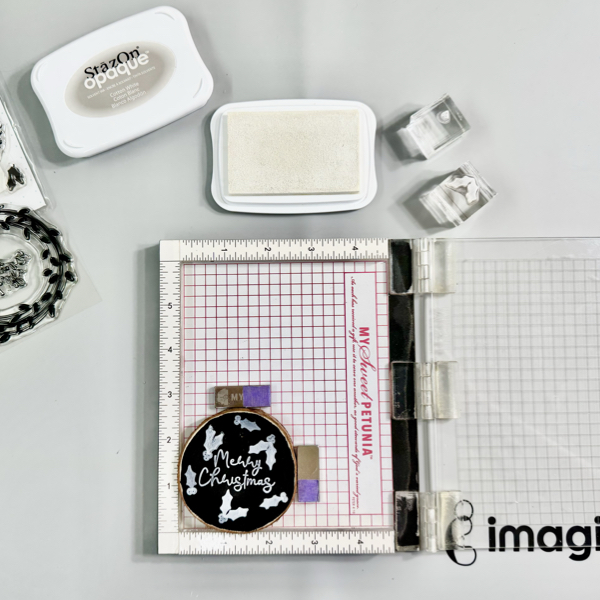
Step 2
Stamp the holly leaves and berries using StazOn Opaque – Cotton White on the ornament around the sentiment using the stamping tool or small stamping blocks.
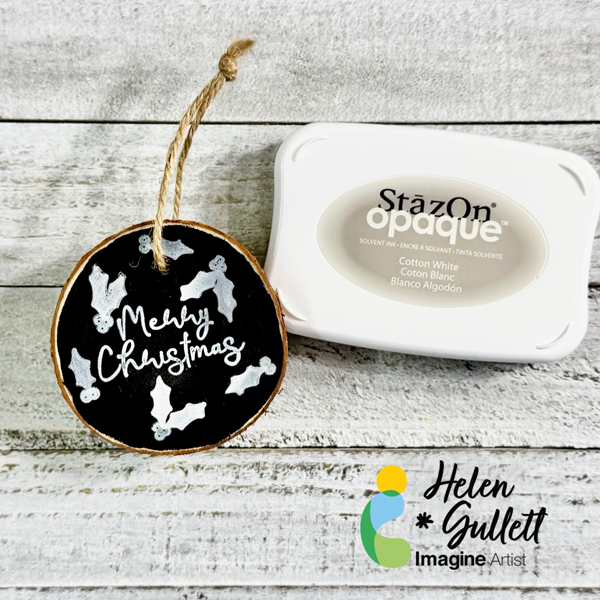
When the ink dried well, add a piece of baker twine to the ornament as the hanger.
I hope you like these ornament ideas and you will find it easy to make your own ornaments. Also, making ornaments can be a fun Christmas craft party idea. I love both style ornaments, which one do you like?
Thank you for stopping by our blog today. Have a wonderful day!
Craft Supplies
Imagine Crafts:
- Memento Markers (Tuxedo Black, Rich Cocoa, Cottage Ivy, Pear Tart, Lady Bug)
- StazOn Opaque Kit – Cotton White
- Imagine Craft Mat
- Staz-On All Purpose Stamp Cleaner
Others:
- Thoughtful Wreath Stamp Set (Creative Worship Stamps)
- Wood Slices (3-4 inch)
- Burlap twine (usually it is included if you buy wood slice kit)
- Black Paint (chalk or multi surface acrylic paint)
- Small flat paint brush
- Sanding paper
- Stamping Tool
- Stamping Blocks