
By Jessica Lin
Hi everyone! It’s Jessica here and I’m excited to share a patterned paper trick with you today. If you like to save scraps of pretty paper, but are unsure how to use them, I highly recommend trying out today’s technique!
Skill: Intermediate
Time: 30 minutes
Step 1:
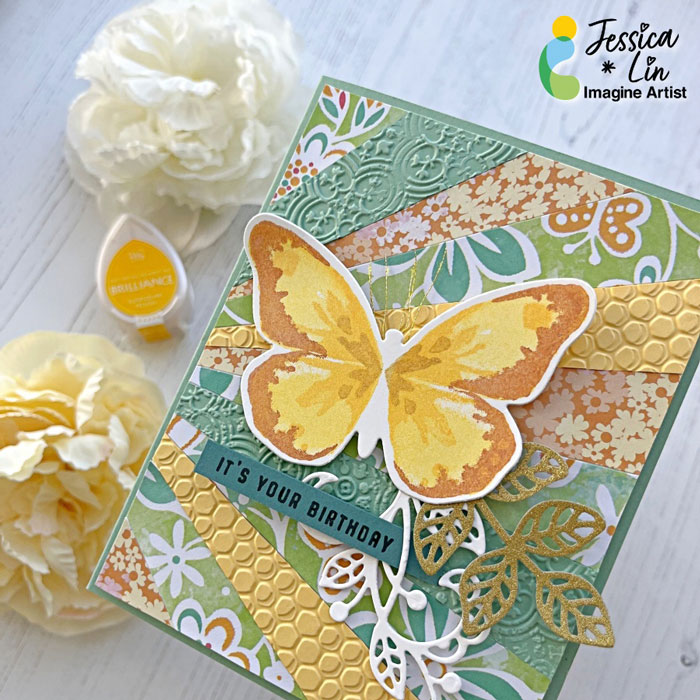
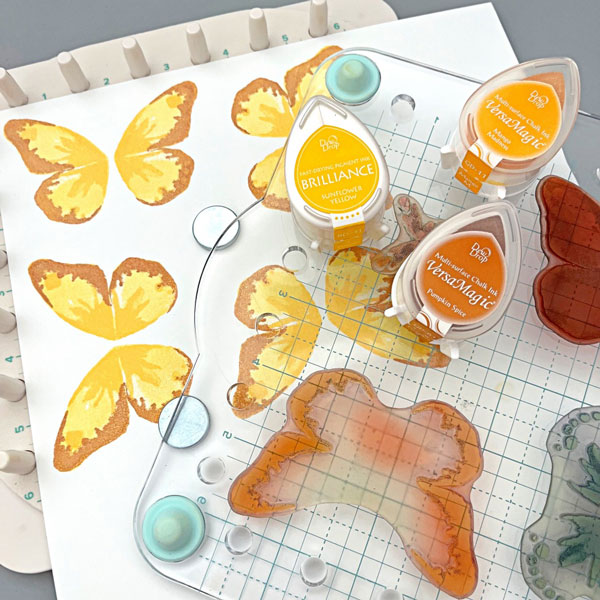
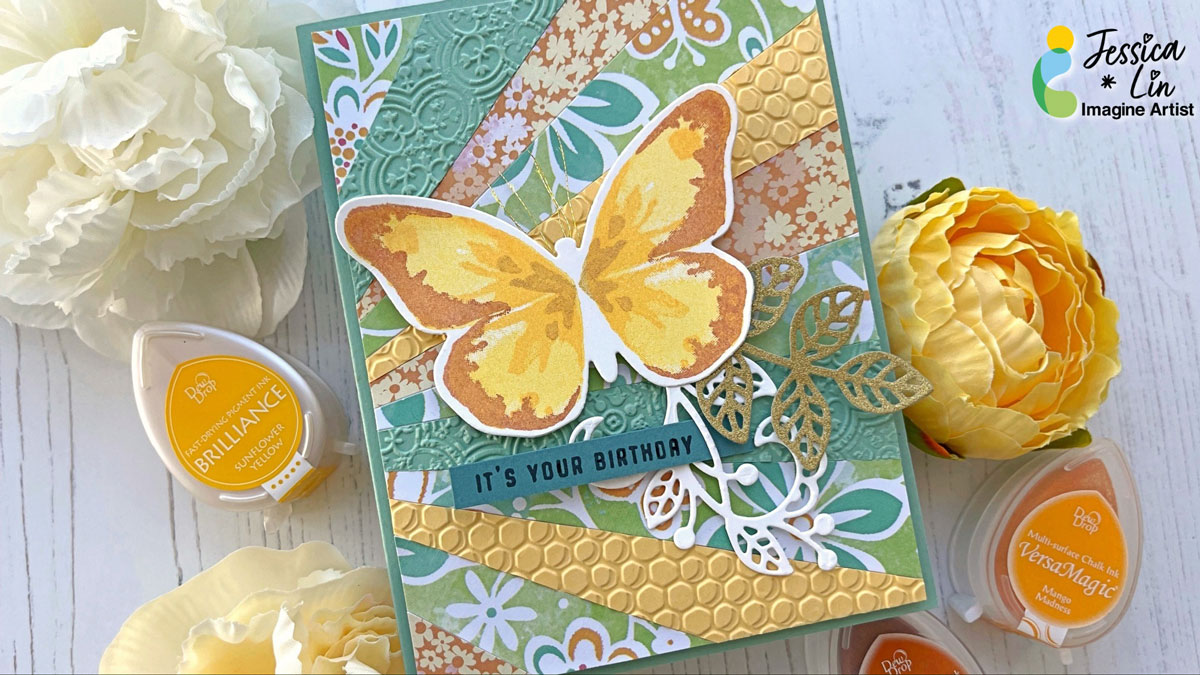
The focal image of today’s card is this butterfly stamp from Watercolor Wings. It’s one of my favorite layering stamp sets of all time. I used Brilliance Sunflower Yellow for the base layer. Then I stamped the second and third layers with VersaMagic Mango Madness and Pumpkin Spice. I did add a fourth layer using Brilliance Galaxy Gold as well (not pictured).
Step 2:
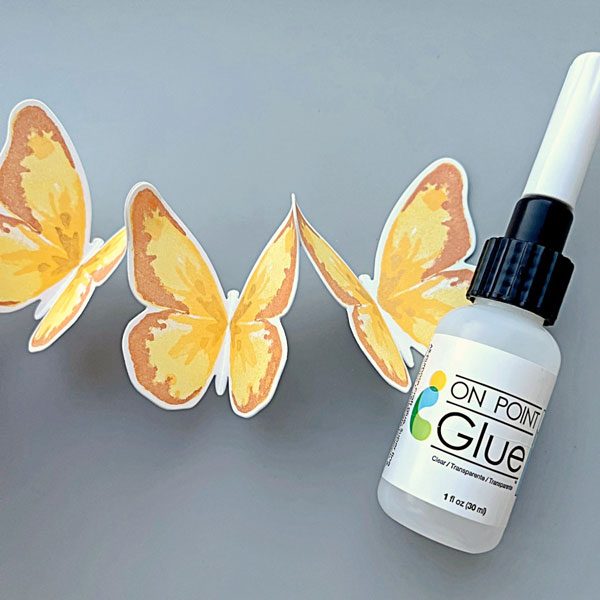
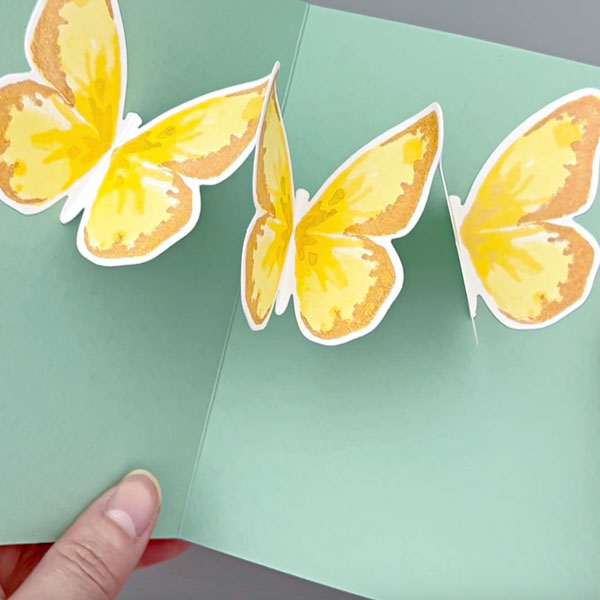
Die cut the butterfly images with Bold Butterfly dies. Then adhere the tips of the butterfly die cuts with On Point Glue. This would create a string of butterflies for a surprise pop up mechanism inside the card (next photo).
Step 3:
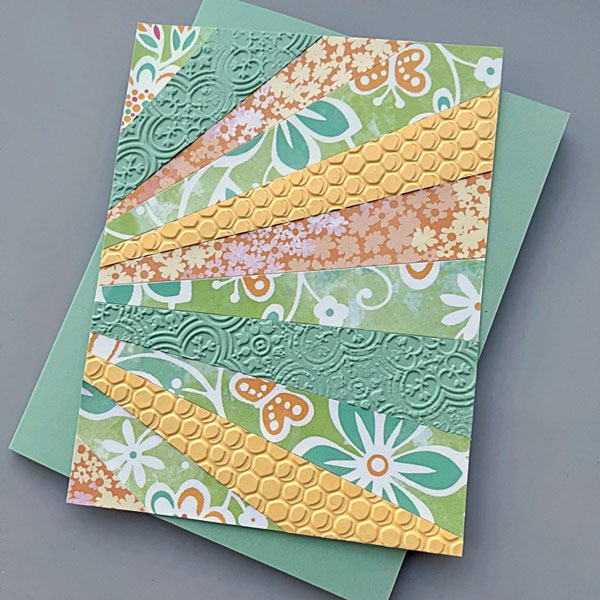
To make the patterned paper background for the card front, trim your patterned paper scraps to 1 x 6’’. Then cut each piece diagonally to create long, triangular shapes. I used Stick It adhesive to cover the entire background panel and adhered the patterned paper pieces on top. However, you could use whichever adhesive you prefer. Once the entire panel is covered, trim off the hanging pieces on the edges.
Step 4:
Lastly, adhere the last butterfly along with any additional foliage die cuts. And the card is complete!
Imagine Supplies:
- VersaMagic – Mango Madness, Pumpkin Spice
- Brilliance – Sunflower Yellow, Galaxy Gold
- VersaFine Clair – Nocturne
- On Point Glue
- StazOn Cleaner
- Craft Mat
Other Supplies:
- Stampin’ Up! – Stamps – Watercolor Wings
- Stampin’ Up! – Dies – Bold Butterfly, Flourish
- We R – Tool – Precision Press
- Foam Tape
- Stampin’ Up! – Cardstock – Mint Macaron
- DCWV – Pattern Paper – Floral Flair
- White cardstock
