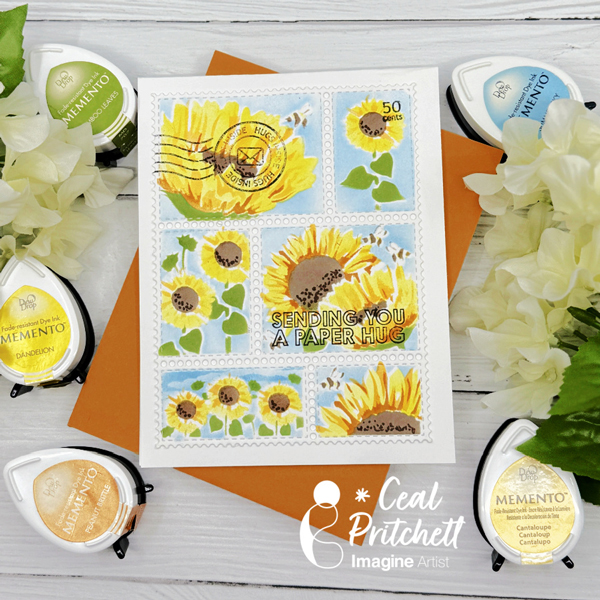
Hello crafty friends! It’s Ceal, here. Today I am sharing a card using a postage die and stencil. I love using stencils in my card making because I love using inks.
Skill Level: Beginner Time: 30 minutes
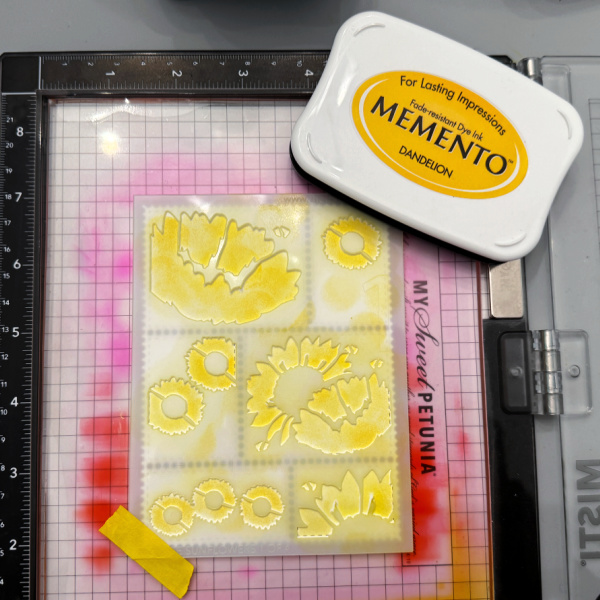
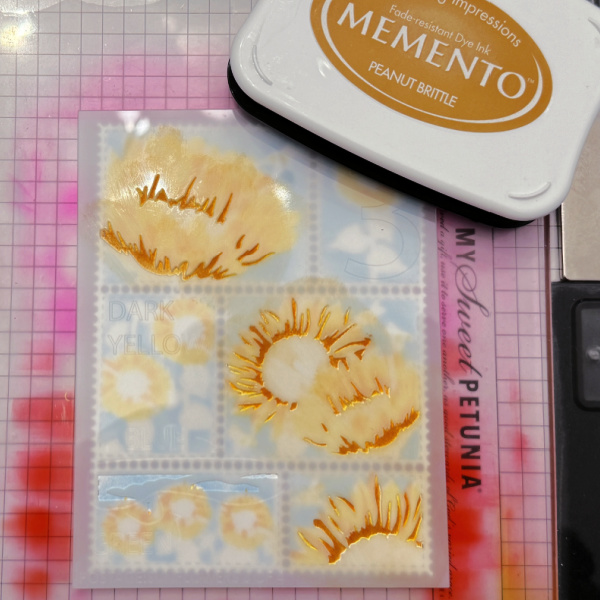
Directions: Gather your supplies. You will need several colors of ink, I used Memento inks. I used a layering stencil by The Ton and a postage stamp set also by The Ton
Step 1/Layer 1 Color in the layers with different colors of ink. The first layer is Dandelion, and I have added photos of the color for each layer.
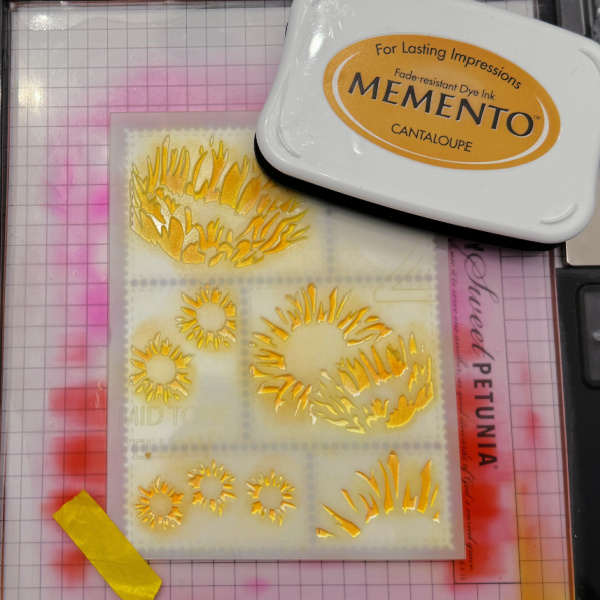
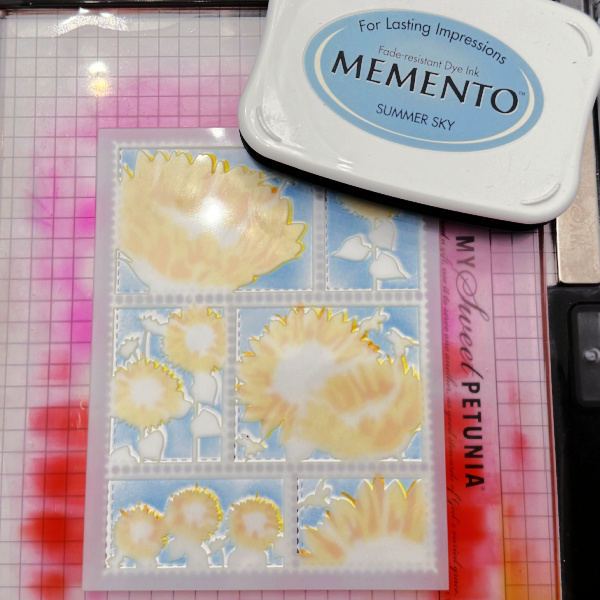
Step2/Layer 2
Step 3/Layer 3
Step 4/Layer 4
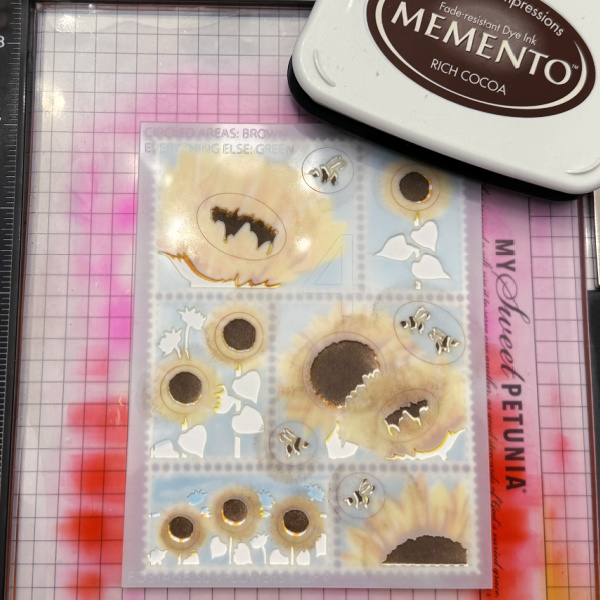
Step 5/Layer 5 using Rich Cocoa
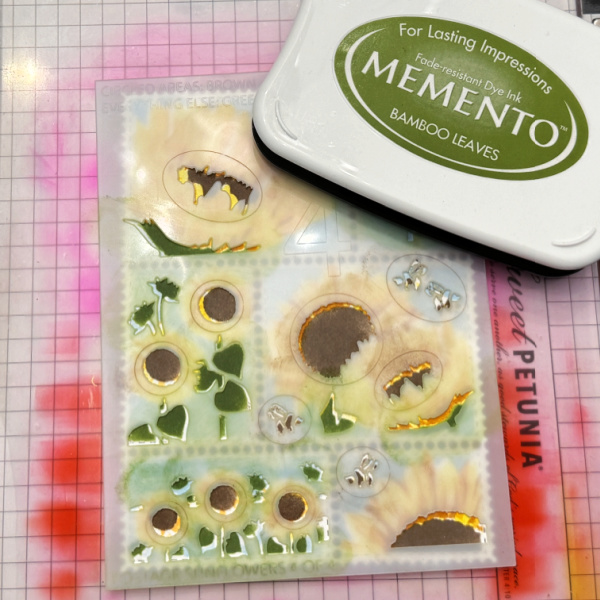
Step 6/Layer 5 using Bamboo Leaves
Step 7: Added sentiment and postage stamps. Adhere to card base.
Other Supplies: – Neenah Classic Crest Solar White 120lb – Neenah Classic Crest Solar White 80lb – Postage Die – The Ton – Sunflower Postage – The Ton – Not A Bill stamp set – The Ton
Hey everybody! It’s Ceal, here. Today I am sharing a card using a technique that I am calling “faux watercolor” because the end result look like it was water colored to me.
Skill: Beginner Time: 30 minutes
Directions:
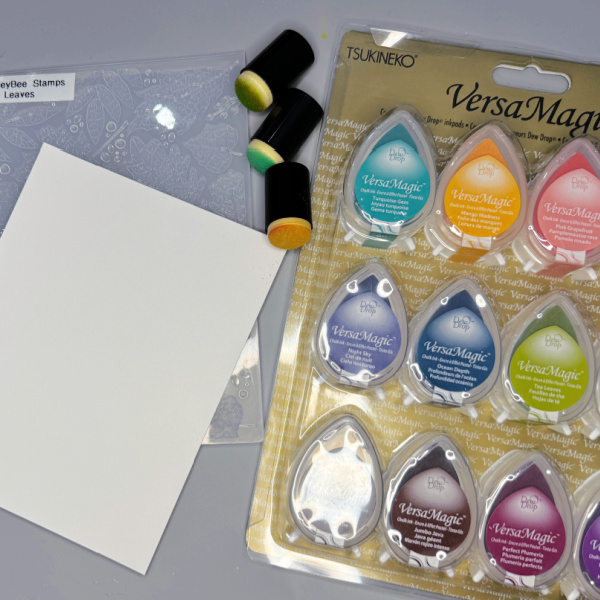
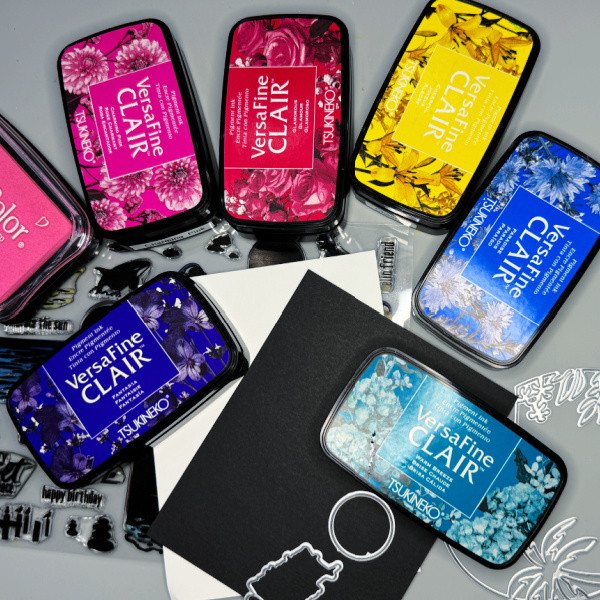
Start by gathering your supplies. You will need a A2 card base, a white panel, a panel of tidepool cardstock, several colors of VersaMagic ink, VersaFine Clair Pinecone ink, Memento Tangelo ink, sponge daubers and an embossing folder.
Step 1: Make a dry run of the embossing folder through the die cutting machine.
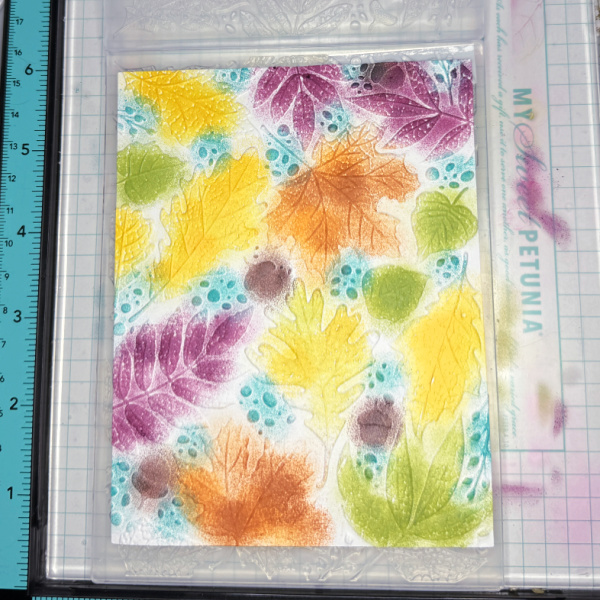
Step 2: This looks like a hot mess, but I promise it gets better. Using a sponge dauber, color the leaves as desired using VersaMagic inks.
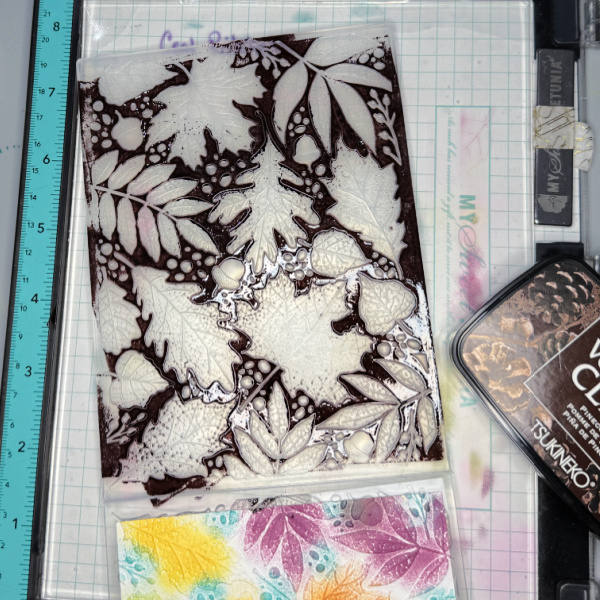
Step 3: Lock the embossed panel back into the folder and generously ink up the debossed side with a dark brown ink. Close the folder and run it through the die cutting machine.
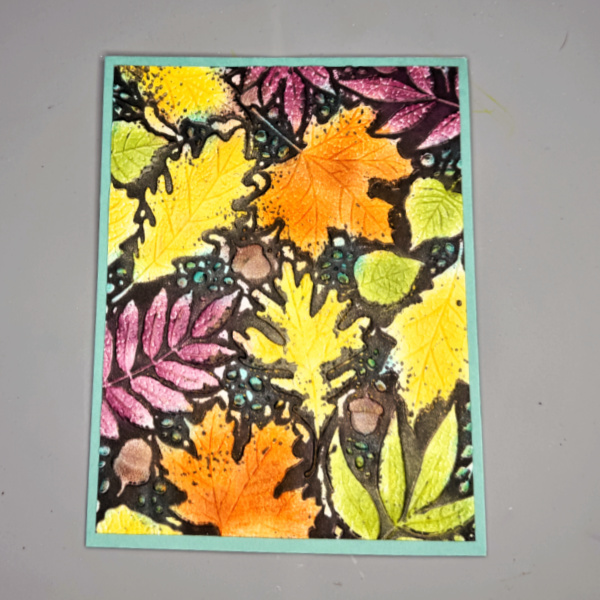
Step 4: Glue the panel down on the card base and add a sentiment. I used a happy birthday die cut.
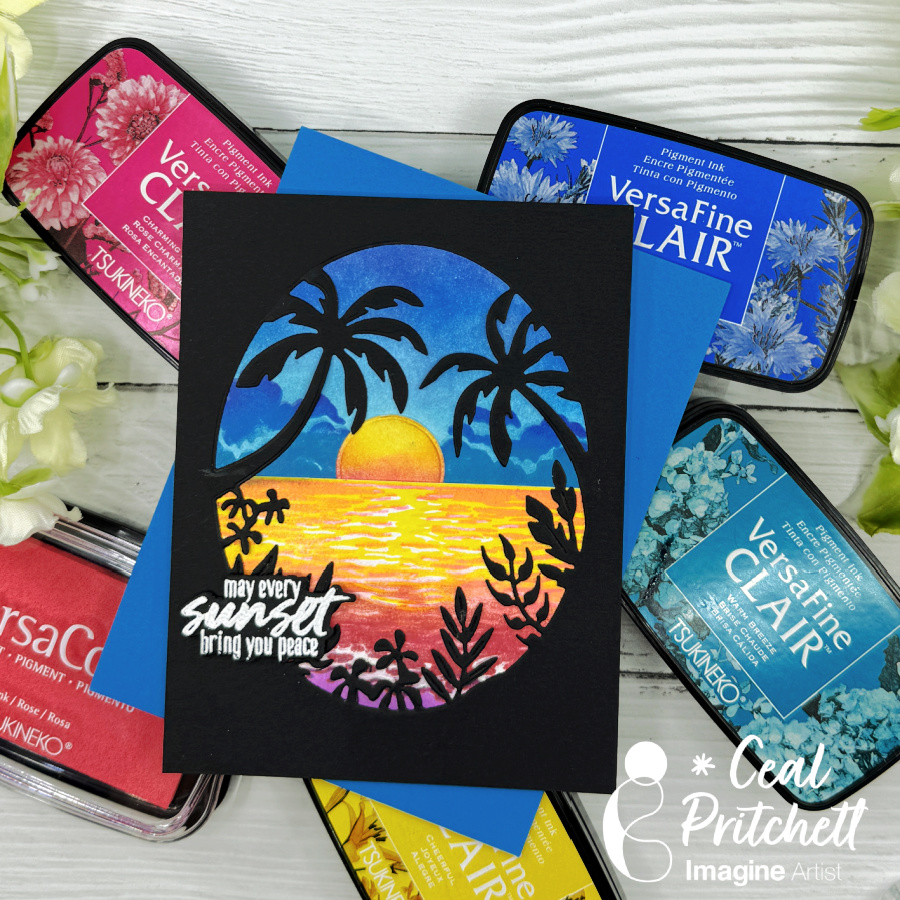
Today I am sharing a card that uses VersaFine Clair inks to create a dramatic sunset. You will need to gather the following supplies to recreate this card. I have them pictured below.
Skill: Advanced Time: 1 to 1 ½ hours
Directions:
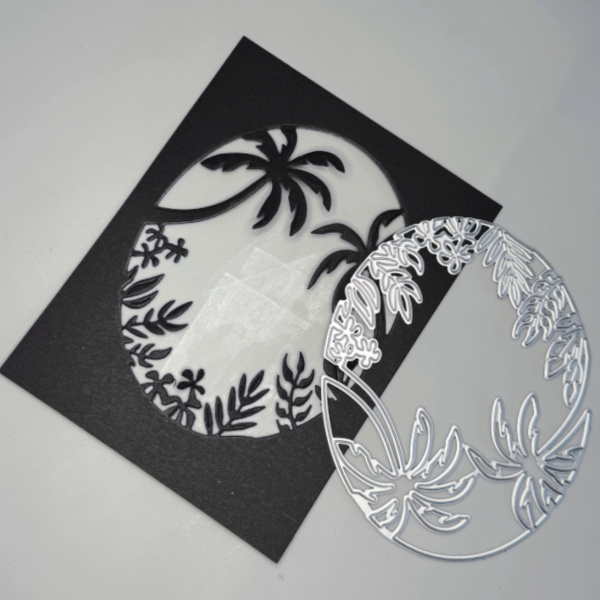
Step 1: Cut the window die out of black cardstock.
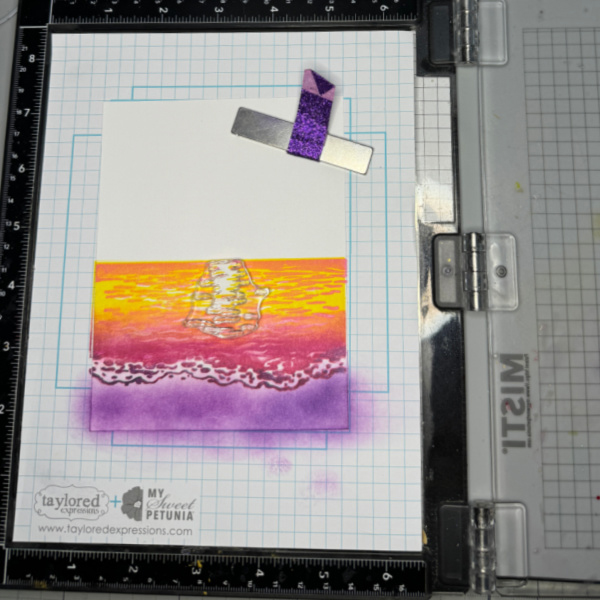
Step 2: Using the large stamp in the layering stamp set, place it near the bottom of the panel and ink one third of the top portion with Cheerful ink. Next ink the middle portion with Pink VersaColor. The bottom portion should be inked with Charming Pink and Glamorous. The very edge of the stamp should be inked with Purple Delight. I also used a dauber to add purple delight to the bottom of the panel and later went over that with a Copic marker.
The next layer adds more definition to the sea. I inked it up with Pink VersaColor which turns orange when stamped over yellow.
The last layer is to stamp the reflection which I stamped in Cheerful (yellow) ink.
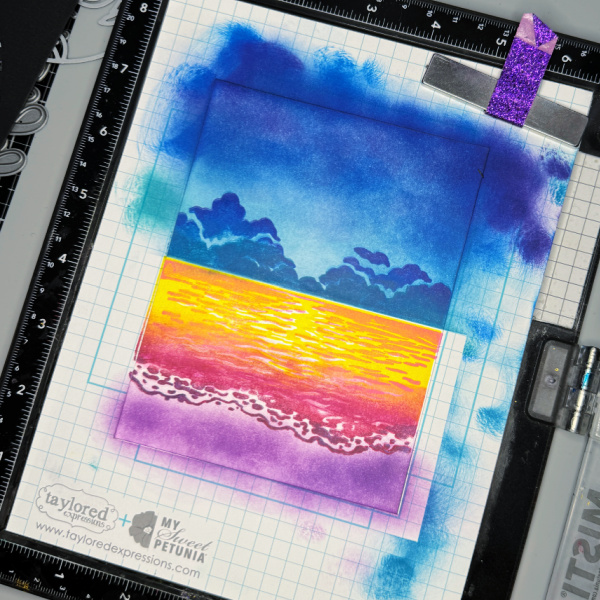
Step 3: I used a post it note to mask off the bottom portion so I could create the sky. To do this I used a dauber and blended Warm Breeze and Paradise ink and then added a little of the Fantasia ink to the top portion. I placed the panel back in the Misti and stamped the sky using Warm Breeze on the bottom portion of the stamp, Paradise in the middle and Fantasia on the very edge.
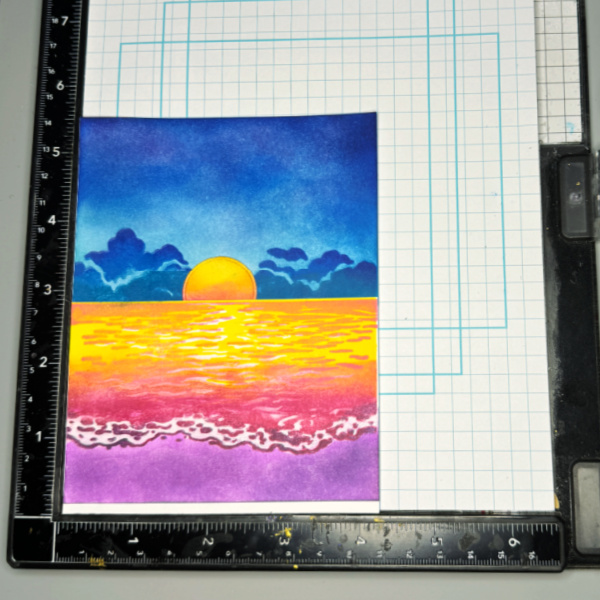
Step 4: Cut out a circle for the sun and ink blend Cheerful at the top, Charming Pink in the middle and Glamorous at the very bottom.
Step 5: Cut the panel into two pieces in order to layer them on an A2 panel.
Step 6: Adhere the sky panel to the top of the white A2 panel, add the sun and then add the sea panel so you overlap the sun and sky just a bit. You can see the white portion left in the photo above.
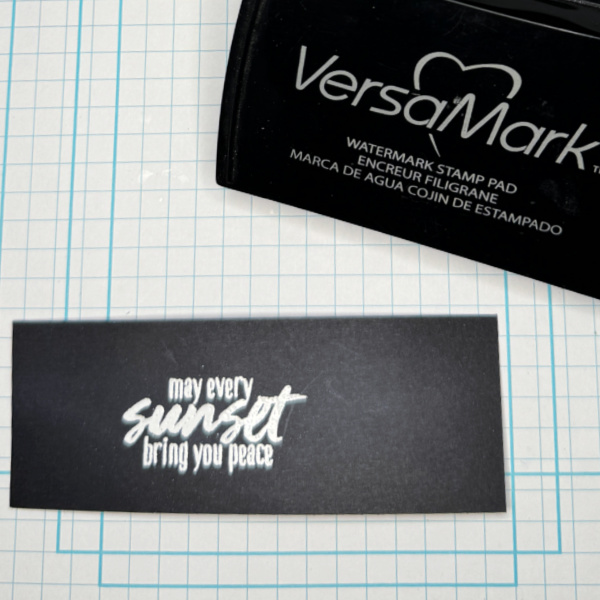
Step 7: Stamp a sentiment with VersaMark ink and emboss with white Mboss powder and then cut it out with the coordinating die and add to the front of the card.
Other Products • Neenah Solar White 110lb and 80lb cardstock • Pitch Black cardstock – Hero Arts • Color Layering Sunset Over Waves Bundle – Hero Arts • Tropical Foliage Window – Hero Arts
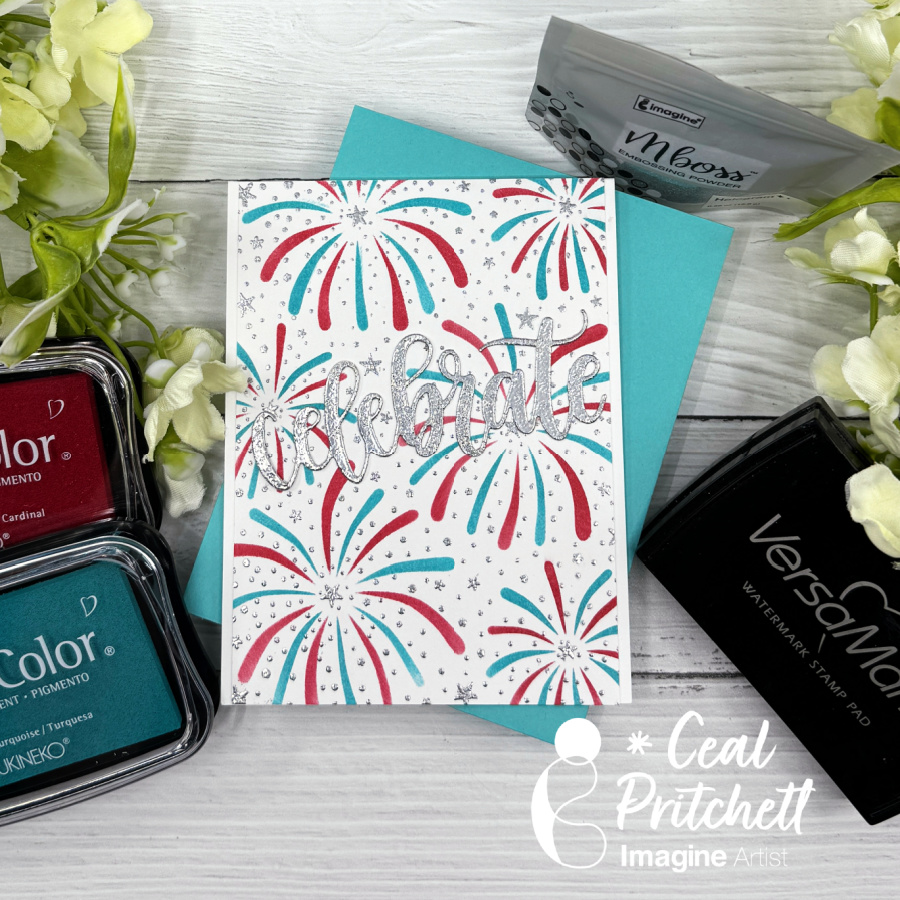
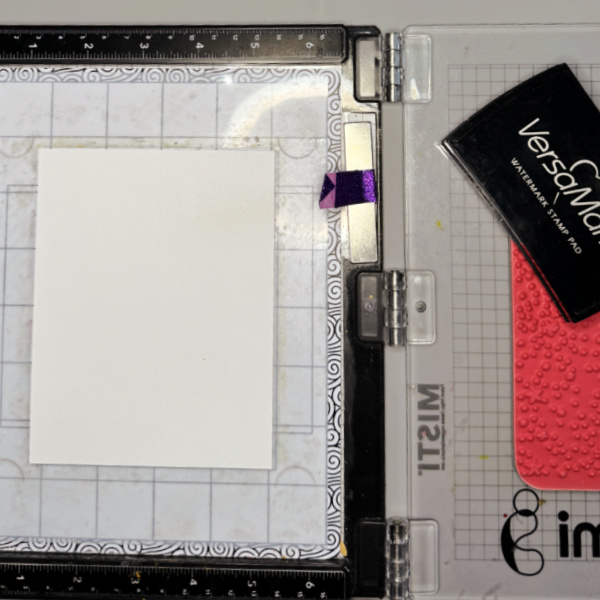
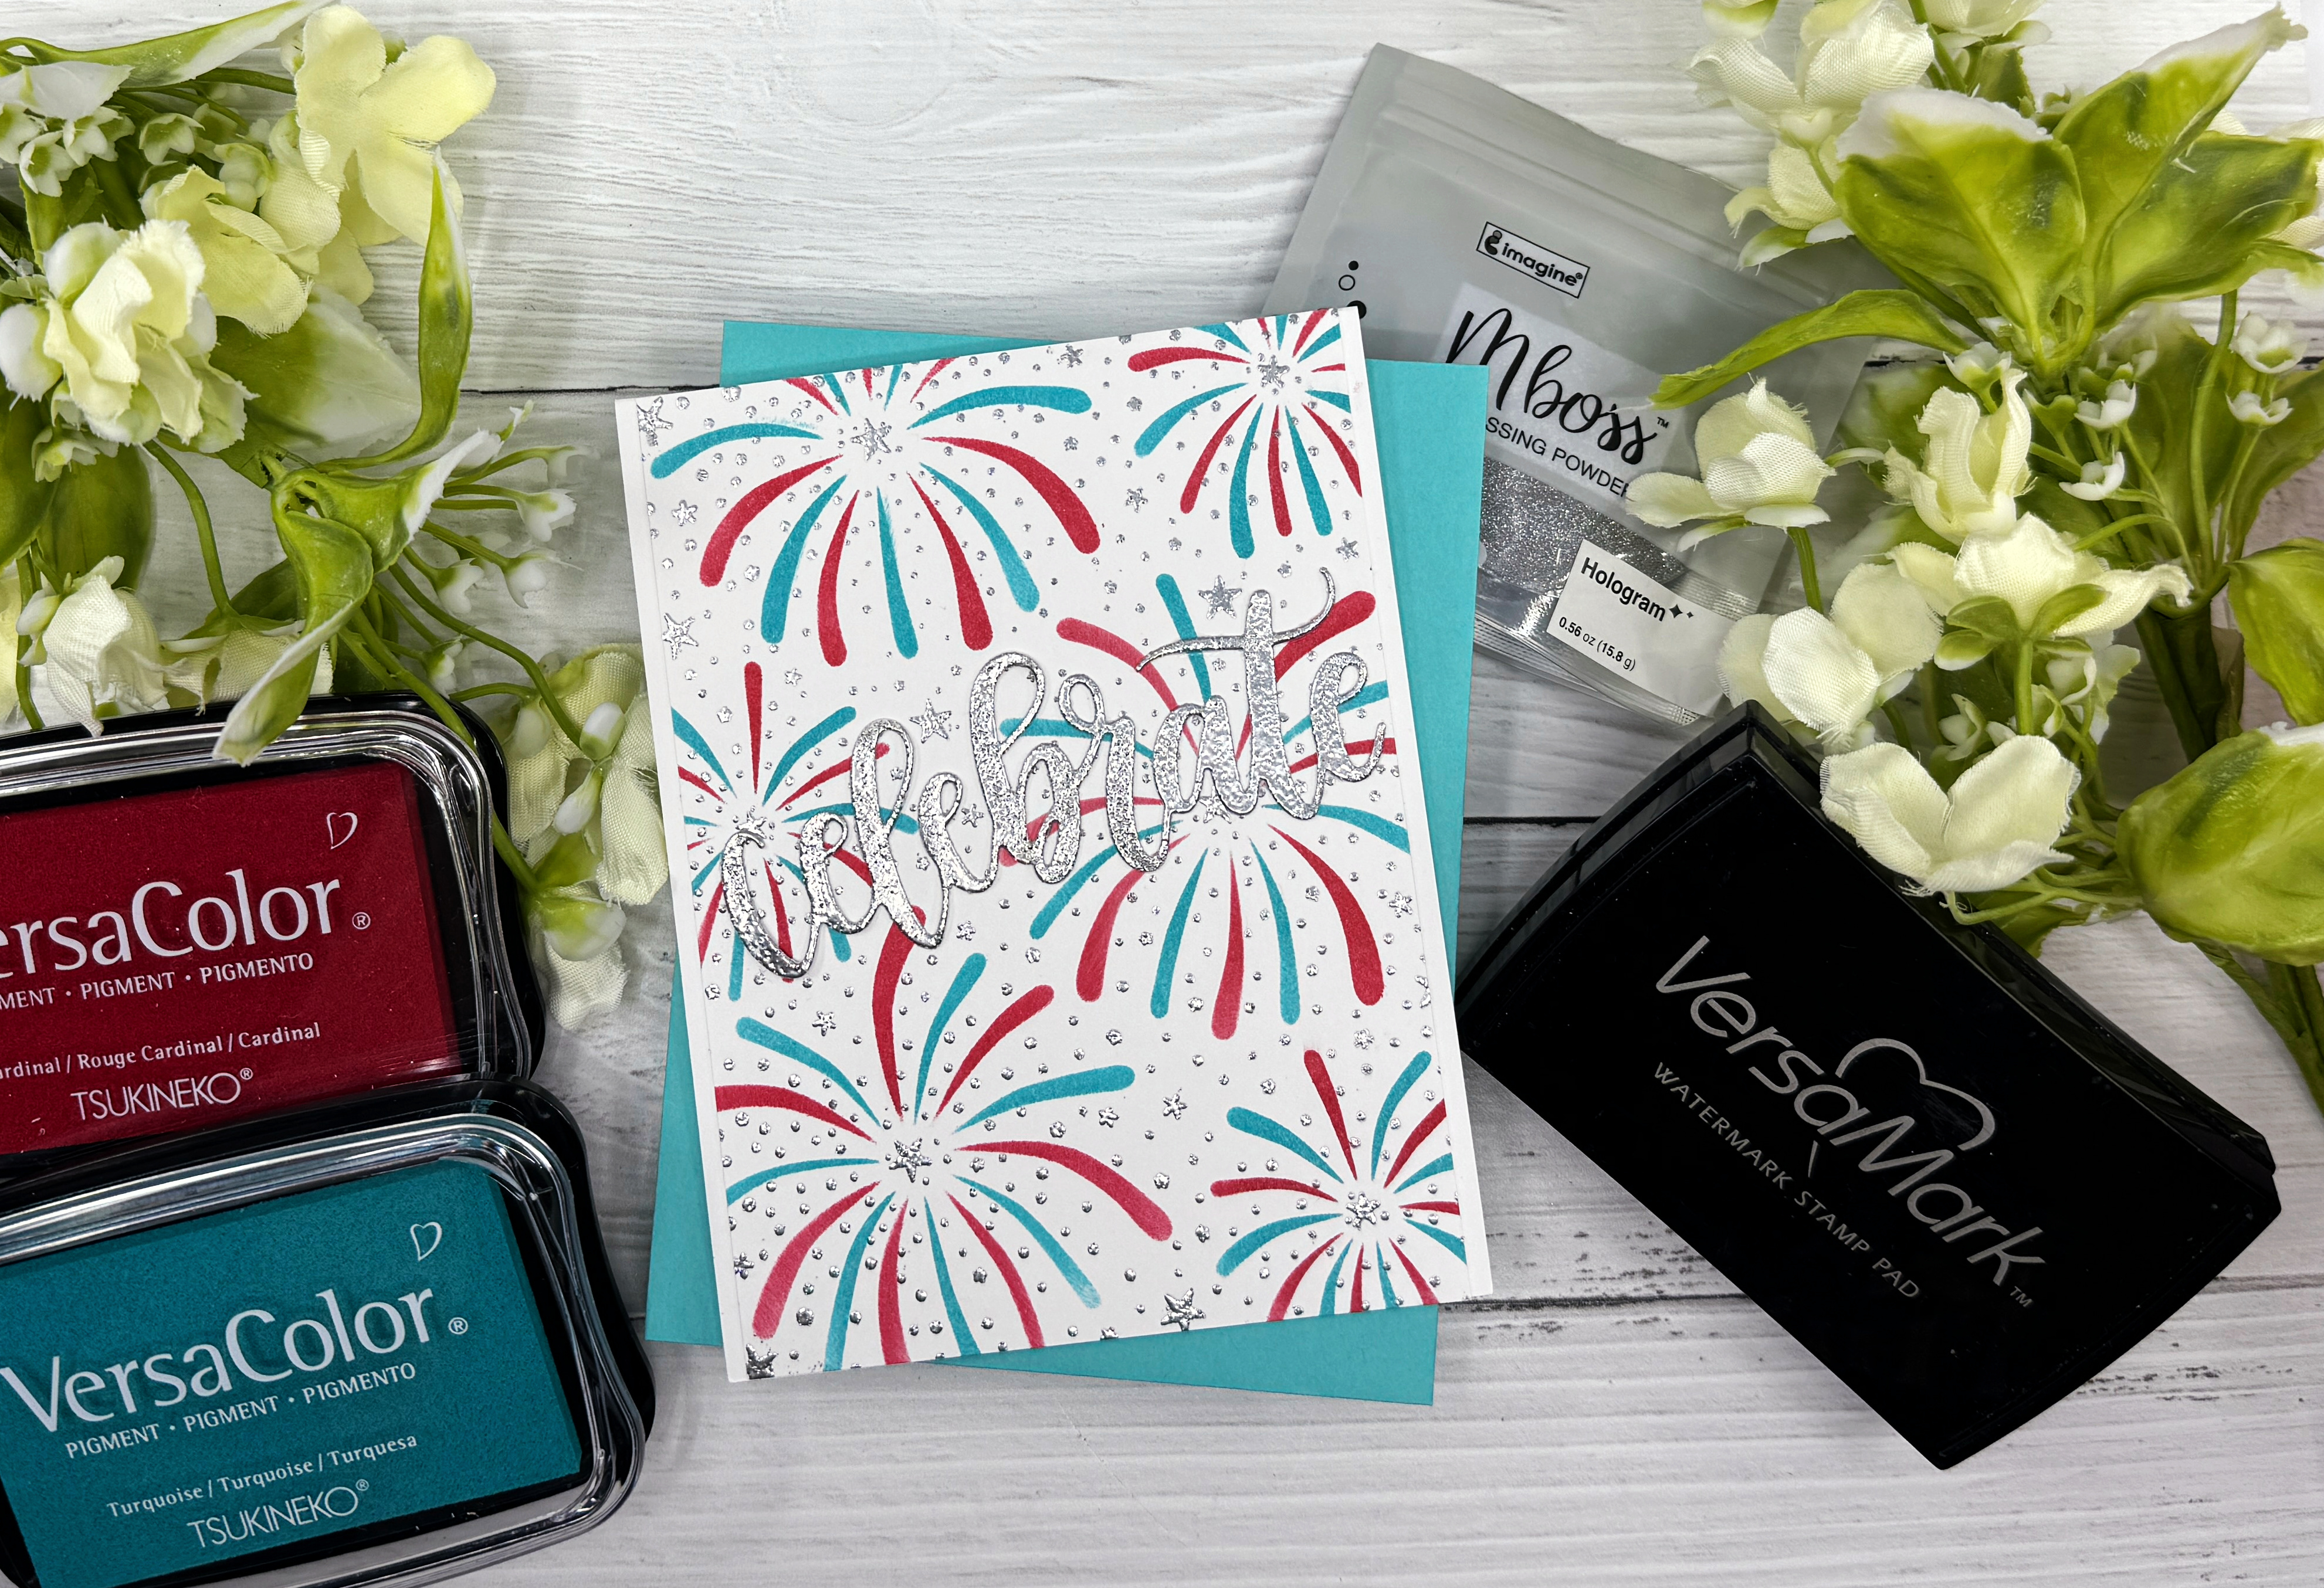
Hello crafty friends! It’s Ceal here. Each year I have my family over to celebrate July 4th and I send out invitations, this is the invitation for this year, and I am sharing how I made it.
Skill: Intermediate Time: 30 to 45 minutes
Directions:
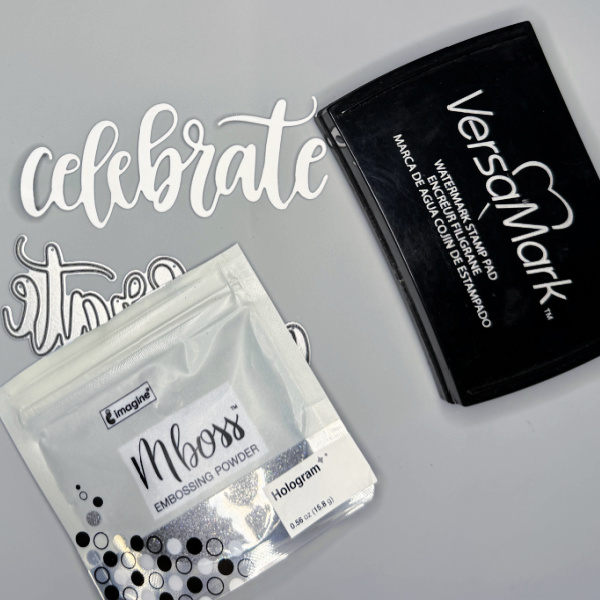
You will need to gather the following supplies. Red and blue ink, stamp/stencil set, celebrate word die cut, VersaMark ink Hologram MBoss embossing powder.
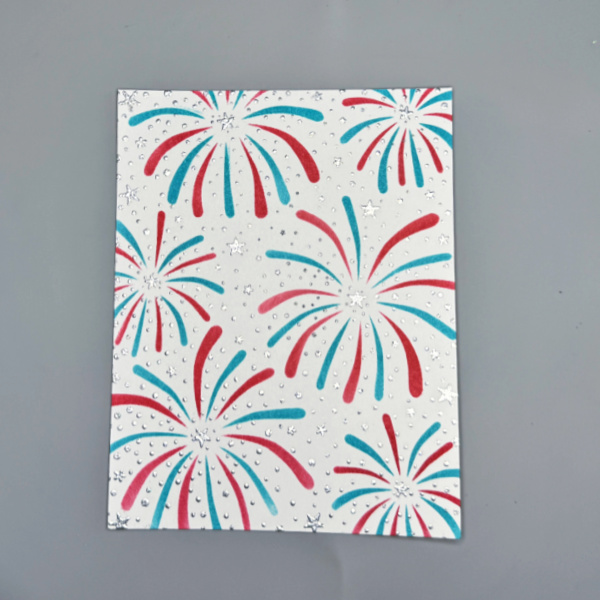
Step 1: Prepare the paper by using a anti-static tool, then ink up the background stamp (fireworks background used here)with VersaMark ink and stamp on panel.
Step 2: Cover the panel with Hologram Mboss embossing powder and melt with heat tool.
Step 3: Using a large dauber along with the stencil color the layers in red and blue, I used red for layer 1 and blue for layer 2.
Step 4: Cut out the word celebrate, cover with VersaMark ink using the pad directly to the word, or a sponge dauber.
Step 5: Cover the celebrate die with Mboss Hologram embossing powder and melt with heat gun.
Other supplies: Neenah Solar White 80lb and 120lb Fireworks background Stamp/Stencil Combo – Taylored Expressions Celebrate Word Die –My Favorite Things
Hello everyone, today I am sharing a summer wedding card that was inspired by a bridal bouquet from my friend’s wedding. I am using a technique that showcases how vibrant our VersaFine Clair inks are.
Skill: Intermediate to Advanced Time: 1 to 1 ½ hours
Directions:
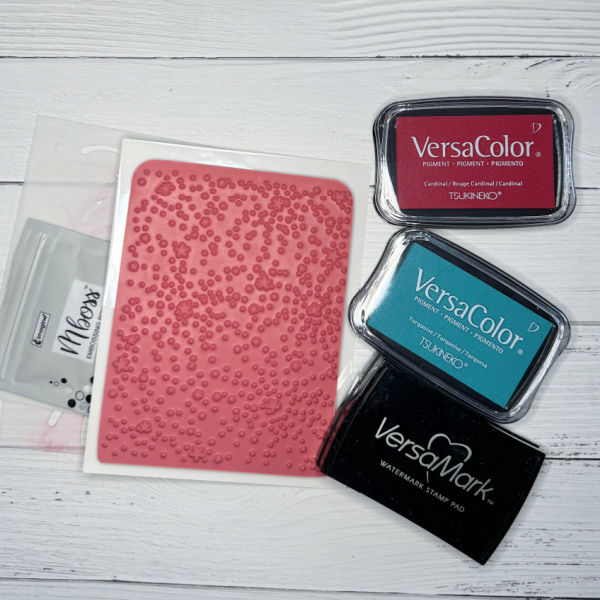
For this card, you will need a 3D embossing folder, several ink colors and sponge daubers or another tool to apply the ink.
Step 1:
Run the 3D embossing folder of your choice through the machine. Tip if you lightly spray it with water this helps get a better impression.
Step 2:
Using a sponge dauber or other inking tool and add color to the debossed side of the panel. It’s okay if you get ink outside of the debossed area because the next step will cover it.
Step 3: Using the VersaFine Clair Nocturne ink pad, rub it across the panel. The black will stay on top and will not go into the debossed areas and create a beautiful background. The versaFine Clair ink pads work well with this technique because they are so vibrant.
Step 4: Stamp your sentiment using the Mini Misti and cut it out with the coordinating die.
Step 5: Add your panel to a white card base and add the elements to finish he card.
Other Supplies: Neenah Classic Crest Solar White 120lb Neenah Classic Crest Solar White 80lb Mini MISTI Cake Toppers Stamp Set – Gina K Designs Cake Toppers Die Set – Gina K Designs Master Layouts One – Gina K Designs
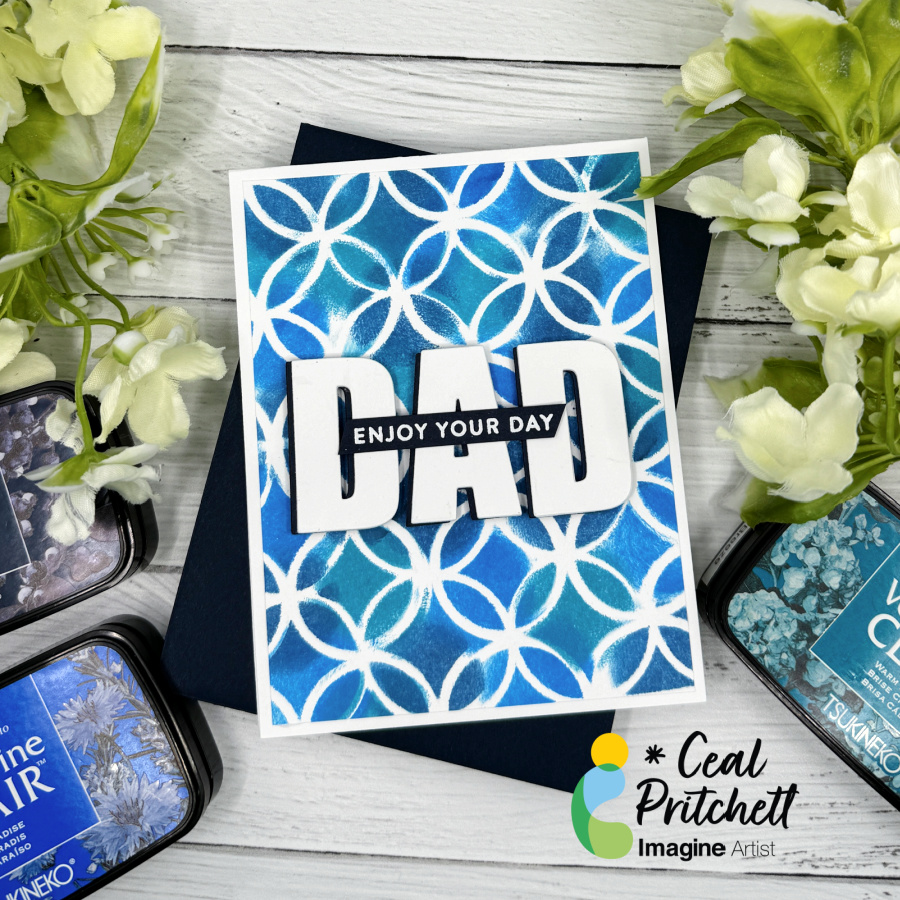
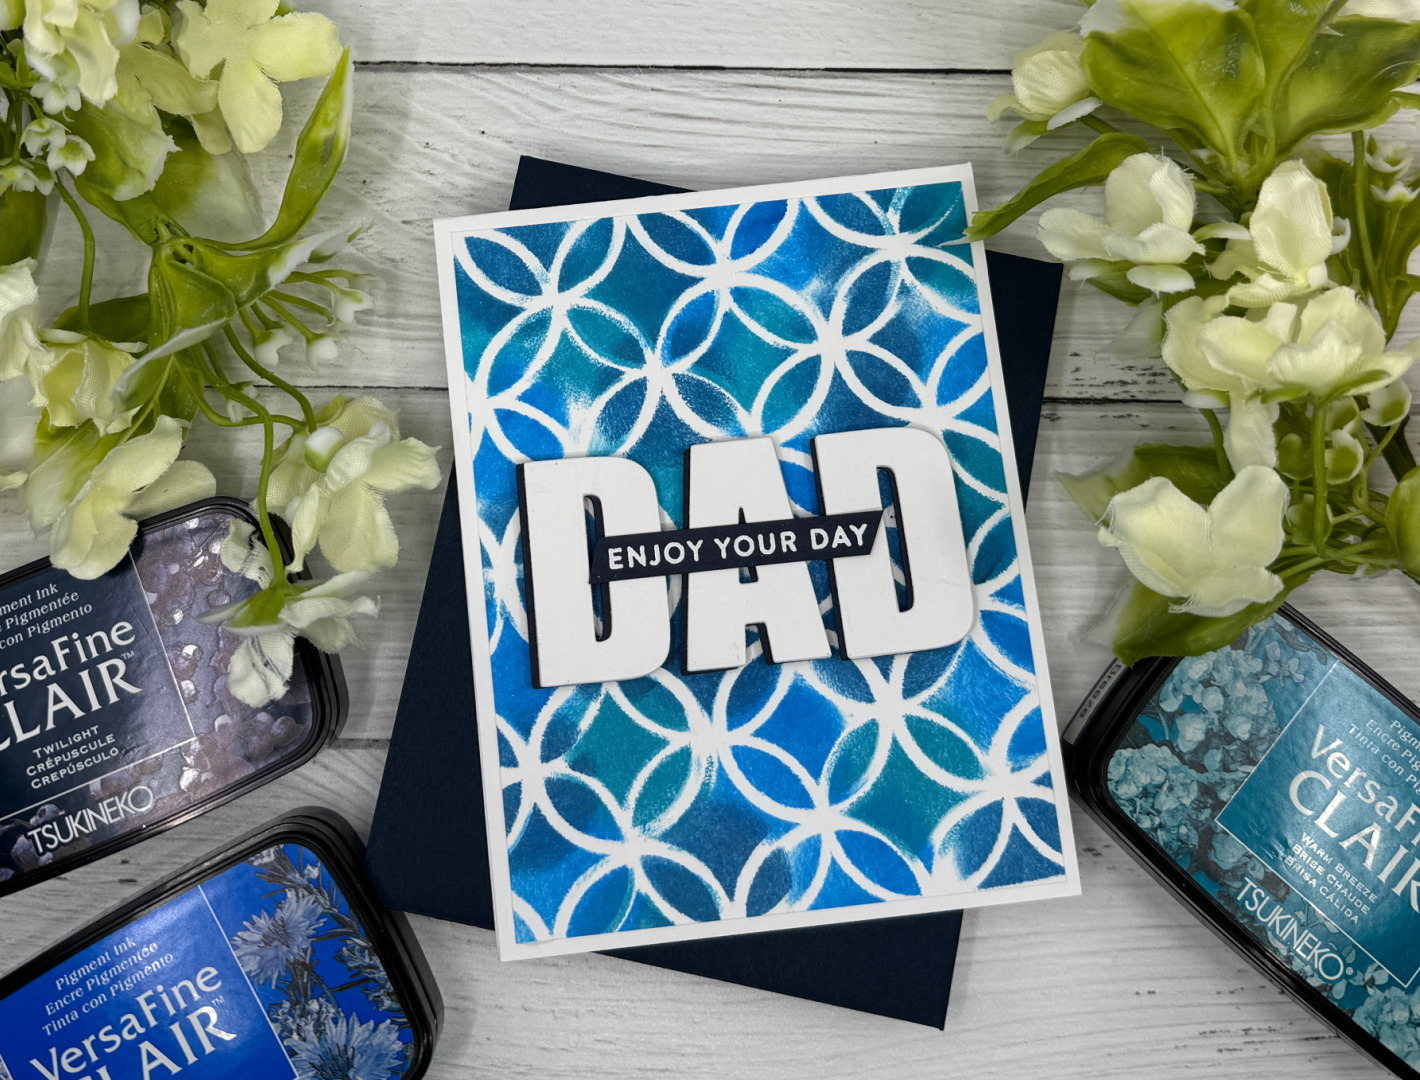
Hello crafty friends, today I am sharing a Father’s Day card using the Bokeh technique.
Skill: Beginner to Intermediate Time: 30 to 45 Minutes
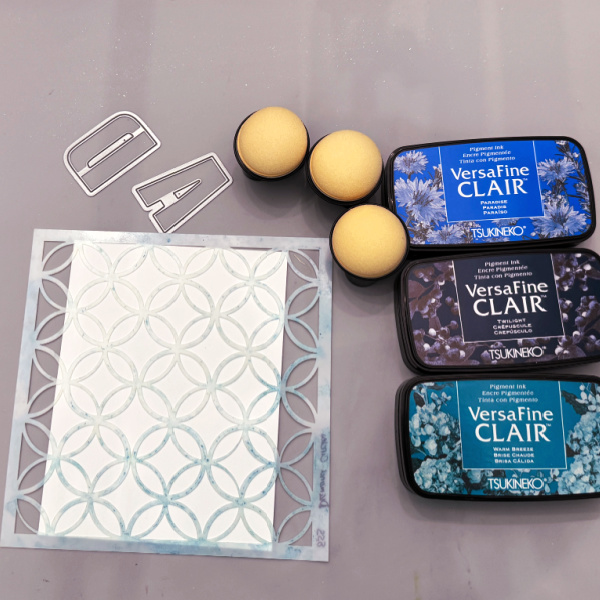
Directions: To create this card, you will need a stencil, at least three different inks that blend well together, round sponge daubers and some Alpha dies.
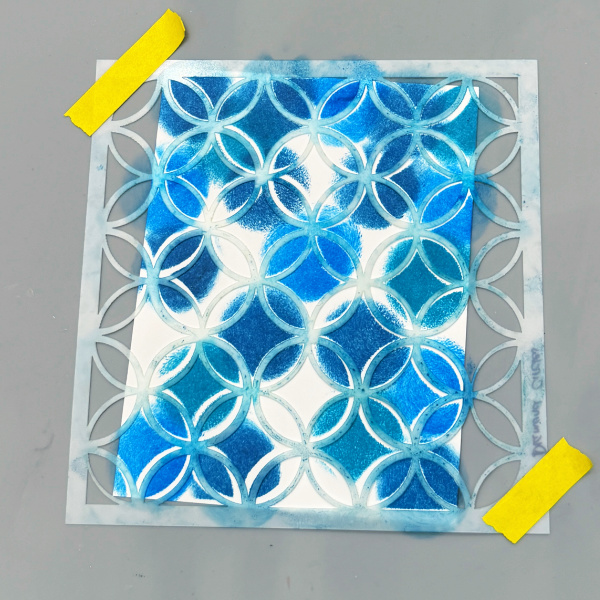
Step 1: Place the stencil over a panel of white cardstock, then ink up the sponge daubers with each color randomly placing dots of color through the stencil to cover the panel.
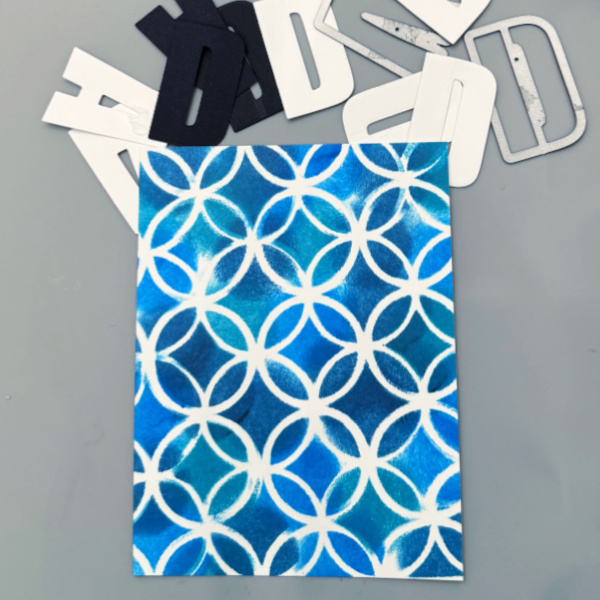
Step 2: Cut the letters of dad out of dark blue cardstock once and out of white cardstock twice so it will have dimension.
Step 3: Layer the letters over one another off-setting the dark blue on the bottom.
Step 4: Stamp “Enjoy Your Day” with VersaMark ink and emboss with white MBoss embossing powder.
Other Supplies: • Neenah Classic Crest Solar White 120lb • Neenah Classic Crest Solar White 80lb • Midnight Cardstock – Concord & 9th • Stencil – Simon Says Stamp • Celebrate Stamp Set – Hero Arts • Large Alpha Dies – Altenew