See How To Create A Dynamic Looking Wedding Invitation

by Martha Lucia Gomez

See How To Create A Dynamic Looking Wedding Invitation

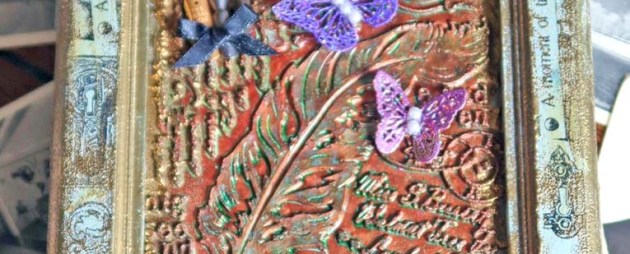
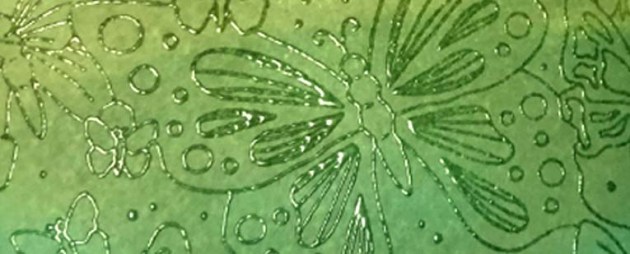
Hi there! Today, I have a unique wedding card technique to share with you. By using this technique each wedding invitation will have its own unique subtleties. I used Desert Sand Memento Ink but you can use the colors used in your wedding decor. Embossing folders can be used in several ways and it is fun and simple. Now that you can get wedding invitations in craft stores you can add your personal touch to the make it more special just by pasting the decorated layer on top.

Skill: Intermediate
Time: 20 minutes

Directions


Step 1

Select an embossing folder, ink the flat layer of the folder with the color of ink of your preference. Since this is a wedding card, I used Desert Sand Memento Ink because it matches well with gold and enhances the white. You can apply the ink directly with the ink pad or using a brayer. Insert the card stock on your embossing folder and pass the sandwich through your cutting machine.


Step 2

On a separate piece of card stock with the same color of the card base, stamp the couple image using VersaMark. Sprinkle Gold Embossing Powder and use a heat tool to set.


Step 3

To create a matching frame for the couple image, I inked the edges of a rectangle with the VersaMark inkpad.


Step 4

Then I sprinkled a heavy amount of Gold Embossing Powder and melted the powder with the heat tool.


Step 5

If you want to add more details this is the moment. In my sample, I tie a bow in the ribbon around of the embossed background and pasted it directly over the card base. Then I pasted the main stamped image over the decorated card base using double-sided foam tape.

Supplies

Imagine
Other
  • Cardstock – Whisper White
  • Die Cutting Machine
  • The Rabbit Hole Designs – Happily Ever After Stamp Set
  • Embossing Folder
  • Satin Ribbon
  • Heat Tool
  • Double-sided foam tape

Learn How To Make 3 Matching Wedding Invitations

by Kyriakos Pachadiroglou

Learn How To Make 3 Matching Wedding Invitations

I wanted to share some easy to make wedding invitations using standard size cards in different designs. The designs are based on two techniques, one requiring a die cutting/embossing machine and one that does not, which makes it easier for everyone to make having basic supplies. The Delicata ink pads give shine and elegance to your wedding invitations. Another fun idea I include is how embossing powder can be used on darker papers to add beautiful contrast and pop to the front of a wedding invitation. Two of the designs form pockets. The text can be printed on a separate card and placed inside. You could also order pre-printed 5 x 7 inch cards, and not follow the pocket making instructions included in this tutorial.

Skill: Beginner
Time: 5 minutes per invitation (depends on details)

Directions


Step 1

Use the embossing folders to emboss the fronts of the first two card designs. If you have an embossing folder that is for a full card background, you can place it over just a portion of the card front to get the 1/3 partial coverage.


Step 2

Add some color and shimmer to the embossed areas by lightly and smoothly pressing/rubbing the ink pad directly on the embossed surface. In the examples above, I used White Shimmer on the embossed lower 1/3 and Golden Glitz on the medallion shape. By going lightly you will only get ink on the raised portions which will highlight the embossing.


Step 3

For the large medallion embossed design, cut about 1 inch on the sides of it to fit the satin ribbon width.


Step 4

Pass the ribbon from the back side to front, add some Tear It Tape on the cutting, and fold the ribbon to set it to make a loop. Add a large rhinestone on the center of the medallion adhering it with the On Point Glue. This finishes the first card design.


Finishing the Second Embossed Design


Step 1

For the second invitation add printed ribbon using Tear It Tape just above the embossed area. Trim so it is flush with edges.


Step 2

To make a pocket card, cut about ⅜ x 5 inches strip of the front side of the card opposite to the embossed edge.


Step 3

Add Tear It Tape to the inside of the card along the bottom of the embossed area and the outside edge. Remove the backing and fold shut to make a pocket.


Step 4

Stamp with VersaFine Clair ink in Pinecone and the “And They Loved Happily Ever After” sentiment (or sentiment stamp of choice). Print or order cards with the text printed on a 4 ½ x 6 inch size card, punch a hole at the top of the insert card and add a matching ribbon. This ads a bit of extra elegance while confirming to the recipient they should pull out the insert card.


If you Do Not Have an Embossing Machine…


Step 1

Stamp a large flourish stamp with the VersaMark watermark ink on kraft paper, only covering 1/3 of the card front. Apply embossing powder over the stamped area, shake off excess and heat set with a heat tool.


Step 2

Add ribbon and further embellishments and follow the steps from second card design above.

Supplies

Imagine
Other
  • 5 x 7 inch card base
  • 4 1/2 x 6 inch insert cards
  • Craft knife
  • Satin ribbons
  • Hole Punch
  • Printed cotton ribbon
  • Rhinestones or Pearls
  • Embossing folders
  • Die cutting machine
  • Flourish Background Stamp
  • Acrylic Block
  • Heat tool
  • Wedding-themed stamp

April Color of the Month is White Wedding

April Color of the Month is White Wedding

“Hey, little sister what have you done? Hey, little sister who is the only one?”…*continues Billy Idol song until the chorus* “It’s a nice day for a White Wedding”! We are happy to announce the Color of the Month for April is White Wedding. With wedding season just around the bend, we hope you are stocking up on the right inks for your special day.

We have been very pleased with our latest release of StazOn Pigment Ink in Snowflake. This ink will be great for multiple surfaces and especially great on dark or kraft cardstock. Another set of fantastic inks for wedding crafts is Delicata in White Shimmer (the name speaks for itself), Brilliance in Moonlight White (a bit of a heavier pigment ink), and VersaMagic in Cloud White (matte finish ink).

As always we challenge our artist with the color of the month and a technique or theme. This month expect to see white inks and wedding crafts!

Here is a Sneak Peak!

Project by Lindsay Adreon

Project by Martha Lucia Gomez

Project by Kassy Tousignant

See How to Make Clear Card Elements with StazOn Pigment Ink

by Lindsay Adreon

See How to Make Clear Card Elements with StazOn Pigment Ink

I love to send cards to people, but adding in unexpected touches is one of my favorite things to do! Today’s card has one of those surprises – a completely clear front! Using the new StazOn Pigment ink and acetate, I was able to create my own patterned acetate using Waffle Flower stamps to make the front of the card really unique!

Skill: Advanced
Time: 1 hour

Directions

Supplies

Imagine
craft matImagine Craft Mat stazon pigment inkpadStazOn Pigment in Piano Black
StazOn Pigment in Lemon Drop StazOn Pigment in Grape Candy
Other
  • Acetate
  • Waffle Flower – Plaid Play Stamp Set
  • Paper Smooches – Sentiment Sampler Stamp Set
  • Acrylic Block
  • Copy paper
  • Cardbase
  • Scissors or Cutting Tool
  • Foam Tape

How To Use StazOn Pigment Ink As A Resist

by Nadine Carlier

hello-butterfly-card-by-nadine-carlier-ic web

Did you know that you can use StazOn Pigment Ink as a resist with other inks like VersaFine Clair? Find out how by watching my video below.

Skill: Intermediate
Time: 30 minutes

Supplies

Imagine
Other

Visit our YouTube Channel for more inspirational videos and subscribe. Make sure to click the bell to get updates when we post new videos.

Learn How To Blend VersaFine Clair Inks

by Roni Johnson

Learn How To Blend VersaFine Clair Inks

Sometimes colors speak volumes and Imagine’s Color of the Month for March does so for me…Peacock Feathers. I love the rich jewel tones found in peacock feathers from the brilliant greens, lush blues to the royal purple not to mention the amazing metallic glimmer thrown in for good measure. Mother Nature is amazing, isn’t she? I tried to keep all of this in mind when creating a project to share with you. I decided to use one of my favorite techniques, color blending paired with the lovely VersaFine Clair inks, I think I came pretty darn close. I hope you enjoy!

Skill: Intermediate
Time: 45 minutes

Directions


Step 1

Mask off the area that you would like to color. I have used JudiKins Eclipse Masking Tape but you could just as easily use scrap paper secured with washi tape or something similar. I wanted the colors to be bold like a peacock so I chose to work with a 2” wide area to ink.


Step 2

Begin applying the ink to the paper using a Sponge Dauber. I like to work from lightest to darkest but that’s up to your personal preference. In this instance, I began with VersaFine Clair in Verdant (bright spring green).


Step 3

VersaFine Clair in Shady Lane (darker green) is the next color in the lineup. Apply the ink beside the previous color, save the overlapping and blending till the end.


Step 4

VersaFine Clair in Paradise (cyan blue) is applied next.


Step 5

VersaFine Clair in Blue Belle (darker blue) is the 4th color added.


Step 6

VersaFine Clair in Fantasia (darker purple) is the 5th and final color added to the peacock feather stripe.


Step 7

It is time to go back and blend the colors together. To do so, look at your colors in pairs; use the lighter of the two colors to blend them both together. In this case, I am using the Blue Belle Sponge Dauber to blend Fantasia and Blue Belle together.


Step 8

Once you are satisfied with the blending, remove the masking tape (scrap paper).


Step 9

Spray the card panel with Sheer Shimmer Spray in Sparkle and let it dry completely.


Step 10

Sprinkle a few drops of All-Purpose Ink in Vegas Gold on the Craft Mat; add a couple drops of Ink Potion No. 9 (or water) to the ink and mix. Use a paintbrush, toothbrush or another tool to flick the ink over the card panel.


Step 11

Stamp a sentiment such as “hello” and a peacock feather image using VersaFine Clair Nocturne inkpad. Mat the Peacock Feather panel with Violet and Sapphire Starstruck Rinea Foiled Paper; affix to a white card base.

Supplies

Imagine
Other
  • JudiKins Eclipse Masking Tape
  • Just For Fun Rubber Stamps – Peacock Feather
  • Paper Smooches – “Hello” sentiment
  • Rinea Foiled Paper – Violet Starstruck, Sapphire Starstruck
  • Silicone Baster
  • White Card Base