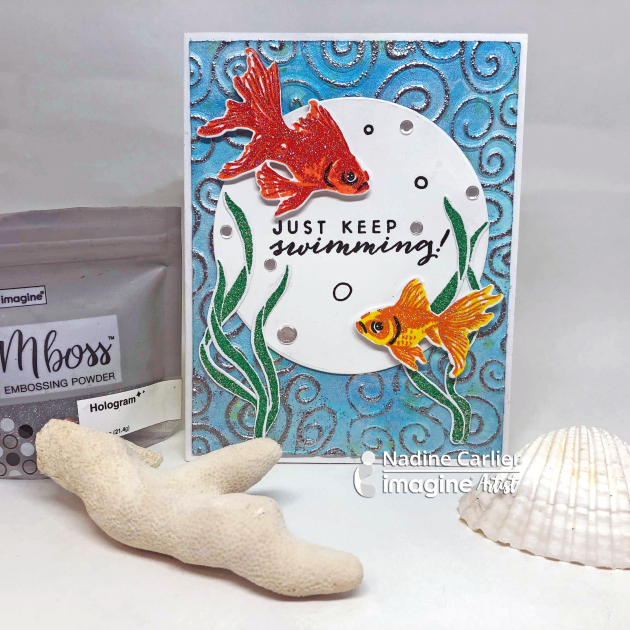
This card is dressed with the new Mboss Embossing Powder from top to bottom.
Watch my video below to see the different techniques I used to create my card. Enjoy!
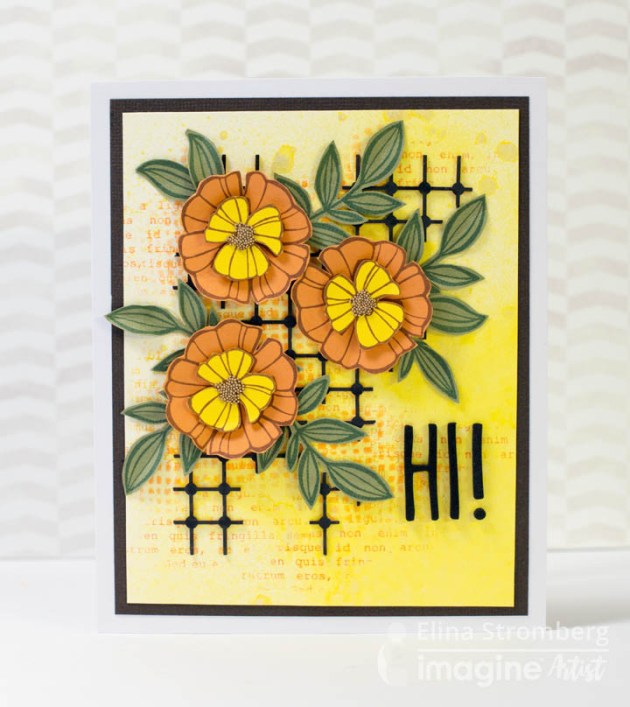
Here in Finland, the winters are usually quite long, and when you now look out from the window you still see piles of snow even if it is already March! On a grey late winter day when spring and summer seem to be still quite far away, you can turn your mind already into spring mood: For that, you only need a few stamps, your favorite bright ink colors and some colorful pieces of scrap paper. When you spend a short moment stamping, cutting, and layering your colorful hand-made elements on a beautiful flower card I’m sure you will soon feel your mood rising. Happy and pleased with your creation you quickly feel that actually spring is just around the corner!
Skill: Beginner/Intermediate Time: 1.5 hours
Directions
Step 1
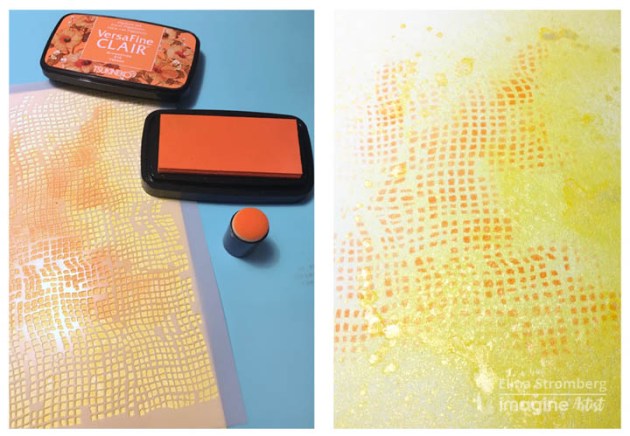
Mist a piece of watercolor paper with Fireworks Shimmery Craft Spray in Dandelion. Let dry. Place a stencil on the colored paper. Use VersaFine Clair in Summertime and a Sponge Dauber to stencil random patterns on the paper. Do not cover the entire area but leave areas unpatterned.
Step 2
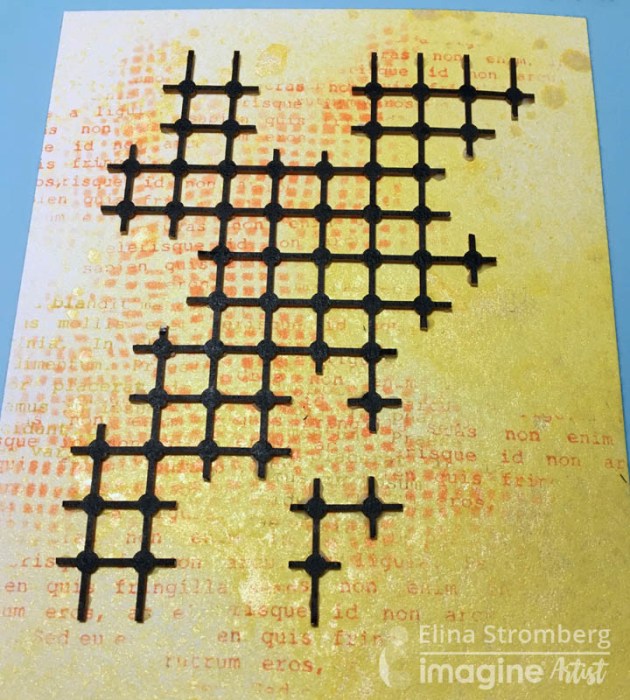
Shape a chipboard grid by cutting out some parts with scissors. Color the plain chipboard with a Fabrico Pen in Real Black.
Step 3
Stamp patterns on the yellow stenciled paper, using the same orange ink. Glue the colored chipboard grid on the paper.
Step 4
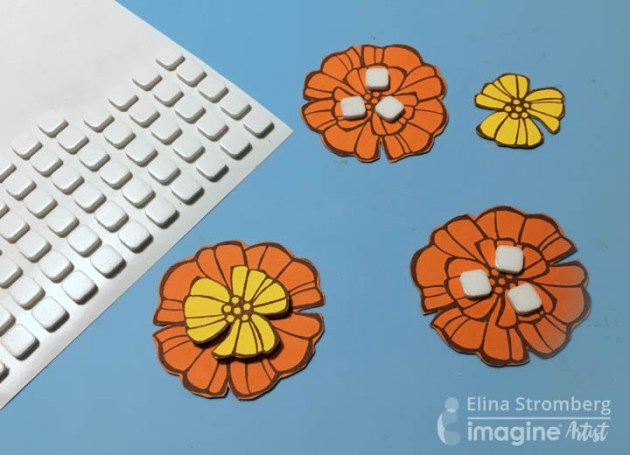
Stamp flowers and leaves on pieces of colored cardstock. Stamp each flower twice; first on orange paper and then on yellow. Cut out. Layer each flower center on a base flower. Attach using 3-D foam stickers.
Step 5
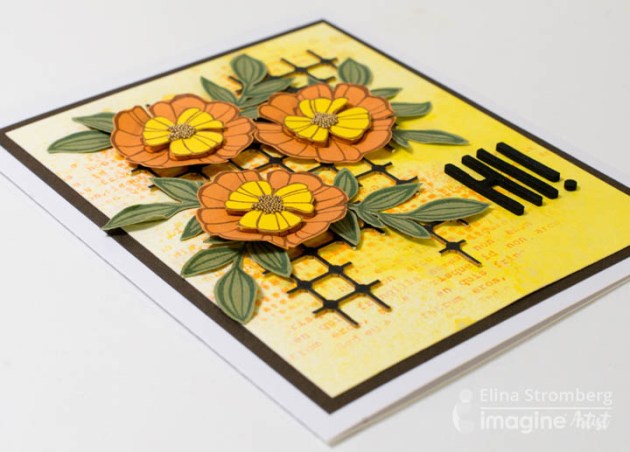
Glue flowers and leaves on the card front. Write greeting word with foam letter stickers. Mat on dark brown cardstock and attach to card base.
Create a Valentines’ day card with a mixed media feel and matching washi tape that you make yourself in a few easy steps using your Imagine Craft Mat. Add interest with inks and textures layered to create interest.
Skill: Intermediate Time: 1 hour
Directions
Step 1
Spray a piece of white cardstock with Fireworks Shimmery Craft Spray in Lady Bug and leave to dry.
Step 2
Use the direct-to-paper method and ink the remainder of the pane using Lady Bug and Lilac Posies Memento DewDrop inkpads.
Step 3
Use sponge daubers with ink to create a bokeh effect to the background. First, add red inked circles using Memento Luxe in Love Letter and then add white Brilliance circles over the top and slightly off-set for a fun effect.
Step 4
To create your own matching washi tape, adhere a strip of masking tape to your Craft Mat.
Step 5
Use Memento DewDrop ink pads to add color to the masking tape strip.
Step 6
Use VersaFine Clair in Morning Mist and a texture stamp to add script stamping to the tape. Leave the ink to dry before adhering the tape to your card.
Step 7
Carefully peel the masking tape off of your Craft Mat and adhere the washi tape to your card panel.
Step 8
Emboss the panel using a love-themed or Valentine’s Day themed embossing folder. Add a layered die-cut heart with a silver leafed heart on top. Finish off your card with ink splats and diamanté for a mixed media look and feel.
This project is all about making something out of nothing. At least, nothing as in a piece of corrugated cardboard from a discarded box and lined paper from an old notebook. These reuse items, paired with a few Imagine Fireworks sprays, create a beautiful notebook that would be a great gift for friends or family. In the tip video, I will show you how to use Fireworks sprays with a liquid varnish to create a permanent finish. This is a helpful tip especially if you are into Mixed Media.
Skill: Intermediate Time:2 hours
Directions
Step 1
Start by drawing a heart shape (approximately 4 1/4” x 4” in size) onto a piece of corrugated cardboard. Cut out shape.
Step 2
Trace the heart onto a piece of heavy weight cardstock and cut out.
Step 3
Line up the corrugated and cardstock heart shapes and punch a hole in the upper left hand corner.
Step 4
Tear off sections from top layer of paper on the corrugated heart, exposing he corrugated layer underneath.
Step 5
Paint a layer of Gesso over the front and back sides of the corrugated heart. Lay a stencil down over the corrugated heart and apply modeling paste. Only apply in small sections around the heart.
Step 6
On your craft mat, mix Rhubarb Stalk Fireworks with a liquid varnish (2 parts fireworks to 1 part varnish).
Step 7
With a paint brush, add puddles of the Fireworks/varnish mixture to the top of the corrugated heart. Add/spray water onto the puddles of Fireworks mixture. Allow the mixture to run and drip down the heart. Blot with a paper towel to stop run. Add more Fireworks mixture and repeat, as needed. Allow to dry in between layers.
Step 8
Repeat inking with Desert Sand Fireworks. Once the Fireworks mixture is completely dry, seal with a coat of liquid varnish. Stamp a script stamp randomly across the corrugated heart with Jet Black StazOn ink.
Step 9
Add splatters to the heart with some watered down black acrylic paint.
Step 10
Spray a few resin roses with Rhubarb Stalk Fireworks and heat set. Repeat, a needed. Fireworks can also be applied with a paint brush, if preferred.
Step 11
Once the Fireworks ink (on the resin roses) is completely dry, edge the roses with Jet Black StazOn inkpad and a dauber.
Step 12
Edge the circumference of the corrugated heart with StazOn and a dauber as well. Deconstruct twine into individual threads and shred the fibers to create a “bed” for the resin hearts to sit on. Adhere the shreds of twine down into the upper left corner of the heart (be sure not to cover the punched hole). Then adhere the roses over the shredded twine.
Step 13
Stamp a title word onto the upper center portion of the heart with Jet Black StazOn ink. Trace the heart shape onto lined paper and cut out. To keep the paper from moving, staple about 4 to 5 sheets together prior to cutting. Repeat for more sheets, as needed (keep in mind the size of book binder ring that you are using). Line up the 3 booklet elements (front = corrugated heart piece, center = lined paper, back = cardstock heart) and attach a book binder ring. Finished!
The New Year is upon us. Wow! Where does time go? As we think about our New Year’s resolutions and plans; don’t forget to send well wishes to friends and family with this easy, fun and whimsical card using a few supplies.
Skill: Beginner Time: 30 minutes
Directions
Step 1
Spray Fireworks Shimmery Craft Spray in Lady Bug, Bamboo Leaves, Summer Breeze and Dandelion over a stencil. Set aside to dry.
Step 2
Stamp the New Years sentiment. Another option is to print a sentiment or favorite quote out. This is what I have done in this case. I downloaded a free Hippy font style from the internet, added to my Microsoft Office software. I then, cut the sentiment, darkened the edges with VersaFine Clair in Nocturne. Finally, I adhered the sentiment onto the card using On Point Glue and finished assembling the card.
When people think of heavy acrylic pastes like Creative Medium, they tend to assume it can only be used on mixed media projects. I would like to bust that myth by showing you that Creative Medium is also an excellent product to use in card making. Placing a light layer of Creative Medium on your paper can transform the look and feel of your cards.
Skill: Beginner or Intermediate Time: 1 hour
Directions
Step 1
Creative Medium can be used to transform any paper. Here I used Creative Medium in Gold Metallic to add a gold shimmer to patterned paper.
Step 2
Use a palette knife to spread a light layer of Creative Medium on paper then place the paper aside to dry. Creative Medium will not wrinkle your paper and will dry flat.
Step 3
I used 3 different colors of Creative Medium in Gold, IridescentBlue and Silver on assorted papers which consisted of stripes, small prints, and large prints, light and dark papers. Again, a light layer is all that is needed for your papers to achieve amazing results. Let the papers dry thoroughly before continuing.
Step 4
On the Silver Creative Medium backgrounds, I used an assortment of techniques. I used a brick stencil and spritzed over it with Fireworks Shimmery Craft Spray in Lilac Posies. On another, I used a large script stamp with VersaFine Clair ink in Nocturne. On another, I used the Scor-Pal to create the grid effect. As you can see Creative Medium works with dye ink sprays, stamping and scoring and it doesn’t affect the initial application.
Step 5
On the Gold Creative Medium backgrounds, I used a large brick background stamp with VersaFine Clair ink in Fallen Leaves, embossed snowflakes and lightly inked with Bahama Blue ink and, I used a star stencil with Silver Creative Medium. Each of these show again how you can completely transform your cardstock.
Step 6
Finally, I experimented with the Creative Medium in IridescentBlue backgrounds. I used a Thank You embossing folder, then lightly inked with Memento Potter’s Clay. And the second one, I used Rose Bud with a floral stencil. So if you have cardstock or scrapbook paper you don’t particularly like or has an out-dated look, consider using Creative Medium to change it up and add some new life to them! Enjoy!