By Ceal Pritchett
Hello crafty friends!
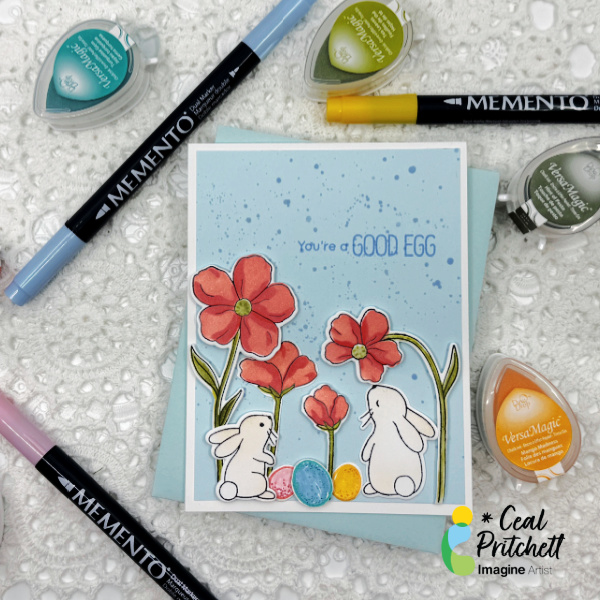
It’s Ceal, here. Today I am sharing how to make this cute Easter card. I love the elements to this card; the flowers are gorgeous, and the bunnies are super cute. You could leave off the eggs and easter sentiment and it becomes a spring card.
Skill: Intermediate to Advanced
Time: 45 Minutes
Directions:
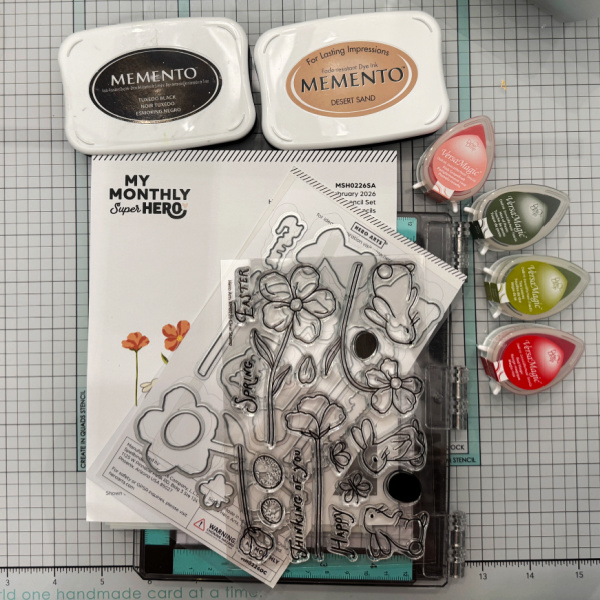
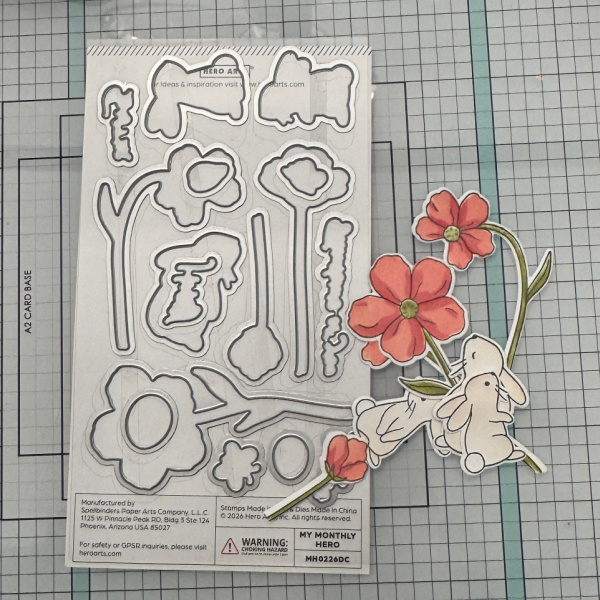
Gather your supplies. To make this card you will need a stamp set that has bunnies, eggs and flowers, along with coordinating dies. Several colors of inks, some markers and a re-inker.
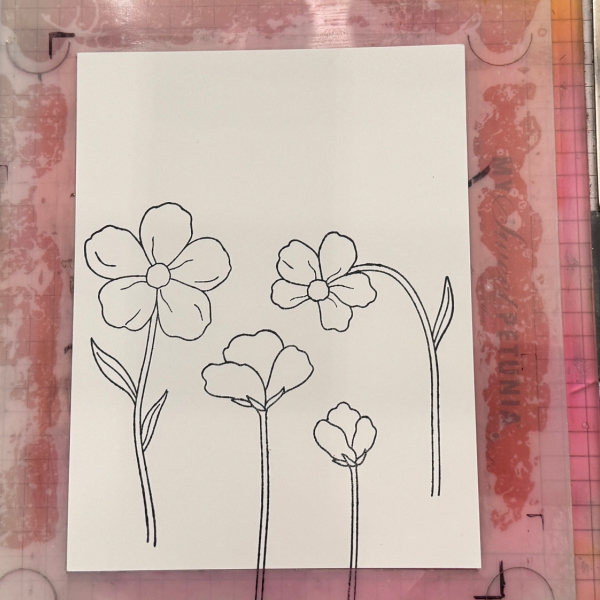
Step 1:
Stamp the flowers in a black ink. I used Memento Tuxedo Black
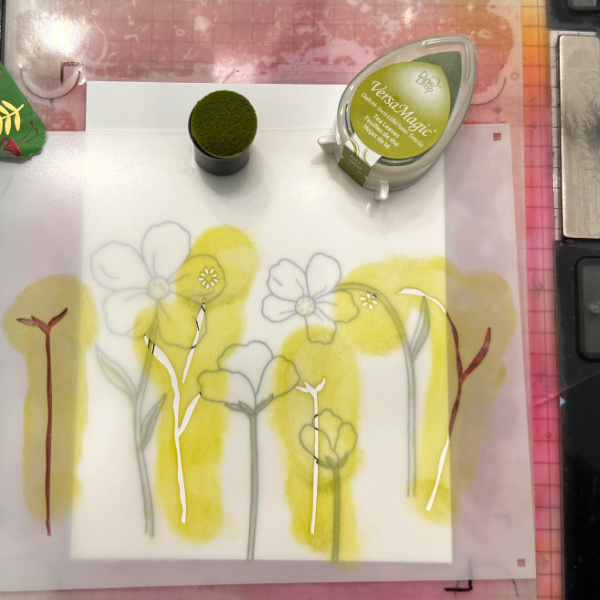
Step 2:
Color the flowers using the coordinating stencils. Stencil one is a light green. I used VersaMagic Tea Leaves
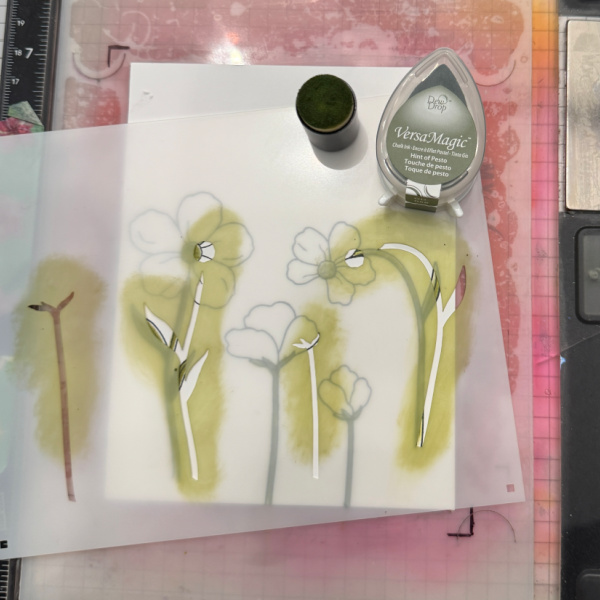
Step 2a
Stencil two is a darker green. I used VersaMagic Touch of Pesto
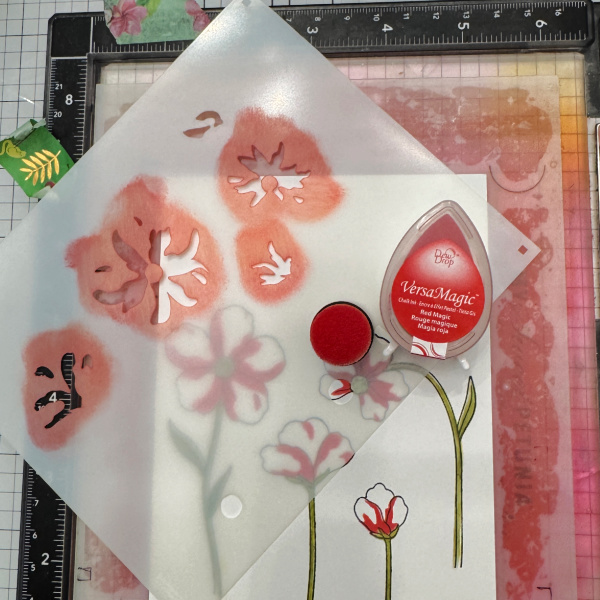
Step 2b:
Stencil three is a dark red. I used VersaMagic Red Magic.

Step 2c:
Stencil four is a peachy pink. I used VersaMagic Pink Grapfruit
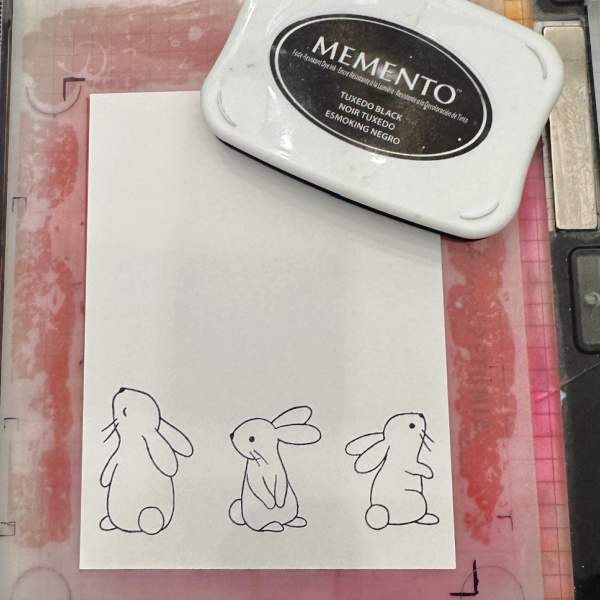
Step 3:
Stamp the bunnies using a black ink. I used Memento Tuxedo Black.
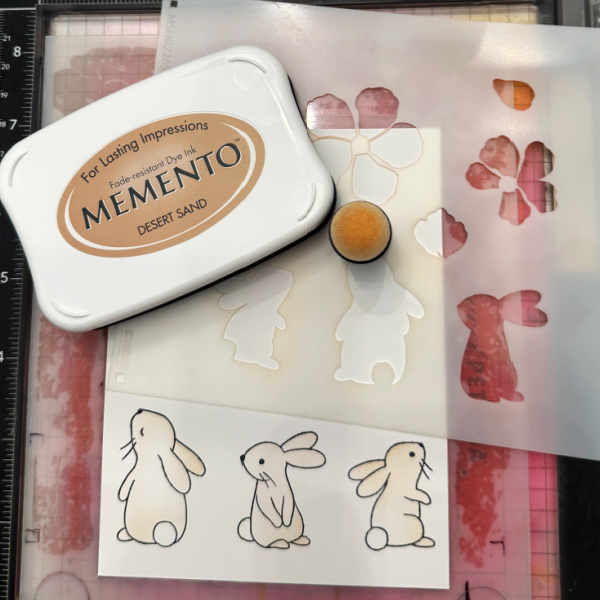
Step 4:
Using the coordinating stencil color the bunnies a light brown. I used Memento Desert Sand.

Step 5:
Cut a panel of light blue cardstock 5.25 x 4. Using a paint brush and a re-inker splatter the panel with a light blue ink. I used Memento Summer Sky.
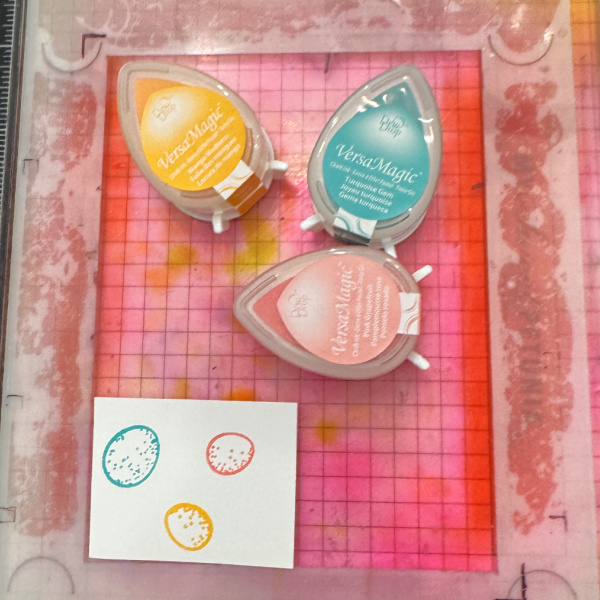
Step 6:
Stamp the eggs in colored inks. I used VersaMagic Mango Madness, Turquoise Gem and Pink Grapefruit.
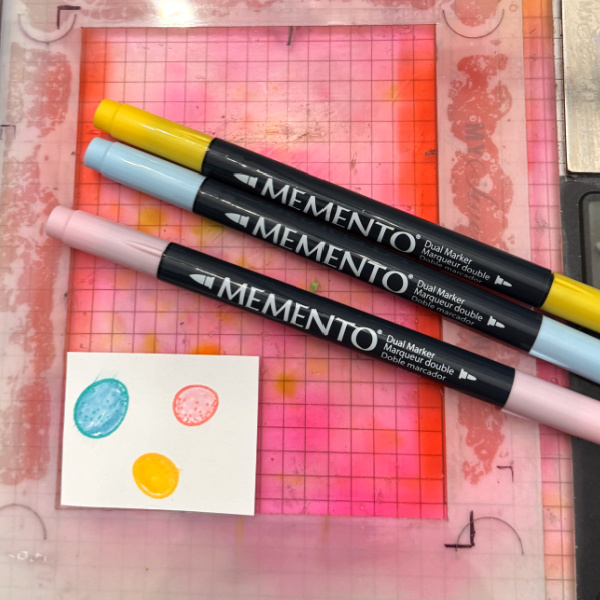
Step 7:
Color in the eggs with markers. I used Memento markers in Dandelion, Summer Sky and Angel Pink
Step 8:
Cut out all the elements and arrange them as you wish on the blue panel, stamp the greeting on the panel and then finish the card by adhering the panel to the base.
Craft Supplies:
Imagine Products:
• VersaMagic Dew Drops
– Red Magic
– Pink Grapefruit
– Mango Madness
– Turquoise Gem
– Tea Leaves
– Hint of Pesto
• Memento Markers
– Dandelion
– Pink Angel
– Summer Sky
• Memento Ink Pad
– Desert Sand
• Sponge Daubers
Other Products:
• My Monthly Hero February 2026 Kit – Hero Arts
• Sentiment – My Favorite Things \\\\