Rinea foil is a non porous surface that can be tricky to stamp on, however, with StazOn Pigment ink it’s a breeze! In my video today I am sharing two different ways you can achieve a tone-on-one stamping look with StazOn Pigment ink and Rinea foil!
Create amazing shiny elements for your scrapbook layout or cards using the range of beautiful Rinea foils. Combining these foils with inked backgrounds and coordinating focal elements you can create a feast of color and shine. I colored the beautiful heart image with Memento Dual Markers and added lots of shine with Imagine’s Sheer Shimmer spray.
Skill: Advanced Time: 1 hour
Directions
Step 1
Stamp heart image onto white cardstock using VersaFine Onyx Black.
Step 2
Use Memento markers in shades of yellow and gold to color in the heart.
Step 3
Once you are done coloring in, its time to add some shine. Fill an empty waterbrush with some Shimmer spray, then paint over the entire heart to add a nice thin shiny layer.
Step 4
Back Rinea foil with some double sided tape opposite side of the Rinea Foil. Leave the adhesive backing in place and emboss it with an embossing folder to add texture and pattern.
Step 5
Adhere the Rinea foil to the bottom of some patterned paper. (I actually made this patterned paper. Want to know how? Check it out here.) Add sewing detail where the two pieces meet.
Step 6
Add ink and paint splatters across the heart for a nice finishing touch. Then adhere the heart, stamped sentiment and some bling elements to finish off your card.
Today we are sharing how to create a fun birthday card with a cute piglet image using Memento inks and Fireworks Shimmery Craft Sprays. Did you know you don’t have to have a rainbow of expensive markers or watercolors to create a gorgeous colored scene? Using common craft supplies, I color this entire card without the help of a marker. I do use some beautiful silver Rinea paper along with my favorite Imagine and Tsukineko products to make this adorable birthday card that has a lot of dimension and shine!
There are many ways to create galaxy/night sky backgrounds for your cards. You can use ink blending, watercolor, ink smooshing, braying, and so much more. But did you know you can create galaxy and night sky backgrounds with embossing powder? It’s such a fast and easy way to get the galaxy look! I’m using a few of the new glittery Mboss Embossing Powders from Imagine to show you how to create your own backgrounds! I hope you all enjoy it!
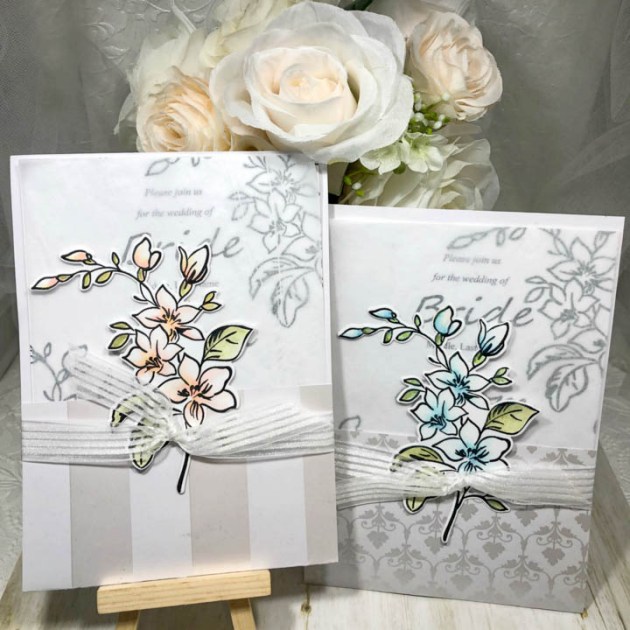
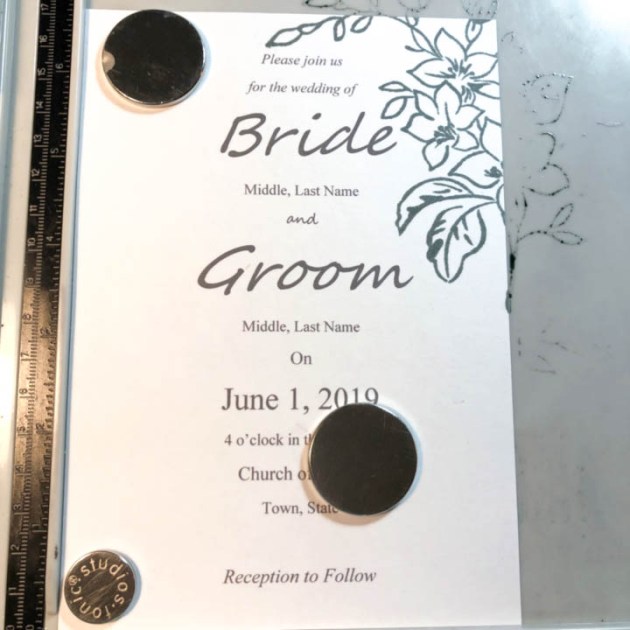
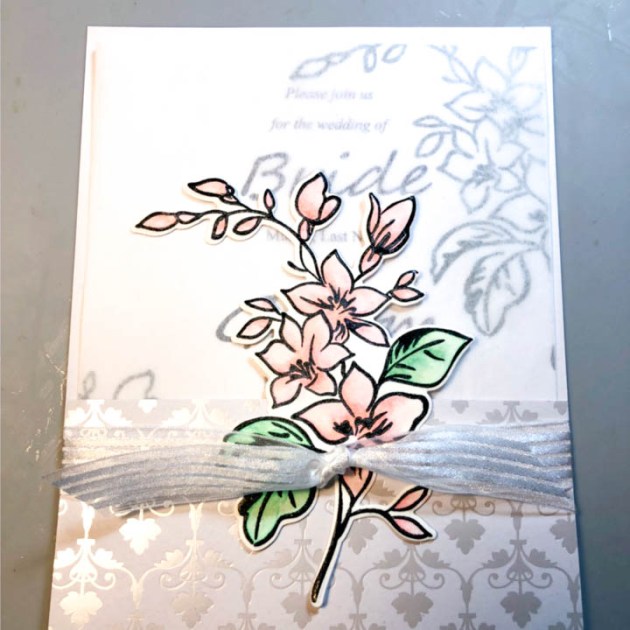
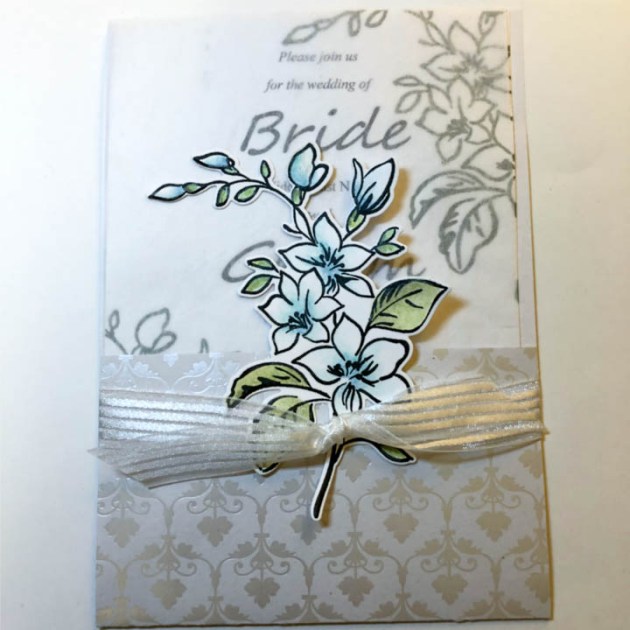
Did you know that, according to Wikipedia, there are 2.5 million weddings in the United States each year? Wow, who knew?! That means that there are a lot of individuals out there planning for their big day! It’s a good thing that this project is designed to inspire those planning for their special day to create quick, simple and elegant handmade wedding invitations.
Time: 30 minute Skill: Beginner/Intermediate
Directions
Step 1
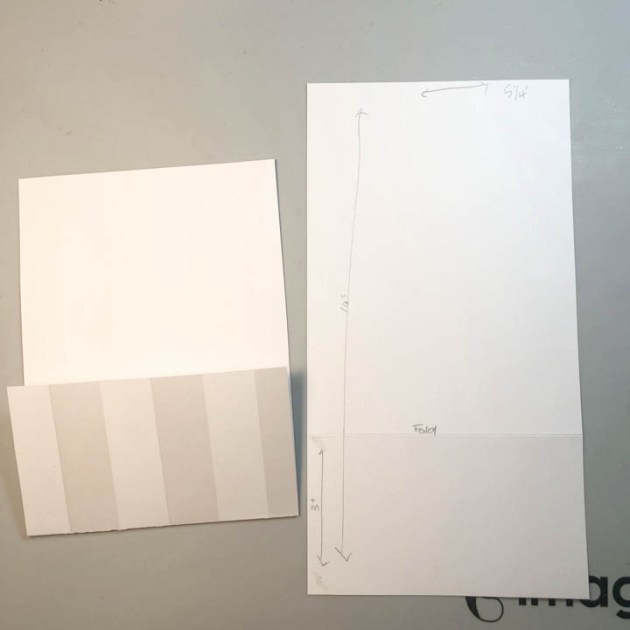
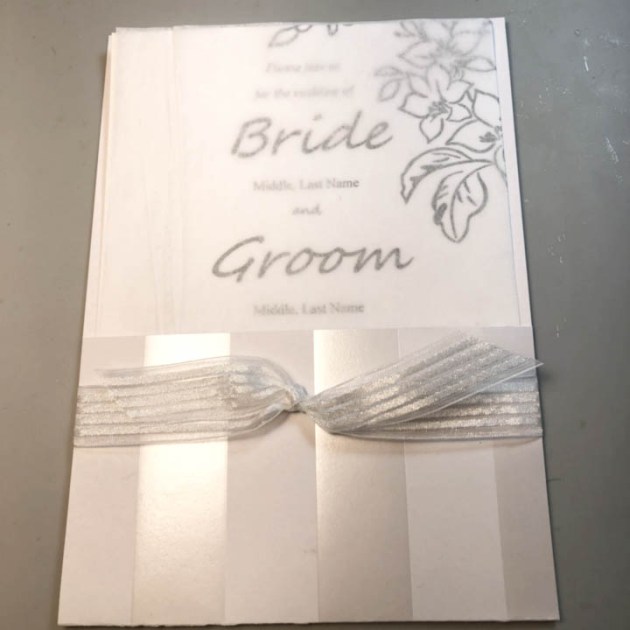
Cut a piece of decorative cardstock to size, 5 ¼” x 10”. Fold up at 3” from the bottom.
Step 2
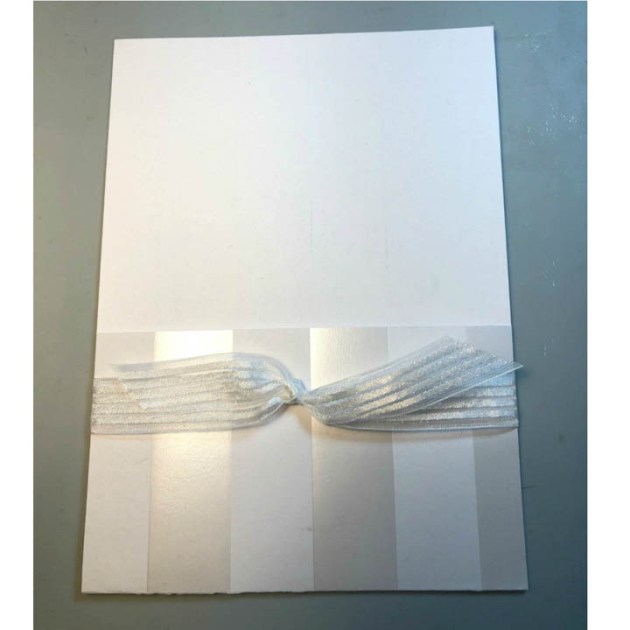
Tie sheer ribbon around the bottom portion of the folder.
Step 3
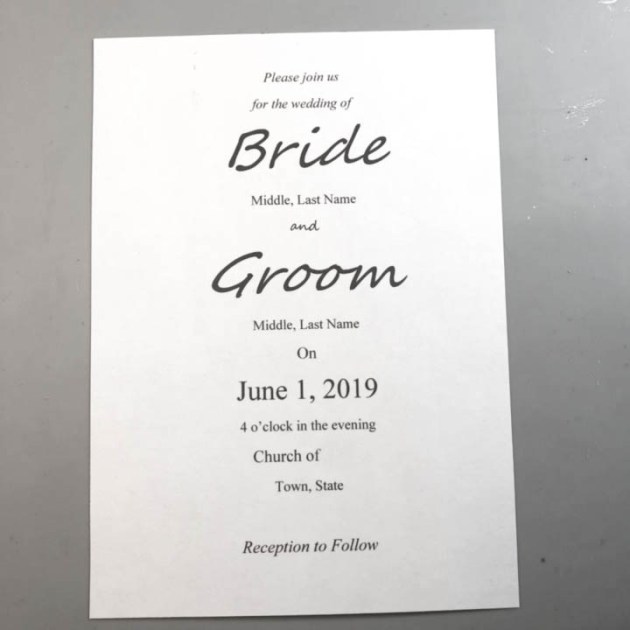
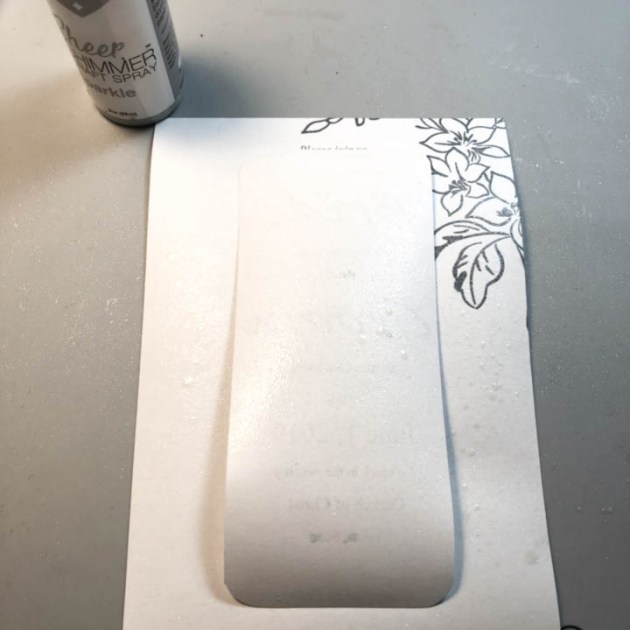
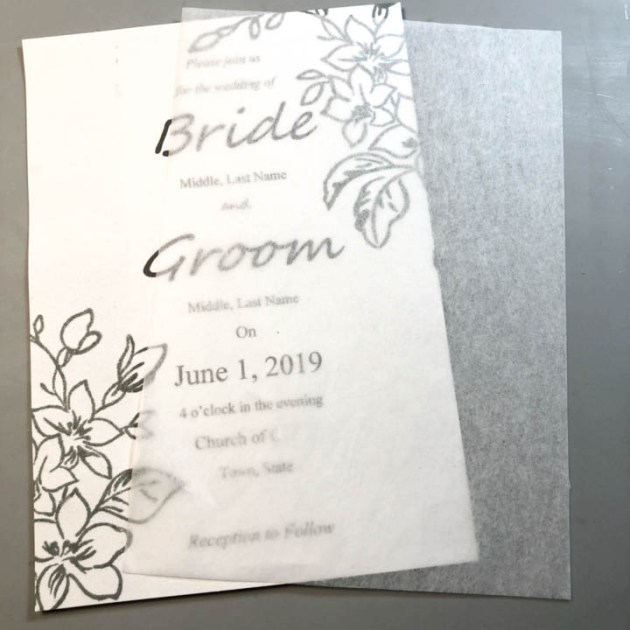
Print wedding announcement on a 5”x 7” piece of cardstock.
Step 4
Stamp floral image with Memento London Fog at top right and bottom left of invitation.
Step 5
Create a template to cover printed words and spray with Sheer Shimmer Craft Spray.
Step 6
Cut tissue paper to cover invitation.
Step 7
Slide invitation, with tissue cover, into the previously made folder.
Step 8
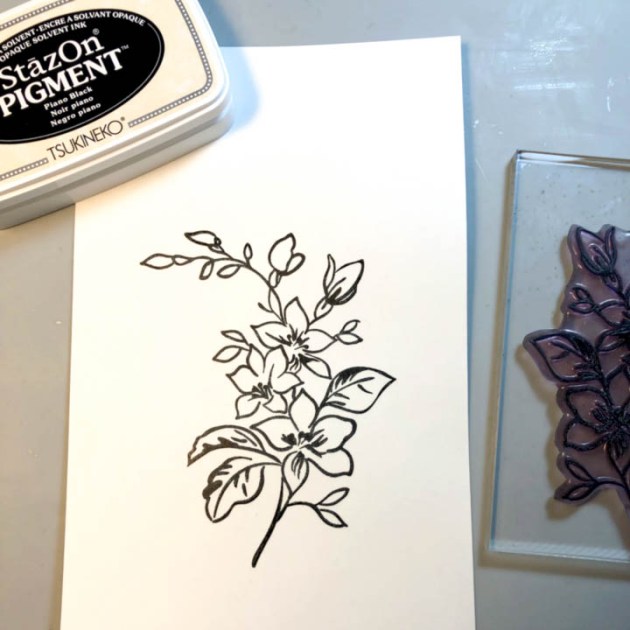
Stamp floral design on cardstock with StazOn Pigment ink in Piano Black.
Step 9
Using watercolor pen and VersaMagic ink, water-color floral image.
Step 10
With matching die, cut out floral image.
Step 11
Adhere to the bottom portion of folder front, see the example for placement. Try the same design in different color schemes.
Supplies
Imagine
VersaMagic Chalk Ink – Pink Grapefruit, Mango Madness, Tea Leaves, Hint of Pesto, Turquoise Gem, Ocean Depth, Cloud White