Shimmering Snowflakes Card with All-Purpose Inks

By Katy Ingram

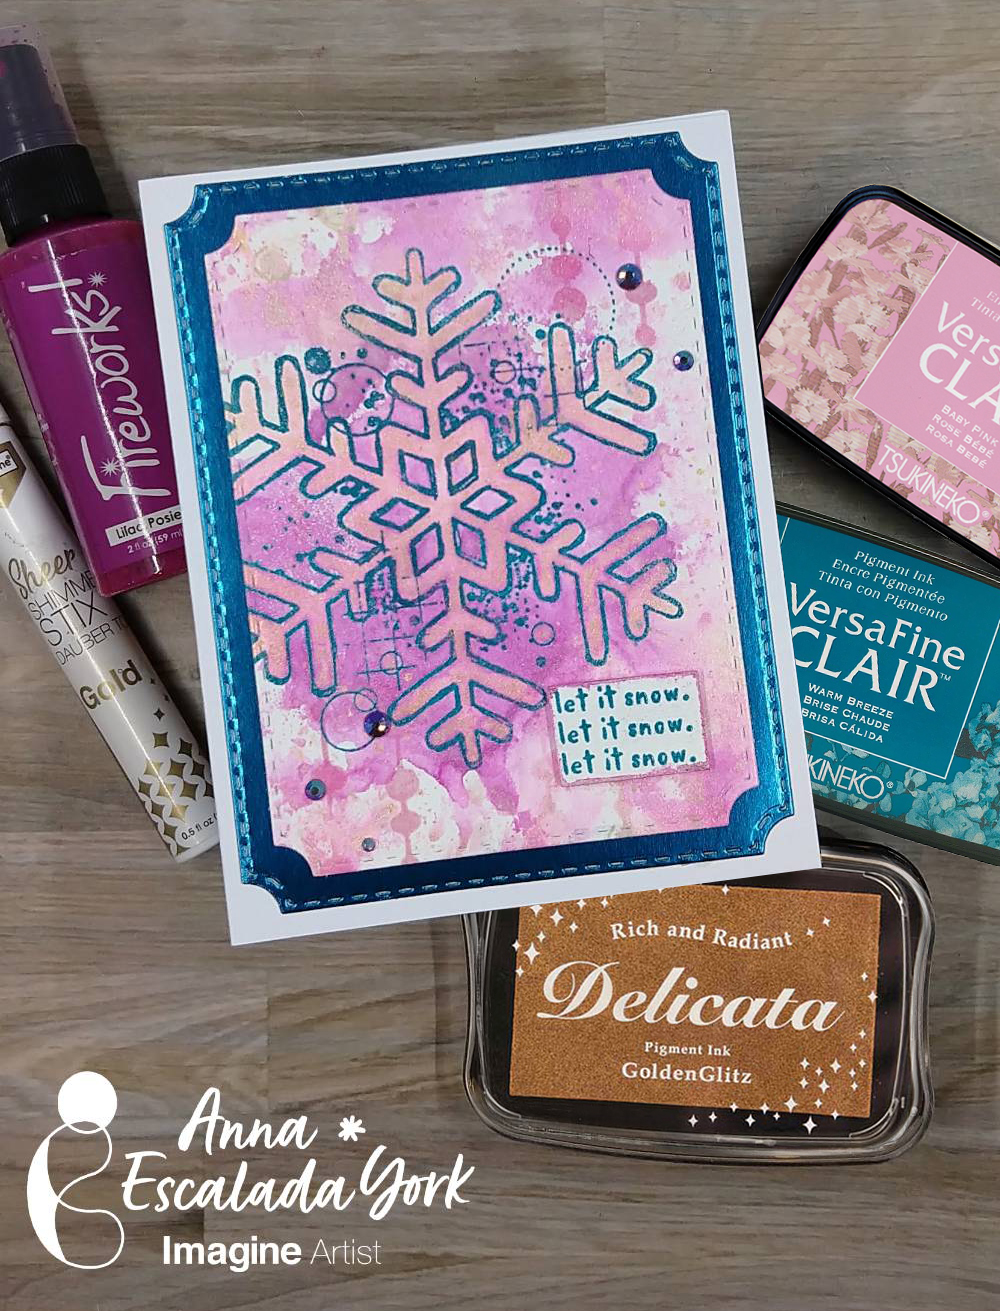
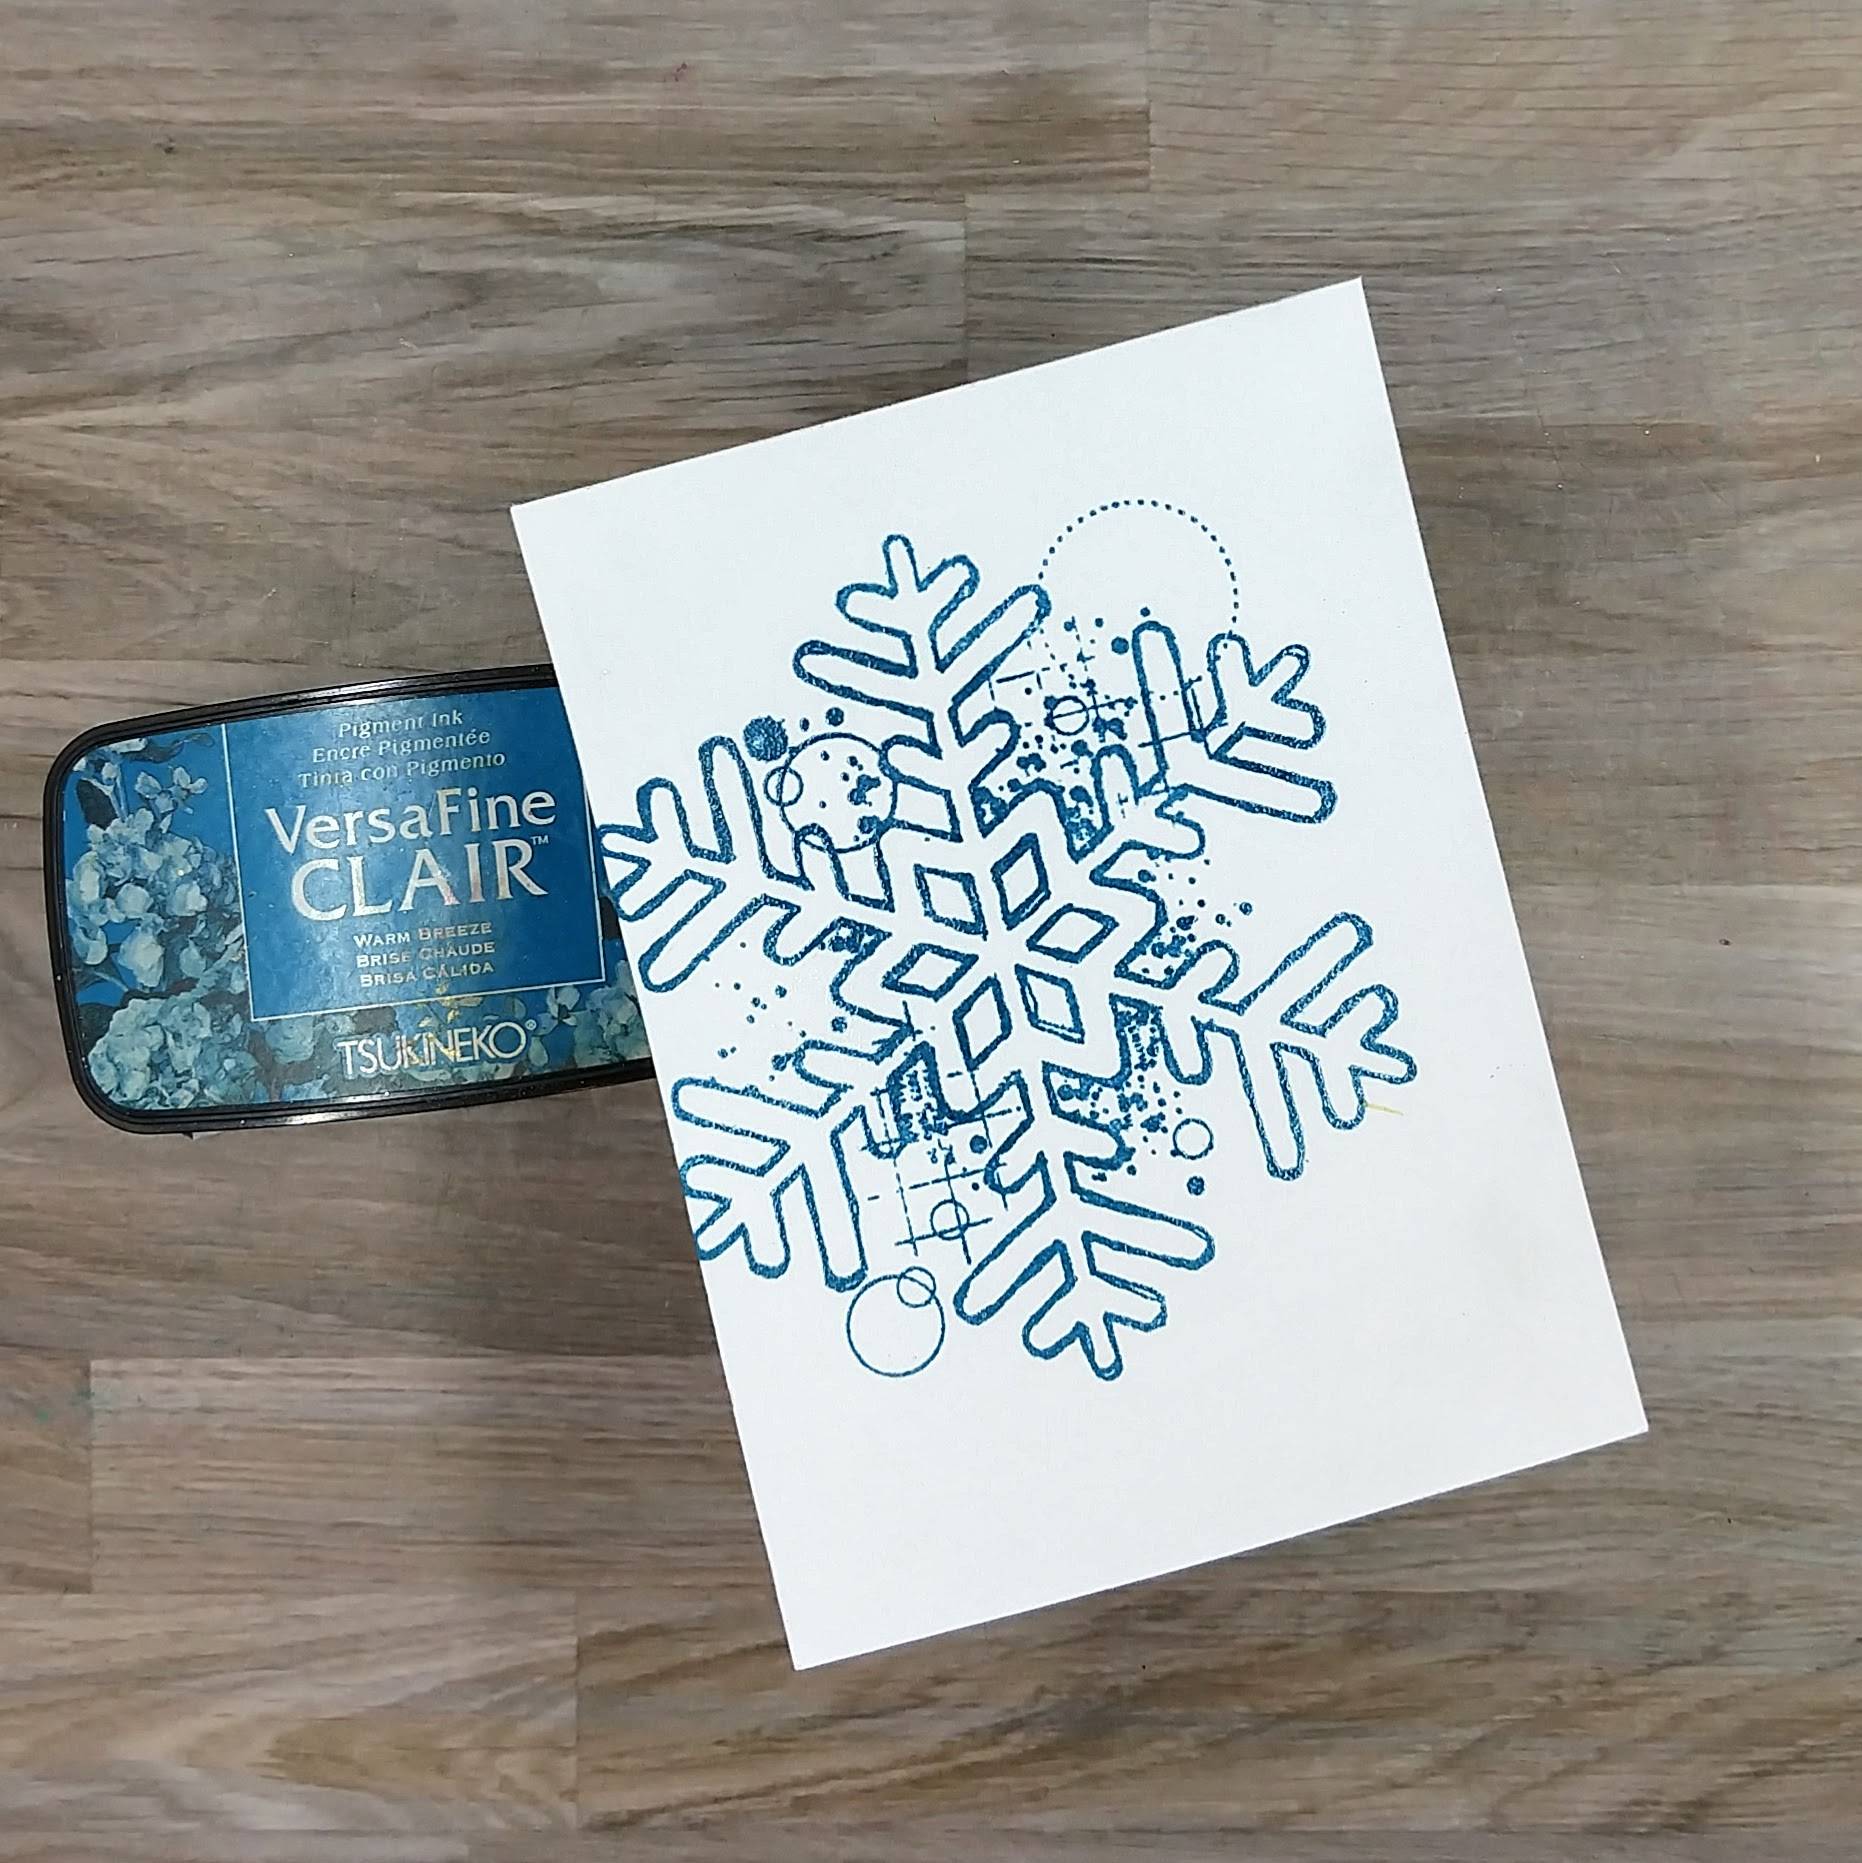
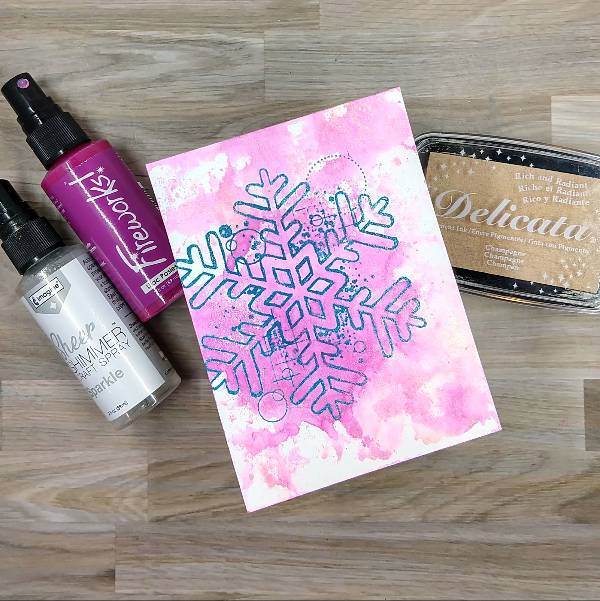
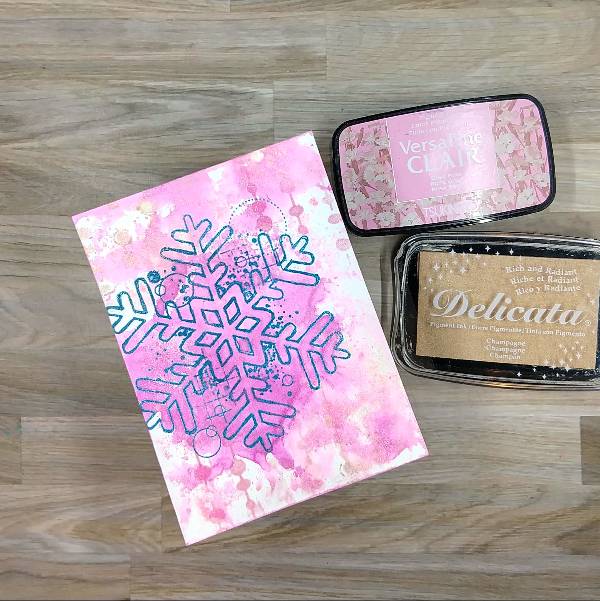
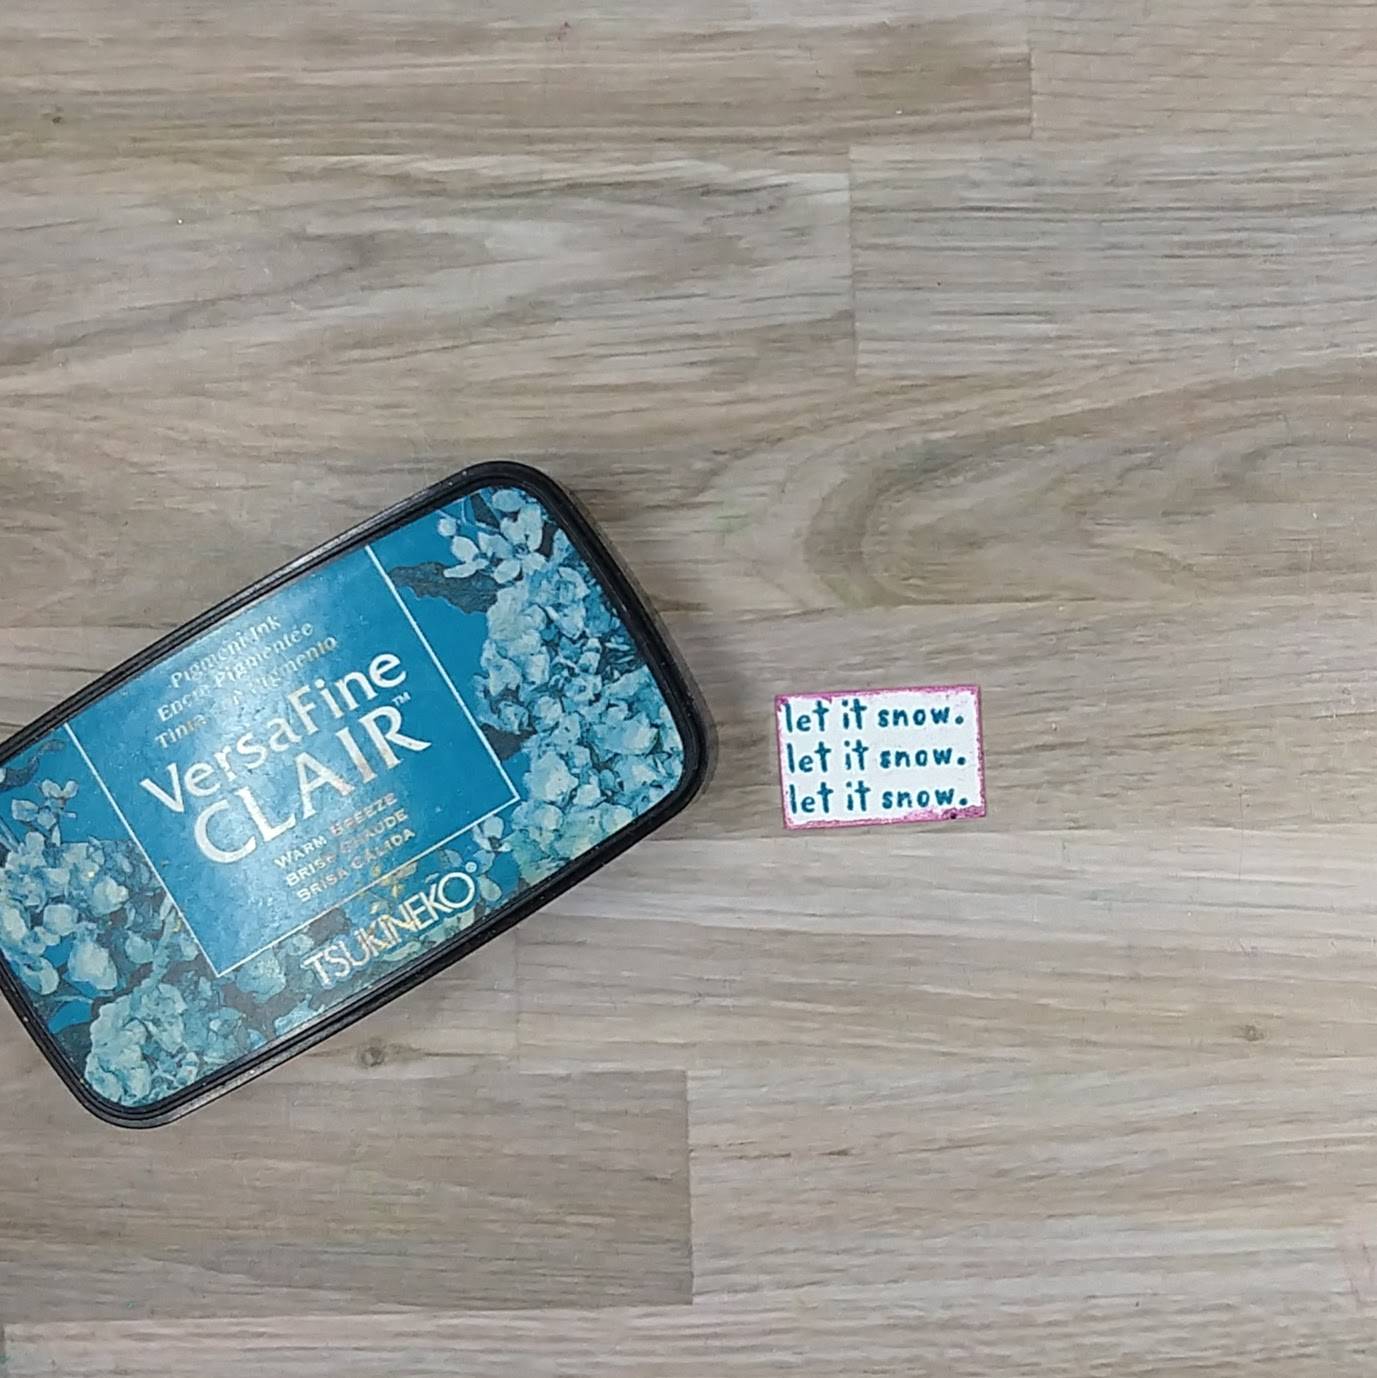
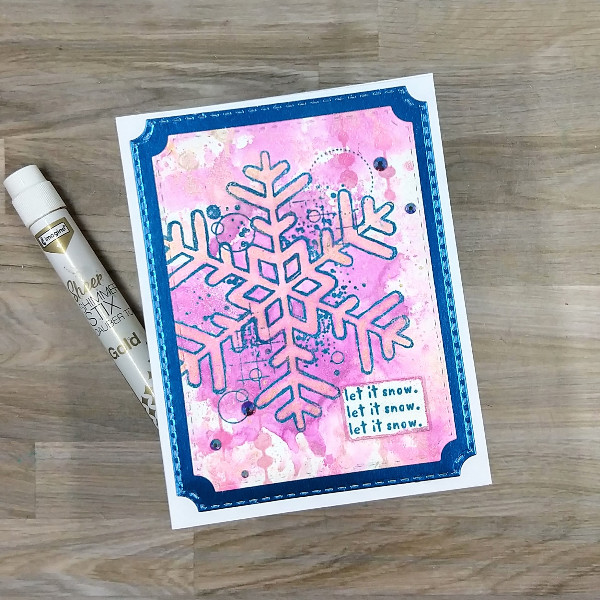
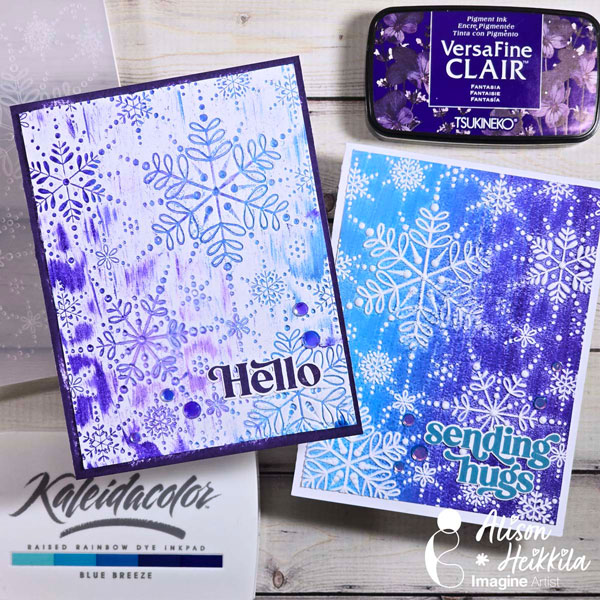
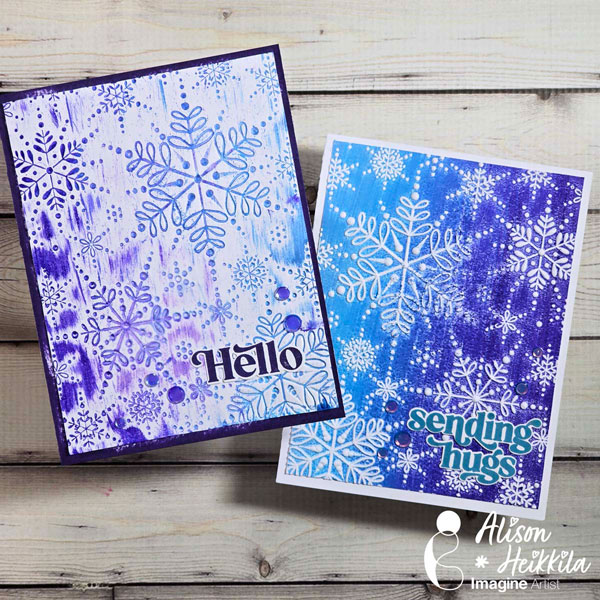
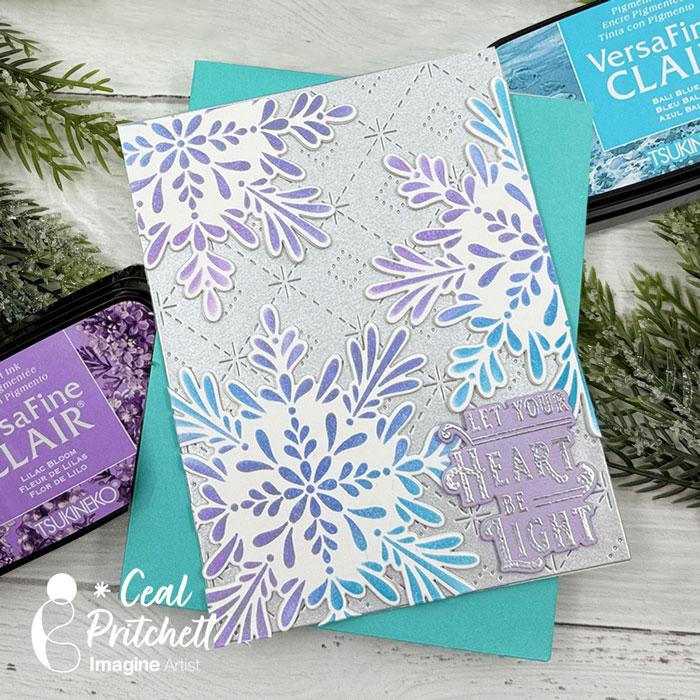
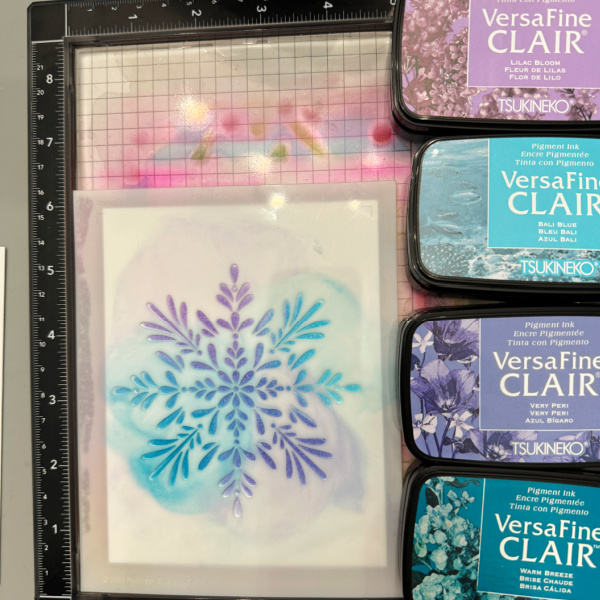
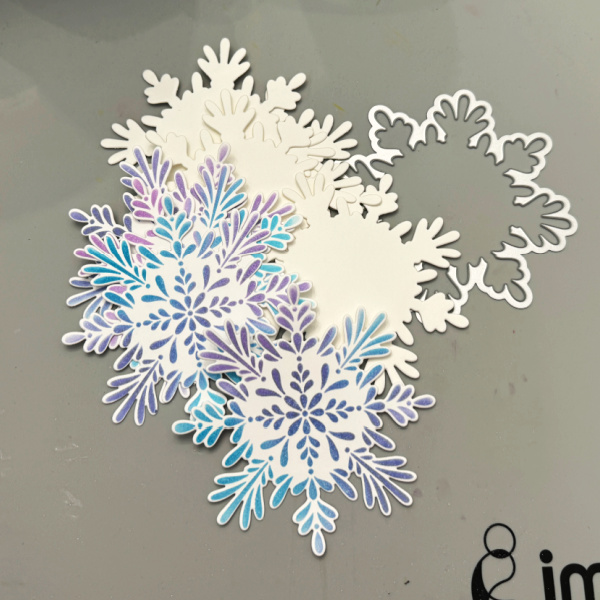
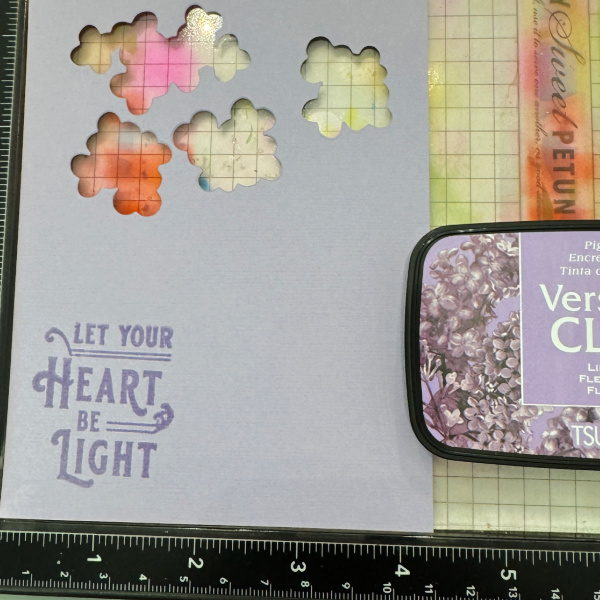
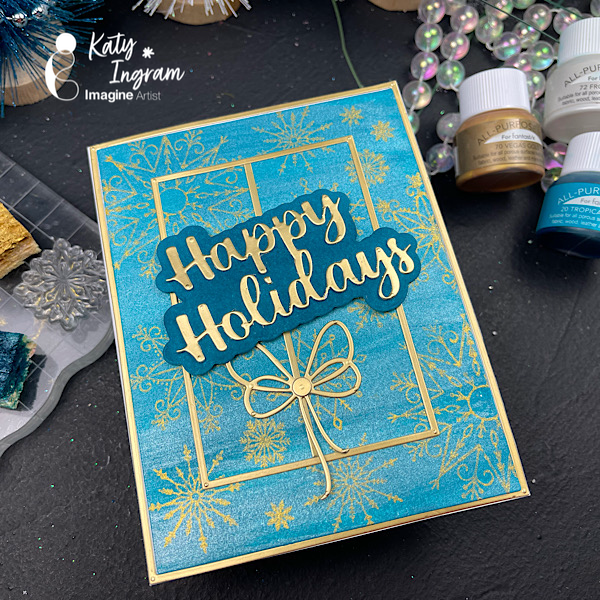
Hello Friends! Katy here with another quick project using All-Purpose Inks. I used my simple swiping technique for the background and then used Vegas Gold All-Purpose Ink to stamp my snowflakes.I kept things even simpler by using a kitchen sponge to ink up my stamps.

Video has all the details. Thanks for watching.

Skill: Beginner
Time: 15 minutes

Art Supplies

Imagine Products
• All-Purpose Ink Tropical Lagoon https://www.imaginecrafts.com/all-purpose-ink
• All-Purpose Ink Frost White https://www.imaginecrafts.com/all-purpose-ink
• All-Purpose Ink Vegas Gold https://www.imaginecrafts.com/all-purpose-ink

Other Products Used
• Affiiate links used at no additional cost to you. Thank you for your support
• Simon Says Stamp Snowflake Stamp Options https://ldli.co/e/1pldn15
• Thin Rectangle Frames https://ldli.co/e/6l92ryl
• Kitchen Sponge https://amzn.to/4f72Ka4
• Double Sided Adhesive 5 inch wide https://amzn.to/455H6OS
• Double Sided Adhesive 1/2 inch https://amzn.to/4m9cKlc
• Matte Gold Cardstock https://amzn.to/4f3H5zn
• Altenew Hot Press Watercolor Paper https://ldli.co/e/nqgeq6m

Let’s Make a Holiday Card!

By Anna Escalada York

It’s July, so bring on the holiday cards! I personally love non-traditional colored holiday cards and so created one in pink, blue and purple.

Skill: Intermediate
Time: 1.0 hour

Directions:

Step 1:
Stamp a large snowflake stamp on watercolor paper with Warm Breeze VersaFine Clair ink and heat emboss with clear embossing powder.

Step 2:
Watercolor smoosh the watercolor panel with alternating layers of Lilac Pansies Fireworks! Craft Spray and Champagne Delicata Ink mixed with Sparkle Sheer Shimmer Craft Spray on scrap acetate.

Step 3:
Ink blend a combination of Champagne Delicata Ink and

Step 4:
Stamp the sentiment on a small scrap of watercolor paper with more of the Warm Breeze VersaFine Clair ink. Heat emboss with more clear embossing powder. Trim the sentiment down to the desired size with scissors. Then press the edges of the sentiment strip into the remaining mix of colors from step 2’s watercolor smooshing to color the edges.

Steps 5 and 6:

Press the Gold Sheer Shimmer Stix Dauber Top onto another piece of scrap acetate to create a liquid gold medium. Watercolor the gold liquid inside the snowflake to make it shiny. Watercolor smoosh the remaining gold watercolor onto the card panel.

After everything dried, die cut the watercolor panel with the second-largest die from an A2-sized nesting die set and a piece of blue metallic cardstock with the largest die from the same

A2-sized die set. Glue both die cut layers together. Attach the sentiment with foam tape. Glue sequins around the snowflake. Finally, glue the whole thing onto an A2-sized white cardbase.

Art Supplies

Imagine
• Delicata ink – Champagne
• Fireworks! – Lilac Posies
• Sheer Shimmer Craft Spray – Sparkle
• Sheer Shimmer Stix Dauber Top – Gold
• VersaFine Clair ink – Baby Pink
• VersaFine Clair ink – Warm Breeze
• Sponge dauber

Other
• Altenew – foam tape
• Crafty Meraki – embellishments – Meraki Sparkle Prismatic Blue
• Idea-ology and Tim Holtz – 6 x 9 cardstock – blue (from the Metallic Colors collection)
• Pink and Main – die set – Notched Corners
Scrapbook.com – stencil – String Lights
• A2-sized white card base
• Clear Embossing Powder
• Watercolor paper
• Thin paint brush
• Die cutting machine
• Scissors
• Glue

2 Cards, 1 Embossing Folder with Kaleidacolor Inks

By Alison Heikkila

Hello! Alison Heikkila here. Let’s make 2 fun cards with 1 embossing folder and a Kaleidacolor Ink Pad lickety-split! This is so much fun, it’s perfect for beginners, and will work with pretty much any embossing folder you may have.

Skill Level: Beginner-Intermediate
Time to Complete: 10-15 Minutes

*Some affiliate links are used in this post. That means that if you shop through these links, I may receive a small compensation, at no cost to you.

Here is the YouTube video. If it doesn’t play properly, please click HERE.

Supplies:
Imagine:
Blue Breeze Kaleidacolor Inks
Fantasia VersaFine Clair Ink
Warm Breeze VersaFine Clair Ink
On Point Glue

Other:
Simon Says Stamp: Refined Snowflakes Embossing Folder
A Colorful Life Designs: Crystal Opaque Poseidon Card Bling (code AlFan10 to save 10%)
A Colorful Life Designs: Crystal Iris Skyline Card Bling (code AlFan10 to save 10%)
Pinkfresh Studio: Perfect Sentiment Stamp
Pinkfresh Studio: Perfect Sentiment Die
Accent Opaque: 100lb. White Cardstock
Scrapbook.com: Artis Craft Glue
Glassboard Studio: Color Burst Craft Mat (code ALISONHEIKKILA to save 15%)
Glassboard Studio: Trendy Color Pawn Magnets 8 Pack (code ALISONHEIKKILA to save 15%)

That’s it for me today. Thanks so much for stopping by. Have an inspiring day!

Let’s Make Elegant Holiday Cards

By Ceil Pritchett

Hello Crafty Friends. Today, I am sharing how to add dimension to your card using diecuts and VersaFine Clair Inks.

Skill Level: Beginner to Intermediate
Time: 30 to 45 Minutes

Directions:

Step 1:
Gather your supplies. You will need several colors of ink, a stencil, a background cover plate, and die cuts for your stenciled image. You will also need VersaMark ink and some clear embossing powder.

Step 2:
Using a grip mat or another sticky mat, lay your panel on the mat and cover with the stencil. Use several colors of ink to color the snowflake. Repeat this process 3 times.

Step 3:
Using the coordinating die, cut out all of the snowflakes you colored along with 6 others out of a heavyweight cardstock. Add the ones cut out of the heavyweight cardstock to the colored ones. This will give you dimension for the snowflakes and will still go through the mail without extra postage.

Step 4:
Stamp the sentiment in purple ink and emboss it with clear powder. For my sample I decided to go with embossing it with silver powder on purple cardstock.

Create a background by using a cover plate die.

Assemble your card.

I created a second card with the left-over pieces.

Craft Supplies:

Imagine products:
VersaFine Clair – Bali Blue, Warm Breeze, Lilac Bloom and Very Peri
VersaMark
On Point Glue

Other products:
Neenah Classic Crest Solar White 120lb – CutCardStock
Neenah Classic Crest Solar White 80lb – CutCardStock
Stardream Silver Metallic 105lb – CutCardStock
Radiating Snowflake Stencil – PinkFresh Studio
Radiating Snowflake Die – PinkFresh Studio
Holiday Greeting Sentiments – PinkFresh Studio
Cover plate die – PinkFresh Studio
Merry Die –  Kristina Werner C9

Create Elegant Winter Snowflakes Cards

By Ceal Pritchett

Hello crafty friends!

It’s Ceal, here. Today I am sharing my first post as an Imagine Artist In Residence.  I am so excited to be a part of the Imagine team. I love all things snow related and with the groundhog not seeing his shadow and predicting an early spring, I had to make a couple more winter cards.

Here are the supplies I used:

Skill: Intermediate to Advanced.
Time: 45 mins

Directions:

Step 1
Stamp the snowflake with VersaMark ink onto a piece of white cardstock cut to 4.25″ x 5.5″ .
Emboss the snowflake with MBoss Sparkle embossing powder.

Step 2
Using a Sponge Dauber, Ink blend over it with Brilliance Pearlescent Purple Ink

Step 3
With a die cutting machine, run the snowflake cover plate through.

Step 4
Cut a piece of amethyst cardstock to 4.25” x 5.5” to back the snowflake cover plate.

Step 5
To make the snowflake more dimensional place foam adhesive dots in between the two snowflakes
Tip: Apply a little On Point glue to each foam dot to allow you to move it as needed.

Step 6
Stamp and die cut the sentiment and add it to the card front.

Step 7
Using On Point Glue, layer and glue all the pieces together.

I made a second card using Mboss Hologram and silver foil paper with the same design.

Crafting Supplies

Imagine :
VersaMark Ink Embossing
VersaFine Clair  – Nocturne
Mboss –  Sparkle, Hologram
Brilliance  – Pearlescent Purple ink
On Point Glue
Sponge Daubers
Craft Mat

Other Supplies:
Misti 2.0
Neenah 110lb Solar White cardbase
Neenah 80lb Solar White
Lessebo Amethyst Cardstock
Silver Foil Cardstock
Pinkfresh Studio: Folk Snowflake
Pinkfresh Studio: Folk Snowflake Coordinating Cuts
Pinkfresh Studio: Snowflakes Coverplate die

Learn to Make a “Season’s Greetings” Holiday Card 

By Annie Collins –

Hello Crafty Friends – 

Annie here with a Holiday card made using MBoss and VersaMagic Ink.

Supplies Used:

Imagine:

Mboss Embossing Powder: Shimmering Night Sky

VersaMark Ink

VersaMagic Ink: Sea Breeze, Aspen Mist, & Aegean Blue

Sponge Dauber

Tear It! Tape

On Point Glue

Craft Mat

Other Supplies:

Brutus Monroe: Let It Snow Stamp Set

Brutus Monroe: Mixed Media Stencil 6×6: Snowfall

Recollections brand 110lb Cardstock: White

Recollections Brand 65lb Cardstock: Light Blue

Sequins – Blues & Clear