April Color of the Month is Mango!

Mango is April's Color of the Month 2018

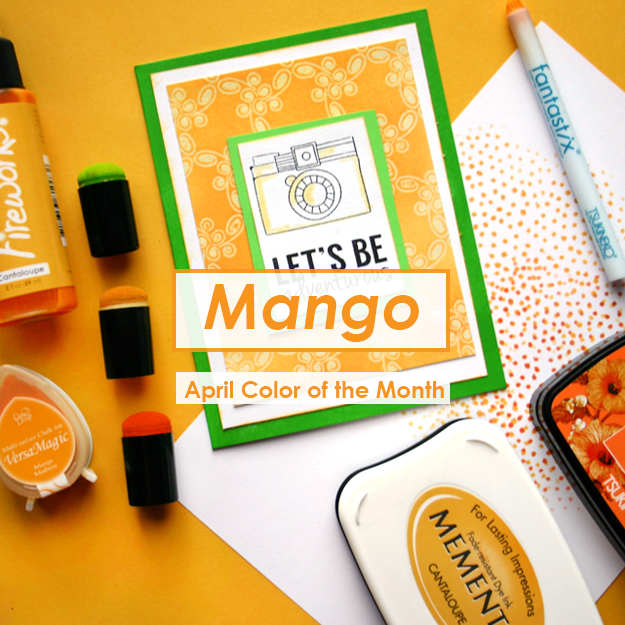
Mango is not only a delicious fruit, it is also a beautiful color! Every month we challenge our Artists in Residence with a couple of different ideas or themes to push them to think outside the box, to try a technique they haven’t tried before and to give flow and continuity to the projects. This month our color is Mango which we consider a soft yellow-orange. We chose it to get us in the mood for summer! This color reminds us of fruit, flowers, the warming sun, and fun-in-the-sun activities. Another challenge we offered to our artists is to use VersaMagic ink. This chalk-like finish makes this ink a delight to work with on almost any crafting project.

Here is a sneak peak for the month of April

Elina Stromberg created this lovely “Hello” greeting card using Memento dye inks in Cantaloupe.

Iris Rodriguez created this “Hello” greeting card with a flowering tree using VersaMagic Mango Madness, Thatched Straw, and Aegean Blue

Roni Johnson created this “Keep on Swimmin” encouragement card using VersaMagic in Mango Madness with some shading using Memento Dual Tip Markers.

Keep an eye on our posts this month to see these and many more tutorials in this fabulous color!

Product Release: Inkpad Personality Kit

Announcing the Inkpad Personality Kit!

Do your inkpads seem to speak to you every time you walk by your crafting space? We know what it means to become attached to certain inks. At times, it even seems the inkpads develop their own personality. Knowing this inspired us to develop the Inkpad Personality Kit™ to fill this void in the industry. If you feel that your inkpads have eyes…then why not give them some?!

All eyes on your little Angel! Give Memento Angel Pink a sweet smile to match!

Do you have an inkpad that is considered your bestie? We recommend the fun lets-go-get-drinks-after-work smile!

How about a bright green that is insistent you use it in every project. You can tell VersaFine Verdant to let the other inkpads have a turn!

How about Memento Sweet Plum who can always make you giggle with delight?!

Happy April Fool’s Day!!

If you have not figured it out by now… this is not a real product release! But what if it was?! Would you buy your inkpad a personality kit? Ha! In-house designer Marcie claims that Memento Bahama Blue makes its way into almost all of her projects at home and definitely plans to deck out her inkpads. She is even considering getting her inkpads their own dollhouse! Marketing Manager Amanda thinks VersaFine Clair Nocturne is the bees knees and winks at it every time she uses it. She’s super excited to have him wink back now! Bwahaha!


Create an Ultraviolet Mother’s Day Hugs Card

by Roni Johnson

Create an Ultraviolet Mother’s Day Hugs Card

When I found out the color of the month for March would be Ultraviolet I was so excited. I wanted to get a jump start on upcoming holiday cards and I KNEW this would be the perfect time to make a Mother’s Day card for my mom. She LOVES purple! So much so that she has purple highlights in her hair. Yes, you read that correctly! My mom who is in her 7th decade of life is a bit on the wild side so this card will fit her perfectly.

Skill: Intermediate
Time: 25 Minutes

Directions

Stamp with Radiant Neon Electric Purple.
Step 1

Place a piece of white cardstock in a stamp positioning tool. Stamp the marble background with Radiant Neon Electric Purple.


the marble stamp with VersaColor Neptune Ink
Step 2

Apply ink to some areas of the marble stamp with VersaColor Neptune Ink using a sponge dauber to create depth in the marble pattern and stamp again.


Step 3

Sprinkle Imagine’s Embossing Powder in Sparkle over the image. Shake off excess and heat to melt the powder.


Step 4

Spread an even layer of Iridescent Purple Creative Medium over a 5 ½” x 8 ¼” piece of black cardstock using a palette knife. Set aside to dry.


Step 5

Die cut the “Hugs” sentiment from the center of the marbled panel, then die cut a frame from the edge of the panel.


Step 6

Adhere the black Creative Medium panel onto a purple card base; mount the frame to the card using Tear It Tape. Mount the sentiment panel to the card base using double stick foam tape.


Step 7

Die cut fishtail banner from white cardstock. Stamp sentiment on the banner using VersaColor Neptune ink. Adhere to the card. Die cut “big” from a scrap of the Creative Medium cardstock and adhere using On Point Glue.

Supplies

Imagine
Other
  • MFT Stamps – Bottle Cap Alphabet; Fishtail Banner; Stitched Frame, “HUGS”, Marble Background Stamp
  • Double Stick Tape
  • Cardstock
  • My Sweet Petunia – MISTI Stamping Tool
  • Heat tool

How To Paint With Versafine Clair

by Jennifer Vanderbeek

How To Paint a Desert Scene With Versafine Clair

VersaFine Clair is great for using with wet mediums because it’s oil-based formula won’t interact with paints or sprays. But I also wondered what else I could do with this very versatile ink. I discovered that VersaFine Clair’s quick-drying formulation makes for a wonderful, texture-rich dry brush effect when combined with Fantastix and that, while you can’t make a fluid medium with it and water-based thinners, a little bit of added oil will work! I had a lot of fun reaching beyond traditional techniques to create my “painted desert” scene.

Skill: Intermediate
Time: 1 hour

Supplies

Imagine
Other
  • Canson – Hot Press Watercolor Paper
  • Hero Arts – Stamp Your Own Cactus
  • Acrylic Blocks
  • Fiskars – Paper Trimmer, Scissors
  • Olive Oil
  • Helmar – ZapDots

Make a Purple “Good Vibes” Shimmery Greeting Card

by Jowilna Nolte

Make a Purple "Good Vibes" Shimmery Greeting Card

Creating subtle interest on cards and other projects is easy with the amazing products from Imagine and Tsukineko. I have been experimenting and creating purple background ombre effects using VersaFine Clair and Memento Luxe ink pads as well as some older favorites like Creative Medium and All-Purpose Inks. Take a look at how to make this card.

Skill: Beginner
Time: 30 minutes

Directions


Step 1

Use a jumbo dauber and blend a pattern through a stencil using Memento Luxe Sweet Plum.


Step 2

Continue the same pattern using a darker shade of ink like Memento Luxe Elderberry.


Step 3

The blending creates a perfect ombre effect going from light to dark. Did you know that Memento Luxe has superior blending qualities? It makes for the most amazing blended effects with its creamy effortless application.


Step 4

Add a slight shimmer to the blended effect by adding Creative Medium in Shimmer over the blended pattern.


Step 5

To create a shade of purple, mix a couple of drops of All-Purpose Ink in Orchid Odyssey into the Creative Medium.


Step 6

Paint the colored Creative Medium over the pattern and leave to dry. The end result is a subtle shade of purple removing the bright white background, but also adding a beautiful shimmer to the card.


Step 7

Use VersaFine Clair Monarch and stamp the “Good Vibes” sentiment onto white cardstock and cut it out.


Step 8

Stamp the sentiment again but directly onto the stenciled background and sprinkle with glitter embossing powder. Heat set the embossing powder to give a beautiful shimmering sentiment on the shimmering background.


Step 9

Layer the stamped sentiment slightly off-set from the embossed sentiment onto the card using foam tape for added dimension. The embossed sentiment below makes the stamped sentiment really stand out and creates loads of interest. Add irRESISTible Neon Purple splats to finish off your card.

Supplies

Imagine
Other
  • Cardstock – White
  • Kaisercraft – Good Vibes stamp
  • Sewing machine
  • Jowilna Nolte – stencil
  • Embossing Powder
  • Heat Gun
  • Paintbrushes
  • Palette
  • Pipette

How to Make Fun Shapes with Radiant Neon Amplify

by Arjita Sepaha Singh

I wanted to try the Radiant Neon Amplify Texture to create fun shapes for kids and decided to use stamps as well as some free hand skills. I stamped an egg, a strawberry, the moon and others with a light colored ink and then covered the stamp with a layer of various Amplify colors. Always preheat the heat tool before applying heat to the Amplify. This puffs the pigments quickly. Always clean the nozzle and cap the bottle after use.

Skill: Intermediate
Time: 1 hour +

Supplies

Imagine
Other
  • Heat gun
  • White Card Tags
  • Acrylic Block