Learn to Make DIY Wedding Thank You Notes with Embossing

by Melissa Andrew

Learn to Make DIY Wedding Thank You Notes with Flower stamp and Gold Embossing

In today’s simple DIY, I show you how to create simple, elegant wedding Thank You notes. It’s always important to thank your guests and making your own beautiful thank you notes adds an extra special touch. You don’t need a lot of expensive products, and this tutorial takes no time! You can also customize these notes based on your own taste and style.

Skill: Beginner
Time: 20 minutes

Directions

Supplies

Imagine

Embossing Powder – Gold
VersaMark Inkpad
VersaMarker 
Tear It! Tape
Imagine Craft Mat
Large Dauber
InkBlusher 

Other

• SugarPea Designs Stamp Set
• White Card Stock
• Paper Trimmer
• Heat Tool
• Acrylic block or stamping platform

Learn to Make DIY Wedding Invites with Delicata

by Melissa Andrew

Learn to Make DIY Wedding Invites with Delicata

Hello! Today, I have a very simple and easy do-it-yourself Wedding Invitation. I will teach you, how with very few products, you can get a professional wedding invitation that can be customized for your own taste. No matter the theme, or wedding colors you choose, you can design your own wedding invitations.

Skill: Beginner
Time: 15 minutes

Directions

Supplies

Imagine
Other
  • Gina K Stamp Set
  • White Card Stock
  • Sheer Ribbon
  • Color Printer
  • Paper Trimmer
  • Acrylic Block

Learn How To Create A DIY White Wedding Invitation With Texture

by Martha Lucia Gomez

Hello everyone, today I have a quick and elegant card. This technique would be perfect for a wedding invitation. I create the shimmer and texture using the new Sheer Shimmer Stix in Frost and an embossing folder. The base of my card is Whisper White cardstock and I cut a second layer using the same color of cardstock, but apply the shimmer-texture technique for a very cool tone on tone look.

Skill: Beginner
Time: 30 minutes

Directions


Step 1

Determine the area that you want to paint and add texture. I used post it tape to obtain a straight line.


Step 2

Evenly apply the Sheer Shimmer Frost with the Stix Dauber. Let the paper dry naturally, it takes a few seconds only.


Step 3

Without removing the post it tape, take an embossing folder of your preference and align the borders to only emboss the painted area. Pass the sandwich through your cutting machine.


Step 4

Remove the post it tape and stamp your message on the upper area. I used VersaMark and embossing powder in Gold to stamp my message. It is an image included on the stamp set Happily Ever After from The Rabbit Hole Designs.


Step 5

Resize your layer and paste it directly over the card base. If you want to add more decorations or details you can do it before to paste the decorated layer on to the card base.

Supplies

Imagine
Other
  • Card Stock – Whisper White
  • Embossing Folder
  • Die Cutting Machine
  • Post it Tape
  • The Rabbit Hole Designs – Happily Ever After Stamp Set

Learn How to Make a Clear Wedding Invitation

by Lindsay Adreon

2019_April_LA_ClearInvitation_72PPI

Wedding invitation styles are constantly changing and updating and recently on Pinterest I have seen some beautiful CLEAR invitations using acrylic sheets. I wanted to find a DIY to make clear invitations and still have them be very elegant. I used StazOn Pigment Ink and a Marble stamp layering stamp set to get the look I was going for, and it was easier than I thought to create these see-through translucent invitations!

Skill: Advanced
Time: 15 minutes for each

Directions

Supplies

Imagine
Other

How To Make Easy Wedding Invitations

by Nadine Carlier

Wedding Invites by Nadine Carlier ic

Wedding invitations can be expensive!  But with Delicata Inks and a pretty layered flower stamp, you can create some inexpensive invitations that are not only pretty but they are also easy to make. Find out how by watching my video below.

Skill: Intermediate
Time: 10 minutes per card

Supplies

Imagine
Other

Visit our YouTube Channel for more inspirational videos and subscribe. Make sure to click the bell to get updates when we post new videos.

See How To Make A Birthday Card With A Dynamic Look

by Elina Stromberg

See How To Make A Birthday Card With A Dynamic Look

This card project is a playful combination of two very different design elements; a simple white graphical front and a rich bright colorful background. This design idea can be used for various card projects of different sizes and shapes; this background looks as great on a large square card as on a small ATC. For the background use your favorite colors and color combinations and add additional layers with stamps and stencils. The graphical white card front will calm down even the busiest color burst background making the result look elegant and beautiful.

Skill: Beginner
Time: 2 hours + drying time

Direction


Step 1

Trim a panel from white cardstock. The size should be slightly smaller than your card base (approx. 0.25 inch smaller on all edges). Place the panel on your craft mat, backside up. Using a pencil and a ruler trace a border around the edges. Trace a few straight lines across the panel, letting the lines cross. Decide on the placement of the solid front label that will be the base for the stamped sentiment. Mark the label area clearly so that it will be left uncut.

Step 2

Place the front panel on a cutting mat. Using a craft knife and a ruler cut out the areas inside the crossing lines. Leave a thin border on both sides of the lines. Do not cut into the solid label area.


Step 3

Mist a piece of white heavy watercolor paper with water. Use your craft mat as a palette: Remove the nozzle from the Fireworks mist, pour a drop of color on the craft mat and apply color on the paper using a brush. Add drops of another matching color either with a brush or with the nozzle. Mix colors using both water and a brush, let dry before adding more layers of color.

Step 4

When finished with painting splash the paper with clear water. Let water react with the colors for a few seconds and lift off excess by pressing the paper with a paper towel. Let dry completely and trim to size of your white card front.

Step  5

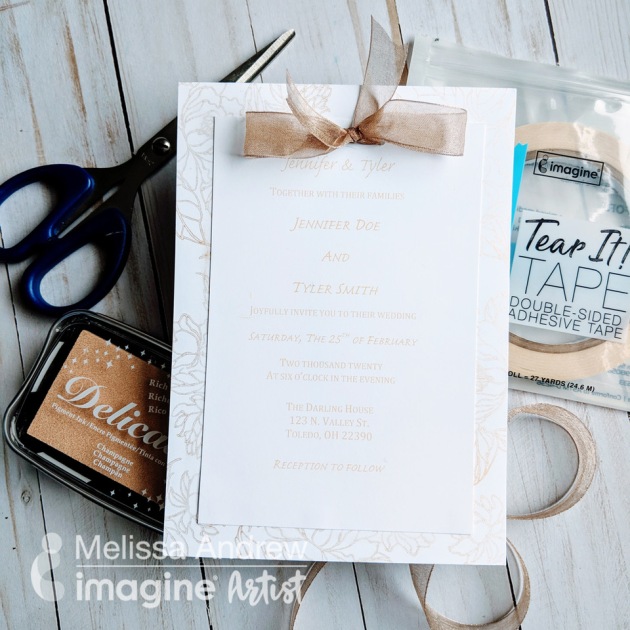
Using one or two ink colors stamp the sentiment text on the card front.

Step 6

Assemble the card by first gluing the white card front on the colorful background and then attaching the entire front panel on the card base.


Extra Tip:

When coloring a card background I often use a paper slightly larger than my finished project. After trimming the panel to the final size I keep the colorful leftover pieces and use them for decorating the inside of the card. This way I’m continuing the same color and/or pattern theme on the inside of the card!

Supplies

Imagine

Other

  • White cardstock
  • White heavy watercolor paper
  • Solid color card base
  • Pencil
  • Ruler
  • Watercolor brush
  • Craft knife
  • Cutting mat
  • Paper trimmer
  • Glue
  • Double-sided tape
  • Ali Edwards – ‘Hello Birthday’ Stamp