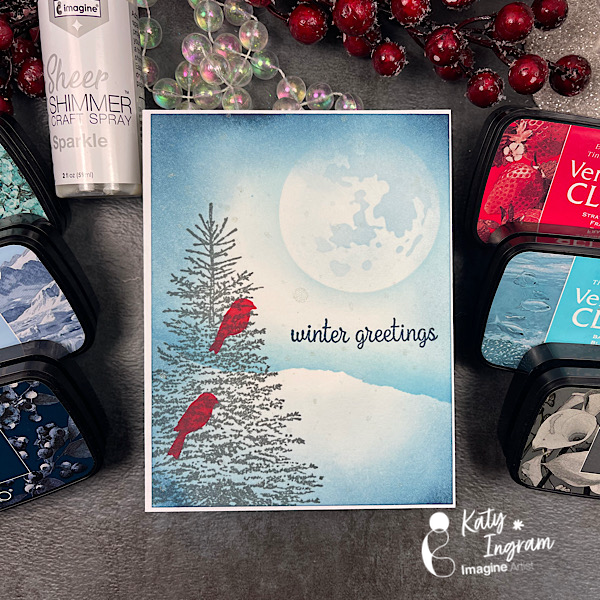
Hello Friends! Katy here with my latest video using a color palette of blue and gray VersaFine Clair inks to create a simple winter scene. This design is great for winter birthday cards or simple greetings. Video has all the details. Thanks for watching.
Strathmore 500 Series Hot Pressed Watercolor Paper 100 lb Cardstock Penny Black Winter Tree Stamp Penny Black Seasons Marvel Stamp Set Hero Arts CM308 Stacking Snowflakes Blending Brushes Tim Holtz Moon Mask
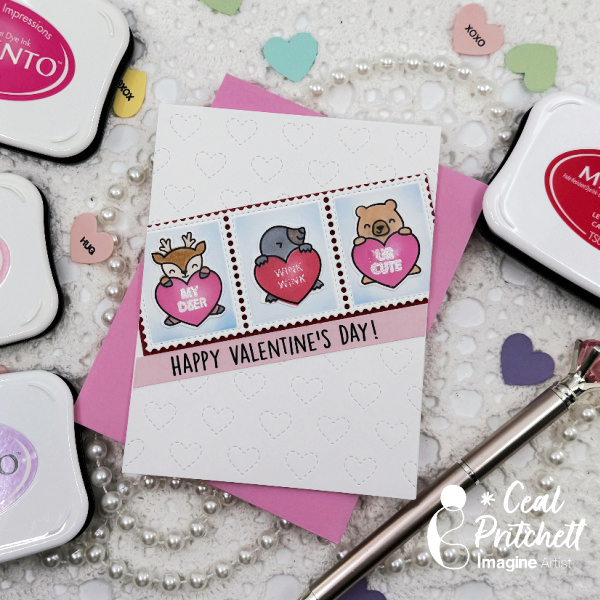
Hello everyone! Today I am sharing how I made this filmstrip valentines card using some Memento inks.
Skill: Intermediate Time: 1 hour
Directions:
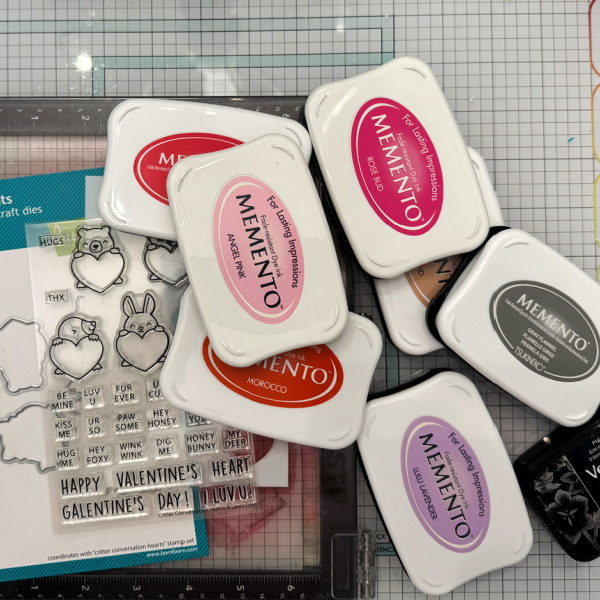
Gather your supplies. To make this card, you will need a valentines set (preferably with small images to fit in the film strip), a film/postage strip die, and sereral colors of ink.
I started with a white top folding A2 card base and a white panel for the images. I used a set from Lawn Fawn that has coordinating stamp, coloring stencils and dies. I used Memento inks in several colors to color the images and a stamp/film strip die.
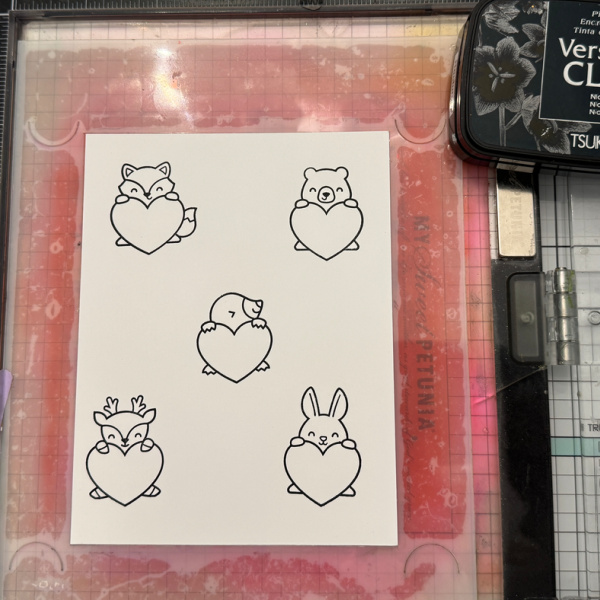
Step 1: Stamp the images in VersaFine Nocturne ink on a panel of white cardstock.
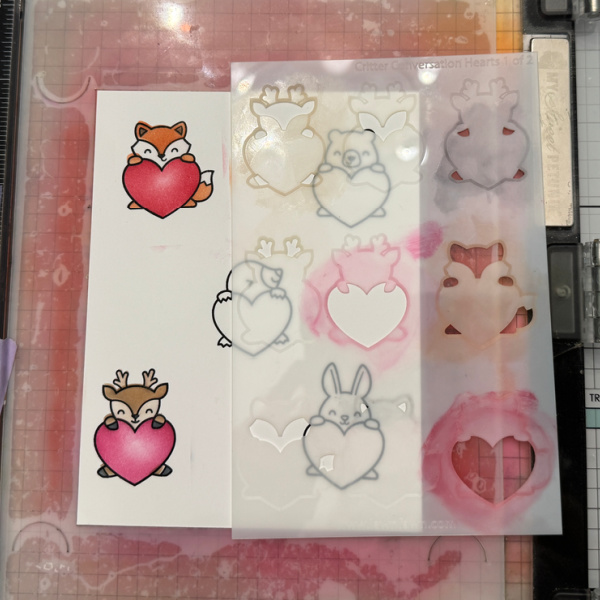
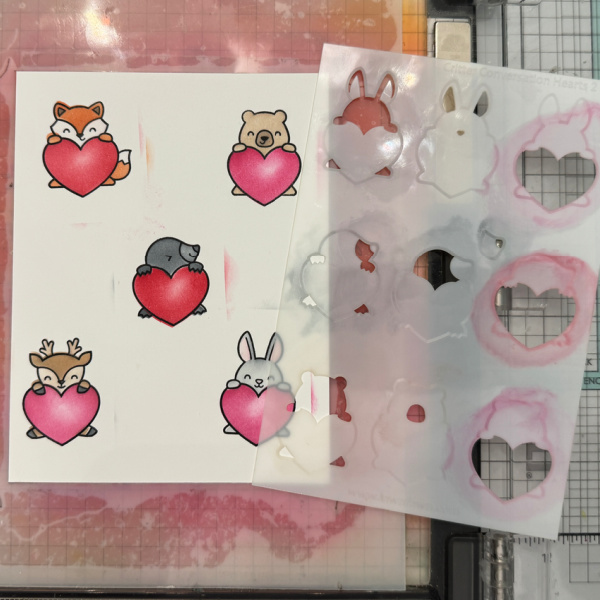
Step 2: Using stencil No. 1, color the images in the desired colors. I used Morocco for the fox and Desert Sand for the deer.
Step 3: Using stencil No. 2, color the remaining images in the desired color. I used Desert Sand for the bear and Gray Flannel for the seal and Bunny just heavier handed on the seal. I used Angel Pink for the ears.
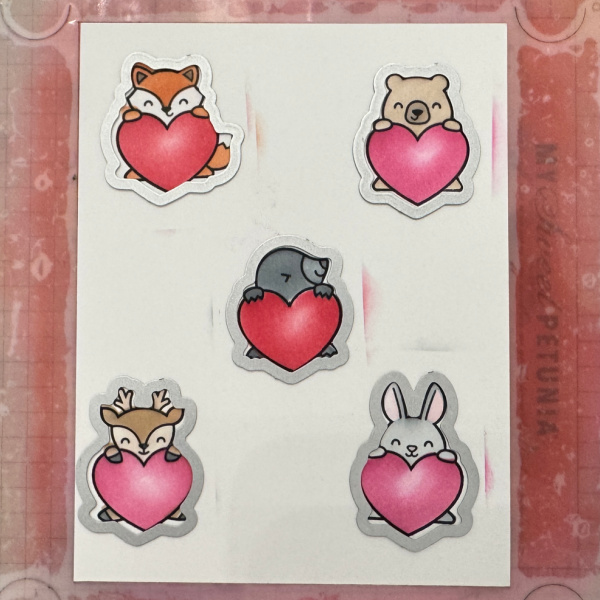
Step 4: Using the coordinating dies and a die cutting machine, cut out the images.
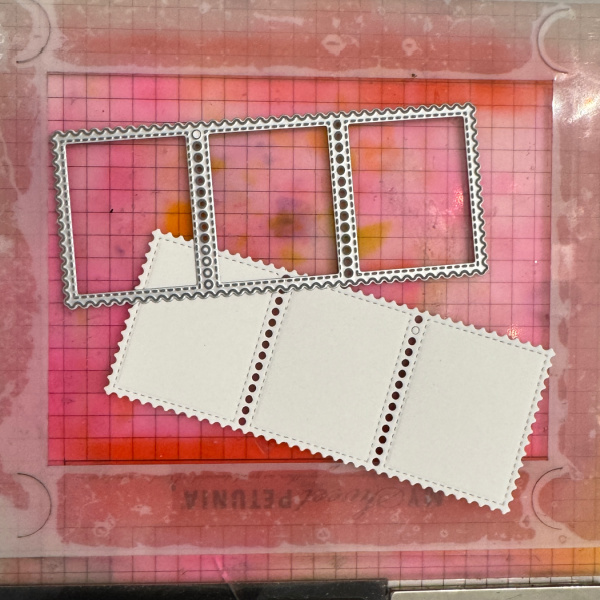
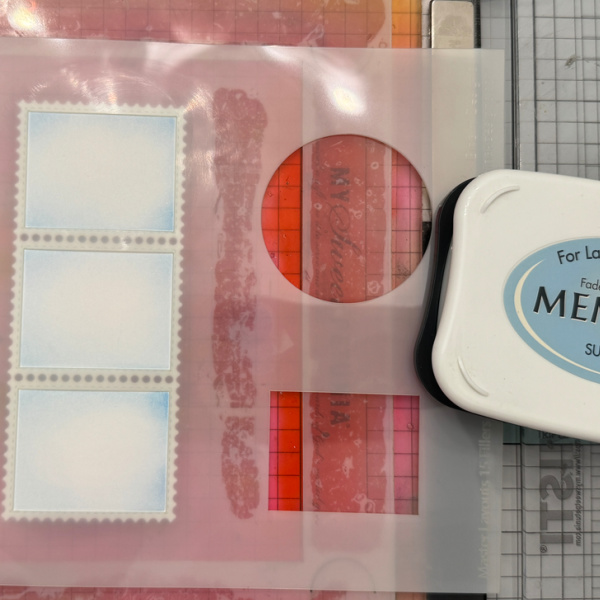
Step 5: Cut out the postage/film strip and then color with coordinating stencil. I used Summer Sky.
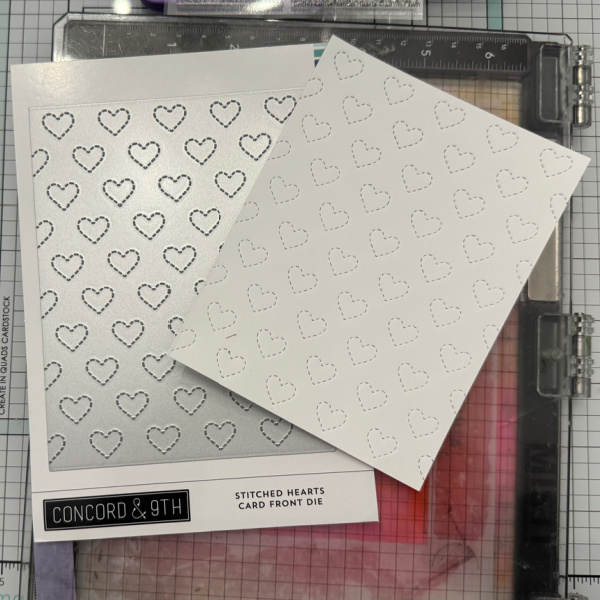
Step 6: Cut out a background using a heart cover plate.
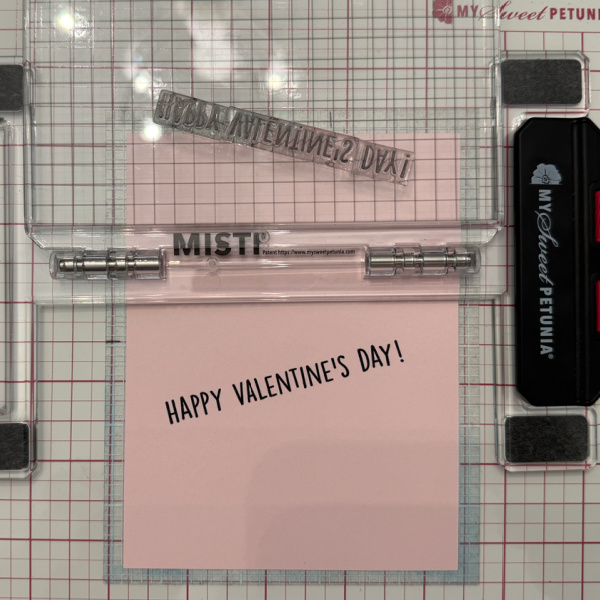
Step 7: Stamp the greeting and then cut down at an angle. Put all the elements together on the card base.
The postage/film strip will hang over a little and will need to be trimmed. You can prevent this by madding a horizontal card rather than a vertical one.
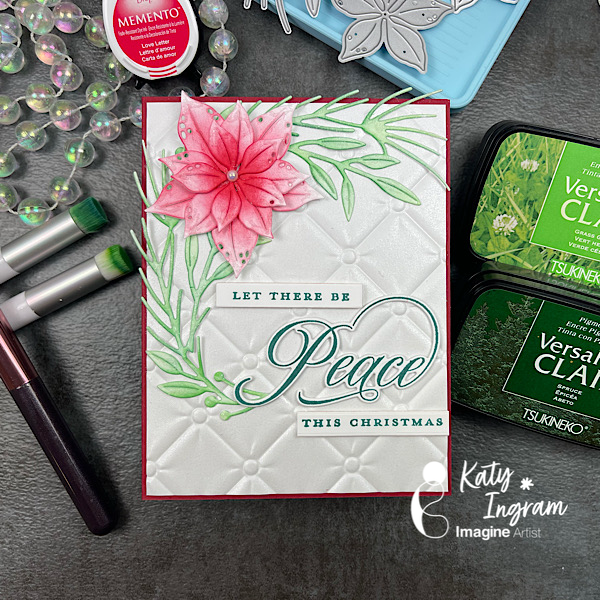
Hello Friends! Katy here with a holiday video using Versafine Clair inks and Love Letter Memento Ink. With some simple touches and color combos you can create a stunning elegant holiday card in just a few steps. Video has all the details. Thanks for watching.
Other Products Used The Greetery Scripted Holiday Sentiments Stamp Set The Greetery Scripted Holiday Sentiments Die Set White Cardstock White Metallic Cardstock Stamp positioner tool Foam Tape
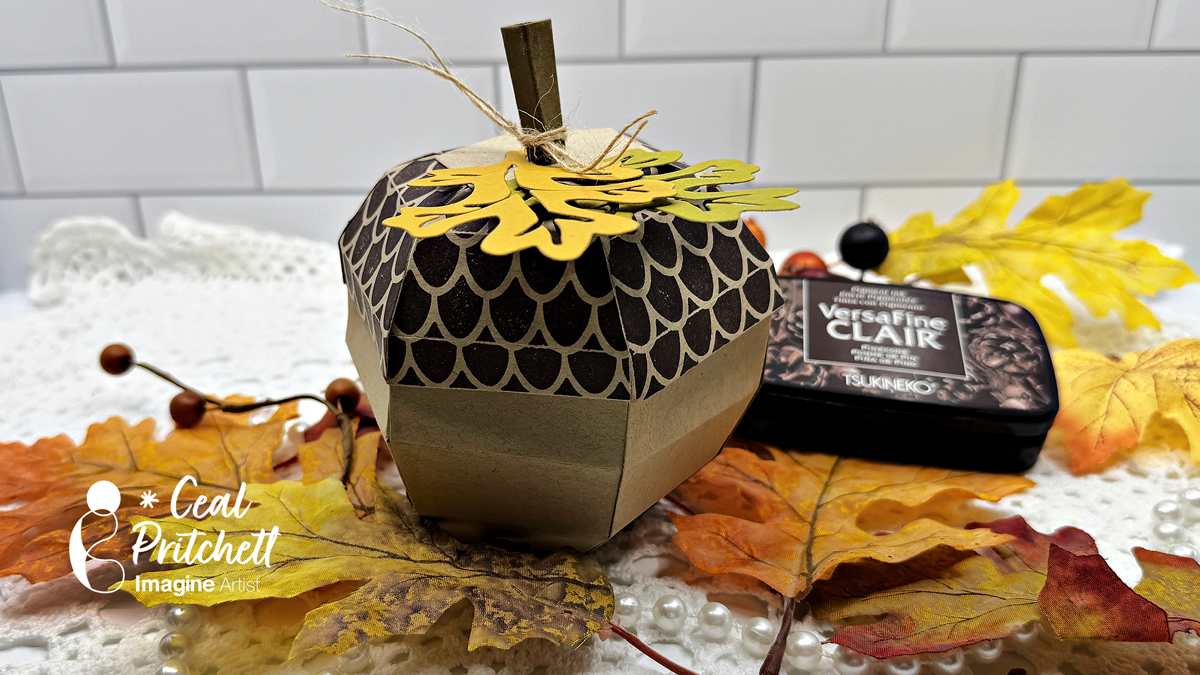
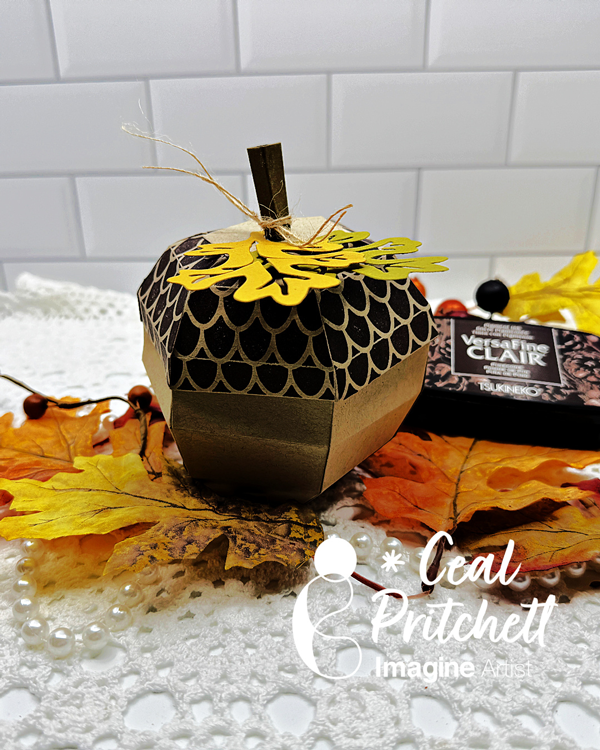
Hello crafty friends! I’s Ceal, here. Today I am sharing a tutorial on how to make this acorn gift box.
Skill: Intermediate to Advanced Time: 45 Minutes
Directions:
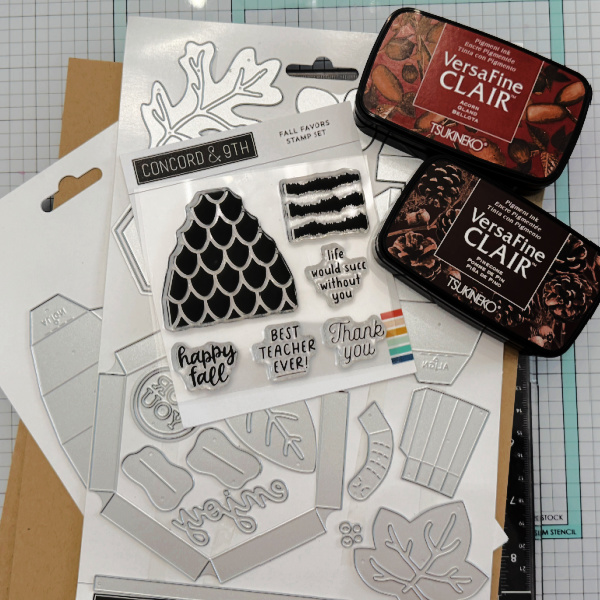
Gather your supplies. For this project you will need the Fall Favors Box die set and the coordinating stamp set. A dark brown ink (VersaFine Clair used here), Kraft and other colors of cardstock.
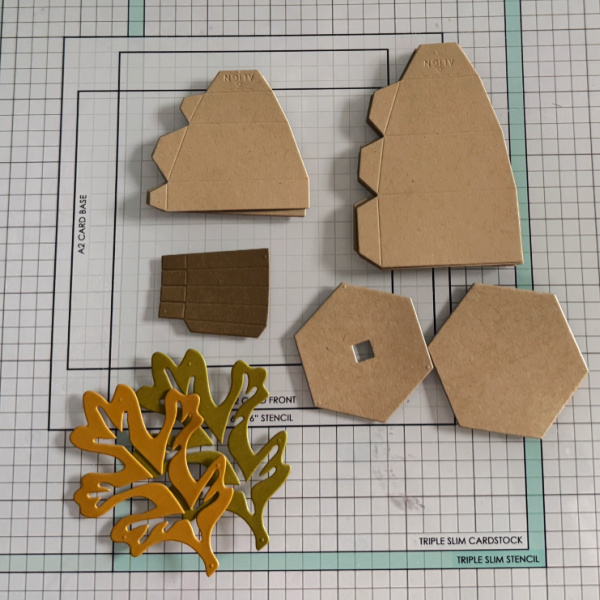
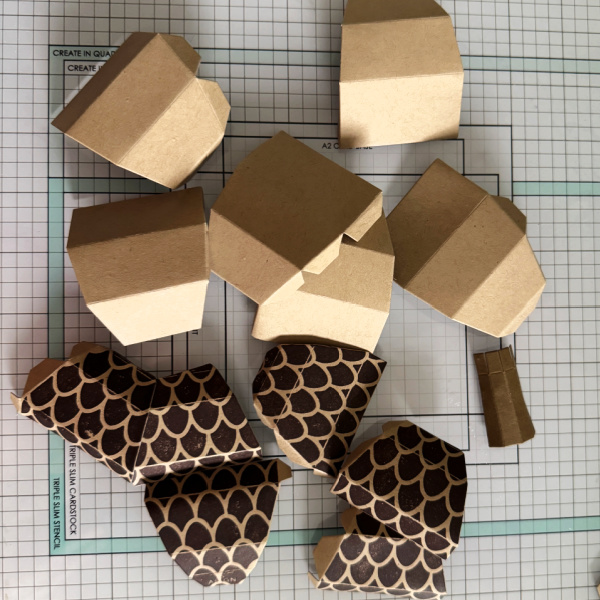
Step 1: Out of kraft cardstock, cut six pieces each of the small (top) and large (bottom) of the acorn, along with the top and bottom hexagon pieces. Cut the stem out of a dark brown cardstock and the leaves out of your color of choice.
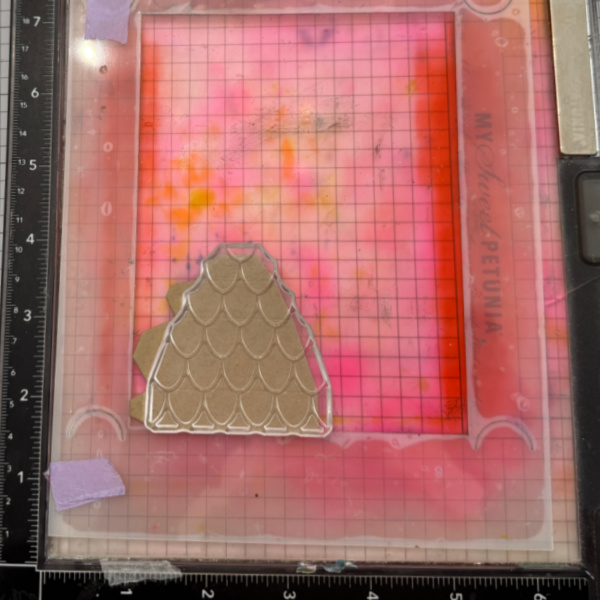
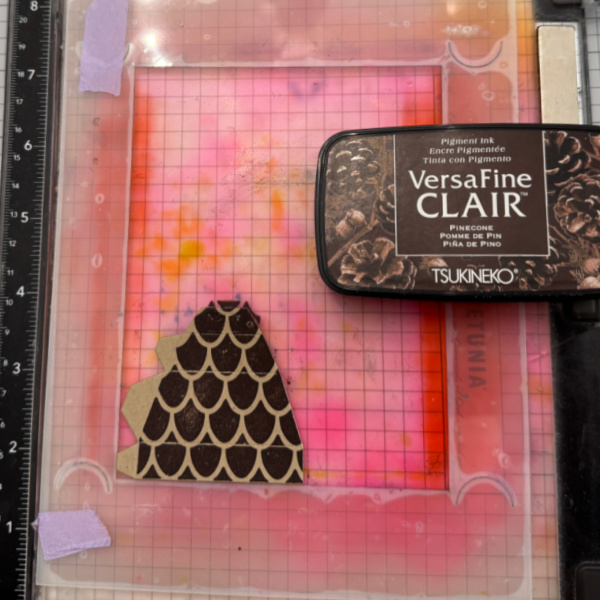
Step 2: Line up the stamp that adds the detail to the acorn top and then stamp all six pieces with a dark brown ink, VersaFine Clair Pinecone used here.
Step 3: Crease all of the score line on all the die cut pieces. Do not use a bone folder, just simply crease them on the score lines.
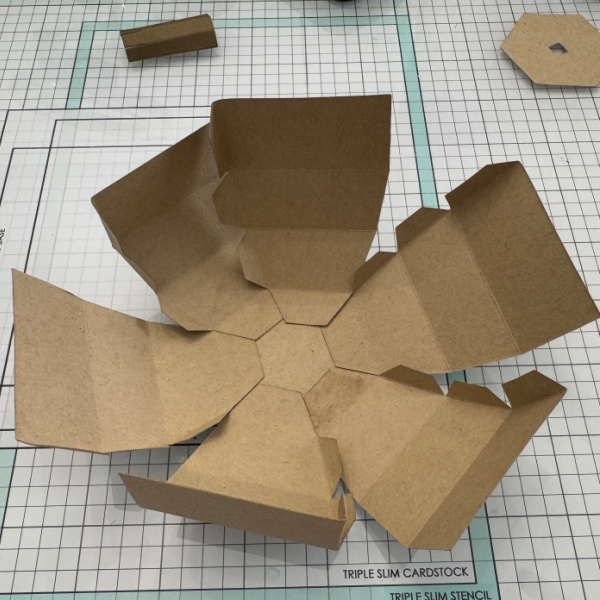
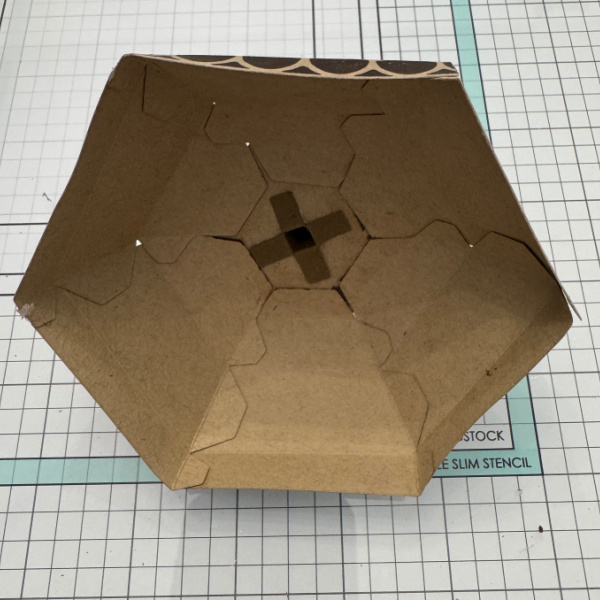
Step 4: Align the large (bottom) pieces of the acorn on the hexagon as shown. Tip: I used liquid glue to allow me to move them as needed.
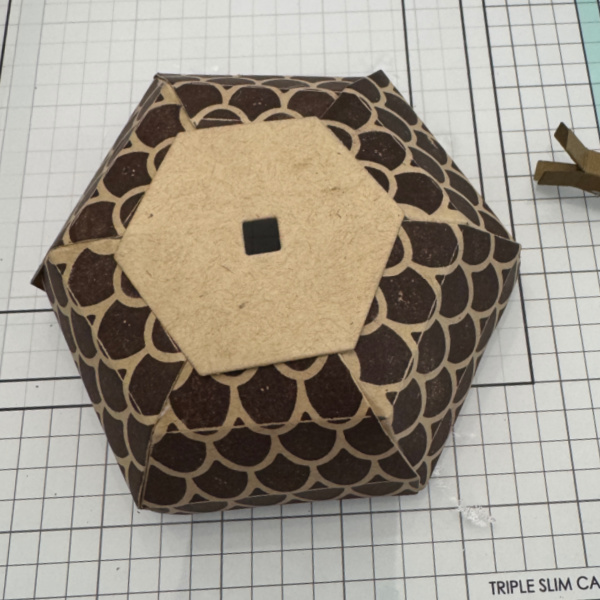
Step 5: Align the small (top) pieces of the acorn on the hexagon with the square hole in it.
Step 6: Fold the stem piece on the score lines and add h=glue to create the stem and then thread it through the square hole on the top. After threading it through the hole, fold back the tabs and glue down as shown.
Finish the project by adding the leaves and some twine.
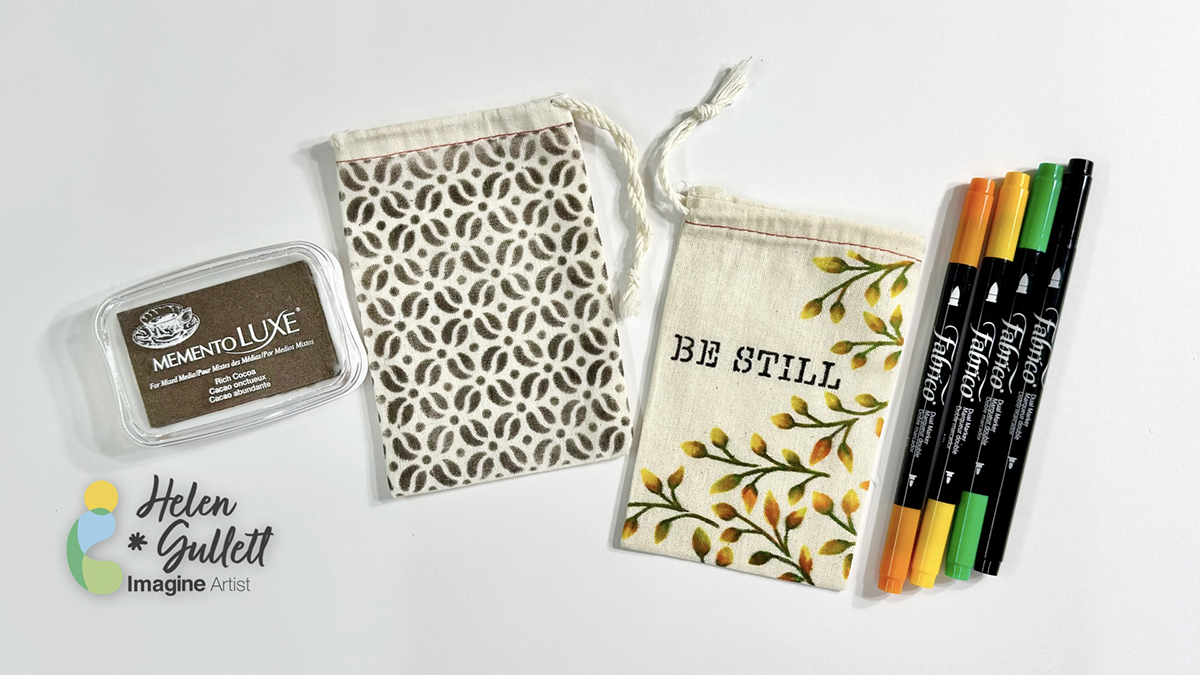
Hello crafty friends! Today’s projects are about how you can personalize any muslin bags or canvas bags by adding patterns, words, or anything you can think of with Fabrico Markers, Memento Luxe ink pads, and stencils. It will be fun projects to make for any occasion gift ideas or even for yourself to use. So, let’s make some together!
Skill: Easy Time: 15-20 minutes
Direction:
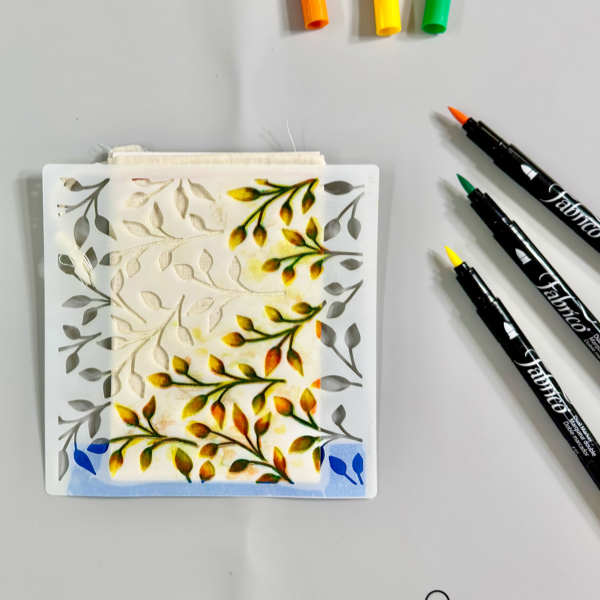
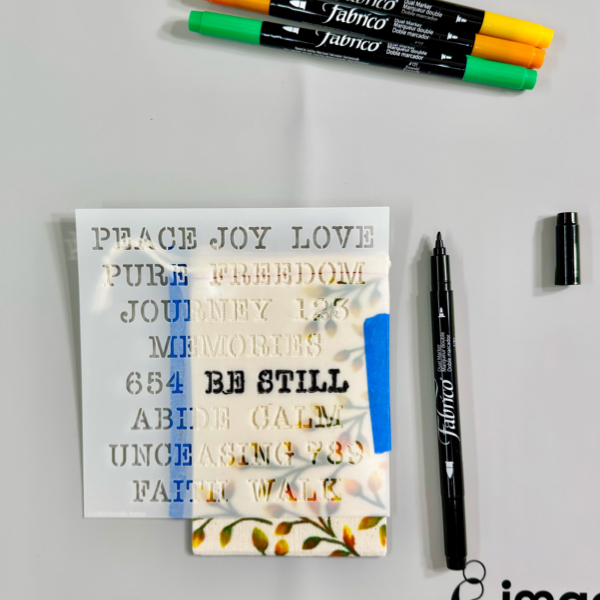
Step 1 If your muslin or canvas bag has some wrinkles or folded lines on it, you can iron it before stenciling on it. I ironed my mini muslin bags that I used on these projects today. Cut out a piece of a thick cardboard or cardstock as an insert mat to put inside the bag to prevent the ink from bleeding through the other side of the bag. Tape the stencil on the bag with masking tape or washi tape. Use Fabrico Markers to color through the leafy stencil. To do the ink blending, start with dark color first, then medium color, then lighter color after to blend the color together. The ink from the bag will transfer to the marker, but do not worry because you can clean the other ink color from the marker tip by scribbling it off on a piece of paper.
Remove the stencil from the bag.
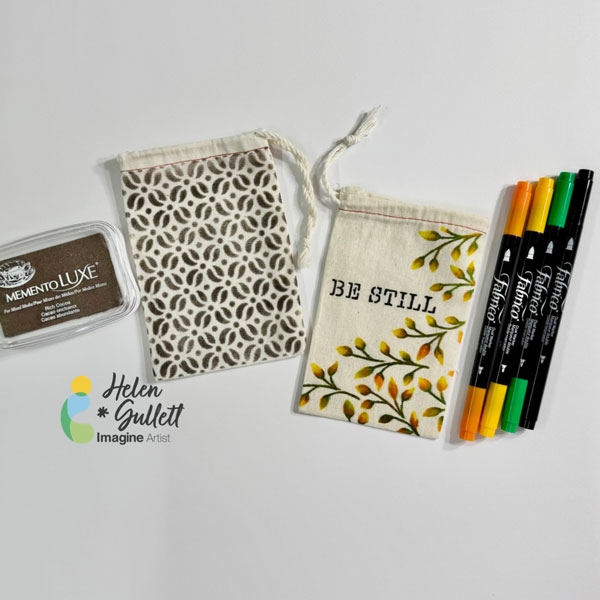
Step 2 Repeat the same step to add more pattern or word to the bag. On this one, I decided to add the word Be Still on the bag using stencil and Fabrico Marker. Remove the stencil and set aside for the ink to dry, or iron the bag to dry the inks permanently and quickly. I love how versatile these Fabrico Markers are when it comes to coloring solid images. The colors blend well together. The second technique to personalize a muslin bag you can try is by adding ink directly to the bag with ink pads, sponge daubers, and stencil.
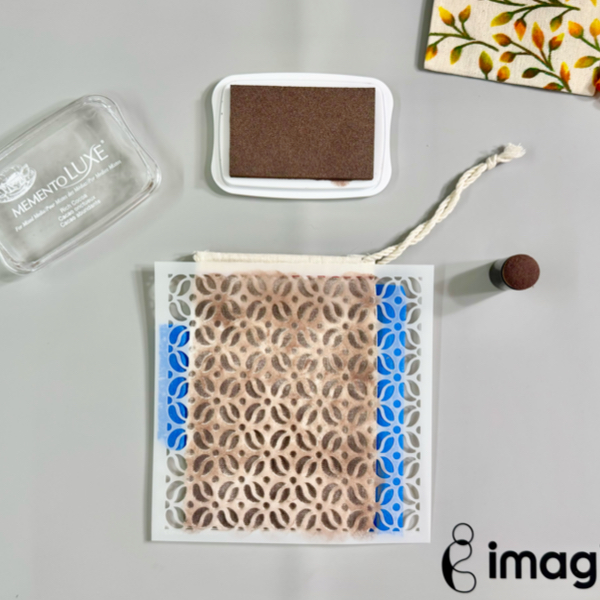
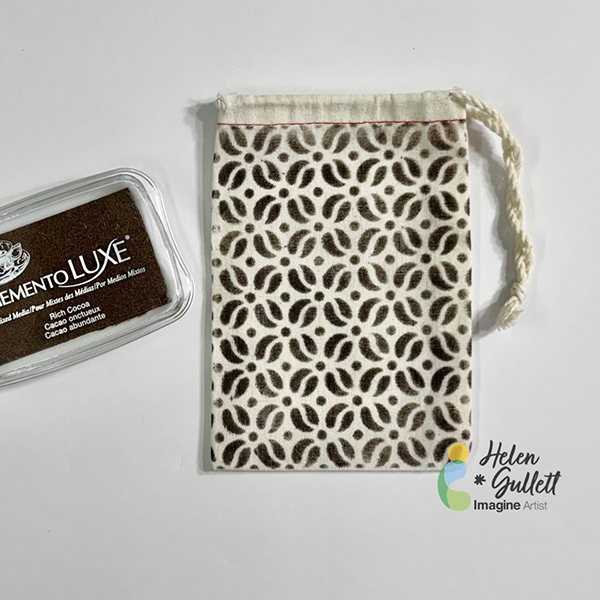
Step 3 Add the insert mat inside the mini muslin bag. Tape the stencil on the mini muslin bag with masking tape or washi tape. Using a sponge dauber, pick up the ink from the Memento Luxe Rich Cocoa ink pad by tapping on the ink pad a couple times. Dab the ink on the sponge dauber on the stencil firmly through the stencil to make sure the ink transfers to the bag. Repeat the steps until the bag is covered with the pattern.
Step 4 Remove the stencil from the bag. Iron the bag to dry the ink permanently on the bag.
I love how they look after removing the stencils off the bags. I personally like both techniques, how about you? Which technique do you prefer better to do to personalize your own bags?
Hopefully you also will have fun personalizing your own bags by trying one of both techniques. Thank you for stopping by our blog today. Have a wonderful day!
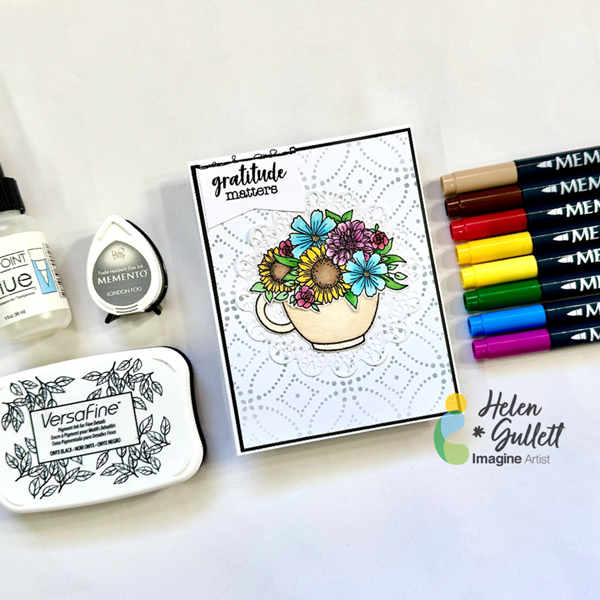
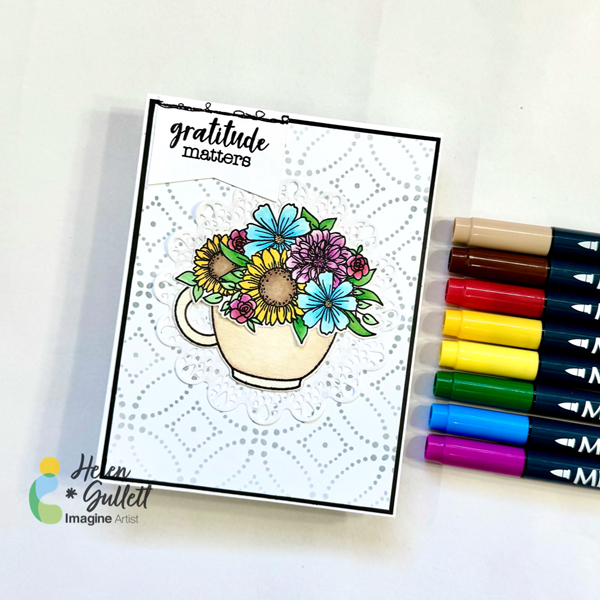
Hello crafty friends! Today, we are going to do some watercoloring with Memento markers, stenciling with Memento ink, and stamping with VersaFine ink to make this Fall floral coffee mug card. Let’s gather your supplies, grab a cup of coffee, and get crafting together!
Skill: Intermediate Time: 15-20 minutes
Direction:
Step 1
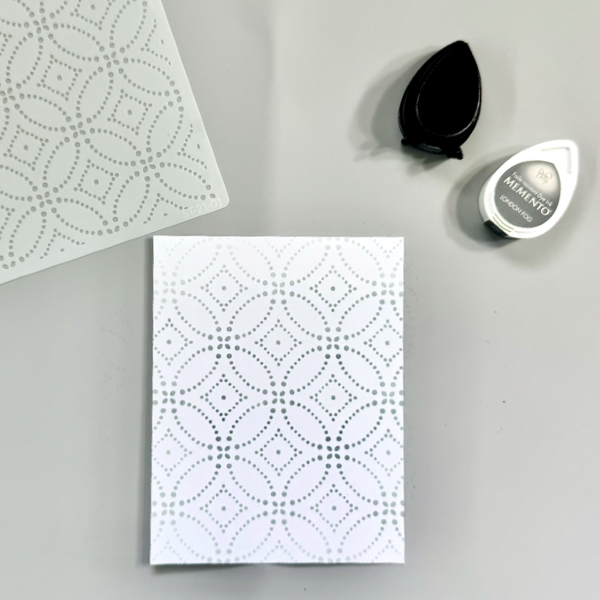
Cut out a piece white cardstock into 4″ x 5 1/4″
Put the stencil on top of the cardstock and secure it with some washi tape or removable tape.
Use a blending brush to add the Memento London Fog ink to the cardstock.
Remove the stencil and set aside for the ink to dry.
Step 2
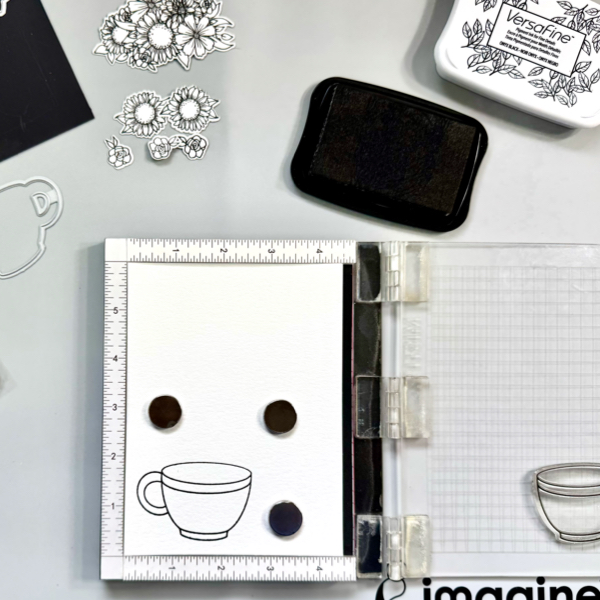
On a piece of watercolor cardstock, stamp all the floral and cup images with the VersaFine Onyx Black ink.
Cut them with their matching die set or you can simply fussy cut them with scissors.
Step 3
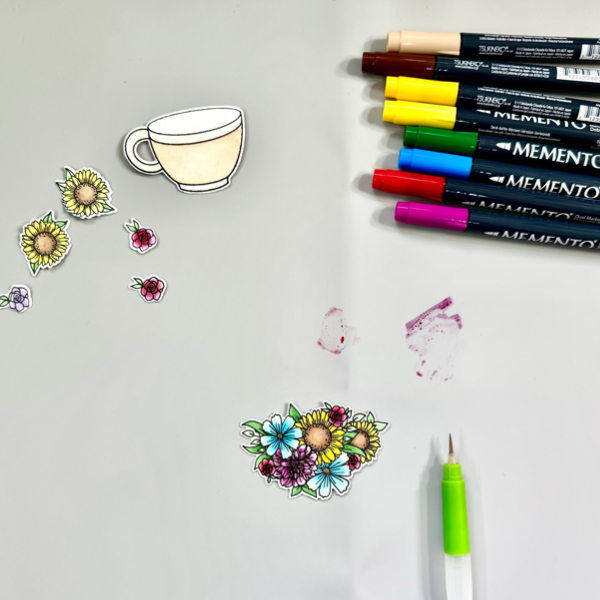
There are two ways of watercoloring. The first option is you can do wet on wet technique by lightly wet the area where you want to add the watercolor paint, and then pick up the ink with a water brush and color on the wet watercolor paper. And the second option is called wet on dry technique where you add the watercolor paint directly on the dry watercolor paper. Both ways work well with these Memento Markers.
On this project, I used the wet on wet technique. First, scribble each color of the Memento Marker on the craft mat. Wet the stamped image, pick up the ink with a wet water brush, and then add the color to the image. Dry the watercolored image with a craft heat gun.
Step 4
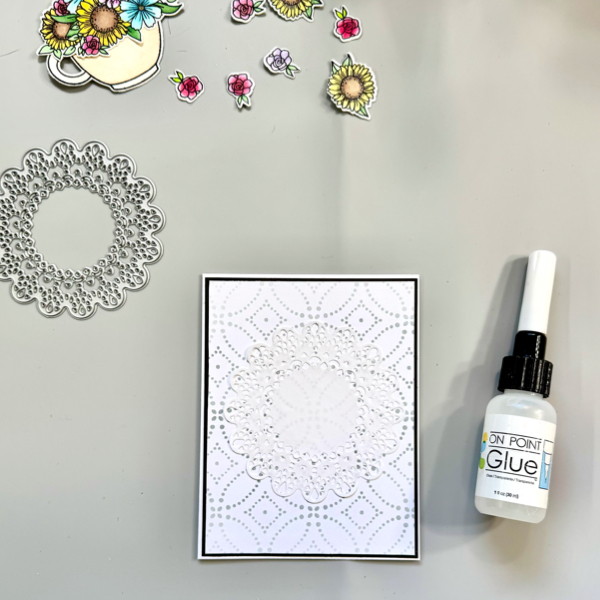
Cut out a piece of copy paper with the doily die to make paper doily. Add it to the stenciled panel with On Point Glue.
Cut a piece of black cardstock into 4 1/8″ x 5 3/8″ mat, add the stenciled panel to it with On Point Glue.
Add the whole background panel to the card base with On Point Glue.
Put together the watercolored coffee mug and flower bouquet cluster with On Point Glue.
Step 5
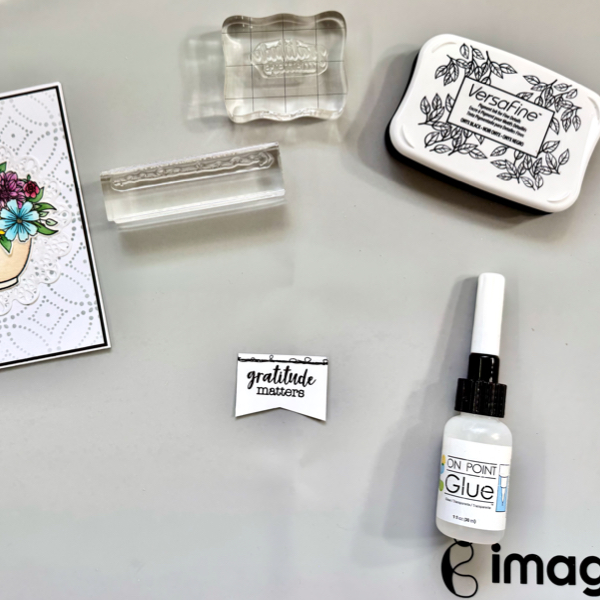
Stamp the sentiment and faux stitch pattern on a piece of white cardstock with VersaFine Onyx Black, and then trim it into a sentiment banner.
Add the floral coffee mug in the middle of the card, on top of the doily with On Point Glue.
Add the sentiment banner on the left top of the card with On Point Glue.
Memento Markers are not only for coloring, but also watercoloring. I had fun making this card with a watercoloring technique using these markers. And I hope this Fall Floral Coffee mug card can perk you up!
Thank you for stopping by our blog today. Have a wonderful day!