By Helen Gullett
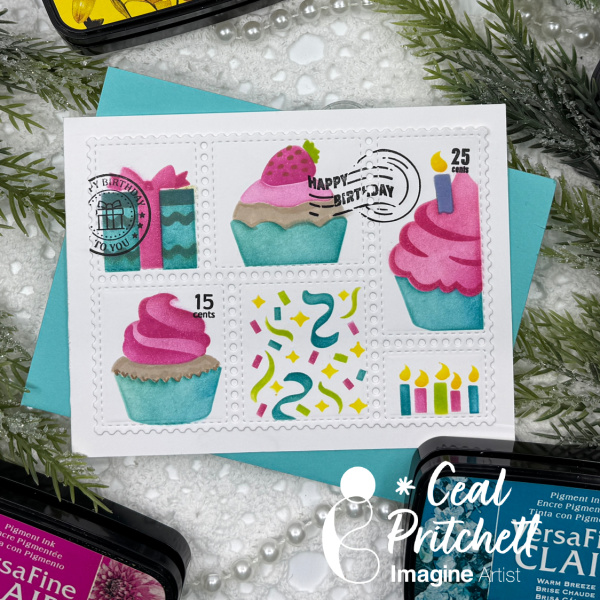
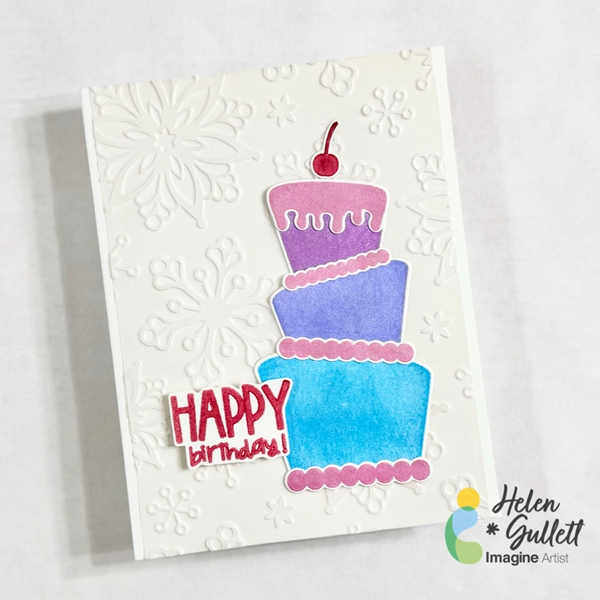
Hello crafty friends… If you are like me, I always need birthday cards at any season. Since it is Winter now, today we are going to make a Winter themed birthday card. Let’s gather your supplies and make it together.
Skill: Intermediate
Time: 15-20 minutes
Directions:
Step 1
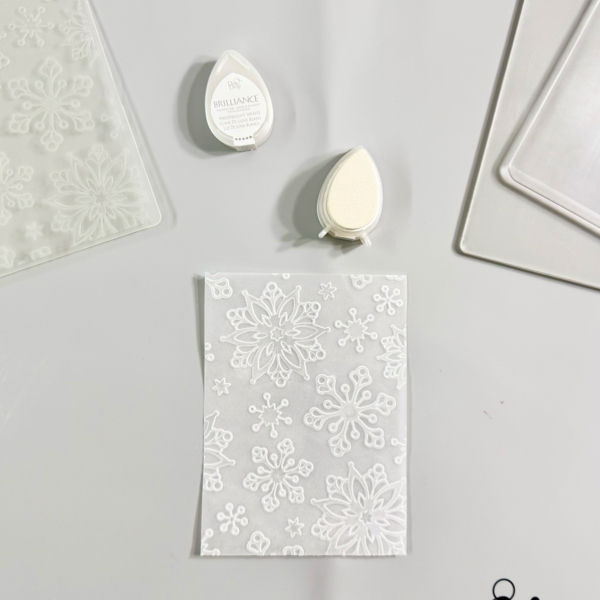
First, cut out a piece of vellum paper into 4.25 inch x 5.5 inch (or any size that will fit inside your embossing folder).
Add some of the Brilliance Moonlight ink to the embossing folder on the raised side, carefully add the vellum paper to the embossing folder, and then run it through the die cutting machine (make sure to follow your die machine sandwich instructions for embossing folder).
It’s optional, you add more of the white ink to the embossed vellum if you want to.
Use a craft heat gun to dry the ink on the embossed vellum.
Step 2
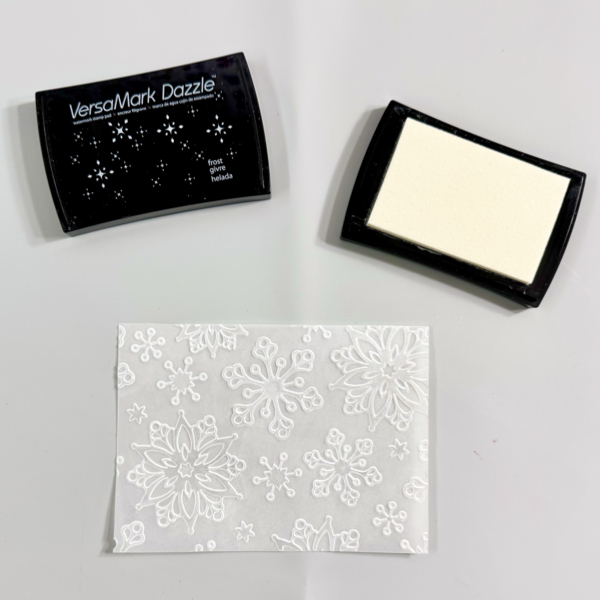
To add more shine and sparkle to the white snowflake embossed vellum, gently rub some of the VersaMark Dazzle Frost ink pad on the embossed side (raised image).
Dry the ink on the embossed vellum with a craft heat gun.
Trim it into 4 inch x 5.5 inch. I suggest using scissors instead of papertrimmer.
Step 3
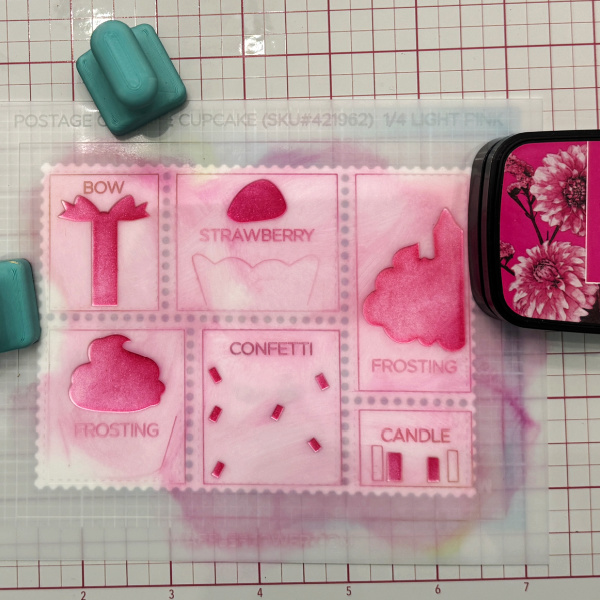
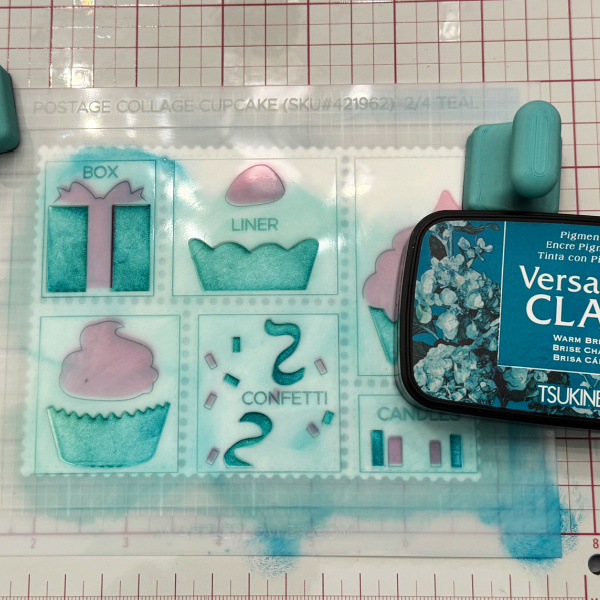
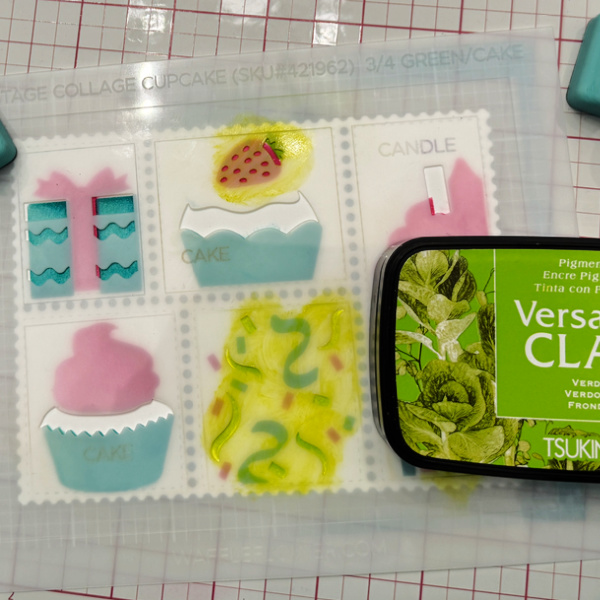
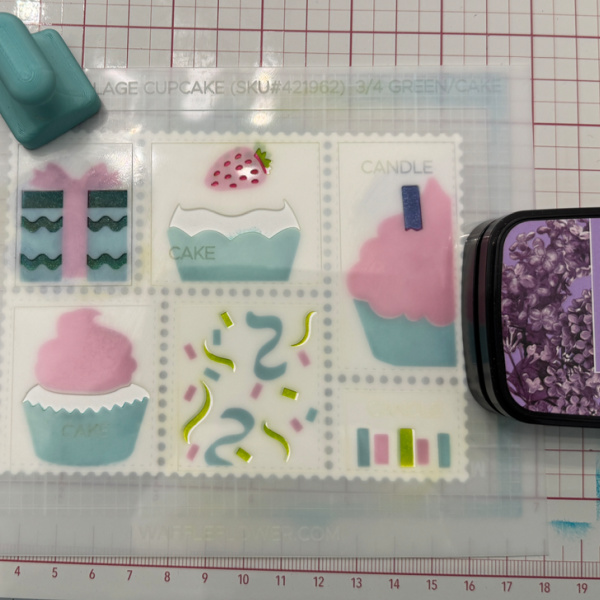
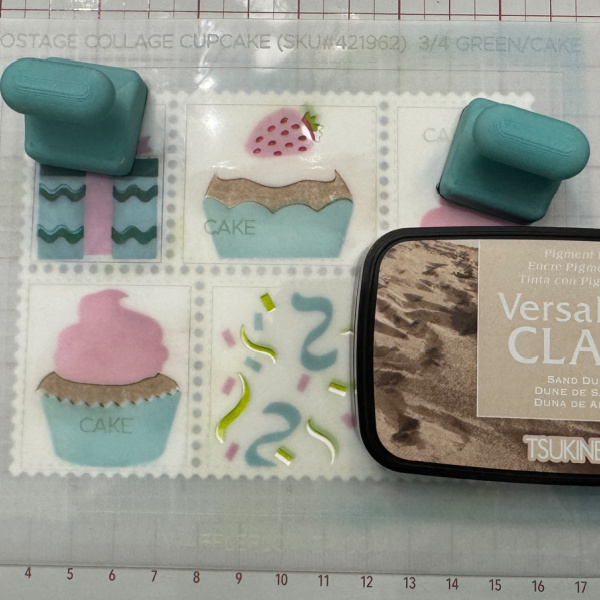
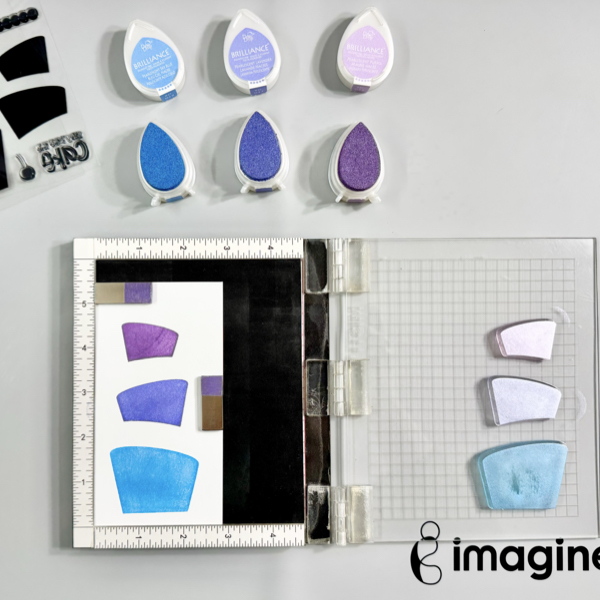
Add the 3 cake image stamps on the stamping tool, and then add the Brilliance inks (Pearlescent Purple, Pearlescent Lavender, and Pearlescent Sky Blue) to each cake stamp. Stamp them on a piece of white cardstock.
Repeat this step if needed to get good solid stamped images.
Dry the ink well with a craft heat gun and set it aside.
Step 4
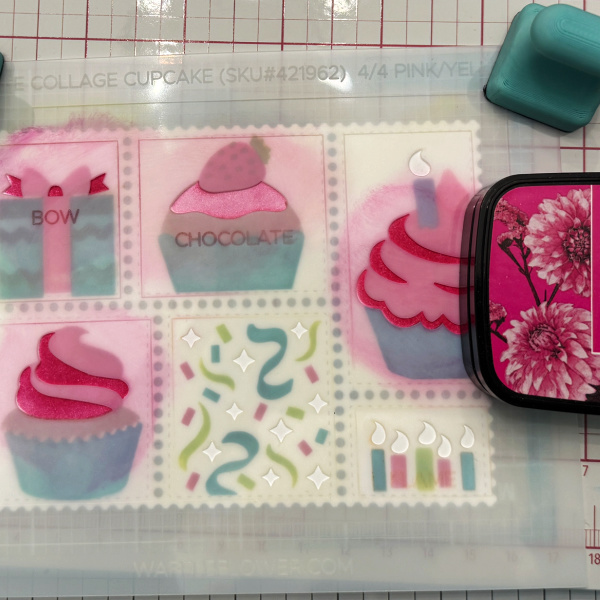
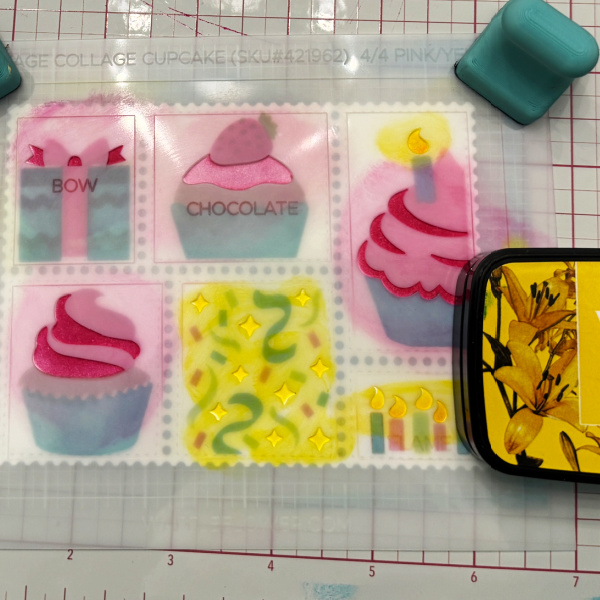
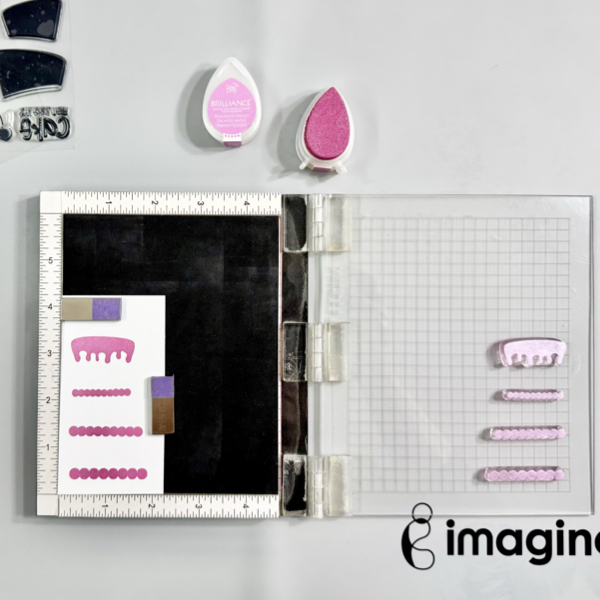
Add the icing image stamps on the stamping tool, and then add the Brilliance Pearlescent Orchid to each cake stamp. Stamp them on a piece of white cardstock.
Repeat this step if needed to get good solid stamped images.
Dry the ink well with a craft heat gun and set it aside.
Step 5
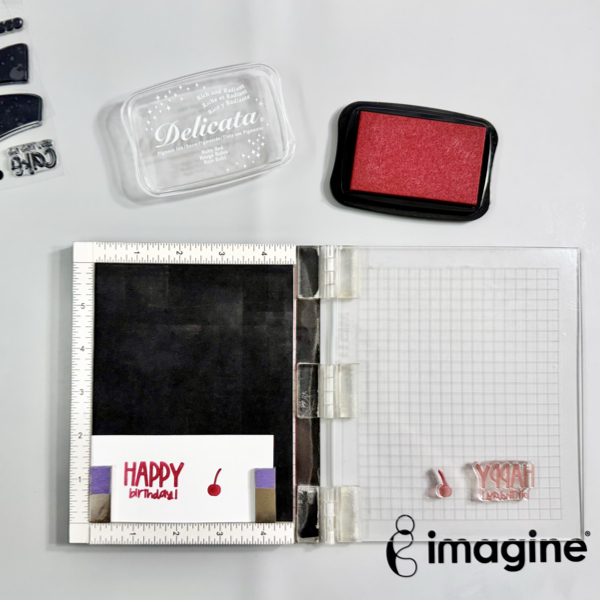
Next, stamp the cherry and sentiment using the stamping tool with Delicata Ruby Red ink on a piece of white cardstock.
Repeat this step if needed to get a good solid stamped image.
Dry the ink well with a craft heat gun and set it aside.
Step 6
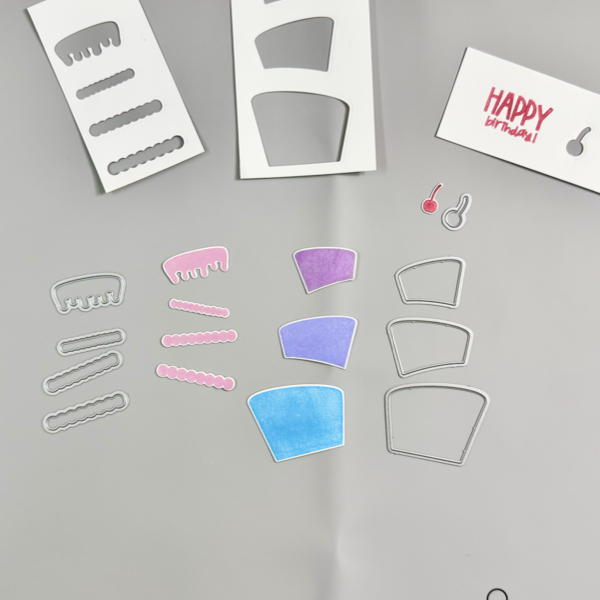
Cut each image with the matching die using a die cutting machine.
If you do not have the matching die set for your stamp set, you can fussy the stamped images with micro-tip scissors.
Step 7
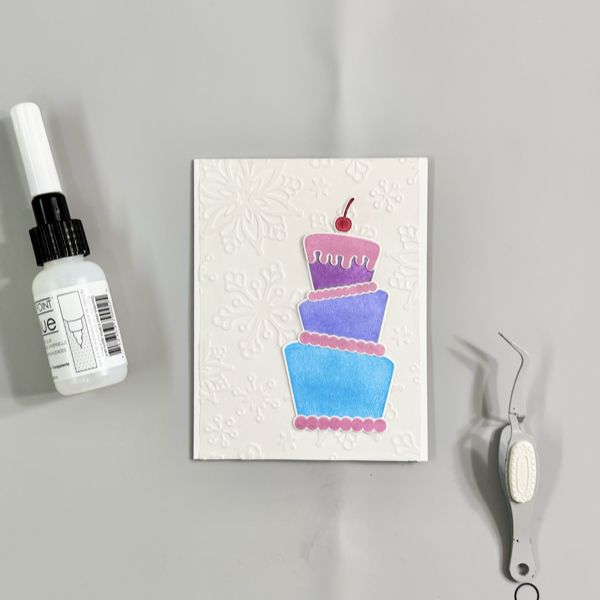
Add the embossed vellum paper to the card using On Point Glue, press gently to make sure the vellum adhered well to the card background.
Add the birthday cake pieces to the card using On Point Glue, press gently to make sure they adhered well to the vellum background.
Step 8
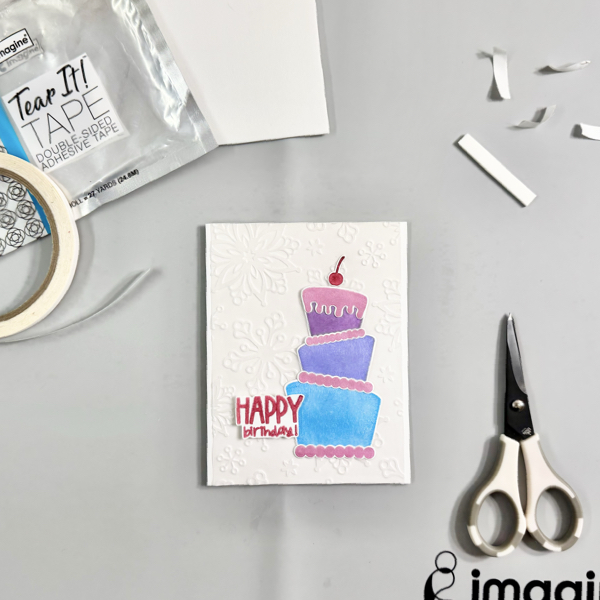
Fussy cut the sentiment using the micro-tip scissors.
Add some of the white fun foam to the back of the sentiment using some of the Tear It! Tape, then add the sentiment to the card.
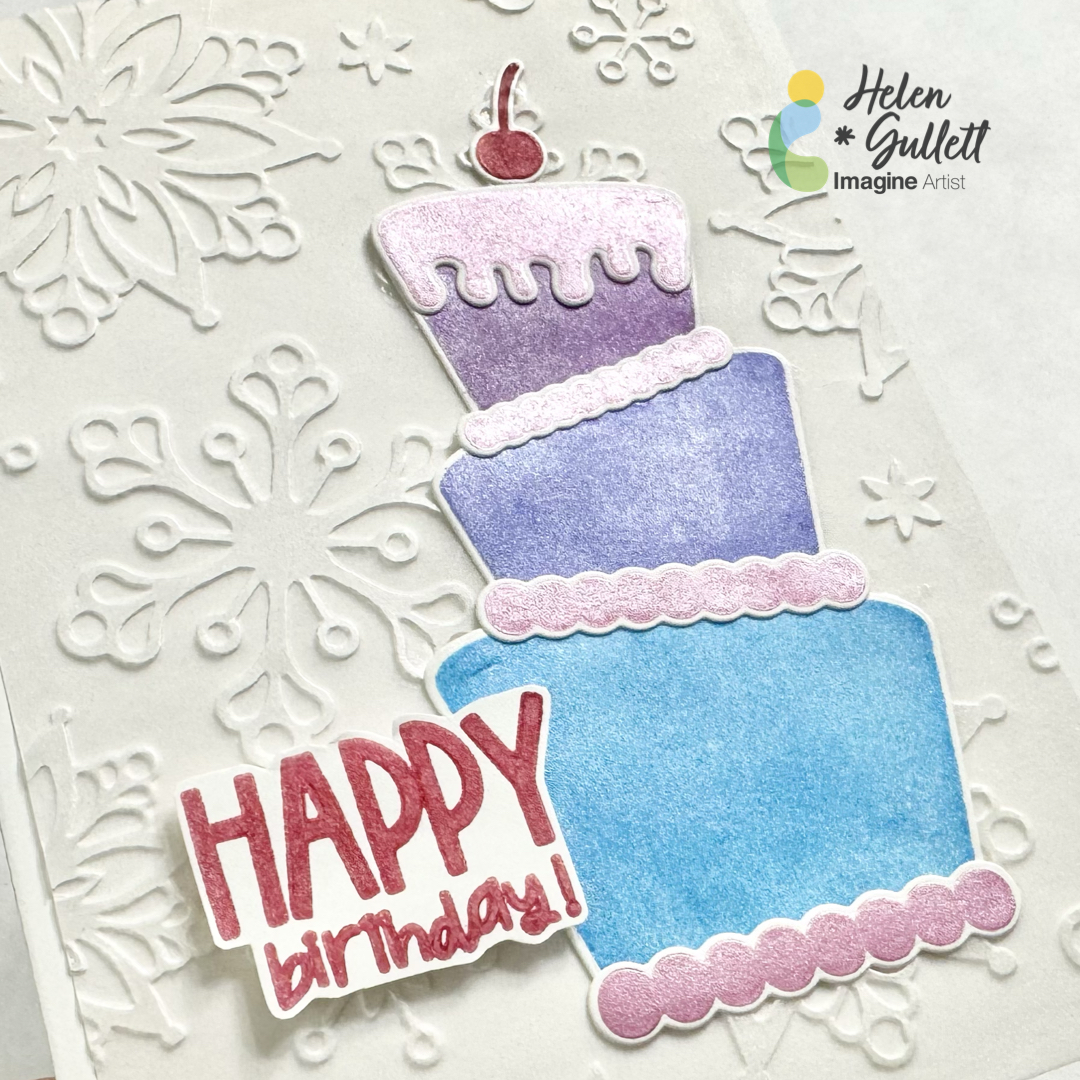
This card is easy and fun to make, especially the Brilliance Pearlescent inks give extra sparkle to the cake!
Thank you for stopping by our blog today. Have a wonderful day!
Craft Supplies
Imagine Crafts:
- Brilliance Dew Drop – Moonlight Bright,
- Brilliance Dew Drop – 4 Pack Jewel Tone
- Delicata – Ruby Red
- VersaMark – Frost
- Tear It! Tape
- On Point Glue
- Imagine Craft Mat
- Staz-On All Purpose Stamp Cleaner
Others:
- Birthday Cake Remix stamp and die set (Catherine Pooler Designs)
- Snowflake Embossing Folder (Darice)
- Vellum paper (Bazzil)
- White Cardstocks
- Thin white fun foam
- Stamping Tool
- Die cutting machine
- Twizzers
- Micro-tip scissors