It’s Ceal, here. Today I am sharing my first post as an Imagine Artist In Residence. I am so excited to be a part of the Imagine team. I love all things snow related and with the groundhog not seeing his shadow and predicting an early spring, I had to make a couple more winter cards.
Here are the supplies I used:
Skill: Intermediate to Advanced. Time: 45 mins
Directions:
Step 1 Stamp the snowflake with VersaMark ink onto a piece of white cardstock cut to 4.25″ x 5.5″ . Emboss the snowflake with MBoss Sparkle embossing powder.
Step 2 Using a Sponge Dauber, Ink blend over it with Brilliance Pearlescent Purple Ink
Step 3 With a die cutting machine, run the snowflake cover plate through.
Step 4 Cut a piece of amethyst cardstock to 4.25” x 5.5” to back the snowflake cover plate.
Step 5 To make the snowflake more dimensional place foam adhesive dots in between the two snowflakes Tip: Apply a little On Point glue to each foam dot to allow you to move it as needed.
Step 6 Stamp and die cut the sentiment and add it to the card front.
Step 7 Using On Point Glue, layer and glue all the pieces together.
I made a second card using Mboss Hologram and silver foil paper with the same design.
Other Supplies: Misti 2.0 Neenah 110lb Solar White cardbase Neenah 80lb Solar White Lessebo Amethyst Cardstock Silver Foil Cardstock Pinkfresh Studio: Folk Snowflake Pinkfresh Studio: Folk Snowflake Coordinating Cuts Pinkfresh Studio: Snowflakes Coverplate die
– In today’s blog post, I will show you a couple of ways to incorporate stencils into your cards using VersaMagic Chalk Inks, Brilliance Pigment Ink, and Delicata Inks. This is a wonderful way to use those stencils you have in your stash for an encouragement card or any holiday.
Skill: Intermediate Time: 1 hour
Directions:
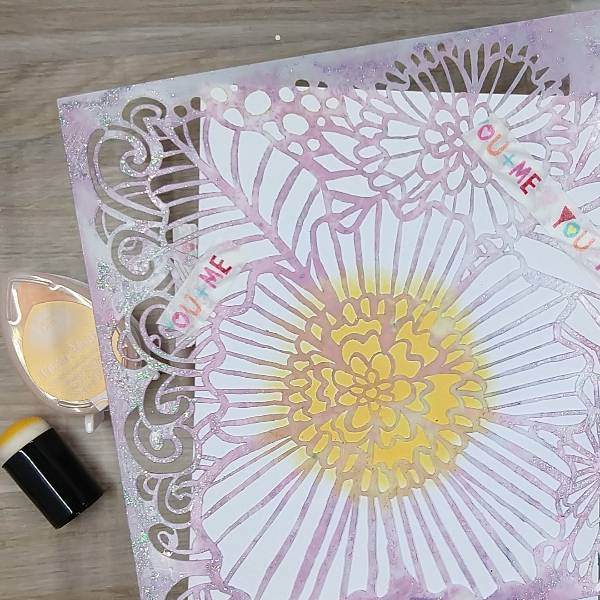
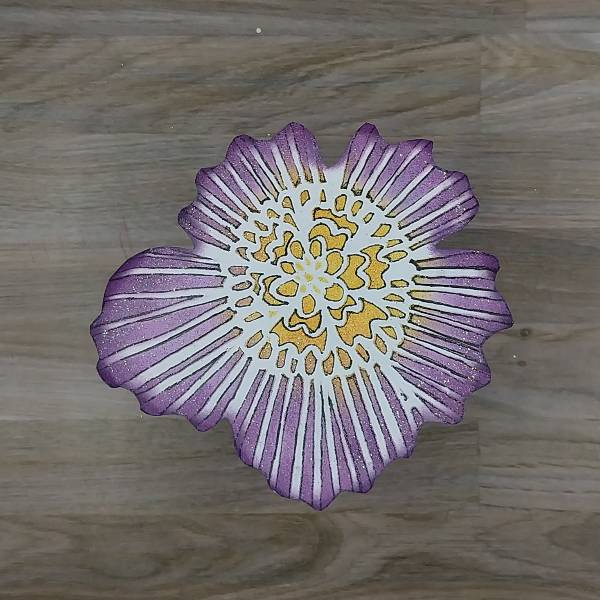
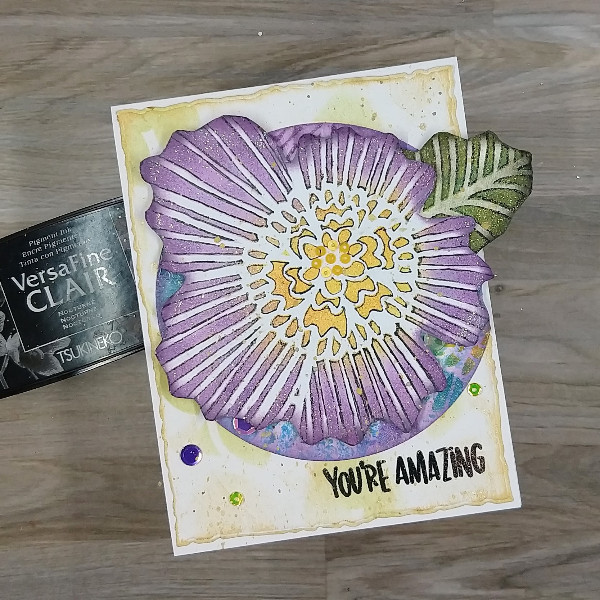
Step 1: Use washi tape to secure a large floral stencil to a piece of cardstock or watercolor paper, making sure that the cardstock is slightly larger than the stencil image you are going to use. Use a sponge dauber to apply Mango Madness VersaMagic Chalk Ink onto the center of the flower. Optional: Move the stencil away from the image and heat emboss the center of the flower with clear embossing powder before replacing the stencil and moving onto the next step.
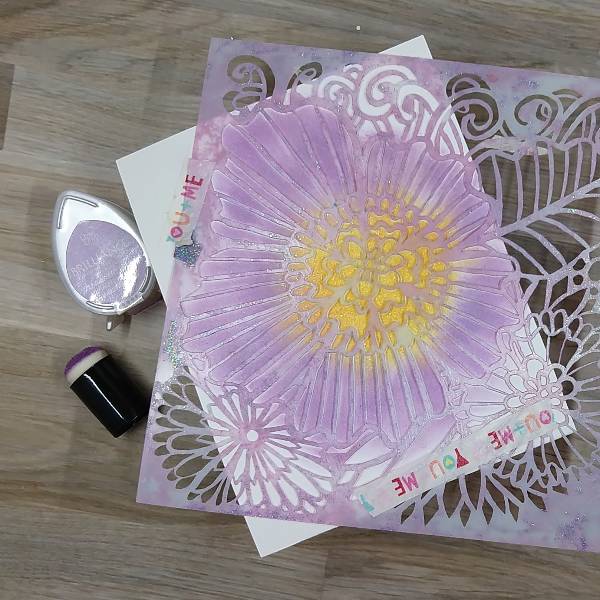
Step 2: Using a second sponge dauber, apply Pearlescent Purple Brilliance Ink to color in all of the flower’s petals.
Step 3: Using the same dauber, apply Purple Hydrangea VersaMagic Chalk Ink to the outer edges of the flower’s petals. Optional step: Remove the stencil and add embossing powder to your flower petals to help with smudging. Then return the stencil onto your paper in the exact same place on your paper.
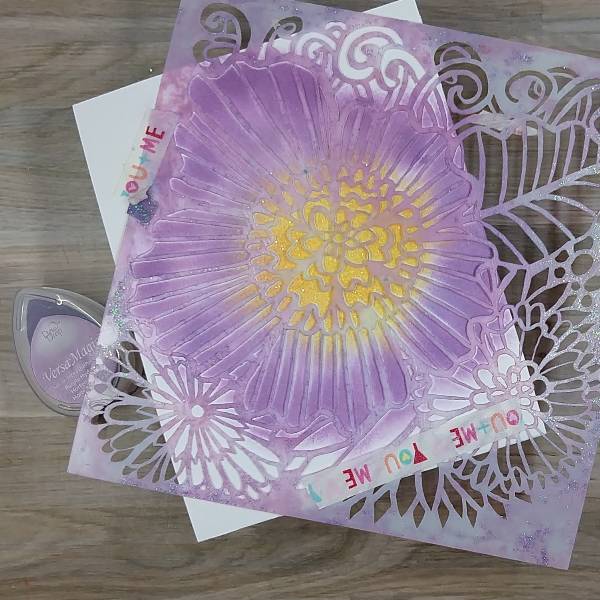
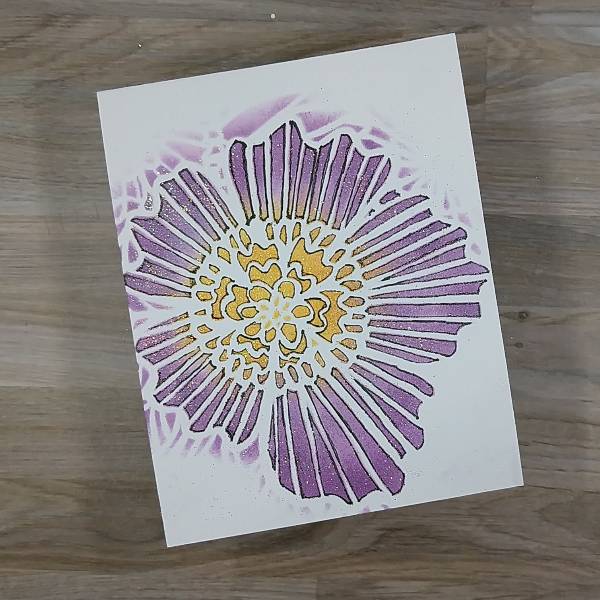
Step 4: Using a black artist pen, trace the edges of the stencil’s holes (to add a border around each ink blended area of the stencil). Then remove the stencil and set it aside. (I decided not to add the black outlines to the innermost circle of the flower’s center as I was planning something different there. Later, I realized that I had not outlined one tiny triangle that I should have in the center of the flower.)
Step 5: Fussy cut the edges of the flower with a pair of scissors. Then use the sponge dauber to ink blend the edges of the flower with more of the Purple Hydrangea VersaMagic Chalk Ink.
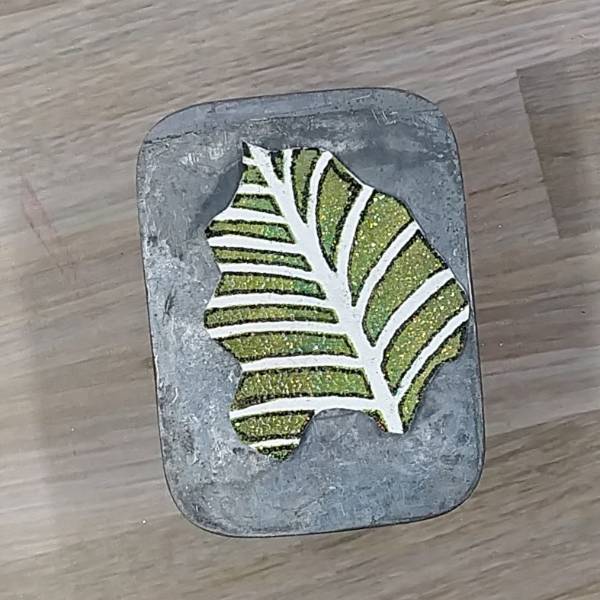
Step 6: Attach the leafy part of the stencil to another piece of watercolor paper or cardstock with more washi tape. Using another sponge dauber, blend the inner part of the leaf with Tea Leaves VersaMark Chalk Ink and the outer edges with Hint of Pesto VersaMark Ink. Mix a little Turquoise Gem VersaMagic Chalk Ink with water and watercolor the center parts of the leaves. Optional: Remove the stencil and heat emboss the ink with more clear embossing powder. Replace the stencil over the leaf.
Step 7: Using the black artist pen, trace the edges of the leafy part of the stencil’s openings (to add a border around each ink blended area of the stencil). Then remove the stencil and set it aside.
Step 8: Fussy cut the stenciled leaf using a pair of scissors. Using the same sponge dauber you used to blend the rest of the leaf, blend the Hint of Pesto VersaMagic Chalk Ink around the edges of the leaf. (Sorry, I forgot to take a picture of the leaf with the ink blended edges.)
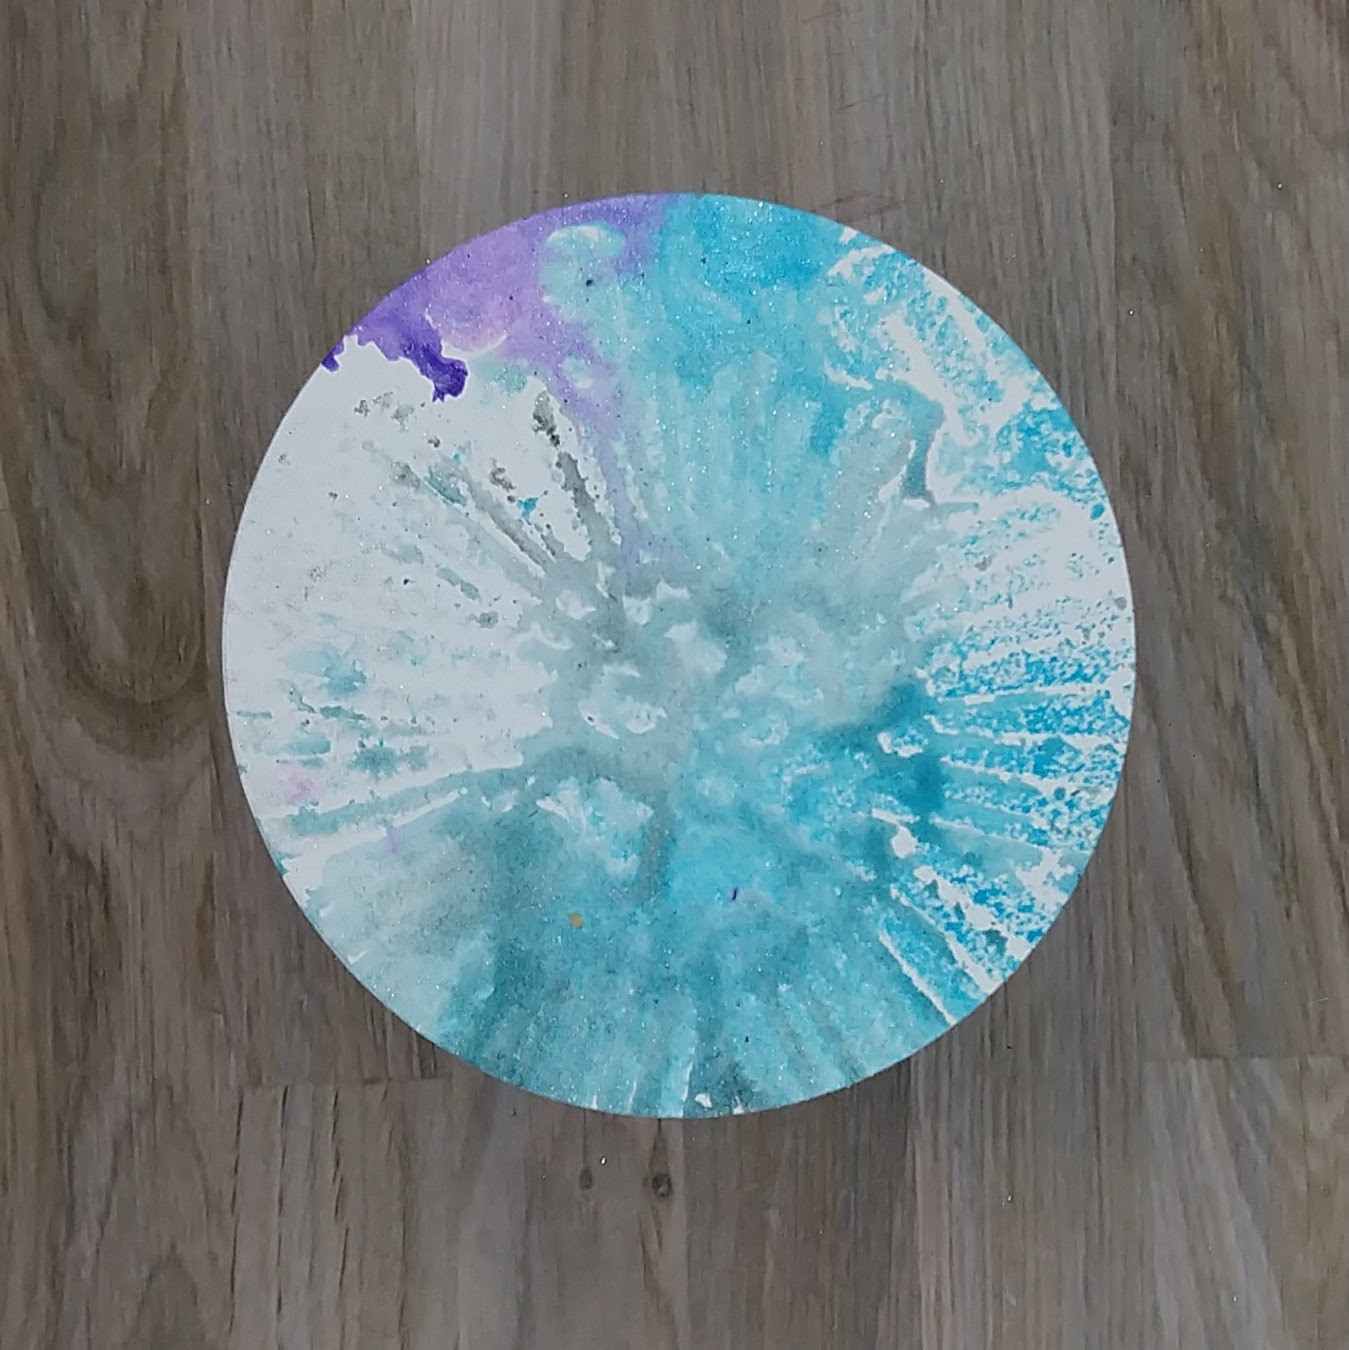
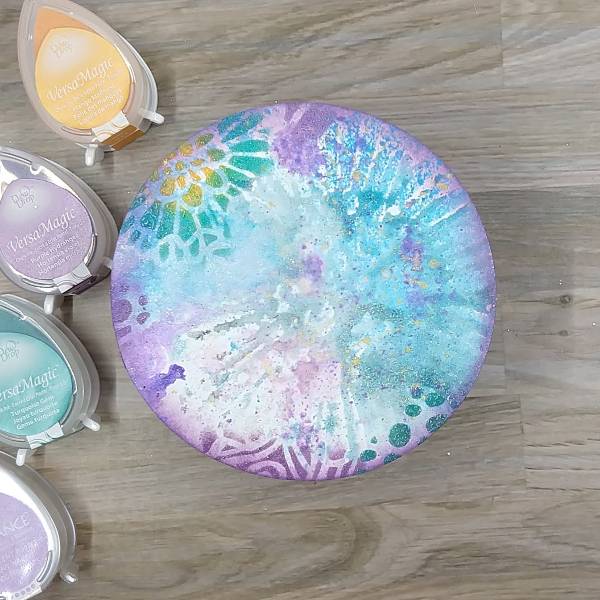
Step 9: Return the stencil to another piece of watercolor paper. Spray the paper through the stencil with Sparkle Sheer Shimmer Spray as well as Bahama Blue and Grape Jelly Fireworks! Shimmery Craft Spray. Allow the spray to dry or use your heat tool to dry the spray. After the spray dried, use a circular die to cut a piece of the watercolor paper that is slightly larger than the stenciled flower.
Step 10: Ink blend the whole edge of the circular die cut with more of the Brilliance Pearlescent Purple ink with a sponge dauber. Return the stencil to the circular die cut and use a variety of the same colors of ink to stencil the edges of the die cut using more sponge daubers. In blend the small flower with Mango Madness and Turquoise VersaMagic Chalk Inks, the dots with more of the Turquoise VersaMagic Chalk Inks, and the curved lines with Purple Hydrangea VersaMagic Chalk Ink. Optional: Heat embossed the ink with more clear embossing powder.
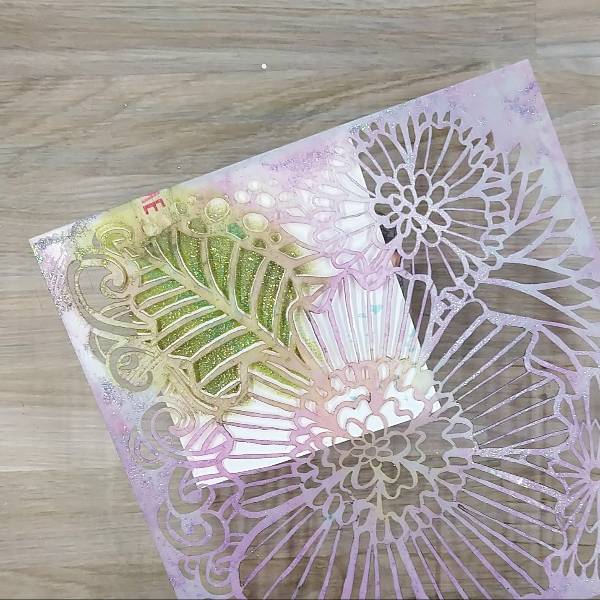
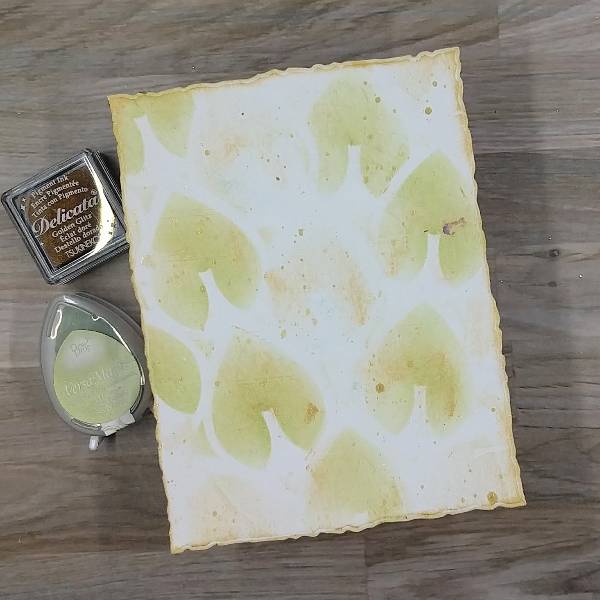
Step 11: Create the background panel by die cutting a piece of white cardstock or watercolor paper with an A2-sized die cut. Place a stencil with larger open leafy areas over the watercolor paper and then gently run Golden Glitz Delicata ink across the panel to add some soft gold accents. Ink blend several of the leaves with Tea Leaves VersaMagic Chalk Ink, making sure that there are some gold leaves and green leaves. Gently press the Golden Glitz Delicata Ink cube to the edges of the panel to leave a gold border around the edge of the panel. Splatter some gold watercolor across the panel and allow it to dry.
Step 12: Stamp a sentiment of your choice on the lower right part of the panel with Nocturne VersaFine Clair ink. Optional: Heat emboss the sentiment with clear embossing powder. Glue the circular die cut onto the center-right of the panel and trim the very edge of the circular die cut to match the background panel. Attach the leaf and flower to the card with foam tape. Glue small yellow sequins to the center of the flower and add purple and yellow sequins onto the card. Glue the whole panel onto an A2-sized white card base. Splatter a little more gold watercolor across the card.
Other TCW (The Crafter’s Workshop)-Stencil-Dahlia Blooms (6”x6”) Simon Says Stamp-Stencil-Mod Layering Leaves (1 of 2 stencils in the set) Simon Says Stamp-Stamp-Amazing Catherine Pooler-Sequins-Paisley Park and Saint Lucia sequin mixes Embossing powder in my stash Hero Arts-Die-Nesting Circle Infinity die set Honey Bee Stamps-Die-Deckle Edge A2 die set Altenew-Foam Tape-Instant Dimension Foam Tape Scissors Black artist pen Clear embossing powder Glue
Here’s a dramatic, yet quick and easy Season’s Greeting’s Card
Skill Level: Beginner to Intermediate Time: 1 hour
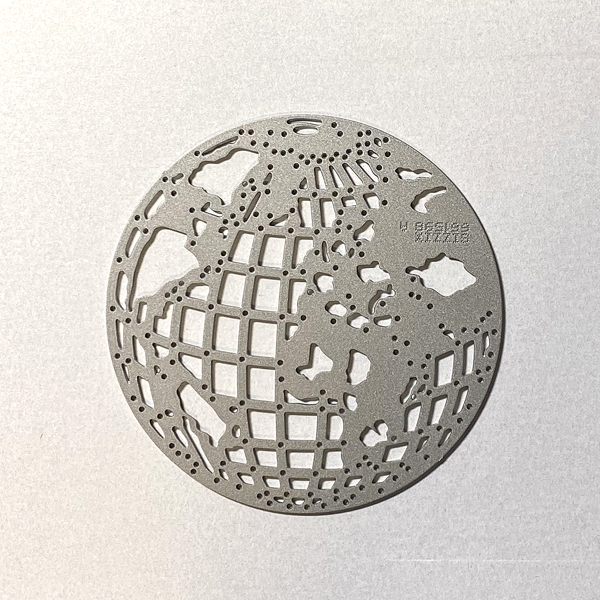
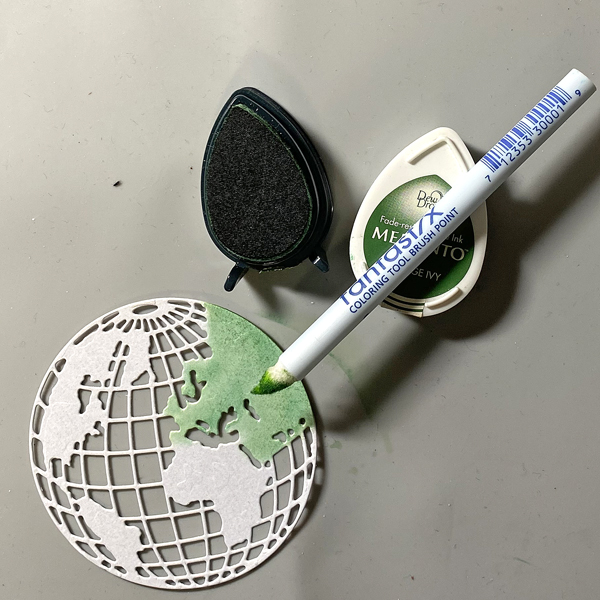
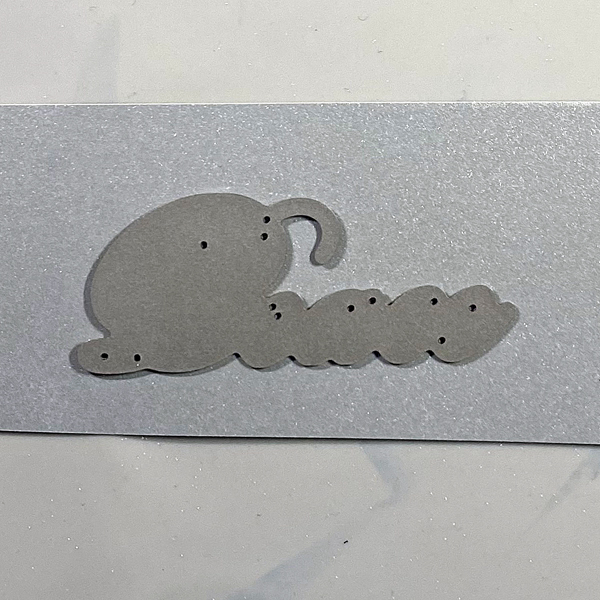
Step 1. Use the Mini Globe Thinlits cutting die to cut white metallic cardstock.
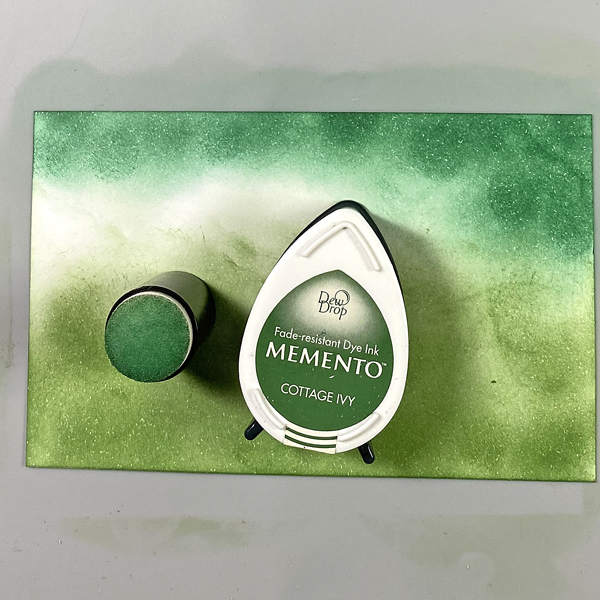
Step 2: Use a Fantastix to apply Cottage Ivy Memento ink to the land areas of the globe.
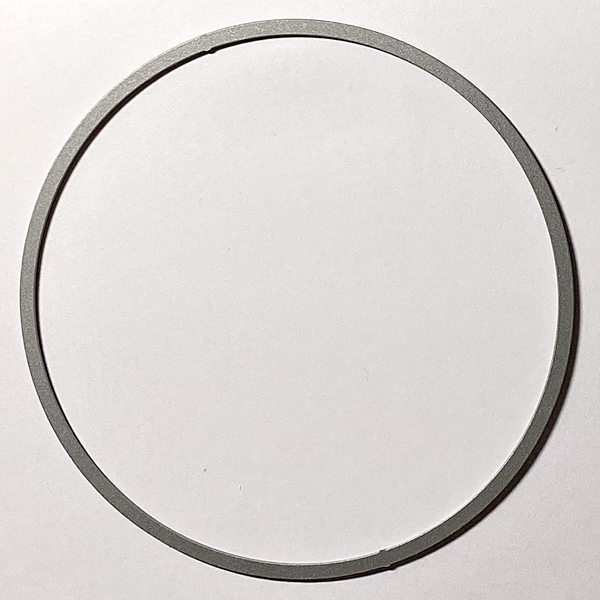
Step 3: Use a circle die to cut white cardstock.
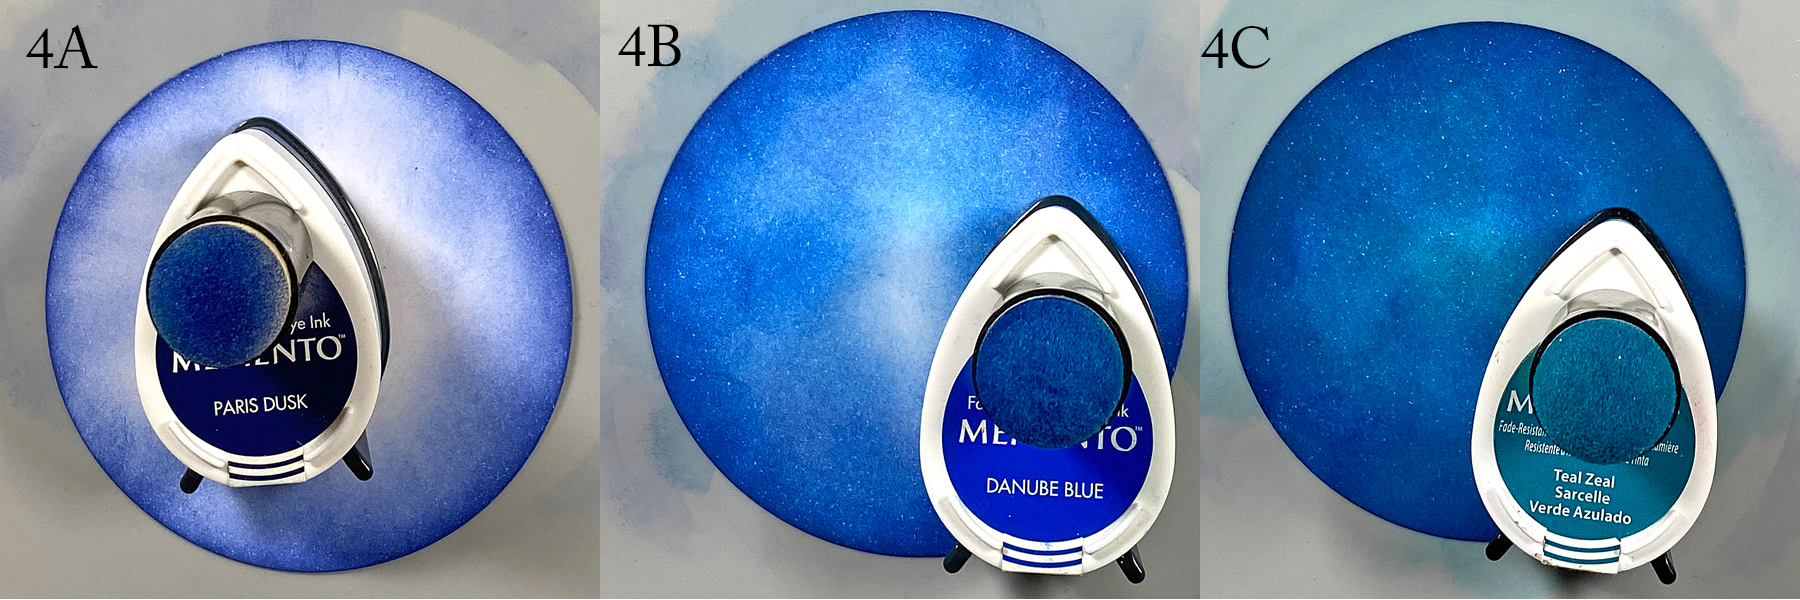
Step 4: Use a sponge dauber to apply Paris Dusk Memento Ink around the outside of the white circle die-cut. Use another sponge dauber to apply Danube Blue Memento Ink from the outside of the circle die-cut blending inwards. Use a third sponge dauber to apply Teal Zeal to the center of the die-cut, taking care to blend the inks together.
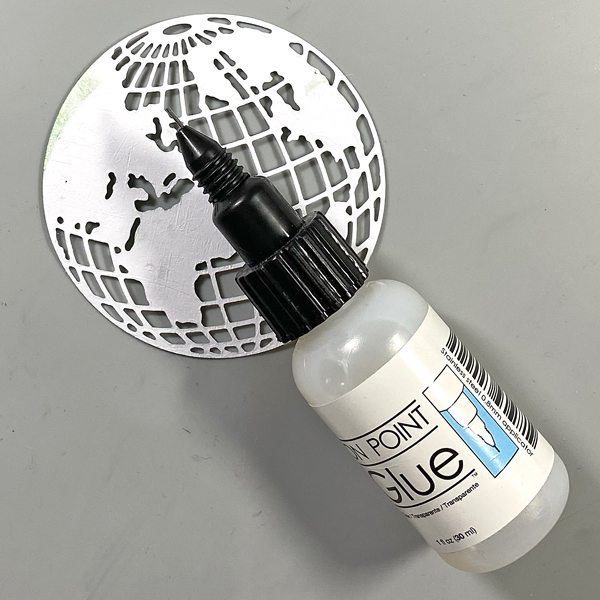
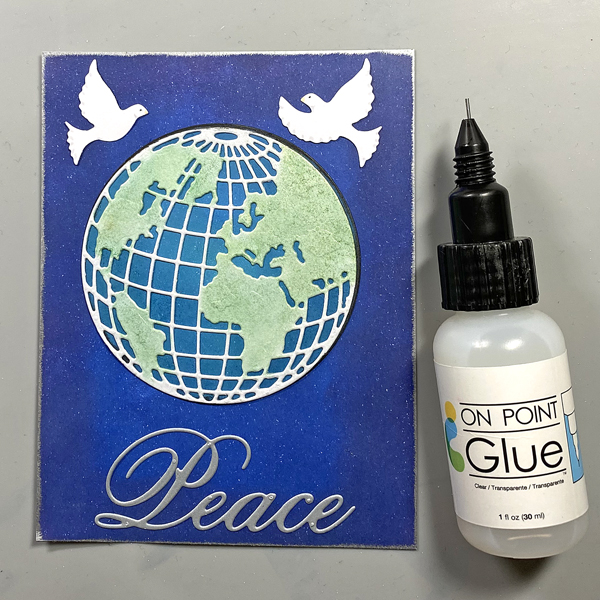
Step 5: Apply On Point Glue to the reverse of the glove, spread the glue with your finger, then adhere the globe to the inked circle. Set aside.
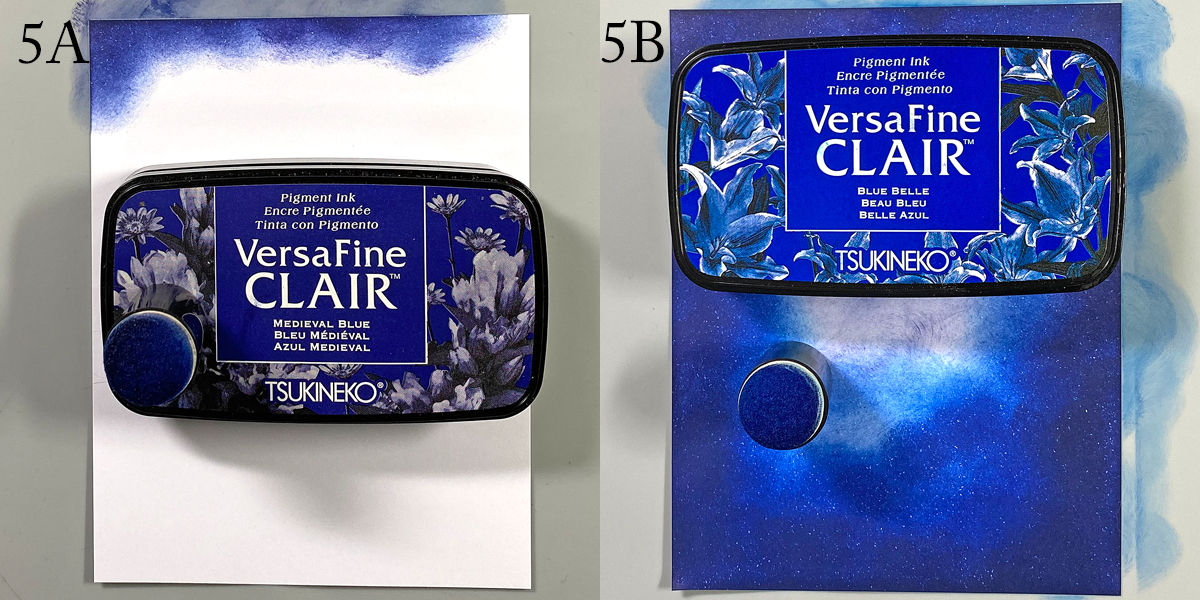
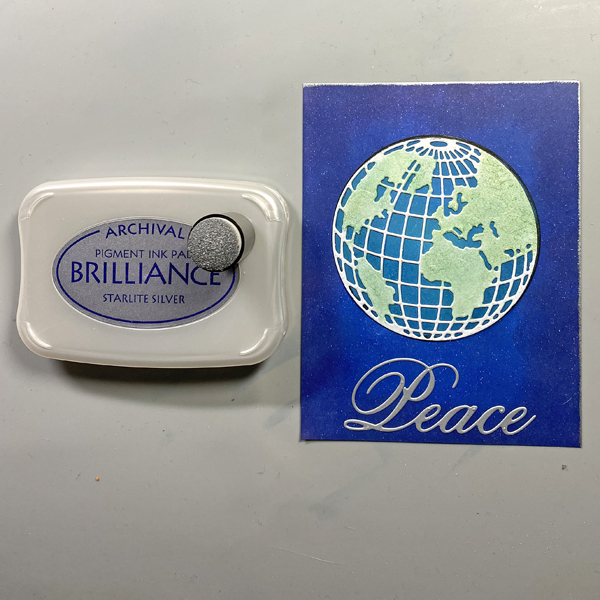
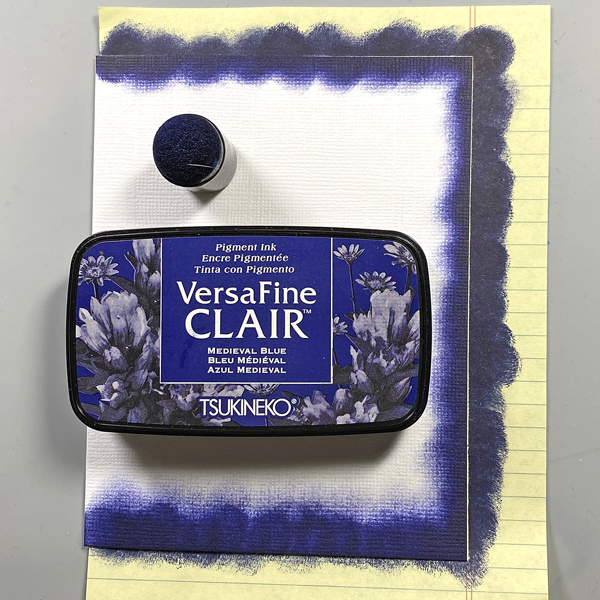
Step 6: Use a sponge dauber to apply Medieval Blue VersaFine Clair ink around the edges of a piece of 4” x 5.25” cardstock to create the image panel. Use a sponge dauber to apply Blue Belle VersaFine Clair ink from the center of the inked cardstock to the outside, taking care to blend the inks together. Heat set.
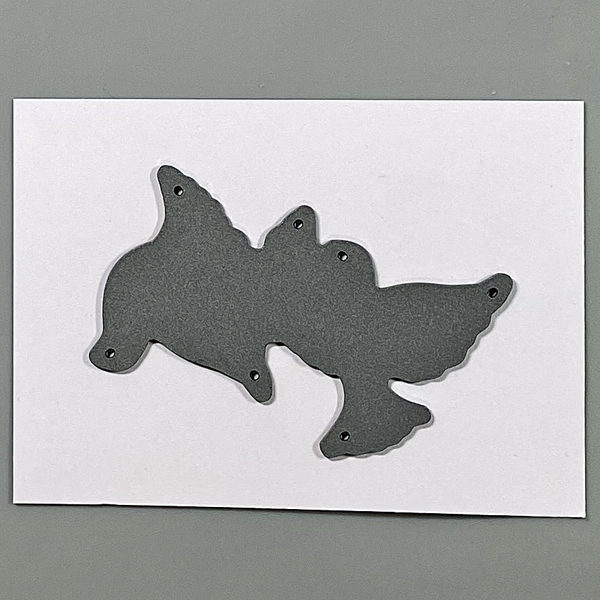
Step 7: Use the doves die to cut white cardstock. Use Copic markers to add details to the doves.
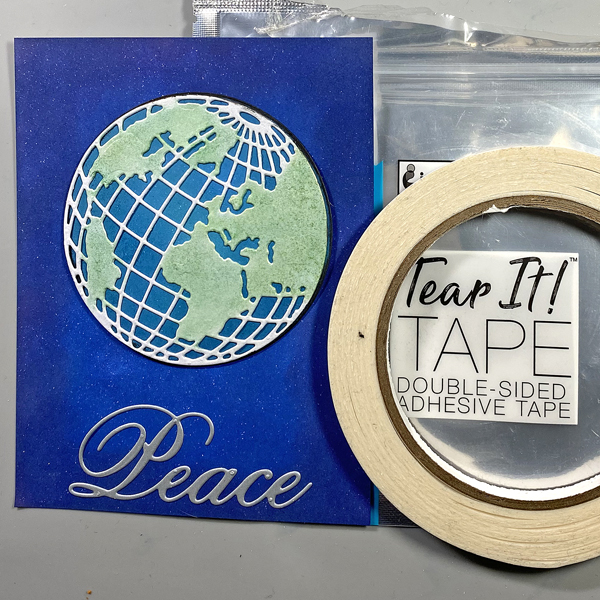
Step 8: Use the peace die to cut silver metallic cardstock and adhere to the base of the image panel.
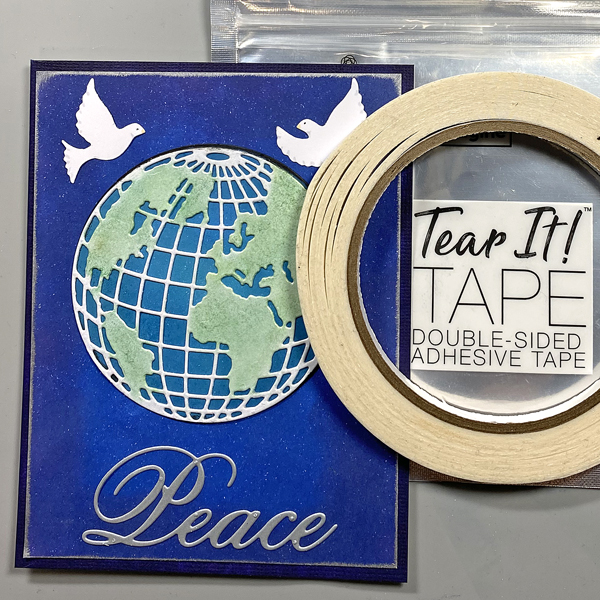
Step 9: Use Tear It! Tape to adhere the globe/circle combination to the card as shown.
Step 10: Edge the image panel with Starlite Silver Brilliance ink and a sponge dauber. Heat set.
Step 11: Use On Point Glue to adhere the doves to the image panel.
Step 12: Use a sponge dauber to apply Medieval blue to the perimeter of a 4.25” x 5.5” white card. Heat set.
Step 13: Use Tear It! Tape to adhere the image panel to the inked white card.
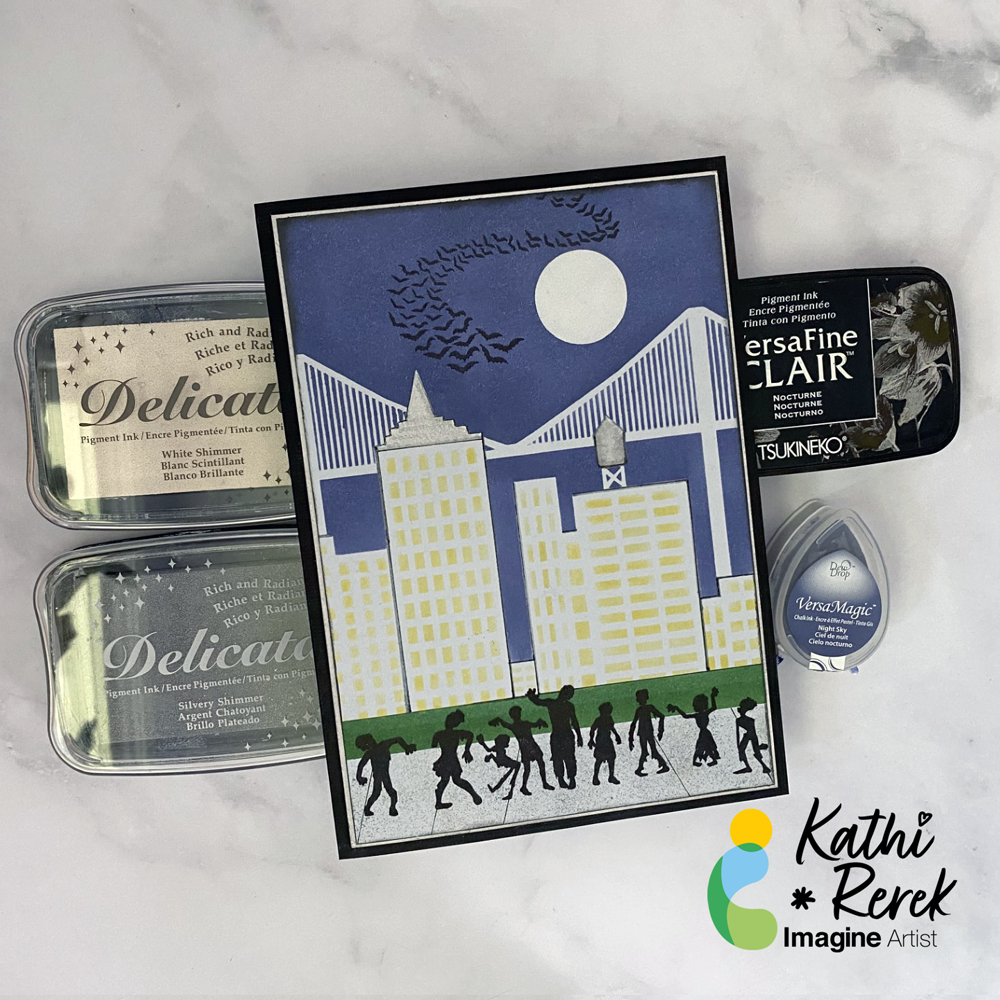
Halloween card made easy with VersaMagic, Brilliance, Delicata, VersaFine Clair, and Memento Inks!
Skill Level: Beginner to Intermediate
Time: 1 hour
Step 1.
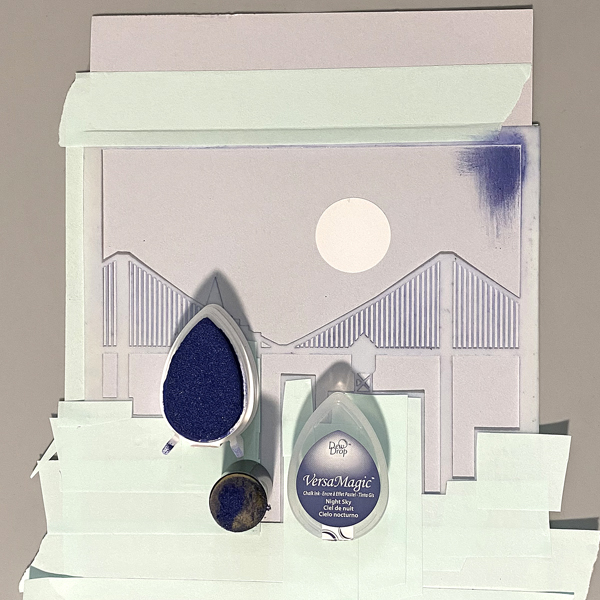
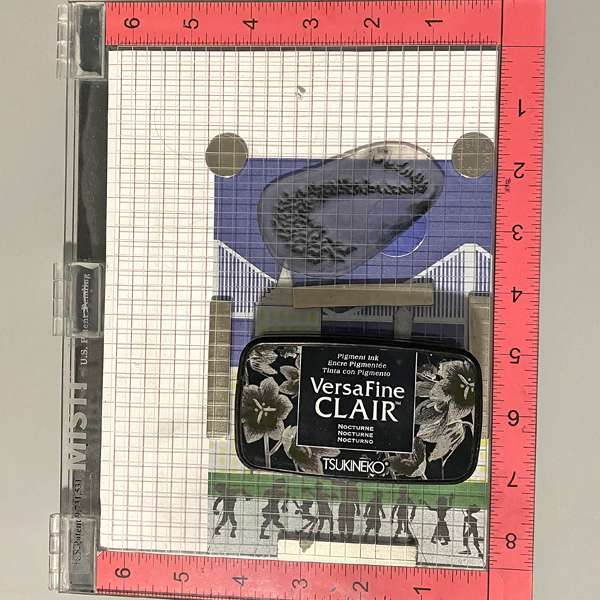
Use low-tack tape to secure the Cityscape Stencil to a 5.5” x 8.5” piece of light grey cardstock. Trim and place low-tack tape to cover the buildings’ windows. Use a circle punch to cut a circle from mask paper and adhere the circle mask above the bridge. Keep the mask paper with the circular hole for another step..
Use a sponge dauber to apply Night Sky VersaMagic Ink over the stencil and the moon mask onto the the grey cardstock to create a night sky.
Step 2:
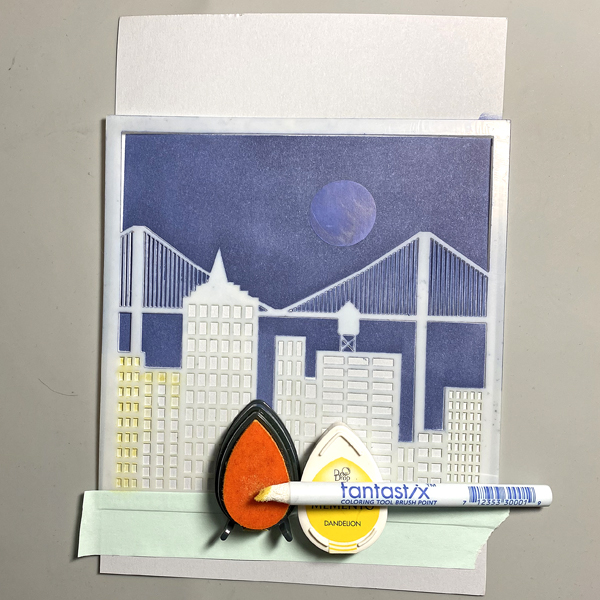
Keeping the stencil in place, remove the tape covering the windows. Use a Fantastix to apply Dandelion Memento Ink over the window apertures of the stencil.
Step 3:
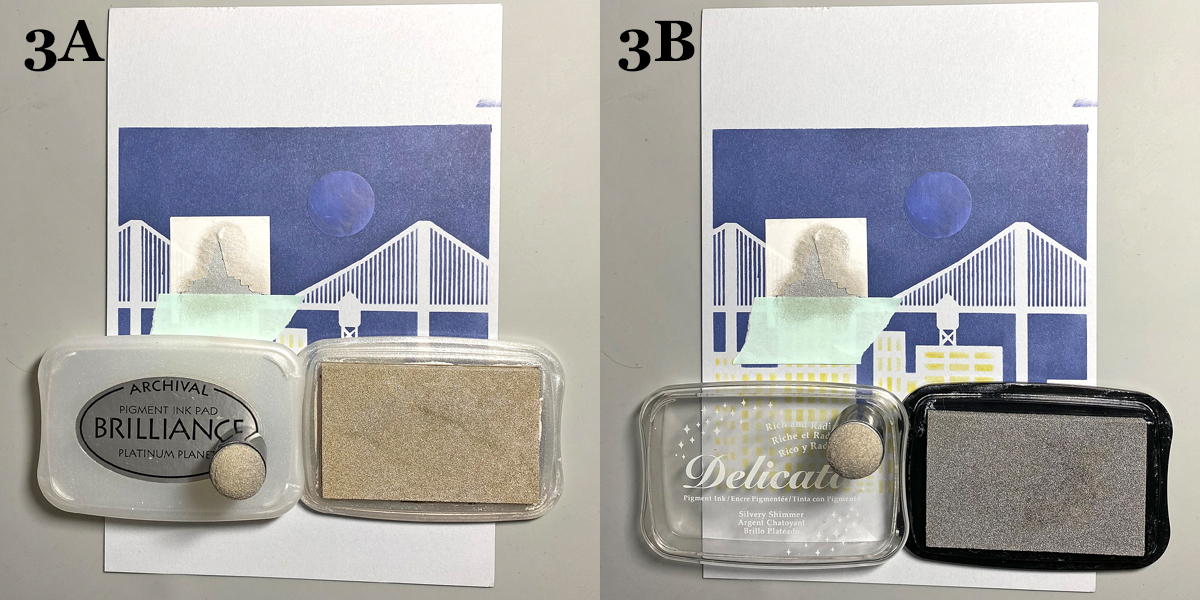
Trace the spire onto masking paper, fussy-cut along the lines, leaving the outline of the spire intact. Place the mask around the spire on the image panel. Use low-tack tape to cover the base of the spire.
Use a sponge dauber to apply Platinum Planet Brilliance Ink to the spire, then apply Silvery Shimmer Delicata Ink overtop to amp up the silver.
Step 4:
Use low-tack tape to cover the area around the rooftop water tower, leaving the tower unmasked. Use a Fantastix to apply Platinum Planet Brilliance Ink to color the water tower. Use another Fantastix to apply Starlight Black Brilliance Ink to add shading to the water tower.
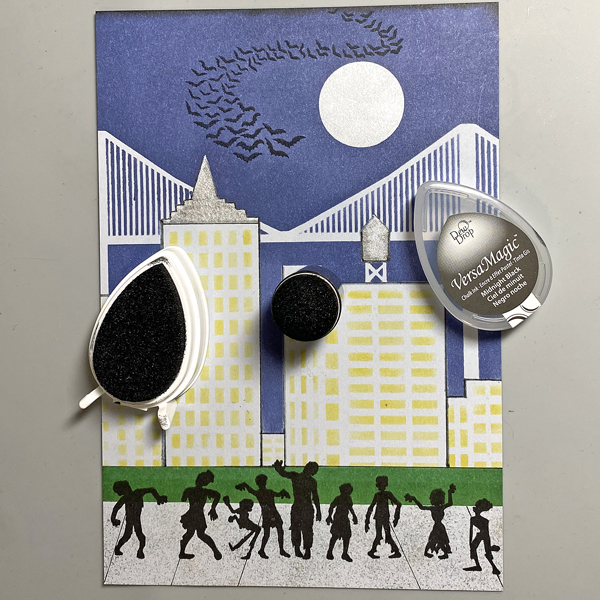
Step 5:
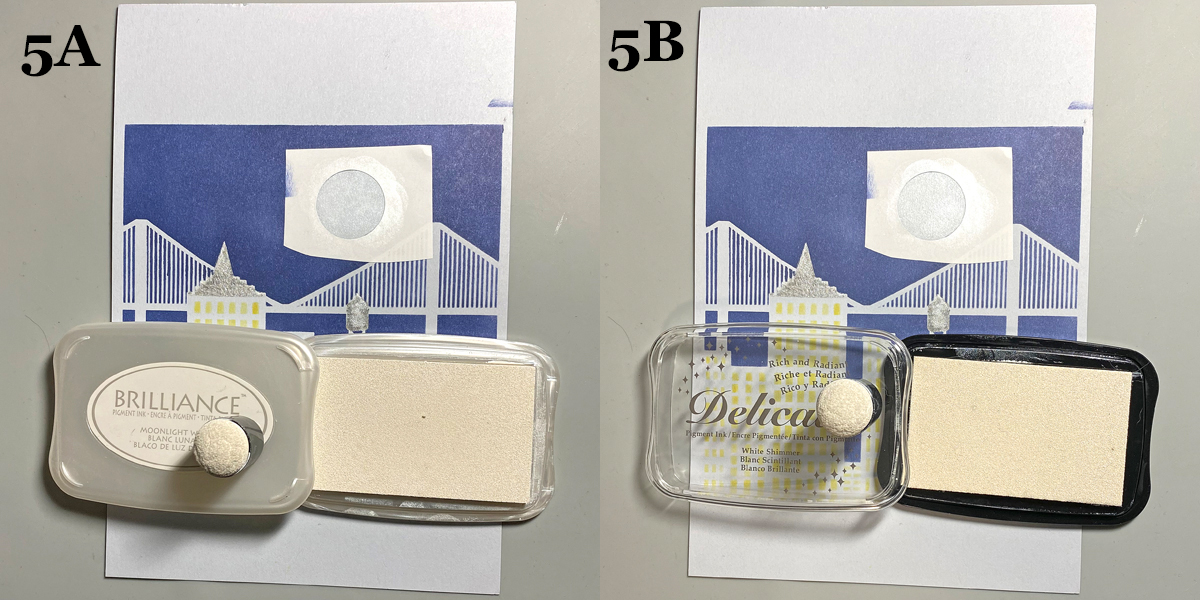
Remove the circle mask from the sky. Adhere the mask paper with the circle hole to the sky area, leaving the center open. Use a Sponge Dauber to apply Moonlight White Brilliance ink to color the moon white. Use a Sponge Dauber to apply White Shimmer Delicata Ink overtop to add shimmer to the moon.
Step 6:
Use a scrap of cardstock and low-tack tape to cover the buildings. Place another piece of low-tack tape horizontally across the bottom 1.25” of the image panel.Use Sponge Daubers to apply Cottage Ivy and Bamboo Leaves Memento Ink between the masked areas to create a grassy lawn.
Step 7:
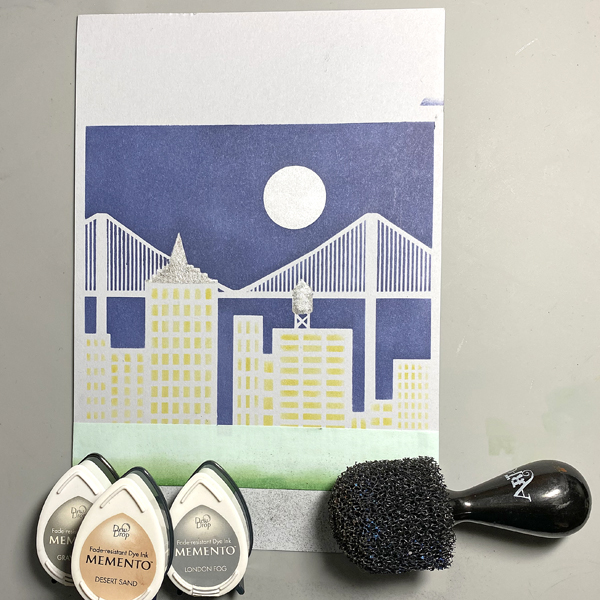
Use low-tack tape to cover the grassy areas. Use the pouncy tool to apply London Fog, Grey Flannel, and Desert Sand Memento Inks to create a cement sidewalk.
Step 8:
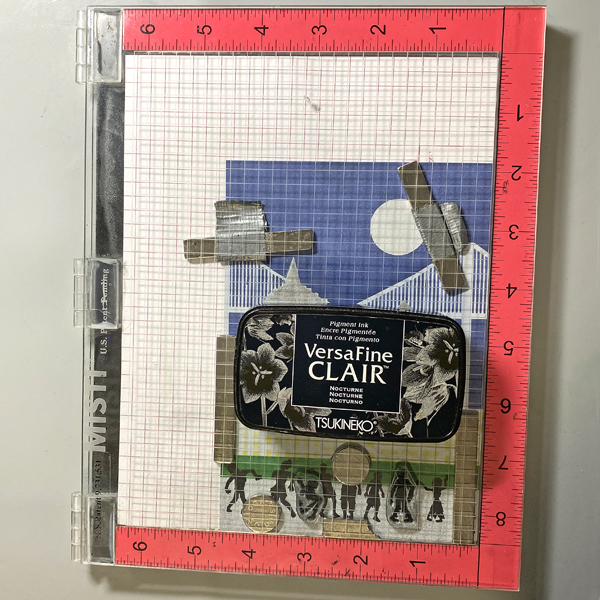
Use magnets to secure the image panel to the stamping platform. Position the Zombie stamps facedown where desired. Press the lid of the platform onto the back of the stamps, lift, ink the stamps with Nocturne VersaFine Clair Ink, and stamp. Re-ink and repeat stamping if needed to attain a good solid impression.
Remove the Zombie stamps from the platform., then remove the image panel from the platform,. Heat set the stamped images.
Step 9:
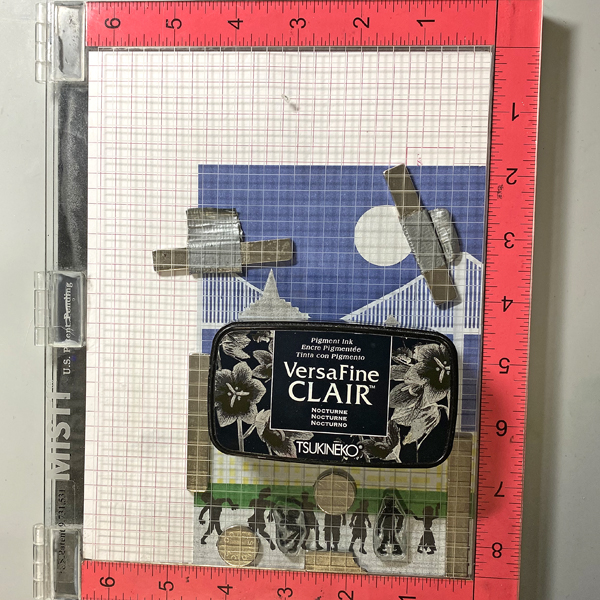
Place the image panel back onto the base of the stamping platform, secured with magnets.. Place the other two small Zombie stamps facedown between the other stamped images. Press the lid of the platform onto the back of the stamps, lift, ink the stamps with Nocturne VersaFine Clair Ink, and stamp. Re-ink and repeat stamping if needed to attain a good solid impression.
Remove the stamps from the platform Remove the image panel from the platform. Heat set.
Step 10:
Place the image panel back onto the stamping platform, secured with magnets. Place the Bat Colony Stamp facedown in the sky area as shown. Press the lid of the platform onto the back of the stamps, lift, ink the stamps with Nocturne VersaFine Clair Ink, and stamp. Re-ink and repeat stamping if needed to attain a good solid impression.
Remove the stamps from the platform Remove the image panel from the platform. Heat set.
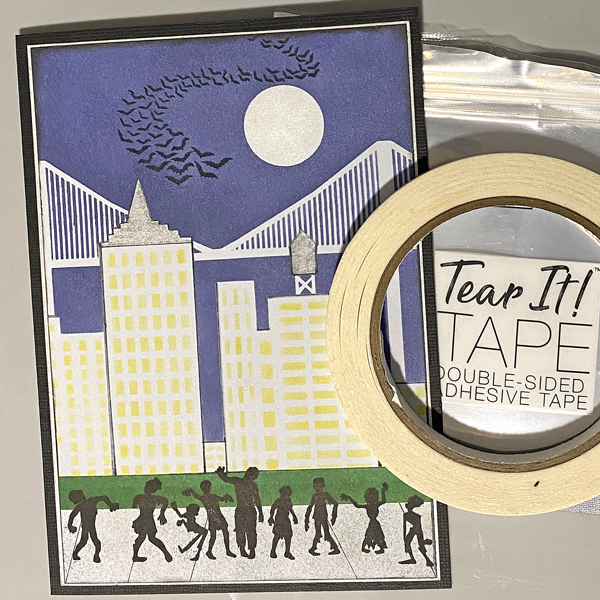
Step 11:
Trim the image panel to 4 5/8” x 6 5/8” . Use a Sponge Dauber to edge the image panel with Midnight Black VersaMagic Ink.
Step 12:
Trim a piece of white cardstock to 4.75” x 6.75”. Use a Sponge Dauber to apply Platinum Planet Brilliance Ink to the outside .5” of the image panel. Then use a Sponge Dauber to apply Silvery Shimmer Delicata Ink overtop to add to the metallic shine.
Step 13:
Use Tear It! Tape to mat the image panel to the silver-inked cardstock, then use Tear-It! Tape to adhere the matted image panel to a black 5” x 7” card.
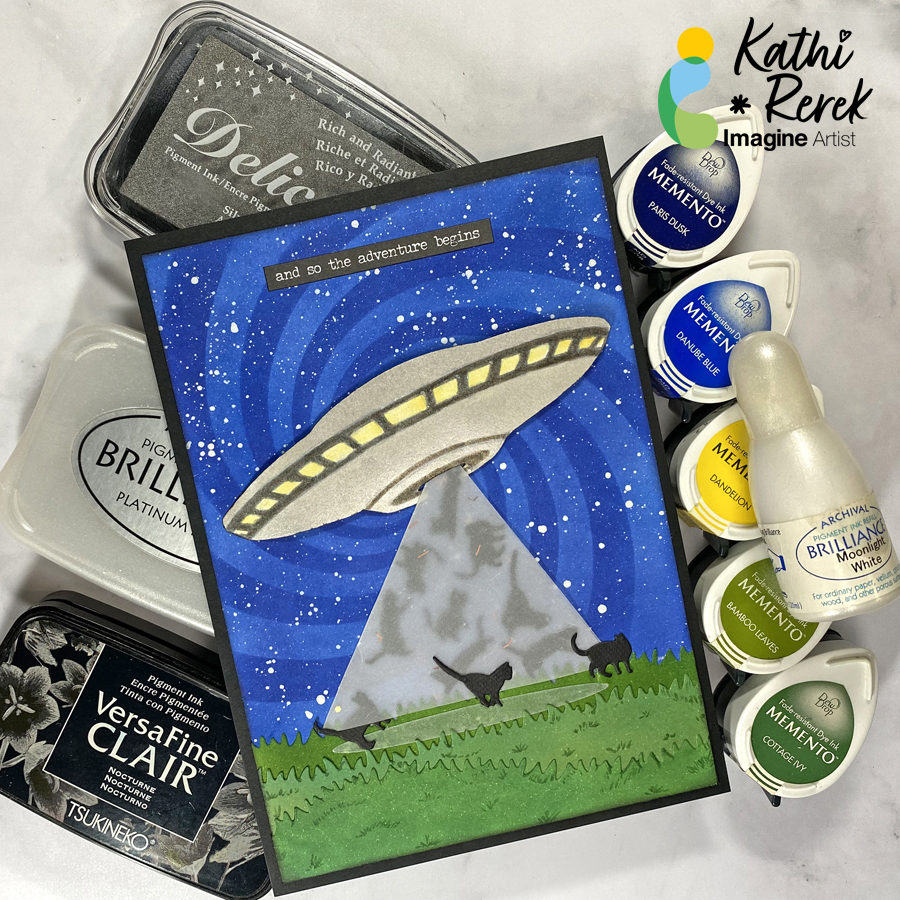
– Here’s a rare project from me that with no stamping at all. I’ve used inks, stencils, and cutting dies to create what will either be a wall hanging or a journal page.
Skill Level: Beginner to Intermediate
Time: 1.5 hours
Step 1.
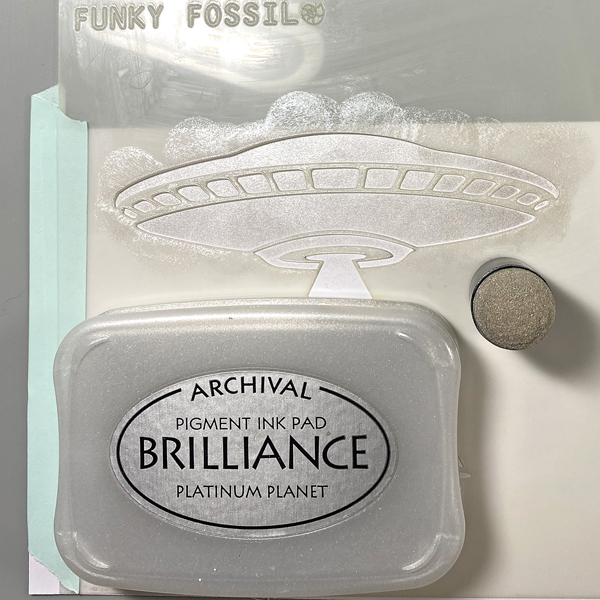
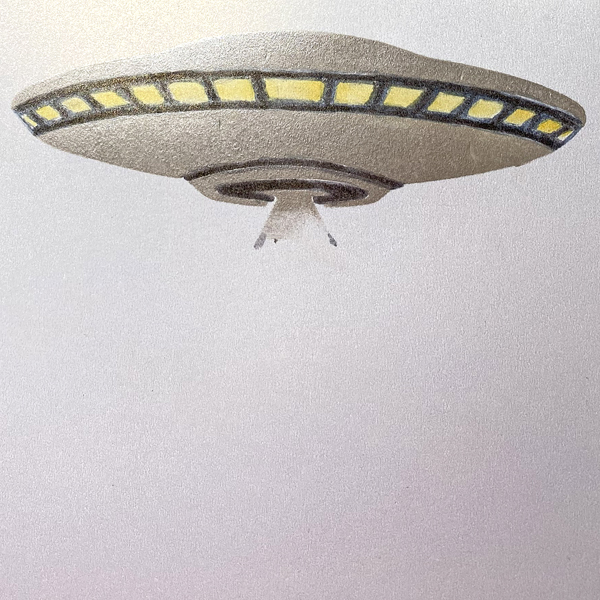
Secure the UFO stencil to a piece of cardstock with removable tape on both sides of the paper, creating a hinge. Apply Platinum Planet Brilliance over the stencil onto the cardstock. Open the hinged stencil and heat set the image panel.
Step 2:
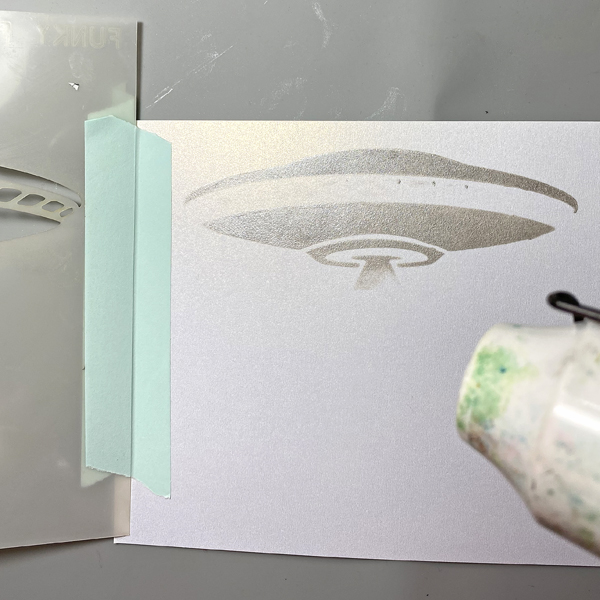
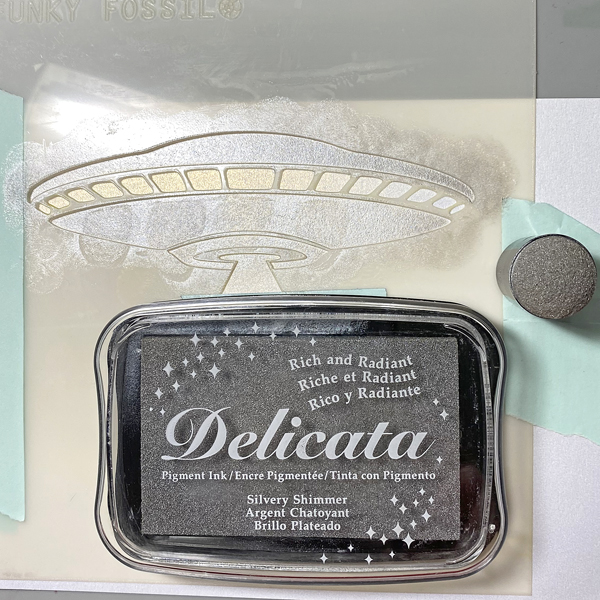
Put the UFO stencil back in place. Use a sponge dauber to apply Silver Shimmer Delicata over the stencil onto the image panel. Open the hinged stencil and heat set the image panel.
Step 3:
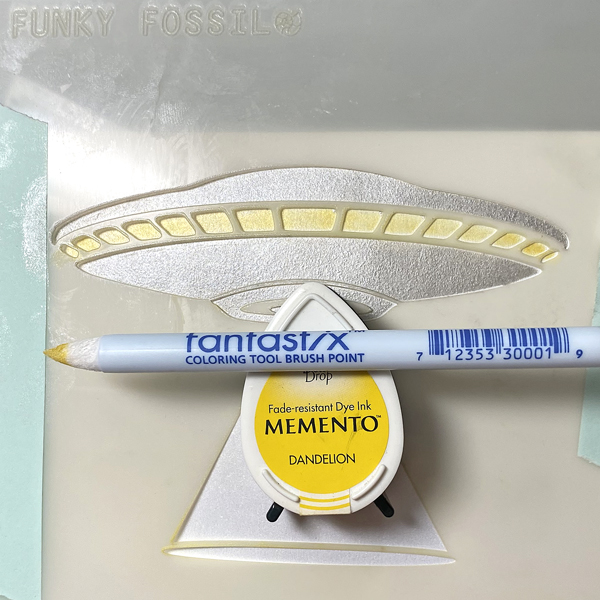
Use a brush-tipped Fantastix to apply Dandelion Memento ink through the UFO’s windows onto the image panel. Remove and clean the stencil.
Step 4:
Touch up the windows with the Fantastix. Use a grey watercolor marker to color the window frames and the bottom aperture of the UFO.
Step 5:
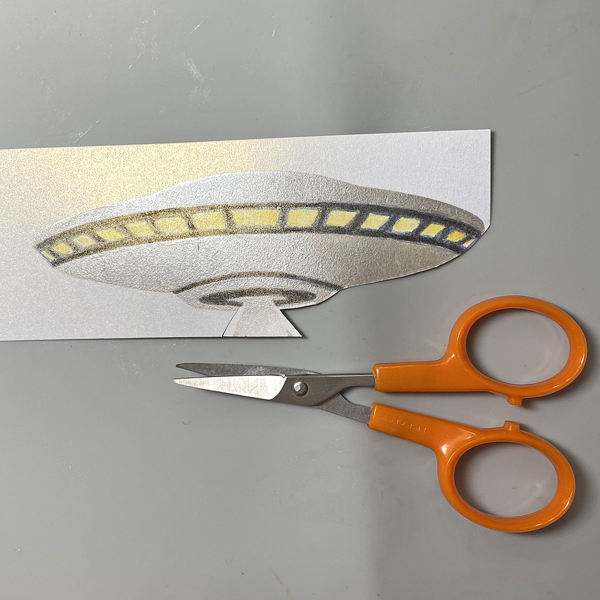
Fussy-cut the UFO, edge with a dark marker, and set aside.
Step 6:
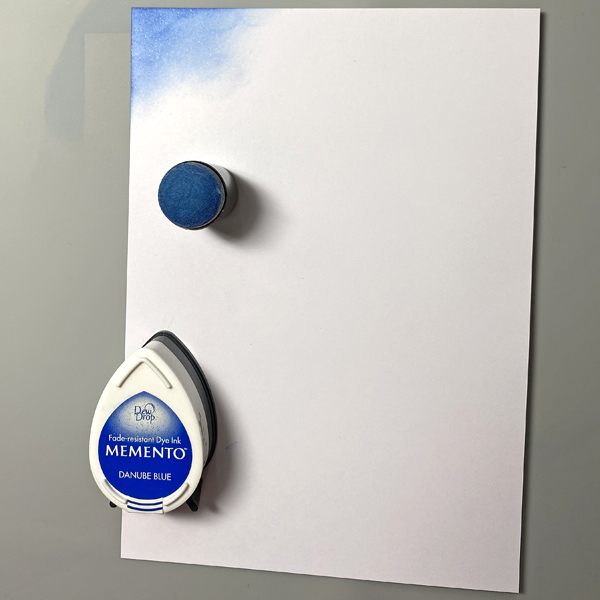
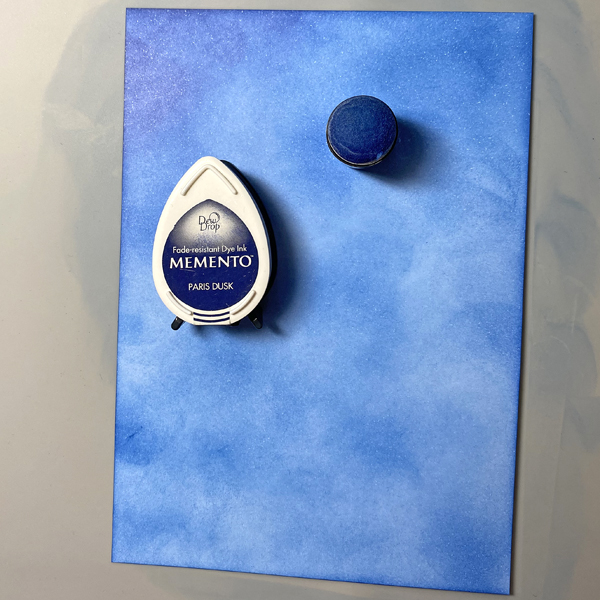
Use a sponge dauber to apply Danube Blue onto a 4.75” x 6.75” piece of Bristol Paper. Use a sponge dauber to blend Paris Dusk onto the Bristol Paper to create a mottled background.
Step 7:
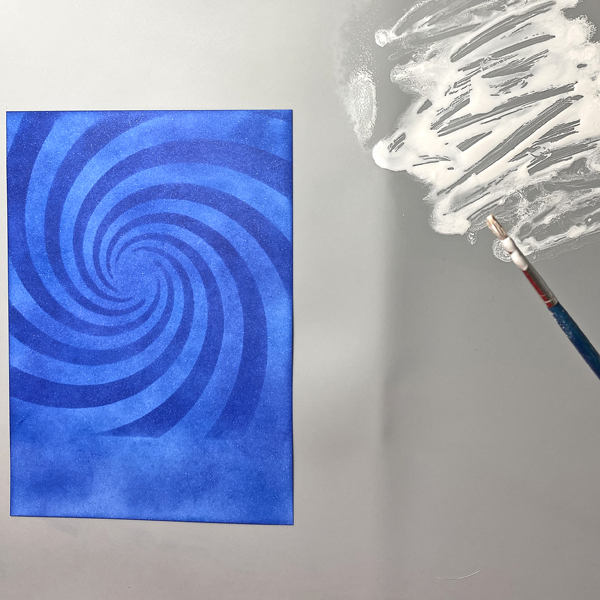
Tape the Time Tunnel Stencil over the inked background panel. Use a sponge dauber to apply Paris Dusk Memento ink over the stencil onto the paper.
Step 8:
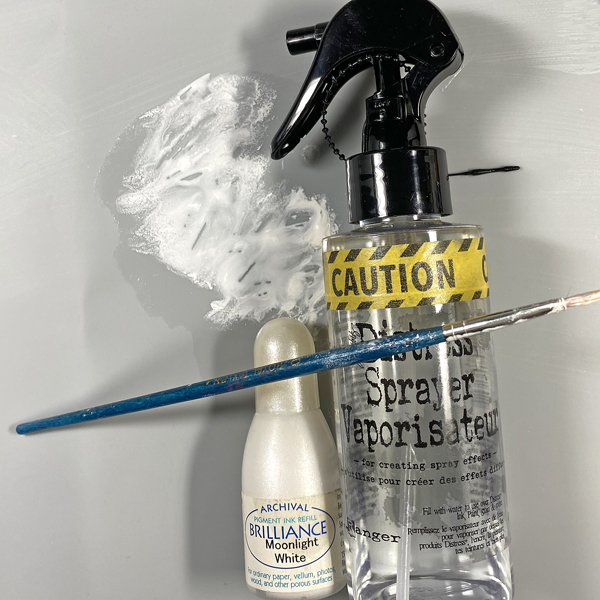
Squeeze a few drops of Moonlight White Brilliance re-inker onto a craft mat. Spray with 91% Isopropyl Alcohol. Use a paintbrush to mix the ink. Load the paintbrush with the diluted Moonlight Brilliance ink and splatter the background panel. Let air dry or heat set.
Step 9:
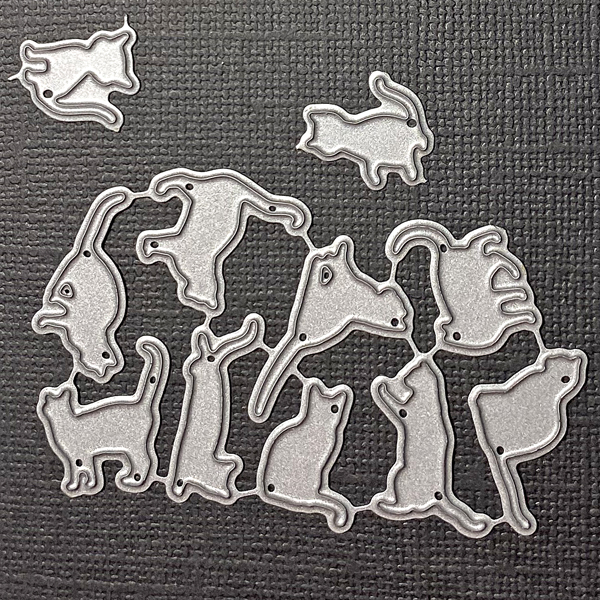
Use the Mini Cats die to cut Raven cardstock. Set the cat dies aside.
Step 10:
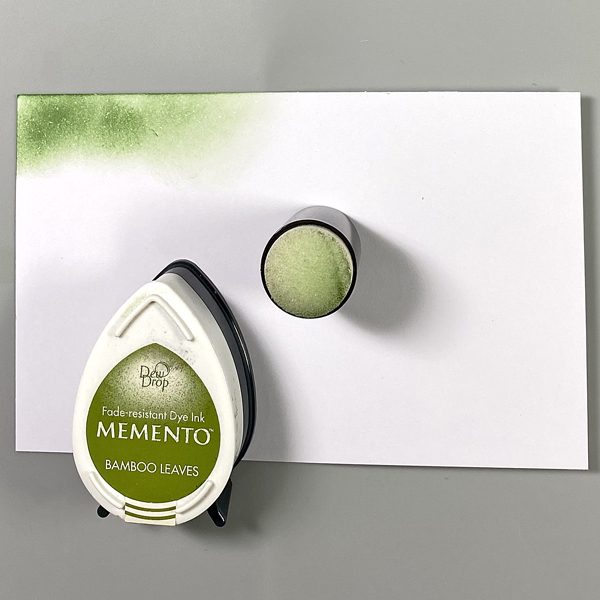
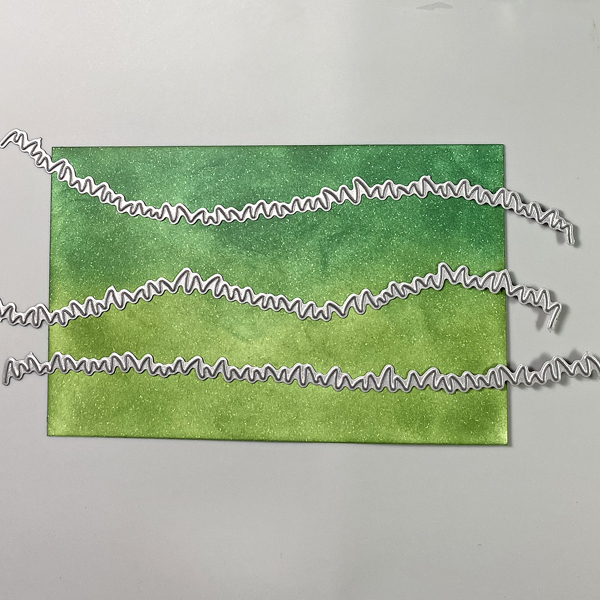
Use a sponge dauber to apply Bamboo Leaves Memento ink onto a white cardstock panel. Repeat Cottage Ivy Memento ink until the panel is covered.
Step 11:
Use the Grassy Hills Die set to cut the inked panels. Use a green Copic marker to edge the grass and to add details. Using Memento Ink to create backgrounds allows you to use Copic markers overtop!
Step 12:
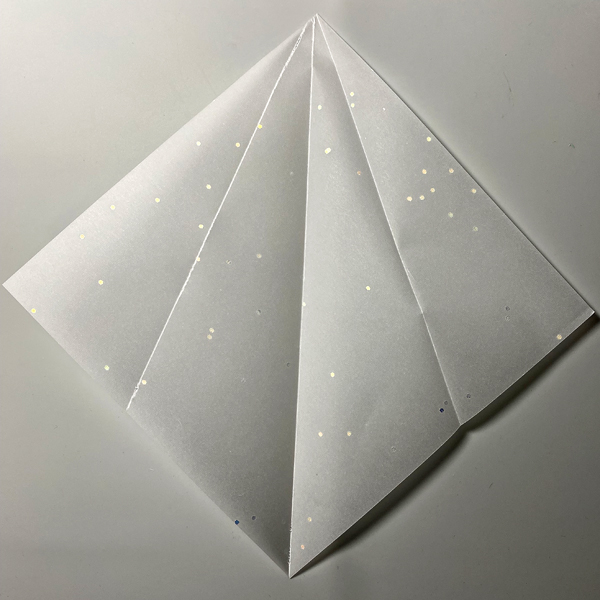
Cut a piece of vellum to 6” square. Score on the diagonal from one point to the opposite point. Fold.
Repeat with both sides until it looks like the above photo.
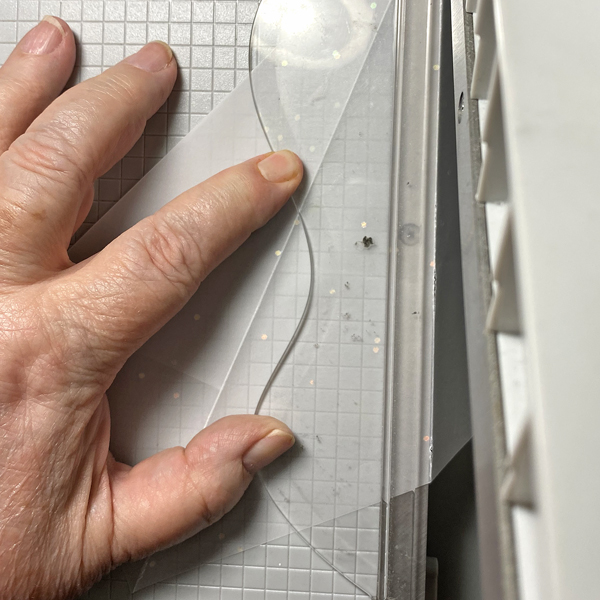
Step 13:
Place one edge of the scored, folded square along the cutting edge of a guillotine trimmer. Cut.
Step 14:
Use On Point Glue to adhere the die-cut cats to the interior of the folded vellum triangle. Sorry that I forgot to take a photo.
Step 15:
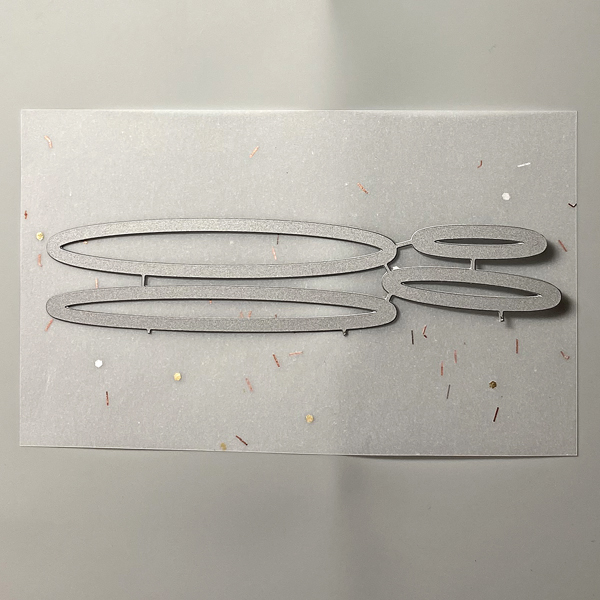
Back a piece of vellum with two-sided tape. Use the Oval Shadows Die-namics to cut the vellum.
Step 16:
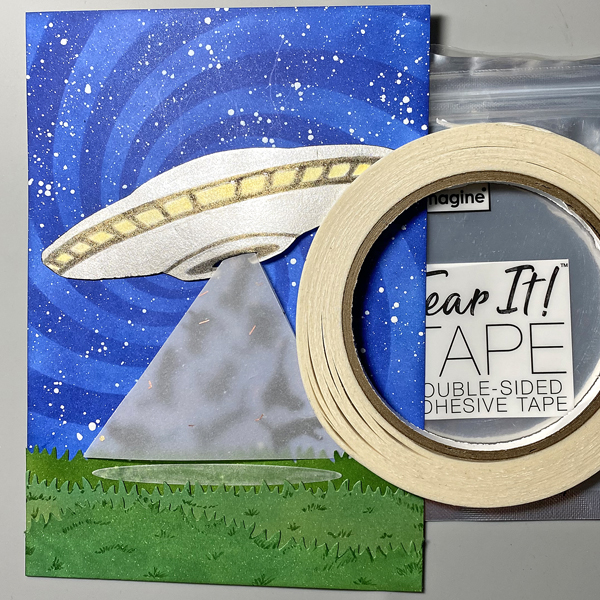
Use Tear It! Tape to adhere the three layers of grass to the background panel as shown. Edge the panel with VersaFine Clair Nocturne .
Adhere the vellum cone and the vellum oval as shown. Use On Point Glue to adhere escaping and/or partially beamed-up cats atop the vellum oval and cone.
Use dimensional foam adhesive to adhere the UFO as shown.
Step 17:
Adhere the image panel to a 5” x 7” piece of Black Mixed Media paper. Add the sentiment sticker to finish the piece.
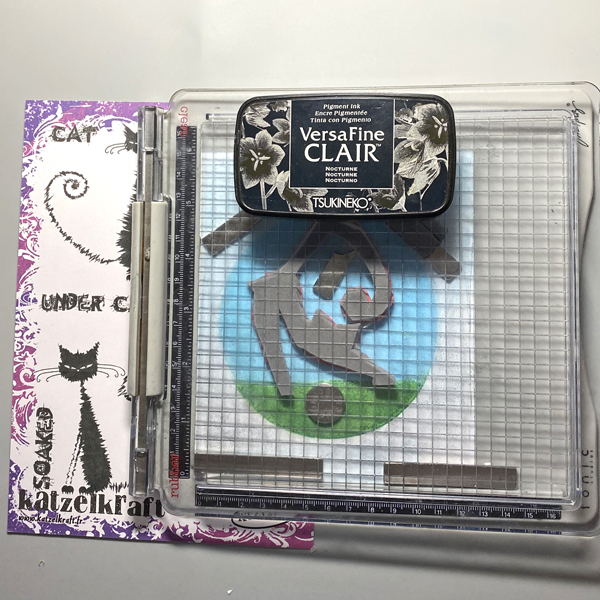
Using a Gel Press with VersaFine Clair inks is a great way to create a quick background.
Skill Level: Beginner to Intermediate
Time: 1 hour
Directions:
Step 1.
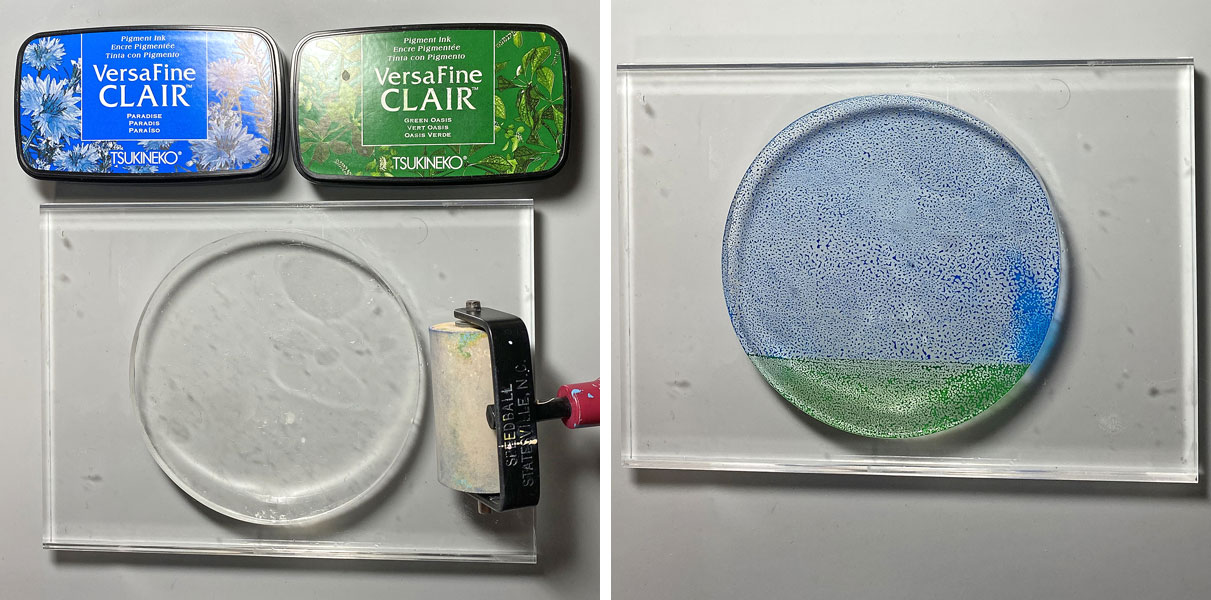
Use a 2” brayer to apply Paradise VersaFine Clair ink to the top part of a 4” round gel press. Clean the brayer, then use to apply Green Oasis VersaFine Clair Ink to the bottom of the gel press.
Press a 6” x 4.25” piece of mixed media paper onto the gel press and pull the print. I actually used a leftover panel from a previous gel print session that was not successful.
Step 2:
Mist the print with with 91% Isopropyl Alcohol.
Use Fantastix to apply Verdant VersaFine Clair Ink to even out the green area of the print and then apply Rain Forest VersaFine Clair Ink to add dimension.
Step 3:
Use paper towel to gently dab the sky and grassy areas of the print with Purell to further blend the ink.
Heat set.
Step 4:
Use magnets to secure the image panel to the base of a stamping platform.
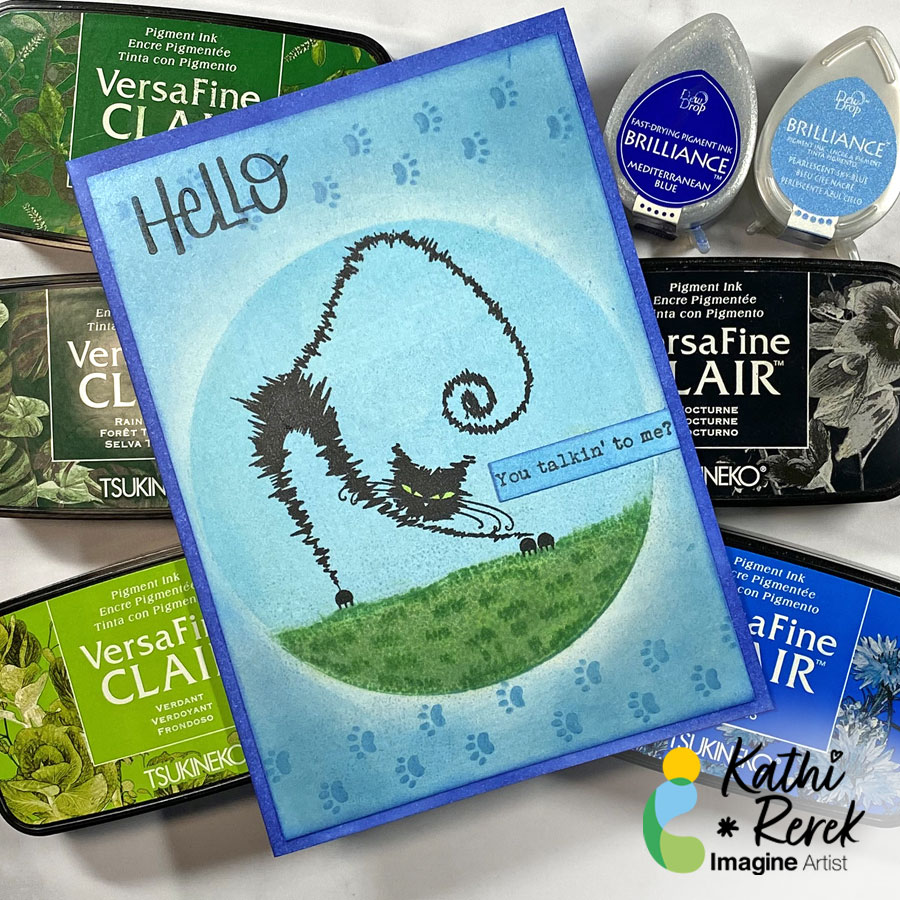
Position the stretching cat stamp from the The Furieux/Caffeinated Cats Unmounted Stamp Set facedown so that its paws are on the grass.
Ink the stamp with Nocturne VersaFine Clair Ink and stamp. Re-ink and stamp again if needed. Remove the stamp and heat set the panel.
Step 5:
The left paws were stamped slightly above the grass, so I used Fantastix and Green Oasis VersaFine Clair Ink to add a tuft of grass under his floating paws and to add detail to the lawn.
Step 6:
Use a Sponge Dauber to apply Pearlescent Sky Blue Brilliance Ink around the image circle, leaving a bit of a halo effect around the circle.
Step 7:
Tape the image panel to the back of the Pawprint Stencil so that the smallest paw prints run horizontally across the top of the image panel.
Use Sponge Daubers to apply Pearlescent Sky Blue and Mediterranean Blue Brilliance Inks over the stencil onto the image panel.
Remove and clean the stencil, then repeat the steps above to stencil the small paw prints across the bottom of the image panel.
Lift the stencil and use the Sponge Dauber to edge the panel with Mediterranean Blue Brilliance Ink. Heat set the panel.
Step 8:
Use a Sponge Dauber to apply Pearlescent Sky Blue Brilliance Ink to a strip of white cardstock. Heat set.
Secure the cardstock strip to the base of a stamping platform. Position the “You talking’ to me?” sentiment from the Whatchamacallit Unmounted Stamp Set facedown on the strip.
Ink the stamp with Nocturne VersaFine Clair Ink and stamp. Heat set.
Use scissors or a die-cut to cut the sentiment and edge it with Mediterranean Blue Brilliance Ink. Heat set.
Step 9:
Cut a piece of white cardstock to 9” x 6.25”, score at 4.5”, and fold to form a 4.5” x 6.25” card.
Use a Sponge Dauber to apply Mediterranean Blue Brilliance Ink around the the edges of the card. Heat Set.
Step 10:
Use Tear It! Tape to secure the image panel to the card front.
Step 11:
After looking at the finished card,I decided that the card needed a larger sentiment up at the top left.
Secure the entire card with magnets to the base of a stamping platform. Position the “Hello” stamp from the Holiday Quotes. Unmounted Stamp Set facedown on the upper left. Use Nocturne VersaMark Ink to stamp the sentiment. Heat set.