Rainbow Kindness Card

By Helen Gullett

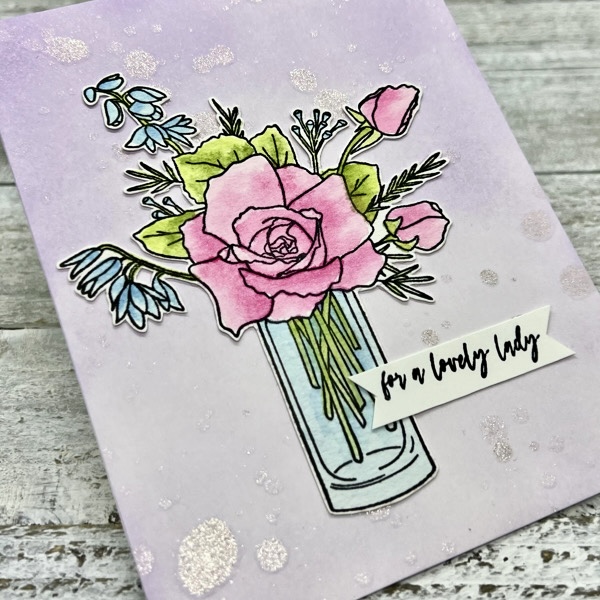
Hello crafty friends! Today, I wanna share this easy and quick card idea for you. You can use stamps to create a fun background and focal point using small image stamps. Let’s make it together.

Skill: Beginner
Time: 15 minutes

Direction:

Step 1
Cut out a piece of 8.5 x 11 inch white heavyweight cardstock and make them your card bases.

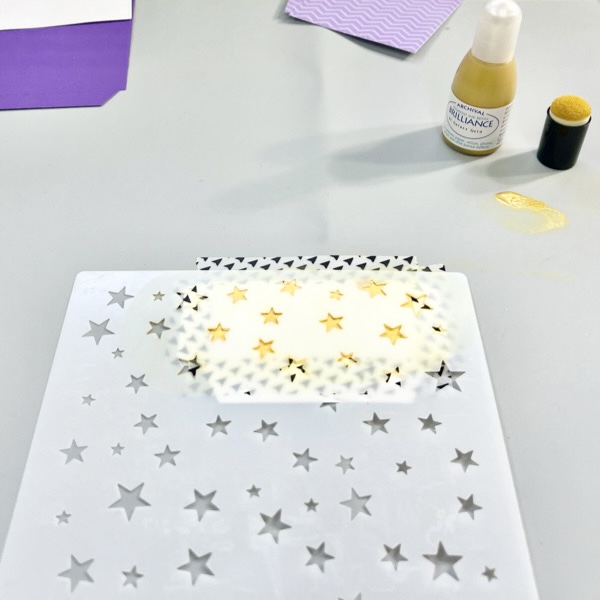
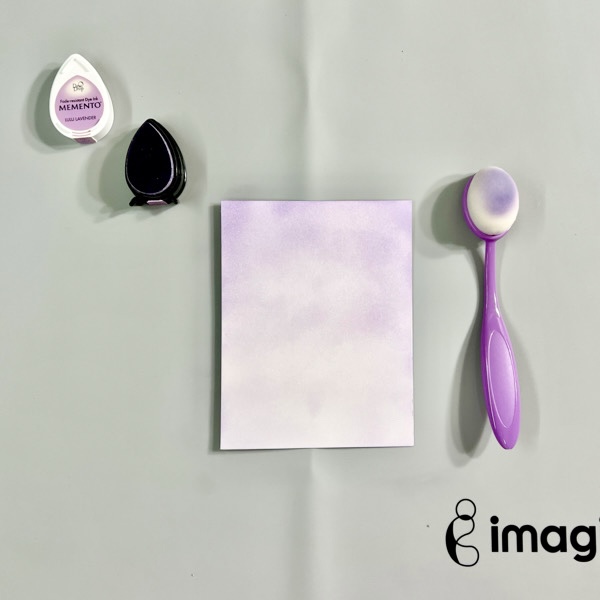
Stamp the cloud image (or any small image stamp) directly on the front of the card base to create your background using Memento Ink (Summer Sky)

Step 2
It is easier to use a stamping tool when you use several stamps to build up an image. This stamping tool can help you to line up your image stamp perfectly.

For my rainbow, I used several small stamps to build it. I stamped each image one by one using VersaFine Clair ink pads (Tulip Red, Summertime, Cheerful, Verdant, Paradise, Fantasia)

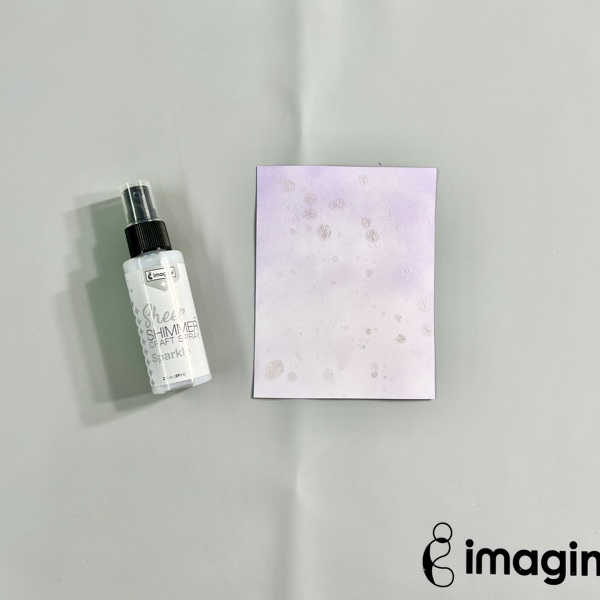
Set aside for the inks to dry when you are done stamping, or you can use a craft heat gun to speed up the drying process.

Step 3
On another piece of white cardstock, stamp the cloud image outline and dots with VersaFine Clair (Warm Breeze)

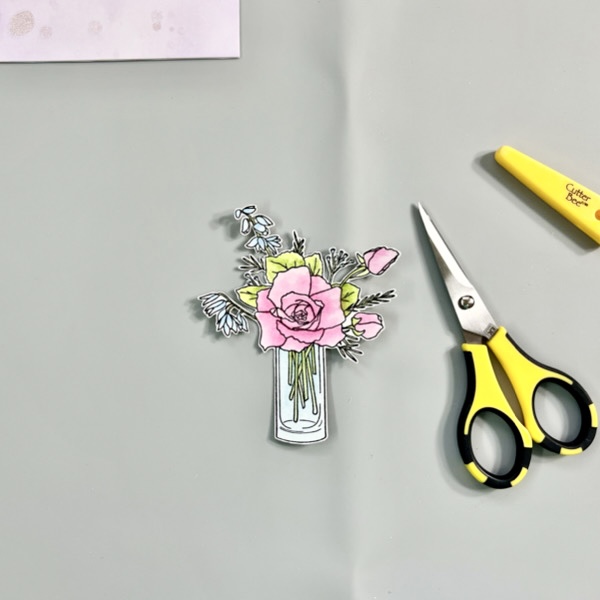
Dry the stamped image with a craft heat gun and then fussy cut it with scissors.

Step 4
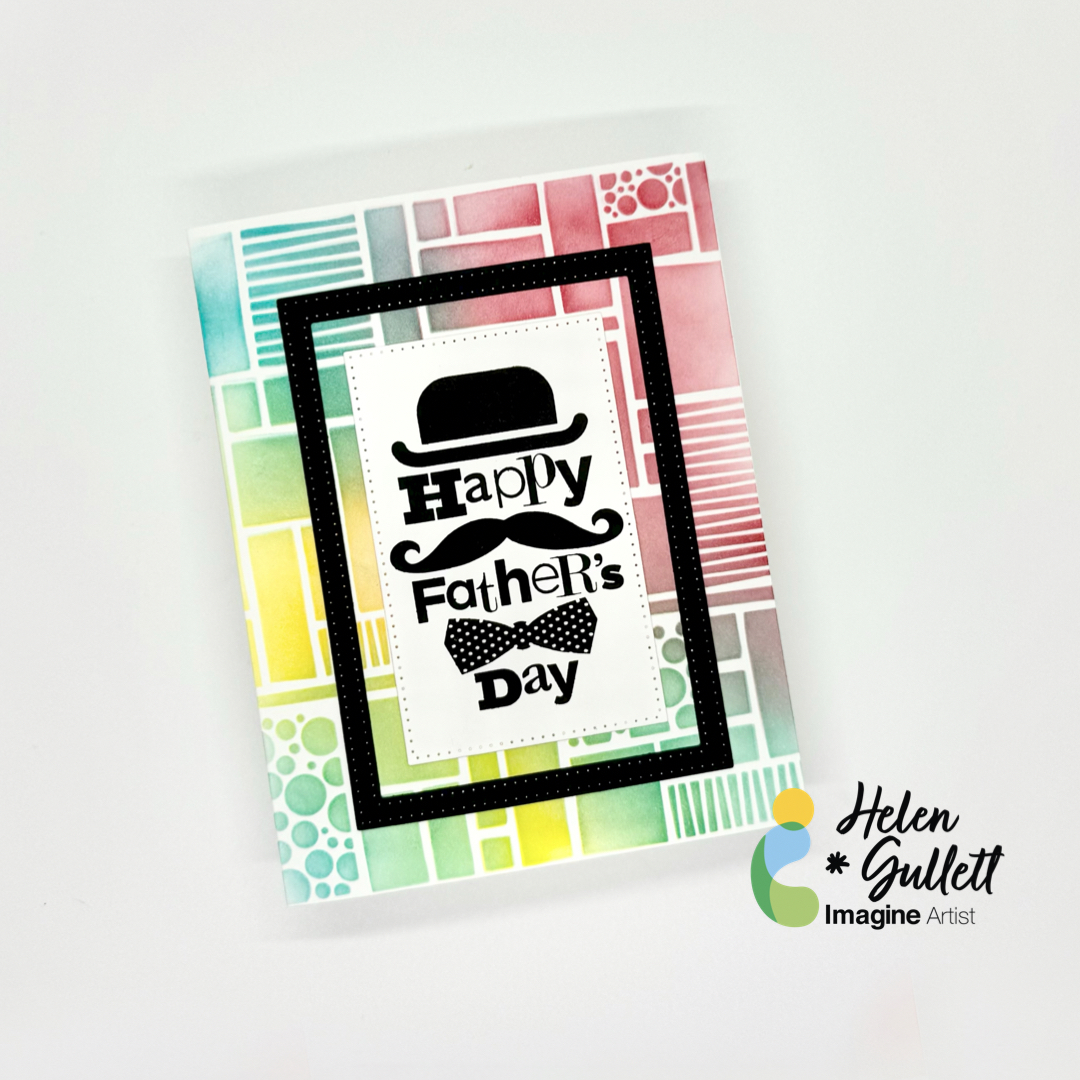
Trim the focal image into 3.5 inch x 3.5 inch.

Cut out a piece of dark blue cardstock slightly bigger than the focal image panel. I cut mine into 3 ¾ inch square mat.

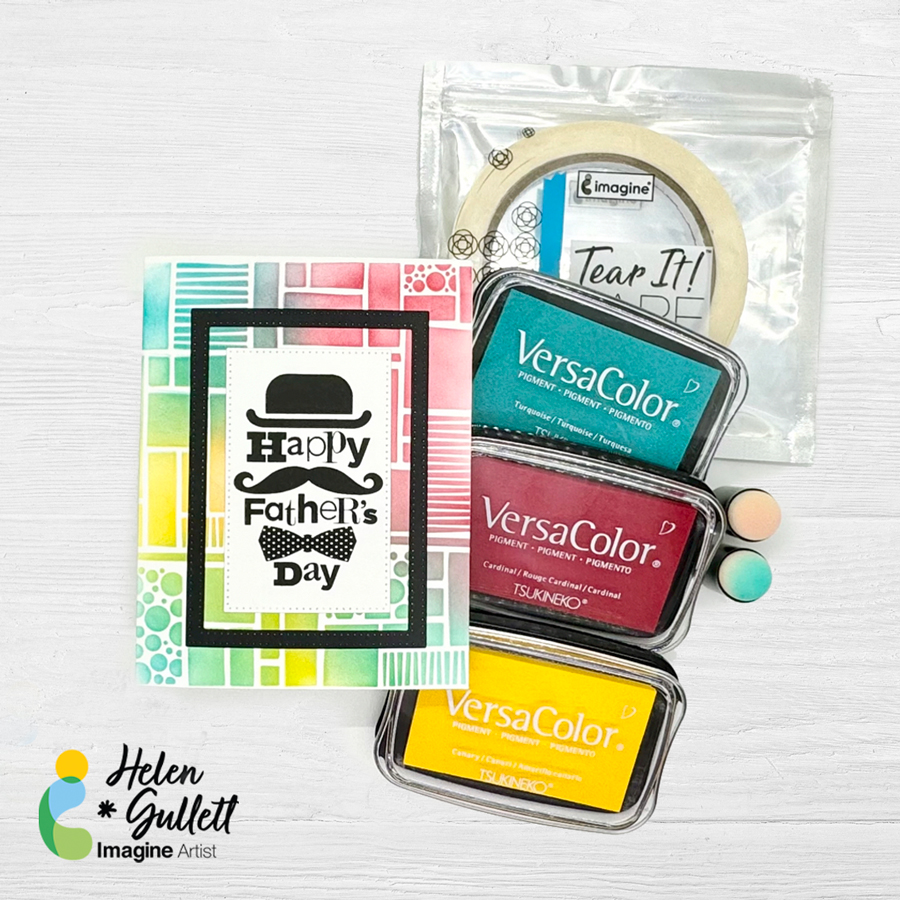
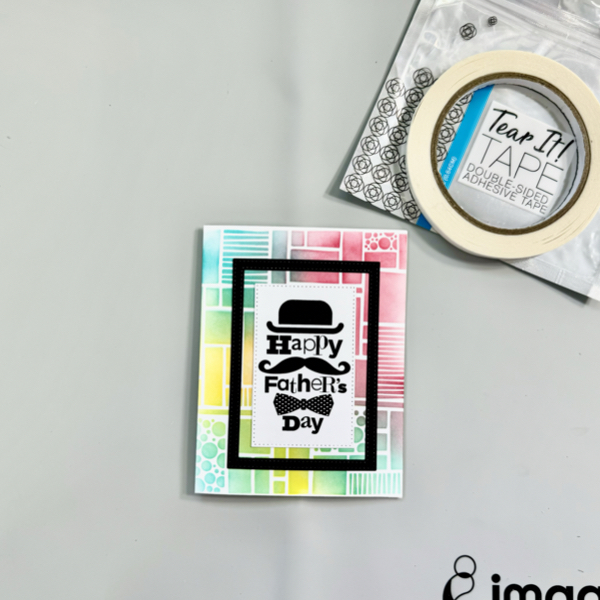
Use the Tear It! Tape to add them to the front of the card.

Add some of the Teart It! Tape on a small piece of white fun foam to make your own 3D foam tape. I use it to add the cloud image on the card.

Isn’t that quick and easy to make this fun rainbow kindness card? I hope you will give it a try and send it out to encourage others with your handmade kindness card.

Thank you for stopping by our blog today. Have a fabulous day!
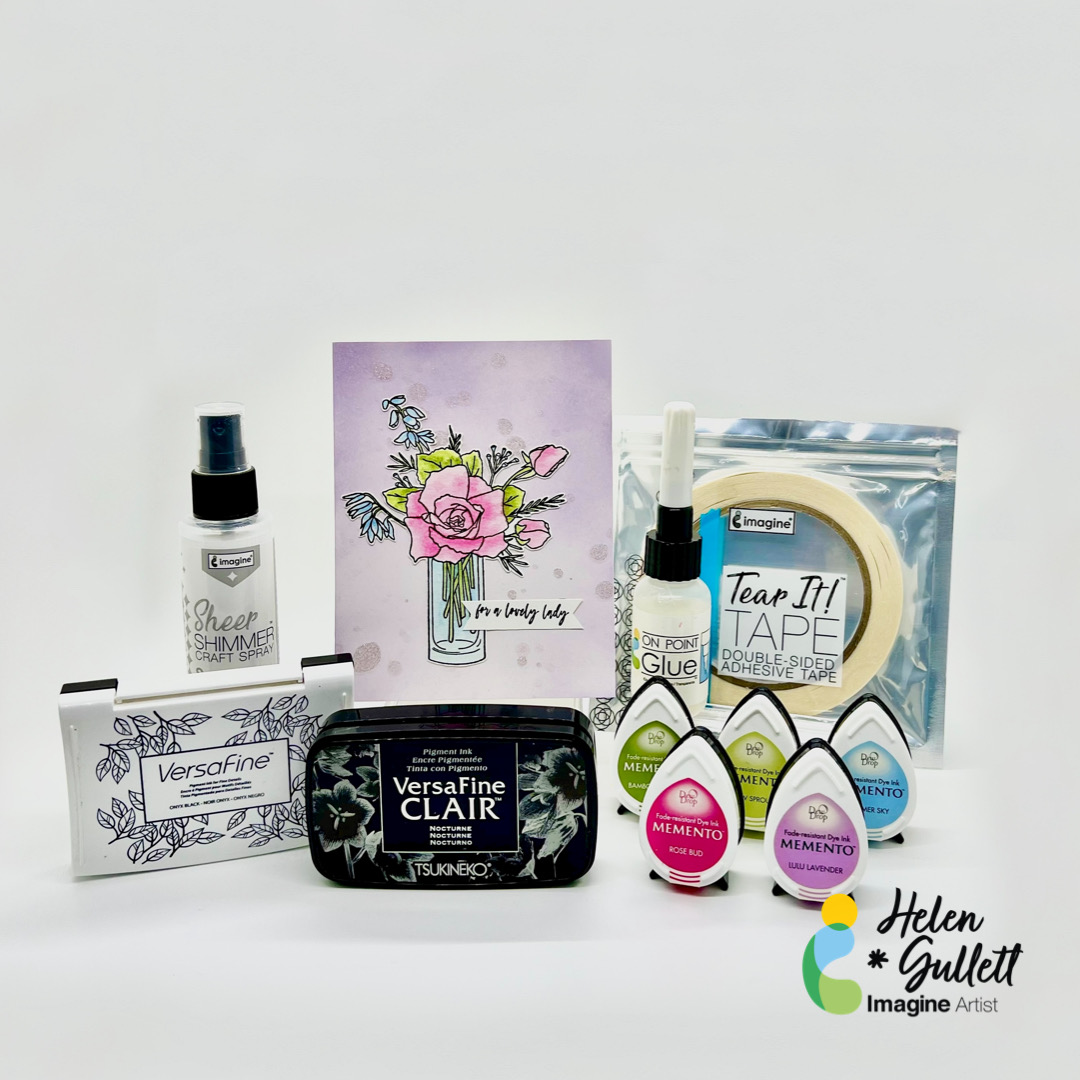
Craft Supplies

Imagine Crafts:

Others:

  • Sunshine and Rainbows Stamp Set (Dare 2B Artzy)
  • Acrylic stamping block
  • MISTI stamping tool
  • Paper trimmer
  • Micro-tip scissors
  • Hammermill 100 lb white cardstock
  • Neenah 80 lb dark blue cardstock
  • White fun foam

DIY Stenciled Marker Bag

By Helen Gullett

Hello crafty friends! This time, I want to share an idea on how you can personalize your own marker bag simply using Fabrico Markers and stencil. It is a fun project. You can do it in your free time and it is quick because the markers do not require a long time to dry. For my project today, I got the fabric bag from a craft store and I picked just one color to use but you can pick any color you want to use depending on the stencil design you use.

Skill: Intermediate
Time: 30 minutes

Direction:

Step 1
Pick a plain fabric bag that is made to be personalized. You can iron it if there are wrinkles on the bag surface, but it is an option.
Cut a piece of cardboard to put inside the bag to prevent ink bleeding through the fabric.
Pick a stencil design that you want to use.
Secure the stencil on the bag surface with temporary tape, or washi tape. Make sure the stencil won’t move around when you start the next step.

Step 2
Trace the design with the Fabrico marker. Fabrico markers are dual tip markers. Pick the tip that will fit to be used for your stencil. On my project, I used the bullet tip to trace the image and words.
After trace one design, remove the stencil to the other side to trace another design if needed.

Step 3
After tracing all the design on the fabric bag, remove the stencil.
You can retrace the design without the stencil if needed.
Fill in the design with more colors using the marker using either bullet or brush tip.

Isn’t that quick and easy to personalize your own fabric bag for markers? I hope you will give it a try.

Craft Supplies

Imagine:

Others:

  • Clear Scraps 3×12 Peace Be Still Stencil
  • Removable Tape
  • Cardboard / Thick cardstock

Make a Happy Father’s Day Card

By Helen Gullett

Hello crafty friends! This time, I want to share an idea with you for Father’s Day. This card has a fun colorful stenciled background. It is also not too hard to make.

Skill: Intermediate
Time: 30 minutes

Directions:

Step 1

Make an A2 size card out of heavy-weight white cardstock. One piece of 11 inch x 8.5 inch cardstock can make 2 cards.

On the front card, tape the stencil with washi tapes to secure it in place while you add colors with some sponge daubers.

Add the VersaColor ink one by one using a different sponge dauber for each color you use. Make sure the colors you pick can blend well.

When you are done adding colors, remove the stencil, set aside the stenciled card to dry.

Step 2

On a piece of white cardstock, stamp the image with VersaFine Clair Nocturne ink pad using a stamping tool.

Use a craft heat gun to dry the ink quickly.

Step 3

Next step, cut the sentiment with a rectangle die.

I also cut out a piece of black cardstock using 2 different rectangle dies to create a frame. This step is an option, if you want to add more layers to the card.

Step 4

Add the sentiment panel at the center of the stenciled card with Tear It! Tape, and add the black frame to the card with the same adhesive.

Step 5

On the inside card, stamp the sentiment with the VersaFine Clair Nocturne ink pad.

Use a craft heat gun to dry the ink after stamping.

This card looks like it has a couple layers of die cuts but still flat enough to send it out on regular mail without extra cost.

I hope you will give it a try to make this fun colorful card for Father’s Day! Thanks so much for stopping by our blog today. Have a wonderful day!

Craft Supplies

Imagine Crafts:

Others:

  • Close To My Heart – Father’s Day Stamp Set (retired)
  • Dare 2B Artzy – Rectangle Framelits Die
  • Dare 2B Artzy – Wacky Boxes Stencil
  • White Cardstock 100 lb
  • Black Cardstock
  • Embossing/Die Cutting machine
  • MISTI stamping tool
  • Acrylic stamping blog
  • Bone folder
  • Craft Heat Gun

Graduation Gift Card Holder

By Helen Gullett

Hello crafty friends! The Month of May is the month for graduation. It is time to celebrate those who made it through their education journey. Today, I would like to share a way to celebrate and congratulate them with this handmade graduation gift card holder.

Skill: Intermediate
Time: 30-45 minutes


Direction:

Step 1
Cut all the pieces from the gift card holder die set using the pattern cardstock and plain cardstock of your choice. I chose the school colors for my project.

Step 2
Add a small amount of the Brilliance Inker Galaxy Gold on the Imagine Craft Mat.

Use the sponge dauber to add the ink on the cardstock cut out.

Let it dry for a few minutes, then add more ink to it for more color, if needed.

Remove the stencil carefully and let it sit to dry completely or use a craft heat gun to speed up the drying time.

Step 3
On the front piece cut out, stamp the graduation hat and diploma images randomly using VersaFine Clair Nocturne ink pad.

Set aside to dry or use a craft heat gun to speed up the drying time.

Step 4
When all the pieces that need stamping or/and stenciling done, you can put together the cut out pieces following the instruction.

Use a bone folder to fold the pieces.

Use On Point Glue and Tear It! Double-Sided Adhesive Tape to put each piece together.

Step 5
On a white piece of white cardstock, stamp the sentiment using VersaFine Clair Nocturne ink pad and stamping acrylic block.

Cut it with the tag die.

Add the tag to the gift card holder handle with a piece of twine.

Here’s how it looks when it is close. Isn’t that cute little gift card holder?

Hopefully this project will give you an idea for a handmade gift project and you give it a try.
Thanks so much for stopping by our blog today. Have a wonderful day!

Craft Supplies

Imagine Crafts:

Others:

  • Dare 2B Artzy – Purse Gift Card Holder Die Set
  • Dare 2B Artzy – Rectangle Framelits Die
  • Close To My Heart – Diploma Day Stamp Set
  • Close To My Heart – Smarty Pants Stamp Set
  • Sweet ‘n Sassy Stamps – Starry Night Stencil
  • Pattern Cardstock
  • White Cardstock 100 lb
  • Solid Color Cardstock
  • Glitter Cardstock
  • Twine
  • Washi Tape
  • Bone Folder
  • Craft Tweezers
  • Embossing/Diecutting machine
  • MISTI stamping tool

Let’s Make A Floral Sympathy Card

By Helen Gullett

Hello crafty friends! One of the handmade cards I always have in my stash is the “sympathy” or “thinking of you” card. Today, I would like to share with you a quick and simple way to make this card using Imagine Crafts products, an embossing folder, and stamps. The cardmaking technique we will use is inking on an embossing folder to create that background.

Skill: Beginner
Time: 10-15 minutes

Direction:

Step 1
Dab some of the VersaMagic inks on the raised-side of the embossing folder. Try to blend the colors while adding them.

Add a piece 4 ¼ inch x 5 ⅕ inch heavy-weight white cardstock to the embossing folder and run it through the embossing machine.

Step 2
Stamp the image and sentiment on another piece of 4 ¼ inch x 5 ⅕ inch heavy-weight white cardstock using the stamping tool with Memento Tuxedo Black ink.

Optional: you can color the image with alcohol markers, or any other coloring medium. But I decided to use this image in simple black and white.

Step 3
After stamping them, use the scissors to fussy cut the image and sentiment. You also can use a matching die, if you have it.

Step 4
Trim the embossed panel into slightly smaller than the A2 card base. And then add it to the card base with On Point Glue.
Add the flower and sentiment banner to the card with the On Point Glue.

Optional: Add some small gems to the card to decorate it, or you can leave as it is.

That’s my project for today. Hopefully, you’ll like this project and give it a try. Thanks so much for stopping by our blog today. Have a wonderful day!

Craft Supplies

Imagine:

Others:

  • Embossing Folder
  • Sympathy Morning Glories Clear Stamp Set (Sweet ‘n Sassy Stamps)
  • Heavy-weight white cardstock 100 lb
  • Clear gems
  • Micro-tip Scissors
  • Fiskar paper trimmer
  • MISTI stamping tool

Clean and Simple Mother’s Day Card

By Helen Gullett

Hello crafty friends! Mother’s Day is coming up soon. Sending out a handmade card is a way to show your love to a lovely mother figure in your life. Today, I would like to share with you how to make this Mother’s Day CAS card using Imagine Crafts products and stamps.

Skill: Beginner
Time: 15-20 minutes

Direction:

Step 1
Cut a piece of watercolor paper into 6 inch x 5 inch size. This size fits on my stamping tool. Then, stamp the image on the watercolor paper with Versafine Onyx Black ink pad.

Step 2
Dab some of the Memento DewDrop Inks (Rose Bud, Bamboo Leaves, New Sprout, and Summer Sky) on the craft mat.

Add a couple drops of water from the waterbrush on the ink to turn it into watercolor paint. Pick up the ink with the waterbrush and paint the flower and vase.

Dry the painted image with a craft heat gun.

Step 3
On a piece of white cardstock, add some of the Lulu Lavender ink using the blending brush.
Build up the color from darker to lighter to create the gradient look on the background.

Step 4
Once done with adding color on the cardstock, lightly spray some of the Sparkle Sheer Shimmer Craft Spray. And then use a small flat brush, add some extra splatter on it for more texture.

Using a craft heat gun, dry the background panel.

Step 5
Fussy cut the flower with micro-tip scissors.
Optional: you can use a die if you use a stamp set that has a matching die set.

Step 6
Stamp the sentiment on a white cardstock using the VersaFine Clair Nocturne, dry the ink with a craft heat gun, and then cut it into a sentiment banner with scissors or paper cutter.

Step 7
Add the background panel on an A2 card base using the Tear It! Tape.
Add the flower and sentiment to the card using the On Point Glue.

That’s my project for today. Hopefully, you’ll like this project and give it a try. Thanks so much for stopping by our blog today. Have a wonderful day!

Craft Supplies

Imagine Crafts:

Others:

  • Altenew – Breeze Bouquet Stamp Set
  • Canson Watercolor Paper 140lb
  • Micro-tip Scissors
  • Fiskar paper trimmer
  • Acrylic stamping blocks
  • Small Round Waterbrush
  • Flat paint brush or fan brush
  • Oval Blending Brush
  • Craft Heat Gun
  • MISTI stamping tool