Learn How To Make A New Years Eve Necklace And Earrings

by Kyriakos Pachadirolgou

The leaf shape of the new Dewlet dies to inspire me to create a piece of jewelry everyone can make. Combining two different colors of metallic sheets, a gold one and a silver using SHEET Metal from Imagine, you can shape a shiny but still elegant necklace with a matching set of earrings. This project would make excellent New Years Eve celebration jewelry.

Skill: Advanced
Time: 1 hour

Directions


Step 1

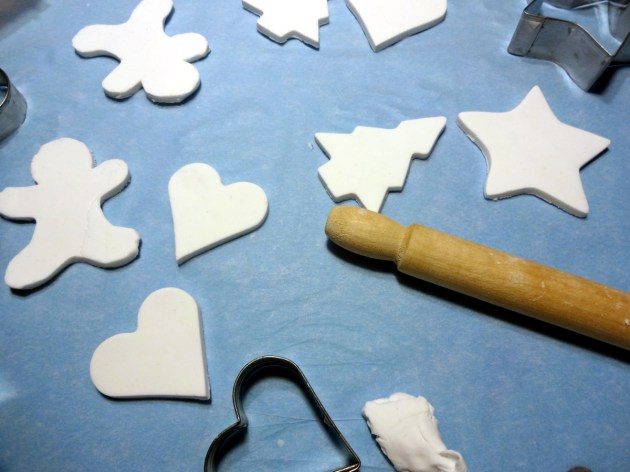
Cut leaves from the SHEET Metal ATC cards and the gold colored aluminum foil. For this set, you will need 10 pieces for the necklace and 2 pieces for each earring.


Step 2

Lay the leaves on a flat surface, place them in the desired design and take a photo to follow the shape later.


Step 3

Use the round shape embossing tool and press into the leaves to create a hammered look.


Step 4

Set a small piece of Tear It! Tape on the back side of each leaf and add a drop of jewelry glue. This step will keep the leaves together in order to proceed to the next one and allow time for the jewelry glue to dry well.


Step 5

To set the waxed cord you can either punch holes and use jump rings or you can just glue it to the back of the leaves. The second option gives a more a steady result on the form of the necklace.


Step 6

To make the earrings, attach two leaves together, punch a hole and place the earring hook.

Supplies

Imagine
Other
  • Gold color aluminum foil
  • Jewelry glue
  • Waxed cord
  • Earring hooks
  • Jewelry end hooks/claps
  • Round embossing tool
  • Die cutting machine

Learn How to Make Wood Slice Holiday Ornaments

by Kyriakos Pachadiroglou

Learn How to Make Wood Slice Holiday Ornaments

Make Christmas tree ornaments using bark slices painted with All-Purpose Ink in White and stamped with Christmas theme stamps. The surface of the wood slices are covered with Creative Medium for an iridescent result and then stamped with Memento Luxe Bahama Blue ink and sealed with clear embossing powder from Imagine. For once more the Radiant Neon Amplify in White makes the perfect snow result and works as a glue medium to add the ice crystals.

Skill: Beginner
Time: 45 minutes

Directions


Step 1

Dilute some All-Purpose Ink with water and paint the wooden slices.


Step 2

When the paint dries use a palette knife to cover with Creative Medium Iridescent Blue.


Step 3

Stamp with Memento Luxe Bahama Blue ink pad.


Step 4

Cover with Imagine’s clear embossing powder and heat set.


Step 5

Add Radiant Neon Amplify! White paint on the top side of the wooden slices.


Step 6

Press the still wet paint in the ice crystals and heat with a heat gun to make the paint puffy.


Step 7

Use the On Point Glue to add rhinestones and tie a bow with the satin ribbon.

Supplies

Imagine
Other
  • Wooden bark slices
  • Crackerbox and Suzy Stamps – Blowing snowflakes tree, Snowflake Trio
  • CraftSmart – Toy soldier stamp
  • Heat tool
  • Viva Decor – Eiskristall
  • Rhinestones
  • Satin ribbon

See How to Make Earrings with Rinea Foil

by Kyriakos Pachadiroglou

See How to Make Earrings with Rinea Foil

To be a star yourself, you need extra star shine in your jewelry! Crafting a pair of supersize star shape earrings is easy with Imagine Sheet Metal and the Starstruck foiled paper from Rinea. The Sheet Metal star frames that are created with dies, keep inside the double-sided foiled paper that shows on both sides of the earrings with no extra work. Tear It Tape is a great tool to attach the metal pieces and the paper together. A liquid glue that may leak on in the center. To gift the star shape earrings, create a small pocket with more Rinea foil paper and a small sentiment stamped with VersaFine Clair ink. See how I did it! 

Skill: Advanced
Time: 40 minutes

Directions

Imagine's Sheet Metal using a 2.5-inch and a 1.75-inch star dies
Step 1

Die cut four star-shaped frames from Imagine’s Sheet Metal using a 2.5-inch and a 1.75-inch star dies.

Die cut 2 Rinea foil paper stars
Step 2

Die cut 2 Rinea foil paper stars using a 2-inch wide star frame.

Tear It Tape around the Sheet Metal star frame
Step 3

Place Tear It Tape around the Sheet Metal star frame on the back side of it.

Rinea foil paper star
Step 4

Set the Rinea foil paper star. It will leave space around it so you can easily glue the second-star frame.

Punch a small hole and add a large jump ring and an earring hook
Step 5

Punch a small hole and add a large jump ring and an earring hook. Repeat on the second earring.

5x5 piece of cardstock
Step 6

Score a 5×5 piece of cardstock at the lower 2-inch mark, place Tear It Tape on the short sides and fold to make a pocket.

Rinea foil, place Tear It Tape and glue on the folded side
Step 7

Cut a 1×5 inch piece of Rinea foil, place Tear It Tape and glue on the folded side.


Step 8

Punch two hole on the main card, leaving 1 ½ in from each side.

Stamp the "Wish" sentiment stamp with VersaFine Clair Purple Delight ink
Step 9

Stamp the “Wish” sentiment stamp with VersaFine Clair Purple Delight ink and cut along.


Step 10

Set a star of Sheet Metal that previously removed to make the frame and the “Wish” stamped paper cutting on the front of the card using Tear It Tape.

make a set of star earrings with a matching wish gift card

Supplies

Imagine
Other
  • Rinea – Starstruck Violet foiled paper
  • 5 x 5 white cardstock
  • Star shape dies
  • Die cutting machine
  • Jump rings and earring hooks
  • Hole punch
  • Crackerbox & Suzy – Wish stamp

Make Gingerbread Ornaments with Clay and Memento Ink

by Kyriakos Pachadiroglou

 See How to Make Gingerbread Ornaments with Polymer Clay and Memento Ink

This holiday season, the best recipe for gingerbread cookies can be found right here! It takes only a few ingredients/materials and no baking, with a long-lasting fresh cookie look! The first ingredient is clay! I used an air dry one to avoid any “baking” at all. A nice match of Walnut Ink Crystals with Memento Rich Cocoa ink pad gives a beautiful gingerbread color that will make people think these cookies are baked to perfection. Decorate the cookies with easy glazing and fine detail provided by the thin nozzle of irRESISTible Pico Embellisher colors. See if you can trick someone into tasting them! (Ok, maybe don’t go that far…)

Skill: Beginner
Time: 1 hour + clay drying time

Directions


Step 1

Use the rolling pin to flatten the clay in a thick layer. Cut shapes with the cookie cutters. Lay them on the parchment paper and set aside to dry.


Step 2

Dilute a few Walnut Ink Crystals in water and paint the clay shapes.


Step 3

Use a jumbo sponge dauber to darken and add a bit of texture on the clay shapes with Memento Rich Cocoa ink.


Step 4

Use the irRESISTible Pico Embellisher in Wedding Dress as ‘sugar glaze’ to decorate the clay cookies.


Step 5

Add color and details on the clay cookies with the irRESISTible Pico Embellisher in Morocco and Pear Tart colors.

Supplies

Imagine
Walnut Ink Crystals
Walnut Ink Crystals
Memento Inkpad in Rich Cocoa
Memento Inkpad Rich Cocoa
irRESISTible Pico Embellisher Wedding Dress
irRESISTible Pico Embellisher Pear TartirRESISTible Pico Embellisher Pear Tart irRESISTible Pico Embellisher MoroccoirRESISTible Pico Embellisher Morocco Sponge DauberSponge Dauber
Other
  • Air dry clay
  • Cookie cutters
  • Rolling pin
  • Parchment paper
  • Paintbrush

We are Excited to be Hopping with Crackerbox + Suzy Stamps Day 2

We are Excited to be Hopping with Crackerbox + Suzy Stamps Day 2

It’s day 2 of blog hopping with Crackerbox + Suzy Stamps! We love blog hops because they are a super fun way for you to learn more about the individual blogs of design team members and it is also a great way to win some new products!

Thanks so much for stopping and be sure to leave comments (one per blog) during these two days of hopping so you can be entered to win a $25 Crackerbox + Suzy Stamps Gift Certificate or one $25 Gift Certificate from Imagine!!! Winners will be announced on the Crackerbox + Suzy Stamps and Imagine Blogs on Friday, October 26th, 2018.

Lindsay Andreon

Kyriakos Pachadiroglou

Teresa DeWitt

Nadine Carlier

Tracy McLennon

Roni Johnson

Giada Rigamonti

Steph Ackerman

Martha Lucia Gomez

Melissa Andrew

Subscribe to the Imagine Blog!

Learn more about Crackerbox + Suzy Stamps!

The Purrfect Card To Make for Your Cat Loving Friends

by Kyriakos Pachadiroglou

It’s time for someone to take charge and change the “myth” and set things straight! That was what the cat was thinking and decided to scratch out the dog in man’s best friend and replace it with the right word! Celebrate cats with your cat-loving friends by making this high contrast purrrfect card. Black and red stamping in contrast with the white card and gray distressed background enhance the bold dimensional design. Add a cute kitty stamp front and center with a little ball of string for her to bat around as adorable final touches.

Skill: Intermmediate
Time: 1 hour

Directions

Step 1

Cut a 4 x 2 ½ piece of watercolor paper and stamp the words “DOG man’s best friend” with the VersaFine Clair Nocturne inkpad.

Step 2

Use a craft knife to scratch the word “DOG” out making it look like a kitty paw might have done it.

Step 3

Stamp the word “CAT” with VersaFine Clair in Tulip red.

Step 4

Stamp the cat design with the same color on a scrap piece of watercolor paper and cut around the shape.

Step 5

On a 3 x 1 ¼ pice of watercolor paper stamp the word “Purrrfect” using both colors of VersaFine Clair already used.

Step 6

Die cut hearts frames from watercolor paper and full hearts from tracing paper.

Step 7

Distress a 4 x 6 in. white cardstock with Memento in London fog and a sponge dauber. Then use the stencil and the same dauber to create a darker overlay pattern.

Step 8

Add Tear It! Tape to the back of your inked cardstock, remove the backing and adhere to your card base.

Step 9

Continue to add the rest of the stamped and die cut pieces using On Point Glue.

Step 10

Cut a 5-6 in. long piece of the red jute cord. Form a little ball and set on the card with On Point Glue.

Supplies

Imagine
Other
  • Watercolor paper
  • Tracing paper
  • Alphabet stamps
  • Cat stamp
  • Heart shape dies
  • Die cutting machine
  • Kaiserkraft – checker plate stencil
  • Red jute cord
  • Craft knife