Learn How To Make Your Own Beads Using Light Weight Clay

by Kyriakos Pachadiroglou

Make bead pearls out of lightweight clay to use in jewelry pieces. The pearls have a marble-like effect that was made using the Radiant Neon Electric Coral ink pad and the help of Imagine Craft Mat. The intense of the coral color can lighter or darker by allowing the clay to absorb the relative amount of ink when it is rolled on the Craft Mat.

Skill: Beginner
Time: 45 minutes + drying time

Directions


Step 1

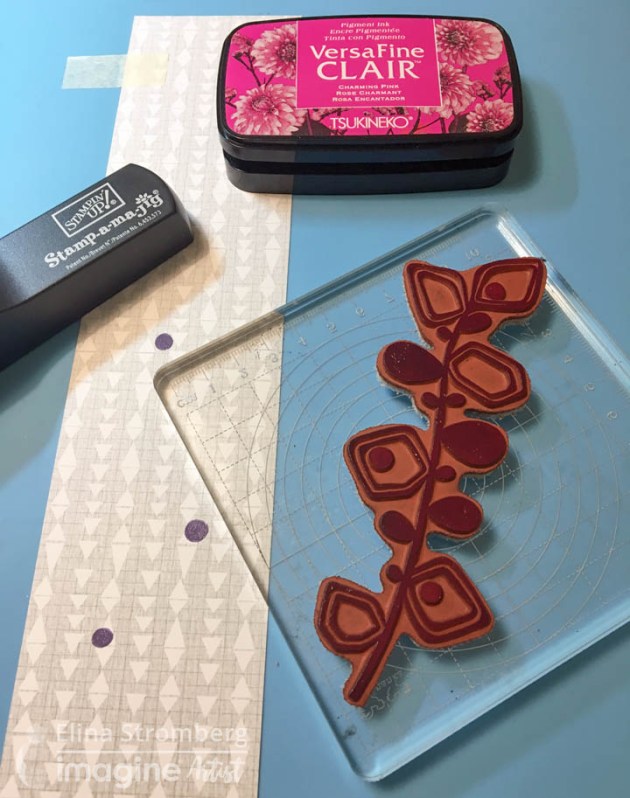
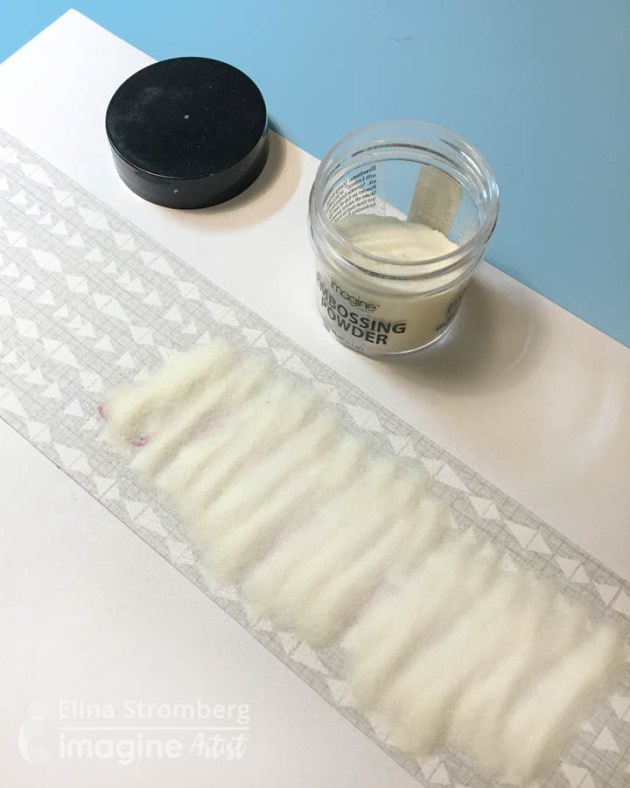
Heavily stamp with the Radiant Neon in Electric Coral ink pad on Imagine’s Craft Mat.


Step 2

Roll on the inked surface a piece of lightweight clay formed into cord-like shape. Form a ball/large pearl in your palms. Continue making more large pearls.


Step 3

When you finish forming the pearls, and before the clay dries, use a piercing tool to open holes through the pearls. Make sure that they are well opened to allow easy access to the cord.


Step 4

When the clay dries, pass the pearls and the metallic beads in alternate order on the waxed cord. Add end clasps and lobster hook at the ends of the cord.


Step 5

For the earrings pass a bead and a pearl in flat head jewelry pin and using the round nose pliers attached on the earring hook.

Supplies

Imagine
Other
  • Lightweight clay
  • Jump rings, lobster hook
  • Earring hooks
  • Metallic beads
  • Waxed cord
  • Piercing tool
  • Pliers

How To Make A CAS Layered Card

by Nadine Carlier

CAS Layered Card by Nadine Carlier IC

Brillance Pearlescent Coral was the perfect ink for the delicate flowers on my CAS layered card. Watch my video below to see how easy it was to create. Enjoy!

Skill: Beginner
Time: 15 minutes

Supplies

Imagine
Other
  • Gina K Designs Watercolor Flowers Stamp Set
  • Misti
  • String
  • Gemstones
  • Cardstock – White, Gray, Pink

Visit our YouTube Channel for more inspirational videos and subscribe to get updates when we post new videos.

Learn How to Make a Set of Retro Style Bookmarks

by Elina Stromberg

Digitalization has changed my life in so many positive ways, but books I prefer having and reading in the old traditional format. My book-lover’s opinion is that one can never have too many books nor bookmarks. Any scrap piece of paper would, of course, serve as a marker that keeps the reader’s place in the book and enables the reader to return to it with ease. But in my opinion, a good book deserves to be accompanied by a beautiful bookmark. Especially if it’s hand-made.

Bookmarks are great gifts, too: A paperback book transforms easily into a festive gift when a hand-made bookmark is slipped between the pages. I’m sure that beautiful bookmarks will make their receivers happy; just like great books will do.

Skill: Beginner/Intermediate
Time: 45 minutes

Directions


Step 1

Trim a strip of light patterned paper, and secure on crafting mat with a few pieces of masking tape. Attach stamp on an acrylic stamping block, turn upside down with the stamp facing the paper. Center stamp on the paper strip, and position stamping tool accordingly. Leaving stamping tool in place, turn the stamping block around. Color a few details of the stamp with Memento markers. Stamp colored details on a paper strip and leave stamping tool in place.


Step 2

Ink the entire stamp with a lighter VersaFine Clair ink color. Stamp again on the same position.


Step 3

Heat-emboss the stamped pattern using clear embossing ink. Trim the bookmark to size and mat on a piece of matching colored or patterned paper.


Step 4

Create a few bookmarks on the same go. Play with different color combinations and patterns. For this multicolor technique, you can use any patterned stamp that has some simple details suitable for highlighting. Both rubber and clear stamps will work fine.

Supplies

Imagine

Other

  • Stamps – Paper Artsy Eclectica by Tracy Scott (sets 18 & 19)
  • Cardstock – Light grey patterned
  • Heat gun
  • Paper trimmer
  • Double-sided tape

See How to Upcycle Packaging into a Mixed Media Statement Piece

by Kassy Tousignant

The inspiration for this piece was the quote I included on the canvas. I am forever on the lookout for inspiring and uplifting quotes. Things that make you think, or give you the push you need to move forward. I really also love working with upcycled materials. We don’t need more trash in the landfills, right?! I knew that my Imagine mixed media products would work wonders to make this piece come alive! When i’m working with resin pieces, I always reach for my Fireworks sprays and All-Purpose Ink. They both cover beautifully. This quote on the canvas is very near to my heart and all of the elements came together perfectly to give it a home.

Skill: Intermediate
Time: 1.5 hours plus dry time

Directions

Supplies

Imagine
Other
  • Recycled packaging
  • Ribbon, string, twine
  • Washi tape
  • Modeling paste
  • Stencil of choice
  • Vellum
  • Sequins
  • Matte medium
  • Resin pieces of choice

Learn How to Create a Beautiful Coral Theme Card with VersaMark

by Jessica Lin

In this video, I’ll share how you can stretch the use of your VersaMark ink pads and create easy backgrounds with them. Even though VersaMark is generally used for heat embossing, it’s also a great ink for tone-on-tone or monochrome stamping. Let me know if you’d like to try this easy, minimal supply technique, and are interested in seeing more of these tutorials.

Skill: Intermediate
Time: 30-45 minutes

Directions

Supplies

Imagine

• VersaMark Dazzle – Champagne
• VersaMagic DewDrop Ink – Pink Grapefruit
• On Point Glue
• Tear It! Tape

Other

• Stampin’ Up Flourishing Phrases Clear-mount Stamp
• Stampin’ Up Flourish Thinlits Dies
• Cardstock – Coral, Green, Yellow, White
• Stamping Tool

See How to Create a Journal Cover with Walnut Crystals

by Iris Rodriguez

“Bloom where you are planted” is a phrase that means to make the best of our situation…a theme for my art journal page this month. For this journal page, I used Imagine’s Walnut Ink Crystals, which I find to be absolutely fabulous. Use them to create mottled, scumbled, drippy, sprinkly, watercolored painterly effects. Use this effect as a background or paint images with these effects. It plays well with other inks.

Skill: Advanced
Time: 1.5 Hours

Directions


Step 1

Begin by stamping and embossing with Imagine’s white embossing powder. I was going for a theme of rulers and flowers, denoting growing and blooming.


Step 2

Spray the paper with a little water in random areas. Sprinkle the Walnut Ink Crystals, they look like coffee grinds. Spray more water in random areas, to allow the crystals to dissolve more than others. To color in sections, use a paintbrush to color.


Step 3

Techniques for varying the look of the Walnut Ink Crystals. Leave crystals as is, spray more water on some areas, for a watercolored look-paint with a brush, hold the paper up and spray water on the top of the paper and allow the ink to drip down. Allow the paper to completely dry.


Step 4

Add a different, but contrasting color. Place a few drops of Tropical Lagoon All-Purpose Ink on your surface, spray a little water into the ink. Brush the ink in random areas. Spray water and allow the ink to drip. Allow the paper to completely dry.


Step 5

Touch up areas with the walnut ink with a brush. Dissolve a few crystals completely in water to make a solid ink solution. I like to scumble ink in areas, making it look, a little like soil. Allow the paper to completely dry.

Step 6

Using white acrylic paint and Imagine’s Jumbo Dauber, stencil in flowers in random sections. Wash the dauber right away. Allow the paint to dry completely.


Step 7

Place the stencils over the same flowers that were just stenciled with the acrylic paint and color in the flowers by inking with pad directly or using InkBlushers.


Step 8

Vary the look by blending several color inks. Color the flower’s outline with a white Posca pen. Add a sentiment and you’re done.

Supplies

Imagine
Other
  • Watercolor paper 9 x 12 inches
  • Carabelle Studio – Steampunk Metre stamp
  • Flower stencils
  • White acrylic paint
  • Posca pen-white (fine)