As I was making one card focusing on summer colors, I realized that I could easily make a second (bonus) card and wanted to share both with you.
Skill: Intermediate Time: 2 hours
Directions:
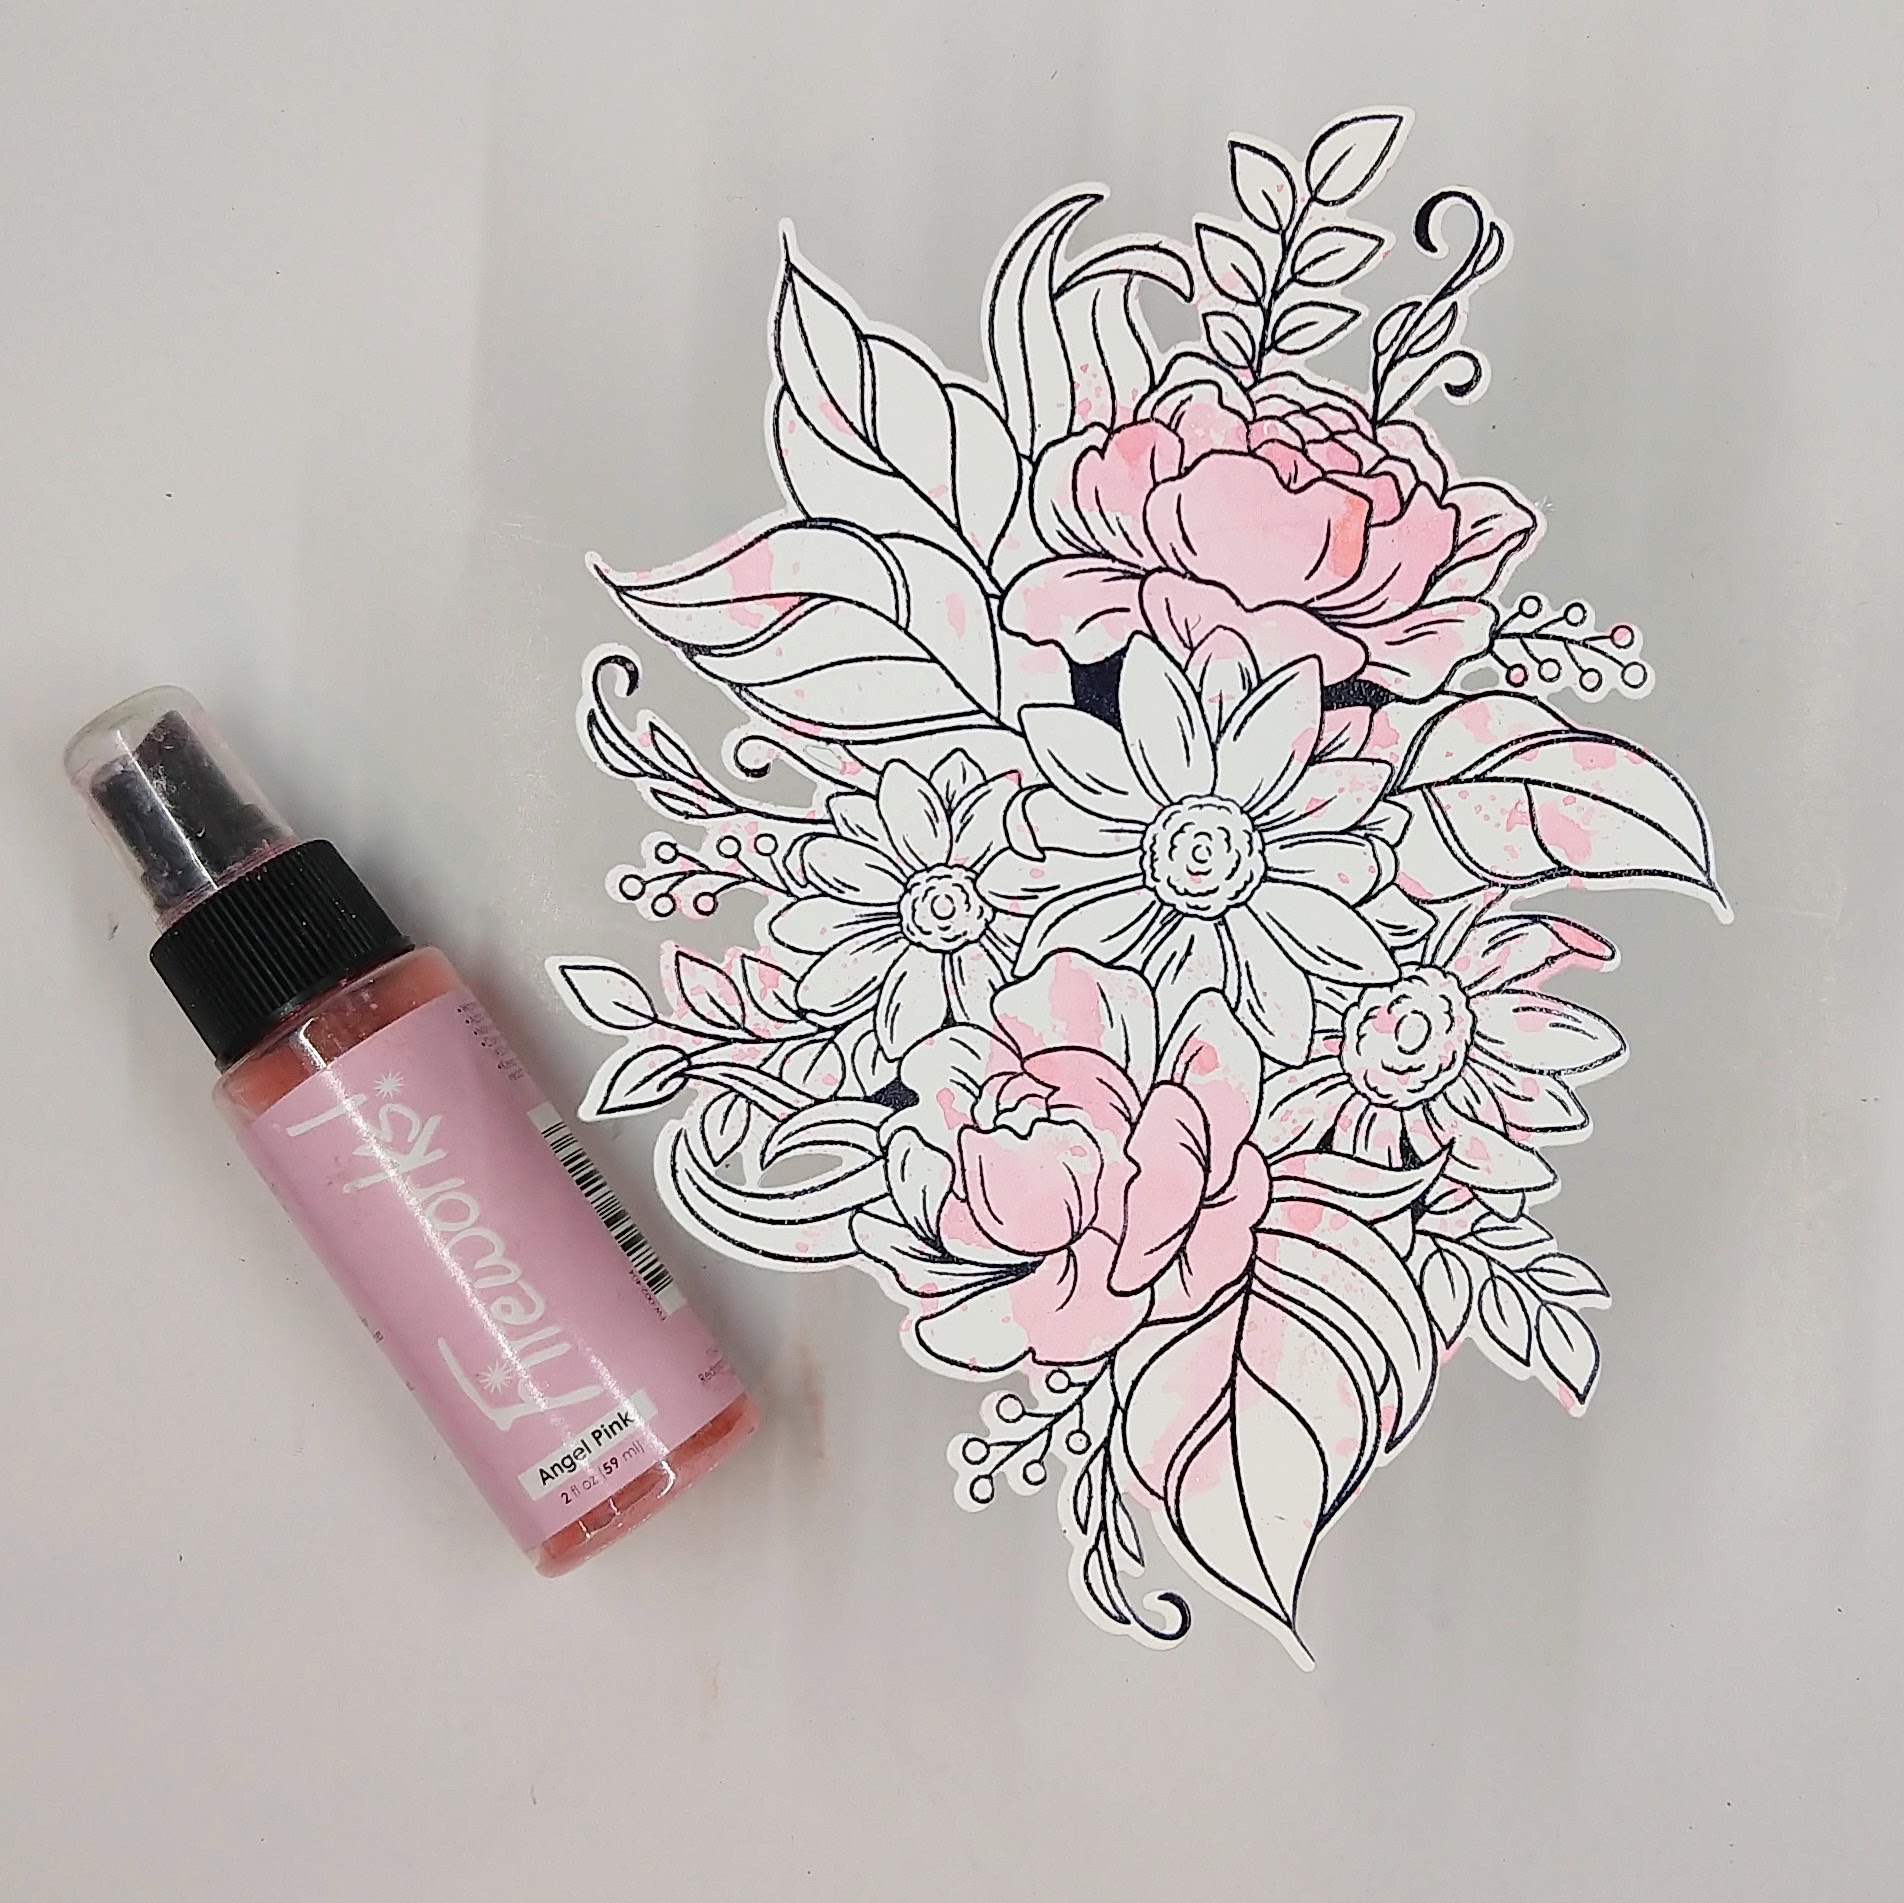
Step 1: Stamp a large floral image on watercolor paper with Medieval Blue VersaFine Clair Ink and heat emboss with clear embossing powder.
Step 2: After die cutting the floral image with the corresponding die, watercolor smoosh Angel Pink Fireworks! Shimmery Craft Spray, focusing on coloring the roses. Use a heat tool to dry the spray or set aside to dry.
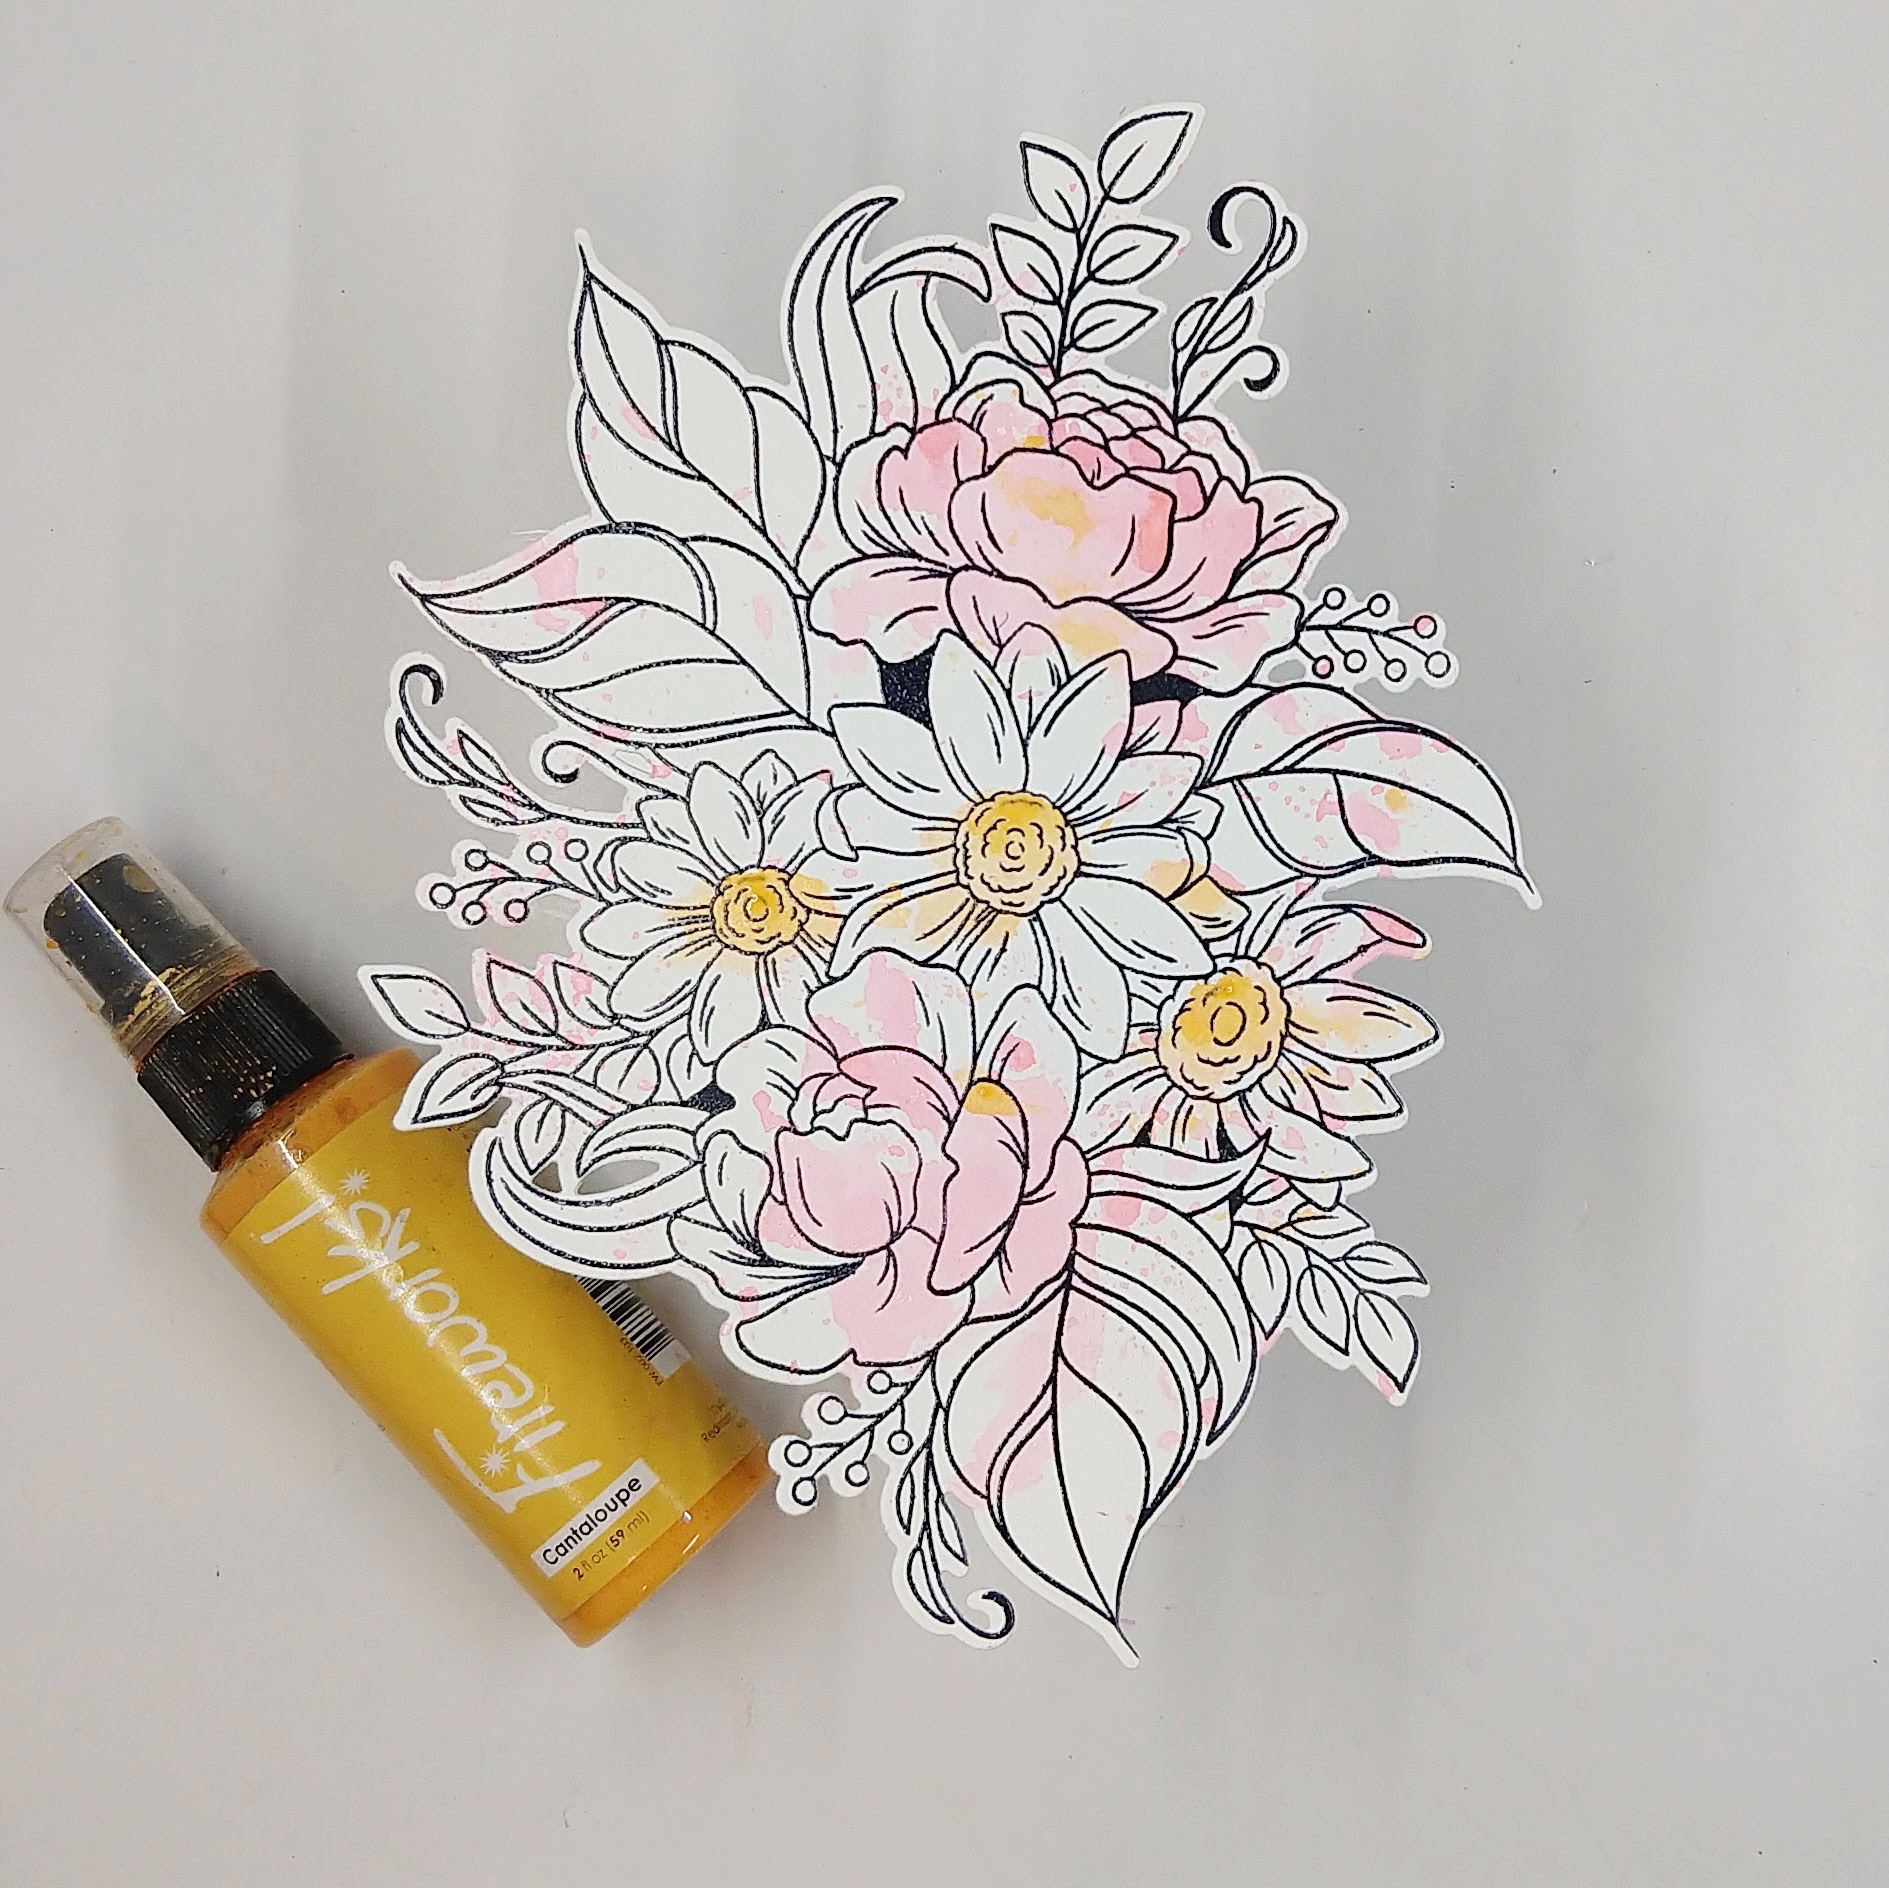
Step 3: Watercolor smoosh the floral image with Cantaloupe Fireworks! Shimmery Craft Spray, this time focusing on getting most of the color into the centers of the daisies. Use a heat tool to dry the spray or set aside to dry.
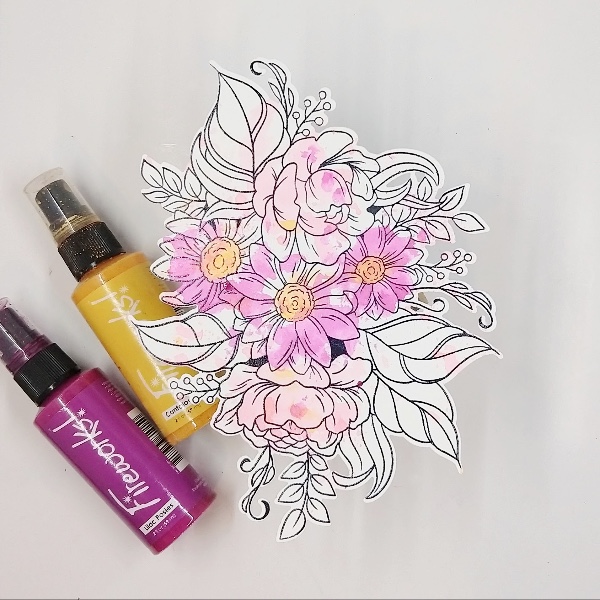
Step 4: Use Lilac Posies Fireworks! Shimmery Craft Spray to add another layer of watercolor smooshing to the image, this time focusing the color onto the daisies’ petals. Then paint in more of the Cantaloupe Fireworks! Shimmery Craft Spray into the centers of the daisies (to cover up some of the Lilac Posies spray in daisies’ centers).
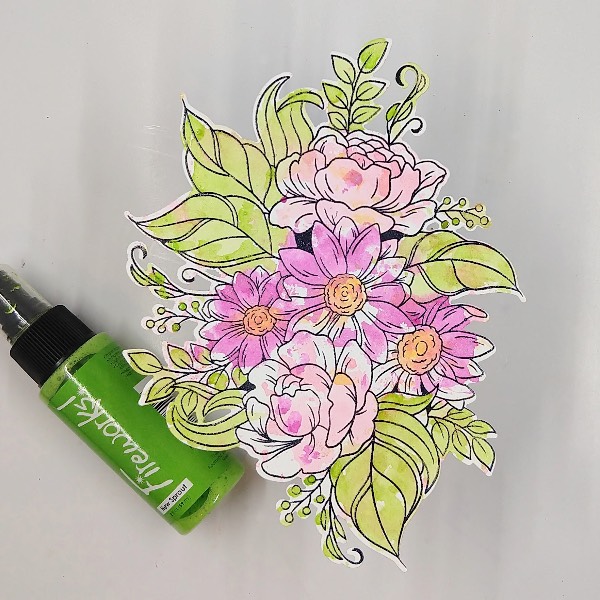
Step 5: Watercolor smoosh the floral arrangement again–this time with New Sprout Fireworks! Shimmery Craft Spray, focusing on adding color to the leaves and other greenery.
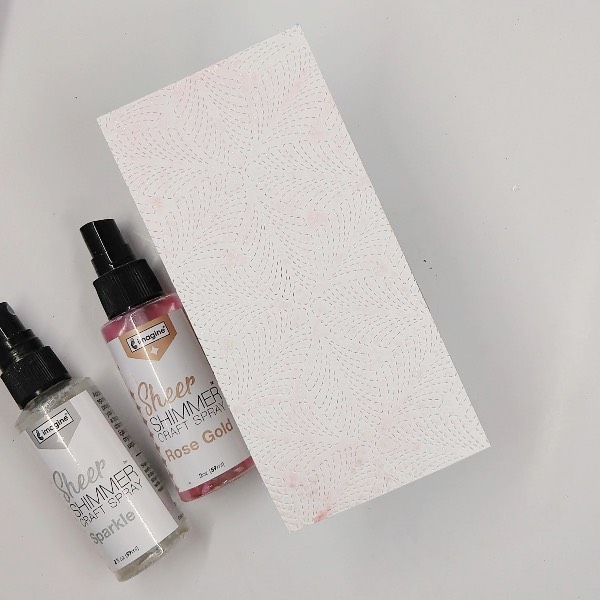
Step 6: Cut a piece of watercolor paper about 3 inches by 5.5 inches. Add texture to the panel by die cutting the panel. (Since the panel was smaller than the die, it didn’t actually cut anything out it just pierced the panel.) Then spray the panel with Rose Gold and Sparkle Sheer Shimmer Craft Spray. Allow to dry.
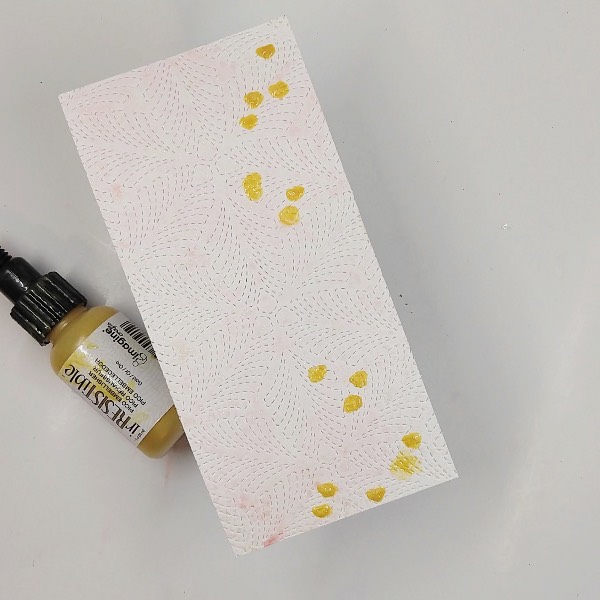
Step 7: Add irRESISTible Gold medium through a heart stencil onto the right side of the watercolor panel.
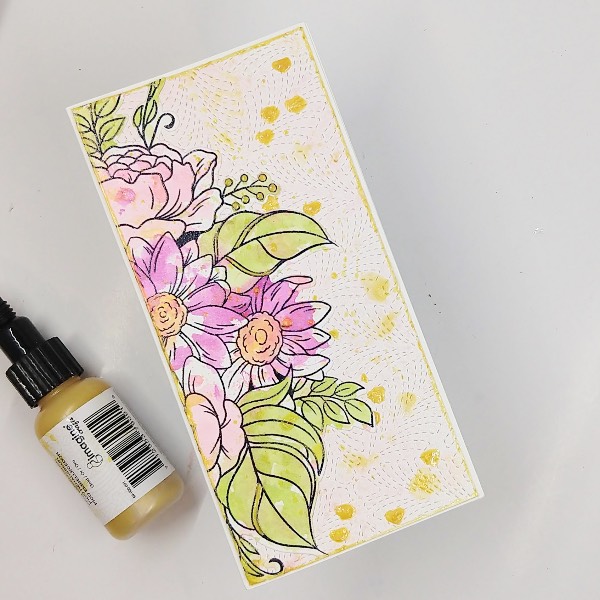
Step 8: Add irRESISTible Gold onto some of the thinner ribs on the larger stamped leaves and onto some of the berries. After it dried, cut the floral cluster in half with a paper trimmer. Then glue half of the floral cluster onto the lefts side of the panel.
Add more of the irRESISTible Gold medium onto the piece of acetate and spray with water to dilute it. Watercolor smoosh it onto the floral cluster and the background panel. Then glue half of the floral cluster onto the left side of the panel. Then paint the edges of the panel with more of the irRESISTible Gold medium.
Finally glue everything onto a minislimline card base.
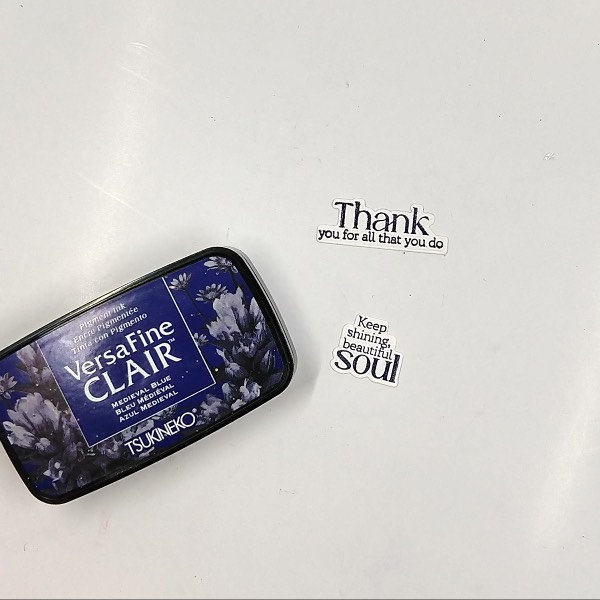
Step 9: Stamp two sentiments on a scrap of watercolor paper with Medieval Blue VersaFine Clair ink and emboss them with clear embossing powder. They were die cut with corresponding dies.
Step 10: Attach one of the sentiments onto the card with foam tape. To finish the card, glue white gem embellishments around the sentiment.
Step 11: Then it was onto the bonus card made with the leftover part of the floral image. The same heart stencil was sprayed with Rose Gold Sheer Shimmer Spray and then was pressed onto another panel of watercolor paper trimmed to 3 inches by 5.5 inches. After the spray dried, more of the gold IrRESISTABLE medium was painted onto a small music stamp, which was then stamped multiple times onto the panel.
Step 12: The remaining half of the floral cluster stamp was glued onto this pahel. The sentiment was attached with more foam tape. The edges were ink blended with Medieval Blue VersaFine Clair ink using a sponge dauber.
Step 13: Finish the second card by gluing the panel onto another mini slimline cardbase and gluing more white gem embellishments around the sentiment.
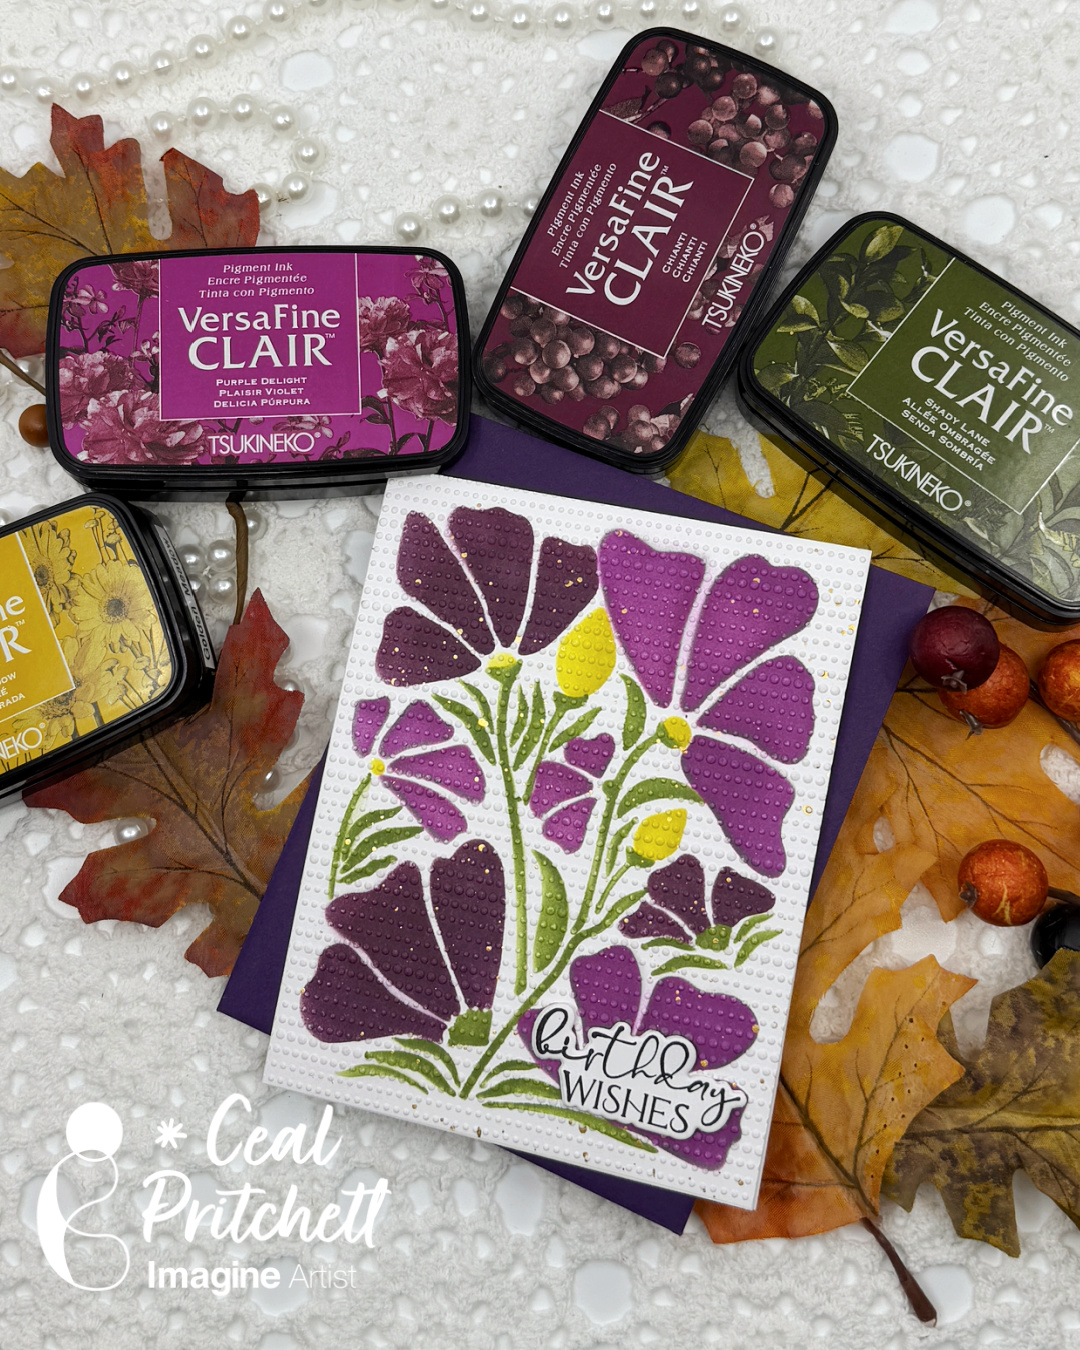
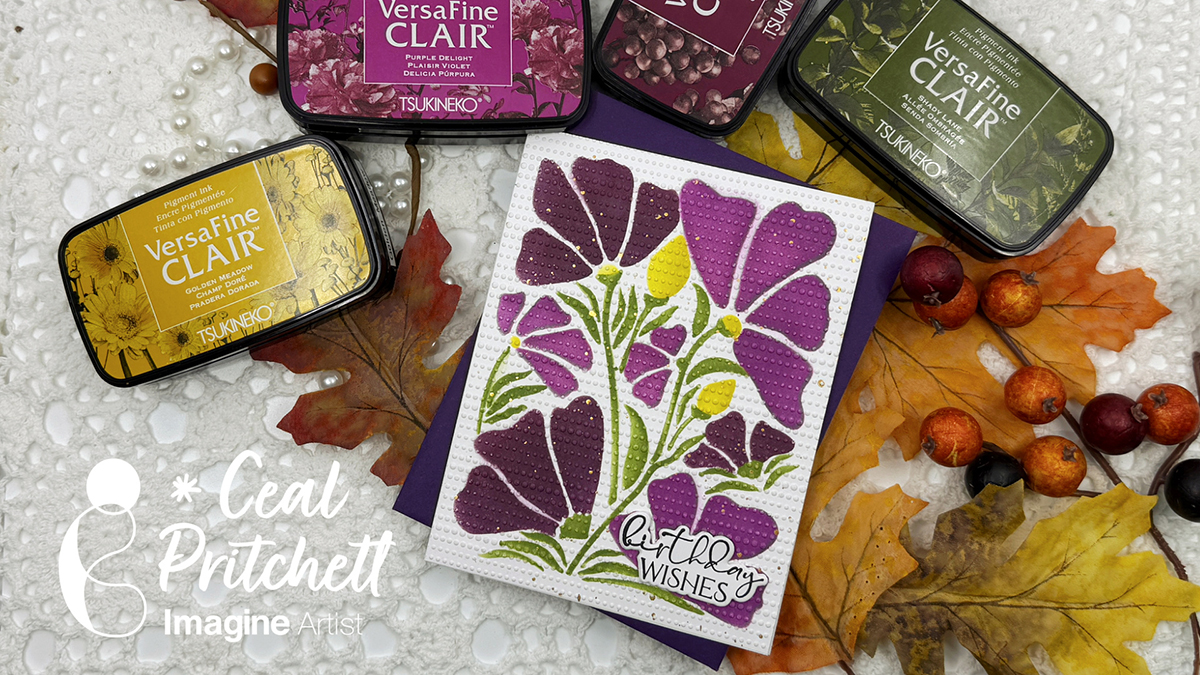
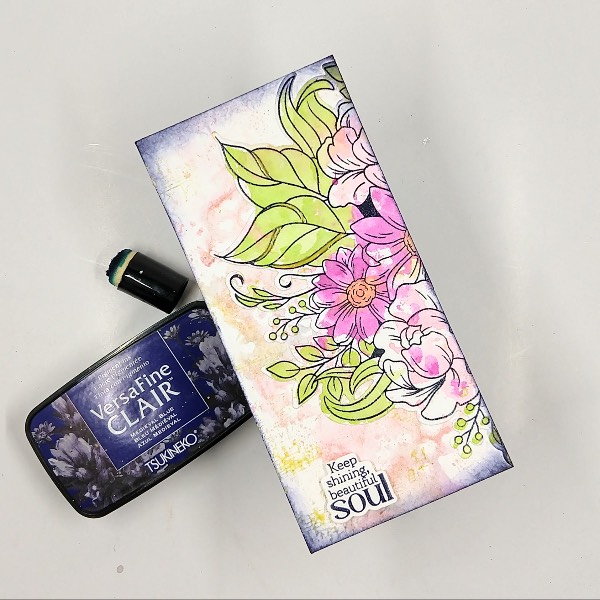
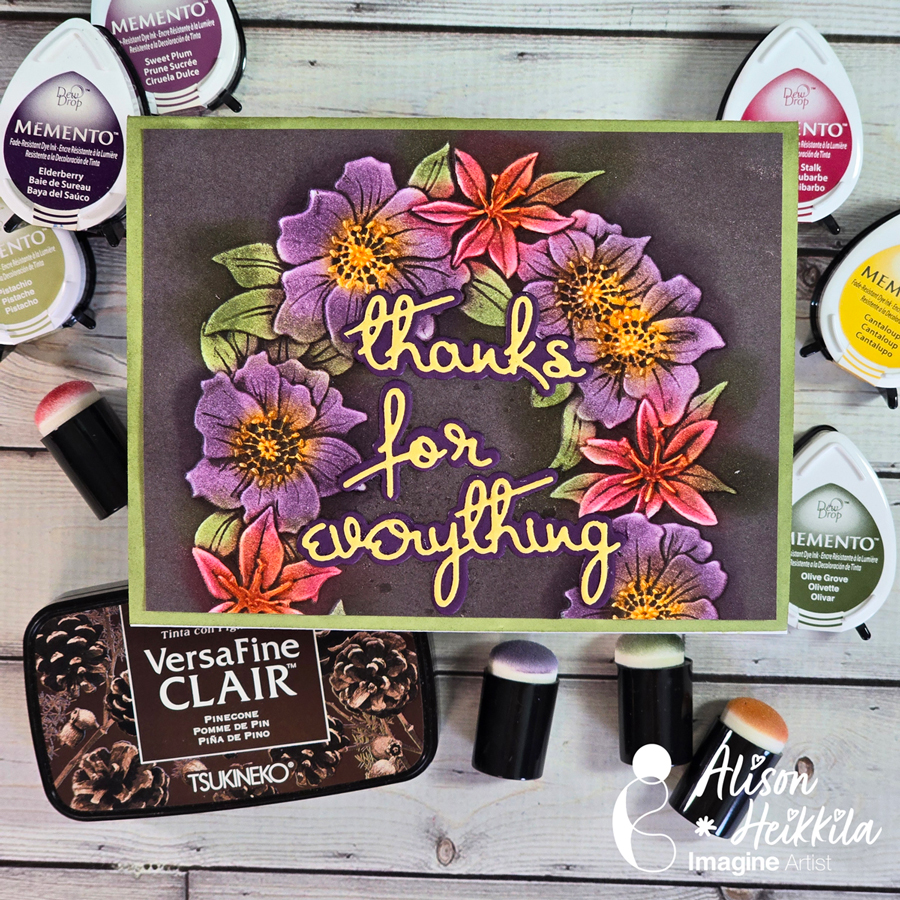
Hello crafty friends! It’s Ceal, here. Today I will show you how to create a Mother’s Day card with you that uses several layers of stenciling, some stamping and then die cut out. This card can also be used for other occasions because the “Happy Mother’s Day” greeting is on the inside.
Skill Level: Intermediate to Advanced Time: 45 mins to an hour
Directions:
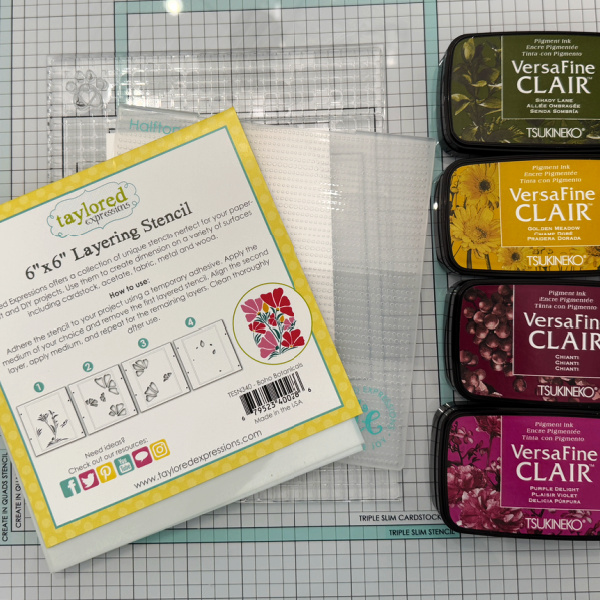
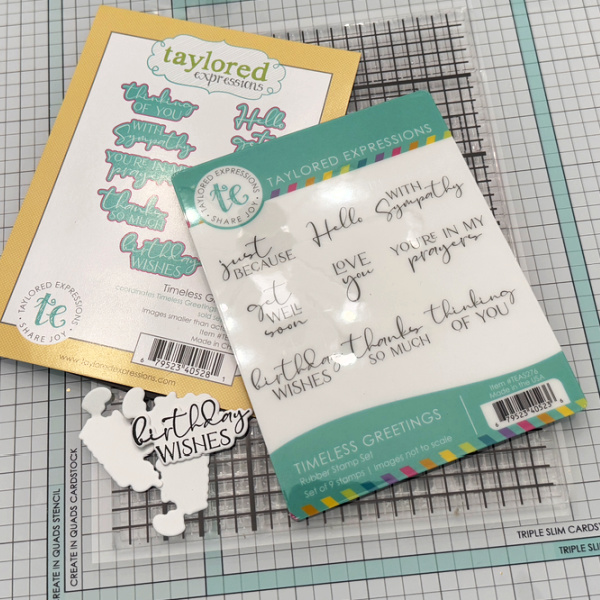
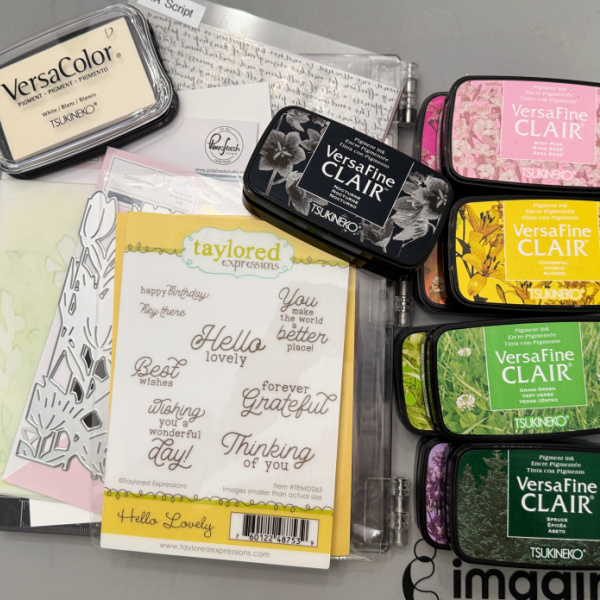
Gather your supplies. You will need cardstock, a layering stencil (Pinkfresh Studio used here) Coordinating Dies, several colors of ink (listed below) and a sentiment stamp set (Taylored Expressions used here).
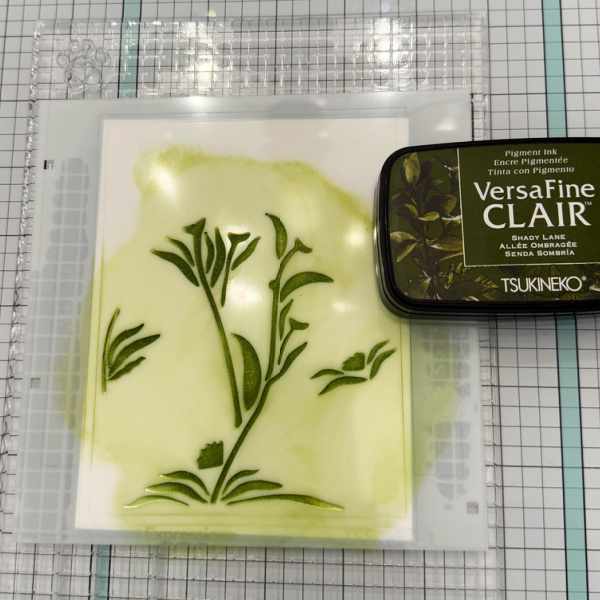
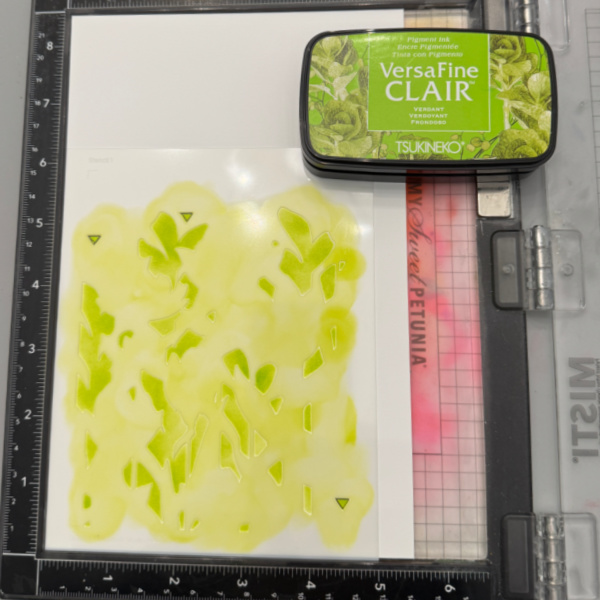
Step 1: Lay stencil one over a piece of cardstock cut to 5.5 x 8.5 and blend VersaFine Clair Verdant ink over it. Remove and clean stencil.
A little tip for you, I place mine in the corner of the Misti so I will be placing all of them in the same place. This set also has alignment guides which are triangles, be sure to add ink to them.
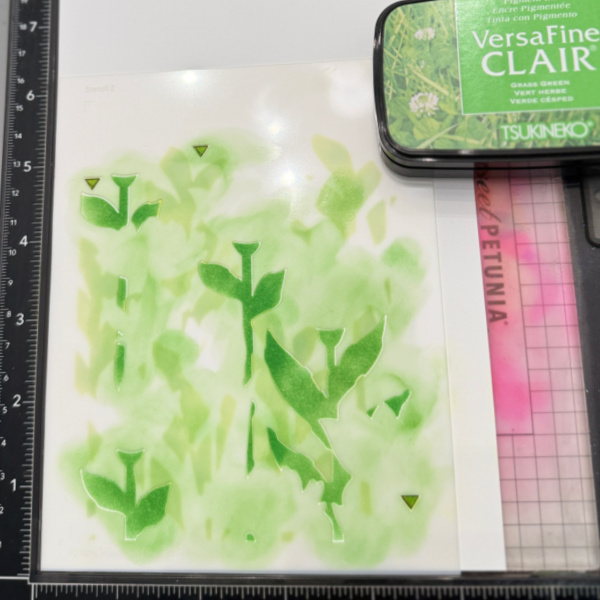
Step 2: Lay stencil 2 over the cardstock, lining up the triangle placement guides and blend VersaFine Clair Grass Green over it. Remover stencil and clean it.
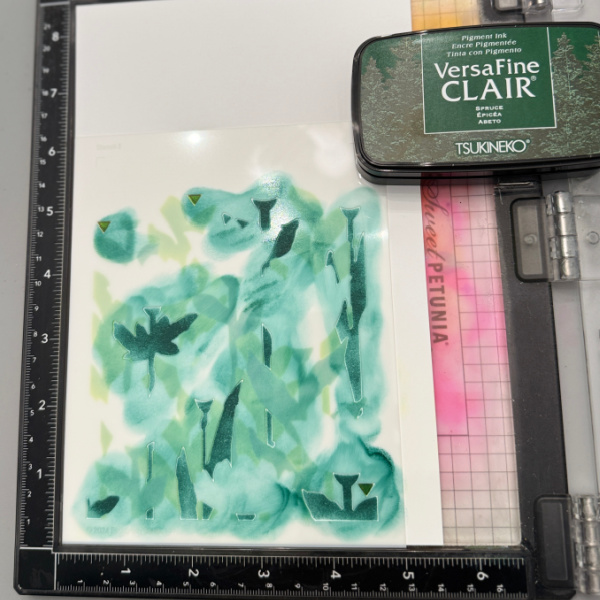
Step 3: Lay stencil 3 over the cardstock, lining up the triangles and blend VersaFine Clair Spruce over it. Remove stencil and clean it.
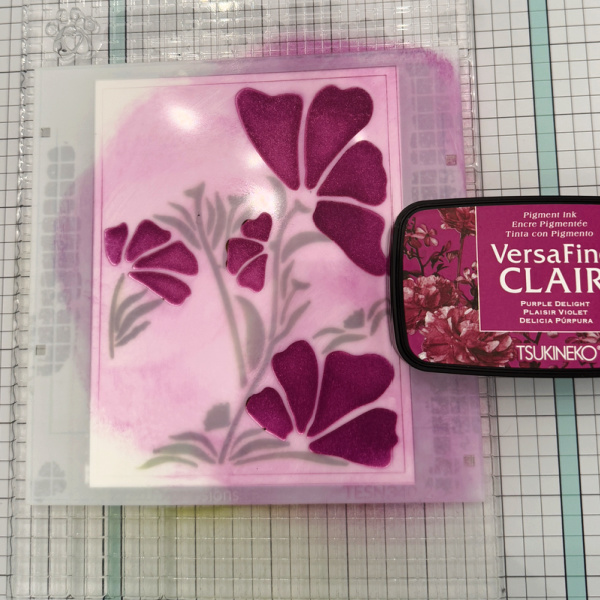
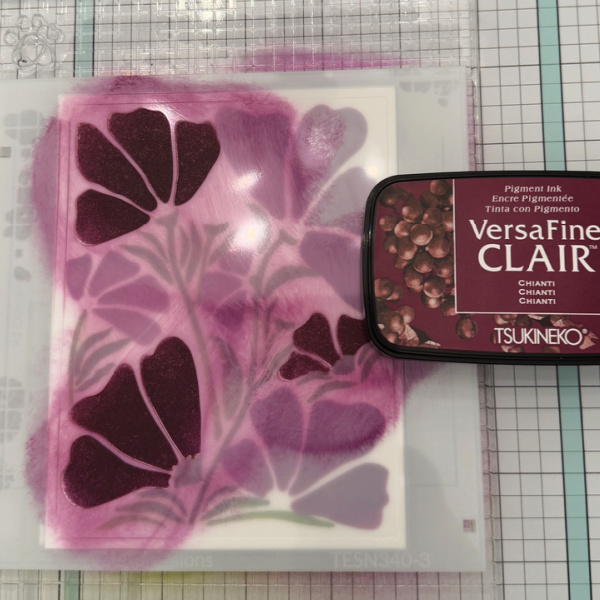
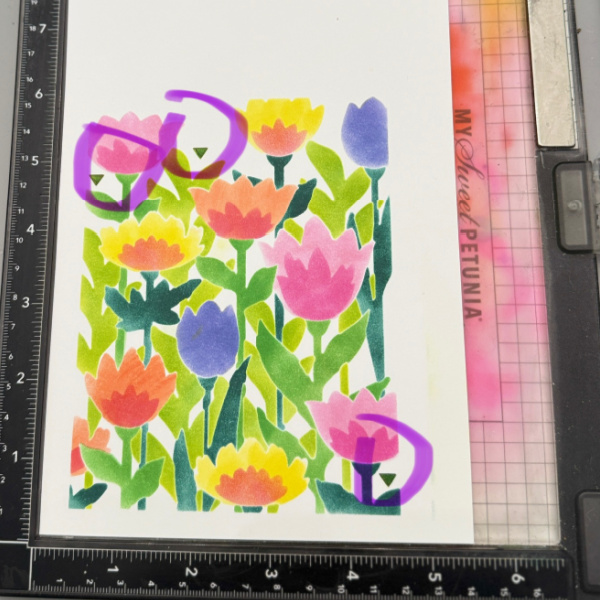
Step 4: This step starts the flowers. Lay stencil 4 over the cardstock and blend VersaFine Clair Baby Pink over the open flowers. This photo shows the triangles that are used to align the stencils. Remove stencil and clean it.
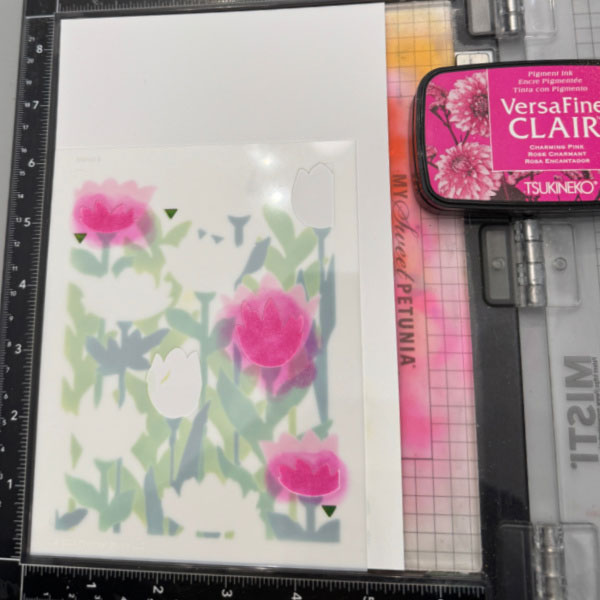
Step 5: Lay stencil 5 over the cardstock, lining up the triangles and blend VersaFine Clair Charming pink over open spaces on the pink flowers and VersaFine Clair Lilac Bloom over the other open spaces. Remove and clean the stencil.
**I forgot to take a photo of the Lilac Bloom, but you can see it below.
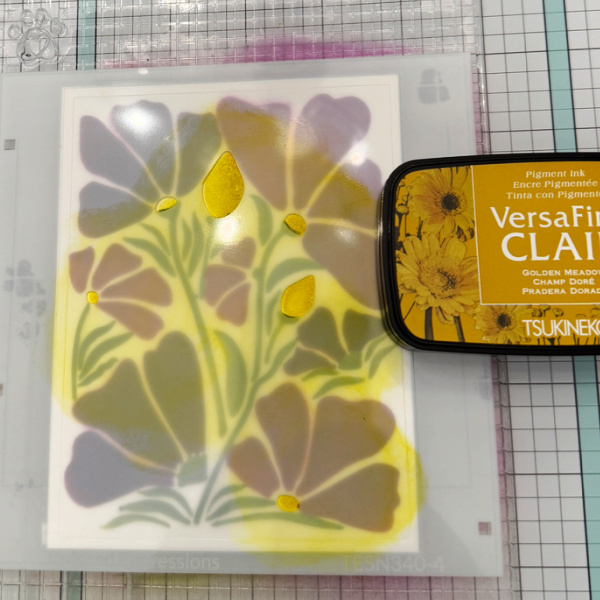
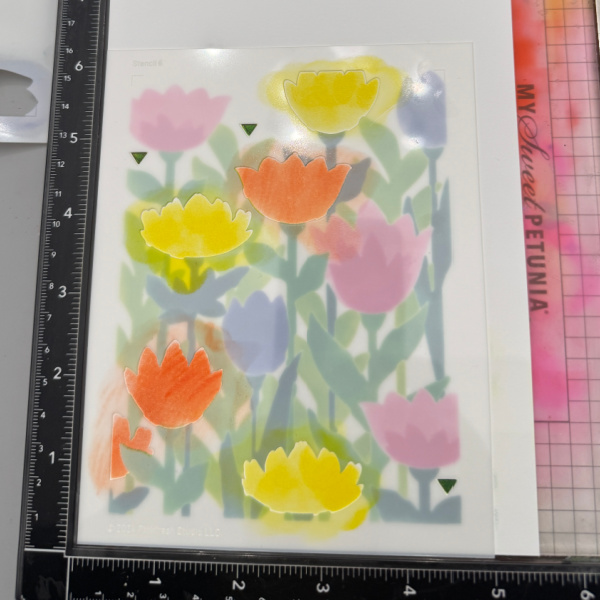
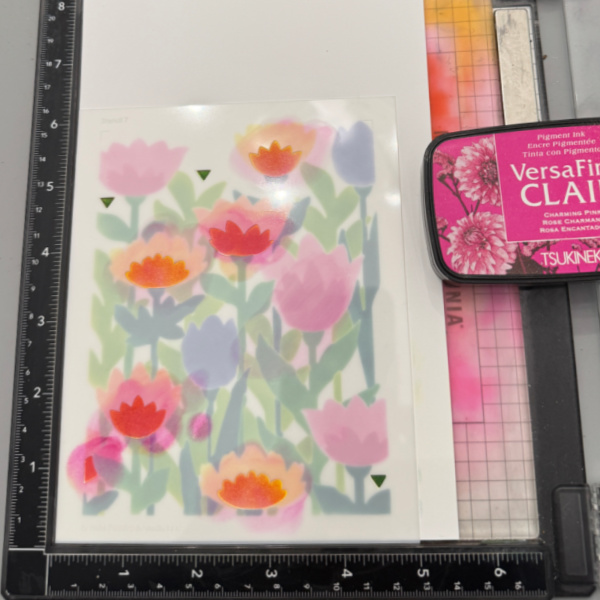
Step 6: Lay Stencil 6 over the cardstock and blend VersaFine Clair Cheerful and VersaFine Clair Summertime inks over the open flowers. Remove and clean the stencil.
Step 7: Lay stencil 7 over the cardstock and blend VersaFine Clair Charming Pink in the open spaces. Remove and clean the stencil.
This photo is showing the alignment triangles I have been referring to. For the next step you will need to know where they are.
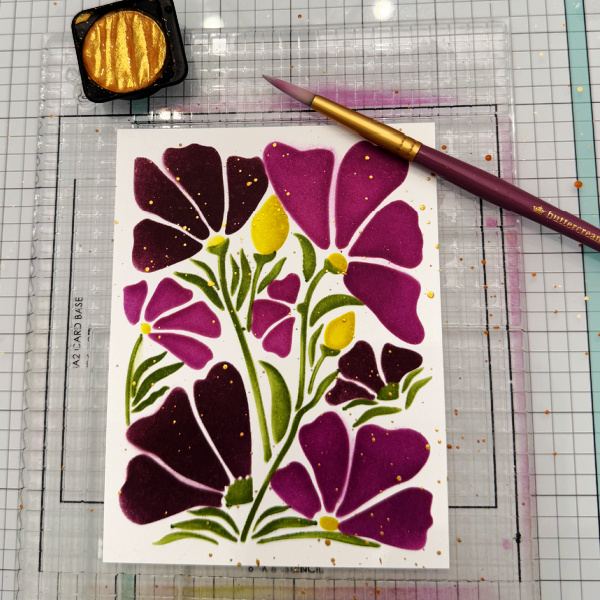
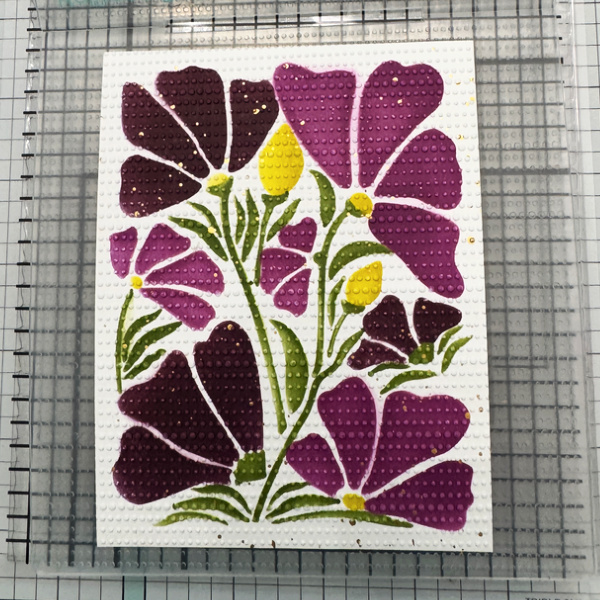
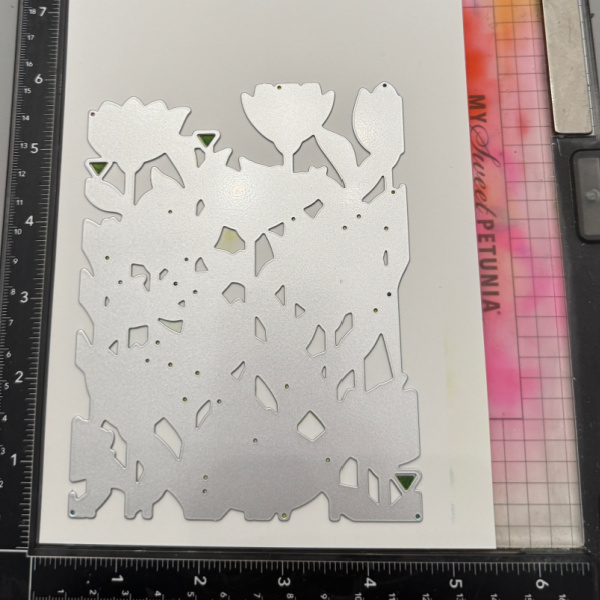
Step 8: Lay the coordinating die over the flowers lining up the triangles as pictured above. Tape it down so it doesn’t move and run it through the die cutting machine. This also adds the texture to the flowers.
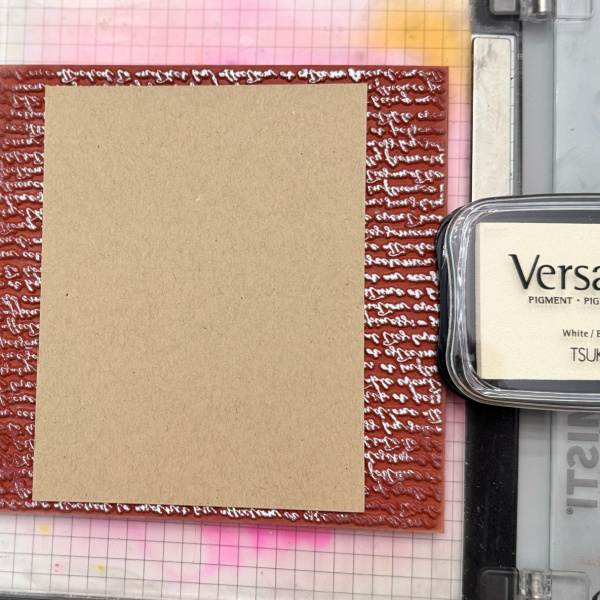
Step 9: Cut a piece of kraft cardstock to A2 size 4.25 x 5.5. Ink up a script stamp with VersaColor White and lay the kraft panel over the ink and rub across with your hand.
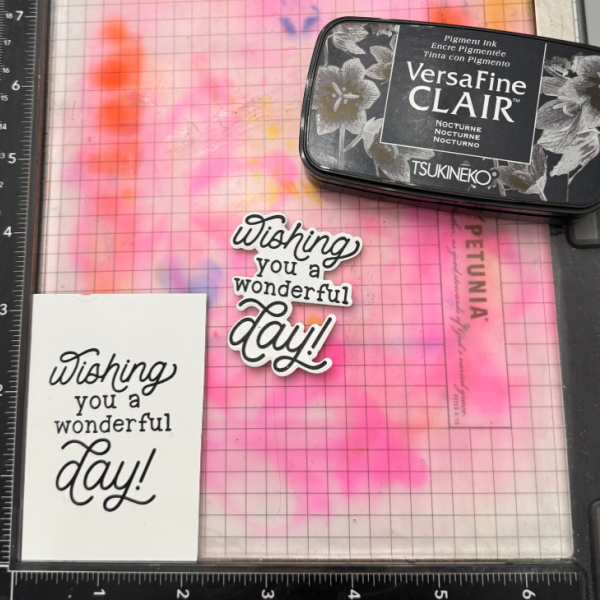
Step 10: Stamp the sentiment and cut it out multiple times for dimension. Adhere the kraft panel to an A2 white card base. Add the floral panel and then the sentiment. Also stamp a sentiment on the inside.
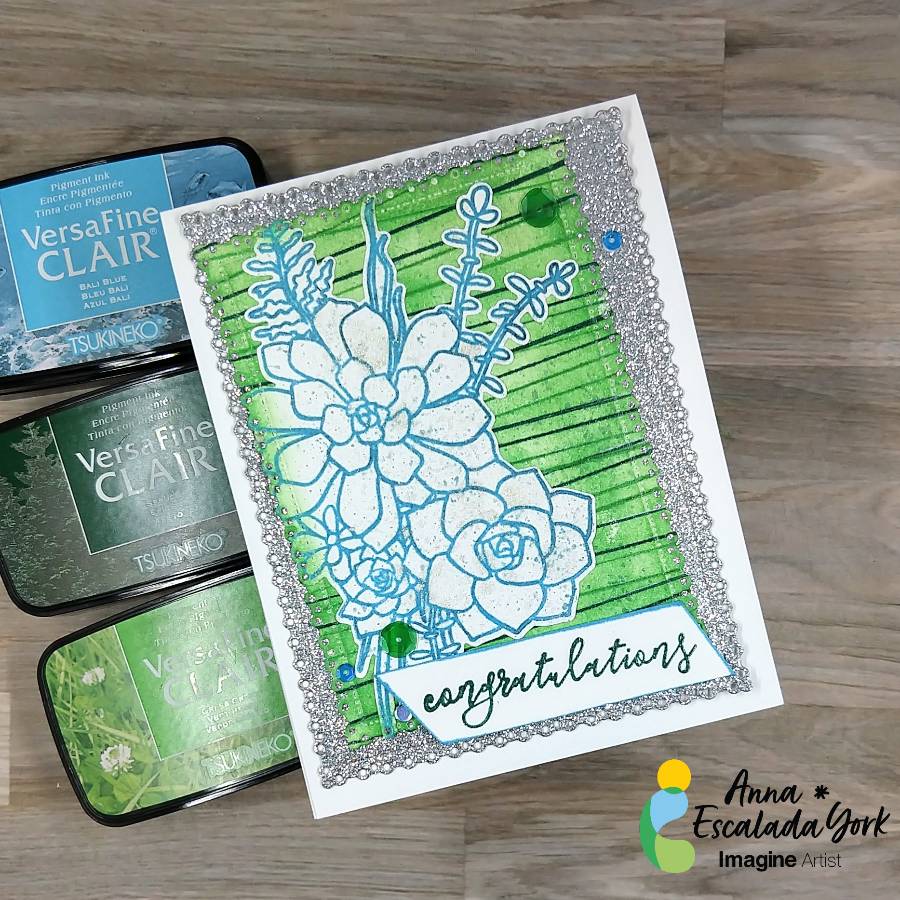
In today’s card, I made a congratulations card for a coworker who just had a baby using some of the beautiful new VersaFine Clair ink colors.
Skill: Intermediate Time: 1.5 hours
Directions:
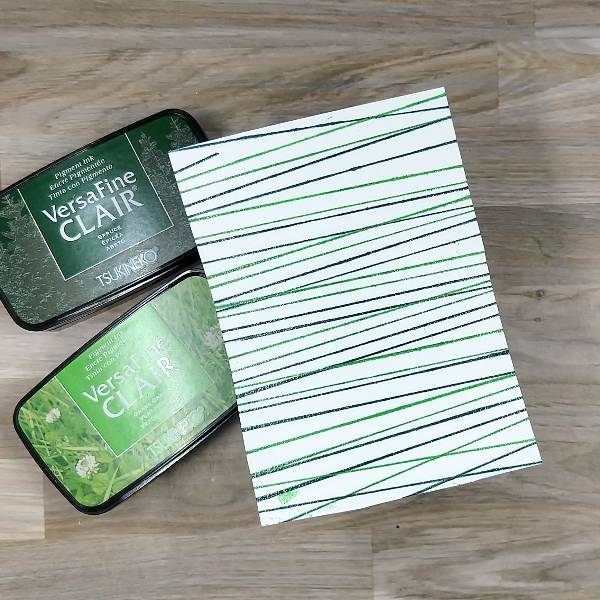
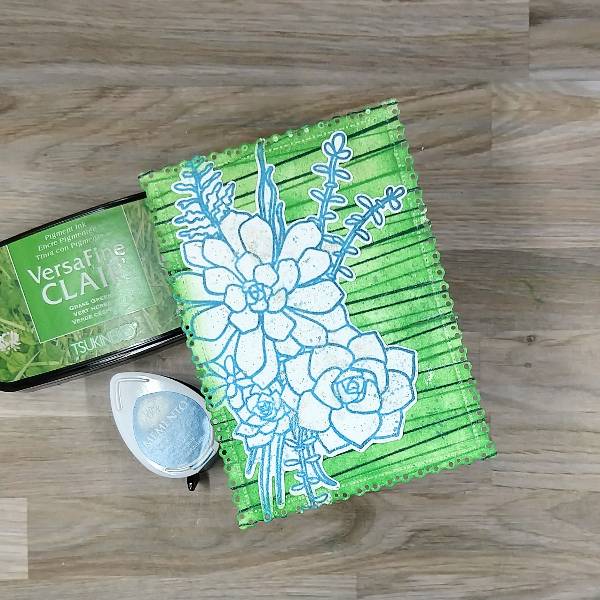
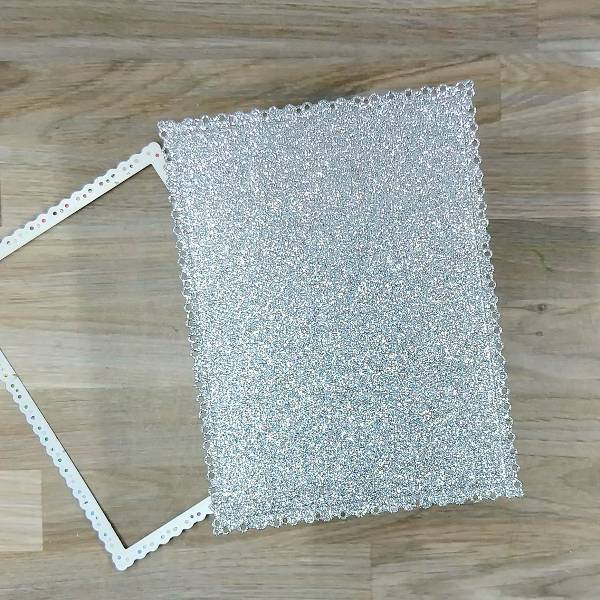
Step 1: Stamp a piece of watercolor paper with Grass Green VersaFine Clair ink using a background stamp with a variety of lines on it. Rotate the paper 180 degrees and repeat the process. Then move the stamp on the stamp positioning tool a little (so the lines don’t overlap) and repeat the process with Spruce VersaFine Clair ink. Heat emboss the whole thing with Clear Mbossing powder.
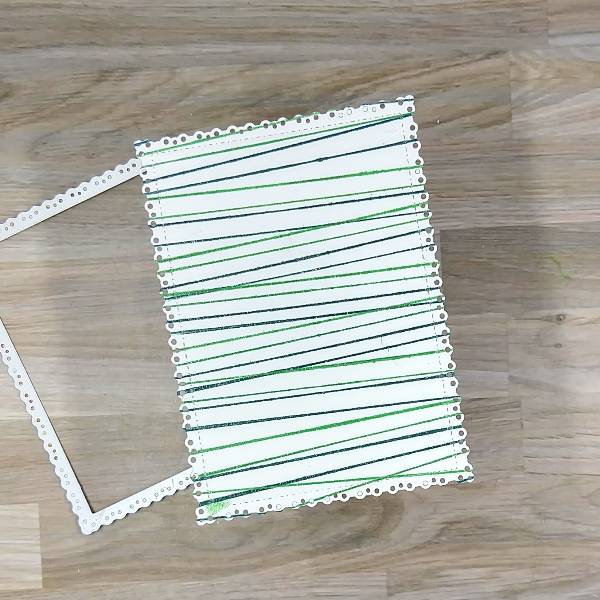
Step 2: Die cut the panel with the second-largest die from a nested die cutting set.
Step 3: Use a sponge dauber to ink blend the whole panel with Grass Green VersaFine Clair ink. (This doesn’t have to be done perfectly because it won’t matter on the final card.)
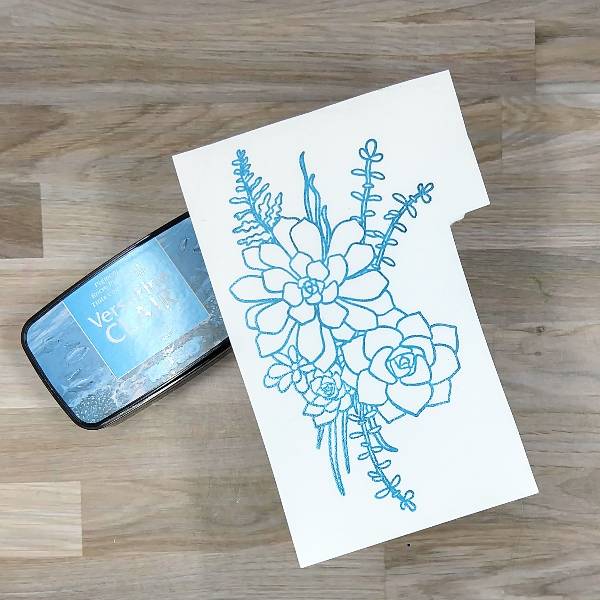
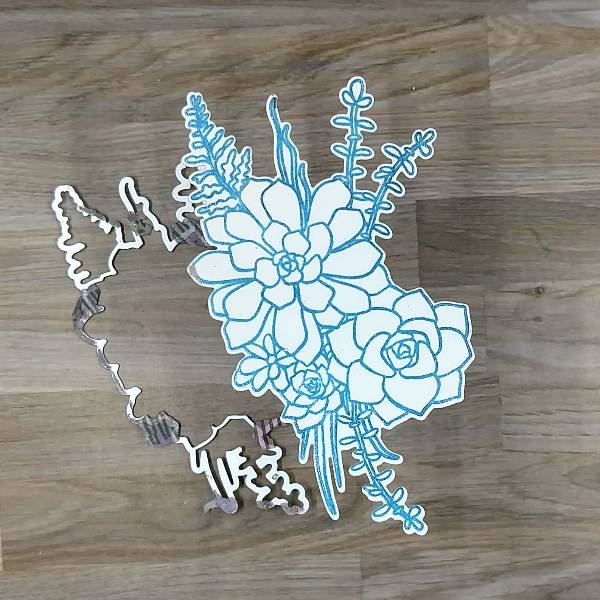
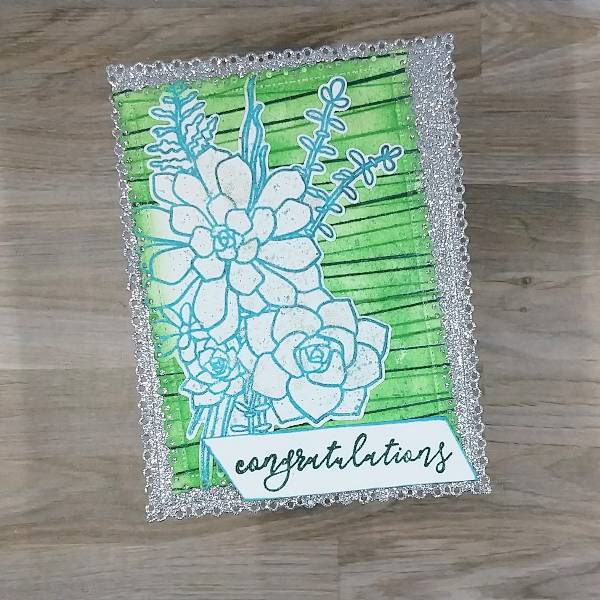
Step 4: Stamp the large floral image with Bali Blue VersaFine Clair ink on another piece of watercolor paper. Then heat emboss with more Clear Mboss powder.
Step 5: Die cut the floral image with the corresponding die.
Step 6: Die cut the left edge of the floral image with the same die used earlier, that way the decorative edge of the stamped image can line up with the edge of the green panel.
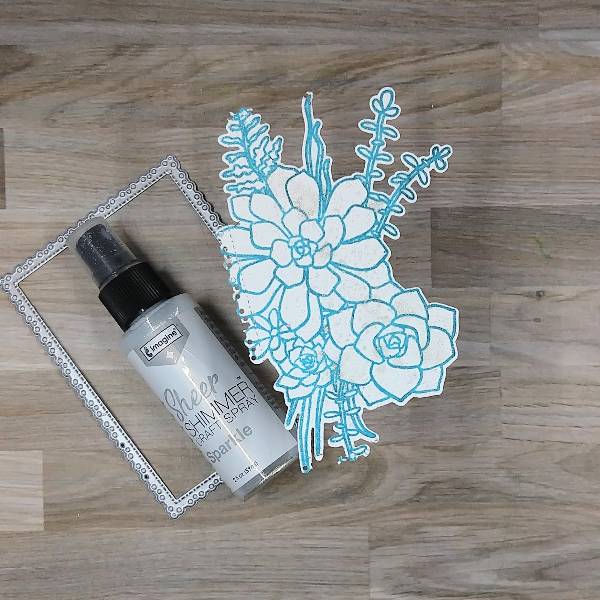
Since I smudged the floral image while die cutting, I decided to cover the smudge with some spray.
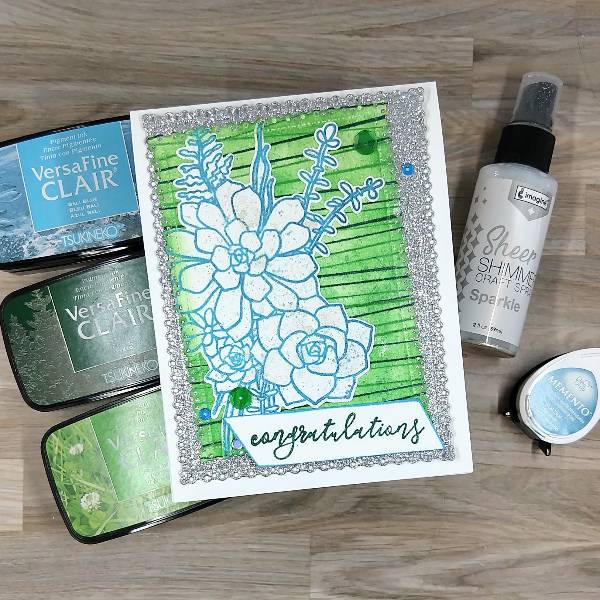
Spray the image with Sparkle Sheer Shimmer Craft Spray. Press the cap of the spray bottle down about half-way, allowing the spray to come out more in drips rather than as a mist. (I was able to cover the smudges with large splatters of spray.) Allow to dry.
Step 7: Glue the floral image onto the left side of the panel.
Press the Teal Zeal Memento Ink pad onto a piece of scrap acetate packaging and spray the packaging with water to create watercolor. Splatter it with a paint brush. After the splatter dried, ink blend the left side of the panel with more Grass Green VersaFine Clair ink.
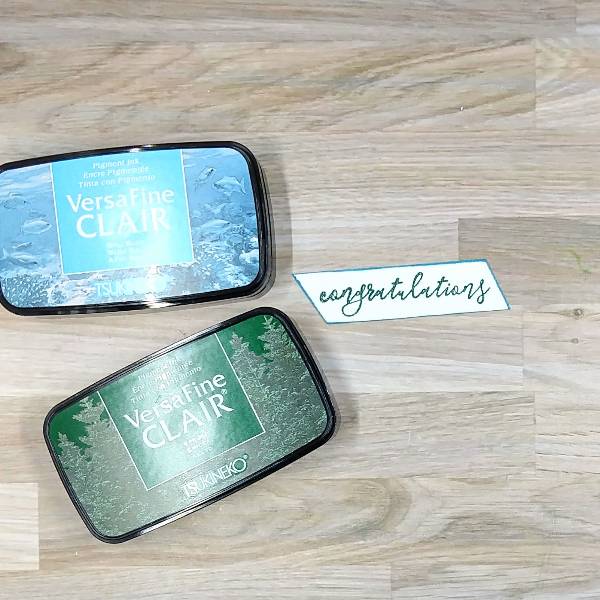
Steps 8 and 9: Stamp a sentiment from the same stamp set as the floral image with Spruce VersaFine Clair ink on watercolor paper and heat emboss with more clear Mboss powder. Trim the sentiment strip with a paper trimmer.
Then run the edges of the sentiment strip through the Bali Blue VersaFine Clair ink pad. Emboss the Bali Blue ink with more clear Mboss powder.
Step 10: Die cut a piece of silver glitter cardstock with the largest die from the same nesting die cut set.
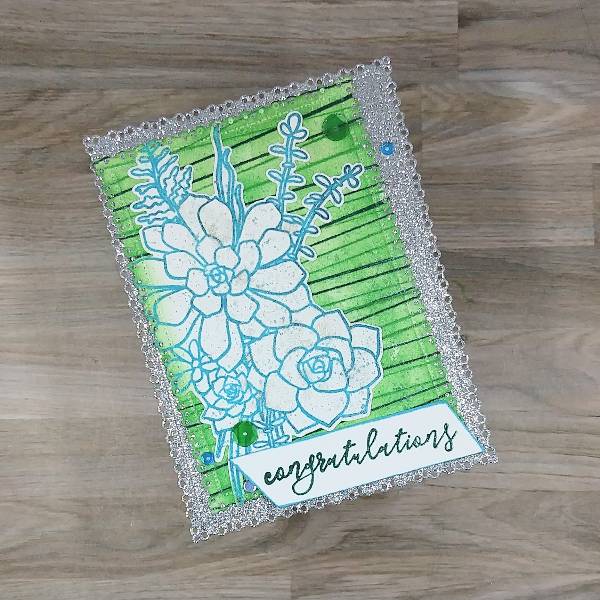
Step 11: Glue the green panel onto the silver panel, orientating them at a diagonal. Glue the sentiment on the lower right corner of the green and silver panels. Set aside to dry.
Step 12: Glue blue and green sequins onto the card–three on the lower left corner and two on the upper right corner.
Step 13: Finish the card by gluing the whole panel onto an A2-sized white card base.
Other • Catherine Pooler – sequins – Yukon • Gina Marie Designs – Die set – Pleated Lace Rectangles die set • Hero Arts – Stamp set – Succulent Bouquet • Hero Arts – Die set – Succulent Bouquet • Unknown stamp company – background stamp – diagonal lines (I don’t know the brand or name of this stamp) • Watercolor paper • Silver glitter cardstock • Die cutting machine • Paint brush • Paper trimmer • Scissors • Glue
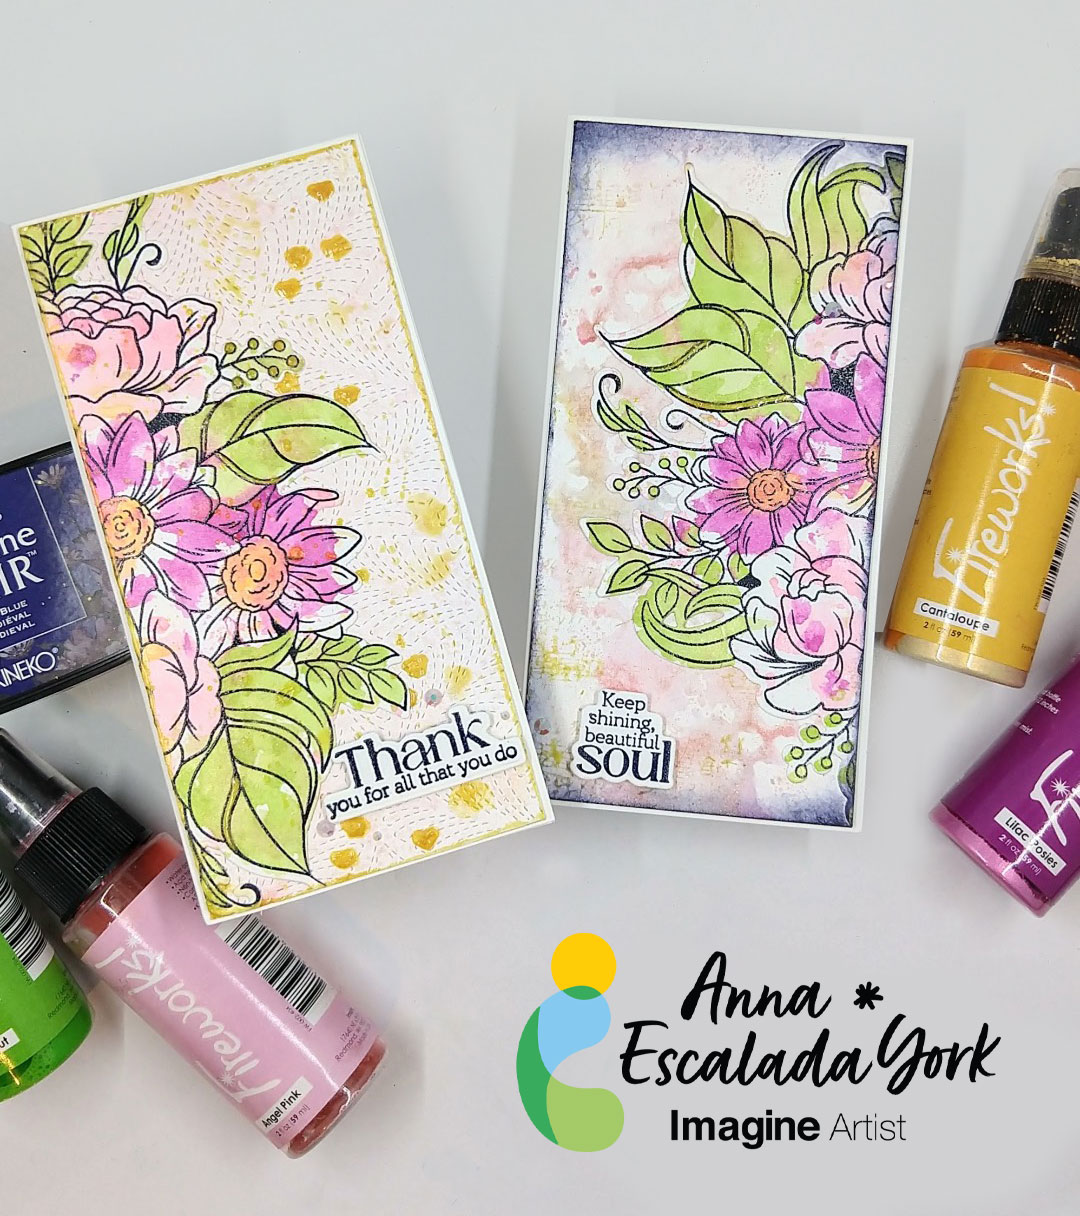
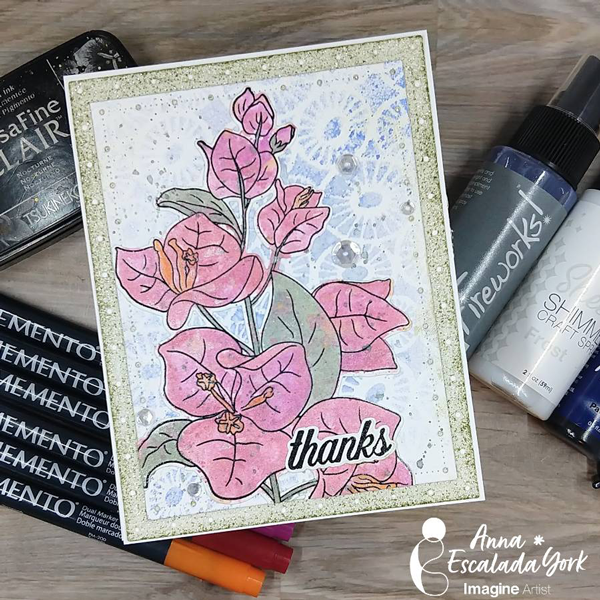
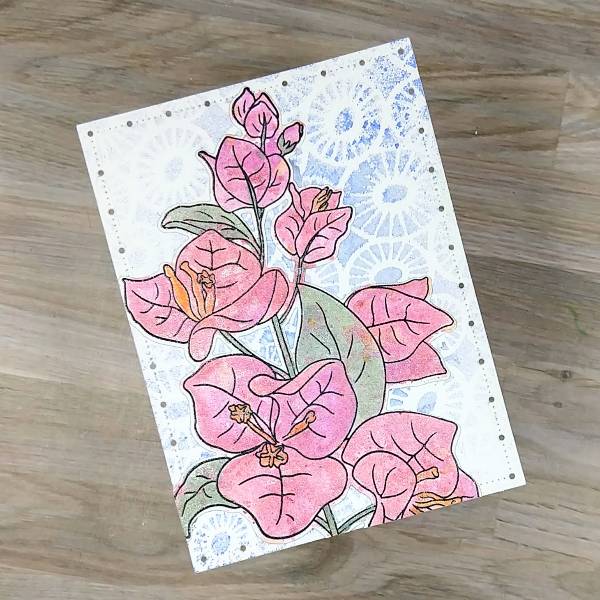
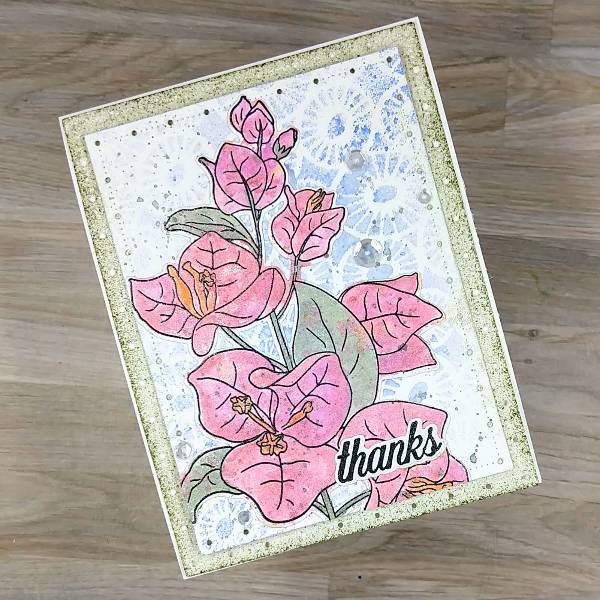
In today’s card, I made a thank you card with some new-to-me Memento markers and sprays.
Skill: Intermediate Time: 1.5 hours
Directions:
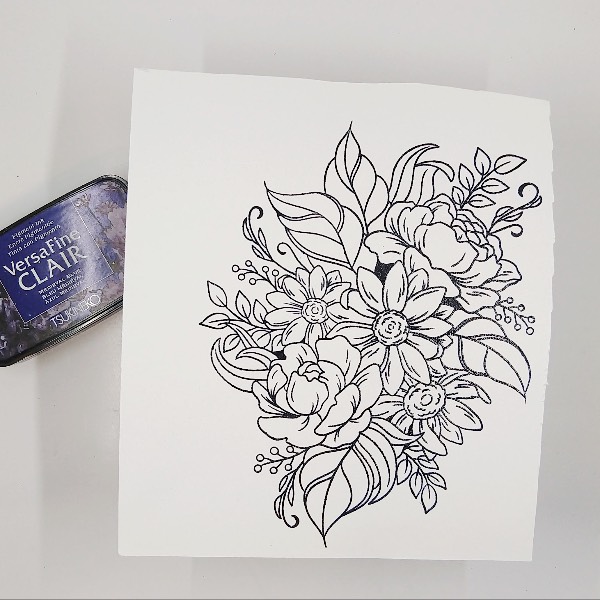
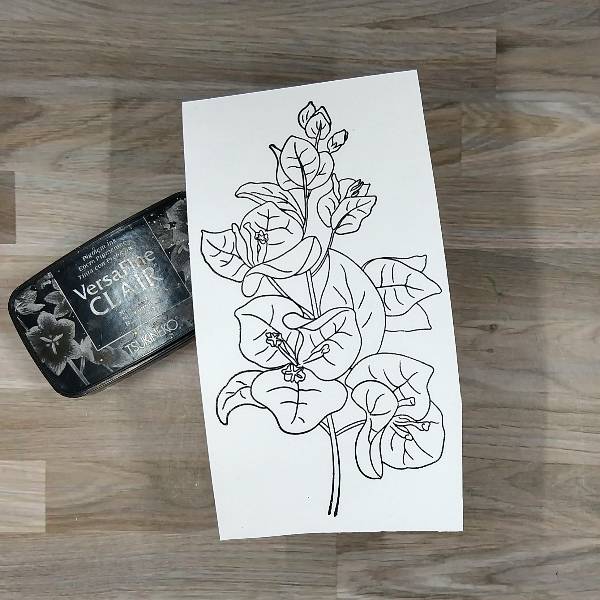
Step 1: Stamp the large floral image with Nocturne VersaFine Clair Ink on watercolor paper and then heat emboss with clear Mboss embossing powder.
Step 2: Die cut the large floral image with the corresponding die cut.
Step 3: The large floral image was colored by watercolor smooshing a variety of Frost Sheer Shimmer Craft Spray mixed with a variety of colors of Memento Dual Markers–Love Letter and Lilac Posies. After the watercolor smooshing dried, the large floral image was watercolor painted with a Northern Pine and Pistachio Memento Dual Markers mixed with more of the Frost Sheer Shimmer Craft Spray on the greenery. The flowers were colored with a mix of Rhubarb Stalk, Love Letter and Lilac Posies mixed with more of the Frost Sheer Shimmer Craft Spray. Finally, Tangelo Memento Dual Marker was mixed with more of the Frost Sheer Shimmer Craft Spray and watercolor smooshed onto the image.
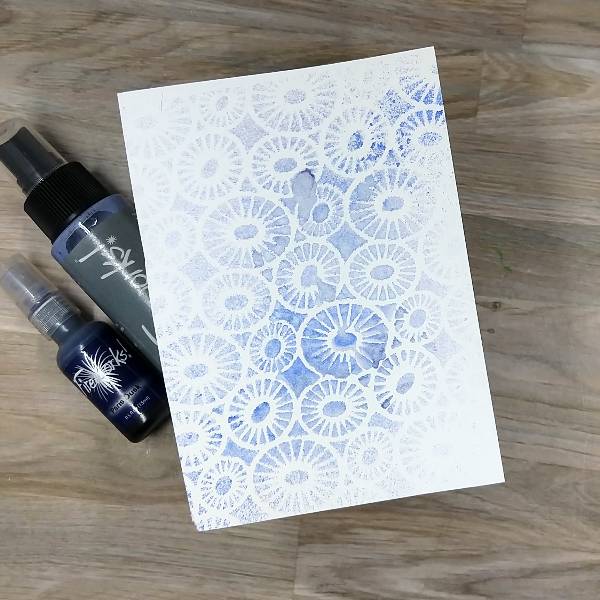
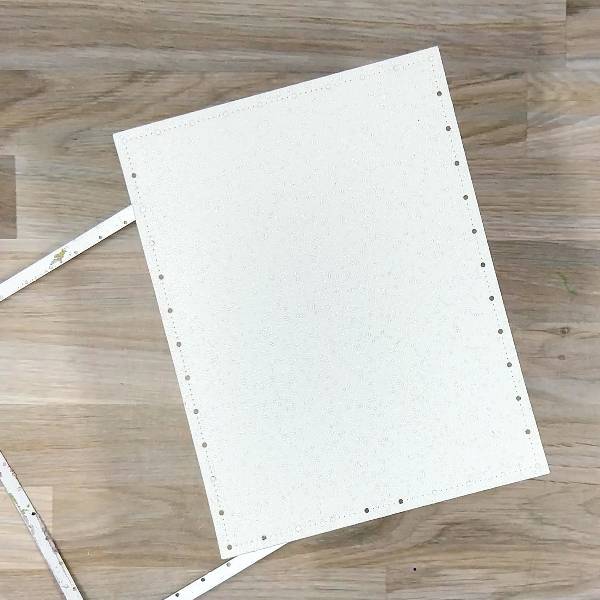
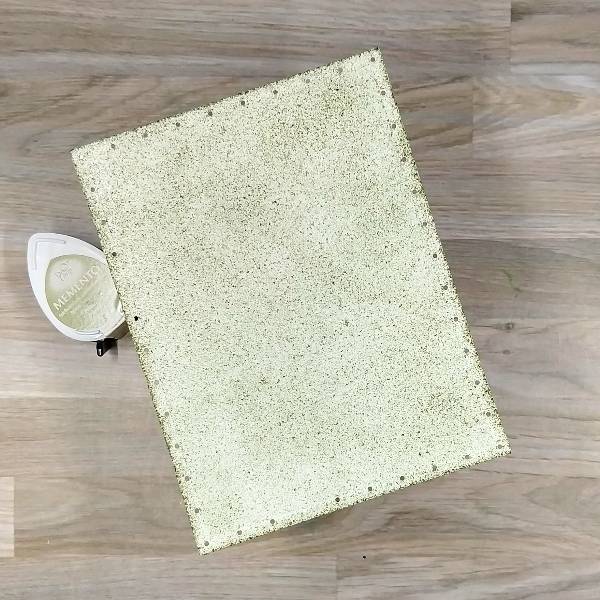
Step 4: Spray London Fog Fireworks! Shimmery Craft Spray onto another piece of watercolor panel through a stencil. Then spray Paris Dusk Fireworks! Shimmery Craft Spray on a diagonal through the same stencil through the same stencil while the ink was still wet.
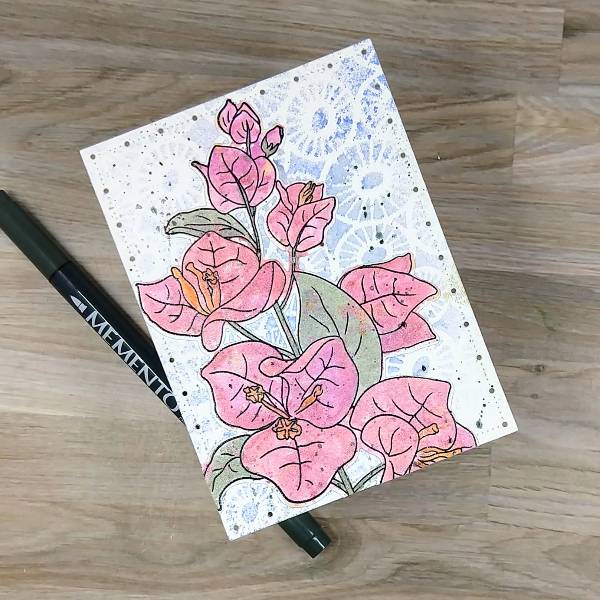
Step 5: Stamp the thanks sentiment with more Nocturne VersaFine Clair Ink on watercolor paper and then heat emboss it with more of clear Mboss embossing powder. Then die cut the sentiment with the corresponding die.
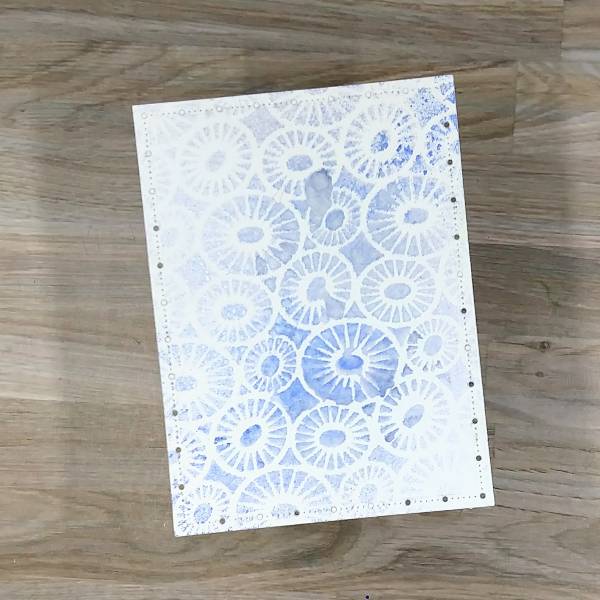
Step 6: Die cut the sprayed background panel with the second-largest die from a nested A2-sized panel die set.
Step 7: Glue the large floral die cut image onto the sprayed panel and then trim the edges of the floral die.
Step 8: Mix Northern Pine Memento Dual Marker mixed with water and splatter onto the panel and floral die cut.
Step 9: Die cut a piece of white glitter cardstock with the largest die from the same nesting die cut set.
Step 10: Swipe Pistachio Memento Ink across the glitter cardstock to color it green.
Step 11: Glue clear sequins and the sentiment die cut onto the upper panel. Then glued the green glitter cardstock behind the focal panel. To finish the card, glue the whole thing onto an A2-sized white card base.
Other Products Altenew – die set – Bougainvillea Altenew – stamp set – Bougainvillea Catherine Pooler – sequins – Crater Lake Gina Marie Designs – Die set – Big and Little Chain Rectangle die set Ink On 3 – Stencil – Pondie 6×6 stencil Watercolor paper White glitter cardstock Die cutting machine Paper Trimmer Scissors Glue
Hello! I’m Alison Heikkila. Embossing folders are so popular right now, not just because of the dimension they create so easily, but because of all the techniques you ca do with them. Today, we’ll be doing a Blackout technique with Memento and VersaFine Clair Inks for Imagine, which is so much fun to do.
*Some affiliate links are used in this post. That means that if you shop through these links, I may receive a small compensation, at no cost to you. For more information, please see my Affiliates page, where I also have some coupon codes.
Skill Level: Intermediate Time to Complete: 20-30 minutes