Faux Stained Glass Christmas Card

By Ceil Pritchett

Hello Crafty Friends!
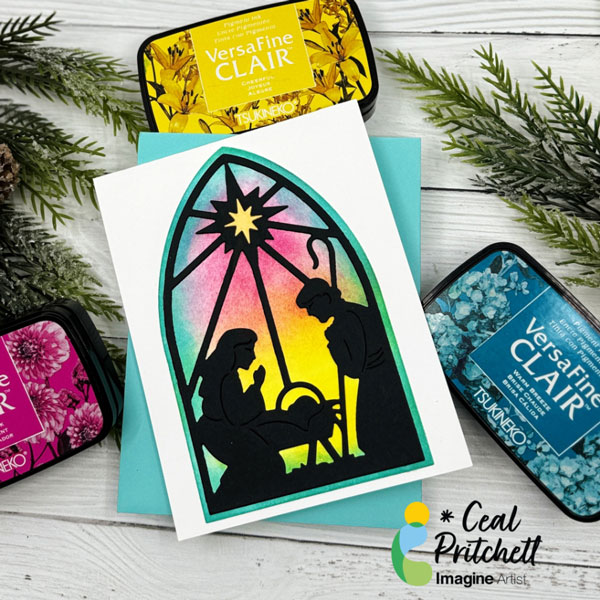
It’s Ceal, here. Today I am sharing how I made this faux stained-glass Christmas Card.

Skill Level: Beginner
Time: 30 Minutes

Directions:


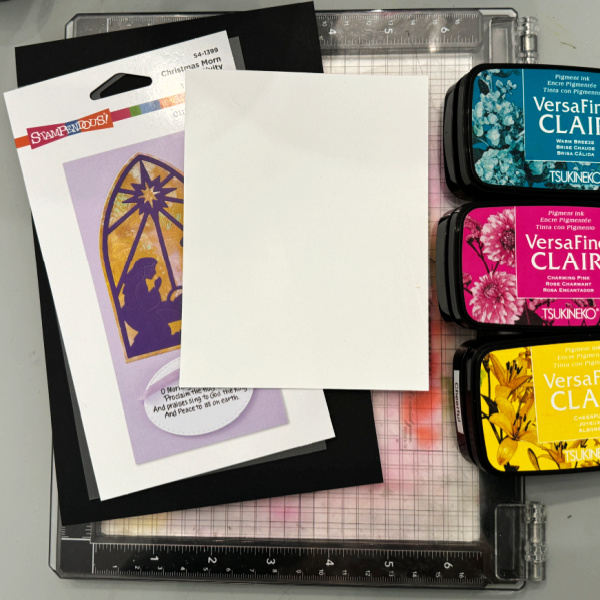
Gather your supplies. You will three inks, Pink, Yellow and Blue. A blending tool, a silhouette die along with black, white and gold cardstock.

Step 1:
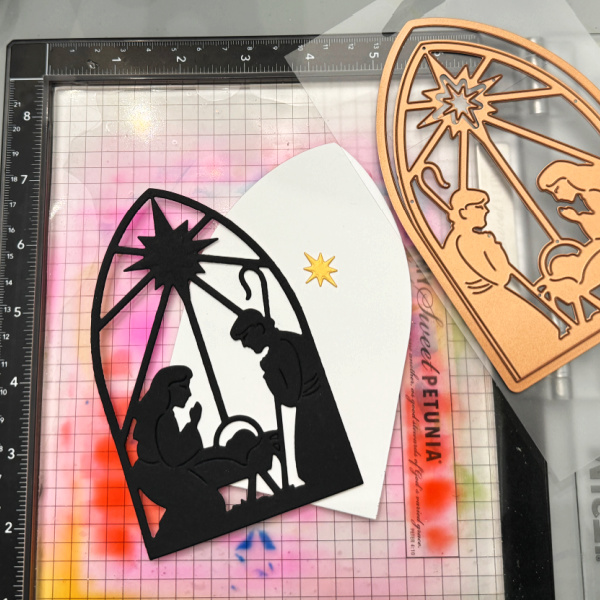
Cut the nativity die out of black cardstock, the backer out of white and the star out of the gold cardstock.

Step 2:
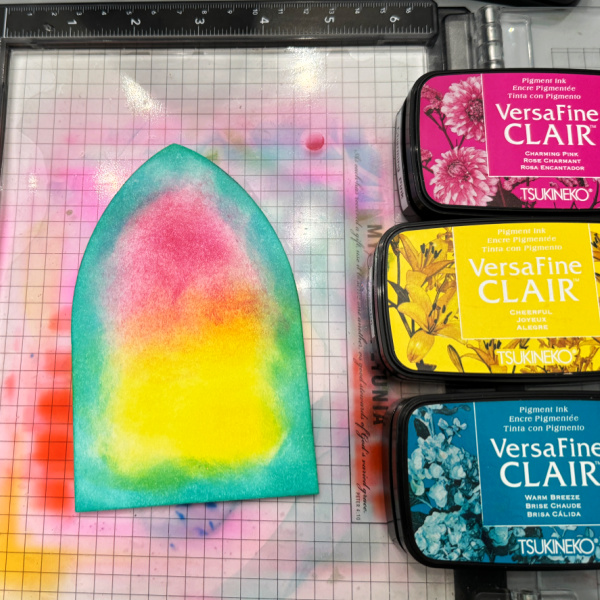
On the backer using a sponge or other blending tool, blend the blue around the outer edge of the panel and the pink and yellow inside the blue.

Step 3:
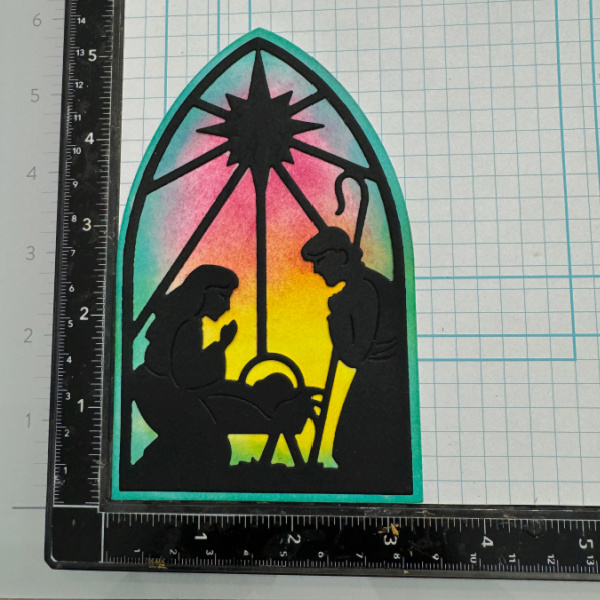
Line up the nativity over the backer and adhere it down with On Point glue. As you can see in the photo above, I use the corner of the MISTI to help me line things up.

Step 4:
Add the window to the card base.

Supplies:

Imagine Products:
• VersaFine Clair – Charming Pink, Cheerful and Warm Breeze
• On Point Glue
• Sponge Daubers

Other Products:
Misti 2.0 – My Sweet Petunia
Nativity Die – Stampendous
White Cardstock – CutCardStock
Black Cardstock – Hero Arts
Gold foil cardstock – Erin Lee Creative

Create a Beautiful Holy Night Card

2021-Nov-Neva-HolyNightCard_IG

By Neva Cole –

Today’s tutorial will feature several Imagine products, Delicata, StazOn, and Vertigo.  Using silhouette style die cut creates a stunning yet quick and easy Christmas Card.

Skill:  Beginner

Time:  30 Minutes

Directions:

2021-Nov-Neva-HolyNIghtCard-step1

Step 1

Trim black cardstock to 6 ½” x 9” and fold in half.  Center die on the front panel of the card base and die cut.

2021-Nov-Neva-HolyNIghtCard-step2

Step 2

Leave the die in place and stamp the starry background with Delicata Golden Glitz.

2021-Nov-Neva-HolyNIghtCard-step3

Step 3

Use a Fantastix Brush Tip to brush in details left open in the die.  Photo shows the die removed after this step.

2021-Nov-Neva-HolyNIghtCard-step4

Step 4

Trim a section of Taffeta Vertigo to 2” x 6 3/8”.  Use an Ink Blusher to build layers of color in StazOn Blazing Red and Midnight Blue.  As the color layers blend, the red, purple, and blue along with the Taffeta Vertigo creates a stunning night sky.

2021-Nov-Neva-HolyNIghtCard-step5

Step 5

Adhere Vertigo behind the opening in the die with small dots of On Point Glue.  I glued around the edge and behind each small portion of the die scene.  Trim white cardstock to 6 3/8” x 8 ¾” and fold in half.  Adhere to the inside back of the card with Tear It! Tape.

2021-Nov-Neva-HolyNIghtCard-step6

Step 6

Apply Tear It! Tape to the front inside of the card and fold card closed.  This allows the card to compensate for the two layers of cardstock.

2021-Nov-Neva-HolyNIghtCard-step7-2

Step 7

Stamp Oh Holy Night sentiment in Delicata Golden Glitz and heat emboss with Gold Embossing Powder.

Art Supplies

Imagine
Other
  • Gemini Follow the Star Die
  • Neto Stuff Star stamp
  • Recollections Christmas Sentiments
  • Black and White cardstock