Create A “Not All Who Wander Are Lost” Greeting Card

by Iris Rodriguez

Create A Not All Who Wander Are Lost Greeting Card

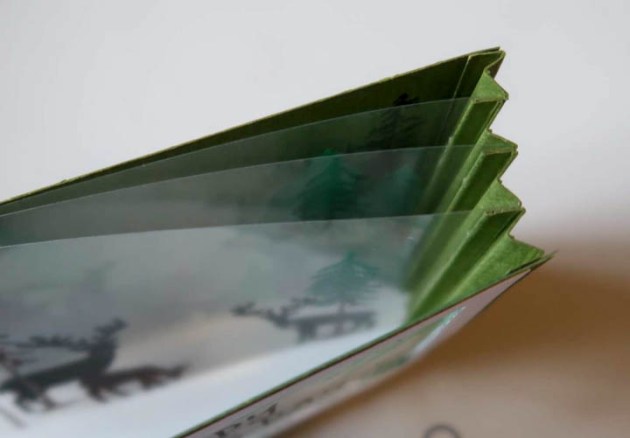
I made a travel theme card with a porthole using the Vertigo film. This is a plastics film containing a 3D, hologram-like imprint. The porthole window view has a fantasy feel. It’s like looking into the abyss as you go onto your great adventure. Vertigo can be tinted with Imagine’s inks and cut with scissors or other cutting tools. Check out how this grungy, travel-themed card is made.

Skill: Beginner
Time: 1 hour

Directions

Step 1

Cut out or use a die cut tool to cut a circle containing an open center from the chipboard.

Step 2

Cut out four or more different size pieces of chipboard. This will be the steampunk looking wall. Rip the edges with your hands for added grungy-ness.


Step 3

Add a few Walnut Crystals to water and mix. Paint the chipboard with a brush. Dry the paper.


Step 4

Smoosh the Golden Glitz Delicata ink onto the craft mat. Spray with water and mix.


Step 5

Smoosh the card pieces onto the watered ink. Dry the paper. Ink the edges with VersaFine Vintage Sepia ink. Ink the porthole with Delicata Celestial Copper ink.


Step 6

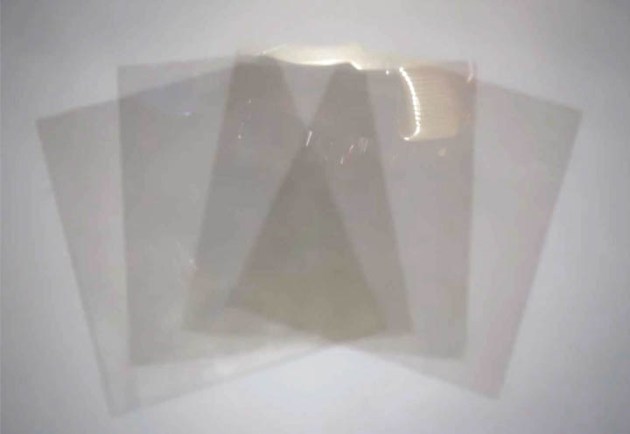
Now we will create the porthole. It’s made using the Breeze Vertigo. This is a firm plastic film that has a cool effect imprint. Looks like a hologram.


Step 7

Tint the Vertigo with Cottage Ivy and Pear Tart Memento inks.


Step 8

Add tiny drops of the On Point Glue to the Vertigo circle and adhere the chipboard circle.


Step 9

Add tiny drops of the On Point Glue to the chipboard circle and adhere the metal studs.


Step 10

Ink an area onto one of the chipboard pieces with the White Shimmery Delicata ink and stamp the sentiment over it with the Piano Black StazOn Pigment ink. I did this so one can better see the sentiment. You may choose to stamp the sentiment over the chipboard piece as is.


Step 11

Adhere the map paper onto the card base first, then adhere the chipboard pieces. Next, adhere the porthole and finally add the rest of the studs onto the chipboard pieces.

Supplies

Imagine
Other
  • Map scrapbooking paper or map stamp
  • Cardbase
  • Chipboard
  • Metal studs
  • Sentiment Stamp

See How To Make These Artist Trading Cards With Vertigo Dragonflies

by Lori Warren

This cardmaking project is all about using layers of ink to create a collage background with stamps and stencils. It’s a great way to build a cool background in order to feature that perfect focal image, like a Vertigo, die cut dragonfly.

Skill: Intermediate
Time: 30 minutes

Directions


Step 1

Apply VersaMagic DewDrops to a Craft Mat and add water.


Step 2

Lay 8.5” x 11” piece of cardstock down into the wet ink. Repeat as needed.


Step 3

Apply VersaMagic through the diamond shape stencil with a sponge dauber.


Step 4

Stamp script stamp with StazOn Pigment Ink.


Step 5

Apply water and blot with a paper towel, pulling some ink away.


Step 6

Spray panel with Walnut Ink, blot and dry. This gives the paper a vintage or antique look.


Step 7

With a different stencil apply a different color of VersaMagic. This creates a beautiful layered effect.


Step 8

Using the same stencil, apply White VersaMagic to make a bit of a frosty ghost effect.


Step 9

Cut cardstock panel to multiple 2.5” x 3.5” ATCs or Artist Trading Cards.


Step 10

Stamp a vintage postcard image with VersaFine Clair.


Step 11

Edge ATCs with brown and black inks to continue the antique look.


Step 12

Tie string around each card a couple times to give the ATCs to give extra flair.


Step 13

Die cut dragonfly image from Vertigo Prism, color with VersaMagic.


Step 14

Prepare dragonfly with double-sided dimensional tape. This will give each dragonfly the effect of flying.


Step 15

Adhere dragonfly die cut to ATCs.


Step 16

Enhance dragonfly with a white pen and embellish with tag and sticky gems.

Supplies

Imagine
Other
  • Sizzix – Dragonfly
  • Jillibean Soup – Sticky Notes
  • Sticky gems
  • Lori’s Cards & Creations – Script Stamp
  • Clear Stamps – Postmarks
  • Uni-ball Signo -White
  • Black string
  • TCW Stencil – TCW202, TCW855

Create Your Own Holographic Vertigo Film for Cardmaking Crafts

by Roni Johnson

Create Your Own Holographic Vertigo Film for Cardmaking Crafts

Holographic … as a color? Yep, that’s what May’s color of the month is at Imagine. I must admit at first I was thrilled. I LOVE the wide spectrum of color, the swirly design, and the amazing depth it gives a project. After the jubilation wore off I was stumped! Short of going out and buying some holographic paper, how do I create this look on my own? Well, I took this as a challenge and I set to experimenting.

Let me tell you experimentation is not a pretty process…lots and LOTS of trial and error but it is very fun! As luck would have it I found the perfect recipe for making my very own holographic colored technique and I’d like to share it with you.

Skill: Advanced
Time: 1 hour + dry time

Directions


Step 1

Cut a piece of Vertigo film to the desired size. I am using a 4.25 x 5.5” for my examples.


Step 2

Begin applying ribbons of color using a variety of StazOn inks and a sponge dauber. I must warn you that the Vertigo film has a texture to it that may or may not tear up your sponge daubers. If you are a bit heavy handed as I am the film does tend to chew on the dauber. It’s o.k. though, I keep a set of the daubers set aside just for this purpose.


Step 3

Continue to add color until the entire piece of Vertigo film has been covered. You will be left with a very colorful sheet of Vertigo film.


Step 4

Freshen up or apply a brand new coat of the ink/glue your Essential Glue Pad.


Step 5

Pounce the Glue Pad over a background stamp.


Step 6

Position the inked piece of Vertigo film over the inked stamp. Lightly rub the back of the Vertigo to ensure complete coverage.


Step 7

Carefully place silver leafing flakes over the inked film. I find that a soft bristle brush helps to push the leafing flakes around where needed. Let the glue dry completely. I usually leave it undisturbed for 2-4 hours.


Step 8

After the glue has dried use a soft bristle brush to remove the excess leafing flakes. Save the excess leafing flakes for future use. And here’s how this example looks after removing the excess leafing flakes.


Step 9

Time to apply a layer of StazOn Pigment ink over the panel. Choose a color that will compliment the overall design and apply it over both the exposed Vertigo film and the leafing flakes.


Step 10

You will be left with an amazing design that has all of the wonderful aspects of holographic colors.


Step 11

The same panel from another angle reveals the beauty of the StazOn ink colors hidden beneath the leafing flakes. It will shine and shimmer from every angle.


Step 12

What can you do with the holographic design? Virtually anything! You are only limited by your imagination. The card above is assembled with a unicorn stamp and the “you are magical” sentiment.

This is another example made using the same technique with a different selection of colors. The card above is assembled with a mermaid stamp and the “The hardest part of moving forward is not looking back” sentiment.

Supplies

Unicorn Example

Imagine
Other
  • Hero Arts – Unicorn Stamp and Cut
  • Black Widow Colored Pencils
  • White Cardstock

Mermaid Example

Imagine
Other
  • Unity Stamp Co – She Mermaid (mermaid), Mystical Mermaid (sentiment)
  • Black Widow Colored Pencils
  • White Cardstock

Learn How to Make a Clear Wedding Invitation

by Lindsay Adreon

2019_April_LA_ClearInvitation_72PPI

Wedding invitation styles are constantly changing and updating and recently on Pinterest I have seen some beautiful CLEAR invitations using acrylic sheets. I wanted to find a DIY to make clear invitations and still have them be very elegant. I used StazOn Pigment Ink and a Marble stamp layering stamp set to get the look I was going for, and it was easier than I thought to create these see-through translucent invitations!

Skill: Advanced
Time: 15 minutes for each

Directions

Supplies

Imagine
Other

Use Different Inks to Make a Congrats Graduation Card

by Iris Rodriguez

Use Different Inks to Make a Congrats Graduation Card

Graduation season is upon us. As much as it a joyous time in anyone’s life, you feel the pressure of the final exams, think about that next phase of your life and probably make a big move. Don’t forget the grad in your life, and make him/her a fun, grungy card. I will show you how you can create a simple, yet layered background with fun ruler embellishments and matching sentiment.

Skill: Beginner
Time: 30 minutes

Directions


Step 1

Smoosh the Turquoise Gem VersaMagic ink onto the Imagine Craft Mat.


Step 2

Spray water over the ink. Smoosh the watercolor paper and create a random background. Dry the paper.


Step 3

Stencil the gears with the Vintage Sepia VersaFine ink and Inkblusher.


Step 4

Using the palette knife and modeling paste, stencil another image.


Step 5

Spray some Walnut Ink, then brush the ink with a wet brush. Dry paper.


Step 6

Stamp the ruler stamps with the Piano Black StazOn Pigment ink.


Step 7

Cut out the rulers and ink the edges with the Piano Black StazOn Pigment ink.


Step 8

Assemble card. Glue on the rulers and add a sentiment.


Supplies

Imagine
Other
  • Watercolor Paper
  • The Crafters Workshop – 6×6 Gears stencil
  • Carabelle Studio – Steampunk Metre stamp
  • Stampendous – Ruler stamp
  • Liquitex – Modeling Paste

Create An Awesome Accordion Fathers Day Card

by Roni Johnson

Tunnel cards just got that much cooler because of StazOn Pigment Inkpads! You can now stamp on acetate and really build up those layers without all of the cutting and snipping like traditional tunnel cards. With the help of StazOn Pigment Inks simply stamp on acetate panels, use Tear It! Tape to affix the panels to the accordion sides and you’re good to go! It takes a matter of minutes instead of hours!

Skill: Advanced
Time: 20 minutes

Directions


Step 1

Stamp beginning layer on a card to use as a stamping guide. Originally I thought I would use this as the back panel of the card but the green was too dark so I stamped a second panel on white cardstock to use as the final layer of the tunnel.


Step 2

Cut acetate (transparencies) to the desired size. I cut 4 layers for this card.


Step 3

Position one of the acetate panels over the stamping guide. Stamp the panels from back to front stamping panel #4 first.

inks yield crisp clean opaque images on the acetate
Step 4

Continue stamping each consecutive layer as desired. As you can see here the inks yield crisp clean opaque images on the acetate. The best part is they dry in a matter of seconds allowing you to stack the next layer on top of the last for ease of alignment and stamping.

Create the accordion side panels by creasing a 4” x 4 ¼” card panel at ¼” increments.
Step 5

Create the accordion side panels by creasing a 4” x 4 ¼” card panel at ¼” increments.


Step 6

Use On Point Glue to create 3 flats between the mountains as shown in the photo. These flat pieces will be what you affix the acetate panels to creating the tunnel effect.

 Use Tear It Tape to affix the front acetate panel to the card frame.
Step 7

Cut a frame for the front of the card. Use Tear It Tape to affix the front acetate panel to the card frame.


Step 8

Adhere the accordion pieces to the back sides of the frame. Use Tear It Tape to adhere to each consecutive panel to the accordion sides as shown in the photo.

Your tunnel card is ready to go!

Supplies

Imagine
Other
  • Acetate
  • Cardstock
  • My Favorites Things – Stitched Frame
  • Just For Fun Stamps – Trees, deer, pine bough
  • Rubber Stamp Tapestry – Mom & Dad Clear Stamp Set
  • Die Machine
  • Acrylic Block