Welcome back to Imagine’s blog. Today, I am going to show everyone how you can get more out of your embossing folders by adding some ink!
Skill Level: Beginner Time: Approximately 30 minutes
Directions:
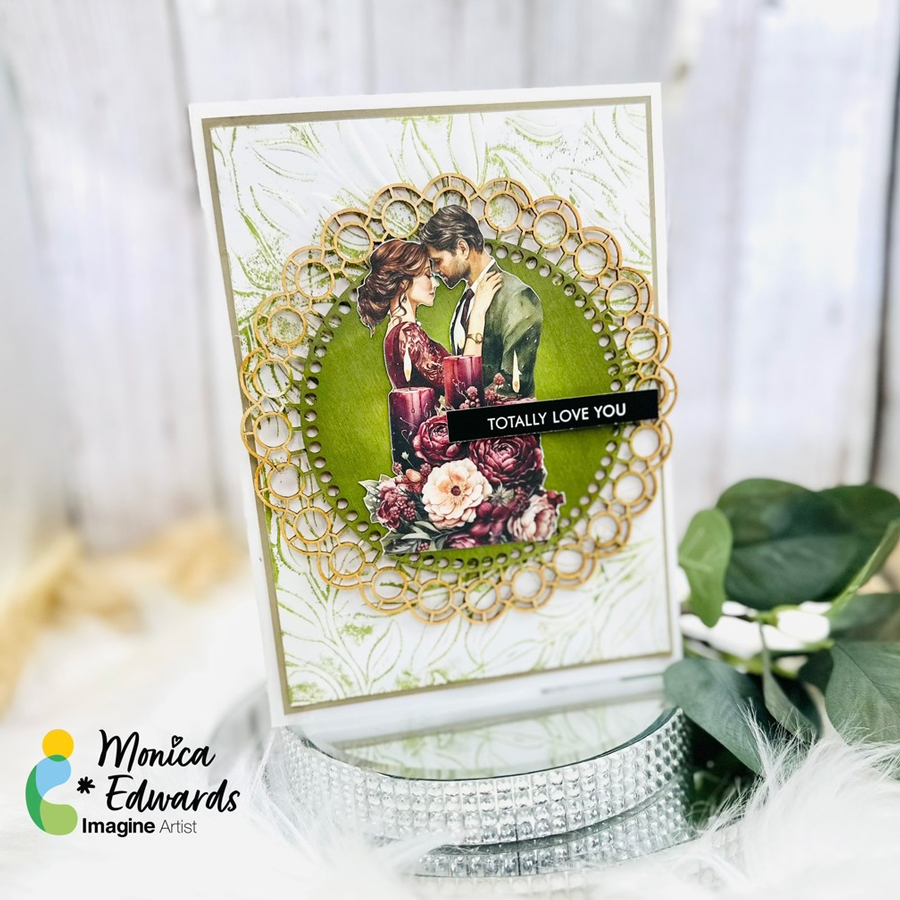
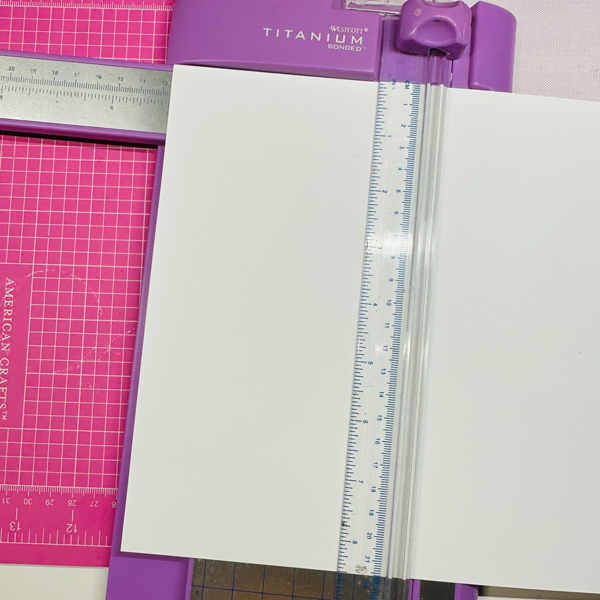
Step 1 Create your card base by taking a piece of white cardstock measuring 10” x 7” and score it down the middle at 5”.
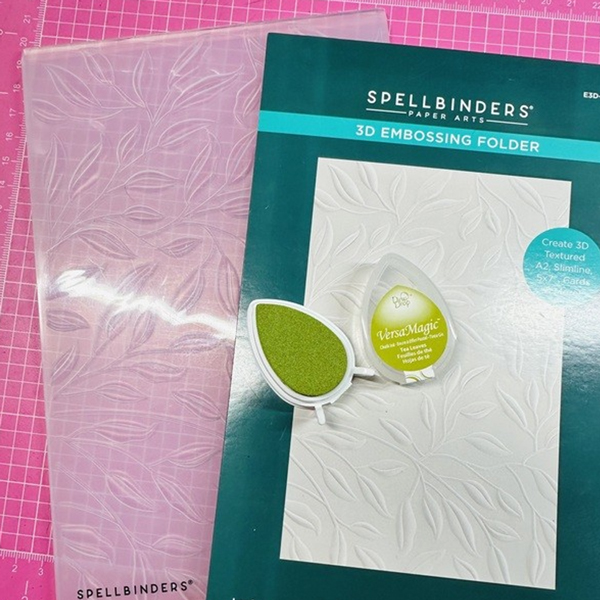
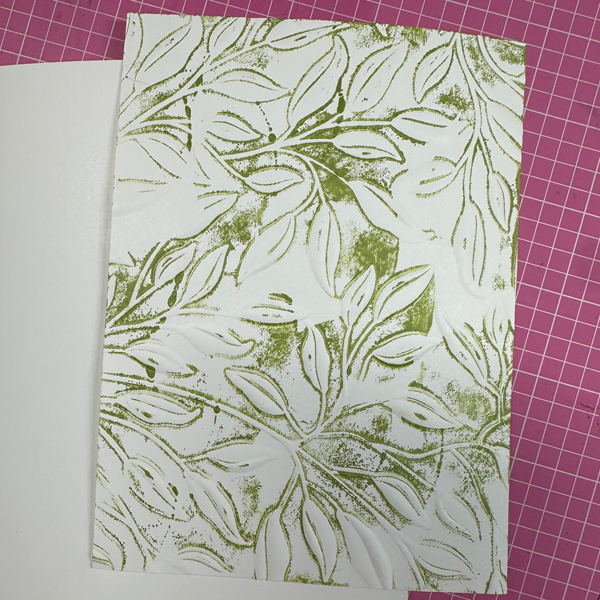
Step 2 To create the colored embossed background, you will need the folder you chose. I am using the Leafy folder with VersaMagic Dew Drop in “Hint of Pesto” and “Tea Leaves”.
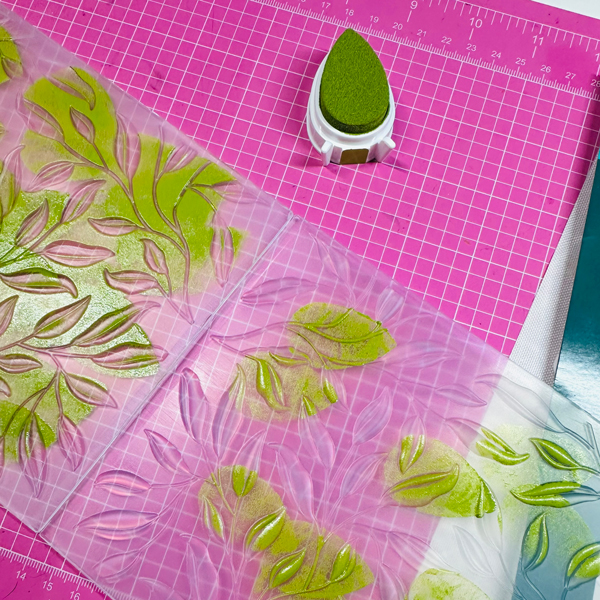
Step 3 Simply take the ink and wipe and/or dab it all over the folder.
Step 4 Once you are done run it through your diecut machine so the ink is pressed onto the paper. The beauty of this is that you can additional colors and simply add more color if you want a darker look.
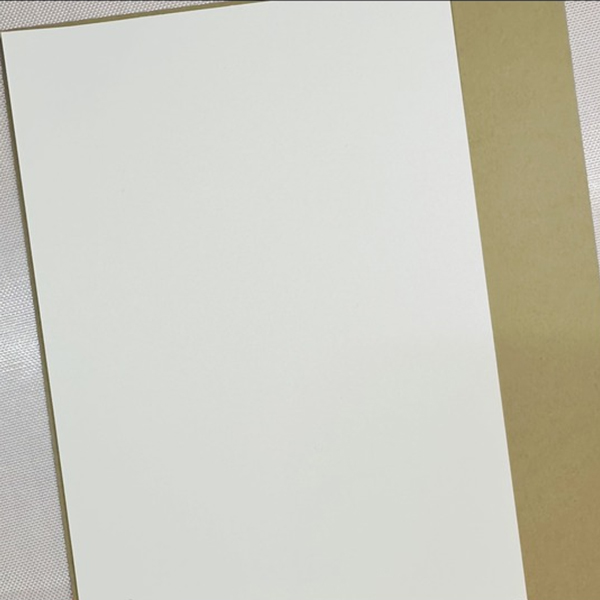
Step 5 You will mat your background onto a piece of cardstock. I chose Putty to go along with the greenery. I am showing the mat before the color for better visibility.
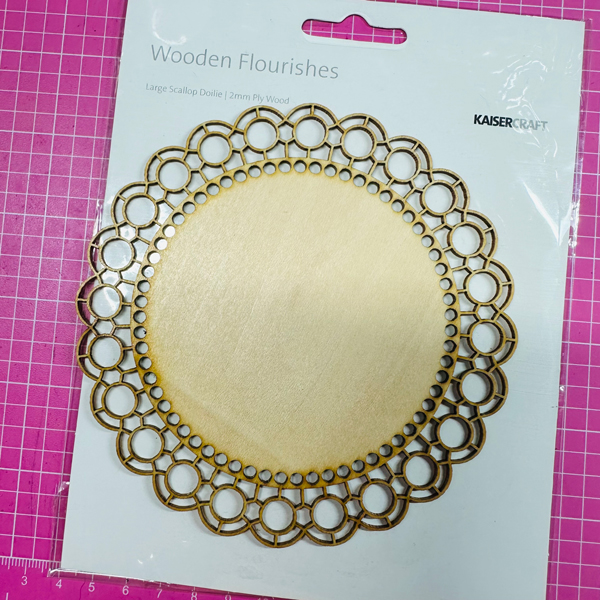
Step 6 Use a Wood Flourish Frame
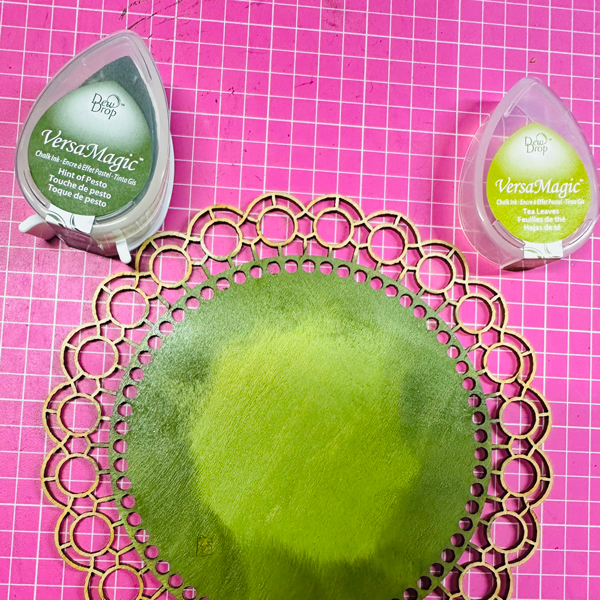
Step 7 Using your Dew Drop like a dauber simply sponge on some color this will bring out the green background.
Step 8 Add a diecut for the focal point, along with a sentiment to complete the card.
Other Products Kaisercraft : Wooden Flourishes Mintay Papers – Bohemian Wedding Collection – Embellishments Spellbinders: Leafy (Embossing Folder) Paper Roses: So Extra Black 1.0 Sentiments Hammermill : White Cardstock My Colors : Putty Cardstock
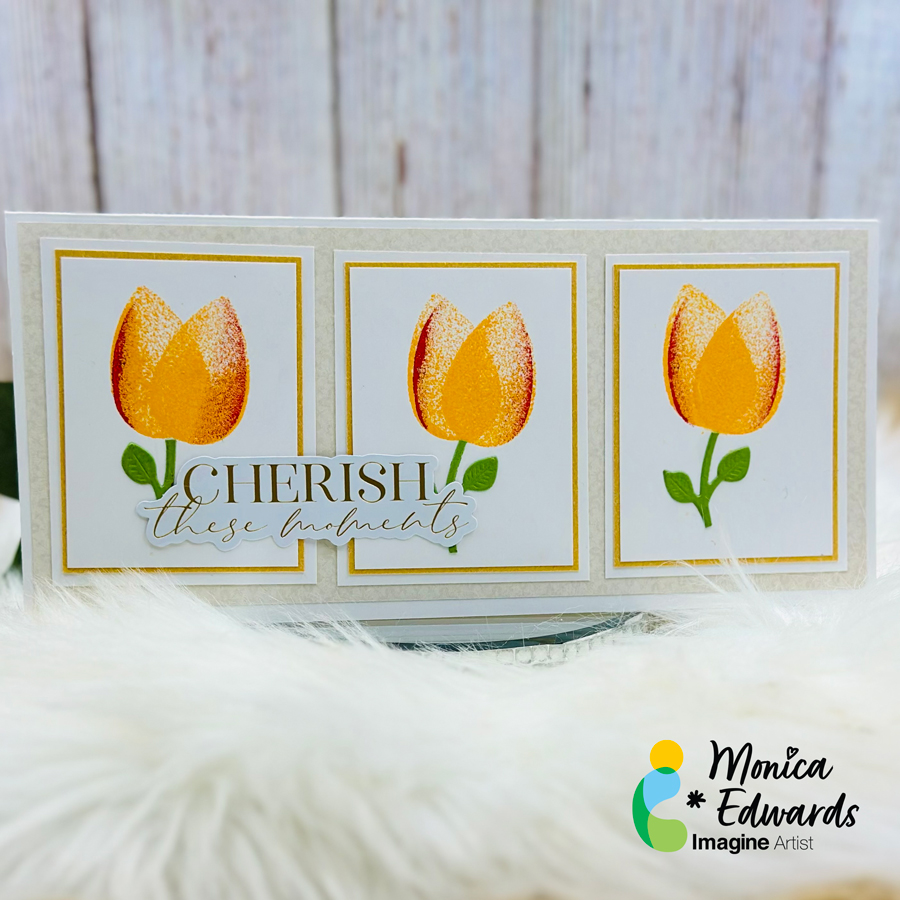
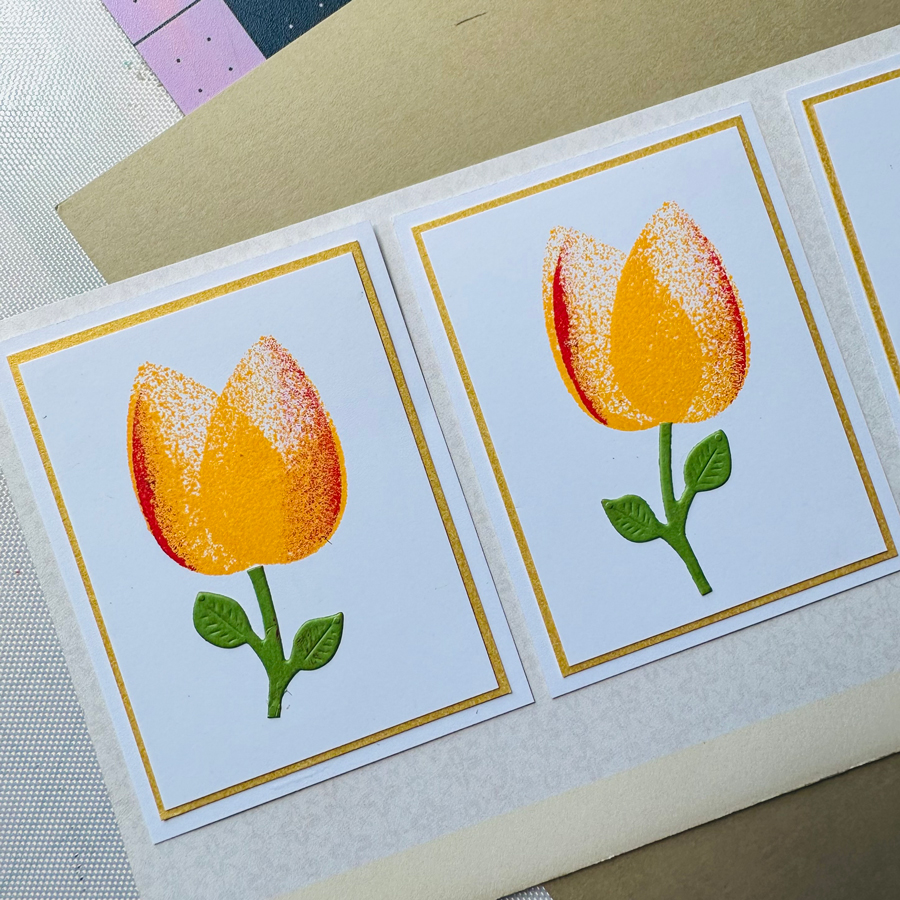
Hello! Today, I’ll show you how to make pretty tulip cards with VersaMagic Dew Drop Inks. I love these line of inks for their soft, chalky finish. The pad shape is also perfect for making tulip petals. You can either make a single card, or you can make a 3-panel slimline card.
Skill Level: Beginner Time: 30 Minutes Approx
Directions:
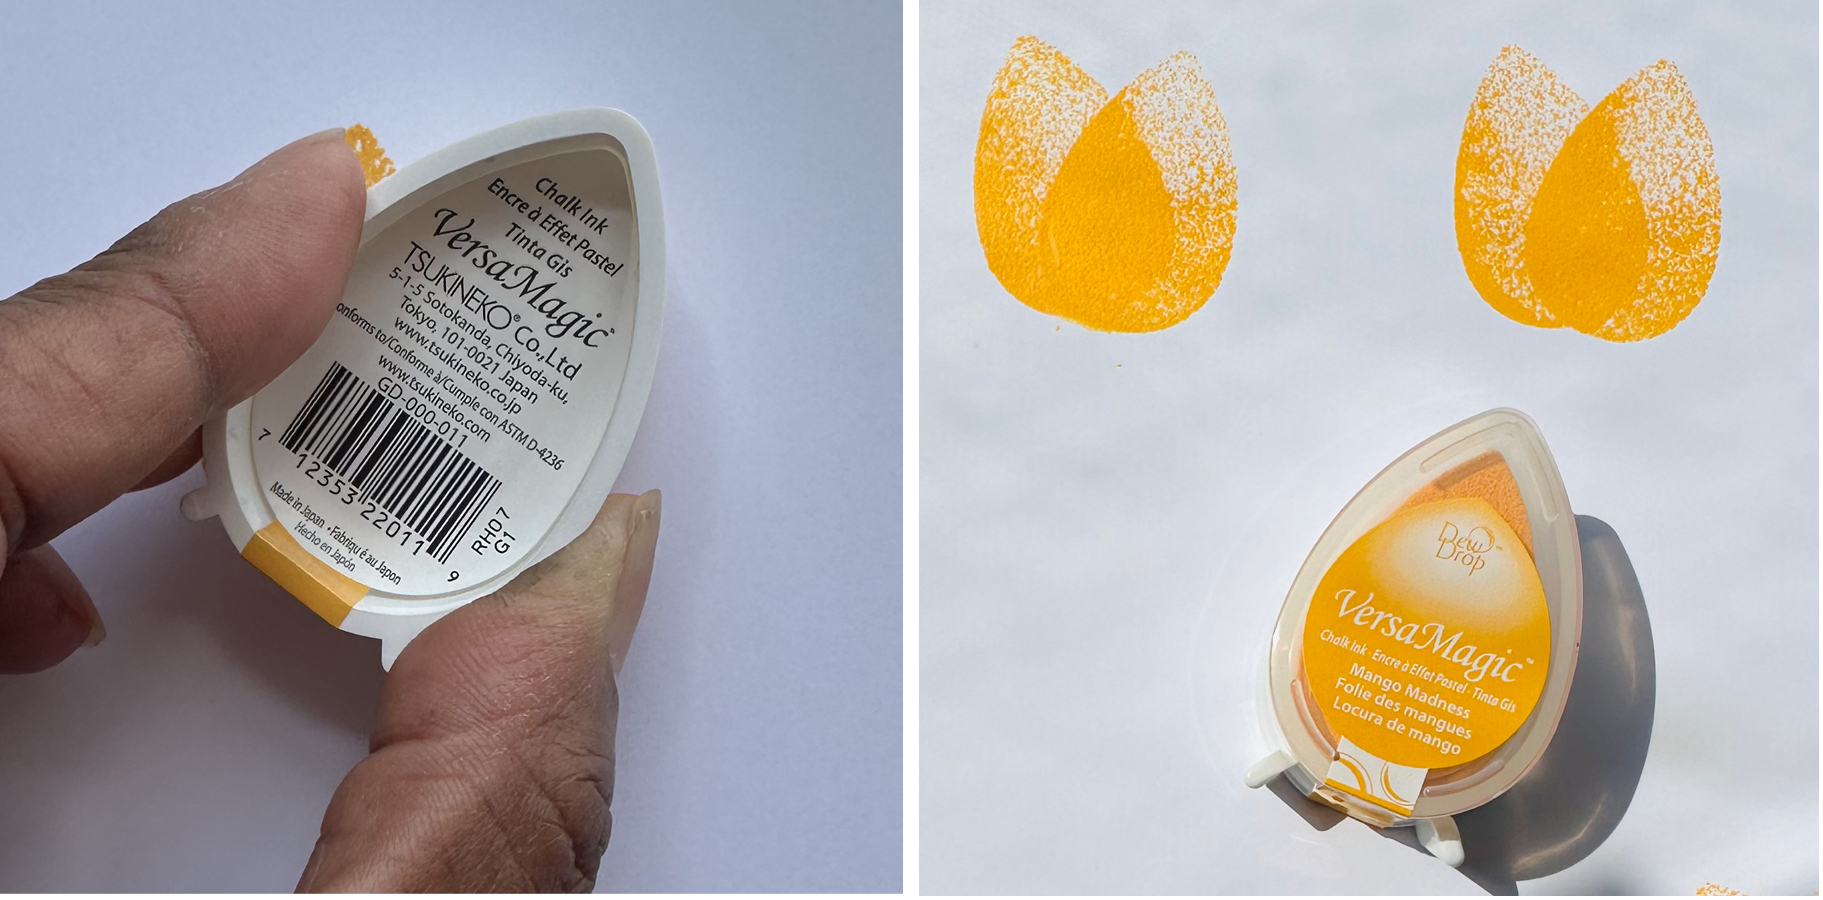
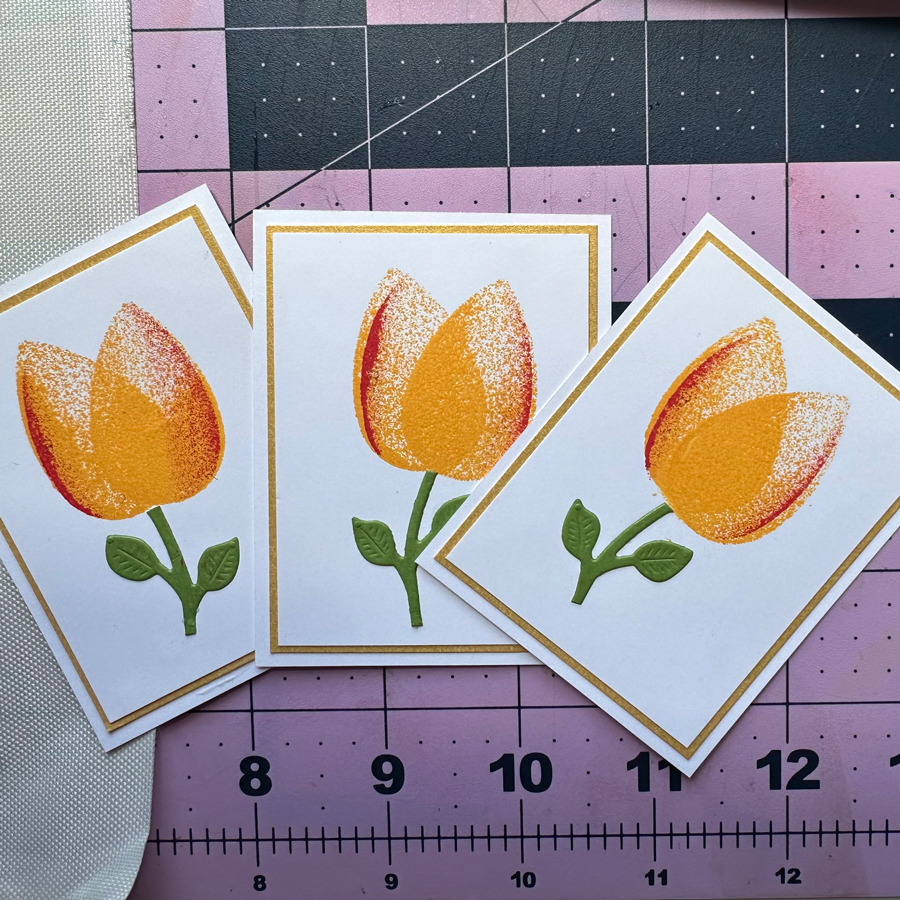
Step 1: Begin stamping 2 to 3 petals with VersaMagic Dew Drop Mango Madness on a 2.5″x3.5″ cardstock panel. Repeat process 2 more times for a total of 3 panels.
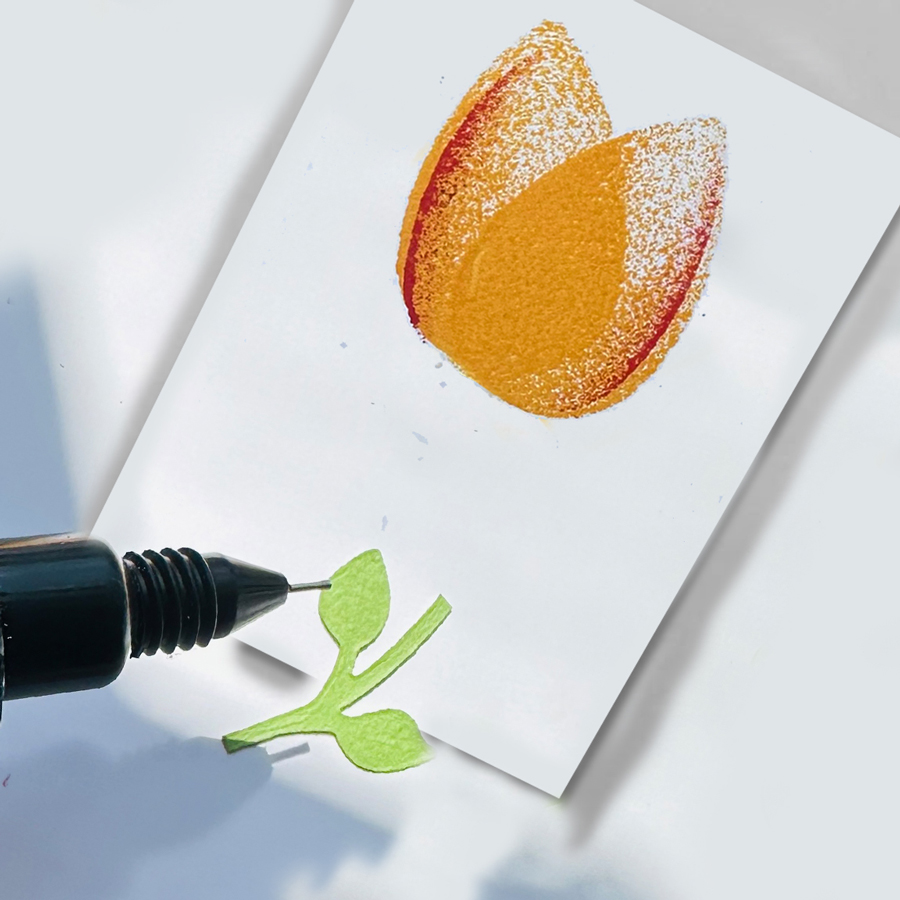
Step 2: Now take your VersaMagic Dew Drop Red Magic and angle it so that when you stamp, you will only get ink only on the outer edge of the tulip.
Step 3: Using On Point Glue, add flower stems to your inked tulip. You can find flower stems at any craft store or you can make your own.
Step 4: To add more dimension to your card, you can add extra layers using different color cardstock. Adhere with Tear It! Tape.
Step 5: For the slimcard, cut a piece of 4″x9″ cardstock. Glue all layers together with Tear It! Tape.
Step 6: You can add a sentiment to complete your card, using On Point Glue, Thanks for stopping by, I hope you enjoy this tutorial.
In today’s tutorial, I am sharing a graduation card. As a high school teacher, it is the time of year to stock up on them!
Skill: Intermediate Time: 1 hour
Directions:
Step 1: Press ink pads onto a piece of acetate packaging or other non-porous surface. Spray the ink with Sparkle Sheer Shimmer Craft Spray and then quickly press the acetate onto a panel of watercolor paper multiple times to press the ink onto the watercolor panel. After the ink dries, repeat with different colors of ink sprayed with more of the Sparkle Sheer Shimmer Craft Spray. Both panels feature Turquoise VersaColor ink, with Jumbo Java VersaMagic chalk ink and Golden Glitz Delicata ink layers, just in different intensities. (I only ended up using one panel, but will be using the other card for a project in the future.)
Step 2: Die cut the panel with a mid-sized panel die (there will be another panel that is slightly larger than this layer from the same nesting die set).
Step 3: Repeatedly stamp a graduation cap stamp onto the watercolor smooshed panel with more of the Turquoise VersaColor ink to create your own patterned paper. Then directly press the edges of the panel into the Turquoise VersaColor ink pad to create a border on the panel. Optional step: Heat emboss the stamped image and the border with clear embossing powder.
Step 4: Using a larger panel die, die cut a piece of kraft cardstock to create a matte layer.
Step 5: Using an ink dauber, ink blend Jumbo Java VersaMagic chalk ink along the edges of the panel. This ink blending can be very imperfect since most of it will be hidden.
Step 6: Stamp the sentiment on another piece of watercolor paper with Jumbo Java VersaMagic chalk ink. Trim the sentiment, with the left and right edge being trimmed on a diagonal if desired. Then press the VersaMagic chalk Ink pad onto the edges of the sentiment strip and ink blend the edges with more of the same Jumbo Java ink using an ink dauber.
Step 7: Attach all of the layers of the card together. Glue the stamped layer onto the larger (brown, matte) one. Then glue both layers onto an A2 sized kraft card base. Finally attach the sentiment strip onto the card with foam tape.
Step 8: Glue copper and blue sequins onto the card.
StazOn is a great, fast-drying ink for stamping on special mediums. They work great for stamping on non-porous surfaces like plastic sheets, but I was surprised with how well they stamp on craft foam. The details are crisp and the ink dries almost instantly. Let’s dive into the process of making a unique tag with craft foam!
Skill: Beginner Time: 30 minutes
Directions:
Step 1: Stamp the image with StazOn Timber Brown ink on craft foam. I used a stamp platform with the Doggone Friendly background stamp but did not have to re-stamp twice.
Step 2: Die cut the craft foam with Gift Tags 2 dies. I like the stitched details around these tag dies.
Step 3: Add a sentiment. I created a custom “Pawsome Bday” sentiment with the Labeler Alphabet stamp set with VersaMagic Ocean Depth ink pad.
Step 4: Add additional embellishments like enamel shapes and ribbons. I also adhered a piece of white cardstock to the back of the foam tag for writing messages. Then the tag is done for decorating any gift boxes!
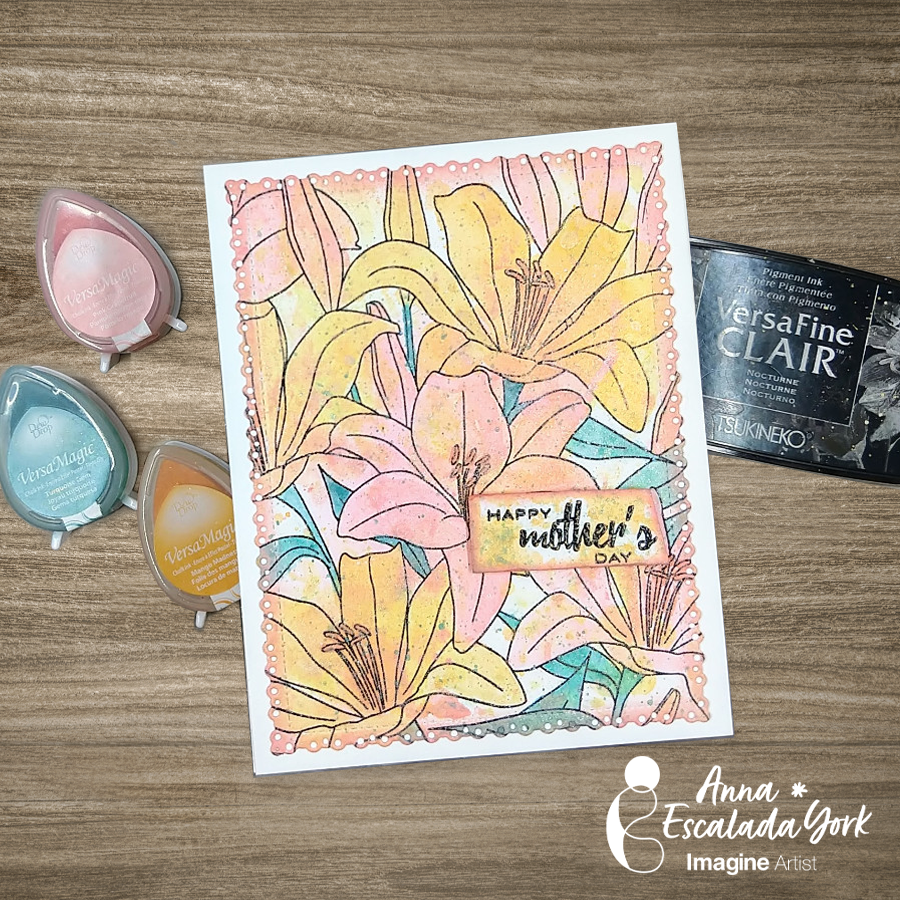
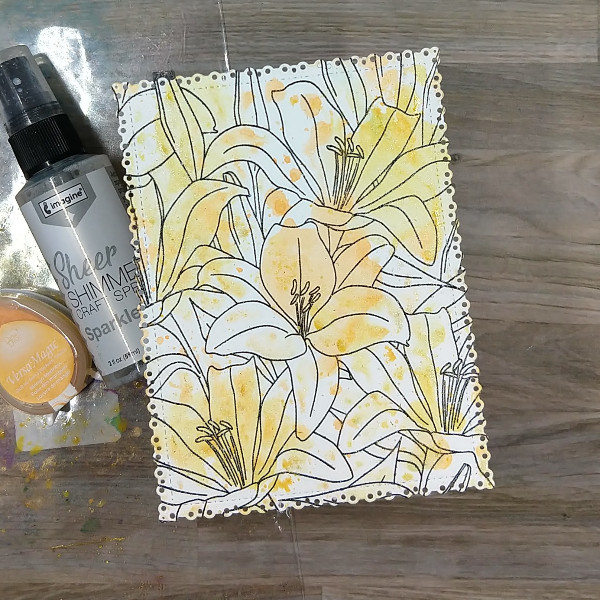
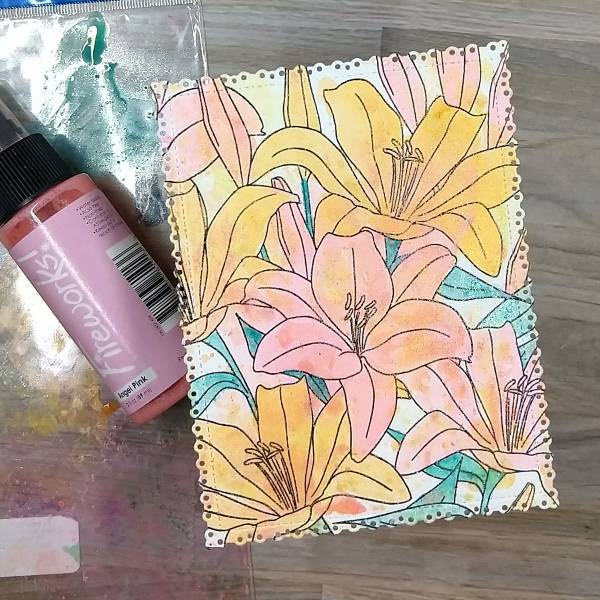
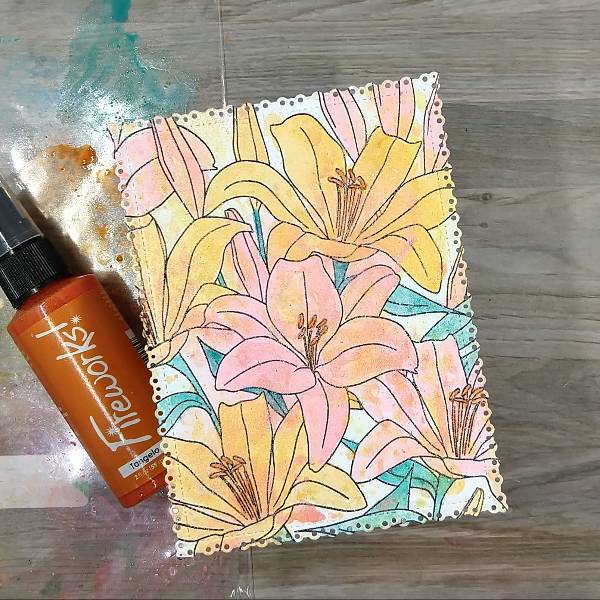
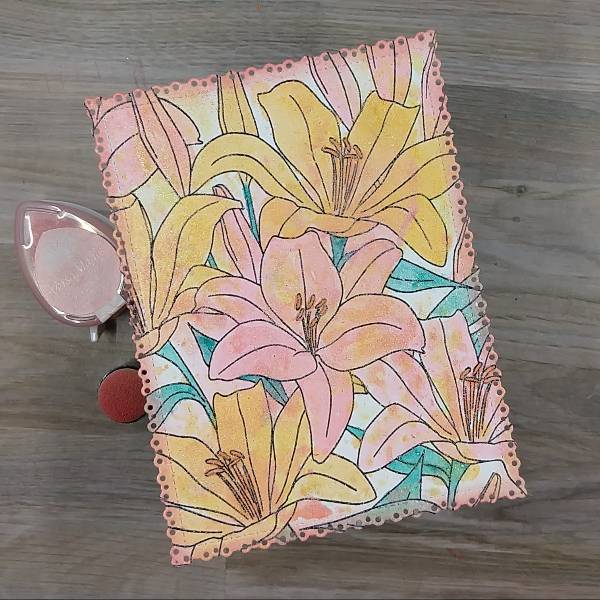
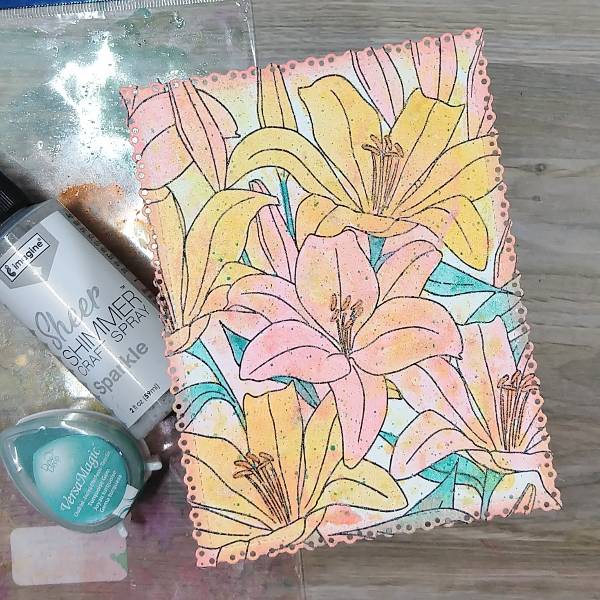
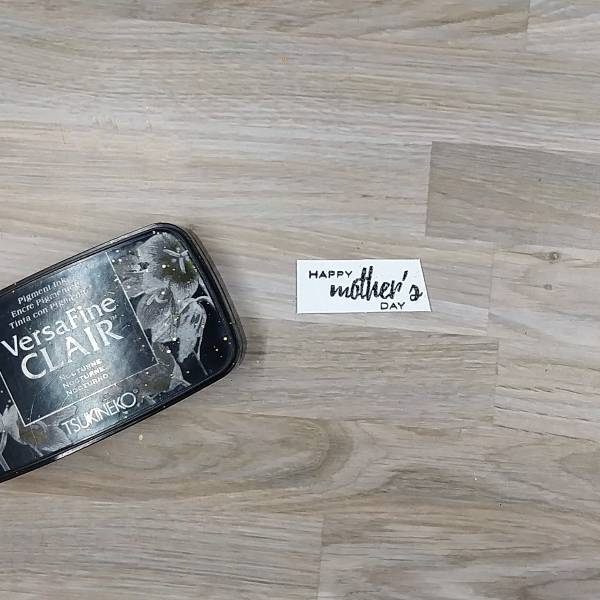
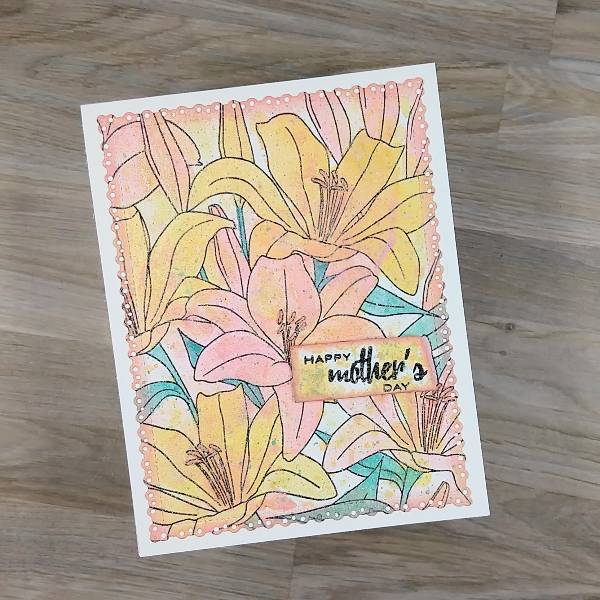
In today’s tutorial, I am sharing the card I made for my mom for Mother’s Day, using sprays and ink mixed with Sheer Shimmer spray to watercolor the images.
Skill: Intermediate Time: 1.5 hours
Directions:
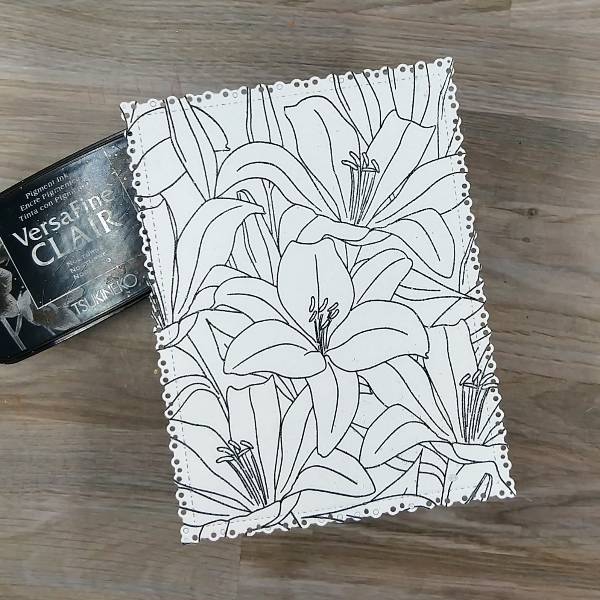
Step 1: Use a die cut to create a watercolor paper panel and then stamp a large flower stamp with Nocturne VersaFine Clair Ink. Heat emboss with clear embossing powder
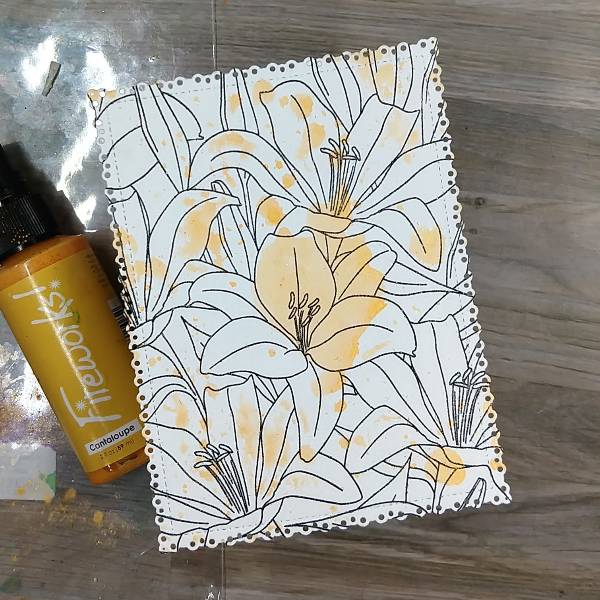
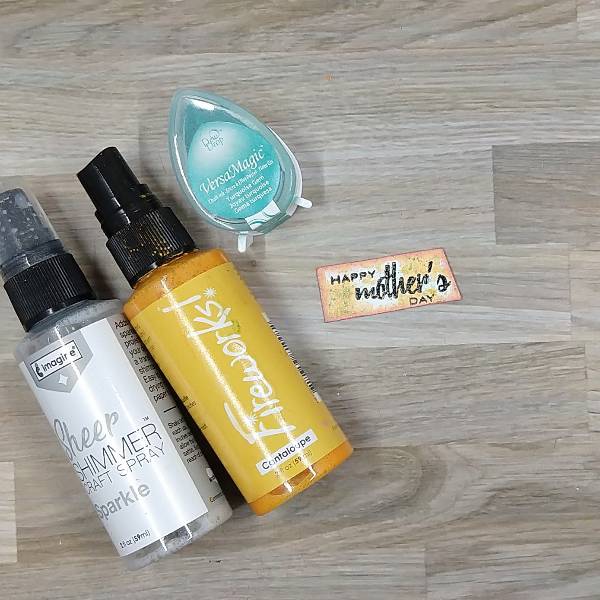
Step 2: Spray Cantaloupe Fireworks! Spray onto a piece of scrap acetate packaging, and press the sprayed acetate onto the stamped panel, making sure to get spray on multiple parts of the stamped panel. Let dry.
Step 3: Press the Mango Madness VersaMagic Chalk Ink pad onto the acetate packaging. Then spray Sparkle Sheer Shimmer Craft spray onto the ink to give it a watery consistency. Then press this color of yellow ink onto the stamped panel to add interest and a variety of colors. Let dry.
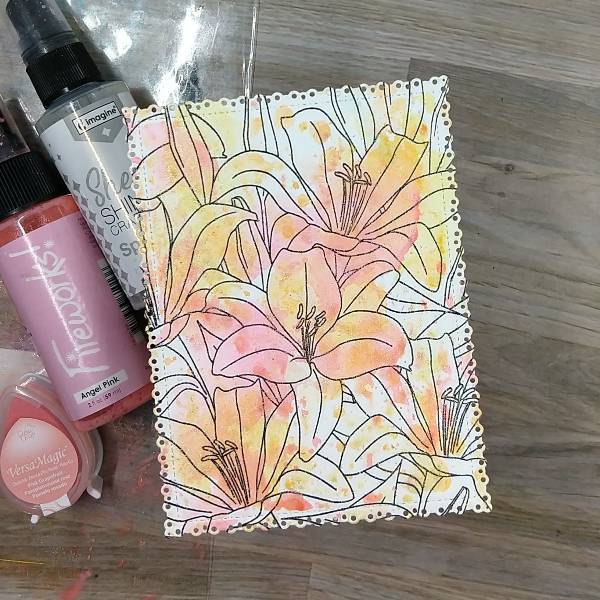
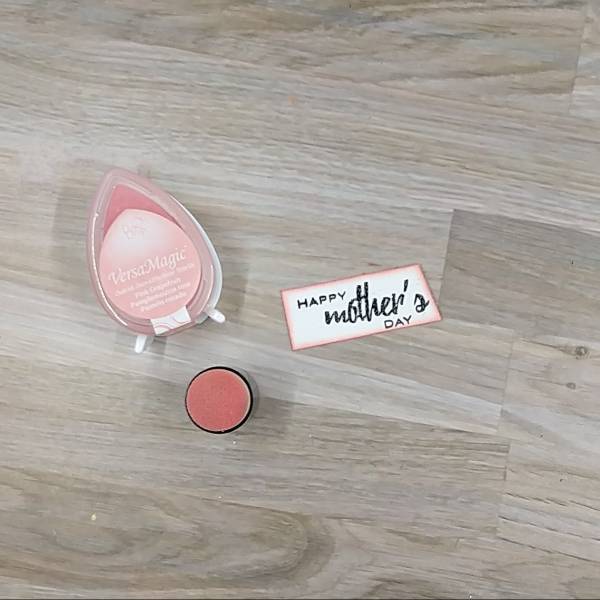
Step 4: Repeat the process with pink inks. Spray Angel Pink Fireworks! Spray onto the acetate packaging and press the packaging onto the stamped panel. After the spray dried, press Pink Grapefruit VersaMagic Chalk Ink onto the acetate and spray it with more of the Sparkle Sheer Shimmer Craft spray and press that onto the stamped panel as well. Again, let dry.
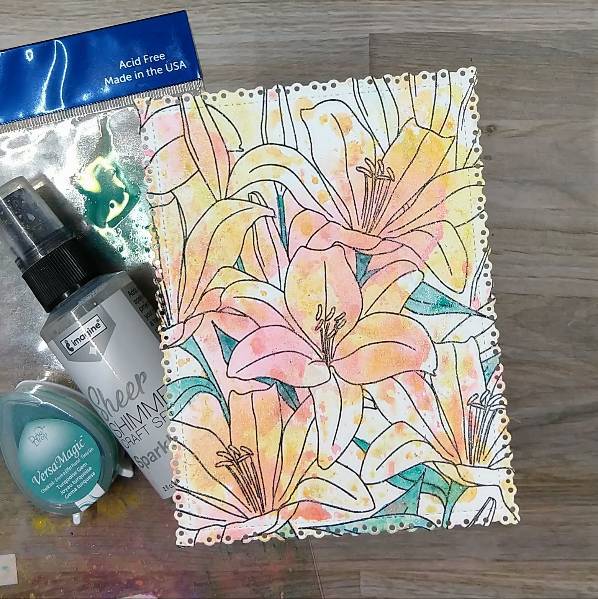
Step 5: Press the Turquoise Gem VersaMagic Chalk Ink pad onto the acetate packaging and spray the ink with more of the Sparkle Sheer Shimmer Craft Spray to create a watercolor consistency. Then use a thin paintbrush to paint the leaves and stems of the flowers turquoise. Let dry.
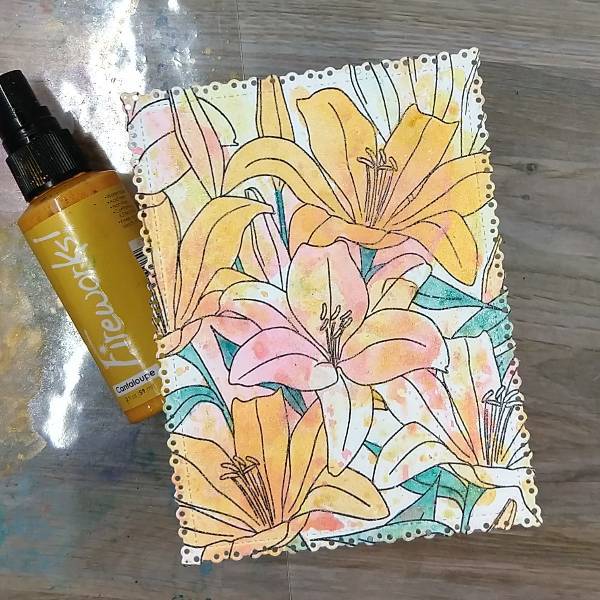
Step 6: Spray more of the Cantaloupe Fireworks! Spray onto the acetate packaging and use the spray to watercolor about half of the flowers yellow. Let dry.
Step 7: Spray more of the Angel Pink Fireworks! Spray onto the acetate packaging and then paint the rest of the flowers pink. Again let the spray dry.
Step 8: Spray Tangelo Fireworks! Spray onto the acetate packaging, and use it to paint the anthers and filaments (center parts) of the flowers. Let dry.
Step 9: Use an ink dauber to ink blend the edges of the panel with Pink Grapefruit VersaMagic Chalk Ink. (I ended up touching up the leaf on the bottom edge by painting a second layer of the Turquoise Gem VersaMagic Chalk Ink mixed with water to make sure the turquoise color wasn’t lost.)
Step 10: Press the Turquoise Gem VersaMagic Chalk Ink pad onto the acetate packaging and spray the ink with more of the Sparkle Sheer Shimmer Craft Spray to create a watercolor consistency a second time. (In my case, I had leftover from step 5, so I used that.)
Hold a paintbrush saturated with the turquoise watercolor parallel to the panel and tap it against your finger. Repeat if needed and let dry.
Step 11: Stamp a sentiment onto a piece of watercolor paper with Nocturne VersaFine Clair ink. Heat emboss with clear embossing powder and trim with scissors or a paper trimmer.
Ink blend around the edges of the stamped layer with more of the Canary VersaColor ink with an ink dauber.
Step 12: Use an ink dauber to ink blend the edges of the sentiment strip with Pink Grapefruit VersaMagic Chalk ink.
Step 13: Spray one part of the acetate packaging with Cantaloupe Fireworks! Spray and press Turquoise Gem VersaMagic onto another part of the acetate before spraying it with more Sparkle Sheer Shimmer Craft spray. Alternate pressing the sentiment strip into both colors of spray before splattering the strip with more of the turquoise ink. Let dry.
Step 14: Glue the panel onto an A2-sized white card base and attach the sentiment onto the card with some foam tape for dimension to finish the card.
Other • Altenew – Stamp – Extra Special stamp set • Altenew – Tape – Instant Dimension Foam Tape • Gina Marie Designs – Die – Pleated Lace Rectangles die set • The Ton Stamps – Stamp – Lily Fields • Clear embossing powder Scissors • Glue
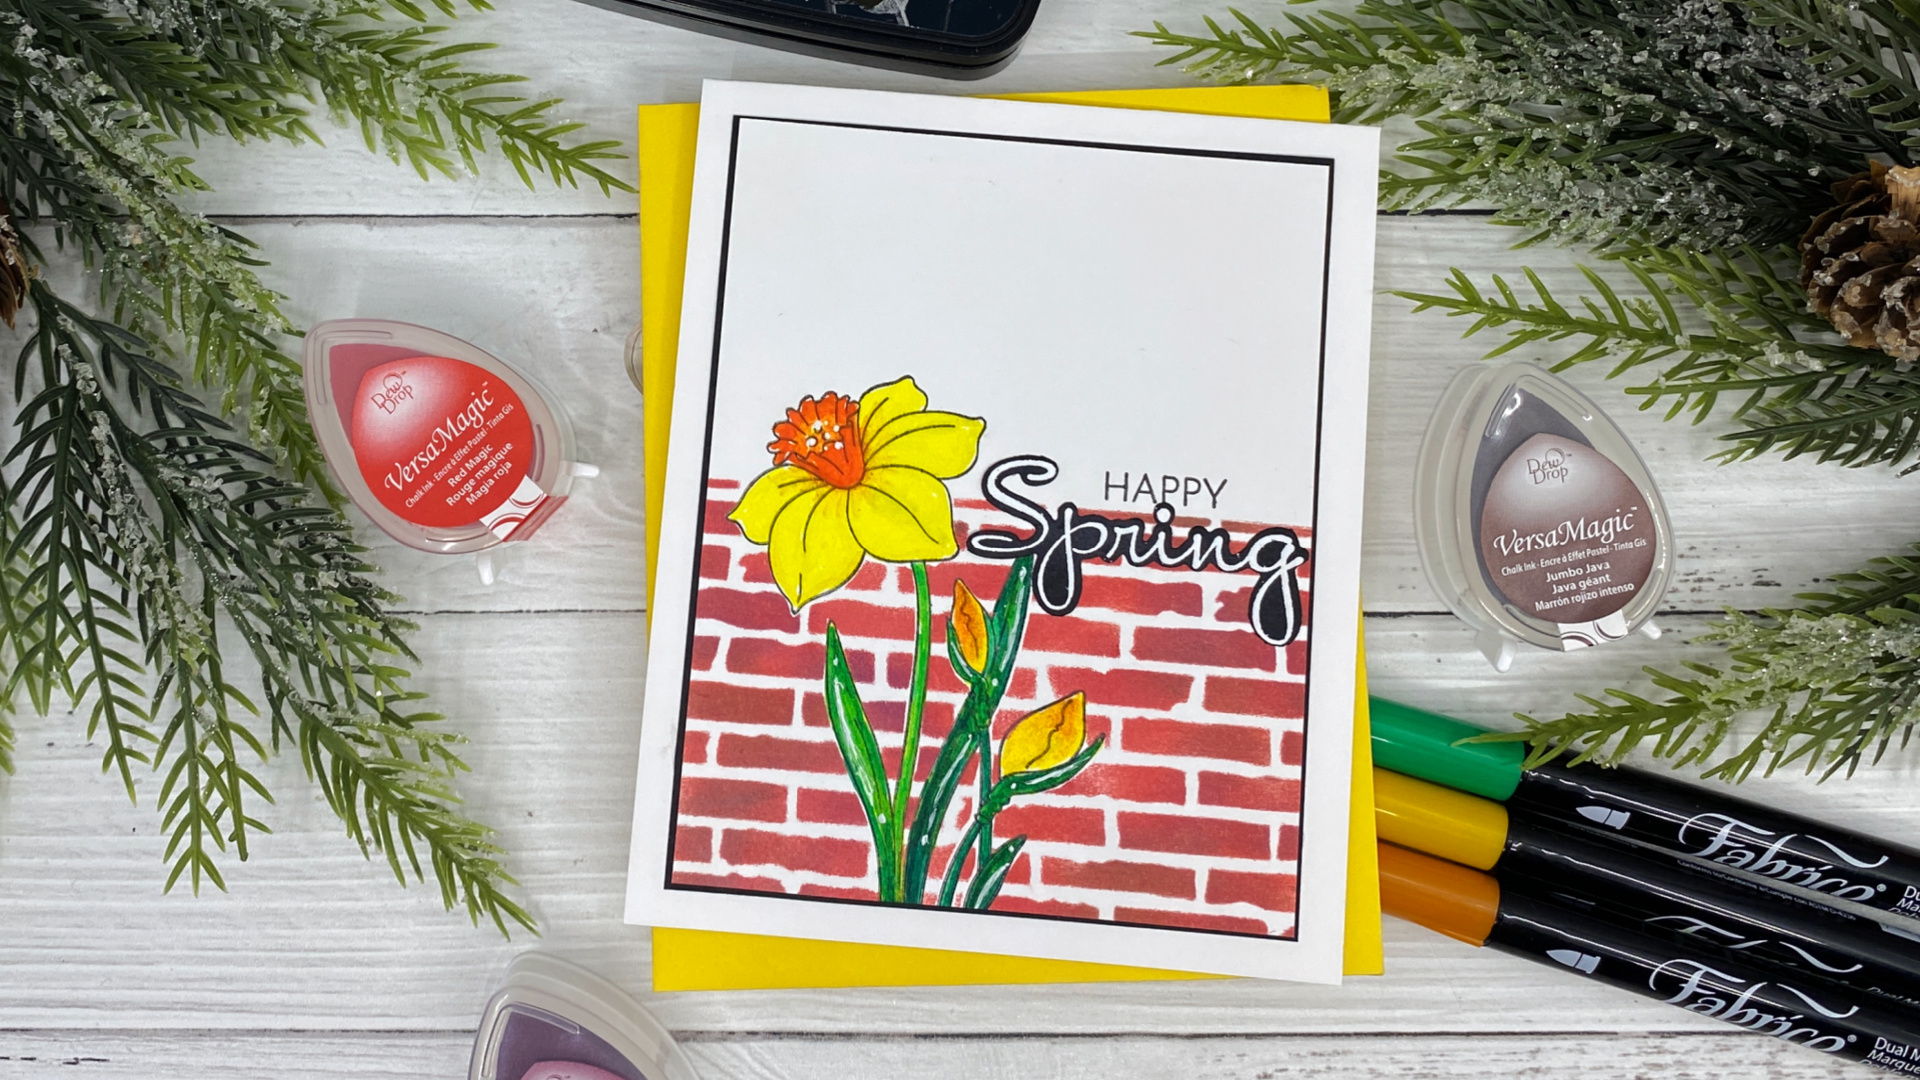
Hello crafty friends, today I am sharing a spring card using a couple of blending techniques, one with Fabrico markers and one with the VersaMagic Dew Drops. I was so happy for spring to finally arrive. I live in the mountains and even though it is officially spring, sometimes we still get snow in April.
Skill: Intermediate to Advanced Time: 45 minutes to an hour
Directions:
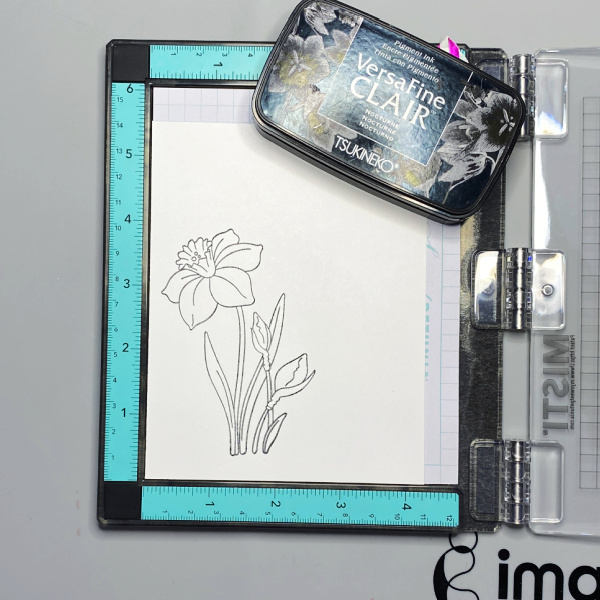
Step 1 Place a piece of white cardstock in the corner of a stamping platform and use Nocturne VersaFine Clair to add ink to the stamp.
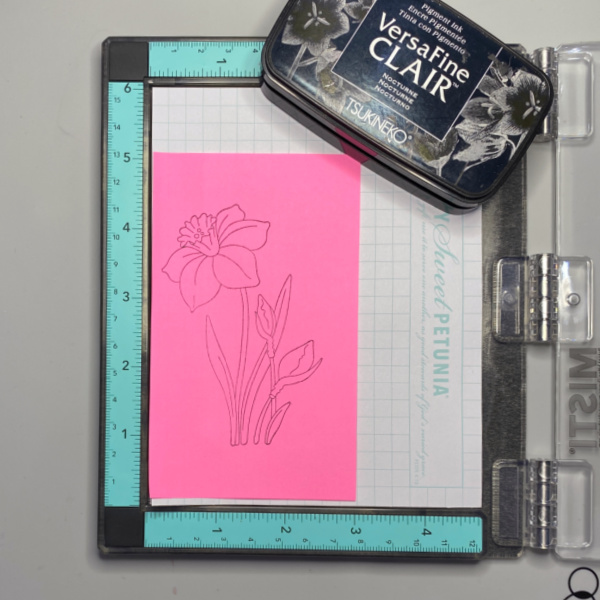
Step 2 Stamp the image on a post-it note or masking paper using Nocturne VersaFine Claire ink, then fussy cut out the image.
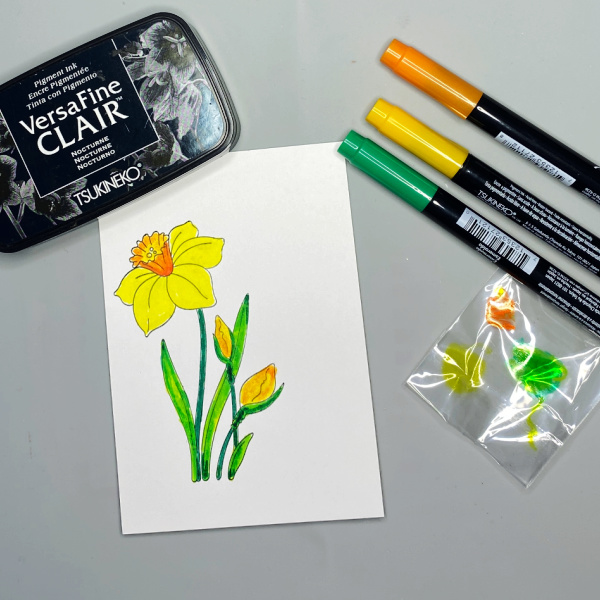
Step 3 Color the image using Fabrico markers. You can blend the colors using a piece of acetate as shown in the picture. The green marker I used is Emerald. I created a lighter green by scribbling some green on the piece of acetate and then picked it up with the yellow marker, creating a yellow green color. I also created a lighter orange by scribbling orange on the piece of acetate and then picking it up with the yellow marker. This doesn’t in any way contaminate your markers, all you do after you finish blending is scribble on a regular piece of paper until you get the true color back.
Step 4 Using the mask you created earlier, cover the daffodil image that you colored and then add the stencil over it. You will also need to mask off the top portion of your panel as well to keep it clean while you ink blend over the stencil. I used three different colors of VersaMagic Dew drops to give the bricks a more realistic look. They are listed below. I love how well the VersaMagic chalk inks blend together.
Step 5 Remove the stencil and mask from the panel and cut it down to 3.78 xX 4.78
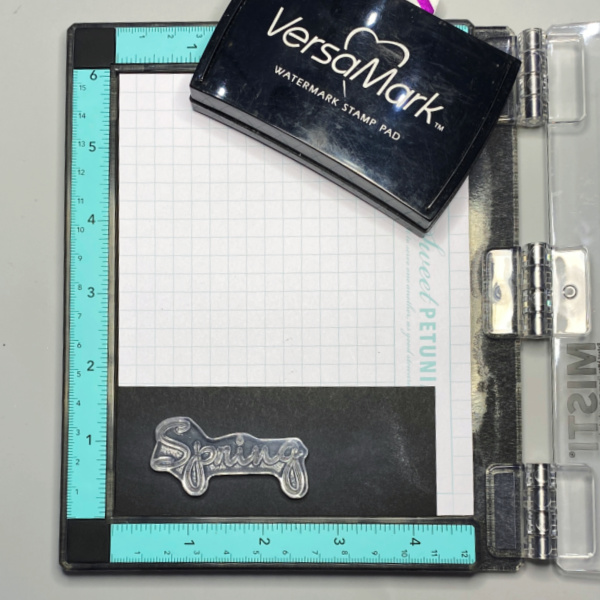
Step 6 Insert a piece of black cardstock into the corner of a stamping platform and use an anti-static tool to prep surface. Stamp the sentiment using VersaMark ink and heat emboss it with MBoss White Embossing Powder, then cut it out with the coordinating die.
Stamp the sentiment “happy” directly on the card front and add the embossed sentiment below it.
Step 7 Assemble your card by adhering the front panel to a black panel cut to 3.75 X 5 using On Point Glue and then adhering it to a card base cut to 4.25 X 11, scored at 5.5
I hop you will give these techniques a try. Thank you for stopping by our blog today. Until the next time, stay crafty!
Other Products: Daffodil Stamp Set + Dies – The Rabbit Hole Designs Back Ally Stencil – The Rabbit Hole Designs Teal Mini MISTI Hero Arts Pitch Black Cardstock Neenah Classic Solar White 120lb Cardstock – card base Neenah Classic Solar White 80lb – Cardstock panel