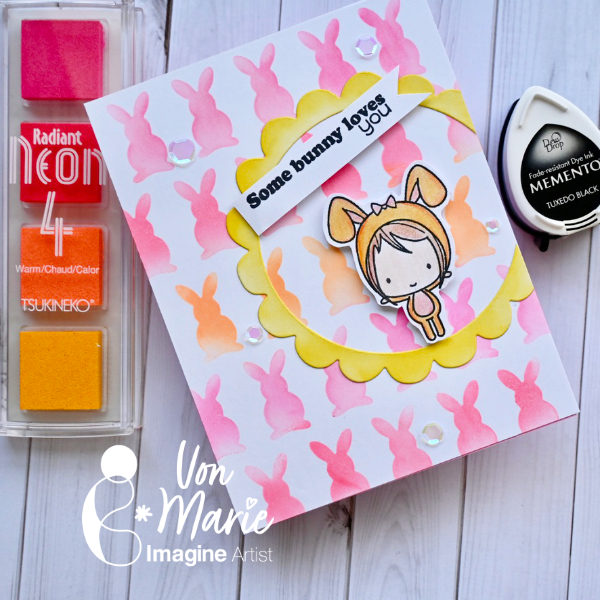
Hello everyone. Von Marie here and I have my latest video sharing an Easter card today. So much fun and we will use lots of fun TSUKINEKO inks to help us stencil and easily make this cute Easter Bunny Card. The video will have more details.
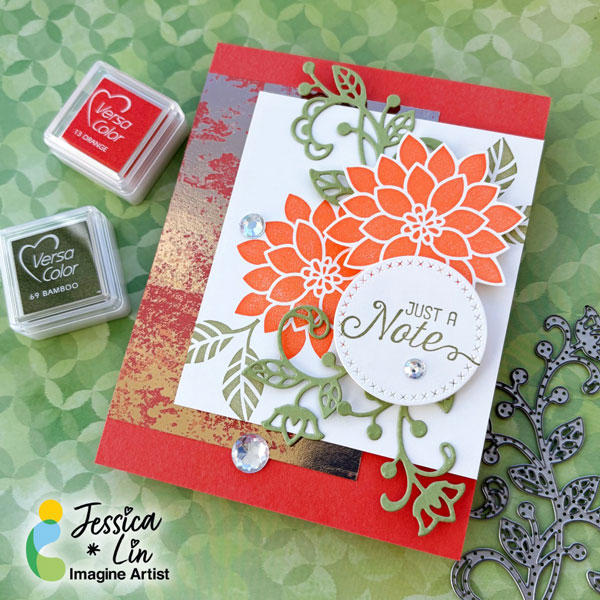
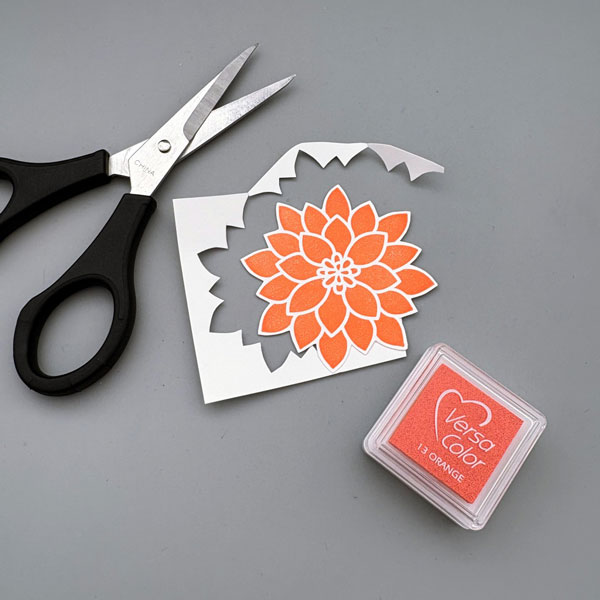
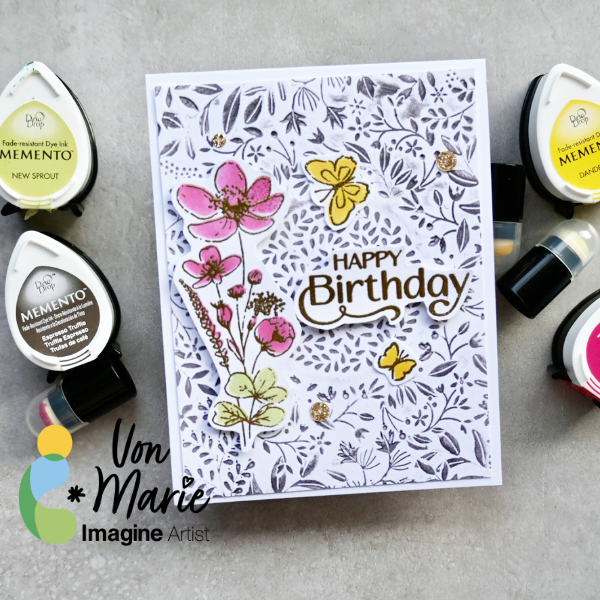
Hi everyone! It’s Jessica here. I am so happy to be on Imagine Crafts’ design team again for 2026. If you have seen some of my creations before, you would notice that I love bold, bright colors. Today, I am sharing a floral card that features this vibrant orange from the VersaColor ink line.
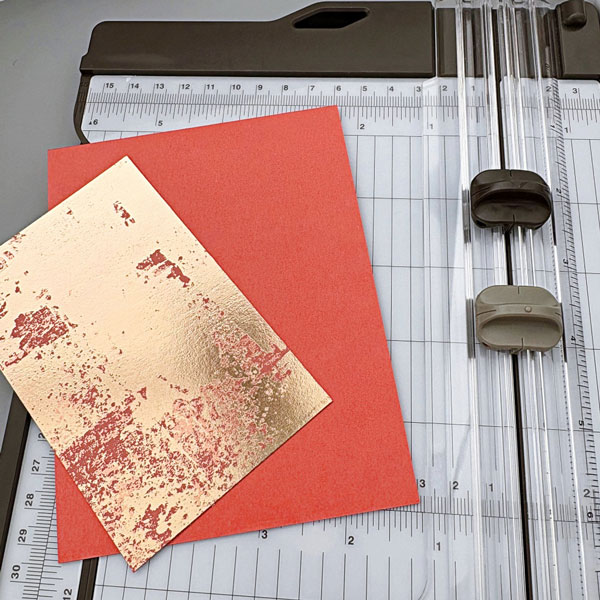
Step 1: I started out by preparing an A2 card base with Calypso Coral cardstock. Then I trimmed a piece of Dry Brushed Metallic paper to 3’’ x 4.5’’ as a background accent.
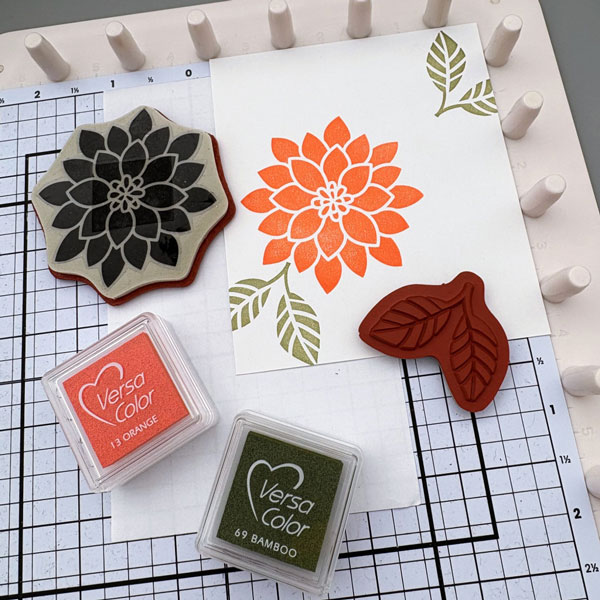
Step 2: The stamp set I am using today is Flourishing Phrases from Stampin’ Up. I stamped the flower image with VersaColor Orange ink pad on a piece of 3.5’’ x 4’’ cardstock. For the leaves, I used VersaColor Bamboo ink pad.
Step 3: I stamped another flower image on a scrap piece of cardstock and fussy cut it along the edge.
Step 4: Then I die cut a circle with cross-stitch details and stamped the sentiment with VersaColor Bamboo ink.
Step 5: The coordinating die set includes various floral designs that work well both by themselves and with the stamp images. I decided to die cut the largest design and cut it into 3 pieces to decorate around the sentiment. Finally, I adhered all of the elements onto the cardbase, added some rhinestones, and the card is complete!
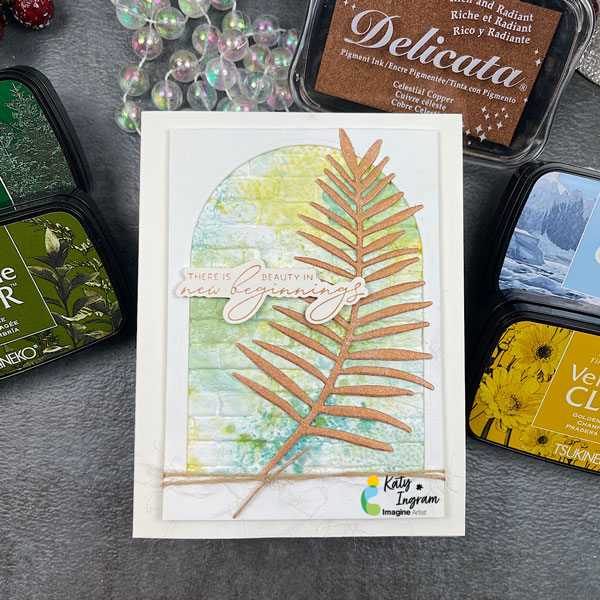
Hello Friends! Katy here with my latest video! In todays video I create an easy background with some VersaFine Clair Inks. In the video I see if I can replicate an ink smooshed background I made earlier using the same technique. I usually can’t! There always seems to be something a little different. Check out the video and see if I was able to do it. I also showcase the Copper Delicata ink coloring a die cut. I just love the results and I think you will too. Video has all the details. Thanks for watching.
Other Products Used Hot Pressed Watercolor paper Brick 3D Embossing Folder Palm Frond Die-The Greetery- Any Large Leaf dies will do. Ivory/Natural Cardstock Neenah Classic Crest Natural Card Base 120Lb White Cardstock Twine Any Sentiment
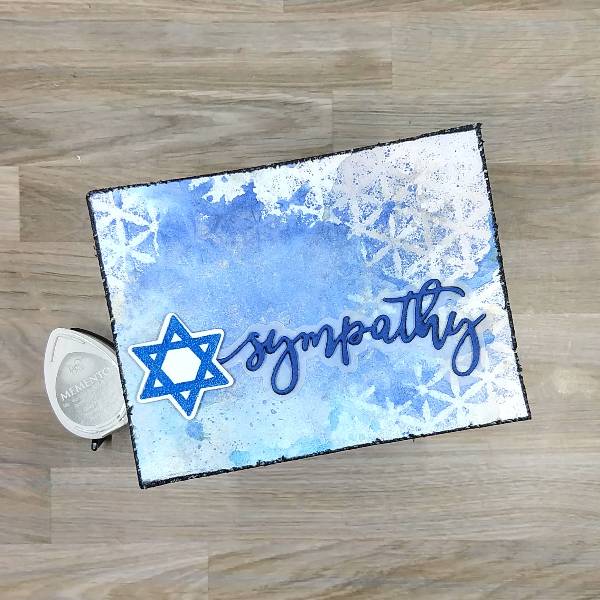
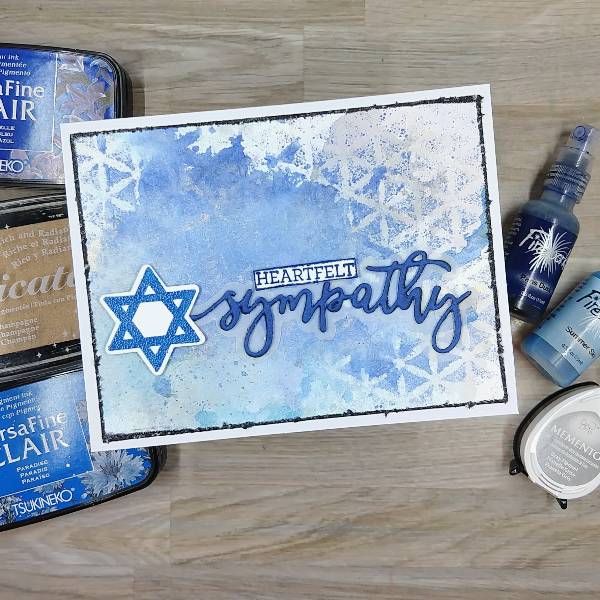
Step 1: Trim a piece of watercolor paper a little bit larger than an A2 sized cardbase (4.5” x 5.75”) and watercolor smoosh the panel with Gray Flannel Memento Ink mixed with water on acetate packaging. Allow the panel to dry. Then repeat the process with Pearlescent Lavender Brilliance Ink and then finally with Champagne Delicata Ink.
Step 2: Stamp stars on watercolor paper with Paradise VersaFine Clair ink. Repeat the process so make the blue of the ink darker. Then heat emboss with clear embossing powder. Then die cut with the corresponding die.
Step 3: Press Blue Belle VersaFine Clair Ink onto another piece of watercolor paper and then use this paper to die cut the sentiment. Die cut two pieces of scrap paper with the same sentiment die and glue the three layers together for dimension.
Use the corresponding shadow die to die cut a vellum shadow layer and glue behind the sentiment.
Step 4: Spray the background panel with Paris Dusk Fireworks! Craft Spray through a stencil. While the spray is still wet, remove the stencil and spray the panel with Summer Sky Fireworks! Craft Spray to move both colors of spray. Splatter some of the light blue areas of the panel with Paris Dusk Fireworks! Craft Spray. Allow panel to dry.
Step 5: Trim the background panel to about 4” by 5.25” and then distress the edges with a pair of scissors. Press the edges of the panel into the Gray Flannel Memento Ink pad and then heat emboss with more clear embossing powder. Next, glue the sentiment onto the center-right and the Star was attached with foam tape.
Step 6: Stamp a sub-sentiment on a small piece of watercolor paper with more of the Blue Belle VersaFine Clair ink and then heat embossed it with more of the clear embossing powder. Then distress the edges with scissors and then press the edges into the Blue Belle VersaFine Clair Ink.
Step 7: Attach the sub sentiment onto the panel with more of the foam tape. Then glue the whole panel onto an A2-sized white cardbase to finish the card.
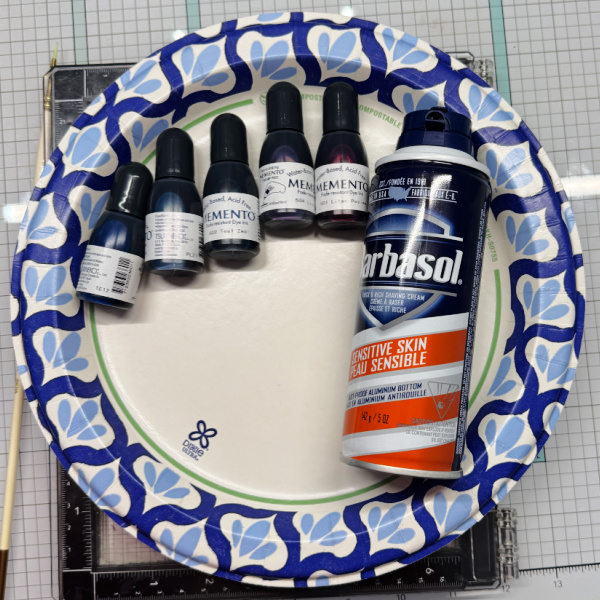
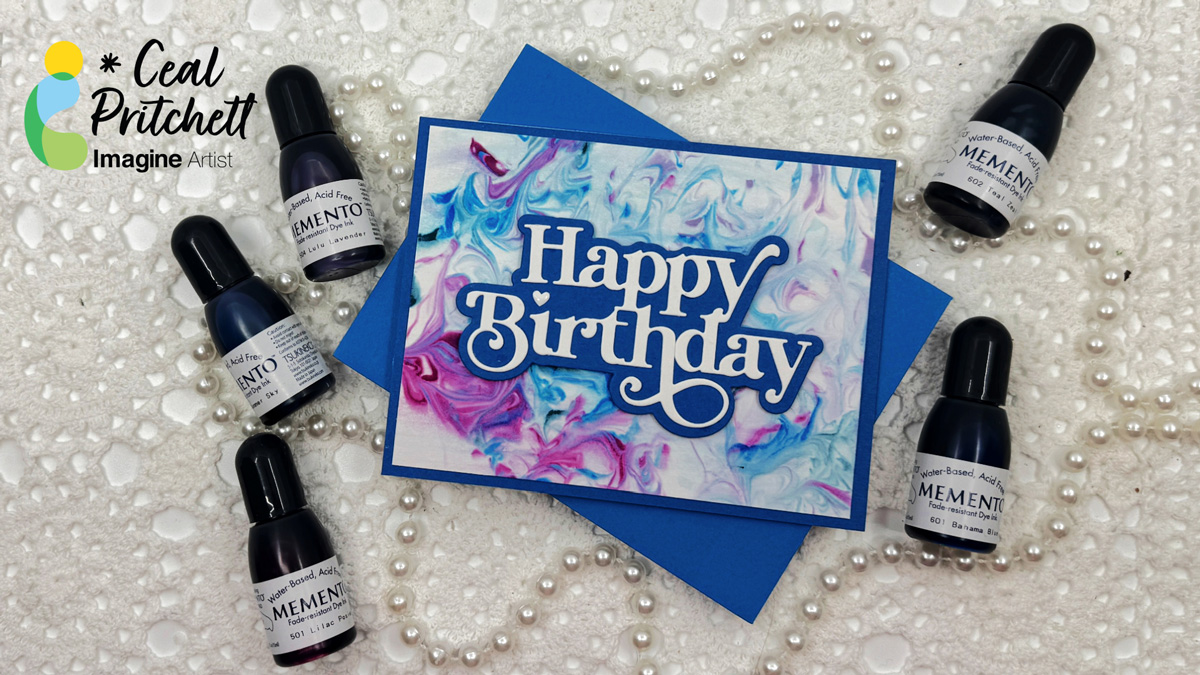
Hello Friends, It’s Ceal, here. Today I am sharing a fun background technique with you that even a child can create. This is a Mixed Media project. Does the word mixed media have you thinking I can’t make a mixed meda card? It used to for me but honestly mixed media is simply a card made with two different mediums, so this one is shaving cream and ink. Don’t let the word mixed media scare you.
Skill: Beginner Time: 45 Minutes
Directions:
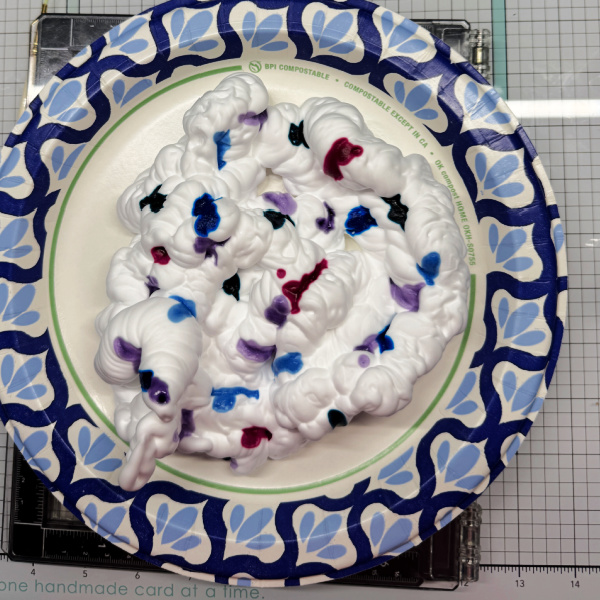
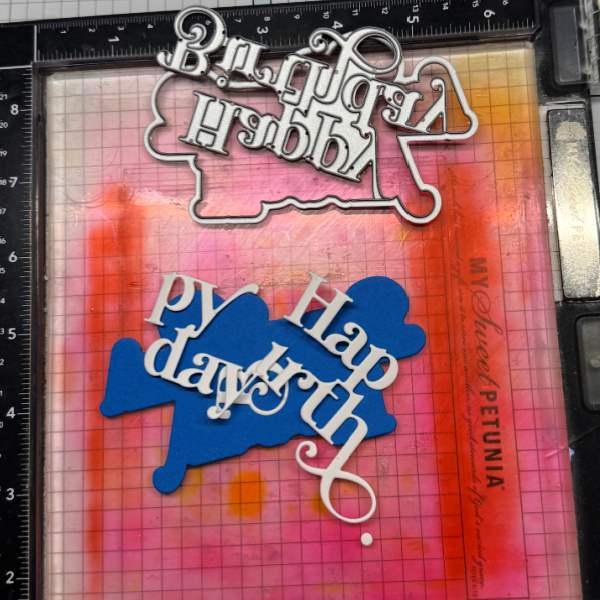
Gather your supplies. You will need a sentiment die cut of your choosing, some foaming shaving cream (gel will not work, some re inkers in different colors, a paper plate, a toothpick and some water friendly paper.
Step 1: Add shaving cream to the paper plate.
Step 2: Add drops of re inkers to the shaving cream. I used 5 different colors.
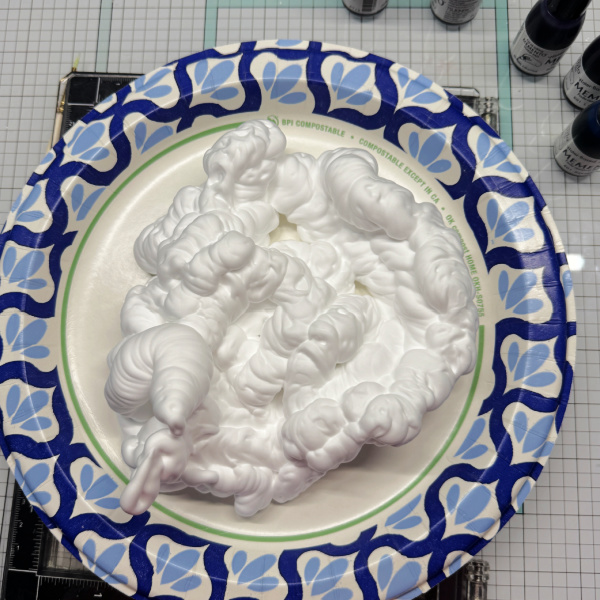
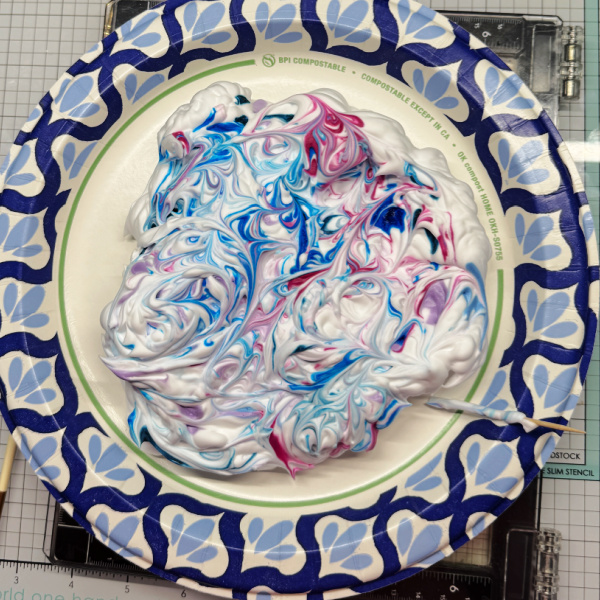
Step 3: Using a tooth pick, swirl the colors around.
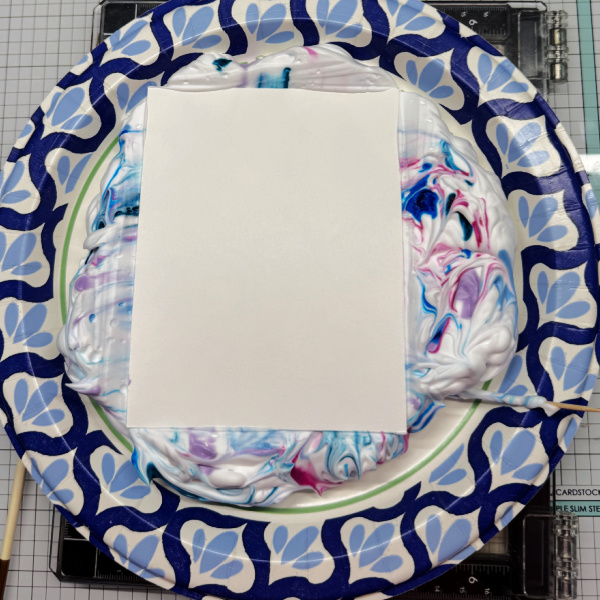
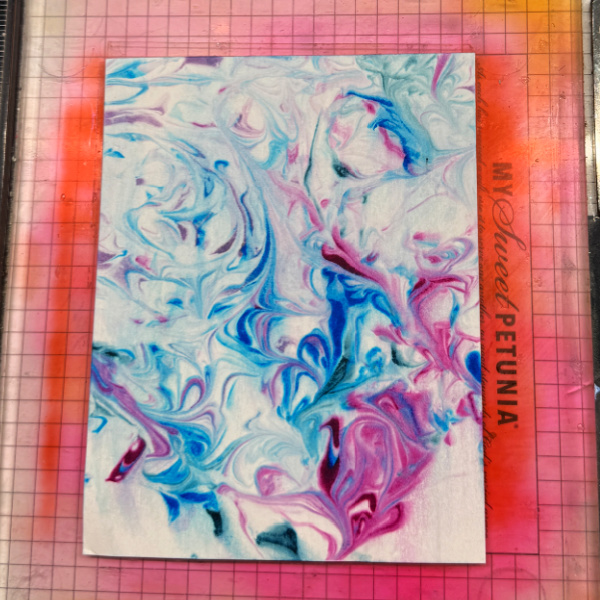
Step 4: Place water friendly paper (I used Bristol Vellum) face down into the shaving cream. Wipe off with paper towel. The results will look like the next photo and as a added bonus, it will smell so good.
Step 5: Cut the sentiment out of White cardstock and the backer out of a coordinating color of cardstock. Adhere them together and add to the front of the card.
Hello everyone. Von Marie here with my newest video using colorful inks to use with stencils. Memento inks are really perfect for inking and stamping. I used Memento Dew inks to stencil some pretty florals and leaves. The video will have more details. I hope you enjoy. Thank you for watching.
Skill: Intermediate Time: 45 Mins.
Products Used:
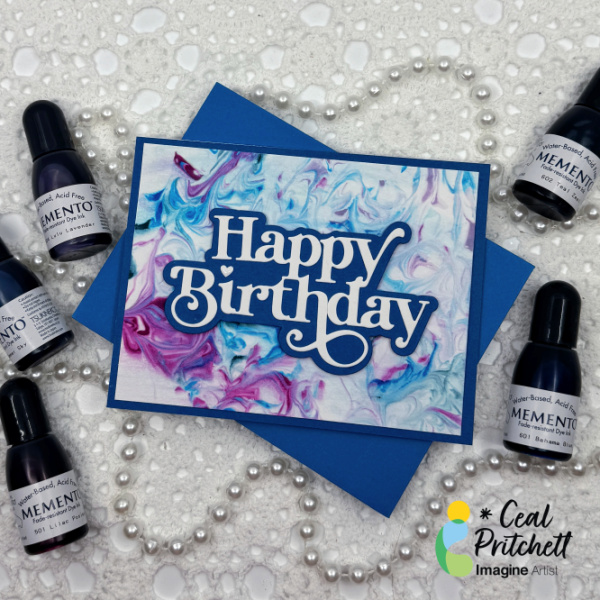
• 100lb white Hammermill Paper • A2 Card Base • Glass Board and magnets • Glue • Die-cutting Machine • Heat Tool • Foam Tape • Scissors • Sequins
• Simon Says Stamp Butterfly Blossoms Stamp and Coordinating Stencils
• Simon Says Stamp Splendid Leaves Circle Frame Embossing Folder
• Kat Scrappiness Platinum Gold Glitter Sequins
ALTERNATIVE PRODUCTS THAT CAN BE USED TO RECREATE SOMETHING SIMILAR Any stamps, inks, and or Embossing Folder. You can watch how to create this Birthday Card Click Here