We are Excited to be Hopping with Crackerbox + Suzy Stamps Today!

Today we are blog hopping with Crackerbox + Suzy Stamps! We love blog hops because they are a super fun way for you to learn more about the individual blogs of design team members and it is also a great way to win some new products! In today’s blog hop, pairing our inks with Crackerbox + Suzy Stamps makes for a perfect match! Crackerbox + Suzy Stamps has fun stamps sets for all sorts of occasions and as you know—we have all sorts of inks for all sorts of projects. Our Artists in Residence have been excited to share their projects with you, and we can hardly wait to see what the Crackerbox + Suzy Stamps Team came up with too!

Thanks so much for stopping and be sure to leave comments (one per blog) during these two days of hopping so you can be entered to win a $25 Crackerbox + Suzy Stamps Gift Certificate or one $25 Gift Certificate from Imagine!!! Winners will be announced on the Crackerbox + Suzy Stamps and Imagine Blogs on Friday, October 26th, 2018.

Enjoy today’s Blog Hop order:


Vicky Briggs

Elina Stromberg

Donna Idlet

Iris Rodriguez

Terri Burson

Jennifer Vanderbeek

Cornelia Wenokor

Jowilna Nolte

Olesya Andreyeva

Kassy Tousignant


Subscribe to the Imagine Blog!

Learn more about Crackerbox + Suzy Stamps!

Create an Elegant Christmas Tag with Grey Ink

by Jowilna Nolte

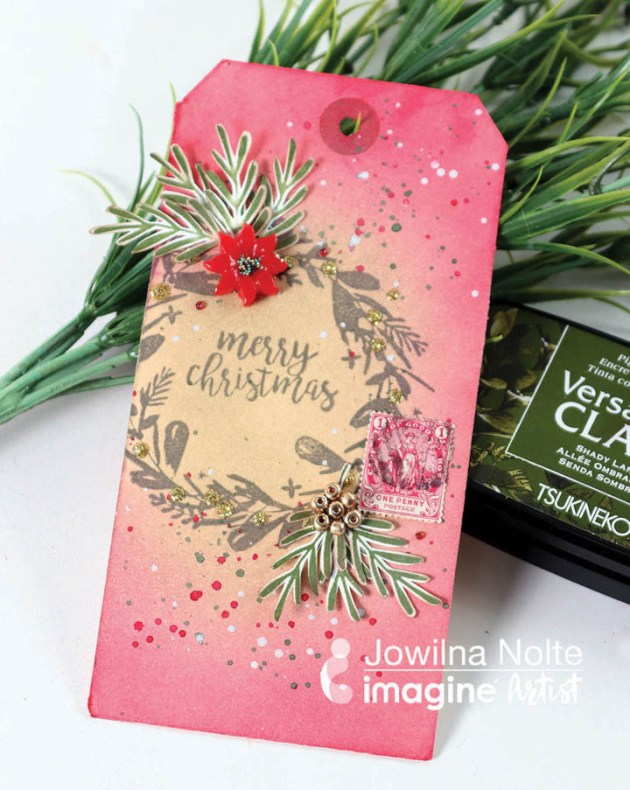
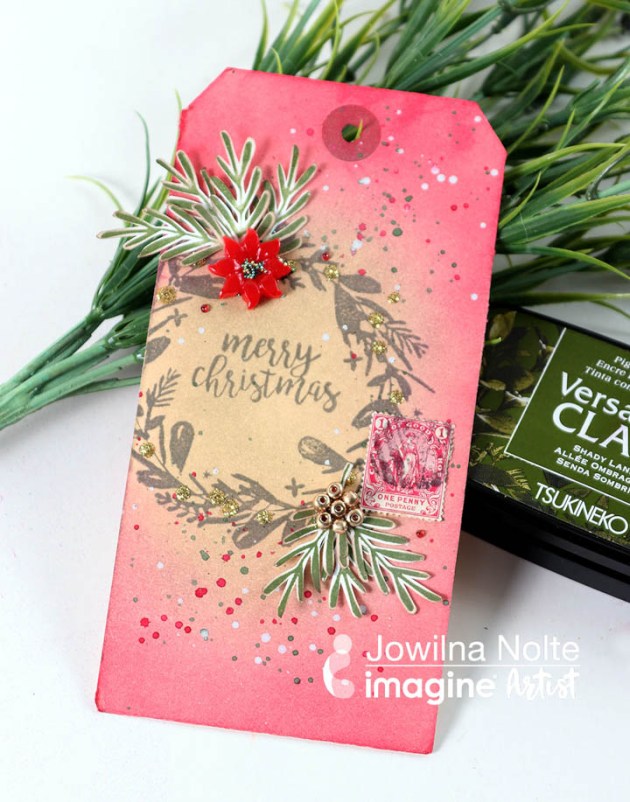
It is that time of the year again when I try and get a head start in making my Christmas cards and tags. This holiday tag is an easy one that I could replicate quickly without making too much of a mess and yet it looks gorgeous. I love the layered look of grey stamping and colorful ink blend for a simple and elegant statement. The grey color from VersaFine Morning Mist is gorgeous and it’s not too harsh making this my perfect go-to ink color for stamping.

Skill: Intermediate
Time: 1 hour

Directions


Step 1

Stamp a wreath and sentiment onto a manilla tag in VersaFine Clair Morning Mist.


Step 2

Use Memento Luxe and a jumbo dauber and blend Love Letter ink around the edges outside of the stamped wreath.


Step 3

Use Memento Luxe Pistachio and blend inside the stamped wreath area.


Step 4

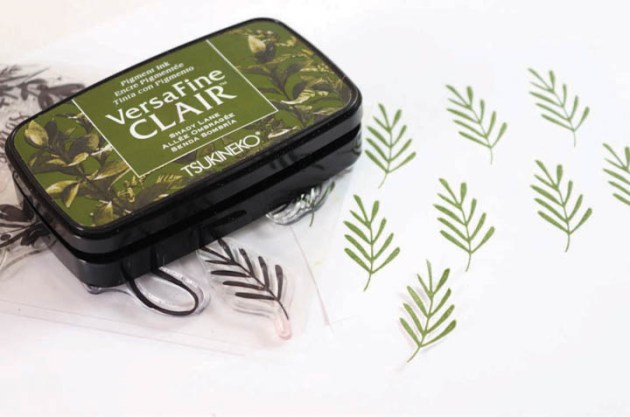
Use VersaFine Clair Shady Lane and stamp several leaves onto smooth white cardstock. Cut out the leaves.


Step 5

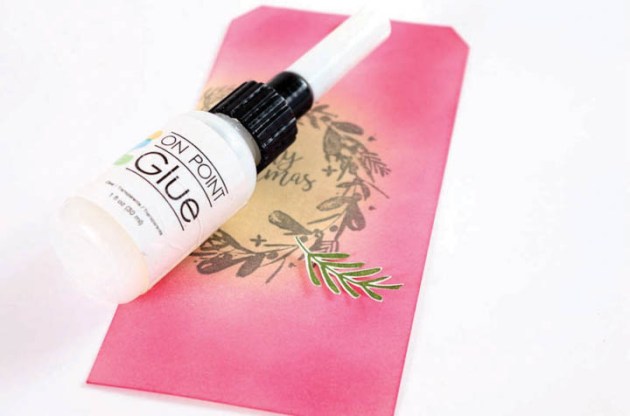
Use On Point Glue and adhere the leaves in clusters in two sections on the stamped wreath.


Step 6

Use On Point Glue and make small drops of glue on the berries and then lightly sprinkle with gold glitter and leave to dry. Shake off the excess glitter and brush clean the tag of stray glitter pieces.


Step 7

Adhere the leaves, add embellishments as desired and then add some colored ink or paint splats to finish off your tag with some added details.

Supplies

Imagine
Other
  • White cardstock
  • Kaisercraft – Christmas stamps
  • Embellishments
  • Tag
  • Glitter – Gold
  • Microbeads
  • Old Postage stamp
  • Watercolor paint

Create a “Be Happy, Be Kind” Scrapbook Layout

by Jowilna Nolte

Create a "Be Happy, Be Kind" Scrapbook Layout

For this super fun scrapbook layout, I wanted to create a background using some of my favorite craft sprays—Fireworks! These amazing sprays create a color splash and shimmer which has a nice effect with a colorful “Be Happy, Be Kind” scrapbook layout like this one. As I created my background something truly magical happened with the ink and I really loved the end result. Scroll through the steps below to find out what it is!

Skill: Advanced
Time: 1 hour or more

Directions


Step 1

Gather at least 3 colors of Fireworks! Sprays to use on your background. I selected Lady Bug, Lilac Posies and Bahama Blue.


Step 2

First, I sprayed a patch of Bahama Blue in the middle of my layout and left it to dry for a few seconds. Then I added splats with all 3 of my colors. If you’d like colors to layer make sure you allow them to dry fully before using another color.


Step 3

Once the Fireworks splatter layer was dry, I added stamping texture with a mixed media feel using VersaFine Clair Nocturne ink.


Step 4

Add texture with a circle stencil and Creative Medium and let dry. I wanted to add more deliberate splats to create a layered effect. Drop large drops of Fireworks onto the background in Lady Bug.


Step 5

Then use Bahama Blue and drop some of the ink directly onto the red drop and let it pool for a few seconds.


Step 6

Then I added more drops of Lilac Posies on top of the blue and let the ink colors blend. Since Fireworks is a dye-based ink the blending will happen if all the inks are still wet.


Step 7

The ink created the most amazing puddles of shimmer once dry. I totally love the unpredictably of the effect these inks layered on top of each other have.


Step 8

I used the same color to spray some flowers that would perfectly match my layout background.


Step 9

Once I was happy with my background I assembled my layout with photo, cut out flower layers, inked flowers and other embellishments. You don’t always have to have tons of crafting inks to be creative – all you need is a plan and a few amazing inks.


Supplies

Imagine
Other
  • Cardstock – White
  • Short Cuts Craft – Stencil
  • Mixed Media Stamps
  • Scrapbook Flower pieces
  • Acrylic block
  • Photo
  • Scissors
  • Sentiment – Be Happy, Be Kind
  • Scrapbook page 12 x 12

Make Magic With This Merry Christmas Gift Tag

by Jowilna Nolte

Make Magic With This Merry Christmas Gift Tag

Every year I make loads of Christmas cards, but this year I am creating tags for friends and family. A handmade tag is a quick and crafty alternative to attach to a gift and even packets of freshly baked biscuits. The tag is often underestimated but this will become my go-to way of adding a quick thank you to gifts – quick and easy to make with loads of impact.

Skill: Intermediate
Time: 1 hour

Directions


Step 1

Use a Jumbo dauber and ink the background of a tag using Rhubarb Stalk Memento ink.


Step 2

On the right edge of your tag use Memento Luxe ink in Rhubarb Stalk and add some darker shaded edges on your tag.


Step 3

On a sheet of smooth white cardstock mist Summer Sky Fireworks Spray. Use a soft paint brush and brush the ink across the cardstock.


Step 4

While the Summer Sky ink is still wet, use Lilac Posies and splatter ink over the base. Concentrate on certain areas more to get lots of ink in certain areas. Leave to dry.


Step 5

Once dry use VersaFine Clair Nocturne ink and stamp Christmas Bauble. Cut out and ink the edges.


Step 6

Use VersaFine Clair ink and stamp a Christmas sentiment repeatedly onto the colored tag.


Step 7

Use at least 3 colors of Fireworks Spray to add splats to the background and leave to dry or heat set using a heat gun.


Step 8

Adhere the stamped bauble, flowers and themed embellishments to finish off your tag. As an alternative layer two stamped baubles on top of each other using foam tape.


Supplies

Imagine
Other
  • Cardstock – White
  • Tag
  • Kaisercraft – stamp set
  • Little Birdie – Flowers
  • Charms
  • Bakers twine

In this Issue of Scrapbook Affairs with Jowilna Nolte

Today’s blog post is not a tutorial. We are just happy to share some love for our Artist in Residence Jowilna Nolte who is the featured artist in Scrapbook Affairs. We love the colors and illumination in this tag-making project using VersaFine Clair! See the page clipping below to see how Jowilna makes all sorts of projects with this fabulous ink.

Here is a sneak peek at one of the pages in the Scrapbook Affairs. In the image below see how Jowilna uses VersaFine Clair in so many different ways.

See more craft tutorials from Jowilna:

Use VersaFine Clair to create a Lavender Card

Design a Live Wild & Free Card

Create a Dazzling Raspberry Red Scrapbook Layout

Shop VersaFine Clair


Learn How to Make a Retiform Inspired Card in Lavender

by Jowilna Nolte

Learn How to Make a Retiform Inspired Card in Lavender using Tsukineko's All-Purpose Ink and VersaFine Clair

Create a fun retiform inspired card in shades of Lavender and Pink with a hint of gold. This interesting technique created a fun grid-like pattern on the background filled with stamped images, but this variation uses a stencil and stamped images differently. Take a look at how to create this fun card in bright and vibrant shades.

Skill: Intermediate
Time: 1 hour

Directions


Step 1

Stamp flower images onto smooth white cardstock using VersaFine Clair in Nocturne and Twilight combined for an interesting effect.


Step 2

Gather at least three colors of All-Purpose Ink to add color to your flowers. I used shades of pink and lavender.


Step 3

First, paint the inside section of your flowers with the darkest shade, I am using Wisteria, with a small soft paint brush.


Step 4

Then use the All-Purpose Ink in Cherry Pink and paint over the Wisteria layer.


Step 5

Lastly, paint a layer of Orchid Odyssey over the entire painted flower – over both colors.


Step 6

Fill a water brush with half water and half Champagne All Purpose Ink. Shake the ink and water to mix together. You now created a glimmer brush for adding shimmer easily to your projects.


Step 7

Paint a layer of shimmer over the painted flowers and leave to dry.


Step 8

See the shimmer over the color – this looks amazing. Cut out the flowers around the edges.


Step 9

Use Gold irRESISTible Pico Embellisher and add detail to the center of your flowers. Leave to dry.


Step 10

Create a stenciled background using Memento Dye inks. Leave the stenciled image to dry.


Step 11

Over the stenciled background, add the retiform inspired inking. Position a scrap piece of cardstock over the background. Pick up ink onto a jumbo dauber using VersaFine Clair Purple Delight and lightly blend over the edge only.


Step 12

Repeat the stenciling and move your scrap cardstock piece each time at a different position. Repeat the inking using a second color like Fantasia for added interest.


Step 13

Trim the inked retiform panel to fit onto the front of a folded card and adhere in place. Stamp a sentiment in VersaFine Clair in Fantasia and adhere the flowers.

Supplies

Imagine
Other
  • Cardstock – white
  • Stencil
  • Jowilna Nolte – Stencil
  • Chiswick
  • Carabelle