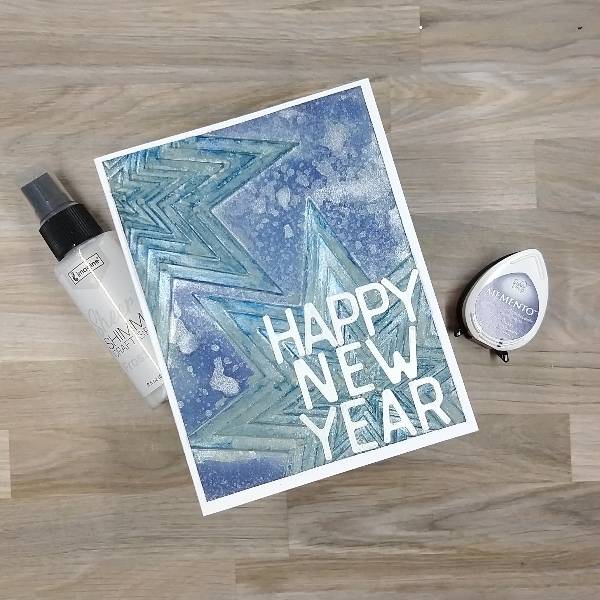
Step 1: Spray Frost Sheer Shimmer Craft Spray onto a piece of white watercolor paper and set aside to dry.
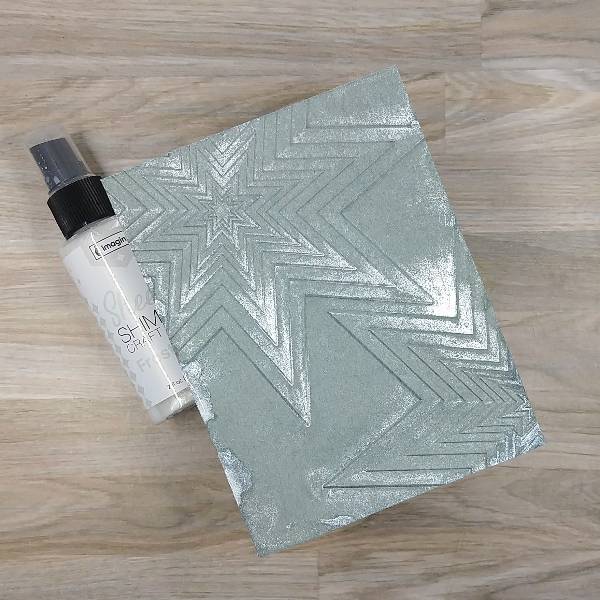
Step 2: Trim a piece of gray watercolor paper to 4” by 5.25” with a paper trimmer. Then spray the panel and the inside of an embossing folder with more of the Frost Sheer Shimmer Craft Spray, place the gray watercolor panel inside of the embossing folder and then run the embossing folder through a die cutting machine. Allow the panel to dry.
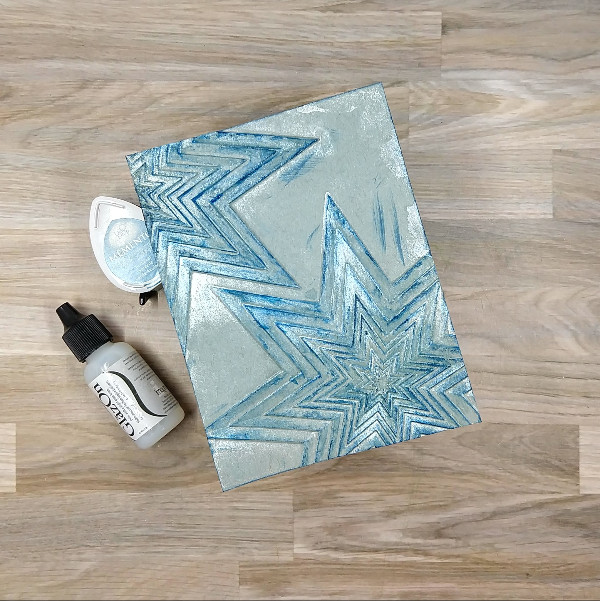
Step 3: Gently run a Teal Zeal Memento Ink pad across both of the embossed stars and around the edges of the panel. Using a small sponge dauber (or your finger), spread some shiny GlazOn onto both of the embossed stars to “lock in” the teal color.
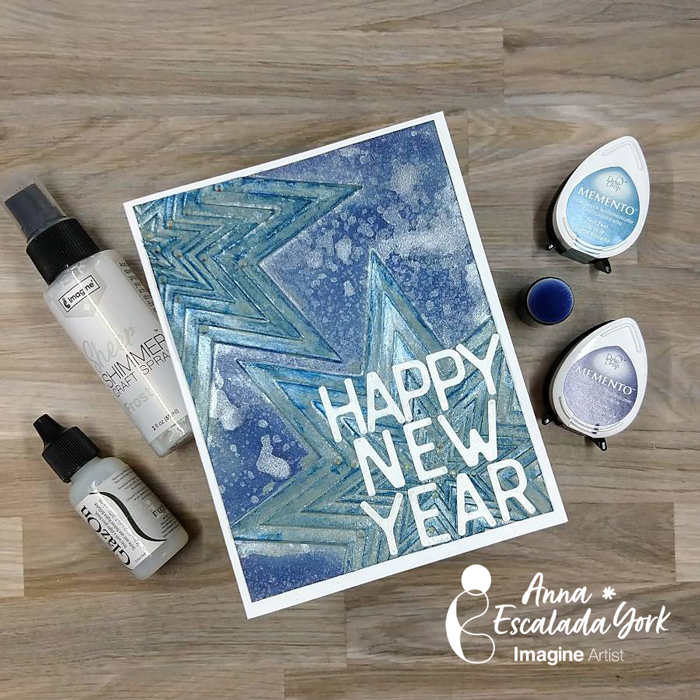
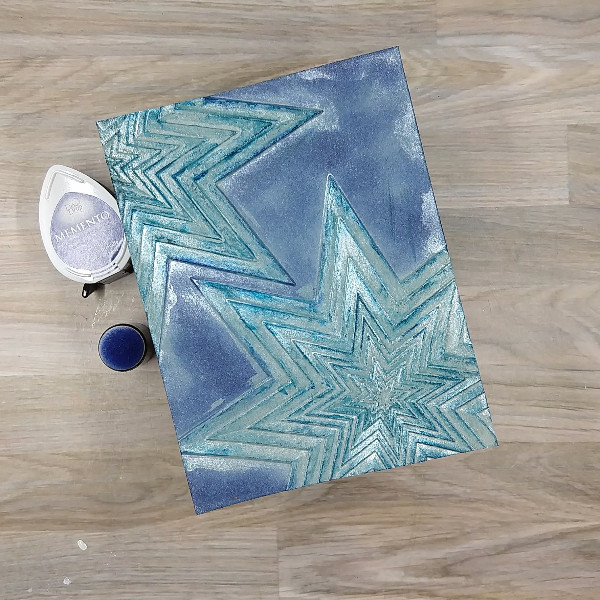
Step 4: Using a sponge dauber, ink blend Paris Dusk Memento ink around the panel (not on the stars).
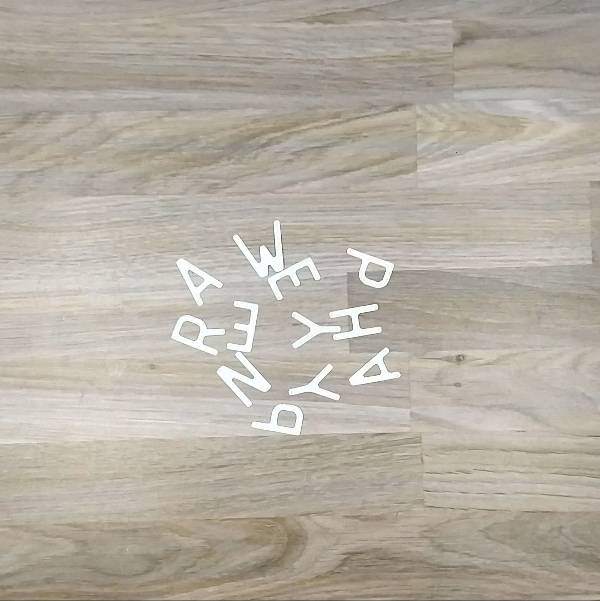
Step 5: Die cut letters to form the sentiment out of the the sprayed white cardstock from step 1.
Step 6: Spray the panel with more of the Frost Sheer Shimmer Craft Spray and allow it to dry. Then glue the letters from the sentiment onto the lower right corner of the panel.
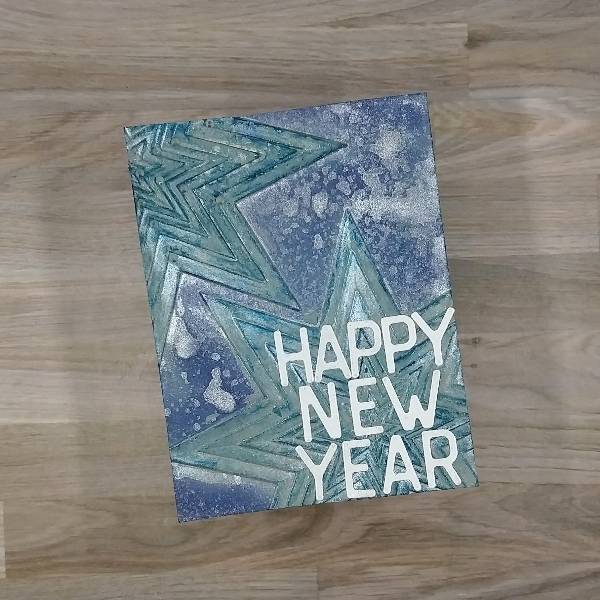
Step 7: Glue the panel onto an A2-sized white card base.
Altenew – embossing folder – Stellar Cascade Sizzix – die set – Letterboard (666859) White watercolor paper Gray watercolor paper Die cutting machine Paper trimmer Scissors Glue
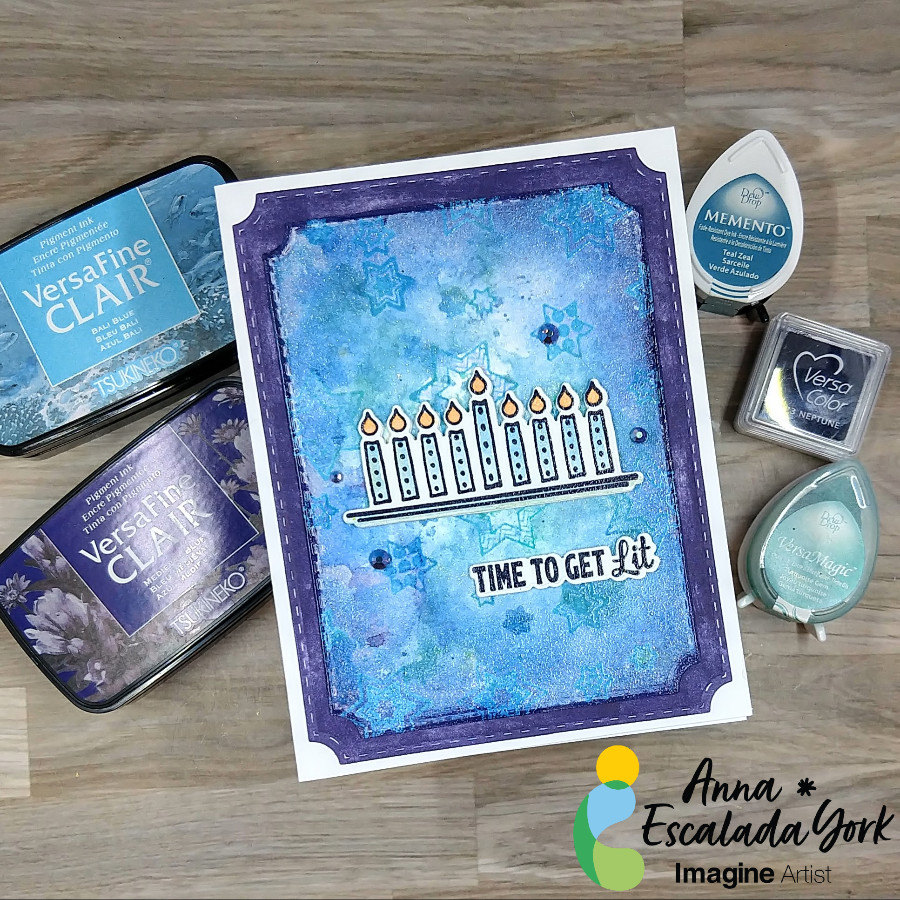
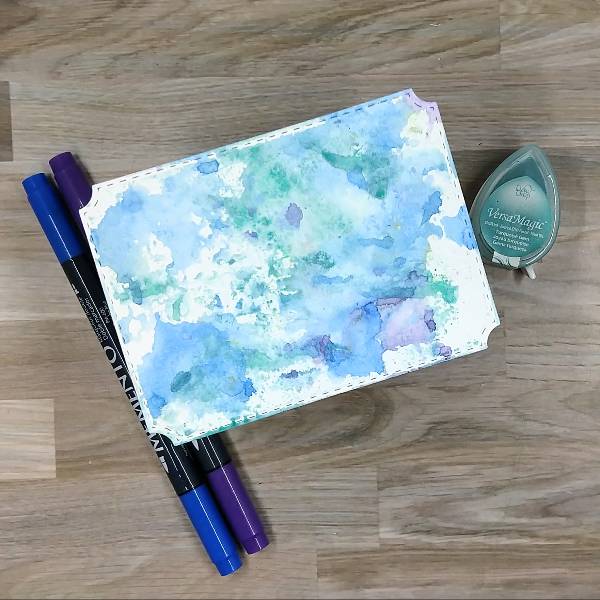
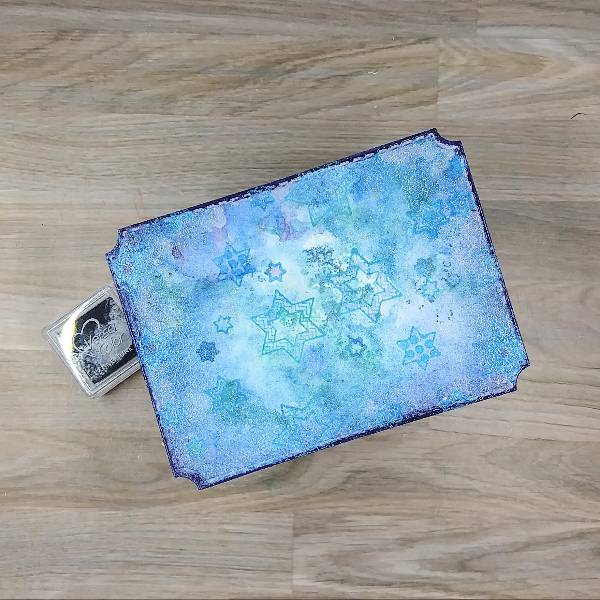
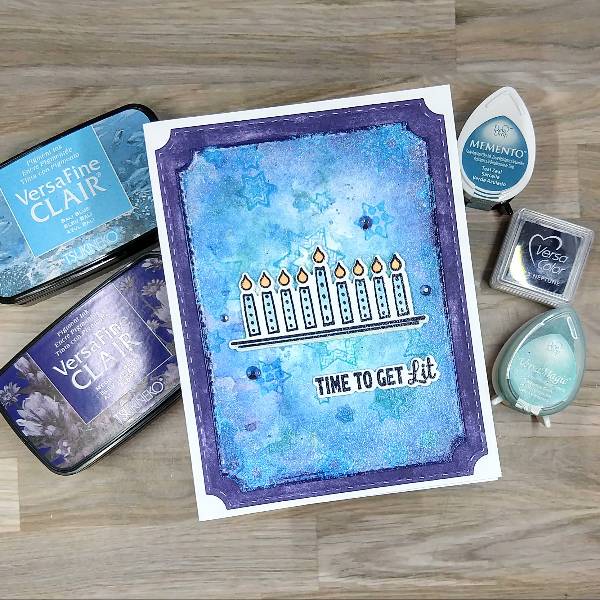
Since we are deep in holiday card making seasons, I am sharing a Hanukkah card featuring a lot of different blues.
Skill: Intermediate Time: 2 hours
Directions:
Step 1: Watercolor smoosh Danube Blue and Grape Jelly Memento Dual Markers as well as Turquoise Gem VersaMagic Chalk Ink mixed with water on a piece of scrap acetate packaging onto a watercolor panel. Allow the panel to dry.
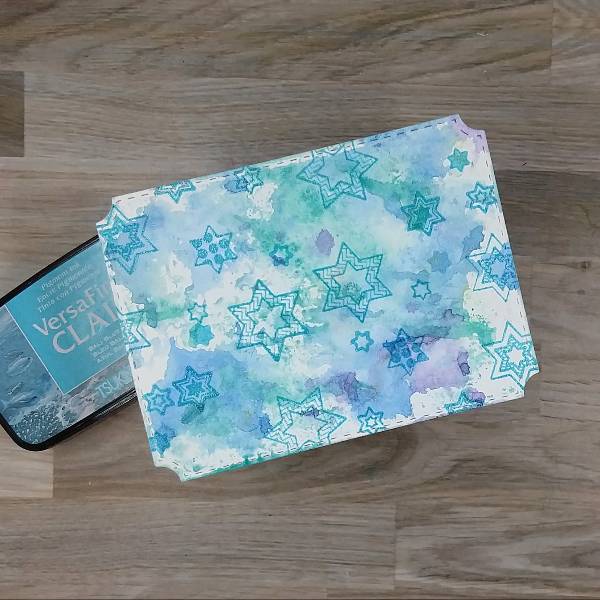
Step 2: Arrange a variety of six-sided stars onto one side of the watercolor panel in a stamp positioner. Stamp the stars onto the panel with Bali Blue VersaFine Clair Pigment Ink and then heat emboss with clear Mboss powder. Flip the panel and repeat the process. Move any of the stars around on the stamp positioner to fill in any holes on the panel.
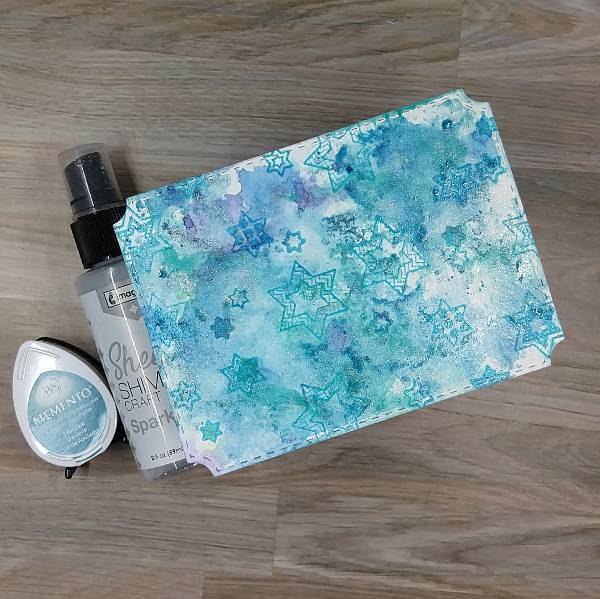
Step 3: Watercolor smoosh the panel again, this time with Teal Zeal Memento Dye ink mixed with Sparkle Sheer Shimmer Craft Spray on the acetate packaging.
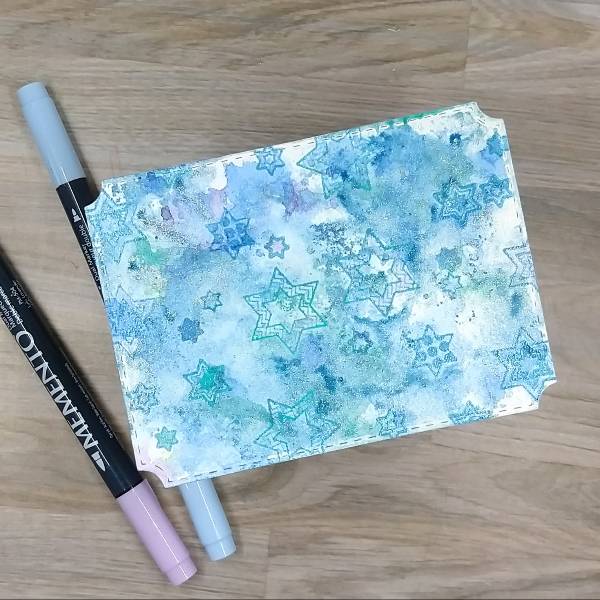
Step 4: Color in the six-sided stars with Summer Sky and Lulu Lavender Memento Dual Markers.
Step 5: Ink blend the edges of the panel Neptune VersaColor ink with a sponge dauber. Run the edges of the panel through the Neptune VersaColor ink pad and then heat emboss with more clear Mboss powder.
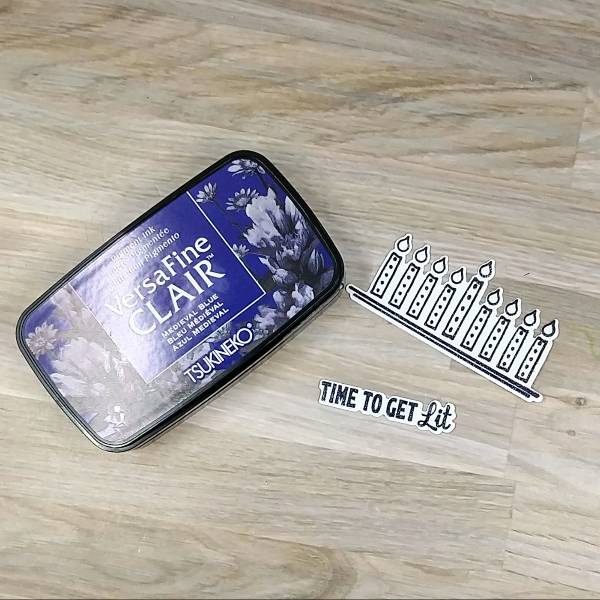
Step 6: Stamp the menorah and sentiment on watercolor paper with Medieval Blue VersaFine Clair ink. Heat emboss with more clear Mboss powder. Then die cut with the corresponding dies from the matching die set.
If desired, die cut some scraps of cardstock with the two dies two more times (to create two layers to glue behind the menorah and two layers to glue behind the sentiment) for strength and dimension.
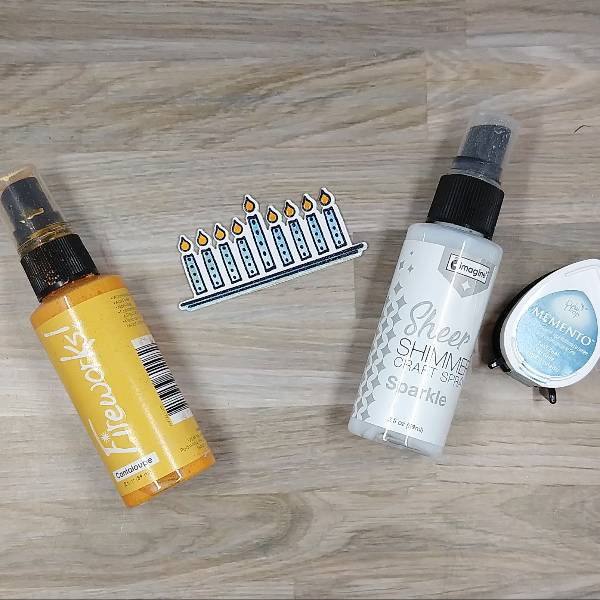
Step 7: Watercolor the flames with Cantaloupe Fireworks! Shimmery Craft Spray. Then use some of the remaining Teal Zeal Memento dye ink mixed with Sparkle Sheer Shimmer Craft Spray (from step 3) to watercolor the tops of each candle. Add some of the Sparkle Sheer Shimmer Craft Spray (by itself) to the bottom of each candle.
If desired, watercolor the base of the menorah with more of the same Tael Zeal Memento dye ink mixed with Sparkle Sheer Shimmer Craft Spray.
Set the die cut aside to dry.
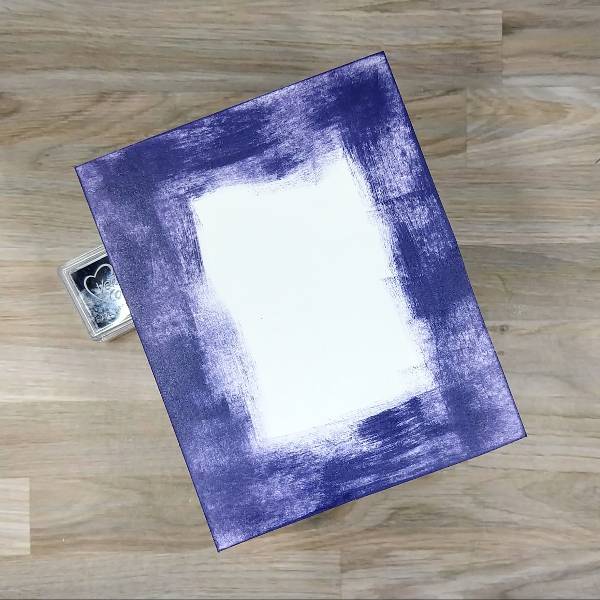
Steps 8 and 9: Add Neptune VersaColor ink directly to another panel of watercolor paper that is slightly larger than the first panel. You may need to do this a few times to get the coverage you want. Allow the panel to dry.
(And this is where my camera crashed after taking pictures so I can’t share the next few steps.) Die cut the panel with a die slightly larger than the stamped panel.
Then glue the two panels together, glue the menorah onto the center of the top panel and the sentiment a little lower and right of the sentiment. Then glue blue gems around the menorah.
Steps 10: Glue the panel onto an A2-sized white card base.
Other • Crafty Meraki – embellishments – Meraki Sparkle Prismatic Blue • Pink & Main – die set – Notched Corners • Simon Says Stamp – die set – Light the Menorah • Simon Says Stamp – stamp set – Light the Menorah • Watercolor paper • Die cutting machine • Paint brush • Paper trimmer • Scissors • Glue
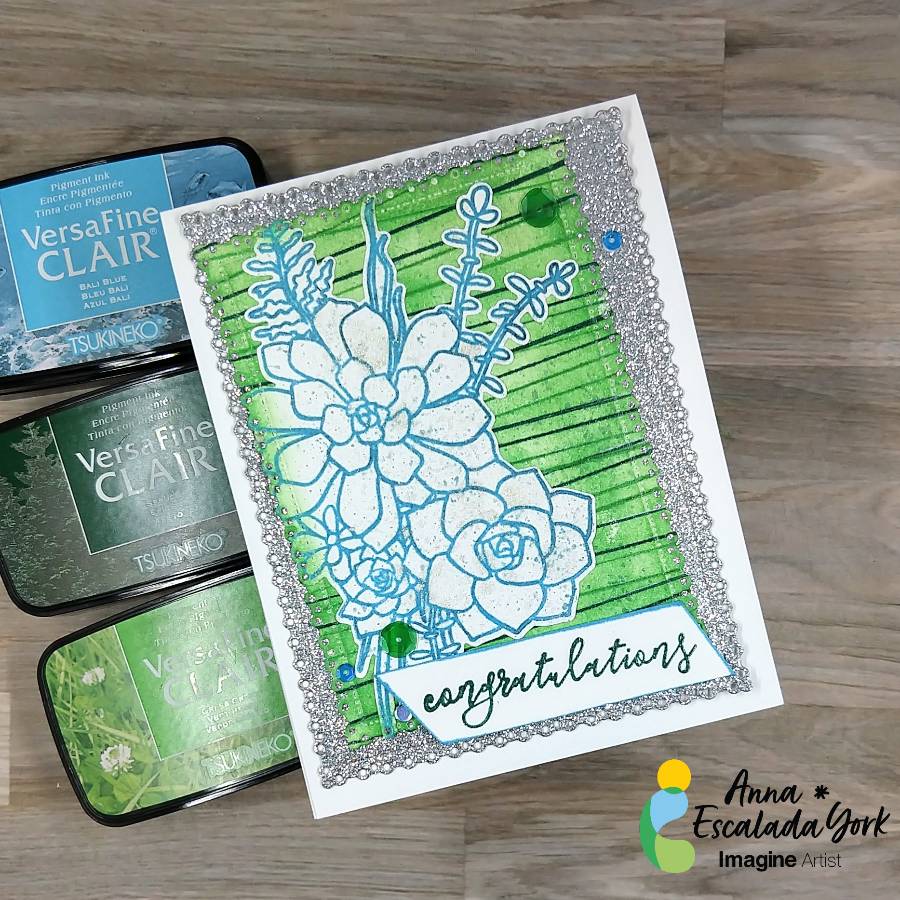
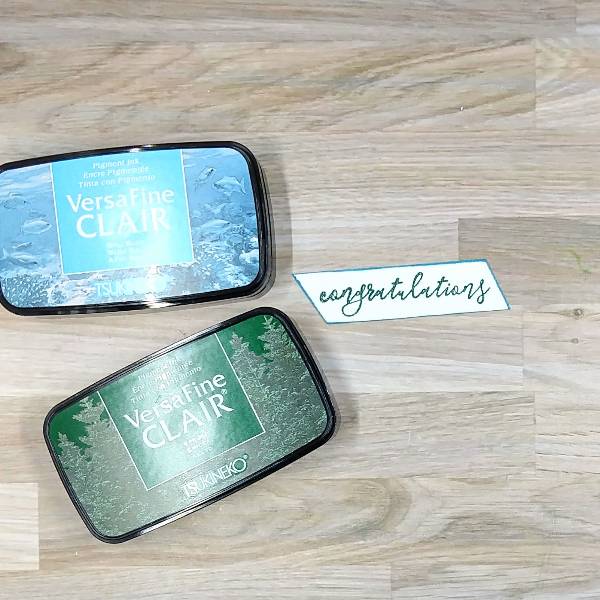
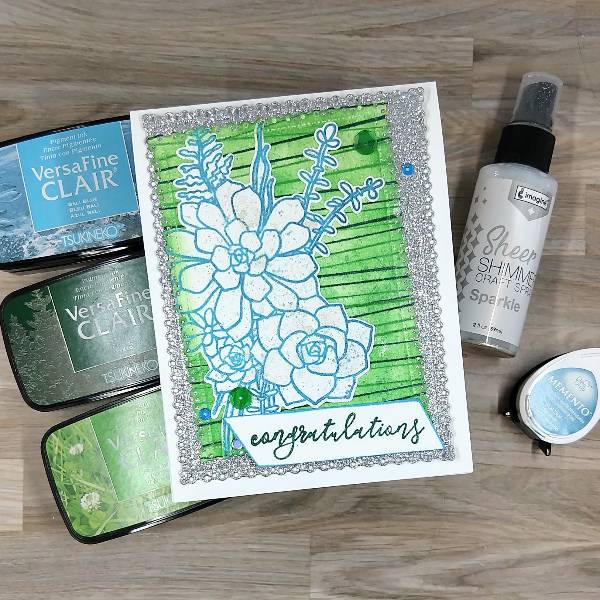
In today’s card, I made a congratulations card for a coworker who just had a baby using some of the beautiful new VersaFine Clair ink colors.
Skill: Intermediate Time: 1.5 hours
Directions:
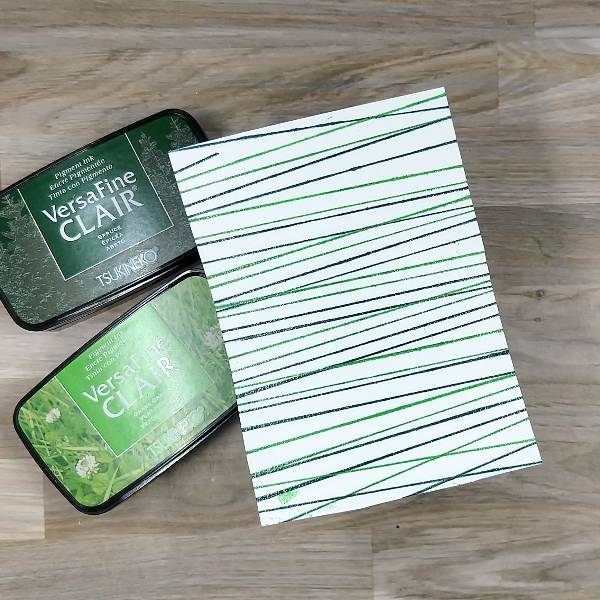
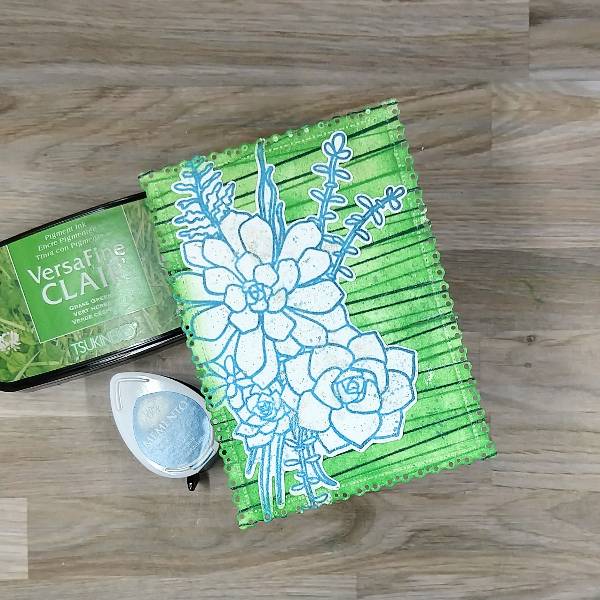
Step 1: Stamp a piece of watercolor paper with Grass Green VersaFine Clair ink using a background stamp with a variety of lines on it. Rotate the paper 180 degrees and repeat the process. Then move the stamp on the stamp positioning tool a little (so the lines don’t overlap) and repeat the process with Spruce VersaFine Clair ink. Heat emboss the whole thing with Clear Mbossing powder.
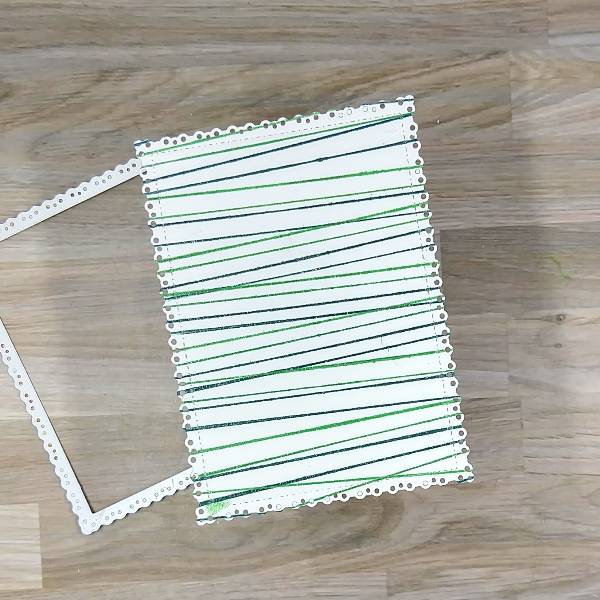
Step 2: Die cut the panel with the second-largest die from a nested die cutting set.
Step 3: Use a sponge dauber to ink blend the whole panel with Grass Green VersaFine Clair ink. (This doesn’t have to be done perfectly because it won’t matter on the final card.)
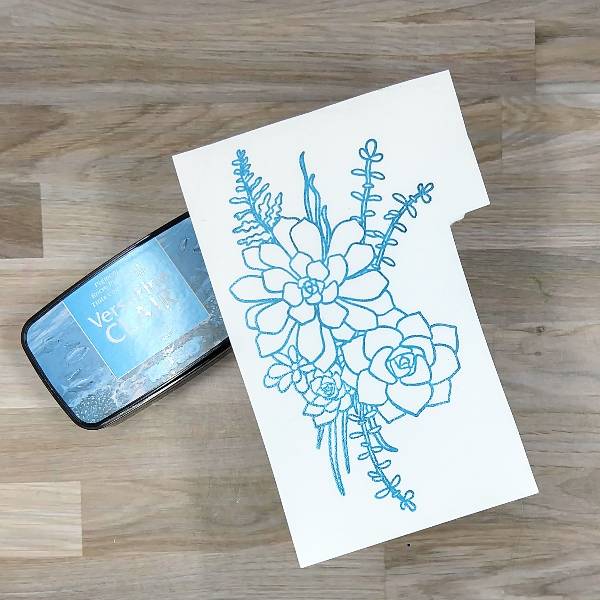
Step 4: Stamp the large floral image with Bali Blue VersaFine Clair ink on another piece of watercolor paper. Then heat emboss with more Clear Mboss powder.
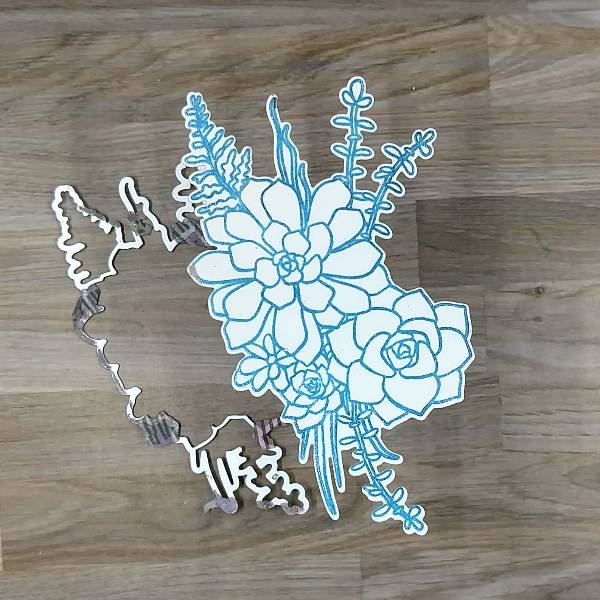
Step 5: Die cut the floral image with the corresponding die.
Step 6: Die cut the left edge of the floral image with the same die used earlier, that way the decorative edge of the stamped image can line up with the edge of the green panel.
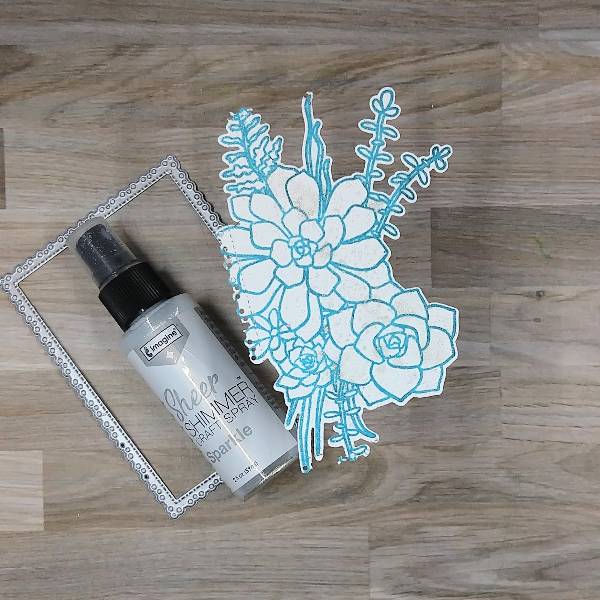
Since I smudged the floral image while die cutting, I decided to cover the smudge with some spray.
Spray the image with Sparkle Sheer Shimmer Craft Spray. Press the cap of the spray bottle down about half-way, allowing the spray to come out more in drips rather than as a mist. (I was able to cover the smudges with large splatters of spray.) Allow to dry.
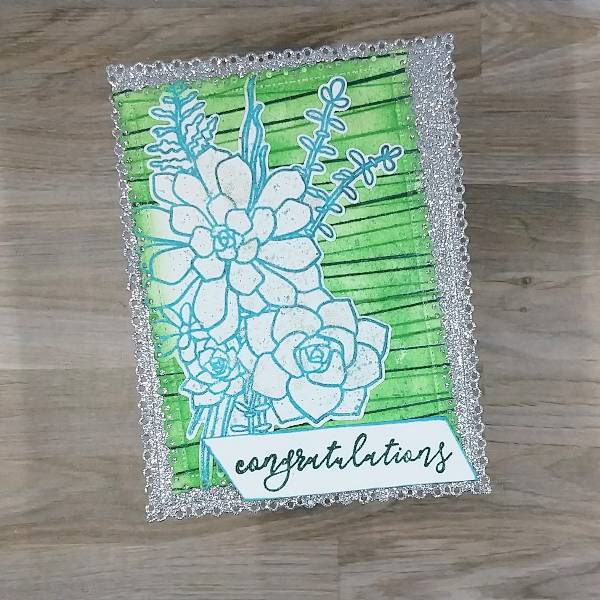
Step 7: Glue the floral image onto the left side of the panel.
Press the Teal Zeal Memento Ink pad onto a piece of scrap acetate packaging and spray the packaging with water to create watercolor. Splatter it with a paint brush. After the splatter dried, ink blend the left side of the panel with more Grass Green VersaFine Clair ink.
Steps 8 and 9: Stamp a sentiment from the same stamp set as the floral image with Spruce VersaFine Clair ink on watercolor paper and heat emboss with more clear Mboss powder. Trim the sentiment strip with a paper trimmer.
Then run the edges of the sentiment strip through the Bali Blue VersaFine Clair ink pad. Emboss the Bali Blue ink with more clear Mboss powder.
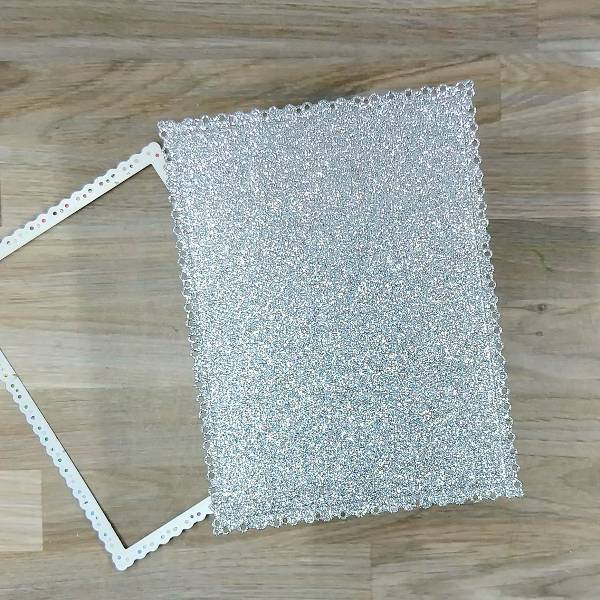
Step 10: Die cut a piece of silver glitter cardstock with the largest die from the same nesting die cut set.
Step 11: Glue the green panel onto the silver panel, orientating them at a diagonal. Glue the sentiment on the lower right corner of the green and silver panels. Set aside to dry.
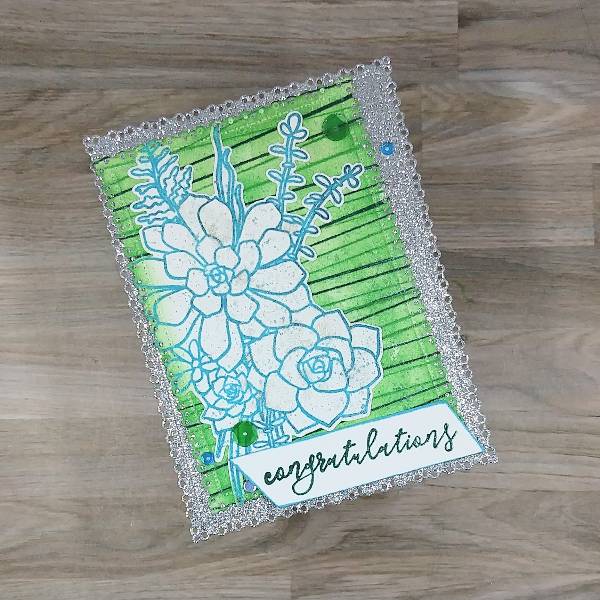
Step 12: Glue blue and green sequins onto the card–three on the lower left corner and two on the upper right corner.
Step 13: Finish the card by gluing the whole panel onto an A2-sized white card base.
Other • Catherine Pooler – sequins – Yukon • Gina Marie Designs – Die set – Pleated Lace Rectangles die set • Hero Arts – Stamp set – Succulent Bouquet • Hero Arts – Die set – Succulent Bouquet • Unknown stamp company – background stamp – diagonal lines (I don’t know the brand or name of this stamp) • Watercolor paper • Silver glitter cardstock • Die cutting machine • Paint brush • Paper trimmer • Scissors • Glue
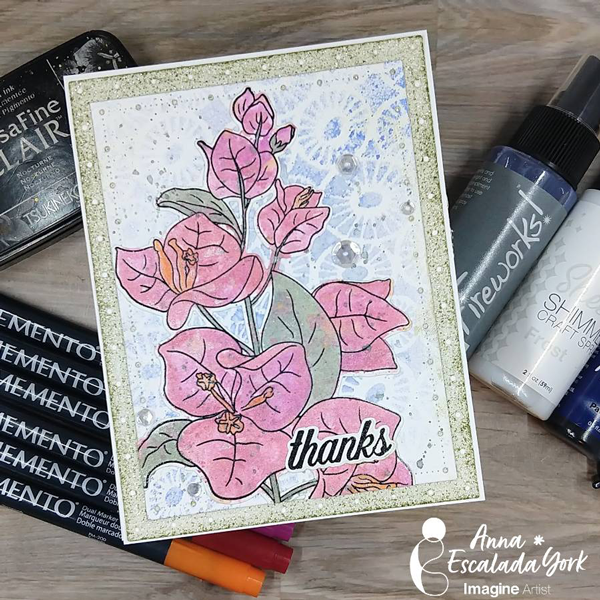
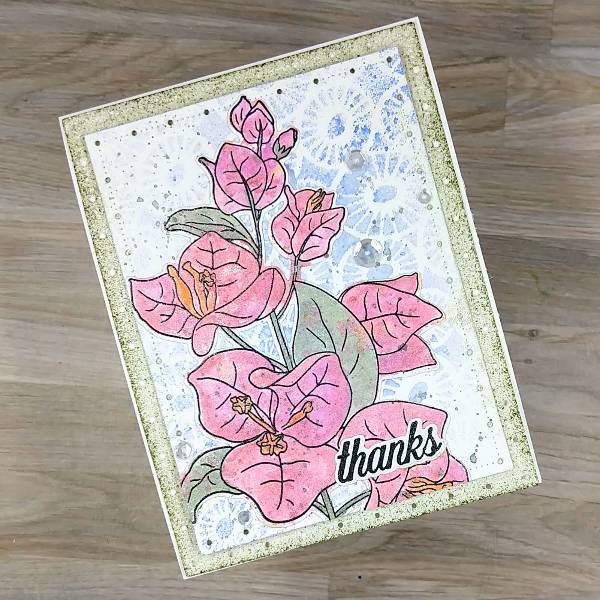
In today’s card, I made a thank you card with some new-to-me Memento markers and sprays.
Skill: Intermediate Time: 1.5 hours
Directions:
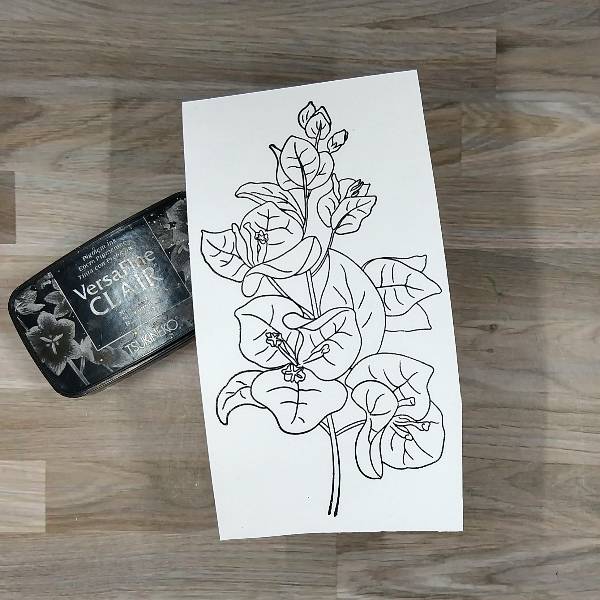
Step 1: Stamp the large floral image with Nocturne VersaFine Clair Ink on watercolor paper and then heat emboss with clear Mboss embossing powder.
Step 2: Die cut the large floral image with the corresponding die cut.
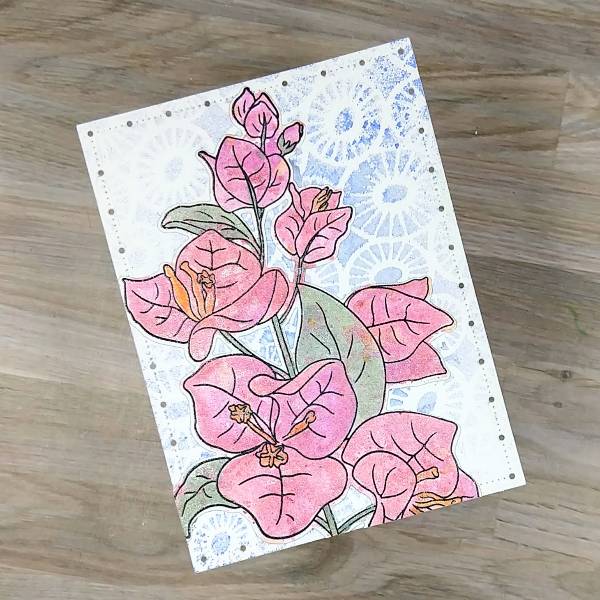
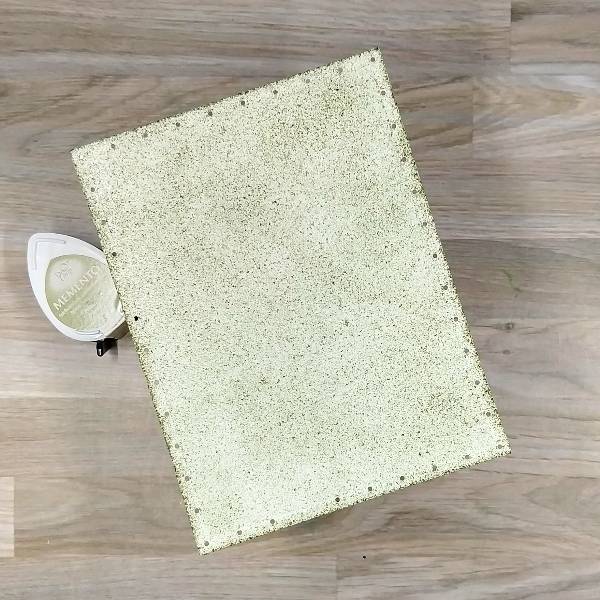
Step 3: The large floral image was colored by watercolor smooshing a variety of Frost Sheer Shimmer Craft Spray mixed with a variety of colors of Memento Dual Markers–Love Letter and Lilac Posies. After the watercolor smooshing dried, the large floral image was watercolor painted with a Northern Pine and Pistachio Memento Dual Markers mixed with more of the Frost Sheer Shimmer Craft Spray on the greenery. The flowers were colored with a mix of Rhubarb Stalk, Love Letter and Lilac Posies mixed with more of the Frost Sheer Shimmer Craft Spray. Finally, Tangelo Memento Dual Marker was mixed with more of the Frost Sheer Shimmer Craft Spray and watercolor smooshed onto the image.
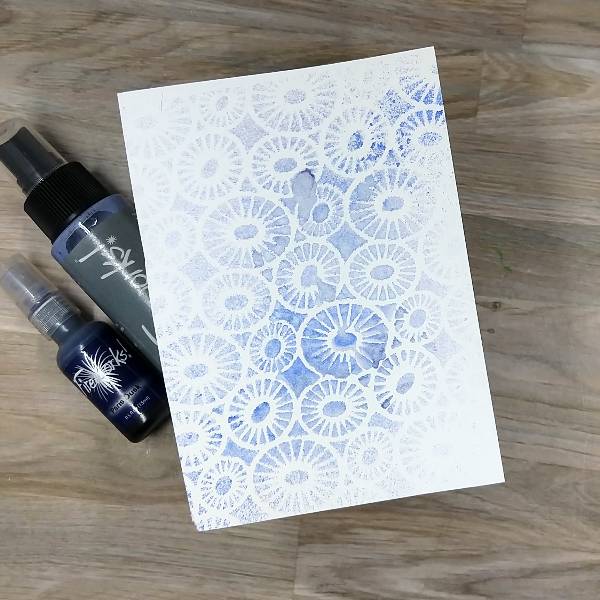
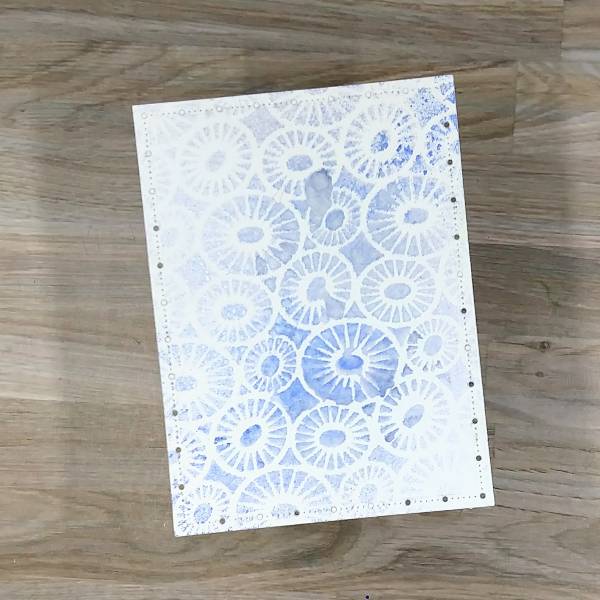
Step 4: Spray London Fog Fireworks! Shimmery Craft Spray onto another piece of watercolor panel through a stencil. Then spray Paris Dusk Fireworks! Shimmery Craft Spray on a diagonal through the same stencil through the same stencil while the ink was still wet.
Step 5: Stamp the thanks sentiment with more Nocturne VersaFine Clair Ink on watercolor paper and then heat emboss it with more of clear Mboss embossing powder. Then die cut the sentiment with the corresponding die.
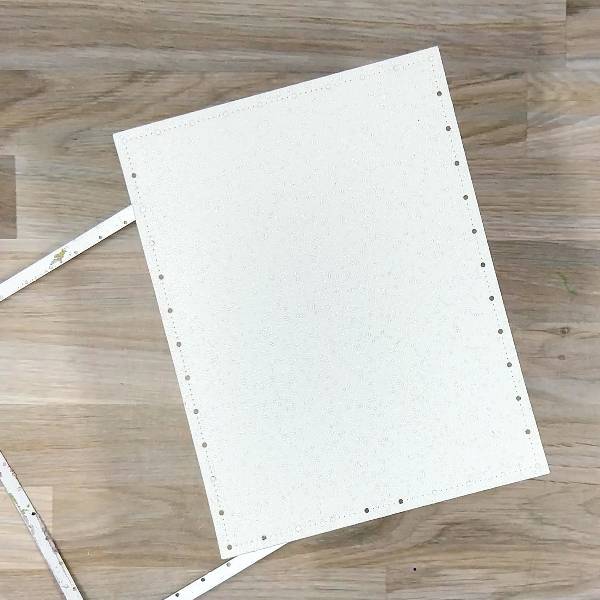
Step 6: Die cut the sprayed background panel with the second-largest die from a nested A2-sized panel die set.
Step 7: Glue the large floral die cut image onto the sprayed panel and then trim the edges of the floral die.
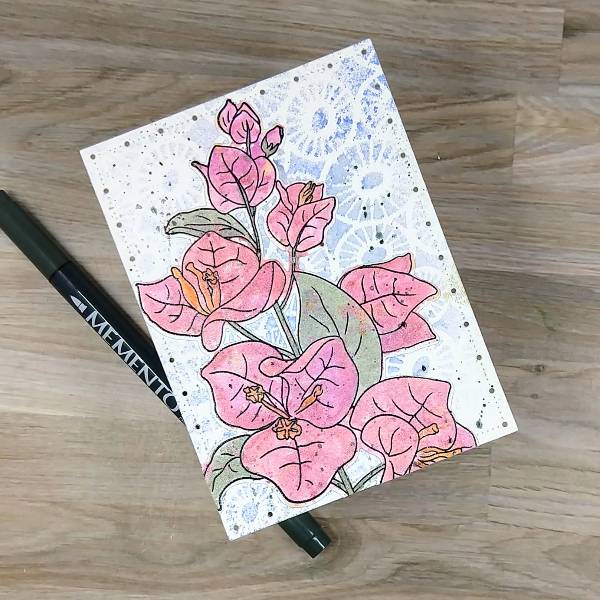
Step 8: Mix Northern Pine Memento Dual Marker mixed with water and splatter onto the panel and floral die cut.
Step 9: Die cut a piece of white glitter cardstock with the largest die from the same nesting die cut set.
Step 10: Swipe Pistachio Memento Ink across the glitter cardstock to color it green.
Step 11: Glue clear sequins and the sentiment die cut onto the upper panel. Then glued the green glitter cardstock behind the focal panel. To finish the card, glue the whole thing onto an A2-sized white card base.
Other Products Altenew – die set – Bougainvillea Altenew – stamp set – Bougainvillea Catherine Pooler – sequins – Crater Lake Gina Marie Designs – Die set – Big and Little Chain Rectangle die set Ink On 3 – Stencil – Pondie 6×6 stencil Watercolor paper White glitter cardstock Die cutting machine Paper Trimmer Scissors Glue
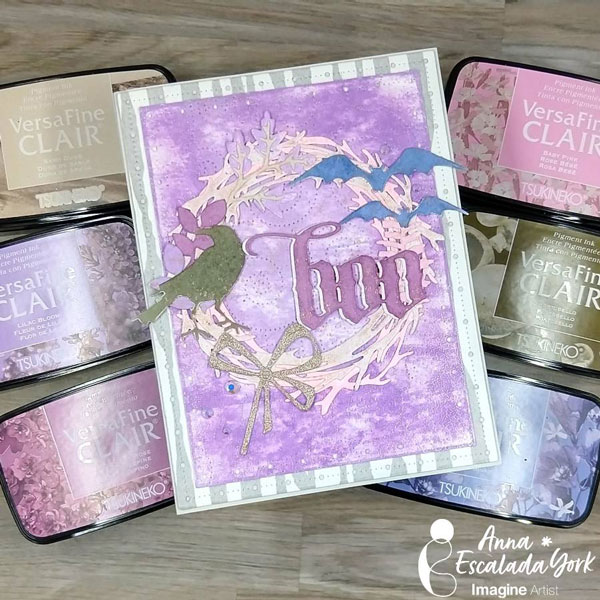
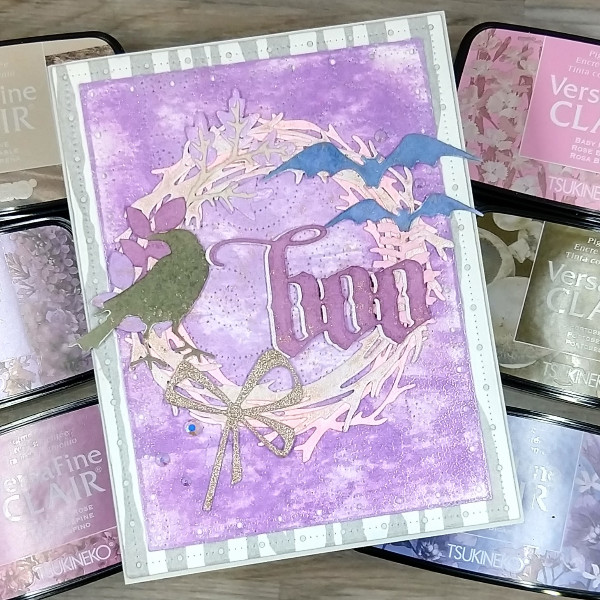
In today’s card, I used many of the new VersaFine Clair Ink colors to make another Halloween card.
Skill: Intermediate Time: 1.5 hours
Directions:
Step 1: Die cut leaves and stems out of watercolor paper. Ink blend the fern-y shaped leaf with Baby Pink VersaFine Clair ink and the individual leaves with Lilac Bloom VersaFine Clair ink. I pressed the stem die cut into the Sand Dune VersaFine Clair ink pad and the leaf cluster die cut into the Lilac Bloom VersaFine Clair ink pad. These were all set aside.
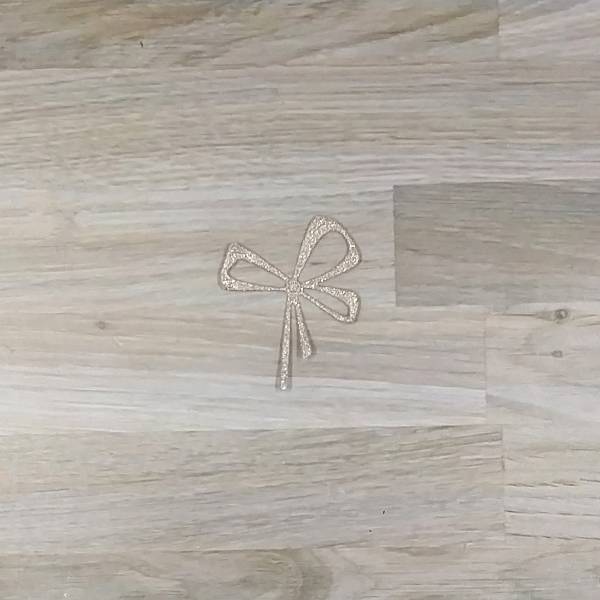
Step 2: A sparkly piece of rose colored cardstock was die cut with a bow die cut.
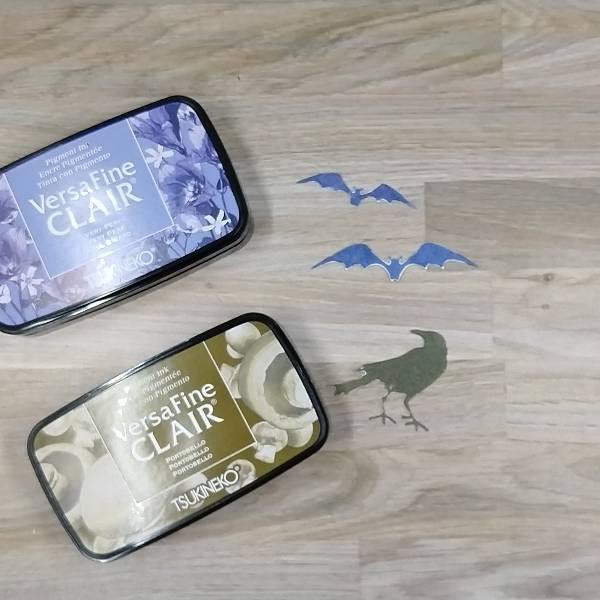
Step 3: Two bats and a crow were die cut out of watercolor paper. The crow die cut was pressed into the Portobello VersaFine Clair ink pad and the two bats were pressed into the Very Peri VersaFine Clair ink pad.
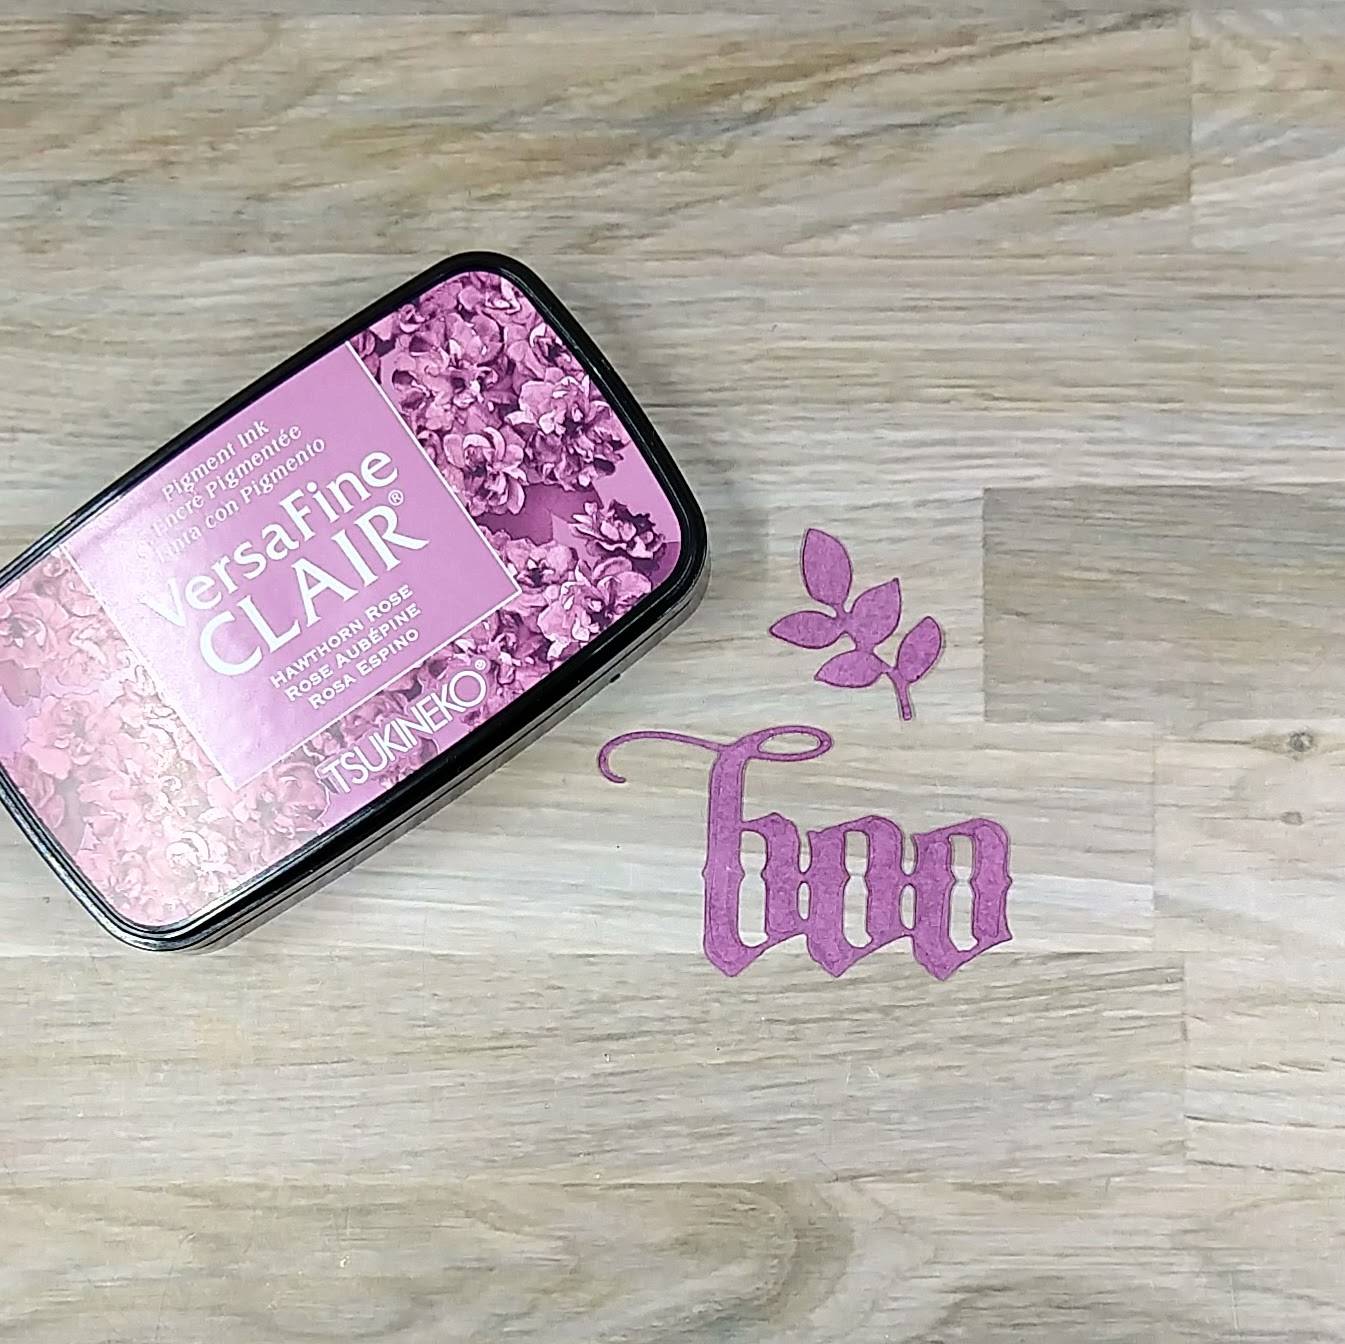
Step 4: Press a die cut leaf cluster and boo sentiment die cuts into the Hawthorn Rose VersaFine Clair ink pad.
Not pictured: die cut a piece of sparkly white cardstock with the same boo sentiment. If desired, also die cut scrap cardstock twice with the same sentiment. Glue the sparkly white cardstock behind the boo sentiment so that the white sparkly cardstock peeks out on the side (like a shadow).
If adding the two layers of scrap cardstock layers behind the sentiment, trim the second o (the one on the right side) off both layers so that when it gets glued onto the wreath, it lays flat.
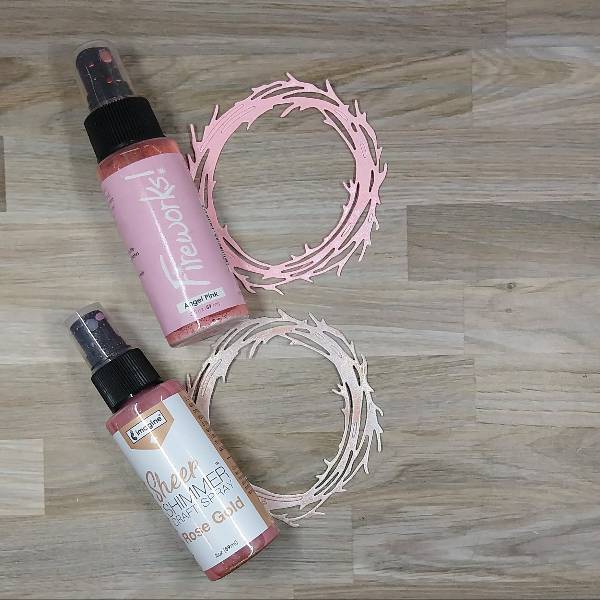
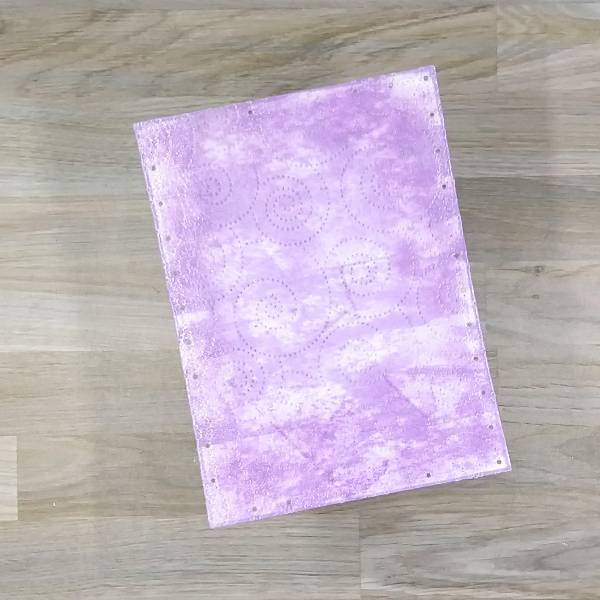
Step 5: Die cut the wreath twice–once out of watercolor paper and once with more of the white sparkly cardstock. Spray the watercolor paper wreath with Angel Pink Fireworks! Shimmery Craft Spray and the white sparkly cardstock wreath with Rose Gold Sheer Shimmer Craft Spray. Set aside to dry.
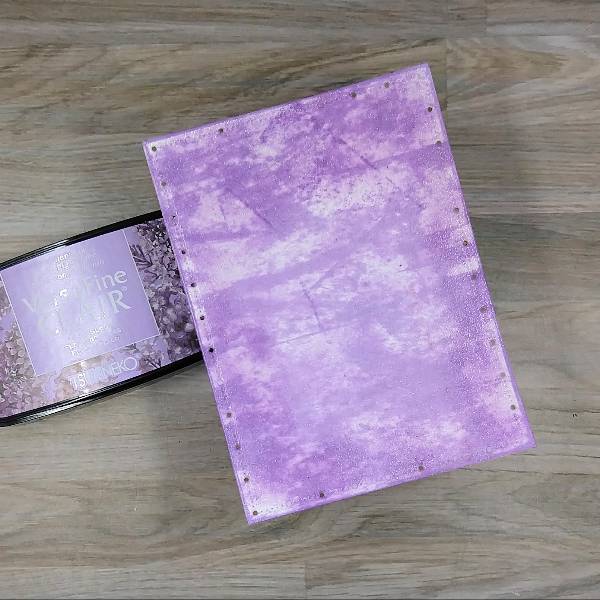
Step 6: Die cut another piece of watercolor paper with a smaller panel die cut. Roughly ink blend the panel with more of the Lilac Bloom VersaFine Clair ink. Then swipe the panel with the ink pad in a variety of directions and the edges of the panel. Add Clear Mboss embossing powder to the edges fo the panel and heat emboss.
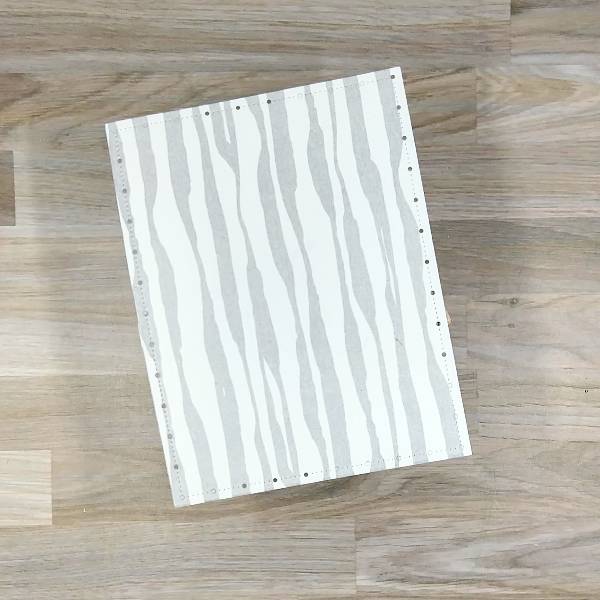
Step 7: Add a piece of patterned washi tape to a piece of scrap cardstock and die cut with a larger panel die cut. (If you don’t have washi tape, use patterned paper or a colored piece of cardstock.)
Step 8: Run the smaller card panel through the die cutting machine with the plate die to add some additional texture.
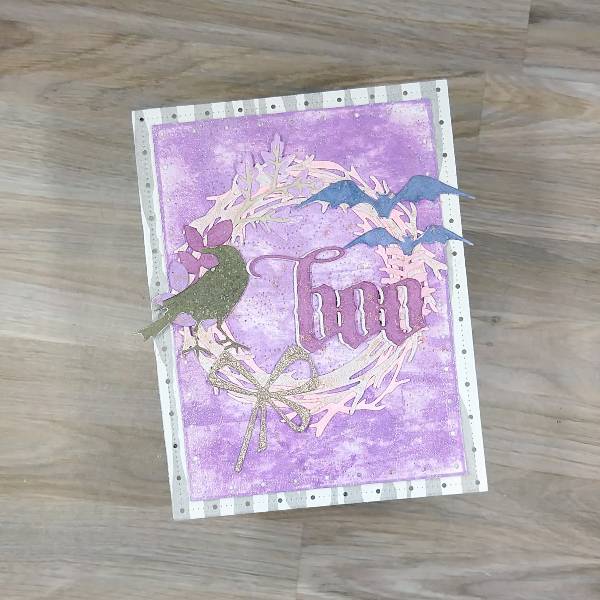
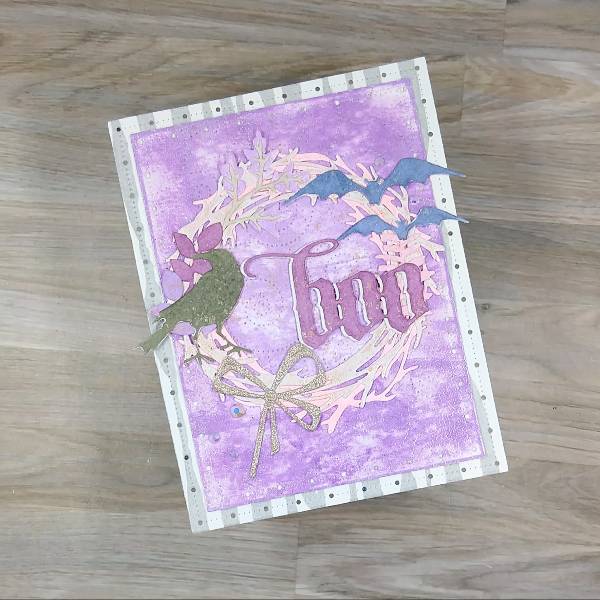
Step 9: Glue all of the die cut elements together. Start with the two wreaths, with the pink layer underneath the rose gold sparkly wreath on the top, making sure they are off set. Then glue the leaves, the crow and the bats along the wreath. The bow is glued down on the lower left part of the wreath. Glue the wreath onto the purple panel. The sentiment was glued down next. Gle the whole panel onto the larger, washi tape panel. Then splatter the whole thing with more of the Rose Gold Sheer Shimmer Craft Spray. Let dry.
Step 10: Glue the frame gems on the lower left and upper right parts of the panel.
Step 11: Glue the whole thing onto an A2-sized gray cardbase.
In today’s card, I used sprays and and ink-blending to make a Halloween card.
Skill: Intermediate Time: 1.5 hours
Directions:
Step 1: Stamp the Death’s-Head Moth stamp onto a piece of white watercolor paper with Nocturne VersaFine Clair ink. Emboss with Clear Mboss powder.
Step 2: Spray a pre-die cut panel of watercolor paper with Lilac Posies Fireworks! Shimmery Craft Spray and Rose Gold Sheer Shimmer Craft Spray. Allow the panel to dry.
Step 3: Color two corner filigree stamps–one at the top right corner and one at the lower left corner–with the Sweet Plum Memento Marker directly and then stamp the sprayed panel. Flip the panel 180 degrees (so the top is now the bottom) and repeat the process to add a stamped image to each corner.
Step 4: Ink blend Perfect Plumeria VersaMagic Chalk Ink around the border of the card panel, overlapping with the stamped decoration just added. Then ink blend the edge of the panel with Midnight Black VersaMagic Chalk Ink.
Step 5: Die cut a piece of black watercolor paper with a frame die. Then spray the die cut with Rose Gold Sheer Shimmer Craft Spray and let dry. If desired, repeat this process to add more shine and color.
Step 6: Fussy cut the Death’s-Head Moth, then use a sponge dauber to ink blend the outer part of the wings with Perfect Plumeria VersaMagic Chalk Ink.
Step 7: Spray the moth with Angel Pink Fireworks! Shimmery Craft Spray and allow to dry.
Steps 8 and 9: Stamp a border and a sentiment on a piece of watercolor paper with Nocturne VersaFine Clair ink. Heat emboss with Clear Mboss embossing powder. Then fussy cut the border. Then ink blend the edges of the sentiment with Perfect Plumeria VersaMagic Chalk ink with a sponge dauber. Then lightly spray the sentiment with Rose Gold Sheer Shimmer Craft Spray. Allow the spray to dry.
Step 10: Glue the frame, Death’s-Head Moth and sentiment onto the background panel.
Step 11: Die cut a piece of sparkly black cardstock with a larger panel die cut. Glue it behind the sprayed panel as a matte layer.
Step 12: Glue embellishments onto the panel and finish the card by gluing the whole thing onto an A2-sized card base.
Other • Crafty Meraki – Embellishments – Meraki Sparkle Gold • Erin Lee Creative – Paper – Las Vegas Sparkly Cardstock • Gina Marie Designs – Die set – Big and Little Chain Rectangle die set • Whimsy Stamps – Stamp Set – Exquisite Beauty stamp set • Whimsy Stamps – Die Set – Forever Cameo Frames die set • Watercolor paper • Paper Trimmer • Scissors • Glue