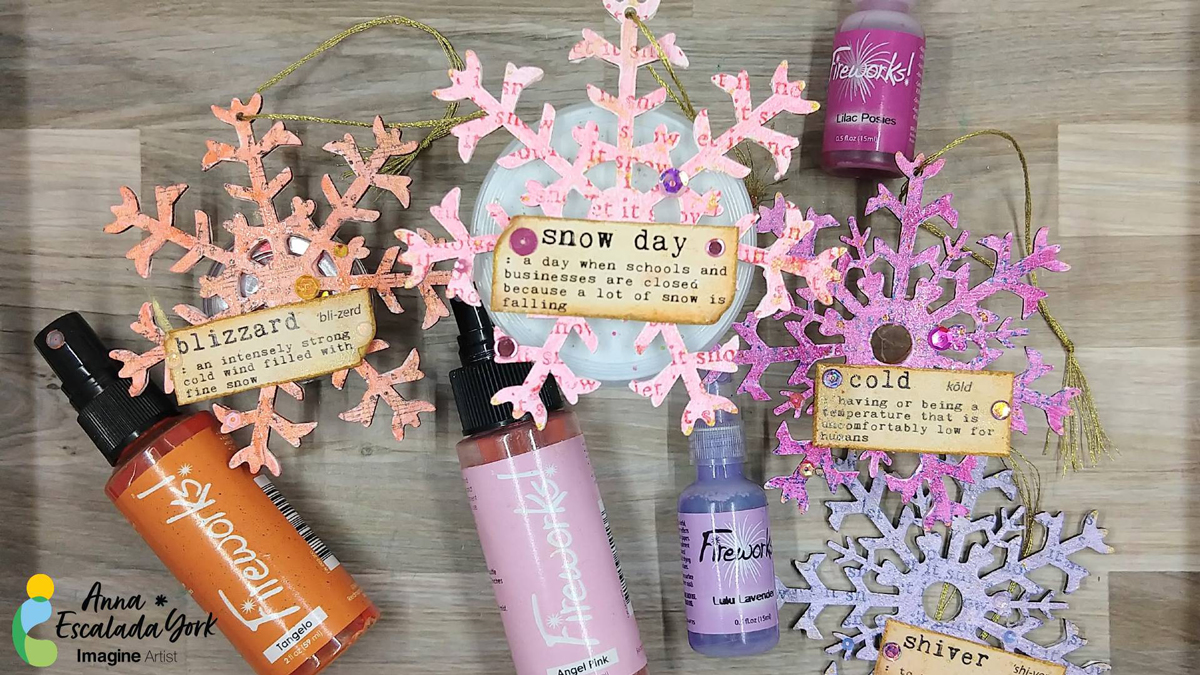
When I saw these fun chipboard snowflake ornaments in my local craft store, I knew I wanted use some Fireworks! spray to make them shine.
Skill: Intermediate Time: 2 hours (active time) + dry time
Directions:
Step 1: Cover the chipboard ornaments with a layer of Gesso. Allow to dry.
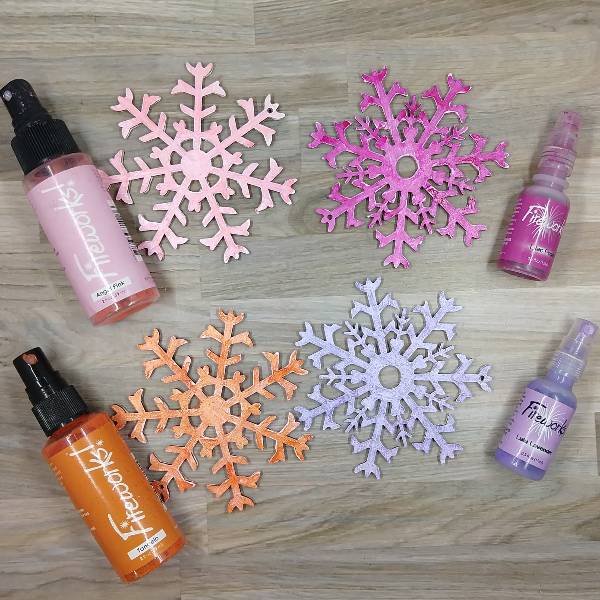
Step 2: Spray each of the ornaments with a different color of Fireworks! Craft Spray: Angel Pink, Lilac Posies, Lulu Lavender, and Tangelo. Allow the spray to dry, and then spray a second time to enhance the color. (I chose to dry the spray to speed up the process but you could allow it to air dry.)
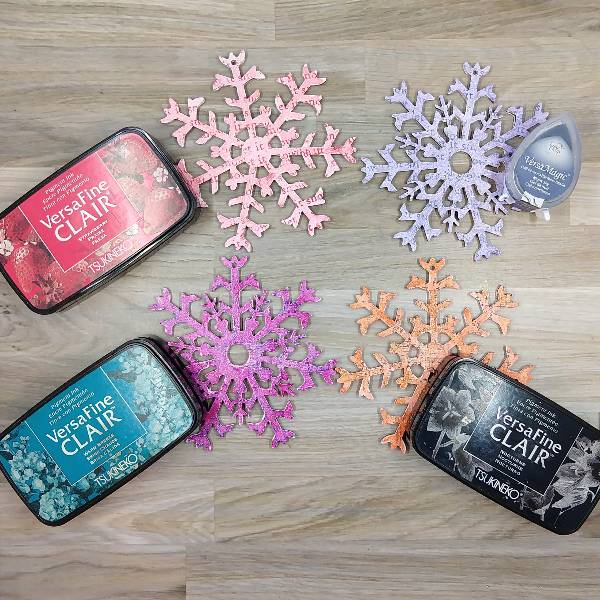
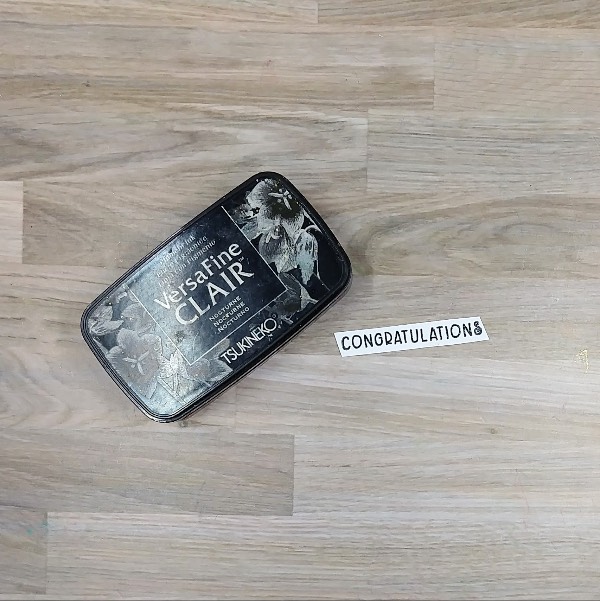
Step 3: Use one of two small stamps to add some texture and color to each of the ornaments: Warm Breeze VersaFine Clair ink (on the Lilac Posies Fireworks! Craft Spray), Nocturne VersaFine Clair ink (on the Tangelo Fireworks! Craft Spray), Strawberry VersaFine Clair ink (on the Angel Pink Fireworks! Craft Spray), and Night Sky VersaMagic Chalk ink (on Lulu Lavender Fireworks! Craft Spray). Heat emboss each of the snowflakes with clear embossing powder.
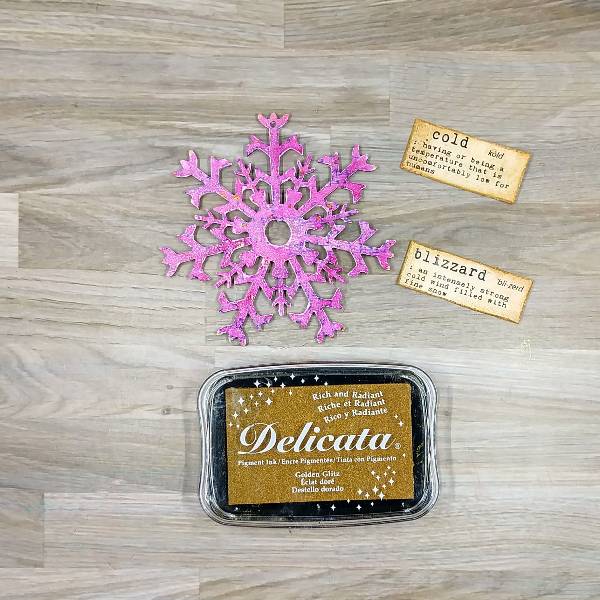
Step 4: Cut out and distress the edges of 4 pre-printed winter sentiments. Then press the edges into the Golden Glitz Delicata ink pad. Heat emboss each of the sentiments with clear embossing powder.
Then press the Golden Glitz Delicata ink pad onto a piece of acetate packaging and spray with water. Then press the acetate packaging onto each of the ornaments to add gold shimmer.
Allow to dry or dry with a heat tool. Then press the edges of the ornament into the ink pad. Allow to dry.
Step 5: Glue the sentiment strips onto the ornaments. Glue sequins onto the ornament and strips. Add a loop of golden embroidery thread through the hole in each ornament to finish the project.
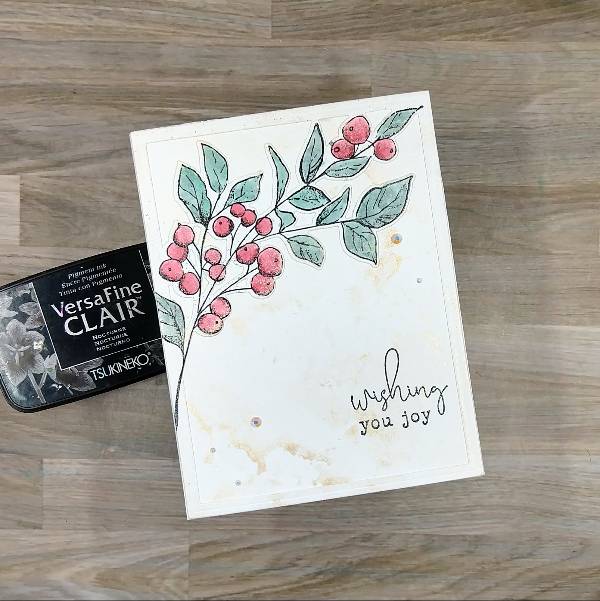
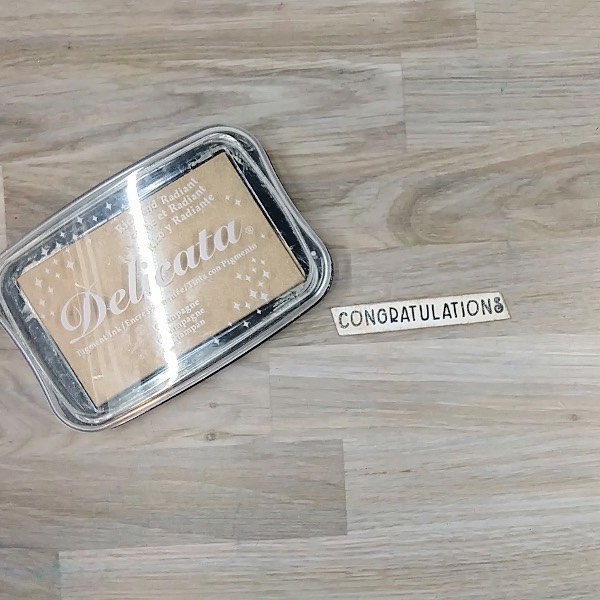
I was inspired to make a minimalist holiday card to allow the main botanical image to shine as the focal point. But I also knew that I wanted it to be shiny, so pulled out my current favorite Delicata color-Champagne- to add some subtitle shine.
Skill: Intermediate Time: 1 hour
Directions:
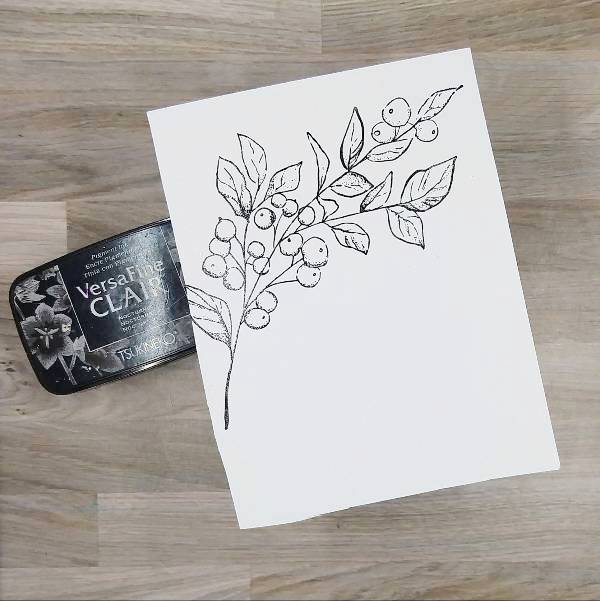
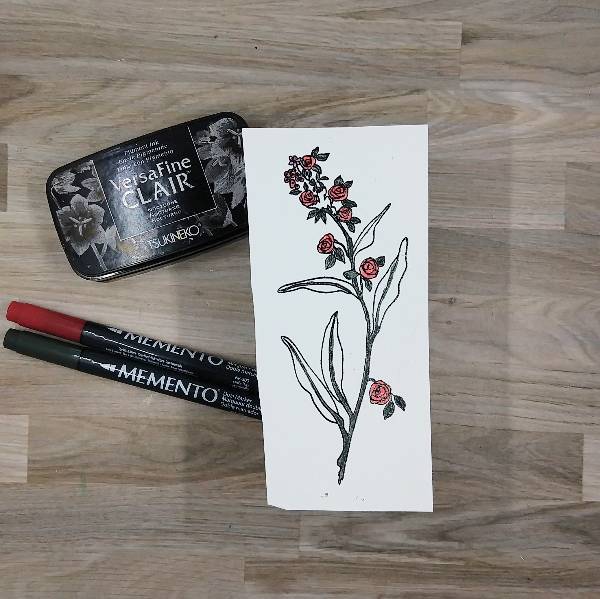
Step 1: Stamp the large botanical image on a piece of watercolor paper with Nocturne VersaFine Clair ink. Then heat emboss with clear embossing powder.
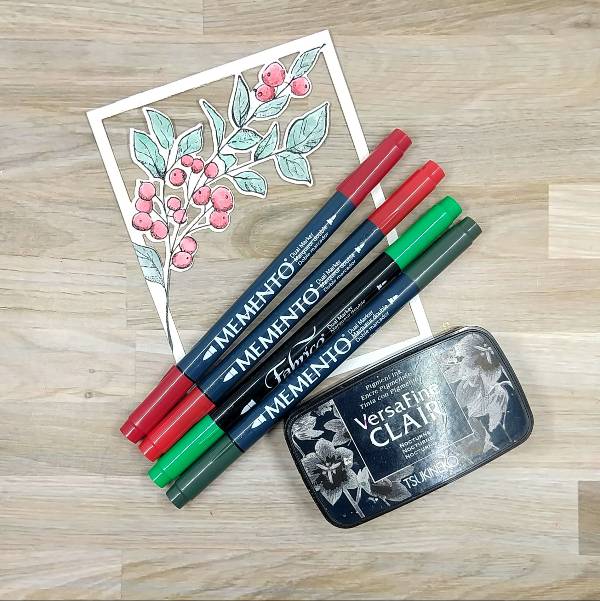
Step 2: Use markers to color in the berries and leaves. Use the Rhubarb Stalk Memento Dual Marker to color over the shaded areas of the berries. Then color a piece of acetate packaging with Lady Bug Memento Dual Marker and spray with water, use this to watercolor in the berries. While watercoloring, make sure to watercolor over all of the berries to blend in the watercolor with the darker red marker already colored in the berries. Then color another area of the acetate packaging with both the Emerald Fabrico Dual Marker and the Northern Pine Memento Dual Marker and spray with more water. Mix the two colors together to create a blend of the two colors and then watercolor the leaves. Allow to dry.
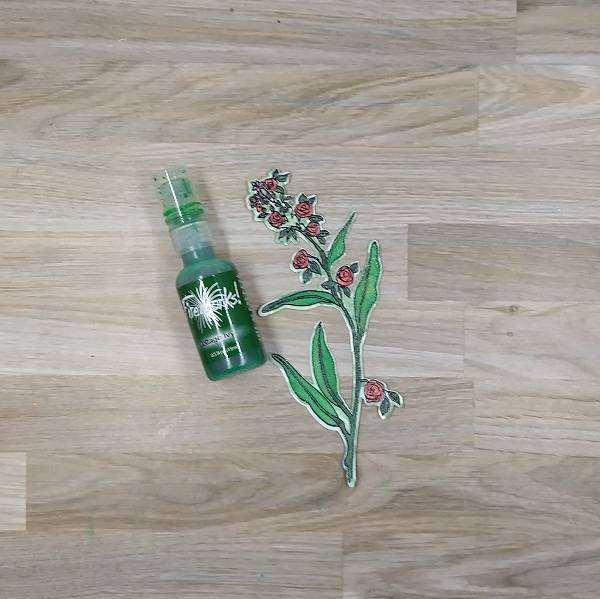
After all of the image dried, die cut the image with the corresponding die.
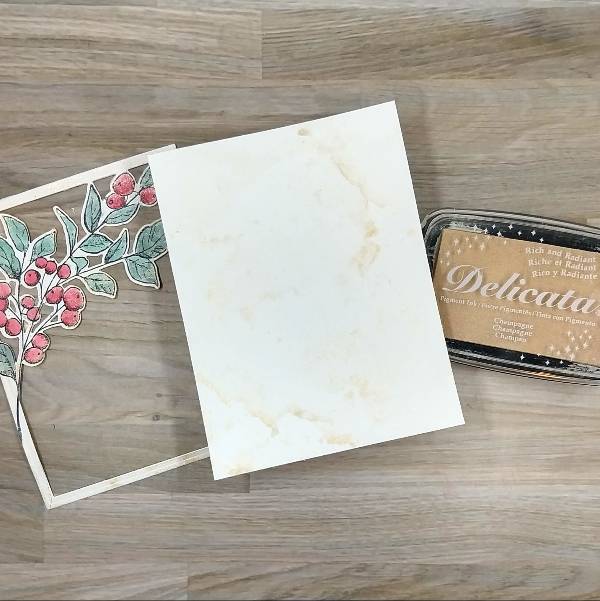
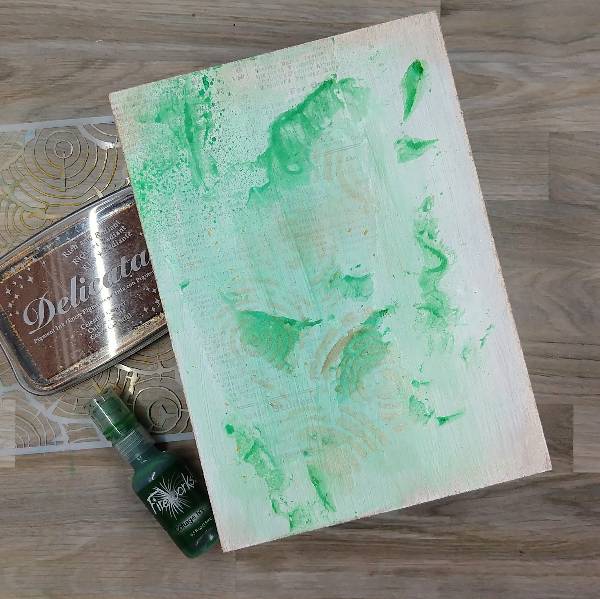
Step 3: Trim a second panel of watercolor paper in the papertrimmer the same size as the die cut frame created in step 2. Then press the Campagne Delicata Ink pad onto acetate packaging and spray with water to watercolor smoosh both the panel and the botanical image/frame to add sparkle to both.
Off camera, I got a small smudge on the frame with my finger. To fix this, I used some of the leftover green watercolor I made for step 2 to splatter green over the frame.
Step 4: Glue the frame onto the watercolor panel. Then stamp a sentiment on the lower right corner of the panel with more Nocturne VersaFine Clair ink and heat emboss with clear embossing powder. Glue the panel onto an A2-sized white cardbase. Glue white rhinestones on the lower left and upper right parts of the card panel to finish the card.
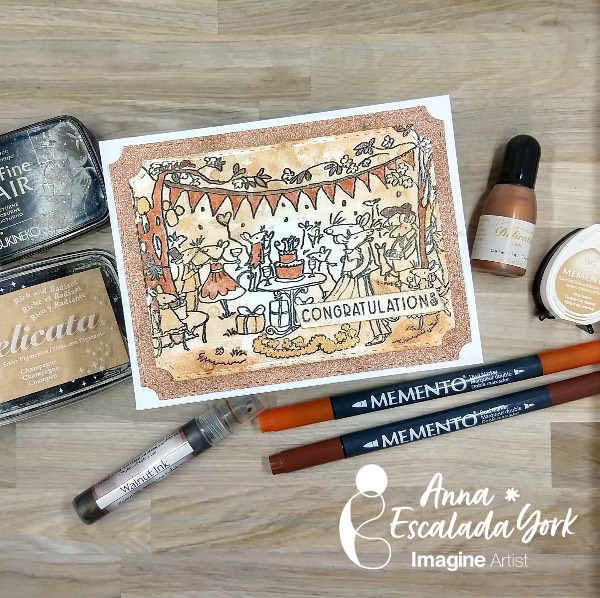
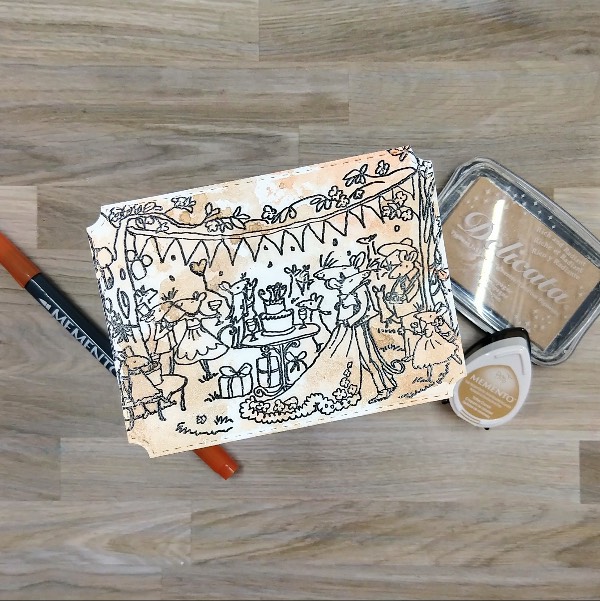
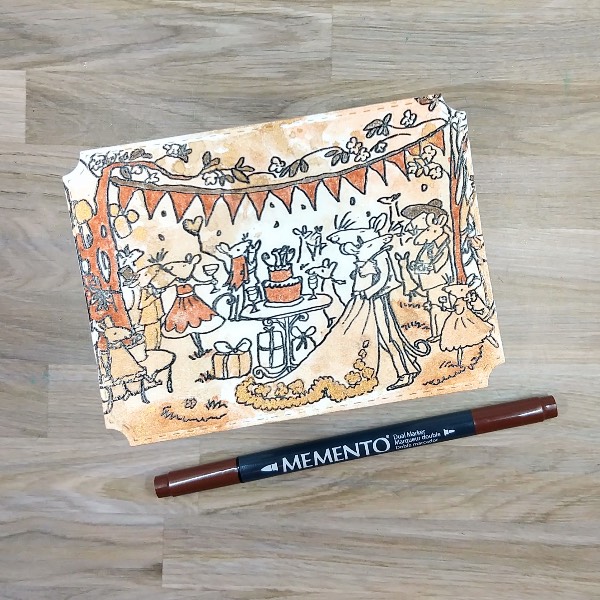
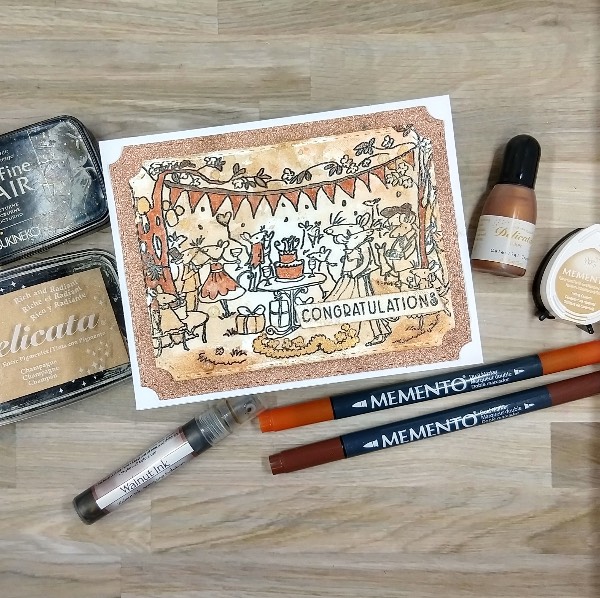
Before making this card, I had no idea all of the different winter wedding color palates there are! I needed to make a winter wedding card, and decided to use some products in a new way (at least for me). Before I share how I made this card, I wanted to share a winter wedding color palate that inspired me:
Skill: Intermediate Time: 2 hours
Directions:
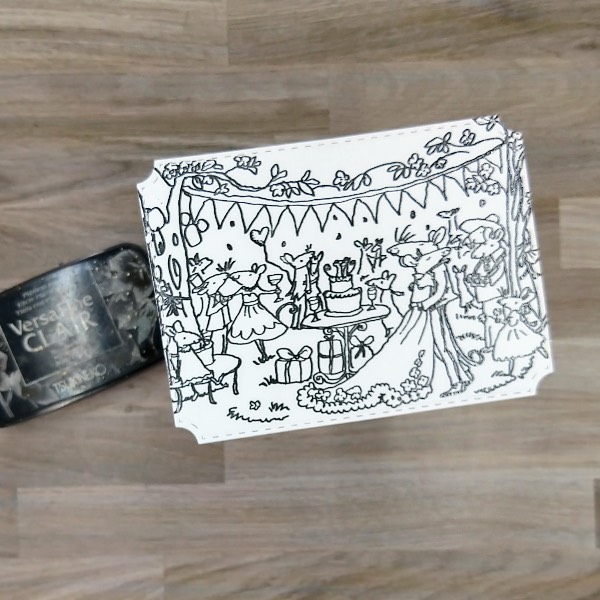
Step 1: I stamped a large wedding scene stamp on a die cut piece of watercolor paper with Nocturne VersaFine Clair ink and then heat embossed it with clear embossing powder.
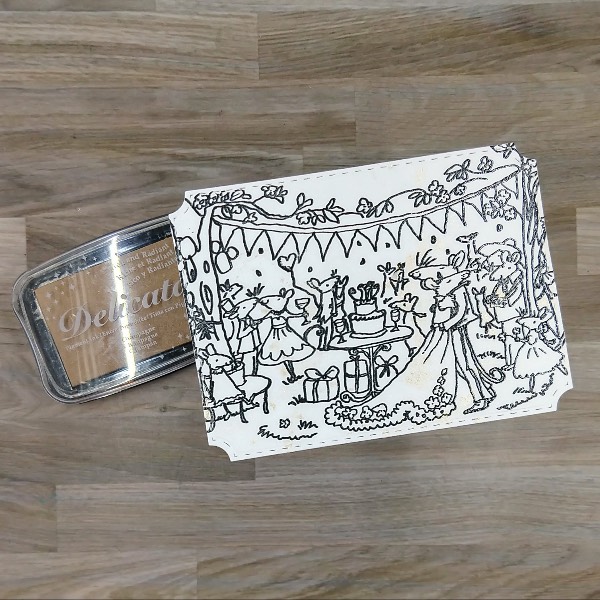
Step 2: Press a Champagne Delicata ink pad onto a piece of acetate packaging and then mix with water. Press the acetate onto the stamped wedding image. (This is very hard to see in the image, but there is a faint sheen on the wedding dress and in other parts of the panel.) Allow to dry.
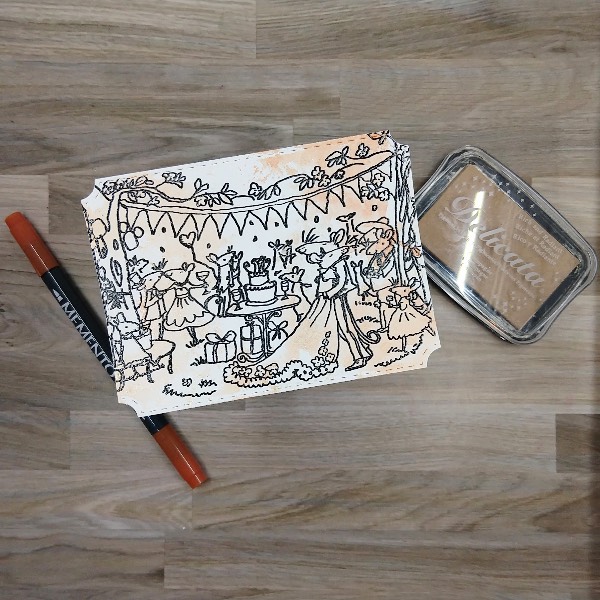
Step 3: Watercolor smoosh the panel with a second layer of the Champagne Delicata ink. Then scribble Potter’s Clay Memento Dual Marker onto the acetate and spray with water. Then press the acetate onto the panel. Allow these layers of color to dry on the panel.
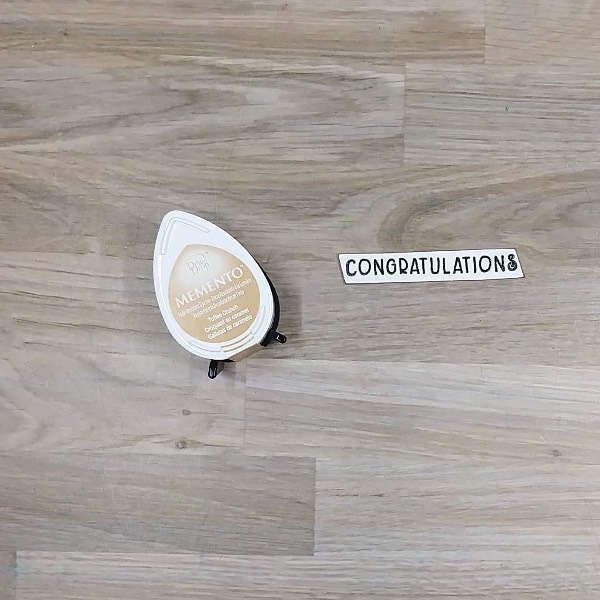
Step 4: Press the Toffee Crunch Memento ink pad onto the same acetate, spray with more water and then watercolor smoosh the panel again.
Step 5: Color in parts of the panel with Potter’s Clay Memento Dual Marker.
Step 6: Add a small amount of Celestial Copper Delicata Inker onto the same acetate packaging and use a small paintbrush to mix with water to thin out the reinker. Then use the paintbrush to paint the trim of the bride’s dress, some of the presents, and some other images with the coppery mix.
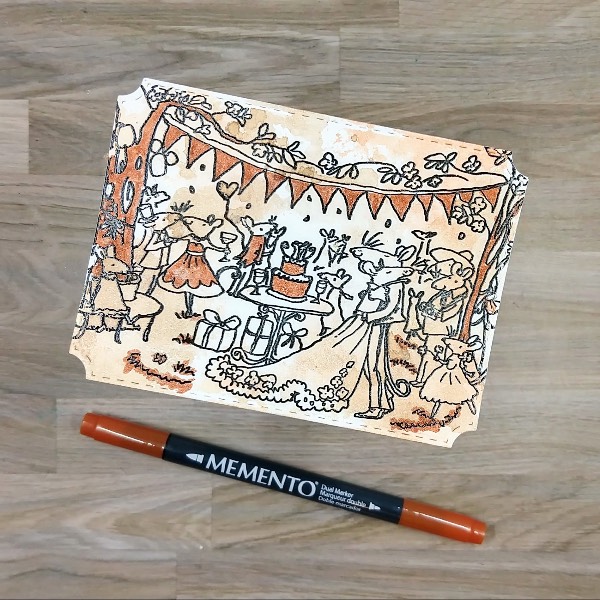
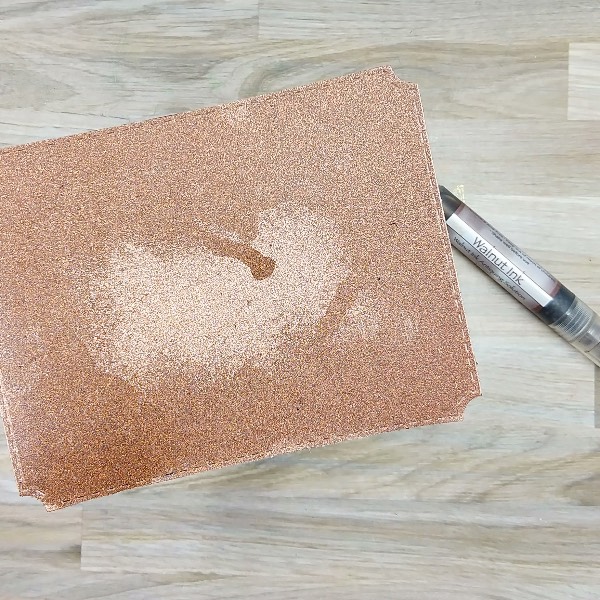
Step 7: Spray Walnut colored Walnut Ink Antiquing Solution onto die cut glitter cardstock to make it darker. (Please note that the panel took a long time to dry. The next time I do this, I plan on adding embossing powder to help it dry more quickly.
Step 8: Color the tree leaves, the pennant ribbon and a couple of the hats with Rich Cocoa Memento Dual Marker.
Step 9: Stamp the sentiment from the same stamp set with Nocturne VersaFine Clair ink and heat emboss with clear embossing powder. Trim the sentiment into a thin strip with the edges at an angle.
Step 10: Press the edges of the sentiment strip into a Toffee Crunch Memento ink pad to color the borders.
Step 11: Press a Champagne Delicata ink pad onto the acetate packaging and then spray with water. Watercolor smoosh the sentiment strip and allow to dry.
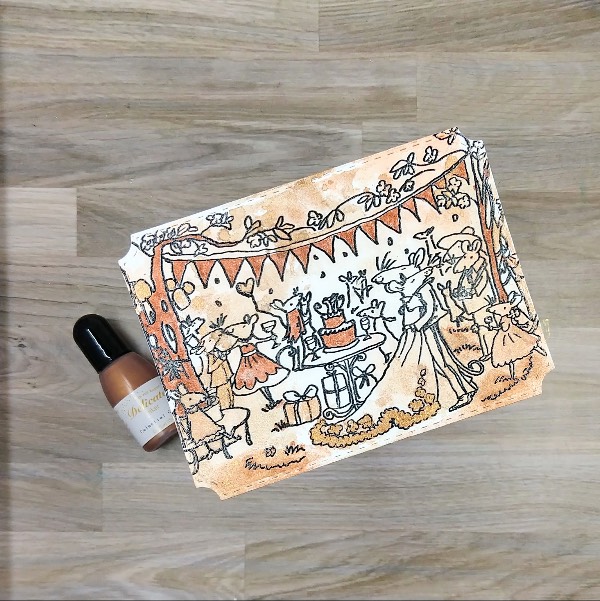
Step 12: Assemble the card. Glue 2 strips of scrap cardstock behind the sentiment and glue the sentiment on the lower right corner of the stamped panel. Then glued the stamped panel onto the sprayed glitter cardstock panel. Glue the whole thing onto an A2-sized white card base.
Glue gems on the bottom left and upper right corners of the card.
Other • Colorado Craft Company – stamp set – Happily Ever After by Anita Jeram • Pink and Main – die set – Notched Corners • Trinity Stamp Company – embellishments – Champagne Twinkle Stardust Rhinestone mix • A2-sized white card base • Clear Embossing Powder • Watercolor paper • Glitter cardstock • Die cutting machine • Paper trimmer Scissors • Glue
I’ve been really enjoying Halloween cards lately and it was so fun to use a bunch of sprays to make this one.
Skill: Intermediate Time: 1.5 hours
Directions:
Step 1: Die cut all of the pieces for the die cut pumpkin out of watercolor paper and then spray the two bottom pieces with Rich Cocoa Fireworks! Craft Spray (bottom-most layer) and Tangelo! Craft Spray (second-largest layer) and let dry.
Step 2: Spray the other three die cut pieces: Dandelion Fireworks! Craft Spray on the middle die cut, Gold Sheer Shimmer Craft Spray on the upper part of the pumpkin’s body, and Bamboo Leaves Fireworks! Craft Spray for the pumpkin stem. Allow all the layers to dry.
Step 3: Glue the layers of the pumpkin together and then ink blend the edges of the pumpkin with Nocturne VersaFine Clair ink and a sponge dauber.
Step 4: Ink blend the pumpkin stem die cut with Nocturne VersaFine Clair ink and a sponge dauber.
Step 5: Spray the whole pumpkin die cut with more Gold Sheer Shimmer Craft Spray and set aside to dry.
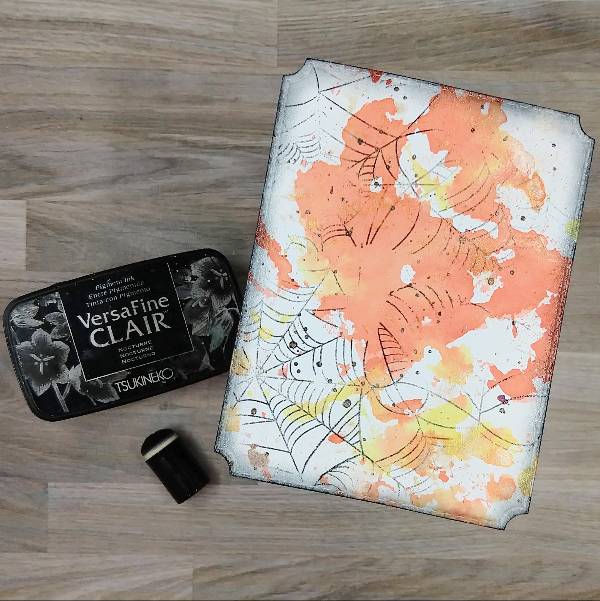
Step 6: Spray the Dandelion and Tangelo Fireworks! Craft Spray onto a piece of acetate packaging and use it to watercolor smoosh a panel of watercolor paper. After the spray dries, die cut it with an A2-sized die cut.
Step 7: Splatter Rich Cocoa Fireworks! Craft Spray onto the background panel with the stick from the bottle’s spray nozzle. Then use a Nocturne VersaFine Clair ink to partially stamp the panel as well as ink blend the edges. Heat emboss the cobwebs and ink blended edges with clear embossing powder
Step 8: Press the Nocturne VersaFine Clair ink pad onto a small piece of watercolor paper to color it black.
Step 9: Die cut the now black piece of watercolor paper to create the sentiment and spray it with Gold Sheer Shimmer Craft Spray.
Step 10: Die cut a piece of vellum with the sentiment’s shadow and glue both layers together.
Step 11: Assemble the card. Glue the pumpkin’s stem and the rest of the pumpkin together and glue it approximately in the center of the panel. Glue the sentiment on the right side of the pumpkin. Then add orange and yellow sequins onto the card. To finish the card, glue the whole card panel onto an orange A2-sized card base.
Pink and Main – die set – Notched Corners Pretty Pink Posh – die set – Fringe Pumpkin Simon Says Stamp – die cut – Trick or Treat 2 Simon Says Stamp – sequin mix – Autumn Leaves (retired) Tailored Expressions – stamp – Spiderweb Cling & Clear Combo A2-sized orange card base Clear Embossing Powder Watercolor paper Die cutting machine Scissors Glue
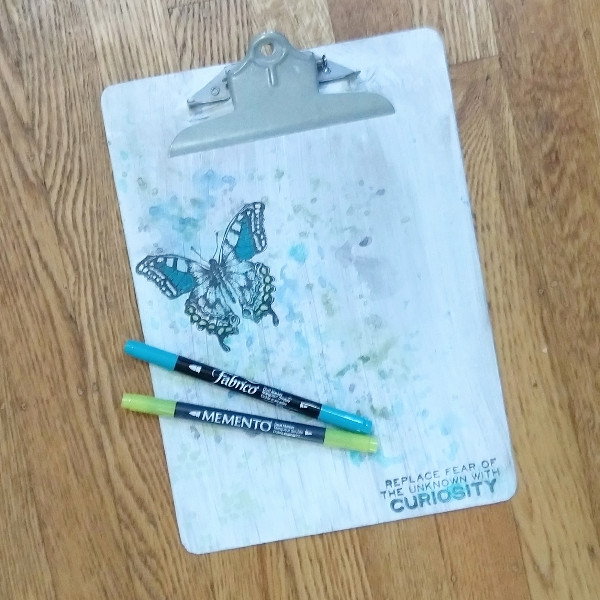
Step 1: Paint a thin layer of thin layer of white gesso onto an old clipboard and set aside to dry. (I used some old spools of washi tape to hold open the metal clip so that it wouldn’t get stuck in the drying gesso.)
Step 2: Spray Pear Tart Fireworks! Craft Spray through a detailed heart stencil on the lower left corner of the clipboard. Emboss with clear embossing powder to set the spray.
Here is a closeup of Step 2:
Step 3: Stamp a large butterfly in the upper left part of the clipboard base and a sentiment (or maybe in this case affirmation) in the lower right corner with Nocturne VersaFine Clair ink and then heat emboss both with clear embossing powder.
Step 4: Watercolor smoosh the clipboard with a variety of blue, green and black watercolor in layers.
Starting out with Turquoise Gem VersaMagic Chalk Ink, press the ink pad onto a scrap piece of acetate packaging and spray with water. Then press the acetate over the butterfly to create a light blue area around the butterfly. Press the remaining color from the acetate in a diagonal line across the clipboard from the upper left corner to the lower right corner into the stamped sentiment.
Repeat the process with Hint of Pesto VersaMagic Chalk Ink.
Then draw on the acetate with Danube Blue Memento Dual Marker and spray with water; this time focus most of this darker color around the butterfly and splatter the clipboard with the remainder of the dark blue watercolor.
Finally, draw on the acetate with Tuxedo Black Memento Dual Marker and spray with water. Use the black watercolor to splatter the butterfly (and to cover up any blemishes left behind when stamping).
Let everything dry.
Step 5: Color in parts of the butterfly image with Tropical Lagoon Fabrico Dual Marker (center of the upper wings) and Pear Tart Memento Dual Marker (small circles on the edge of the lower wings). Color in the word curiosity in the sentiment with more of the Tropical Lagoon Fabrico Dual Marker. Heat emboss with clear embossing powder.
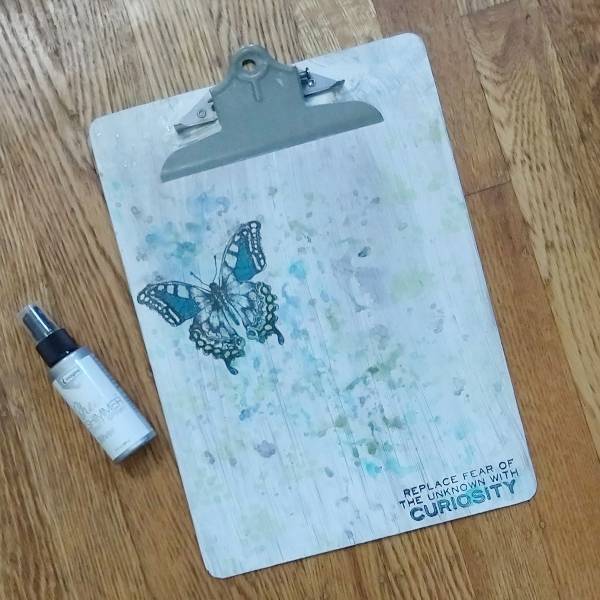
Step 6: Spray Silver Sheer Shimmer Craft Spray onto the acetate and watercolor smoosh it onto the clipboard. Splatter any remaining spray on the acetate onto the clipboard. If larger individual splatters are desired, unscrew the top and use the tube/straw from the spray bottle to dab large blobs of Silver Sheer Shimmer Craft Spray onto the clipboard and finish the project.
Other • Golden – Gesso Semi-Opaque Acrylic Primer • Stampers Anonymous and Tim Holtz – stamp set – Perspective CMS213 Clear Embossing Powder • Foam paint brush (for the gesso) Thin paint brush (for splattering) Small detail stencil in my stash
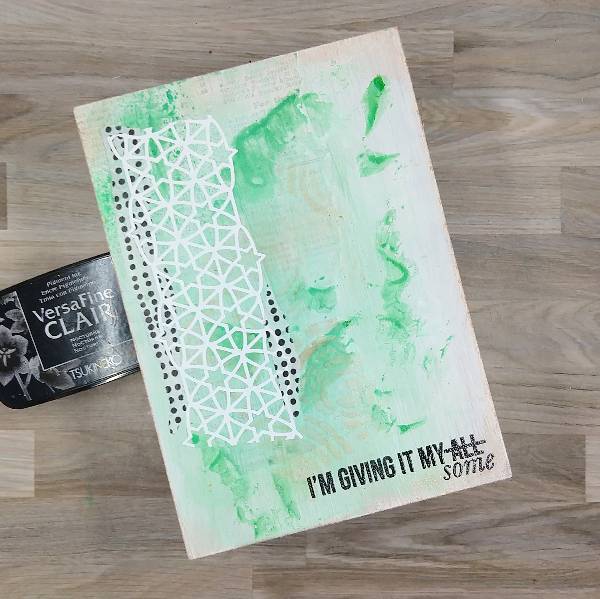
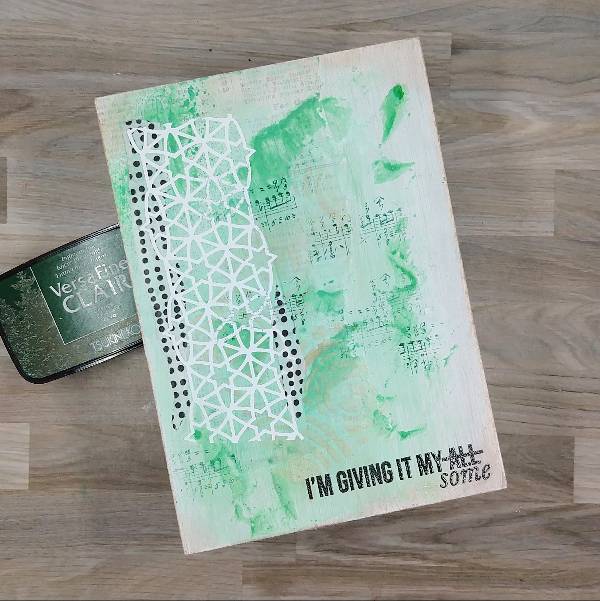
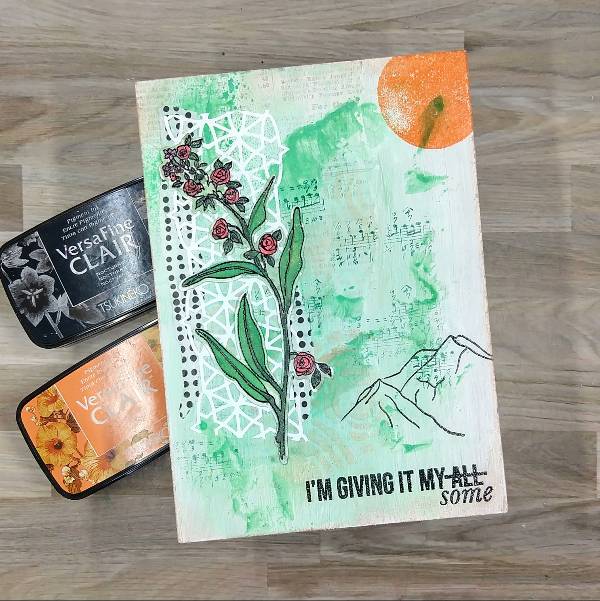
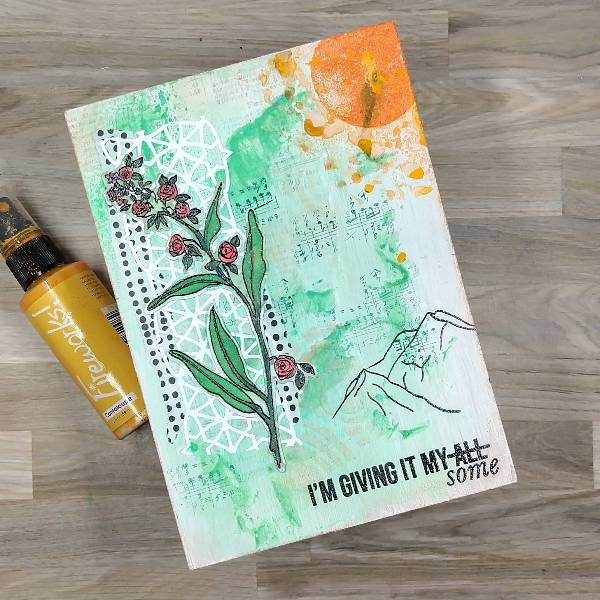
As a mom of a teen and tween, I wanted to make a snarky piece of home decor that would make them smile. So I decided to make a pretty piece of art that I was going to put up in our dining room.
Skill: Intermediate Time: 3 hours
Directions:
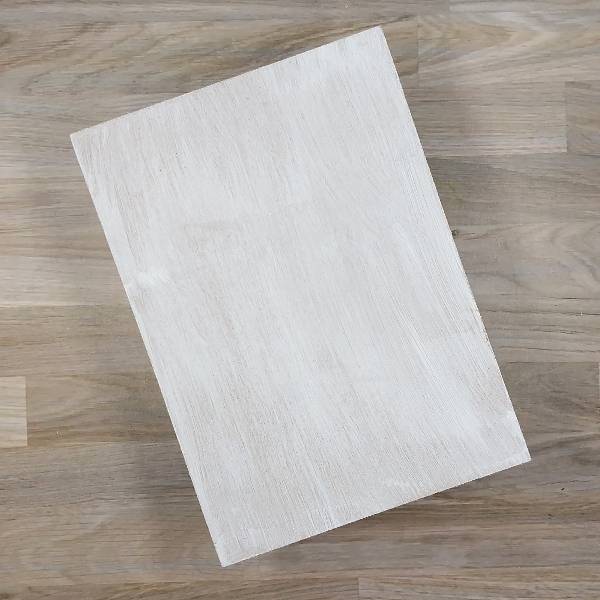
Step 1: Paint a thin layer of white gesso onto a 5” by 7” medium density fiberboard (MDF) panel.
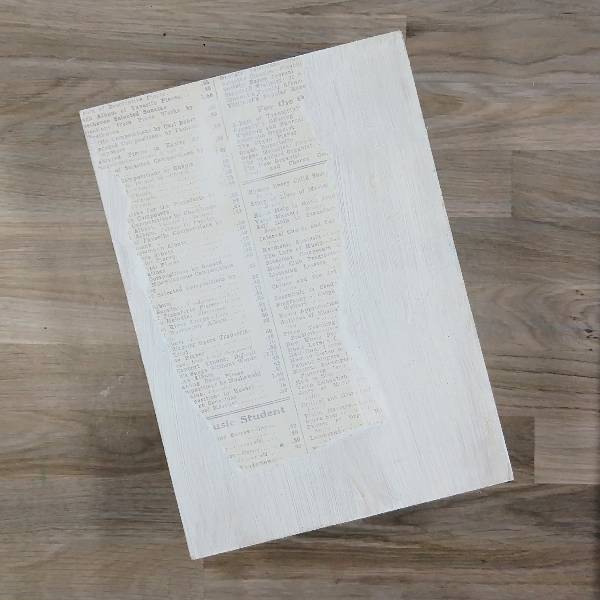
Step 2: Glue a ripped piece of text-based patterned paper onto the left side of the panel, making sure that the paper doesn’t go off the side of the fiberboard panel. Then paint over the whole panel again with more white gesso.
Step 3: Stamp a long, floral image onto white watercolor paper with Nocturne VersaFine Clair ink and then heat emboss it with clear embossing powder. Then color the main branch and ribs of the leaves with Northern Pine Memento Dual Marker and the flowers with Lady Bug Memento Dual Marker.
Step 4: Die cut the long, floral image. Spray Cottage Ivy Fireworks! Shimmery Craft Spray onto a piece of scrap acetate packaging and watercolor paint the leaves and edges of the floral image green, making sure to blend the darker marker color with the lighter spray. Set aside to dry.
Step 5: Add texture to the fireboard panel. Use some of the remaining Cottage Ivy Fireworks! Shimmery Craft Spray mixed with more white gesso to create a light green paint. Paint the center part of the fireboard panel with the light green paint. Then watercolor smoosh more of the Cottage Ivy Fireworks! Shimmery Craft Spray (without any gesso) onto the panel to add texture. After the spray and paint have dried, press Celestial Copper Delicata Ink through a circular stencil overlapping the patterned paper. Then press the Celestial Copper Delicata Ink pad around the edges of the panel.
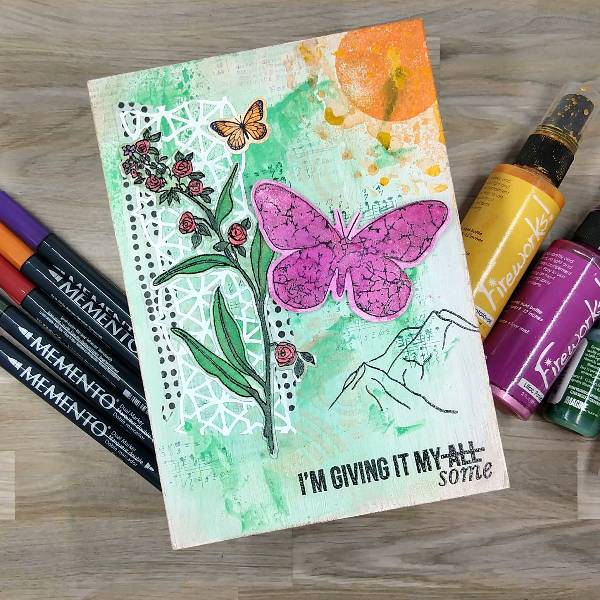
Step 6: Stamp a large butterfly on another piece of watercolor paper using Nocturne VersaFine Clair ink and heat emboss with more clear embossing powder. Then spray Lilac Posies Fireworks! Shimmery Craft Spray onto more scrap acetate packaging and watercolor spray the butterfly. Spray the whole thing with Sparkle Sheer Shimmer Craft Spray, which forces the Lilac Posies spray to diffuse outside of the butterfly’s outline. After the spray dried, die cut the butterfly with the corresponding die. Finally, paint the butterfly a second time with more of the Lilac Posies Fireworks! Shimmery Craft Spray to deepen the color. Set aside to dry.
Step 7: Return to the background panel. Attach two types of washi tape to the left side of the panel–small pieces of black and white dotted washi tape and a white piece of washi tape that comes die cut in a lacy geometric pattern.
Then stamp a sentiment on the lower right part of the panel with more Nocturne VersaFine Clair in and heat emboss with more clear embossing powder.
Step 8: Using a small musical note stamp, partially stamp the panel multiple times with Spuce VersaFine Clair ink.
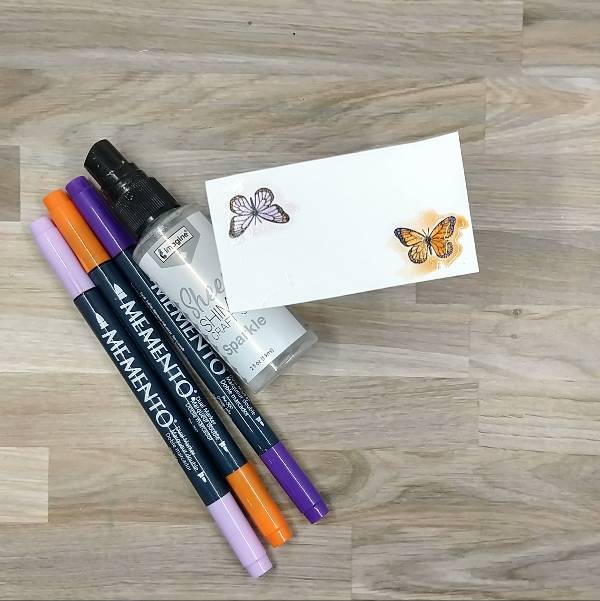
Step 9: Stamp the smaller butterfly twice with more Nocturne VersaFine Clair ink and heat emboss them with clear embossing powder. Then color them in with Lulu Lavender and Tangelo Memento Dual Markers (orange butterfly) and with Tangelo and Grape Jelly Memento Dual Markers (purple butterfly). Then spray both butterflies with Sparkle Sheer Shimmer Craft Spray. Once the spray had dried, die cut the butterflies with their corresponding die.
(In the final piece, only the orange butterfly colored with Tangelo and Lulu Lavender Memento Dual Markers was used.)
Step 10: Stamp part of the mountain outline stamp on the lower right part of the panel with more Nocturne VersaFine Clair ink and heat emboss with clear embossing powder. Then stamp part of the sun stamp with Summertime VersaFine Clair Ink.
Step 11: Spray around the sun with Cantaloupe Fireworks! Shimmery Craft Spray. Use a paintbrush or your finger to move dots of the Cantaloupe spray to make the spray less uniform and more organic.
Step 12: Glue the flowers and small butterfly onto the panel. Attach the larger butterfly to the panel with foam tape. If desired, the outer tips of the top wings can be given additional dimension with two layers of foam tape, forcing them to curve.
Other Altenew – die set – All Things Orange Altenew – stamp set – All Things Orange Altenew – foam tape – Instant Dimension Foam Tape Altenew – washi tape – Many Dots Art Alternatives – MDF Panel (5” x 7”) Golden – Gesso Semi-Opaque Acrylic Primer Ink Road Stamps – stamp set – Roadies 8 (sentiment stamp) Visible Image – die set – Antisocial Butterfly Visible Image – stamp set – Antisocial Butterfly Circular stencil Die cut washi tape Watercolor paper Vellum Pencil Paintbrush Die cutting machine Paint brush Scissors Glue Text-based patterned paper Clear embossing powder