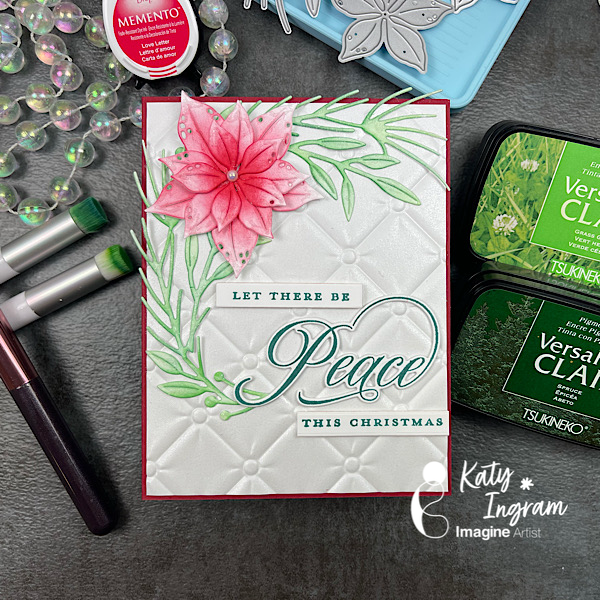
Hello Friends! Katy here with a holiday video using Versafine Clair inks and Love Letter Memento Ink. With some simple touches and color combos you can create a stunning elegant holiday card in just a few steps. Video has all the details. Thanks for watching.
Other Products Used The Greetery Scripted Holiday Sentiments Stamp Set The Greetery Scripted Holiday Sentiments Die Set White Cardstock White Metallic Cardstock Stamp positioner tool Foam Tape
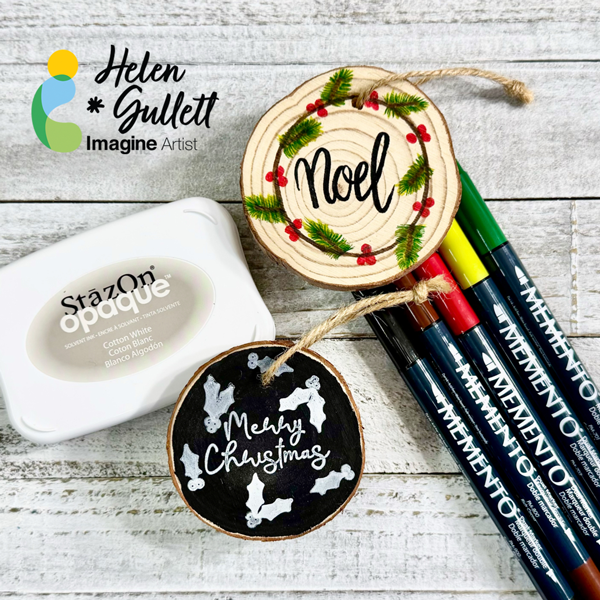
Hello crafty friends… Can you believe it? The holiday season is here!!! Making Christmas ornaments is one of my favorite things to do. Today let’s make some handmade ornaments together. These ornaments can be additions to your own Christmas tree or you can give them to your families and friends.
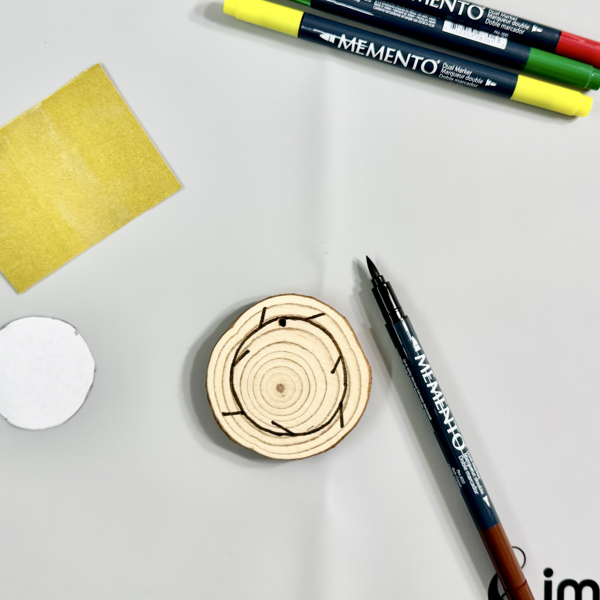
Step 1 First, make sure your wood slice surface is smooth and clean. There are pre-sanded wood slices available online, too. If your wood slices were not sanded yet, you can sand it with sanding paper. Use a dry paper towel to clean the surface well.
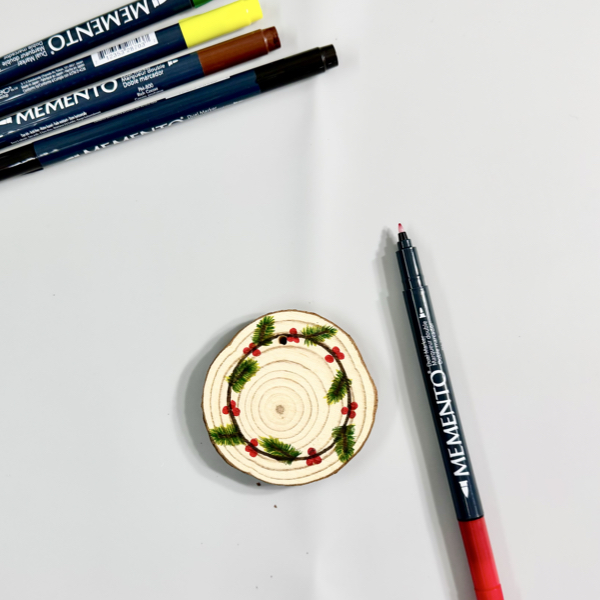
Draw a circle and branches with the Rich Cocoa Memento Marker brush tip. You also can use a circle template to draw the circle.
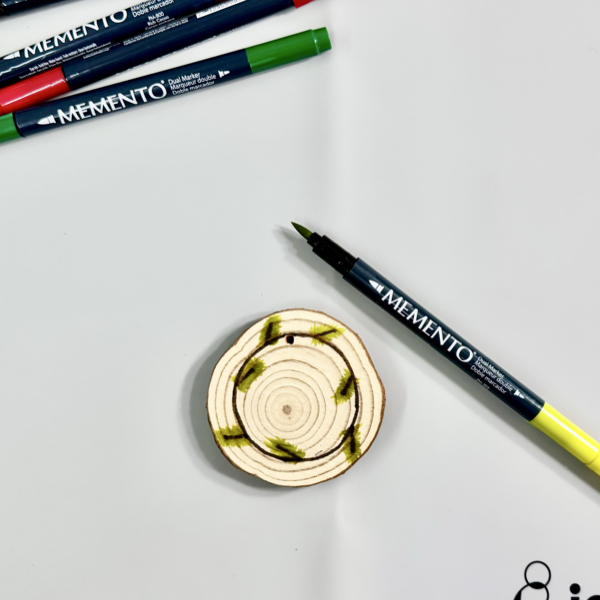
Step 2 Use the brush tip of the Pear Tart Memento Marker to draw the layer of pine needle leaves with outward flicking motion on each branch.
Step 3 Draw the second layer of the pine needle leaves on each branch using the fine tip of Cottage Ivy Memento Marker.
Step 4 Draw the berries on the wreath using the fine tip of the Lady Bug Memento Marker. Simple doodle 3 little circles.
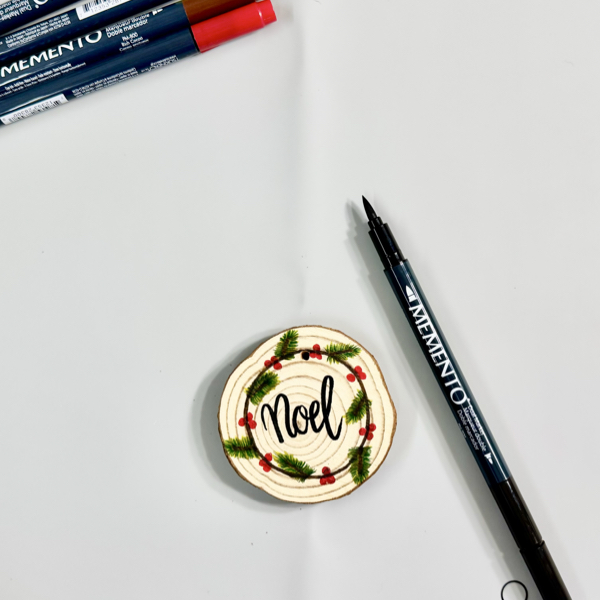
Step 5 Write lightly the word “Noel” (or any word you want on your ornament) with pencil and then trace it with the Tuxedo Black Memento Marker brush tip. You can skip the pencil if you can do handlettering directly with the marker.
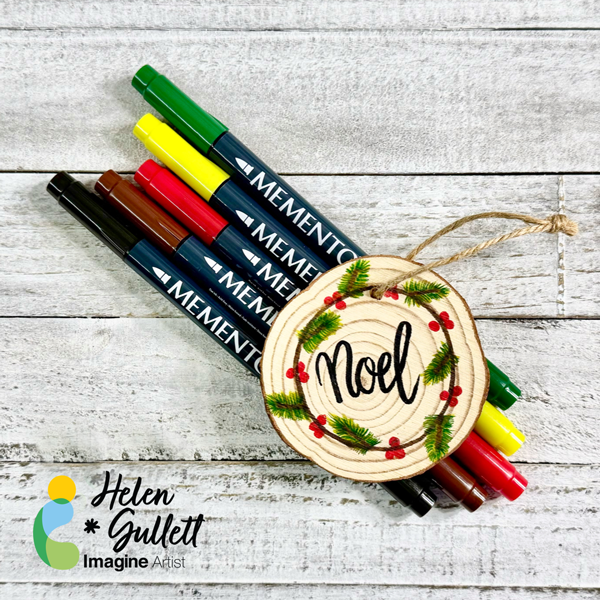
These Memento Markers dry quickly and the ink won’t smudge on the wood surface. Add a piece of burlap twine to the ornament and tie it up as the hanger.
Ornament #2 – Faux Chalkboard Wood Slice Ornament
Directions: For the second ornament we are going to make today is a faux chalkboard wood slice ornament. There are a couple ways to do a faux chalkboard look on a wood slice, today we are going to do simply just painting and stamping.
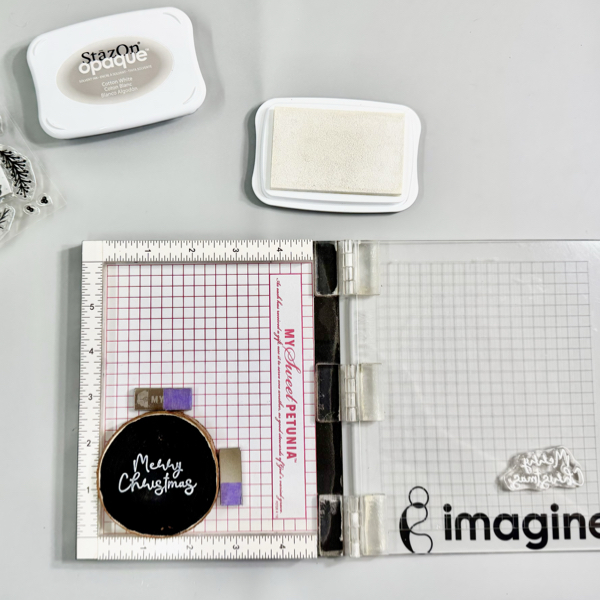
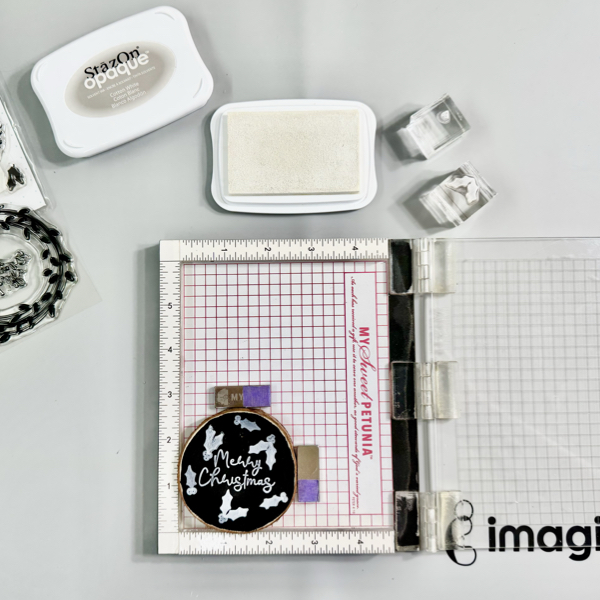
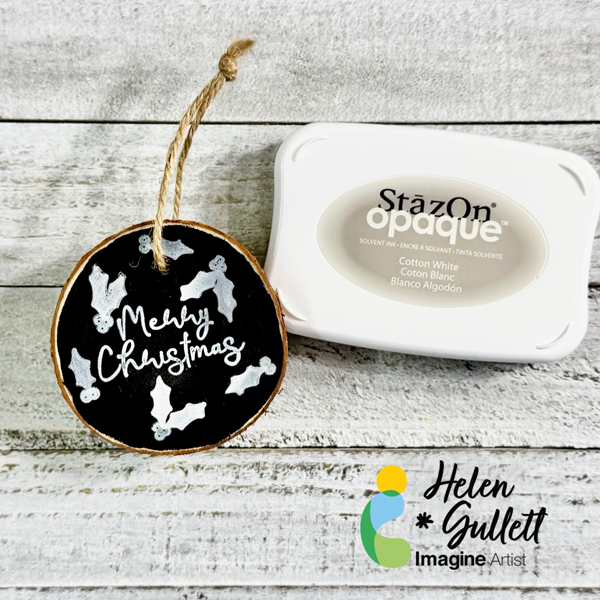
Step 1 Paint the wood with chalkboard paint or multi-surface black acrylic paint. Usually one layer of paint will be enough. Make sure the paint dries well before you do the stamping.
On the wood on a stamping tool and use the magnets to keep it in place or you can use tape on the back of the wood slice and place it on the stamping tool.
On the dried painted surface, stamp the sentiment using StazON Opaque – Cotton White ink.
Step 2 Stamp the holly leaves and berries using StazOn Opaque – Cotton White on the ornament around the sentiment using the stamping tool or small stamping blocks.
When the ink dried well, add a piece of baker twine to the ornament as the hanger.
I hope you like these ornament ideas and you will find it easy to make your own ornaments. Also, making ornaments can be a fun Christmas craft party idea. I love both style ornaments, which one do you like?
Thank you for stopping by our blog today. Have a wonderful day!
Craft Supplies
Imagine Crafts:
Memento Markers (Tuxedo Black, Rich Cocoa, Cottage Ivy, Pear Tart, Lady Bug)
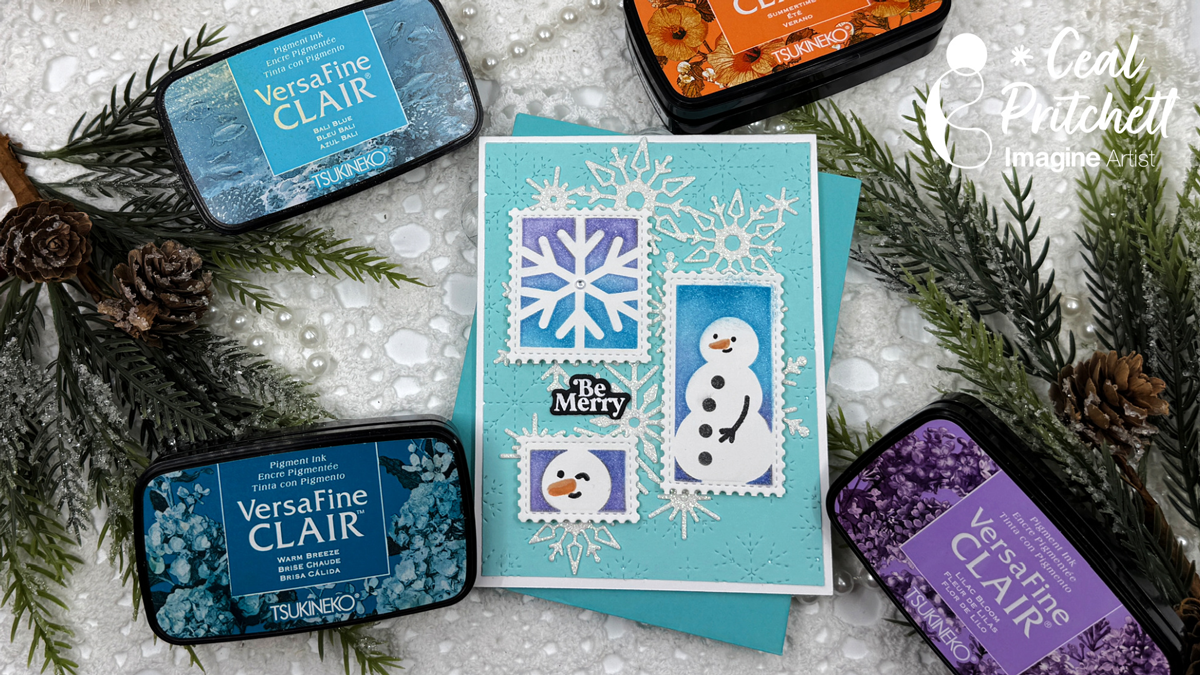
Hello crafty friends! It’s Ceal here. Today I am sharing a postage collage Christmas card with you.
Skill: Intermediate Time: 45 minutes
Directions:
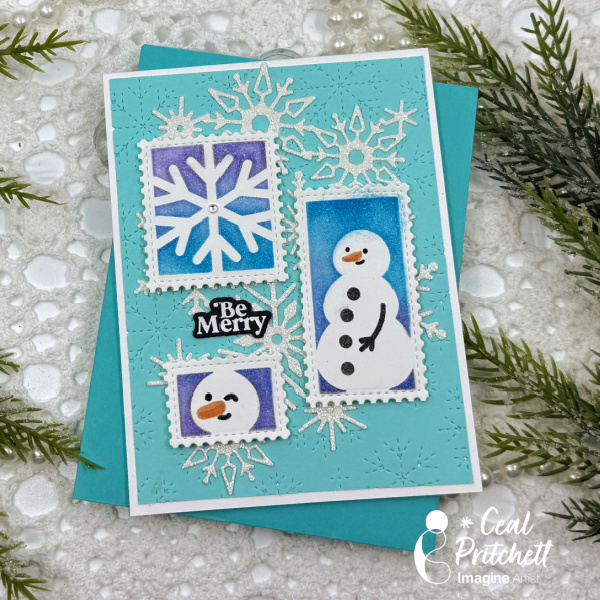
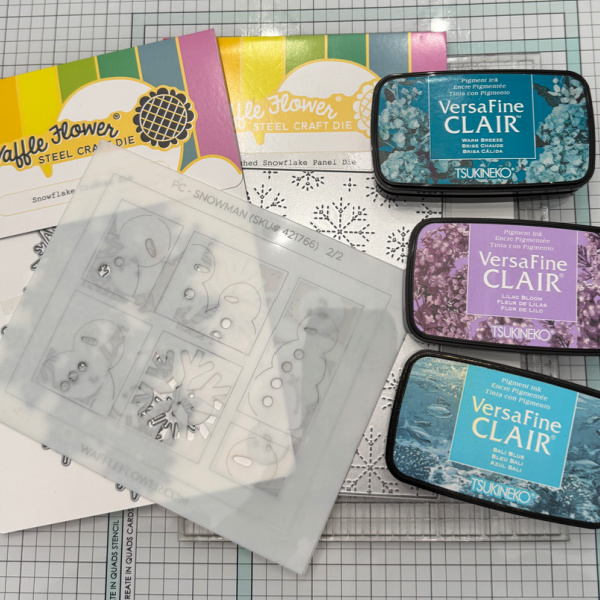
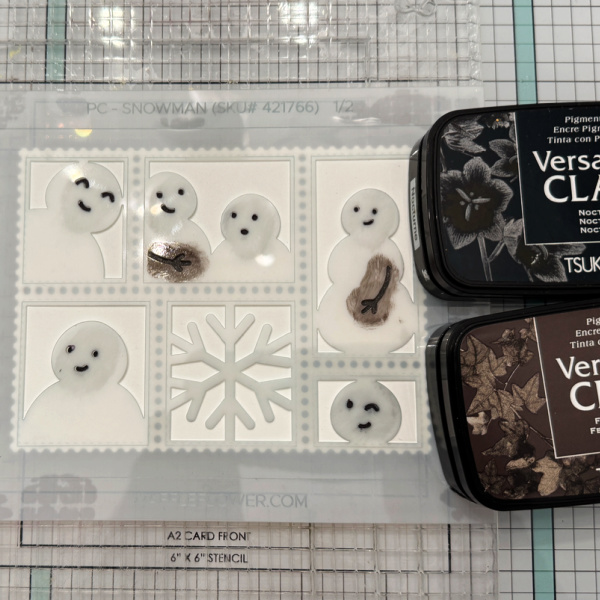
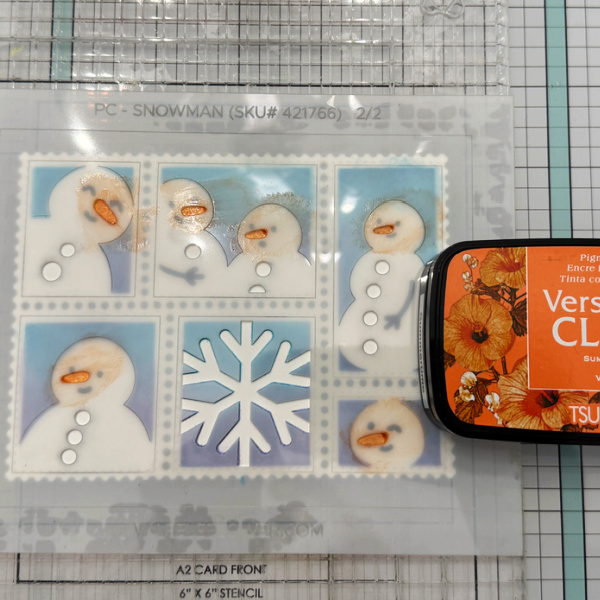
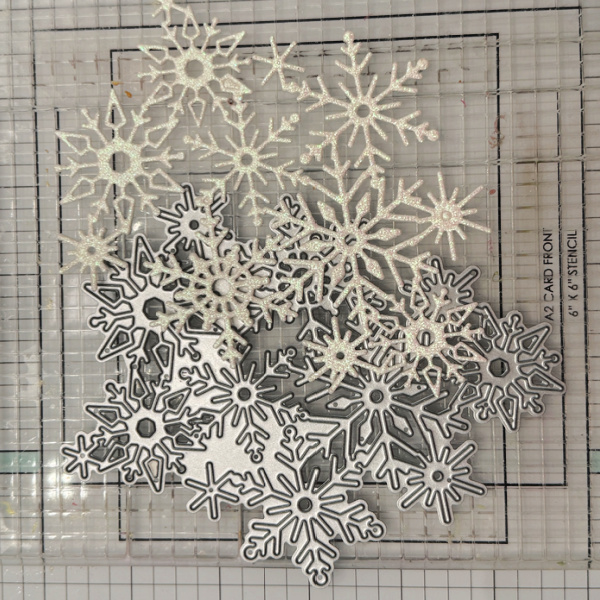
Gather your supplies. To make this card you will need a Postage Collage Layering Stencil, a snowflake cover plate die, a snowflake cluster background die and some inks. The inks I used are listed at the bottom of the tutorial.
Step 1: Cut out a postcard using a postage die. Ink blend VersaFine Clair Nocturne and VersaFine Clair Fallen Leaves for the eyes, mouth and arms on the first stencil.
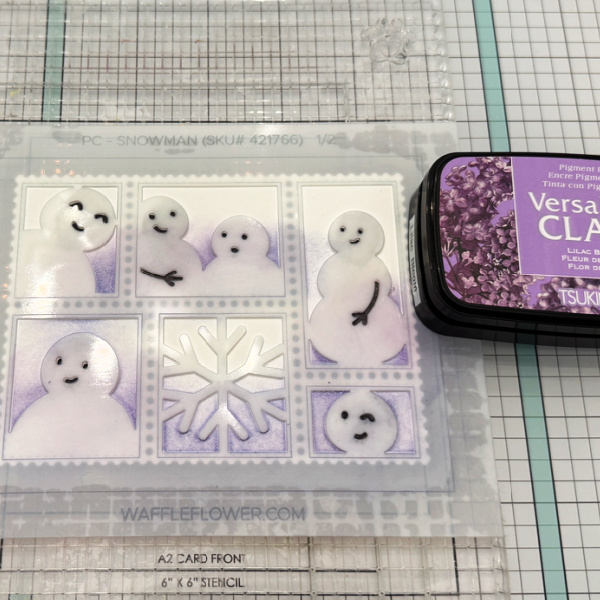
Step 2: Ink blend VersaFine Clair Lilac Bloom over the bottom portion of the first stencil.
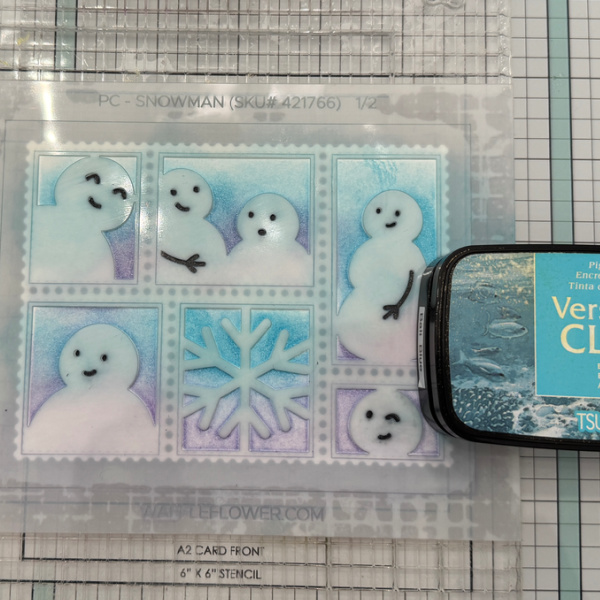
Step 3: Ink blend VersaFine Clair Bal Blue over the middle portion of the first stencil.
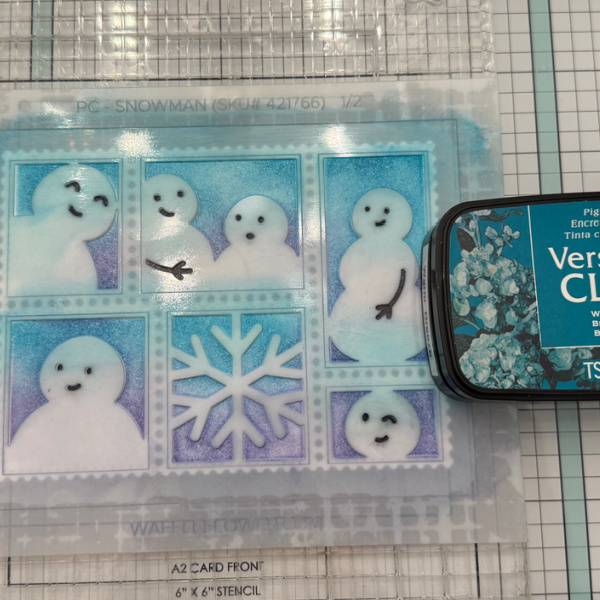
Step 4: Ink blend VersaFine Clair Warm Breeze over the top portion of the first stencil.
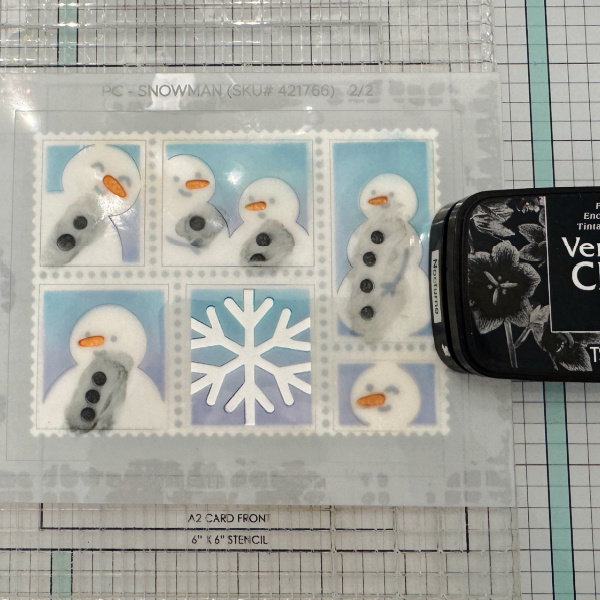
Step 5: Ink blend VersaFine Clair summertime over the noses and VersaFine Clair Nocturne over the buttons on the second stencil.
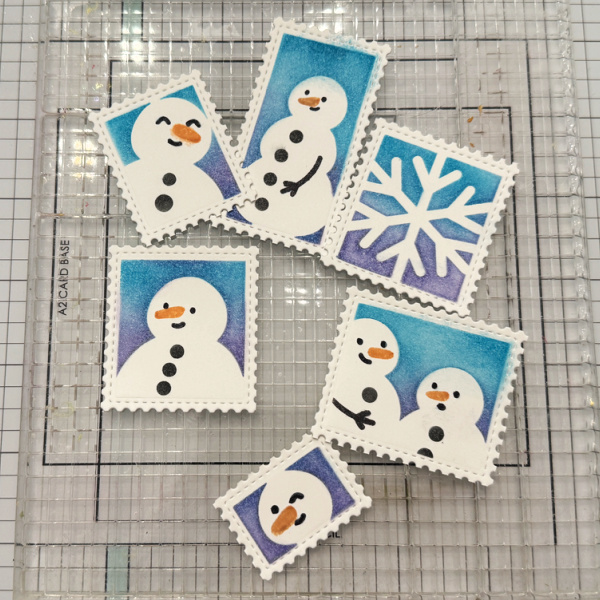
Step 6: Cut apart the postage die to get individual stamps. Choose which ones you want to use on your project and save the rest.
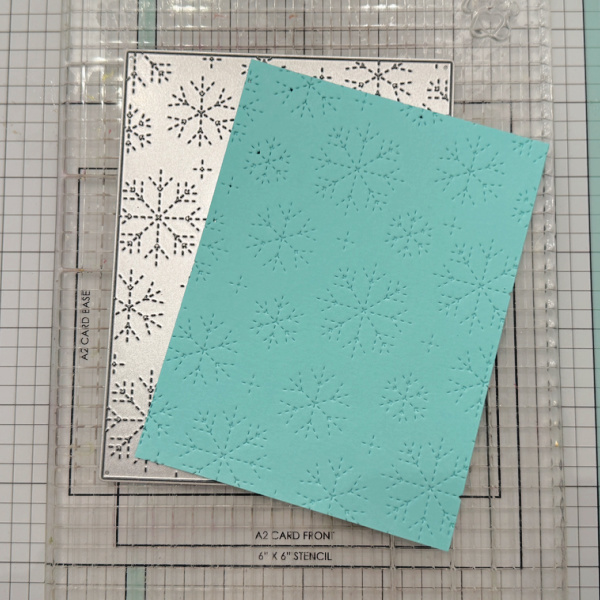
Step 7: Cut out a background panel using the snowflake cover die.
Step 8: Cut the snowflake cluster out of glitter paper.
Step 9: Stamp and emboss the sentiment, then put all the pieces together to create the card.
Craft Supplies:
Imagine Products:
VersaFine Clair – Nocturne – Fallen Leaves – Summertime – Warm Breeze – Bali Blue – Lilac Bloom
Other Products: Postage die – Waffle Flower Layering Postage Stencil – Waffle Flower Snowflake Cover Plate – Waffle Flower Snowflake Cluster die – Waffle Flower Sentiment – Waffle Flower
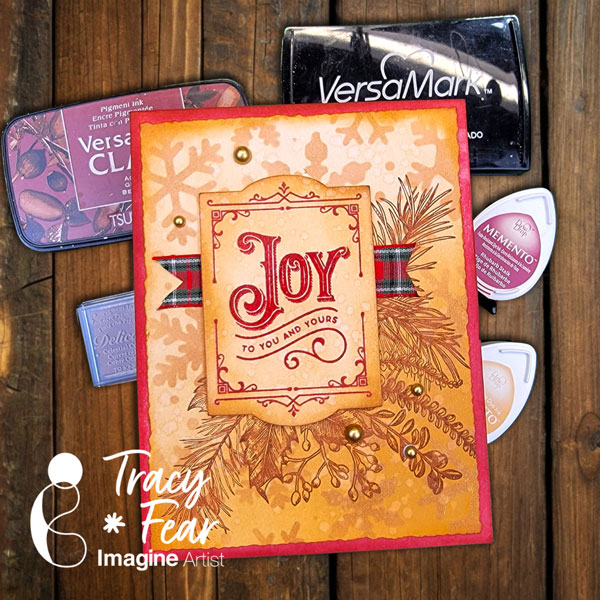
Hello Friends! Happy Holidays! There’s nothing I love more than a vintage Christmas card and that’s just what you will learn to create in the video! Follow along with me while we create this super easy Christmas Card!
• Acrylic stamping block or stamp platform • Snowflake Stencil • Stencil Brush • 100lb white paper • A2 Card Base • Clear embossing powder • Ribbon scrap • Embellishments • Water and a brush • Stamps of your choice • Antistatic Powder Tool • Embossing heat tool • Tim Holtz and Sizzix Dies Darling Deer, Arctic, and Festive Words • Glitter paper from my stash • White Gel Pen • Dr. PH Martin’s Bleedproof White Vellum from my stash
ALTERNATIVE PRODUCTS THAT CAN BE USED TO RECREATE SOMETHING SIMILAR Any Inks any combination of background stamps, dies, and feature stamps and stencil
Hello Friends! Katy here with another quick project. In today’s video I create a simple Thanksgiving card and I share with you an easy way to ink blend directly on your stamp. This is a great technique to use on your silhouette stamps and a great way to change up the color from just basic black.
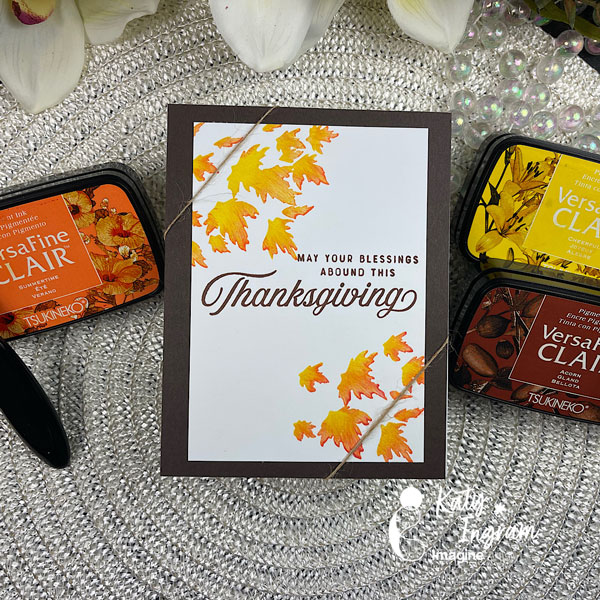
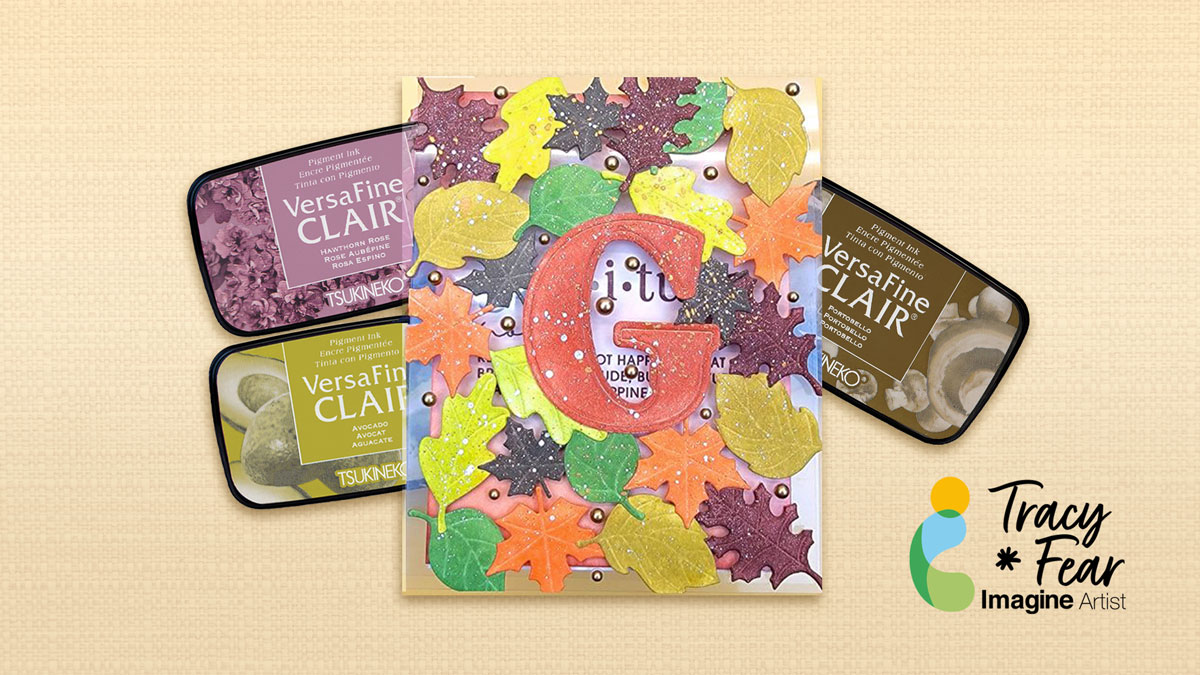
Hello Friends! Today we are going to have some fun and create a see-through Thanksgiving card with a sort of mosaic created from die cut leaves on a clear card base.
Other Products Used • Scrapbook.com Stamps and die set Gratitude and die set Autumn Leaves • Gold Flatback Pearls • PVA Adhesive • Leaf shaped die cuts • Sentiment Stamp • Die cut machine • 100lb white paper • Stencil Brushes or blending brushes • Flatback Pearl Embellishments • Adhesive • Paint for splattering
ALTERNATIVE PRODUCTS THAT CAN BE USED TO RECREATE SOMETHING SIMILAR Any Inks any combination of background stamps, dies, and feature stamps