Create A Beautiful Peacock Feather Handmade Card

by Kyriakos Pachadiroglou

Create A Beautiful Peacock Feather Handmade Card

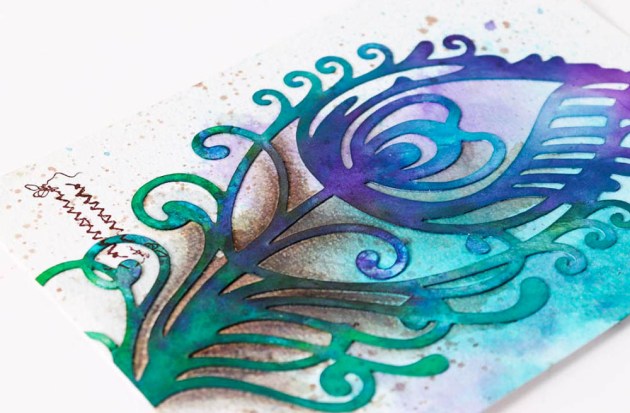
I am happy to share this Peacock Feather theme card. I was aiming to create watercolor-like stamping on the paper and I used Ink Potion No. 9, as it causes no damage to the paper when dries instead of spraying with water. The result was to create a background that had depth and full blur coverage while it helped the embossed designs to show up, making it the centerpiece of the card. The Sheer Shimmer Stix added the shine of gold color like the one you find on peacock feathers and it turned out perfect! See how I made this handmade card.

Skill: Beginner/Intermediate
Time: 1 hour

Directions


Step 1

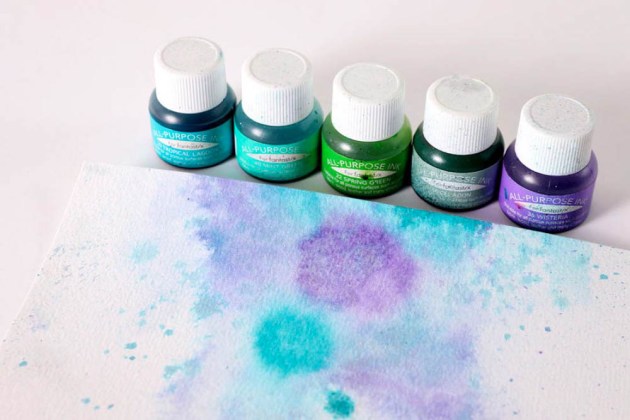
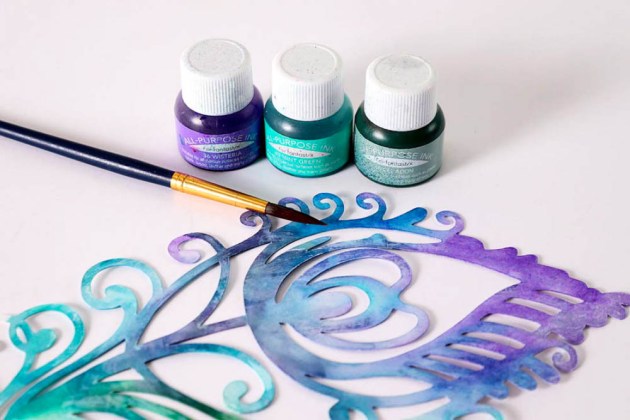
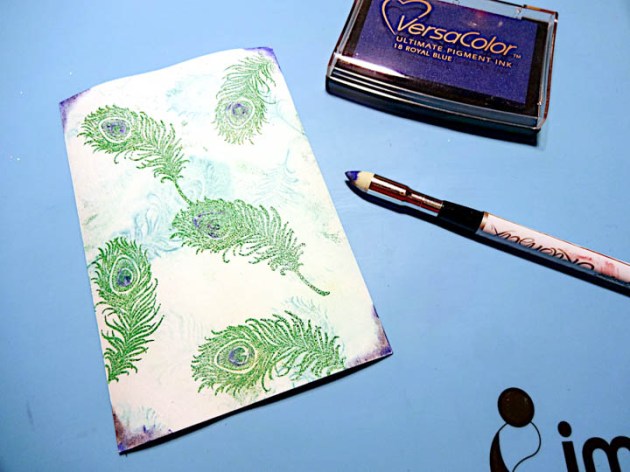
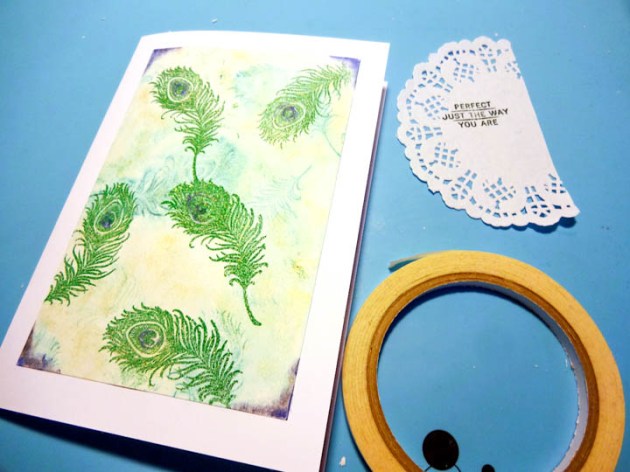
Heavily spray a 4 x 6 inch watercolor paper with Ink Potion No 9. Use the VersaColor Celadon, Turquoise and Pacific ink pads to stamp peacock feathers while the paper is still wet.


Step 2

When the watercolor paper dries, stamp with the VersaMark Watermark inkpad and cover with Imagine’s embossing powder Lucky Stars. Heat set with a heat tool.


Step 3

Use a BrushStix to add color detail at the corners of the paper and the in the center of the peacock feathers with the VersaColor Royal Blue inkpad.


Step 4

Add sparkle with the Sheer Shimmer Stix in Gold.


Step 5

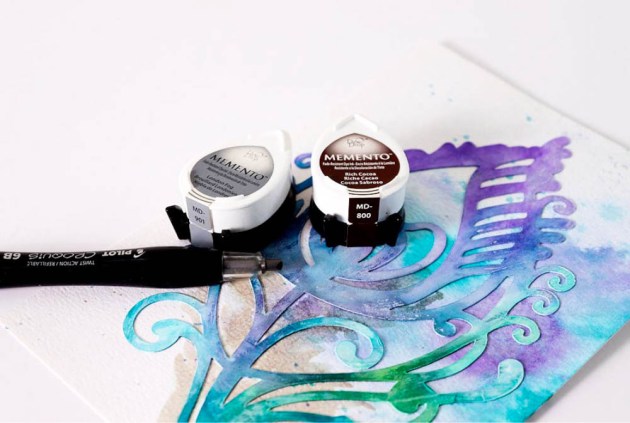
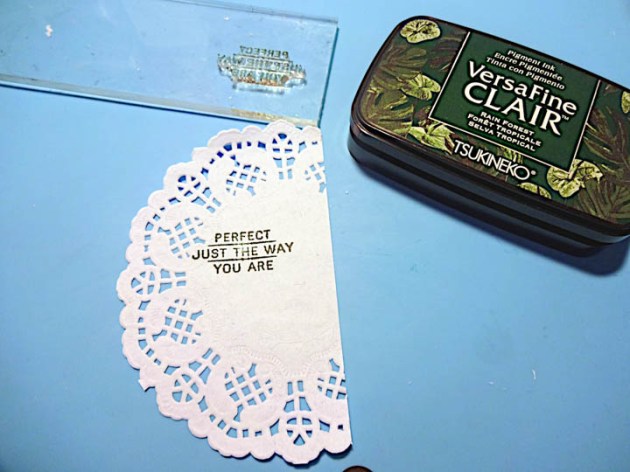
Cut a paper doily and stamp with the quote “Perfect Just the Way You Are” with the VersaFine Clair in Rain Forest.


Step 6

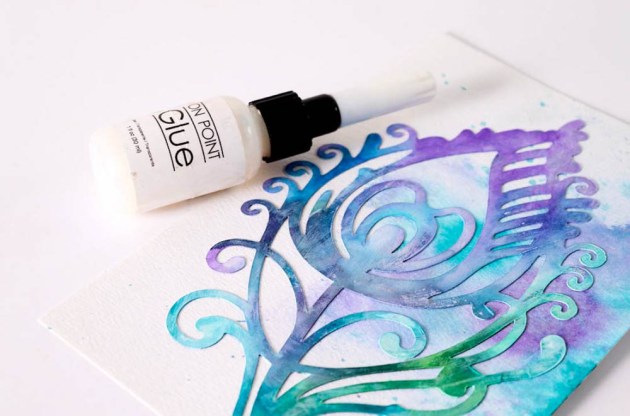
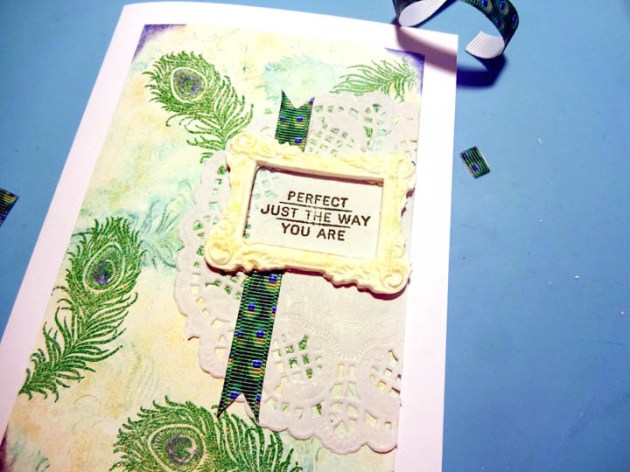
Use the Tear It! Tape to set the watercolor paper and the doily on the card base.


Step 7

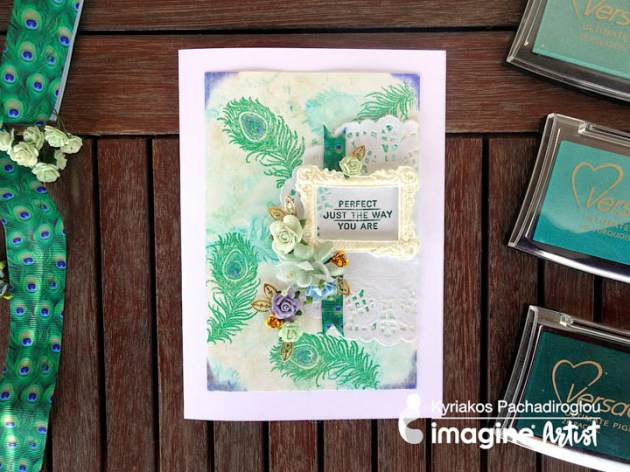
Buy a pre-made frame or cast a frame with lightweight clay and when dries add sparkle with the Sheer Shimmer Stix Gold.


Step 8

Place the peacock ribbon first. Cut it in half to give the illusion it is under the frame. Attach the frame to the card face then place the sentiment inside the frame.


Step 9

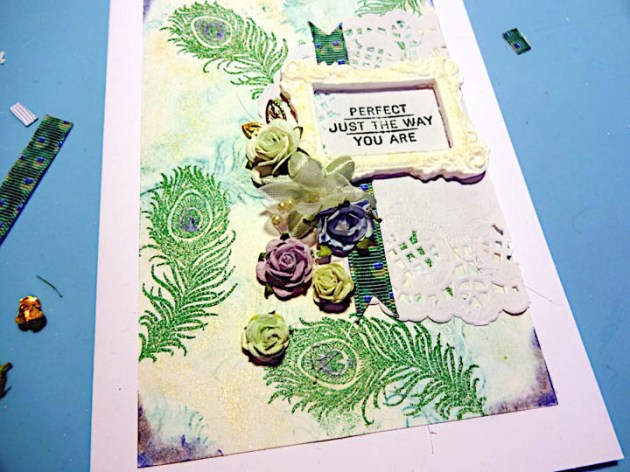
Continue decorating with the paper flowers and metallic details. And you are done!

Supplies

Imagine
Other
  • Watercolor paper
  • Viva Decor – Peacock feathers stamps
  • My Mind Eye – Honey happiness stamp
  • Paper doilies
  • Lightweight clay and frame mold
  • Paper and metallic flowers
  • Peacock themed ribbon
  • Hot glue gun
  • Heat tool
  • Option – Prima Marketing – pre-made frame

See How To Upcycle A Tin With Stazon Pigment Ink

by Roni Johnson

See How To Upcycle A Tin With Stazon Pigment Ink

Did you hear about the new StazOn Pigment Ink? A quick drying opaque ink that you can use on all of the surfaces that you use the original StazOn ink. This will take your mixed media game to a whole new level of fun. Today am sharing a mermaid themed gift tin that I made for my daughter in law. It’s got layer after layer of StazOn Pigment Ink as well as a few other fun products from Imagine like Goosebumps spray, irRESISTible Pico Embellisher, On Point Glue.

Skill: Intermediate
Time: 1 hour

Directions


Step 1

Prepare the tin you will be working with by sanding off any artwork. 180 or 220 grit sandpaper works well for this process. Wash and dry the tin to remove dust, debris, and oils from your skin.


Step 2

Use sponge daubers and StazOn inks to build layers of color beginning with the darkest layer on the bottom. Mariner Blue was applied to the very bottom rim of the lid to create the deepest and darkest part of the ocean. Let dry. Shamrock Green was the next layer which overlapped the Mariner Blue a bit and was applied approximately half way up the tin. Peacock Feathers was used for the third layer of ink, it was pounced darkest above the green but was also pounced over both the Shamrock Green and Mariner Blue to help blend the colors together. Snowflake was applied on the upper quarter of the lid, it was then lightly pounced into the Peacock Feathers to bring a look of natural gradation.


Step 3

The mermaid stamp was inked with Piano Black StazOn Pigment ink and immediately stamped on the lid. Due to the fact that the lid has a slightly curved surface, I have found that it works best if you hold the lid in one hand and the stamp in the other and bring them together. This allows you to see that the stamp is making contact as you press the stamp around the contour of the lid. Let the ink dry completely.


Step 4

Spritz the lid with Clear Goosebumps Texture Spray to create an illusion of water. Let this medium dry before moving on. Use Wedding Dress irRESISTible Pico Embellisher to create bubbles in the water.


Step 5

Use a sponge dauber to color the side of the lid with StazOn Pigment in Mariner Blue and to frame the stamped image on top of the lid.


Step 6

Selectively apply On Point Glue to the lid and lightly sprinkle glitter over the wet adhesive. Let the glue dry completely, shake off excess glitter and replace it for future use.

Supplies

Imagine
Other
  • Upcycled Tin Container
  • Sandpaper
  • Unity Stamp Co – Mystical Mermaid
  • Fine Glitter

Learn How To Create A Layered Rose Stamp With Stazon Pigment

by Arjita Sepaha Singh

Learn How To Create A Layered Rose Stamp With Stazon Pigment

I have used one of my all-time favorite Rose stamp for today’s card project. I love this stamp because of its realistic layering effect. To achieve this beautiful layering I used a couple of ink types today. I used the Memento Inkpads, our brand new Stazon Pigment inks, Radiant Neon inkpad, and VersaMagic inkpads & I was very happy to see the final outcome and the way they all work together.

Skill: Intermediate
Time: 30 minutes

Directions

Supplies

Imagine
Other
  • Altenew Stamp & Die set – Vintage Roses
  • Card Stock – White, Kraft
  • Scissors
  • Misti Stamping Tool
  • Double-sided Tape

Introducing StazOn Pigment

Introducing StazOn Pigment

We are so excited to announce a great addition to the StazOn family. The all new StazOn Pigment ink line has 12 vibrant, opaque colors of ink that work like the original. StazOn Pigment can be used on porous and non-porous surfaces and still has the lightning-quick dry time of the original.

StazOn Pigment comes in an ergonomic, easy to open, airtight case with a new felt pad that helps to produce very crisp stamped images. Any crafter or artist that likes to use acetate, metal, glass, or slick pastes will want to add StazOn Pigment to their stash. These colors really pop!

Learn more


Color Swatches Include


Colors include Lemon Drop 091, Orange Peel 071, Passion Red 021*, Pink Cosmos 081*, Grape Candy 011*, Mariner Blue 061*, Shamrock Green 051*, Peacock Feathers 062*, Koala Gray 032*, Chocolate Brown 041*, Snowflake 001*, Piano Black 031*

*Inker also available

Take a closer look at the colors in this video


Quick Facts about StazOn Pigment

  • Dries quickly on most surfaces
  • Works on all surfaces that original StazOn does
  • New style of felt pad produces crisp stamped images
  • Vibrant opaque colors of ink


shop-now-button-blog

Learn to Create a Card with All-Purpose Ink Blowing

by Lindsay Adreon

Learn to Create a Card with All-Purpose Ink Blowing

I love to create fun backgrounds with new techniques to be the main focal point on my cards. In this video, I’m sharing a really fun and creative way to use the All-Purpose Inks from Imagine to create one of a kind backgrounds! And all you need is a straw!!

Skill: Intermediate
Time: 1 hour for 2 cards

Directions

Supplies

Imagine
Other
  • Watercolor paper
  • Painter’s Tape
  • Straw
  • Water Mister
  • Deco Foil – Gold, Bronze
  • Concord & 9th Hello Lovely
  • Inspired by Stamping Smile Die
  • Die Cutting Machine

Make a Peacock Feather Design with All-Purpose Inks

by Jowilna Nolte

Make a Peacock Feather Design with All-Purpose Inks

The month of March celebrates the beautiful color in Peacock Feathers and with so many ink choices in just the perfect colors, it was hard to choose what to create. But in the end, my love for watercolors and the stunning effects won and I created this art journal page using All-Purpose Inks.

Skill: Intermediate
Time: 30 minutes

Directions


Step 1

Color a sheet of watercolor paper. Paint a layer of water on top and then drop All-Purpose Ink onto the paper to let it mix and flow. Mist with more water to activate and promote flow. Leave to dry.


Step 2

Die-cut a peacock feather using a Silhouette machine. Paint with a layer of gesso and then add color using peacock color shades of All-Purpose Inks and a paint brush.


Step 3

Once the feather is dry, use On Point Glue to adhere the feather to the watercolor paper piece.


Step 4

To add shading and interest, add some grey and brown ink to your craft mat and mist with water, then paint in shadows. Use a graphite pencil for shading even more and adding details.


Step 5

Add some additional stamping and a quote as desired. Then adhere the page into your art journal or frame it as a home decor piece.

Supplies

Imagine
Other
  • Silhouette die machine
  • Peacock Feather metal die
  • Smooth white cardstock
  • Graphite pencil
  • Watercolor paper