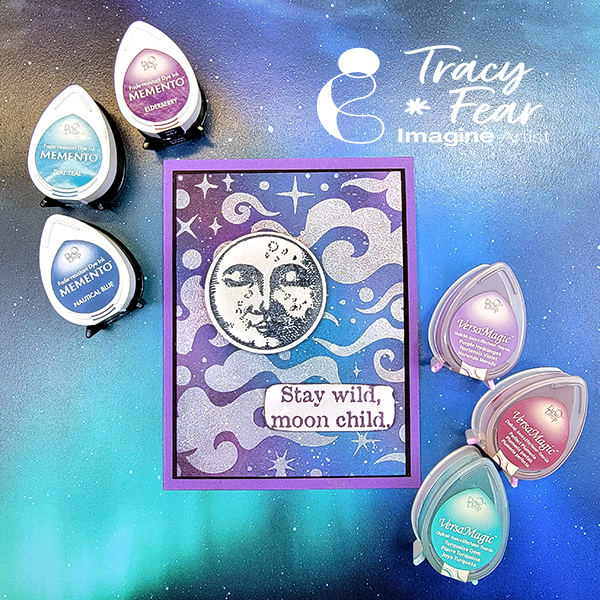
Hello Friends! Tracy here and today I am excited to share this really easy galactic, out of this world background technique!
In today’s video tutorial I am sharing how I use some Memento, VersaMagic, Brilliance, and VersaFine Clair inks to create this stunning card along with a paint pen, a stencil from my stash and some holographic embossing powder!
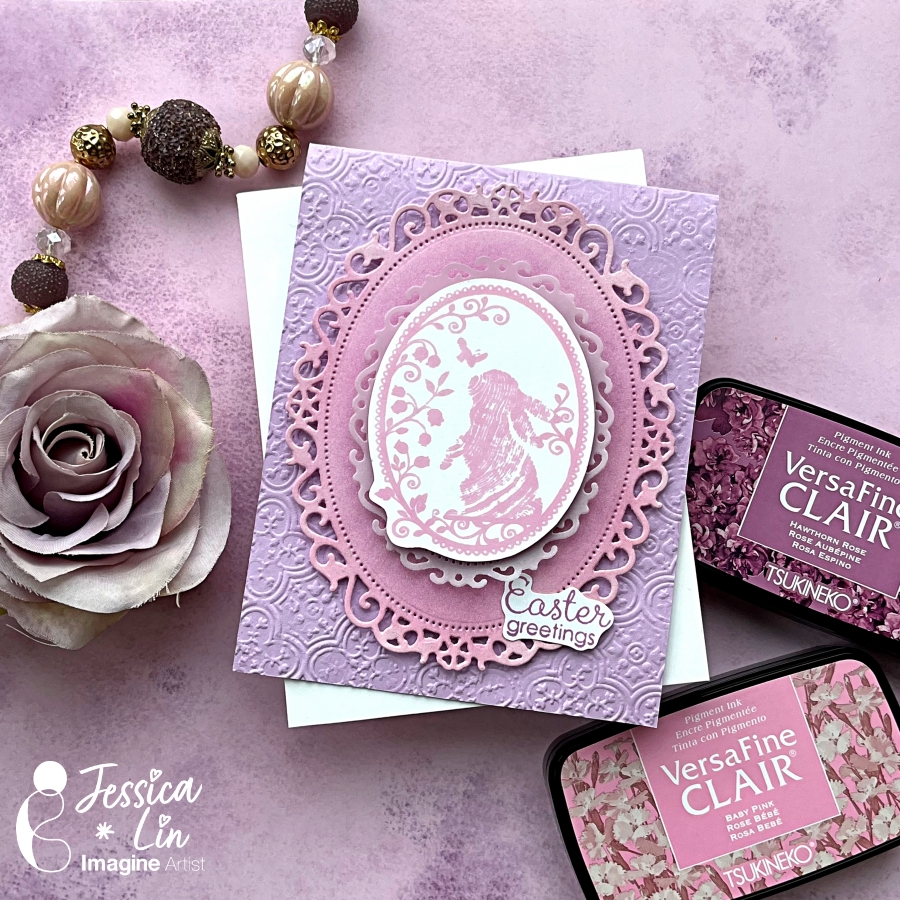
Hi everyone! It’s Jessica here. Today I want to share an Easter card with a soft and romantic color palette. This color scheme turned out so well, and I think it would be perfect for a birthday or Valentine’s card! If you are interested in the colors I used, just keep reading!
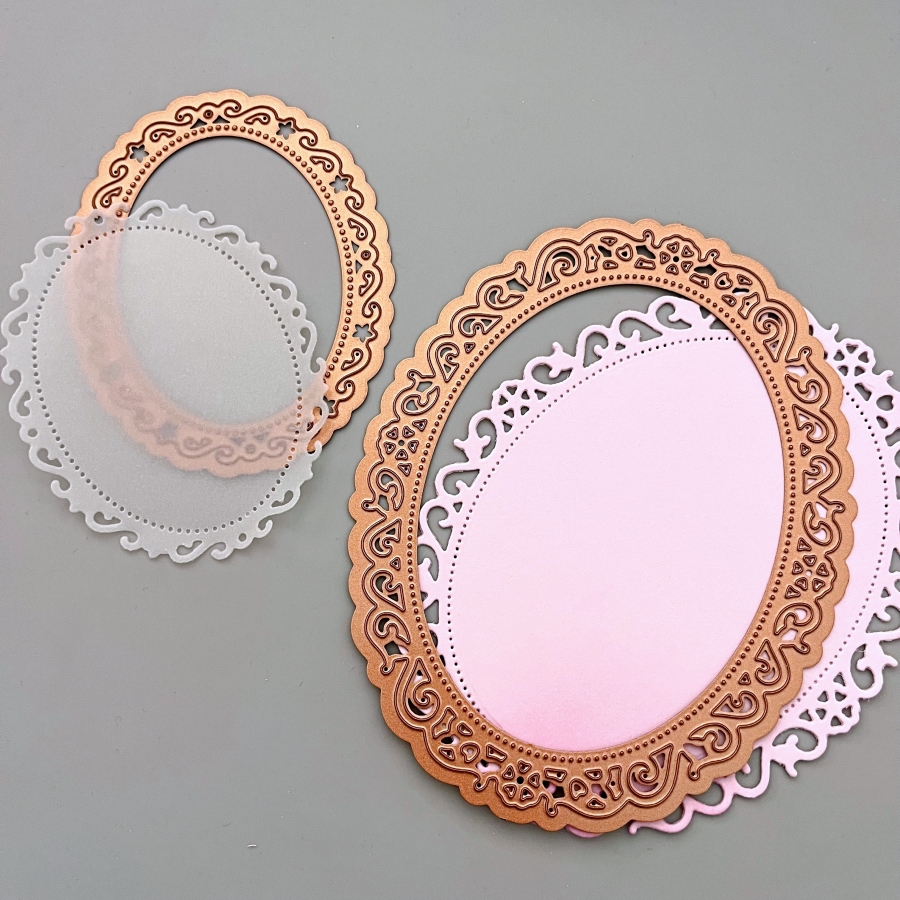
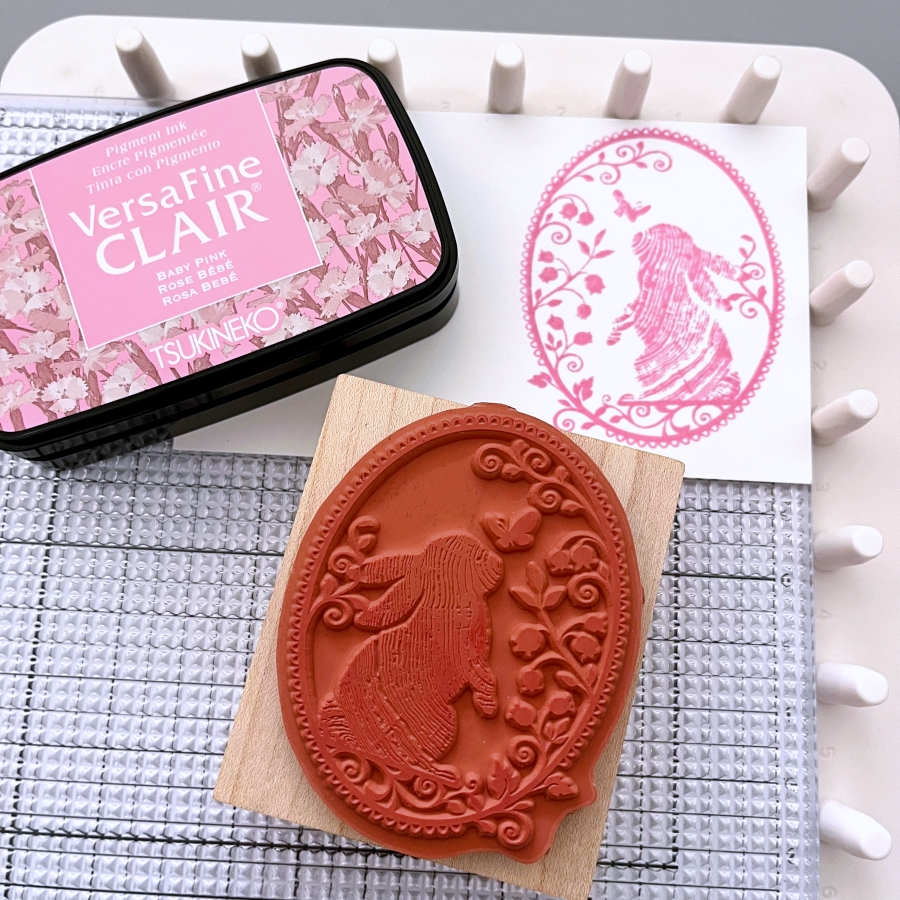
Step 1: Die cut the largest two shapes from Spellbinder’s Nestabilities Floral Oval die set. For the largest oval, I used Stampin’ Up!’s Bubble Bath cardstock. For the second largest oval, I used vellum.
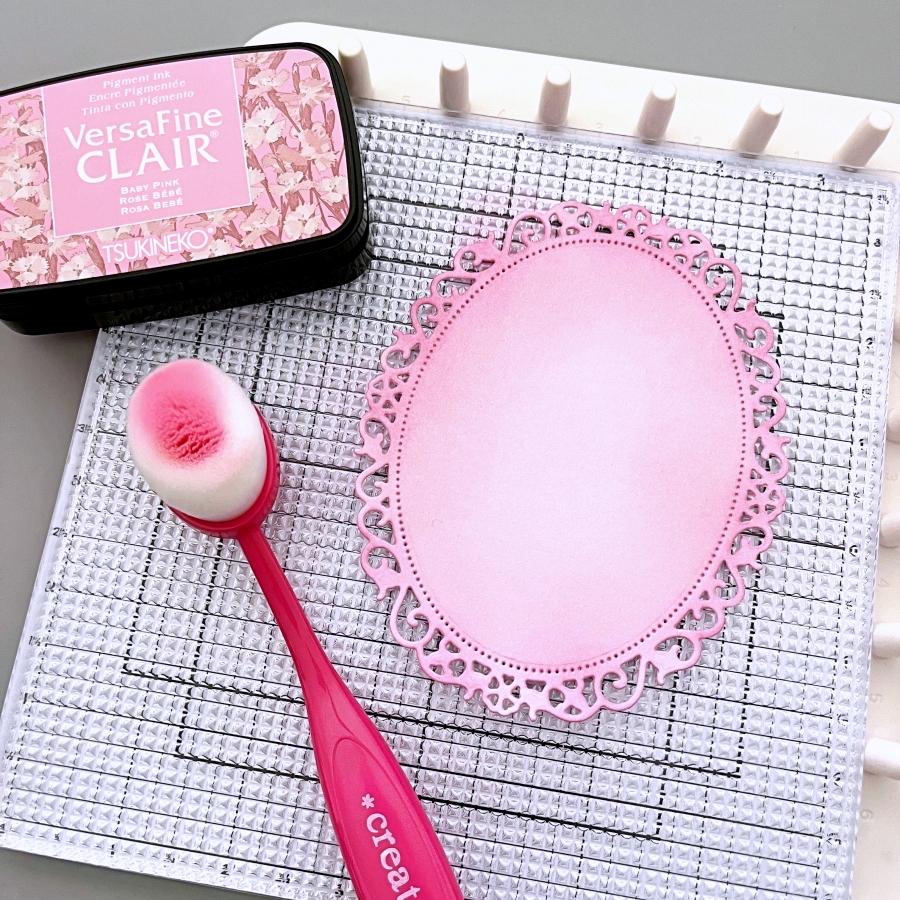
Step 2: For some added dimension, ink blend VersaFine Clair Baby Pink ink around the edges of the largest die cut. I recently bought the photopolymer sticky mat from Altenew and it’s a great tool for ink blending. It grips the die cut (or stencil) firmly so you don’t have to worry about anything shifting during ink blending.
Step 3: Stamp the focal image with VersaFine Clair Baby Pink ink. This is an old wooden stamp from K-Kingdom that I got back in the days before I discovered photopolymer stamps. The dainty floral frame with the lacey details is what inspired the theme for this card. The VersaFine Clair ink is also great for showcasing the fine, wood-grain details on the rabbit.
The stamped image looks a bit dark when freshly stamped. It will turn into a softer, pastel pink that you see in the cover photo.
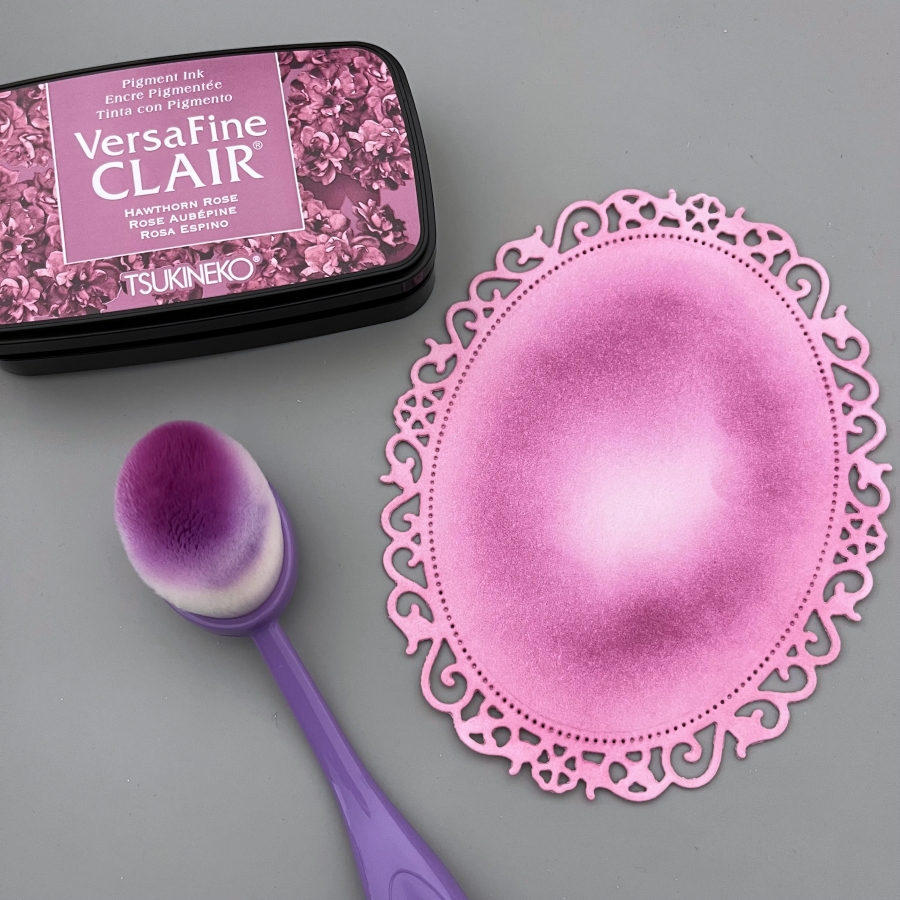
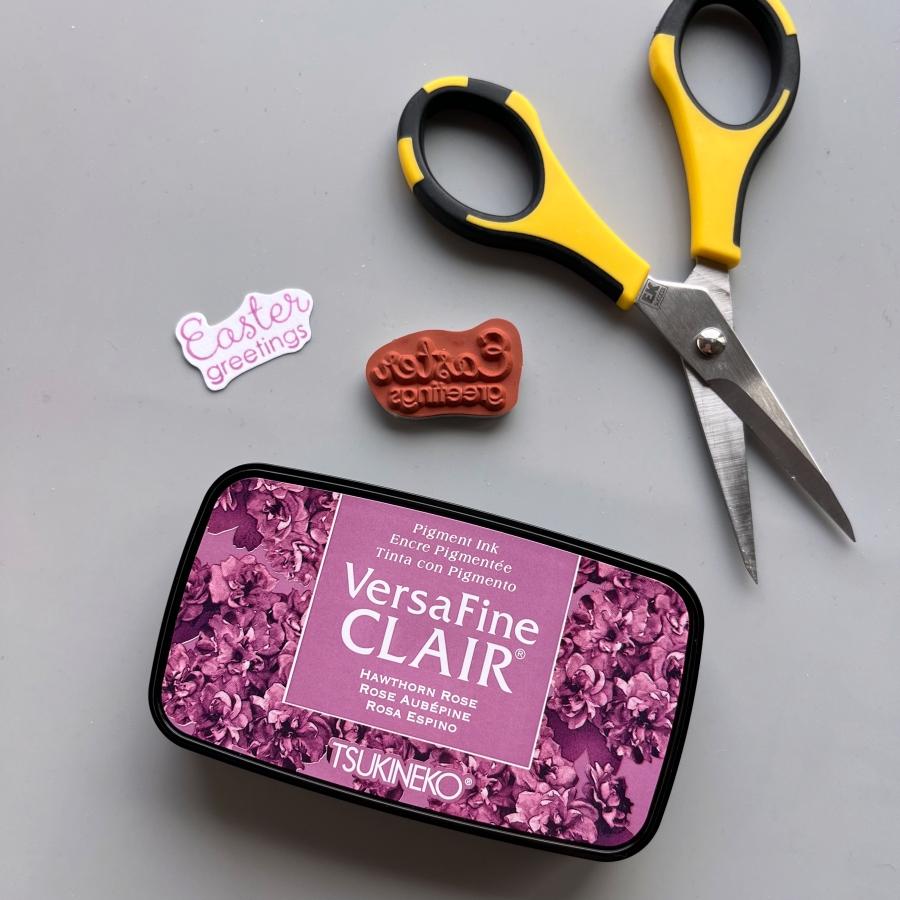
Step 4: I decided to add some shadows behind the vellum die cut layer with VersaFine Clair Hawthorn Rose. Baby Pink and Hawthorn Rose compliment each other so well. I think they might be my favorite new color combo!
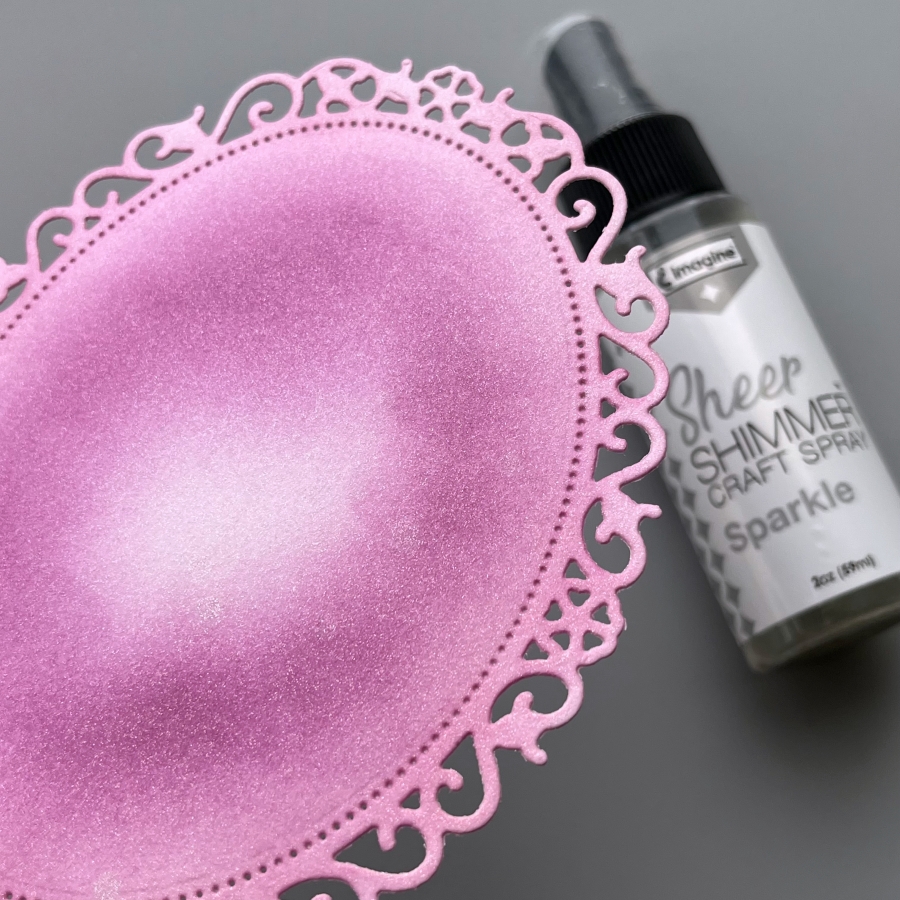
Step 5: Apply a generous coat of Sparkle Sheer Shimmer Craft Spray onto the ink blended die cut. I wish the camera could capture the shimmery effects of this spray; it is mesmerizing and the sparkle never dulls!
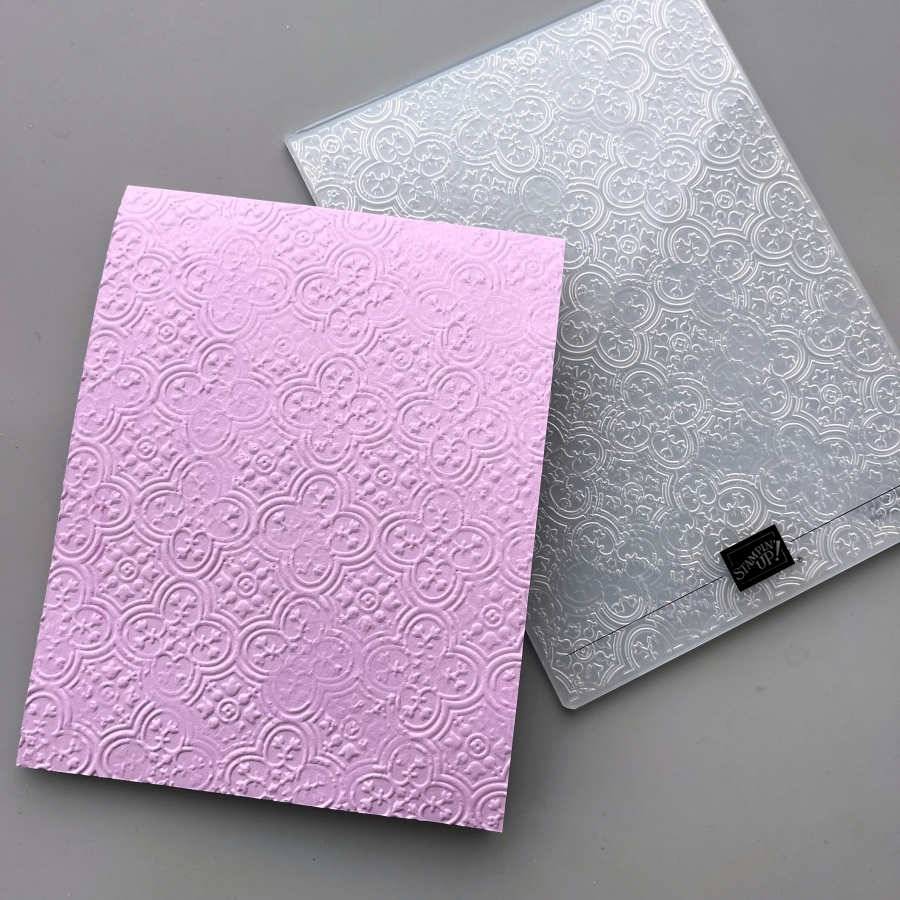
Step 6: For the card base, I chose Stampin’ Up!’s Fresh Freesia cardstock and embossed it with Distressed Tile embossing folder. It adds the perfect touch to this shabby-chic look.
Step 7: Finally, stamp the sentiment with VersaFine Clair Hawthorn Rose ink and fussy cut the sentiment. I fussy cut the rabbit image as well since there were no coordinating dies for wooden stamps.
Step 8: After some quick assembling with Tear-It Tape and foam tape, the card is completed! I love how this card turned out, and I hope you enjoyed it, too. Thanks for stopping by!
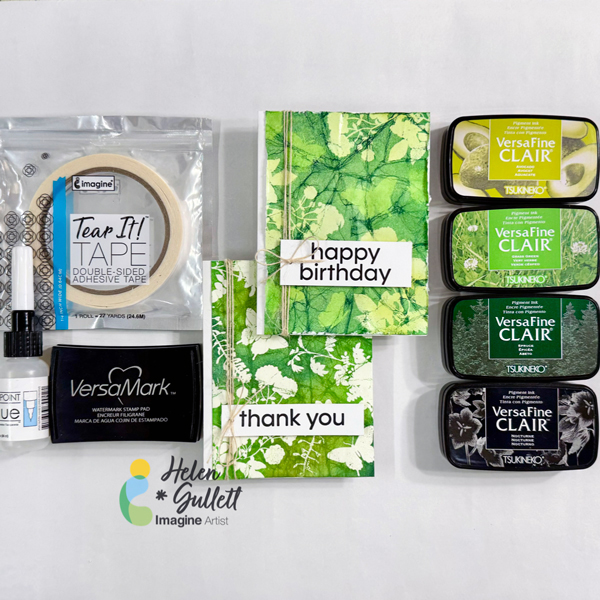
Hello crafty friends! One of my favorite cardmaking techniques is heat-embossing resist. Today, I want to share with you how to make these Batik cards using this technique. It is a technique you can use to create fun and colorful backgrounds with heat embossing and ink blending.
Let’s get crafting!
Skill: Beginner Time: 20 minutes
Direction:
Step 1 Cut out a piece of 8.5 inch x 11 inch white cardstock into 4 panels of 4.25 inch x 5.5 inch.
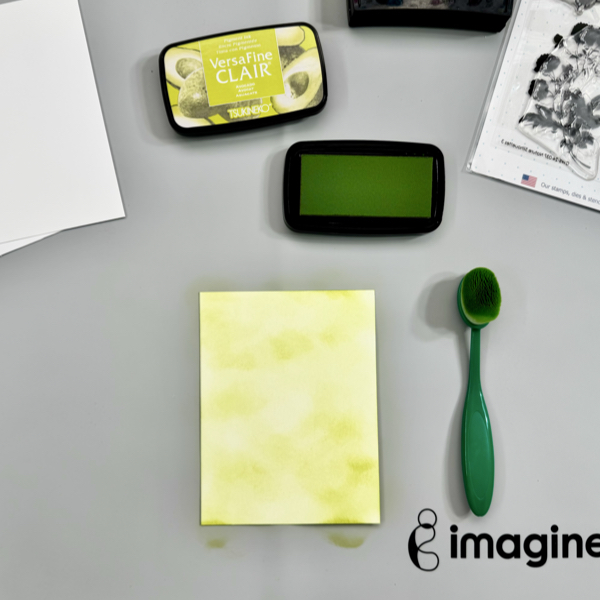
Using a blending brush, add some of the VersaFine Clair Avocado ink to one of the white cardstock panels.
Dry the ink on the cardstock with a craft heat gun.
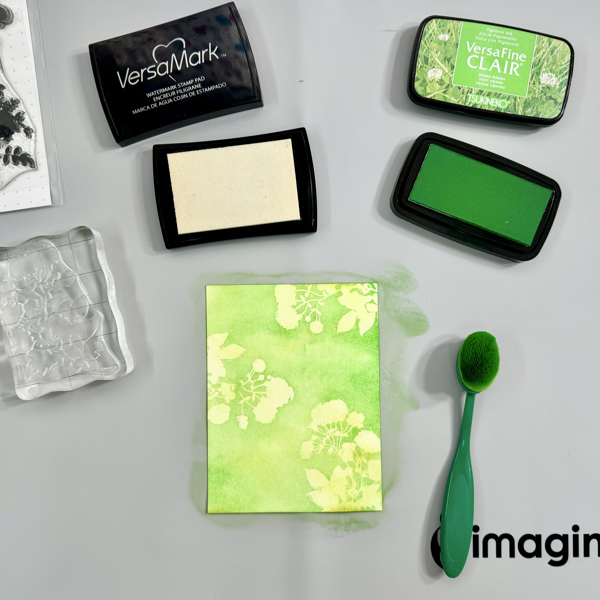
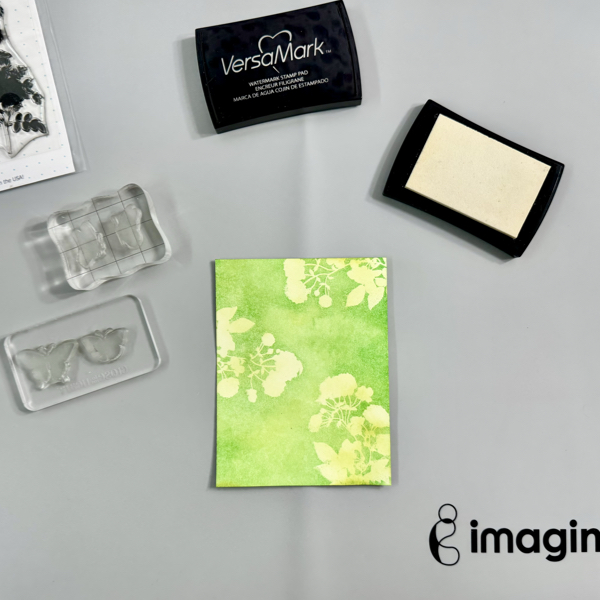
Step 2 Add some of the anti-static powder all over the inked panel.
Stamp the images with VersaMark ink and add some of the clear embossing powder. Heat the embossing powder with a craft heat gun.
Using a blending brush, add some of the VersaFine Clair Grass Green ink on the panel.
Carefully dry the ink on it, not to make the embossed images melt too much. Let it cool down before touching it. Gently wipe off the extra ink with paper towel.
Step 3 Add again the anti-static powder on the panel.
Stamp the next images with VersaMark ink and add some of the clear embossing powder. Heat the embossing powder with a craft heat gun.
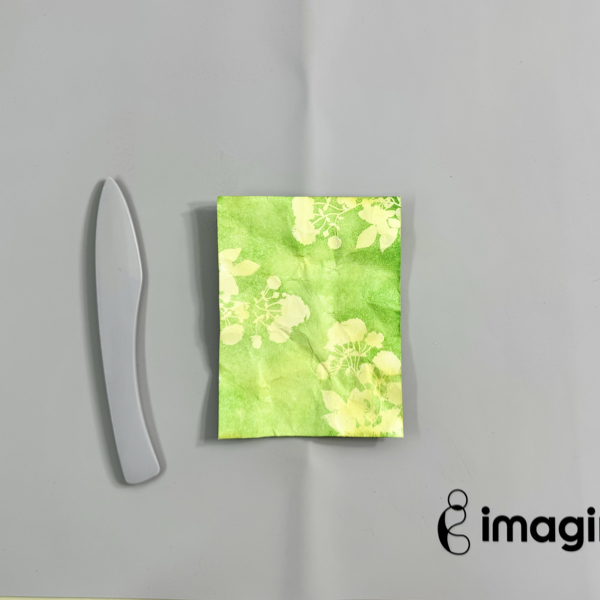
Step 4 After heating up the embossing powder, crumble the cardstock. Depending on the cardstock you use, you can spray the back of the cardstock lightly with water and then crumble it.
Flat it back on the craft mat and use the bone folder to smooth it down. You won’t get perfectly smooth cardstock back but the crumble lines are the one that will give the texture that we need for the batik look.
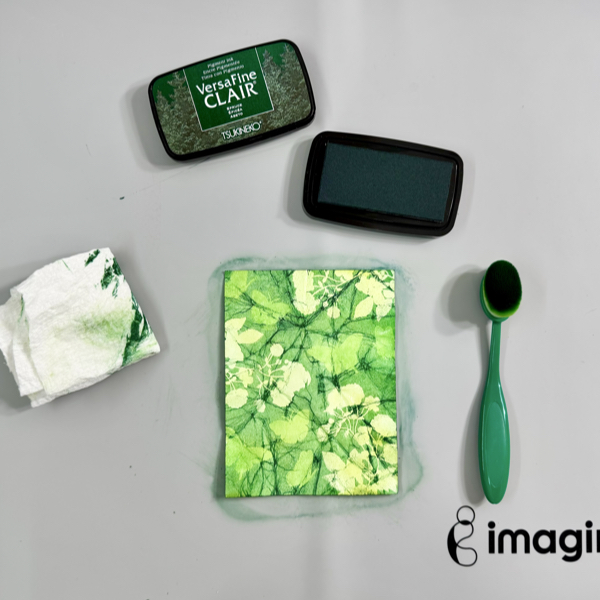
Step 5 The next step is adding more color to the panel!
Use the blending brush, add some of the VersaFine Clair Spruce ink on the panel.
You will start to see the pattern. Add more ink if needed to get more contrast between 3 colors.
Use a paper towel to wipe off the extra ink off the embossed images.
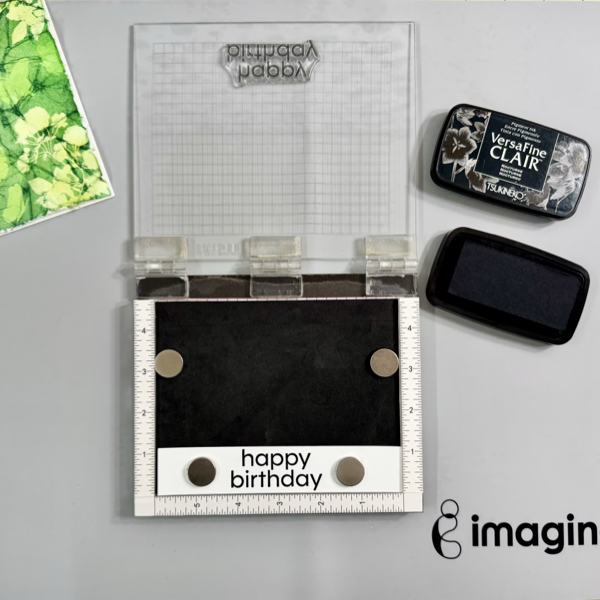
Step 6 On a piece of white cardstock, stamp the sentiment with VersaFine Clair Nocturne ink.
Dry the inked sentiment with a craft heat gun.
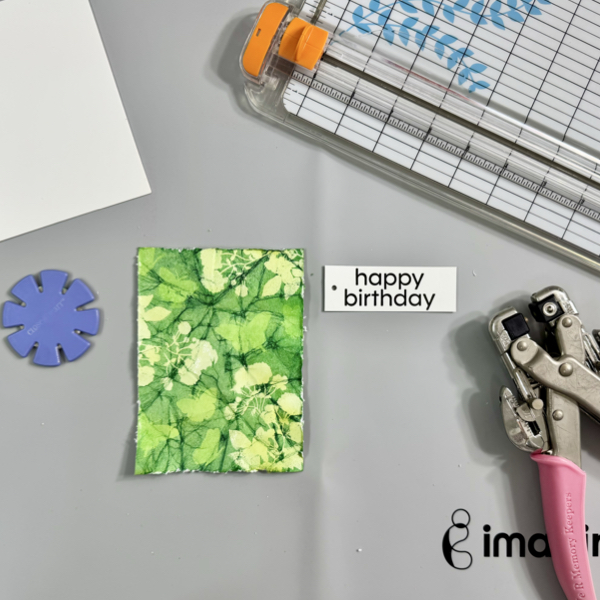
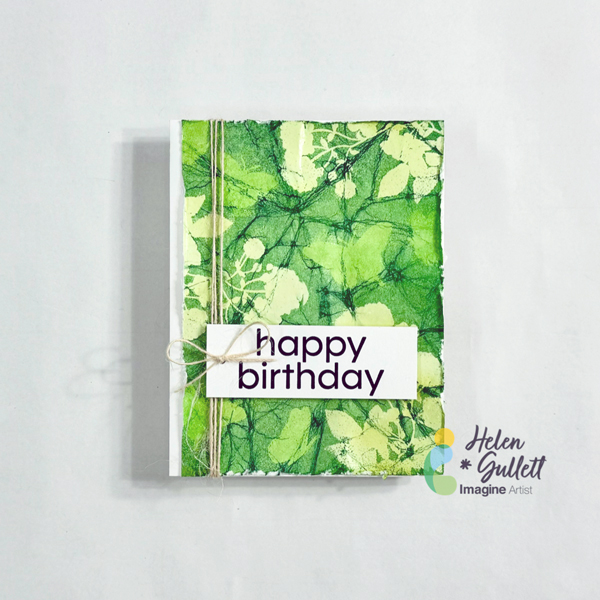
Step 7 Use a paper trimmer to trim the sentiment into a label size and punch a hole on one of the side.
Use a paper distress tool or a knife to distress all the edges of the background panel.
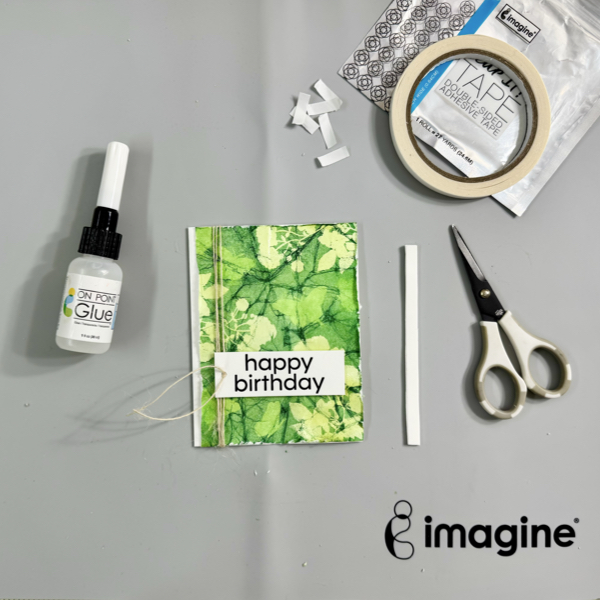
Step 8 Add the background panel on the card base using On Point Glue.
Wrap around some of the burlap twine on the card, before tie it up, add the sentiment label on the card. Put the tail of the burlap twine through the label hole. Glue the sentiment on the card with some white foam and Tear It! Tape.
Tie up the burlap twine into a bow.
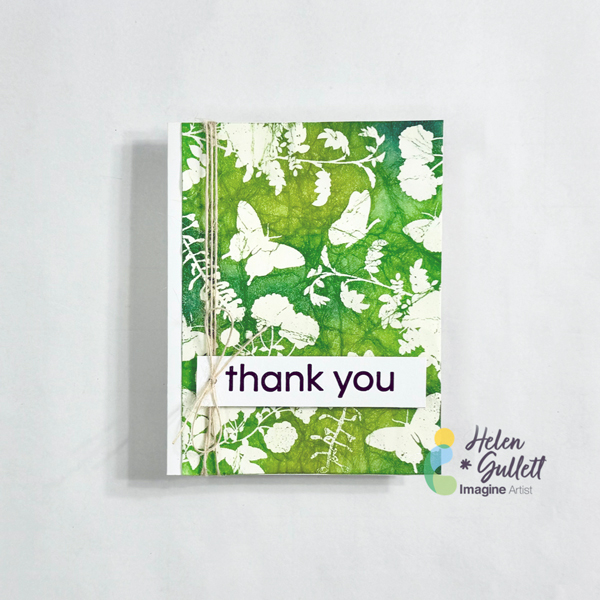
This Batik cardmaking technique works well with solid images because of the heat embossing resist effect. You can pick any 2-3 colors of inks you can use that compliment each other.
Here’s the different look of the Batik card I made using the same heat embossing technique but simpler. So, instead of multiple times heat-embossing the images and blending the inks, this one is only once. Here’s the simpler steps:
First, heat emboss the image directly to the white cardstock panel.
Second, crumble the cardstock, flat it out back using a bone folder.
Third, using blending brush add the ink on the cardstock starting with the light color, medium color, then dark color.
I hope you will give this Batik technique a try and play around with different colors. Thanks so much for stopping by our blog today.
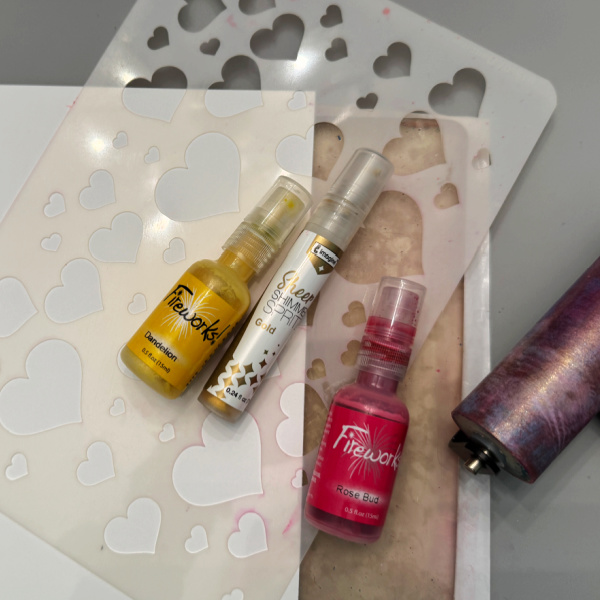
Hello Everyone, it’s Ceal, here. Today I am sharing how to create a background using our Fireworks spray using a Gel Press plate.
Skill Level: Beginner to Advanced Time: 45 minutes to an hour
Directions: Gather your supplies. You will need some Fireworks! sprays, some shimmer spray (I used gold), a stencil, a Gel Press plate, a rubber brayer, some copy paper or cardstock (I used copy paper) A word die or any other die ad some VersaFine Clair Nocturne ink.
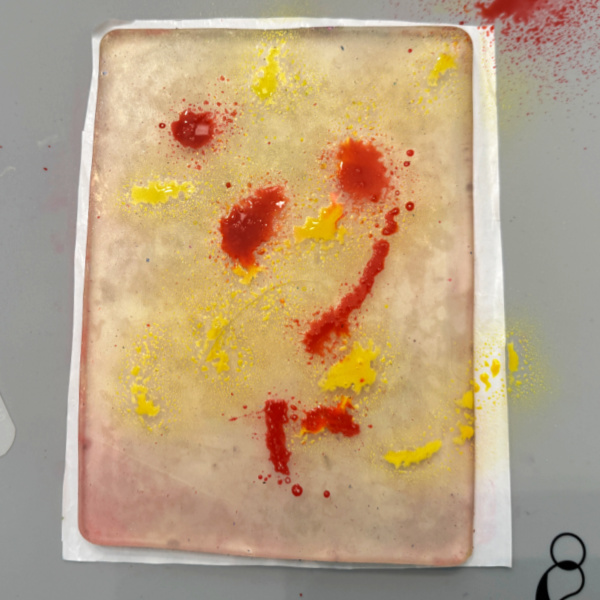
Step 1: Spray Fireworks! spray directly on the Gel Press plate.
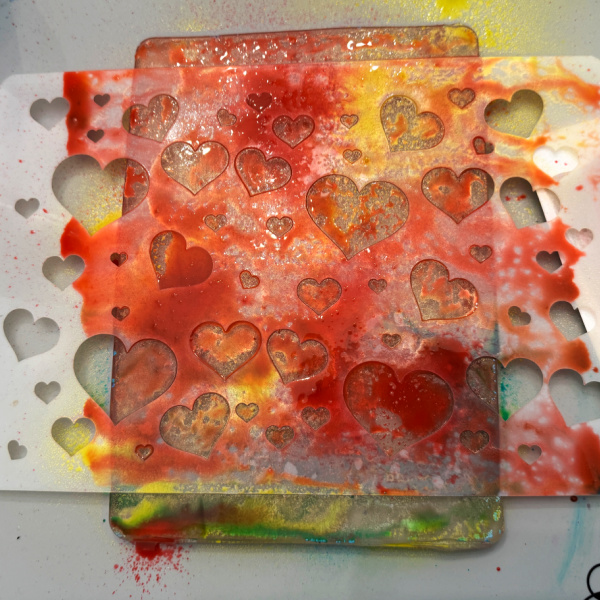
Step 2: Lay stencil over the Gel Press plate and roll the brayer over it to distribute and then spray again with Fireworks! spray.
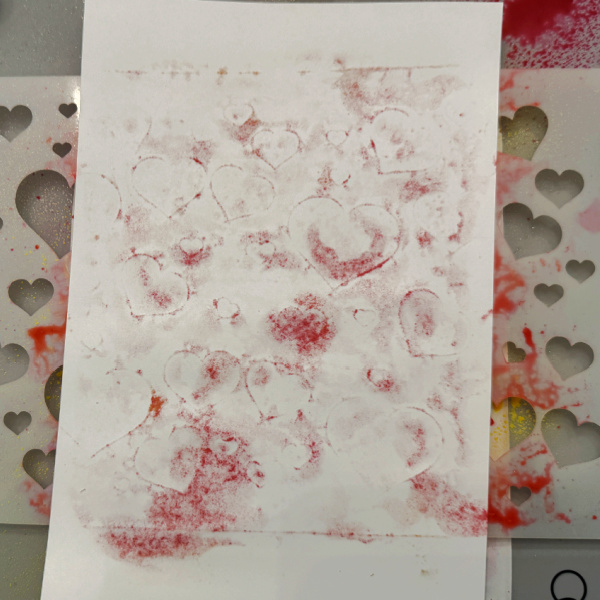
Step 3: Lay the copy paper (I used Hammermil 60lb) on top and rub your hand over the entire piece several times until you see the medium come through the paper.
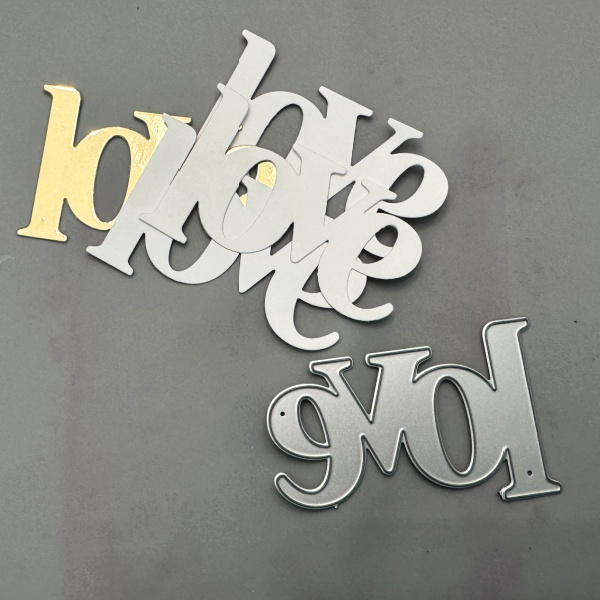
Step 4: Die cut several pieces of the word die. I cut three out of whit and one out of gold to tie in with the gold shimmer on the background. I glued the altogether offsetting the gold one on the bottom.
Step 5: Glue the background on a card base and add the word die to the front. Stamp the coordinating message directly on the background.
• Classic Crest Solar White card base -Neenah • Gold Foil cardstock – Simon Says Stamp • Gel plate – Gel Press • Heart Stencil – A Colorful Life Designs • Love die – Hero Arts • Stamped sentiment – hero Arts
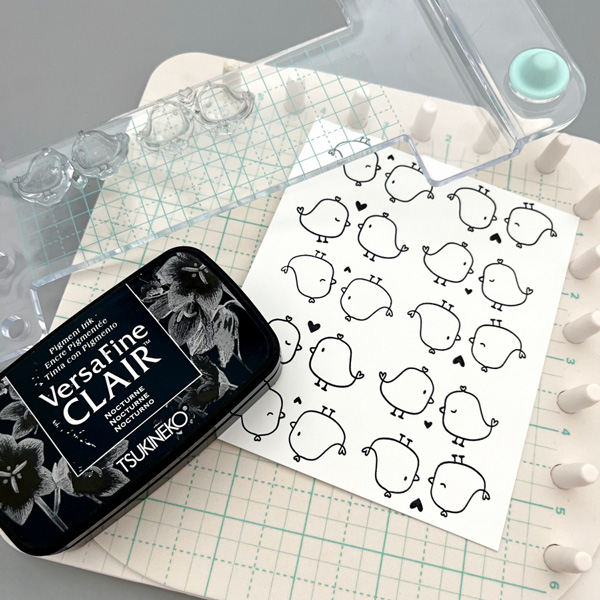
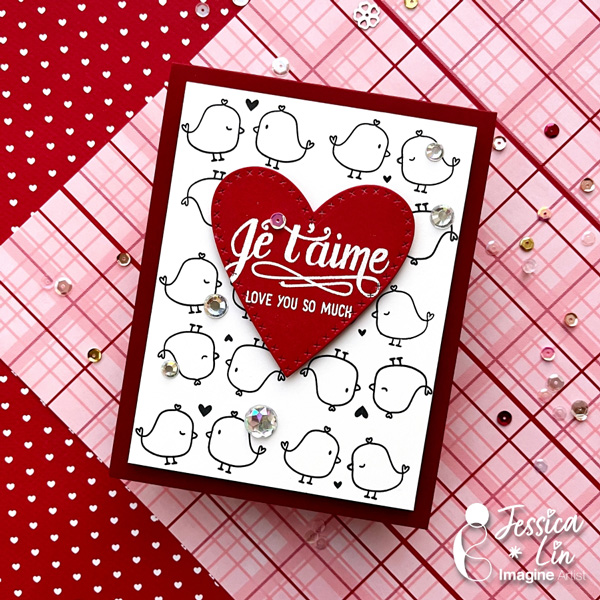
Hi everyone, it’s Jessica here. Have you tried using small stamps to create a card background? Today I am sharing this technique I discovered using the We R Precision Press stamping tool. It takes stamping these small images to the next level, and you can get really creative results!
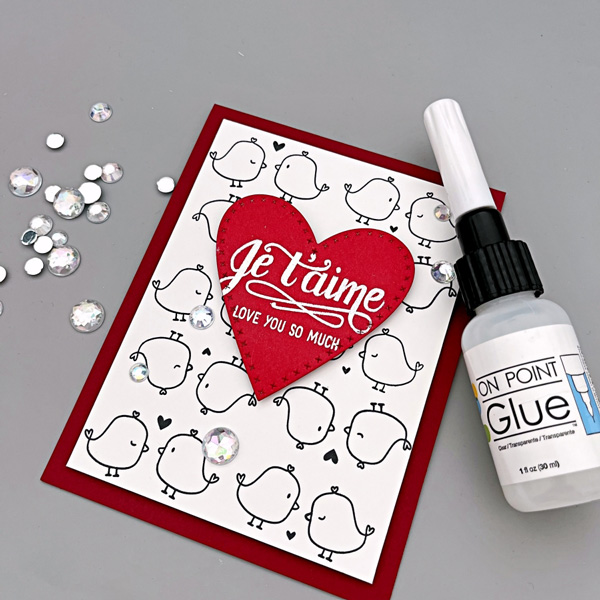
Step 1: I decided to create a stamped background for this year’s Valentine’s card. These adorable love bird images are from Mama Elephant’s Oh Happy Birds set. I placed 4 little birds onto the We R Stamping Pattern Block plate and made sure the images are within the 1’’ grid lines. This made pattern stamping the background so easy; simply use the pegs on the We R Precision Press to stamp on the 1’’, 3’’, 5’’ marks. Then rotate your 5’’ cardstock and stamped on the 2’’ and 4’’ marks using the opposite orientation of the stamps. The VersaFine Clair inks are my go-to for stamping fine line images like these. The lines are so clear and crisp, I’m totally in love with the result!
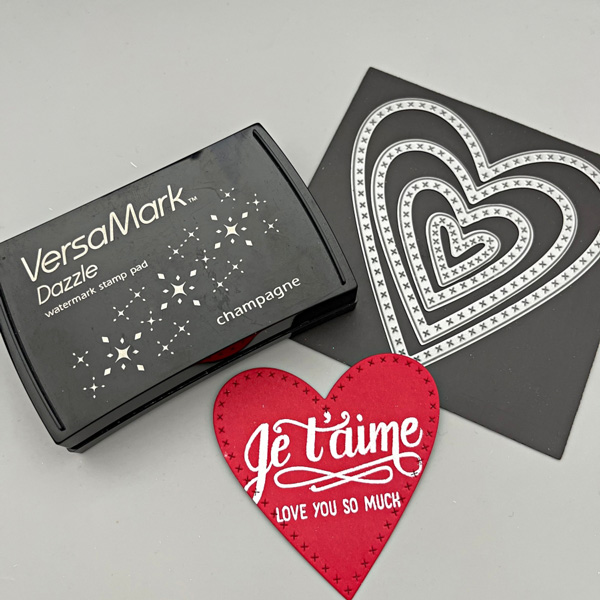
Step 2: Die cut a piece of red cardstock with Cross Stitched Hearts dies. Then stamp the sentiment with VersaMark ink pad and emboss with white embossing powder. The cross stitched details on the die really adds a fine touch to this simple project.
Step 3: Finally, adhere rhinestones with On Point Glue and this quick and simple Valentine’s card is complete!
I hope you enjoyed today’s quick tutorial. I have a lot of small critter stamp sets and I can’t wait to create more stamped backgrounds like this. It’s super easy and fun; I hope you’ll give it a try, too!
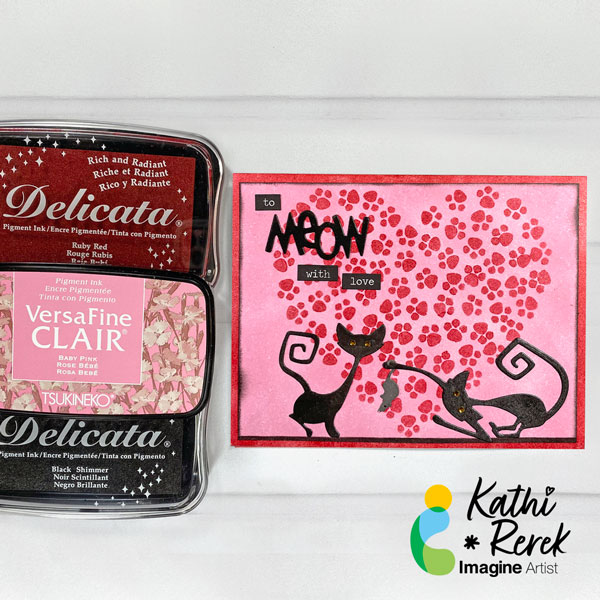
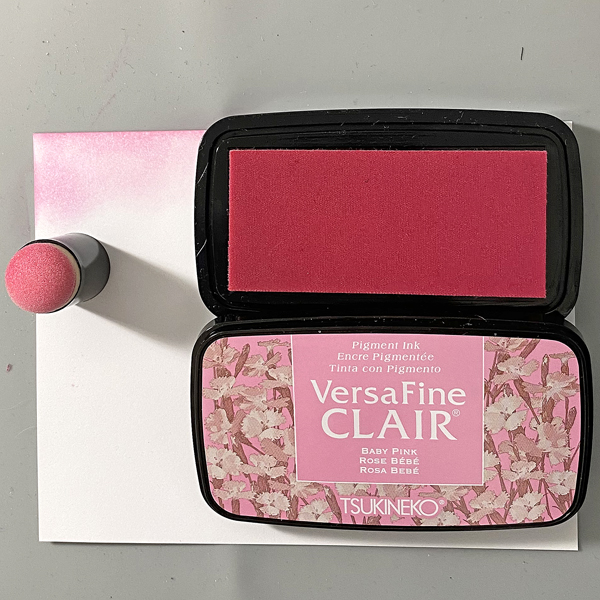
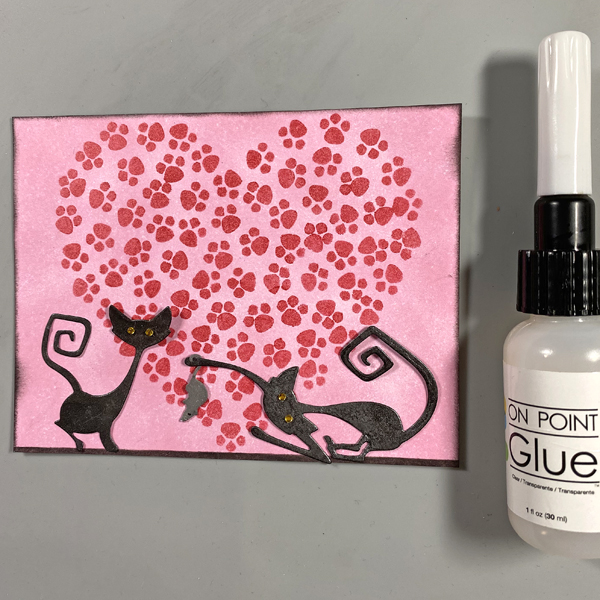
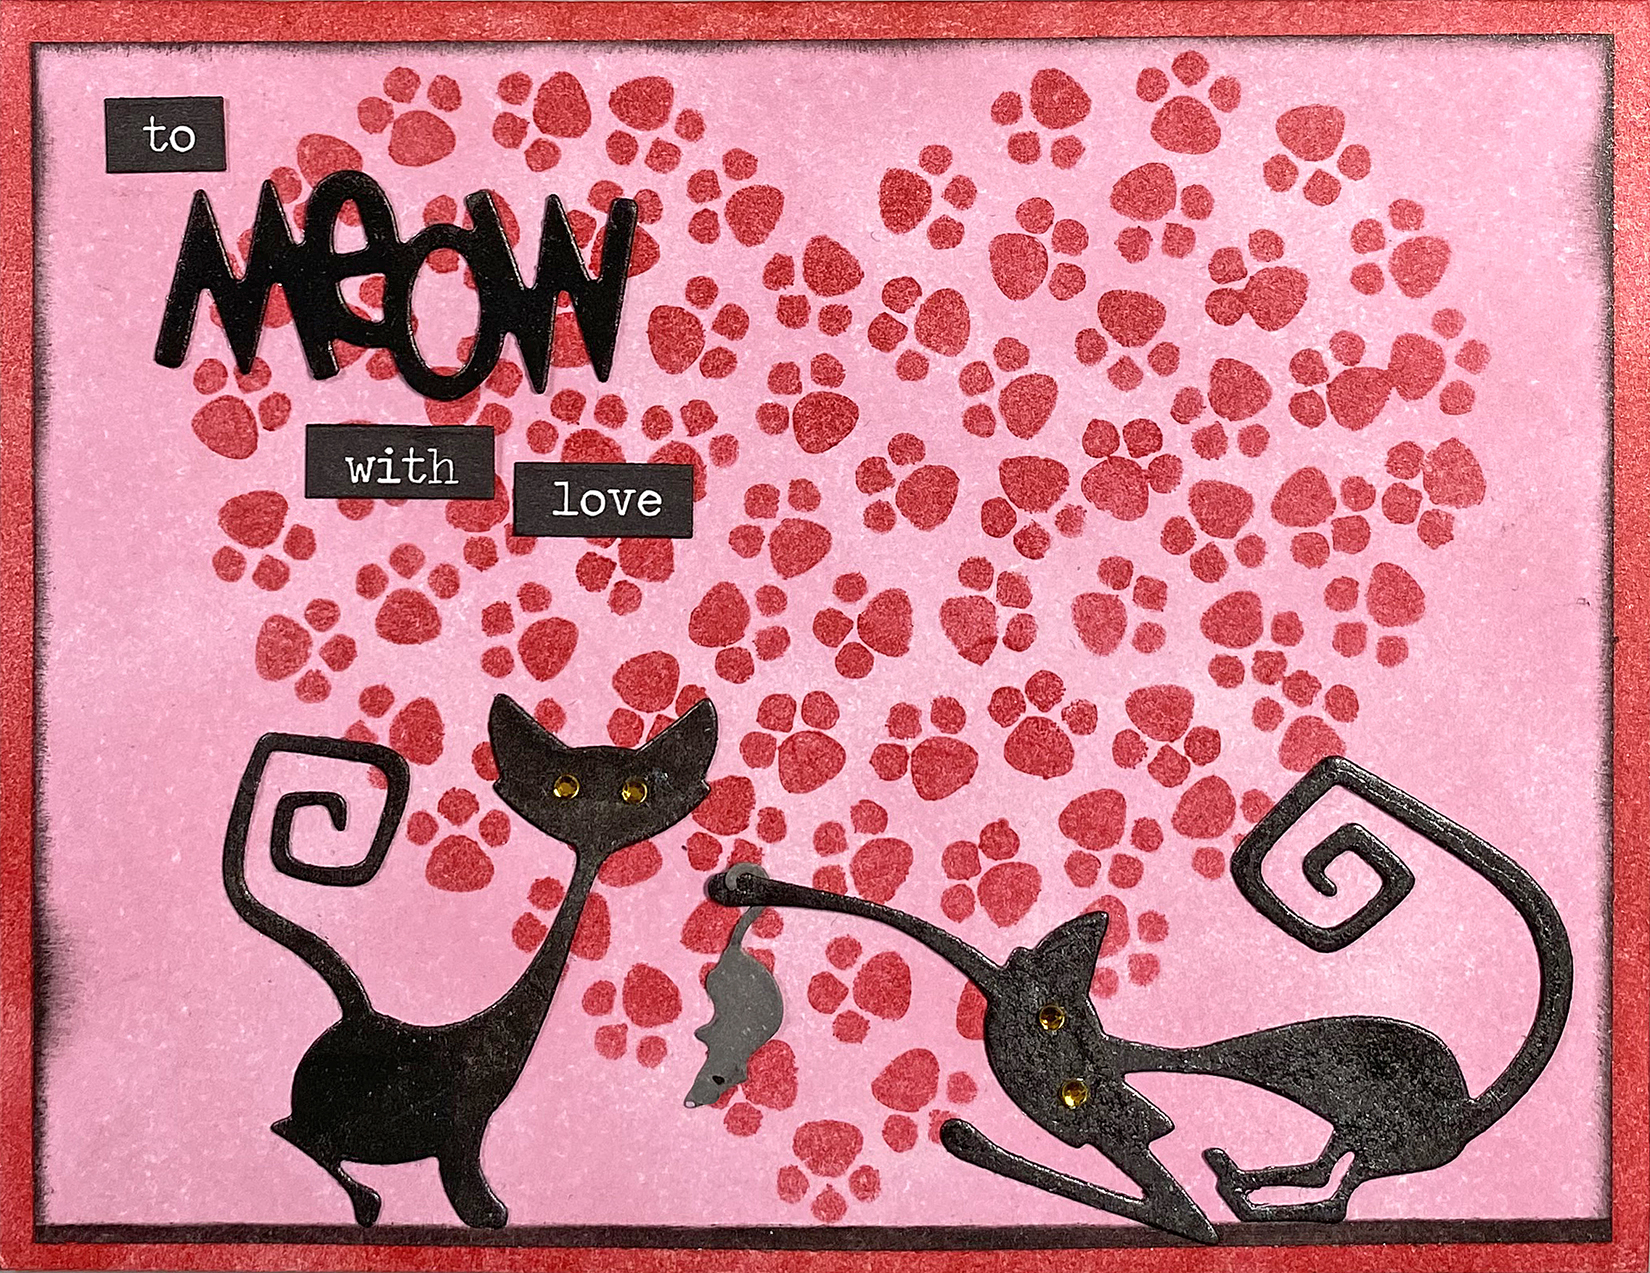
As a certified crazy cat lady, I had to make another another cat-themed Valentine’s Day Card! This one uses Baby Pink VersaFine Clair Ink with a shimmery Delicata die-cuts and a stenciled heart. It was quick, easy, and fun to create.
Skill Level: Beginner Time: 45 minutes
Instructions:
Step 1: Use a Sponge Dauber to apply Baby Pink VersaFine Clair Ink to a 4” x 5.25” piece of white cardstock. Heat set.
Step 2: Use low-tack tape to secure the inked image panel to the back of the Pawsome Heart Stencil. Use a Sponge Dauber to apply Ruby Red Delicata Ink over the stencil onto the image panel. When done, remove the stencil and heat set the stenciled heart.
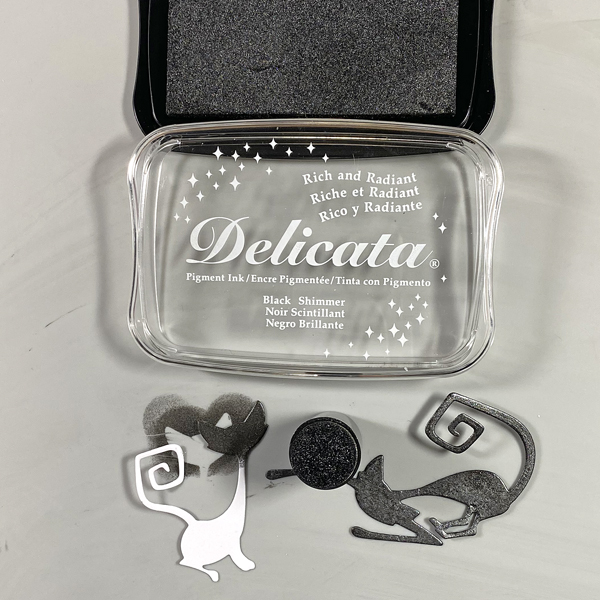
Use a Sponge Dauber and Black Shimmer Delicata Ink to edge the image panel. Sorry that there’s no photo.
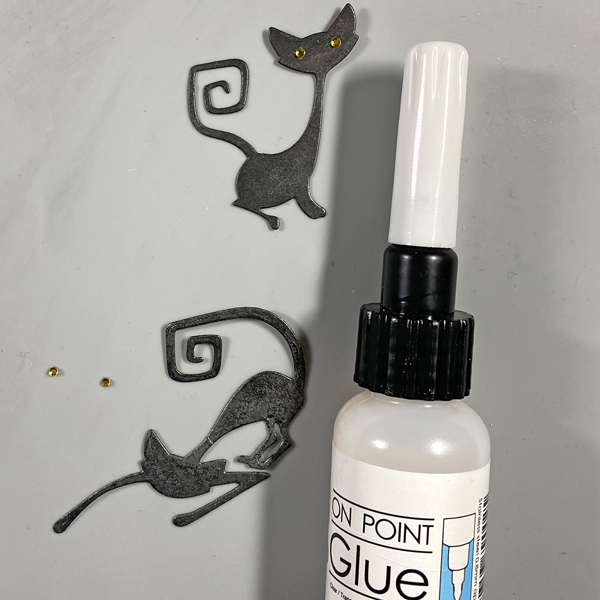
Step 3: Use two of the cat dies from the Mischievous Thinlits Die Set to cut white cardstock. Use a Sponge Dauber to apply Black Shimmer Delicata Ink to both sides of each cat die-cut. Heat set.
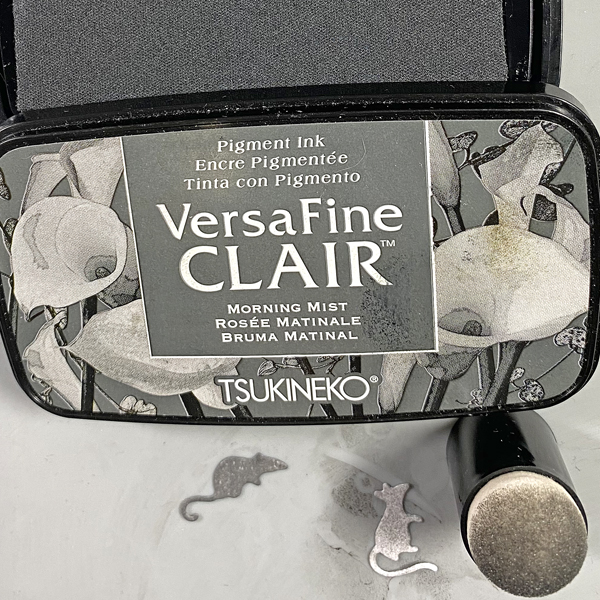
Step 4: Use the Little Mice Die to cut white cardstock. Use a Sponge Dauber to apply Morning Mist VersaFine Clair Ink to the mouse. Heat set. Use a black pen to add an eye to the mouse and a Pink Uni-Posca Paint Pen to color its nose.
Step 5: Use On Point Glue to add tiny gemstone eyes to the cats.
Step 6: Use On-Point Glue to adhere the mouse to the outstretched paw of one of the cats. Use On Point Glue to adhere both cats to the image panel as shown.
Step 7: Use a Sponge Dauber to apply Ruby Red Delicata Ink to the outside .5” of a white A2 card. Heat set. Repeat application of the Ruby Red Delicata Ink to deepen the color and shimmer. Heat set.
Step 8: Use Tear It! Tape to mat the image panel with the Ruby Red Delicata inked card.
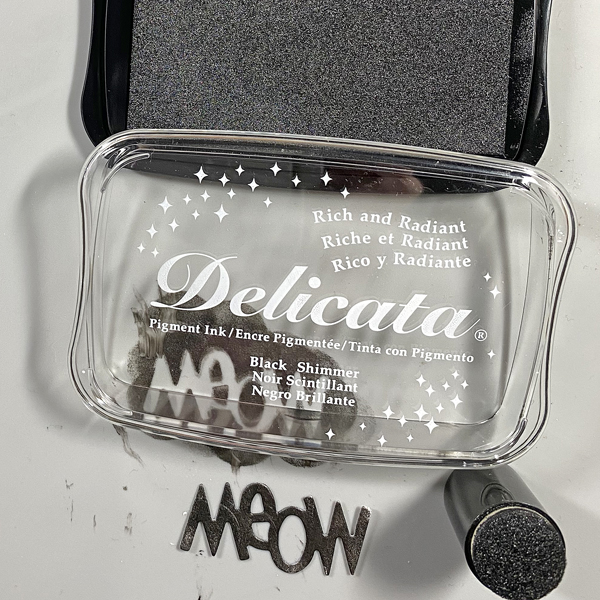
Step 9: Use the “Meow” die to cut white cardstock. Use a Sponge Dauber to apply Black Shimmer Delicata Ink to both sides of the die-cut. Heat set.
Use On-Point Glue to adhere the “Meow” die-cut to the card.
Adhere the “to”, “with”, and “love” Chit Chat Verbiage Stickers to finish the card.