Create a Bright and Fun High Contrast Card Design

by Elina Stromberg

Create a Bright and Fun High Contrast Card Design

Best summer craft projects are fun and easy to make. On a sunny summer day, you don’t want to spend time in collecting a large number of tools and materials, but rather create something beautiful quickly, using just a few basic supplies you’ll always have at hand.

Skill: Beginner
Time: 30 minutes per card

Directions


Step 1

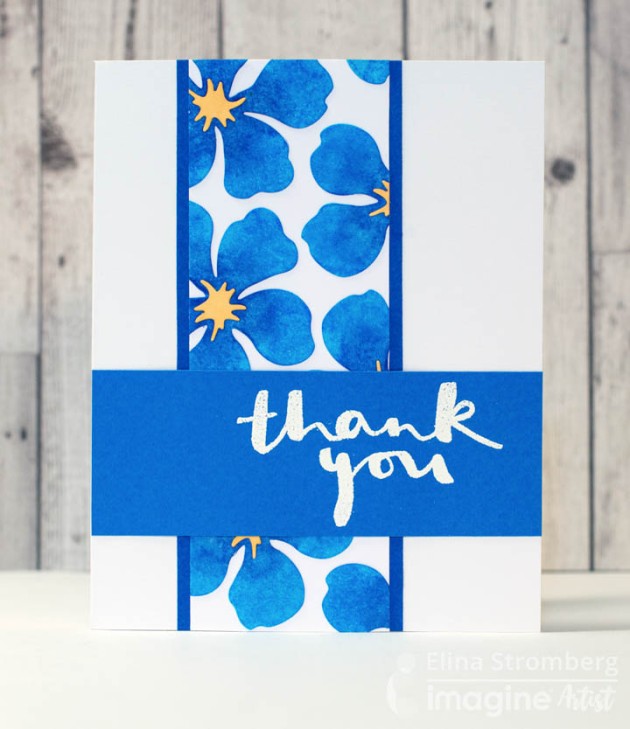
For these flower cards, you first create your own patterned paper using repeated floral images and your favorite ink colors. Then you decorate the front of your card with a panel cut from the self-made patterned paper, add a stamped sentiment on top, and your card is ready! Isn’t that just the perfect recipe for a summer day craft project!


Step 2

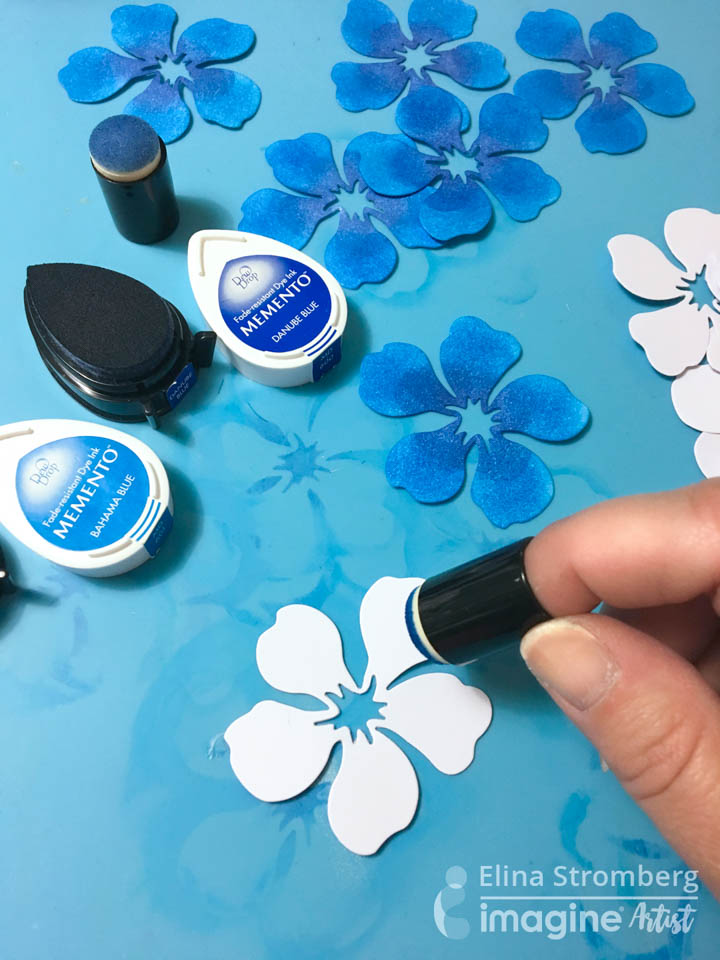
Using white cardstock, die-cut, punch, or free-cut with scissors a pile of flowers. Color the flowers with your favorite ink colors. For these sample cards, I used two blue Memento inks: Bahama Blue and Danube Blue. If you want to let the ink colors mix, mist the flowers with water and let dry.


Step 3

If your flowers have separate centerpieces, color them, too. Glue the inked flowers on a piece of white cardstock. Leave some white space between the flowers. Let dry.


Step 4

Using scissors or a paper trimmer cut a panel from the decorated flower paper. Mat the panel on a piece of matching color cardstock, and glue on the card front. Stamp “Thank You” or “Hello” with VersaMark and heat emboss sentiment on a piece of solid color cardstock. Glue panel on a card front.


Supplies

Imagine

Other

  • Scissors
  • Paper trimmer
  • Glue
  • StudioCalico – ‘Thank You’ stamp
  • Sizzix – ‘Hello my Friend’ stamp, Floral die
  • Cardstock – Dark Blue, White
  • Cardbase – White


Learn How to Stencil a Mixed Media Card

by Kassy Tousignant

Learn How to Stencil a Mixed Media Card

Mixed media techniques aren’t only for canvas and 3-D objects. You can make beautiful mixed media cards too! Fireworks Shimmery Craft Spray and Delicata ink look amazing together on this 6×6 inch card.  Just add a few embellishments on top of the gorgeous, textured background to make a stunning card that anyone would be happy to receive.

Supplies

Imagine
Other
  • Maya Road – frame embellishment
  • Prima – flowers
  • Heidi Swapp – embellishments
  • Gold string
  • Paper butterfly
  • Liquitex – ultra matte gel
  • Neenah Cardstock
  • TCW – stencil
  • SnipArt – chipboard
  • Daler Rowney – white gesso


One Card – Lots of Techniques

by Nadine Carlier

Bee Kind Card by Nadine Carlier Imagine Crafts. StazOn in Jet Black ink

Mixed media cards do not always have to be bulky. I used several different techniques and mediums like Fireworks! Spray, irRESIStible Pico Embellishers and StazOn Ink on my card, yet the card is still flat enough to put in an envelope and mail to a friend.  Watch my video below to see how I did it.  Enjoy!

Skill: Intermediate
Time: 30 minutes + drying time

Supplies

Imagine
Other

Visit our YouTube Channel for more inspirational videos and subscribe to get updates when we post new videos.

How To Use Walnut Ink Crystals To Create A Vintage Card

by Nadine Carlier

Vintage Card by Nadine Carlier IC

Walnut Ink Crystals are rather new to me but once I used it, I instantly became addicted. They are so much fun! One of my favorite techniques is smooshing paper onto my mat with inks. Which if you have ever watched my videos you will see I use this technique often.  To create a vintage feel to my card, I used Delicata Golden Glitz and the Walnut Ink Crystals. Watch my video below to see how I did it.  Enjoy!


Skill: Intermediate
Time: 15 minutes

Supplies

Imagine
Other

Visit our YouTube Channel for more inspirational videos and subscribe to get updates when we post new videos.

How To Make A Firework Background

by Nadine Carlier

4th of July Cards by Nadine Carlier 2 IC

With 4th of July right around the corner, it is time get started on those firework inspired crafts. To create my fireworks background for these cards I used some Fireworks! Spray and also the cool Stars and Stripes Stamp Set from Joy Clair.  This technique would also look awesome on scrapbook layout backgrounds.  Enjoy my video below to see how I did it!

Skill: Intermediate
Time: 15 minutes

Supplies

Imagine
Other

Visit our YouTube Channel for more inspirational videos and subscribe to get updates when we post new videos.

Gnome Is Where The Heart Is

by Nadine Carlier

Gnome Is Where The Heart Is Greeting Card made with Tsukineko and Imagine Crafts inks.

See how to create a sky background with VersaMagic & Memento Inks and clouds with Radiant Amplify in my video tutorial below. This Gnome Is Where the Heart Is stamp set from Joy Clair is a great addition to your crafting collection. Enjoy!

Skill: Intermediate
Time: 30 minutes

Supplies

Imagine
Other

Visit our YouTube Channel for more inspirational videos and subscribe to get updates when we post new videos.