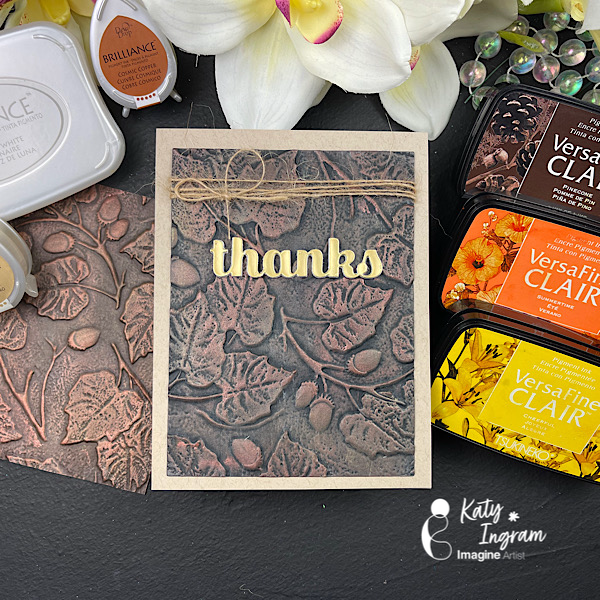
Hello Friends! Katy here with another quick project. I love trying new things with my inks and embossing folders and in todays video I used my VersaFine Clair with some Brilliance pigment inks in Cosmic Copper and Galaxy Gold and Moonlight White, with a 3D embossing folder.
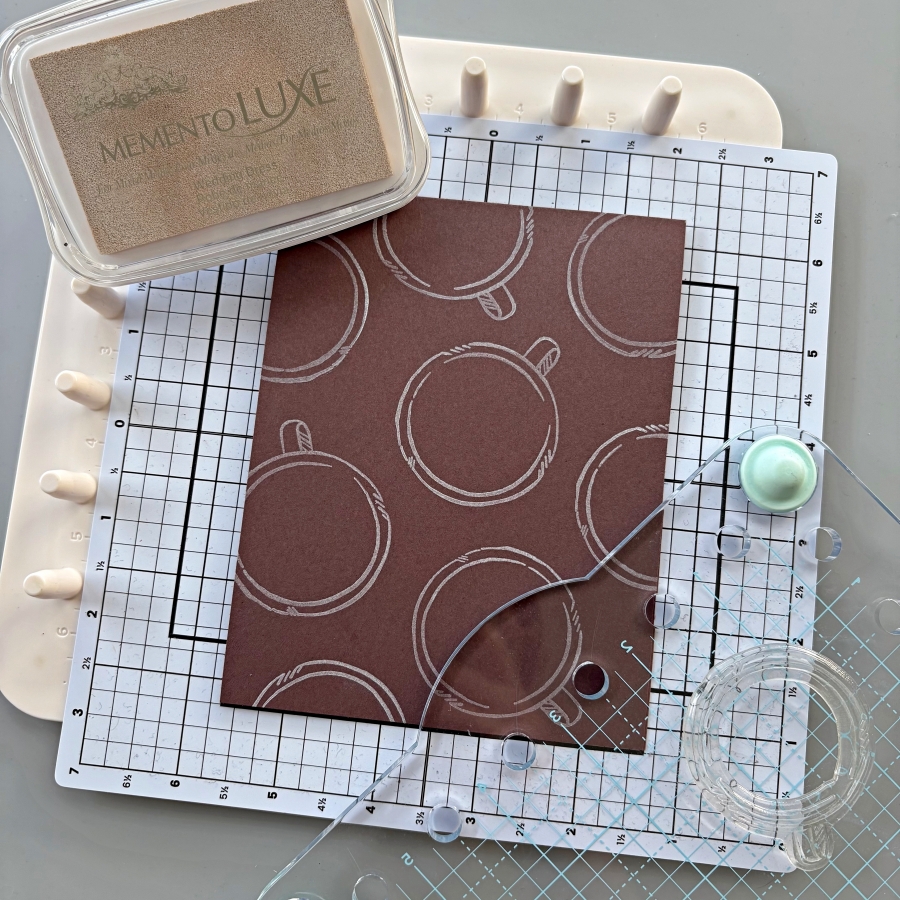
Hi everyone! It’s Jessica here. Today I have a simple coffee card to share with you. I like to include die-cutting and embossing in a lot of my projects, but I thought today I would focus on the basics – stamping with just ink and paper.
Step 1: Stamp the coffee stamps using Brilliance Coffee Bean and VersaFine Clair Warm Breeze ink pads. The stamp set I am using today is from Stampin Up’s Latte Love set, but you can use whatever coffee stamps you may have.
Step 2: To create a simple, patterned background, try stamping the same image at various angles using Memento Luxe Wedding Dress ink pad. For a more subtle, tone-on-tone look, you could use VersaMark ink pad instead. These two ink pads are my favorite for stamping background patterns.
Step 3: For the sentiment, I decided to use VersaFine Clair Pinecone since the VersaFine Clair ink pads are great at capturing fine details in sentiment stamps. I also fussy cut around the stamped image.
Step 4: I added a bow using some twine I saved from previous gift packaging, and adhered both the sentiment and the latte images with foam tape. And that completes today’s coffee card! Thanks so much for stopping by, and I’ll see you in my next tutorial!
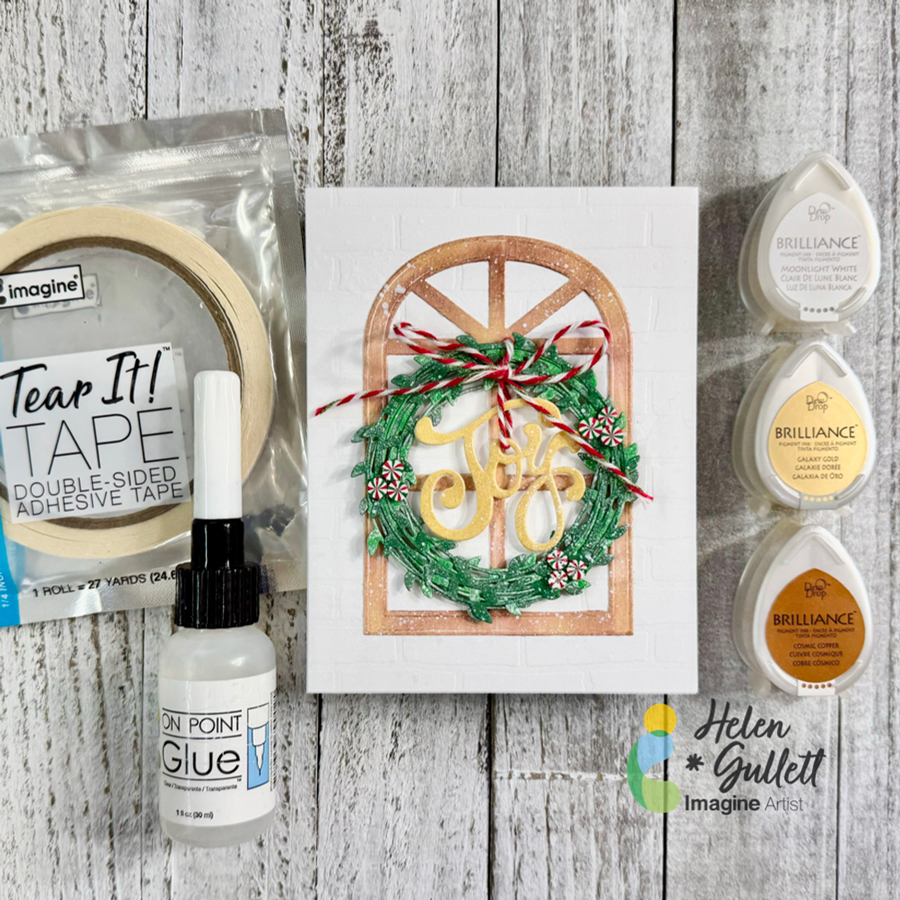
Hello crafty friends! If you ask me if we could start making Christmas projects in July, I would say the sooner the better. One of the ways to share the joy of the Holiday is by sending handmade Christmas cards. Today, I have this no-stamping Christmas card idea to share with you all. Yes… it is a no-stamping card, all die cuts. To add extra shimmer to the die cuts, I use Brilliance Dew Drop inks today. So, let’s turn on the Christmas music and get crafting!
Skill: Intermediate Time: 20-30 minutes
Direction:
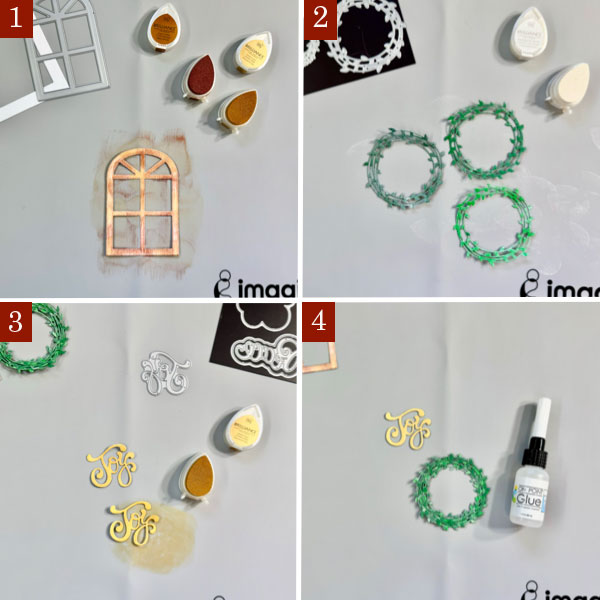
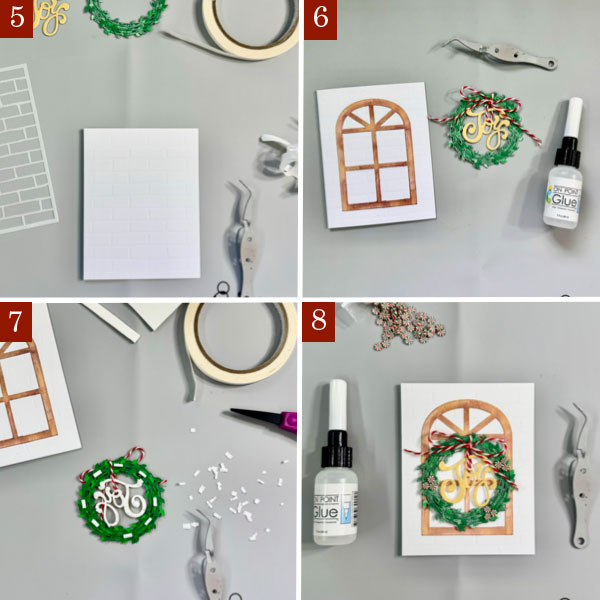
Step 1 Cut a heavyweight white cardstock (110 lb) to make the A2 card base in 4.25 inch x 5.5 inch dimension. Set a side.
Cut out a piece of white cardstock with the Arched Window die with the die cutting machine.
Randomly dab some of the Cosmic Cooper Brilliance ink and Galaxy Gold ink on the window to cover it. Then set it aside to dry or you can use a craft heat gun to speed up the drying time.
Step 2 Cut out 2 or 3 shades of green cardstocks with the wreath die with the die cutting machine.
Randomly dab some of the Moonlight White Brilliance ink on each of the wreaths to give them a snowy effect. Then set them aside to dry or you can use a craft heat gun to speed up the drying time.
Step 3 Cut out another white cardstock with the Joy word die using the die cutting machine twice. You can cut out 3-4 times to create a thicker word chipboard.
Cover the word diecuts with some of the Galaxy Gold ink to give them gold color. Then set them aside to dry or you can use a craft heat gun to speed up the drying time.
Step 4 Put together the wreath diecuts with some of the On Point Glue to become a one thicker wreath. Put a heavy object (I used a large acrylic stamping block) on them until the glue dries permanently in a couple minutes.
Do the same way with the Joy word diecuts to create the word chipboard.
Step 5 I embossed a piece of 4.25 inch x 5.5 inch white cardstock using the Brick Wall stencil. If you have a similar background embossing folder, you can use it, too.
Add the embossed background panel to the card base with some of the Tear It! Tape.
Step 6 Add the arched window to the card with On Point Glue, add a heavy object on it (or a large acrylic stamping block) until the glue dries permanently.
Add the word chipboard to the wreath with some baker’s twine to make it look like hanging down in the middle of the wreath. Tie up the twine into a bow and secure it with a dab of On Point Glue. Put a heavy object (or a larger acrylic stamping block) on it so the twine stays in place until the glue dries permanently.
Step 7 Cut a couple thin strips out of the thin white fun foam (about ¼ inch wide) and add some of the Tear It! Tape to them to create the foam tape.
Cut the foam tape into small pieces and add them at the back of the wreath. Remove the backing of the foam tapes and add the wreath to the card.
Step 8 Decorate the wreath with some of the Peppermint clay embellishments by adding them to the wreath with some of the On Point Glue.
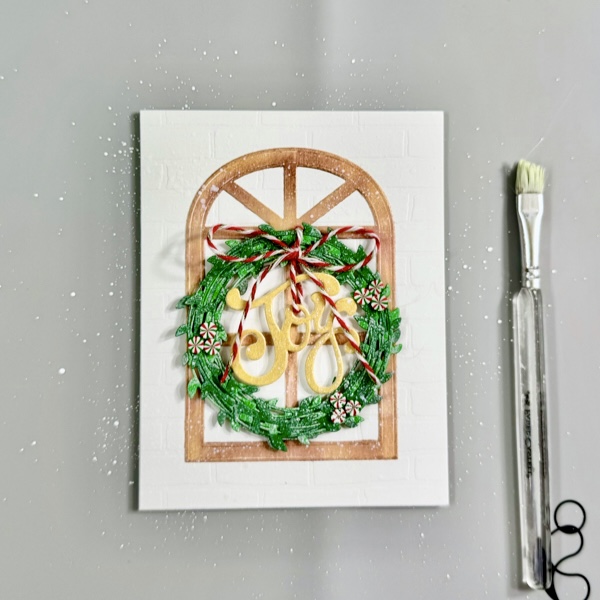
Step 9 On the craft mat, mix a small amount of white acrylic paint with some water.
Add some of white paint splatters to the card using brush for more texture and snowy look.
Dry the whole card with a craft heat gun.
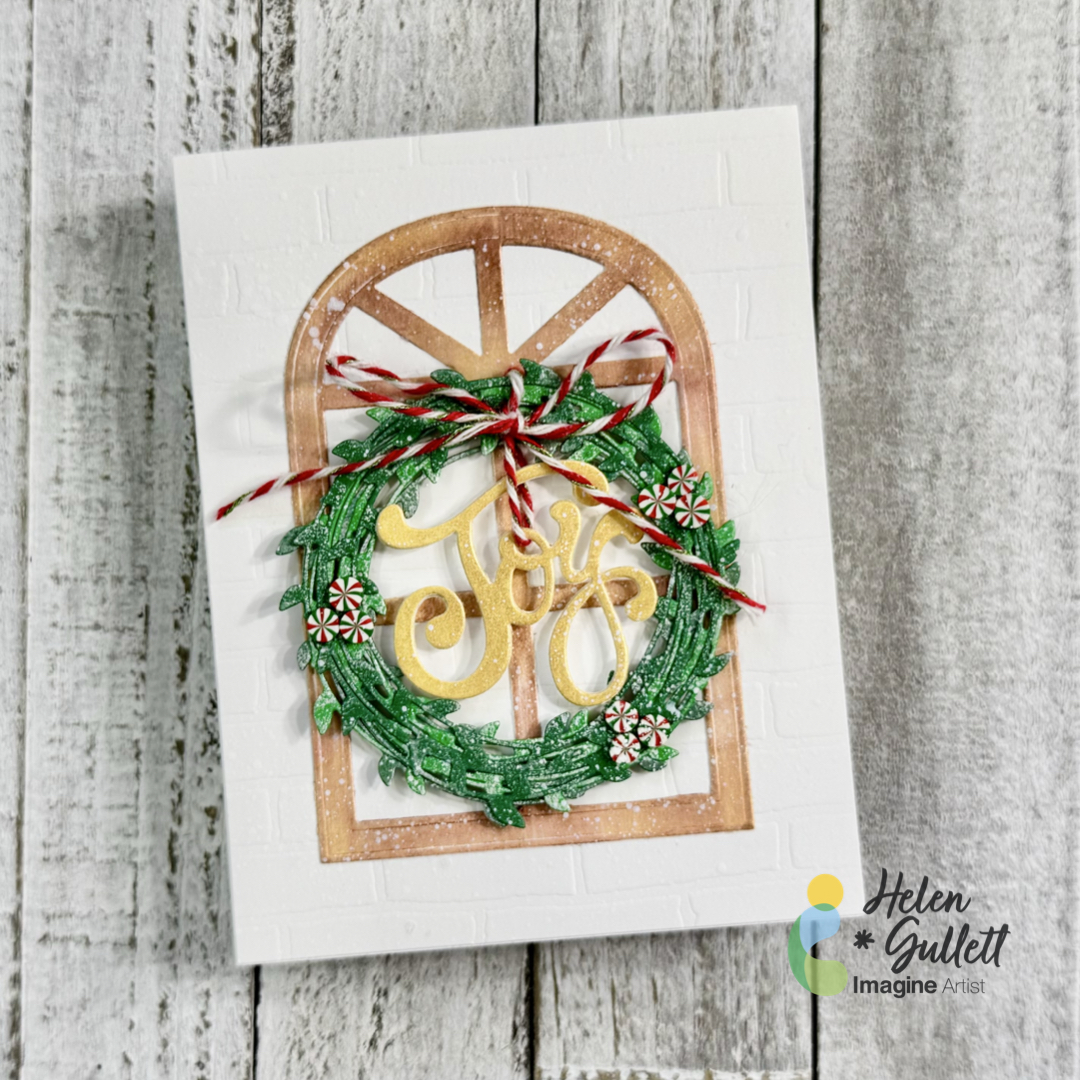
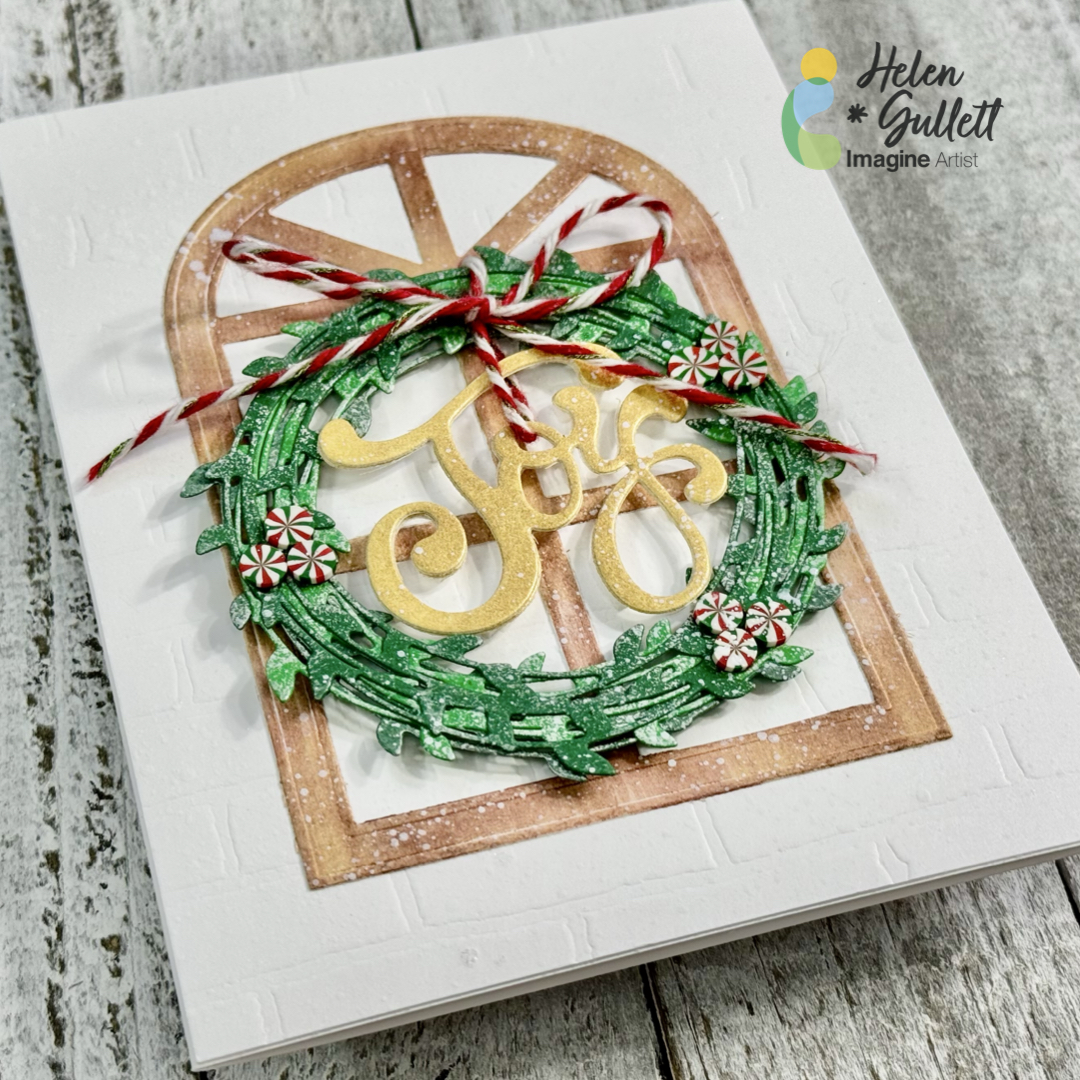
I love how this no-stamping Christmas card turned out and I hope you do, too. I plan to make more of this card to send them out to families and friends later.
Thank you so much for stopping by our blog today. Have a wonderful day!
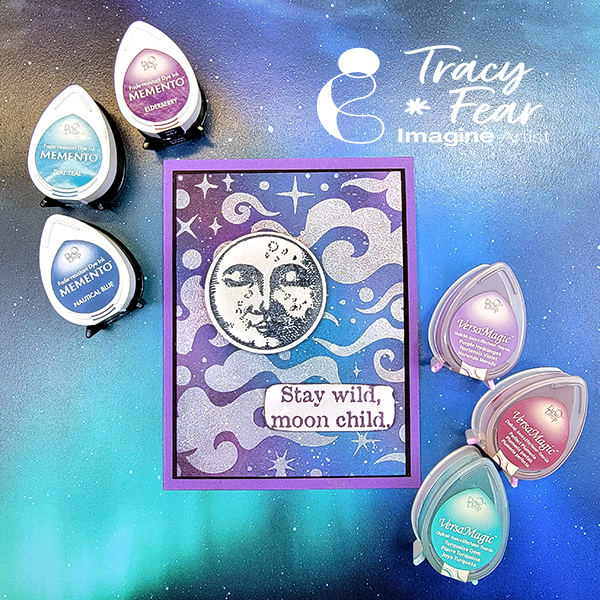
Hello Friends! Tracy here and today I am excited to share this really easy galactic, out of this world background technique!
In today’s video tutorial I am sharing how I use some Memento, VersaMagic, Brilliance, and VersaFine Clair inks to create this stunning card along with a paint pen, a stencil from my stash and some holographic embossing powder!
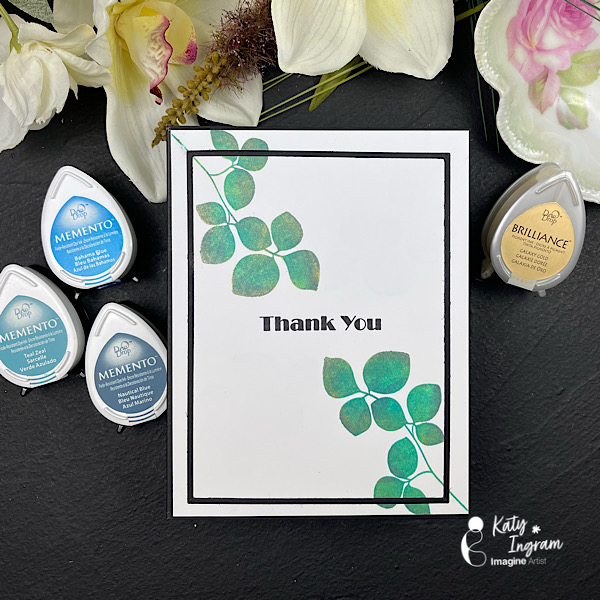
Hello friends, Katy here and in today’s video tutorial, I’m going to show you how to add some gilding to your stamped images as well as how to add some texture to your silhouette stamps using a swiping technique. I will be using Memento inks and Brilliance Galaxy Gold for the gilding. This technique is so quick and I think you will like the end result. I created a thank you card for today, but as always you could put any sentiment you like on this design. Listed below are products I used in todays video including some Affiliate links at no additional cost to you. l thank you for using those links and supporting my work.
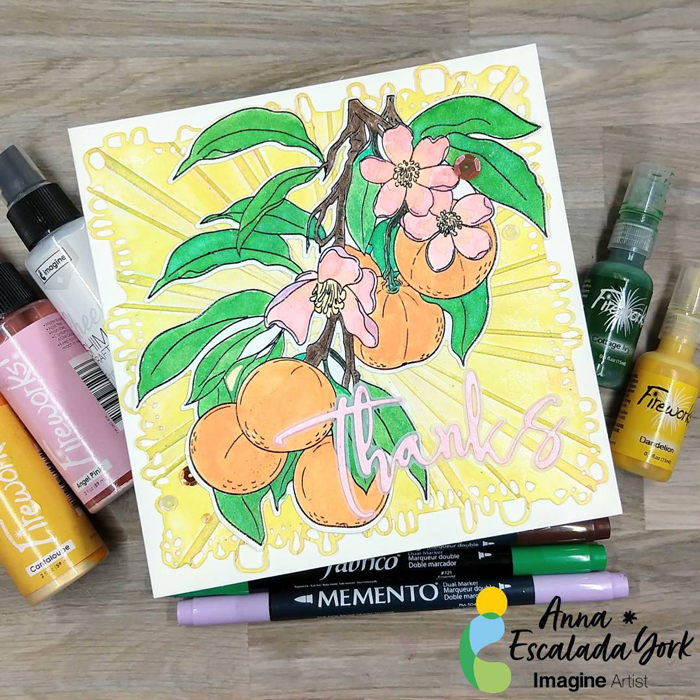
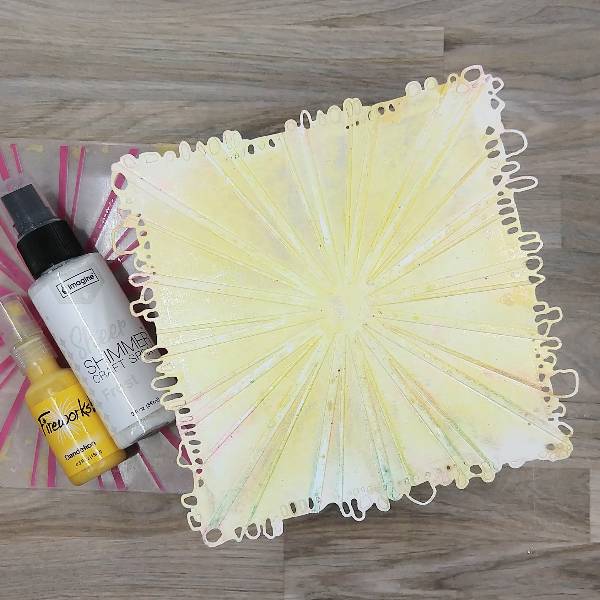
I used to be intimidated by the idea of multimedia cards, but all they are cards that have different types of products. This card features stamping, watercoloring with sprays and Amplify! Ink, and embossing.
Skill: Intermediate Time: 2 hours
Directions:
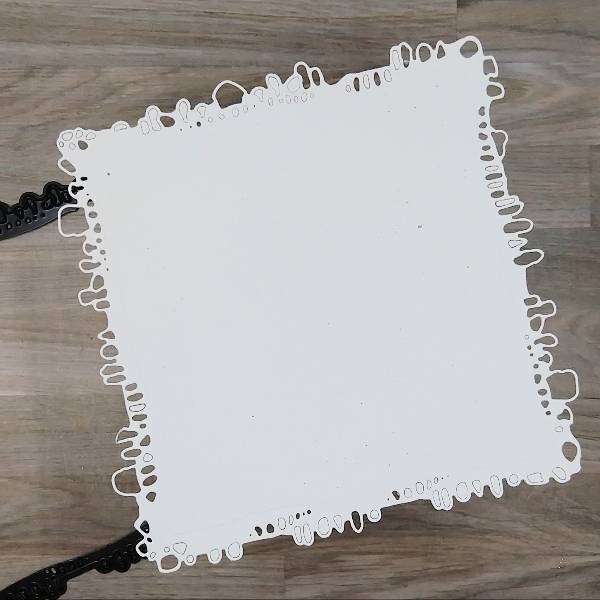
Step 1: Die cut a piece of watercolor paper.
Step 2: Spray Dandelion Fireworks! Shimmery Craft Spray onto the center part of an embossing folder and Frost Sheer Shimmer Craft Spray around the edges. Place the die cut watercolor panel in the embossing folder. (The folder had some residual color from a previous project, but it will be covered up later.)
Step 3: Rub a Sunflower Yellow Brilliance Ink pad over the edges of the embossed watercolor panel.
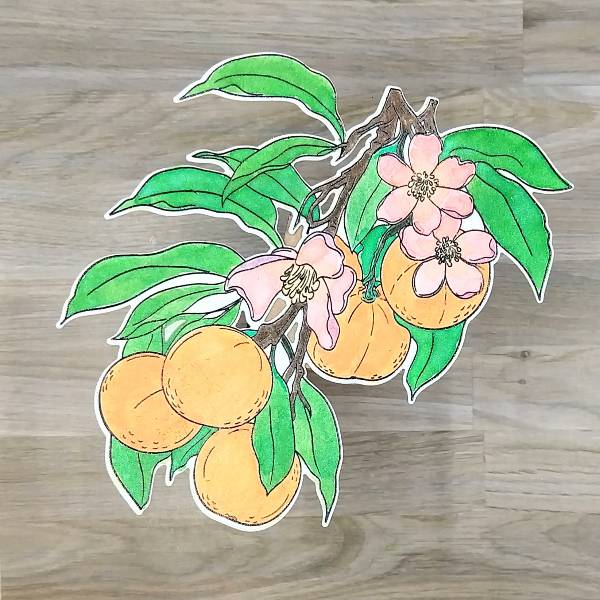
Step 4: Stamp the main image onto another piece of watercolor paper with Nocturne VersaFine Clair ink. Heat emboss with clear embossing powder.
Step 5: Use a variety of sprays and other media to color in the image.
The leaves were watercolored with Cottage Ivy Fireworks! Shimmery Craft Spray.
The green stems were colored with Emerald Fabrico Dual Marker.
The small branches were colored in with Rich Cocoa Memento Dual Marker.
The flowers were watercolored with Angel Pink Fireworks! Shimmery Craft Spray on the petals. After the petals dried, the center of the flower and the center part of the petals were water colored with Cantaloupe Shimmery Craft Spray. Finally, the outside parts of the petals were colored with Lulu Lavender Memento Dual Marker.
Electric Orange Radiant Neon Amplify! pigment ink and Cantaloupe Shimmery Craft Spray were mixed on a piece of scrap acetate and was watercolored onto the tangerines.
Step 6: Die cut the image with the corresponding die.
Step 7: Press Angel Pink Memento Dye Ink onto a scrap of watercolor paper. After the ink dries, spray Angel Pink Fireworks! Shimmery Craft Spray onto the same scrap of watercolor paper and allow it to dry.
Step 8: Die cut the pink watercolor paper with a thanks sentiment die and a piece of vellum with the sentiment’s shadow die.
Step 9: Glue the tangerine image onto the embossed watercolor background panel. Then glue the sentiment die cut to the vellum shadow sentiment die cut. Glue the sentiment onto the panel as well.
Step 10: Glue the panel onto a 6” by 6” square cardbase. Glue sequins on the lower left and upper right parts of the panel to finish the card.
AALL & Create – die set – Nature’s Doily Alex Syberia Designs – die set – Large Thanks die Altenew- die set – Tangerine Grove Altenew- stamp set – Tangerine Grove Catherine Pooler – sequin mix – València Sequin Mix Pink & Main – Embossing Folder – Sun Ray Clear Embossing Powder 6” by 6” cardbase Watercolor paper Vellum Die cutting machine Scissors Glue