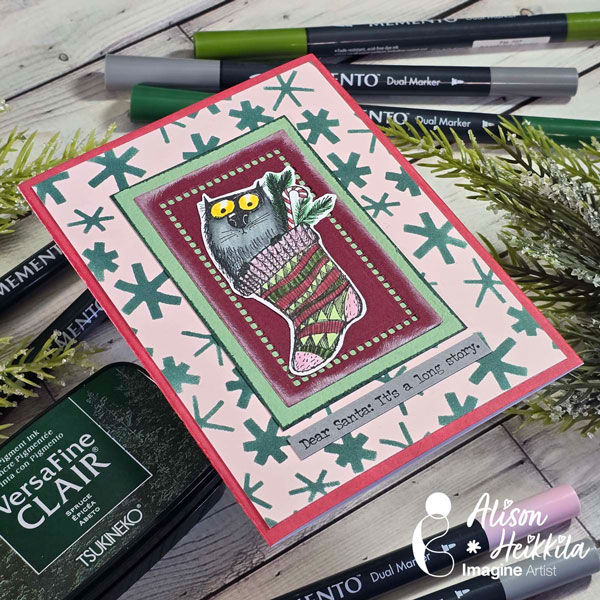
Hello! Alison Heikkila here. It’s time for my latest video for Imagine and I thought it would be fun to show a variety of simple techniques to make a fun cat-themed Christmas card. Plus, we’ll be using Memento Markers. If you’re already a fan of Memento Inks, you’ll want to check these markers out.
Skill Level: Beginner Time to Complete: 20-30 Minutes
*Some affiliate links are used in this post. That means that if you shop through these links, I may receive a small compensation, at no cost to you.
None of these techniques are difficult, but when you combine them you get to use a lot of items that are in your stash to make a really fun and festive card. I hope you’ll give these techniques a try. Thanks so much for stopping by. Have an inspiring day!
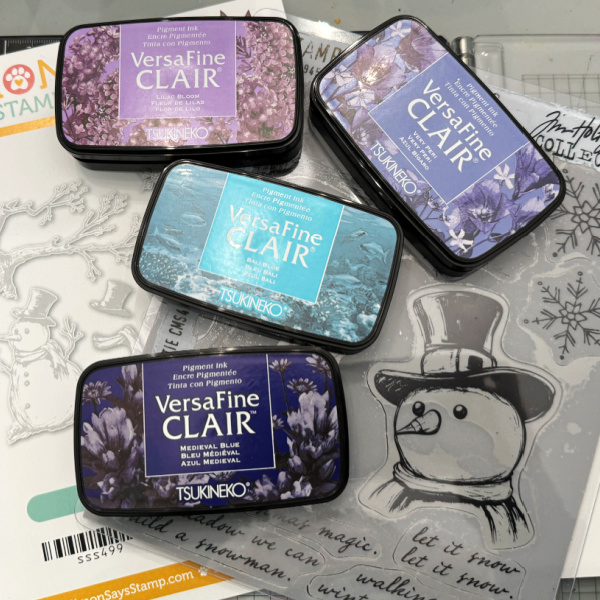
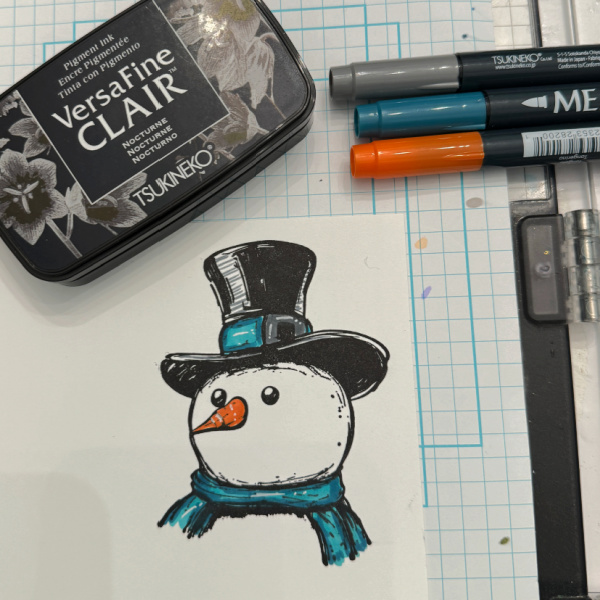
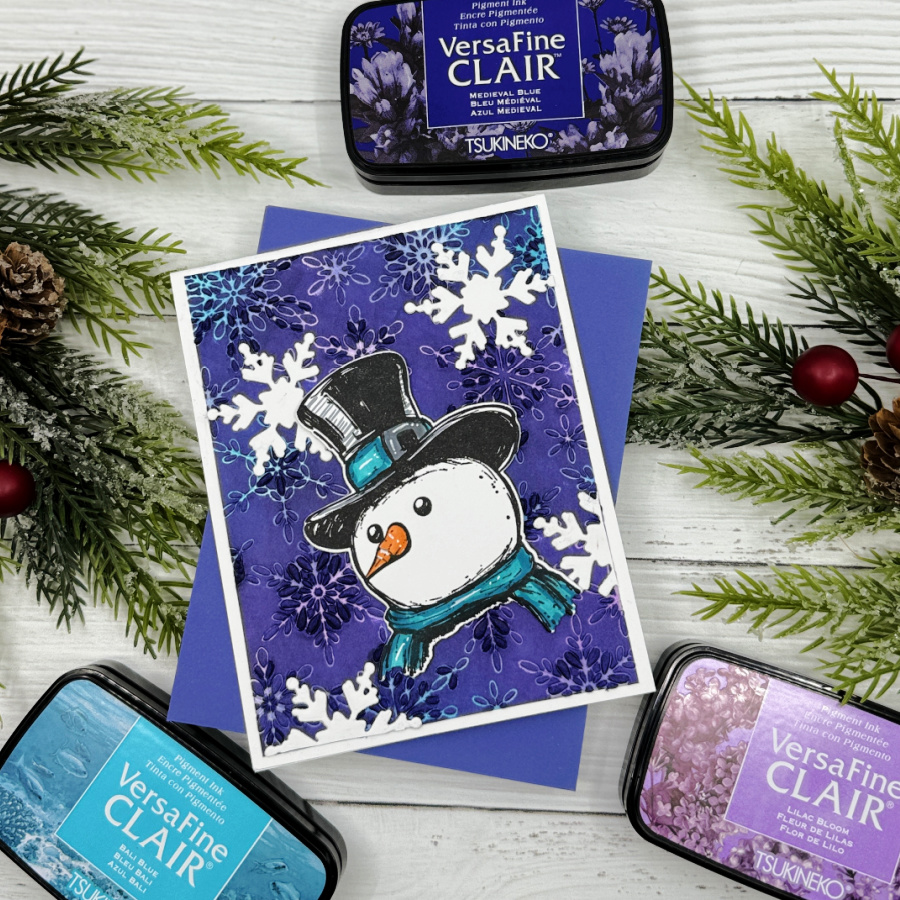
Hi crafty friends! It’s Ceal. I am back with a card using the Black Out Technique but I used blue ink instead.
Skill Level: Intermediate Time: 30 to 45 Minutes
Directions:
Gather your supplies. You will need 3 softer inks and 1 dark ink. A snowflake 3D embossing folder, a snowman stamp set and coordinating dies.
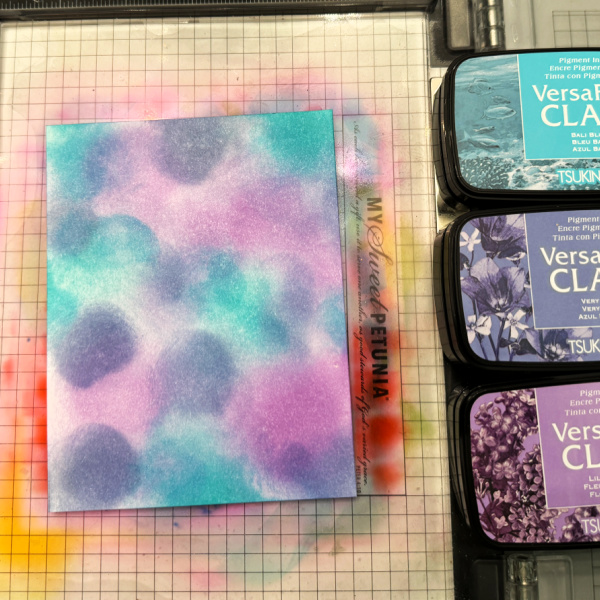
Step 1: Using the three lighter colors randomly add them to a white panel cut to A2 size.
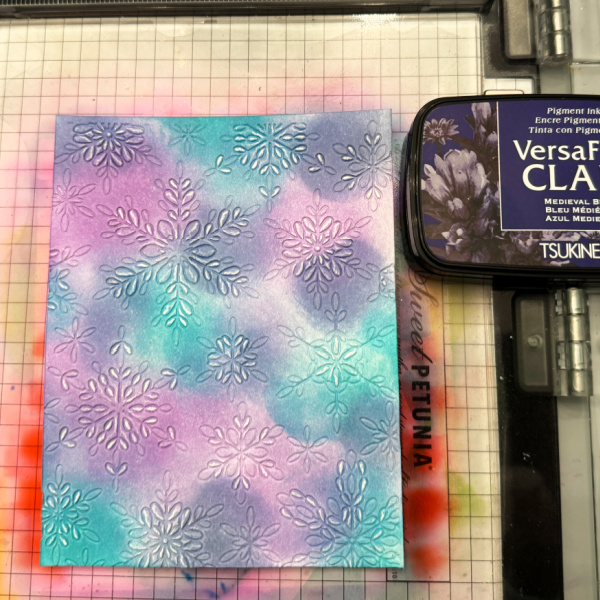
Step 2: Place the blended panel inside of the 3D embossing folder and run through the die cutting machine.
Step 3: Using the darker ink, rub across the entire embossed panel.
Step 4: Stamp, color and cut out the snowman image along with some diecut snowflakes. Places the pieces on the embossed panel and add to the card base.
Mr. Frostie stamp set – Stampers Anonymous/Tim Holtz Mr. Frostie coordinating dies Snowflake 3D embossing folder – Simon Says Stamp Neenah Solar White cardstock – CutCardStock
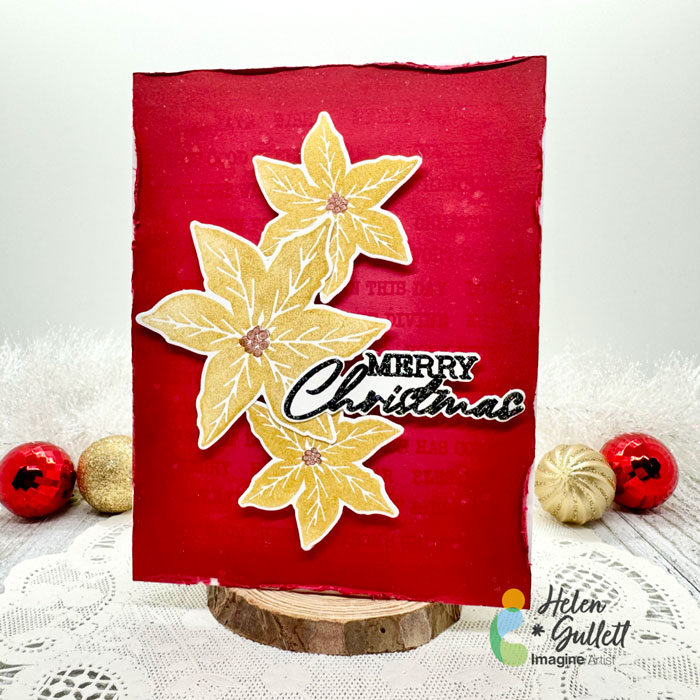
Hello crafty friends! It’s the time of the year to start making some Holiday projects. As for me, I love making and sending handmade Christmas cards. Today, I wanna share how to make this CAS Christmas Poinsettia Card.
Let’s get crafting!
Skill: Intermediate Time: 15-20 minutes
Direction:
Step 1
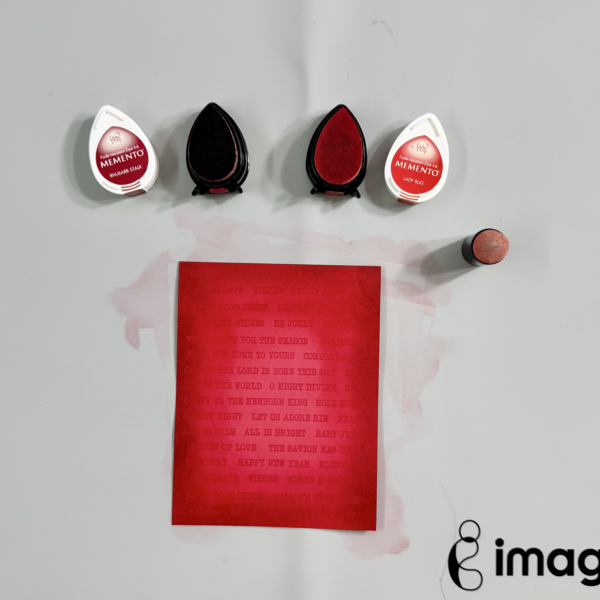
Cut out a piece of any color cardstock into 4.25 inch x 5.5 inch that you want to use as your background panel.
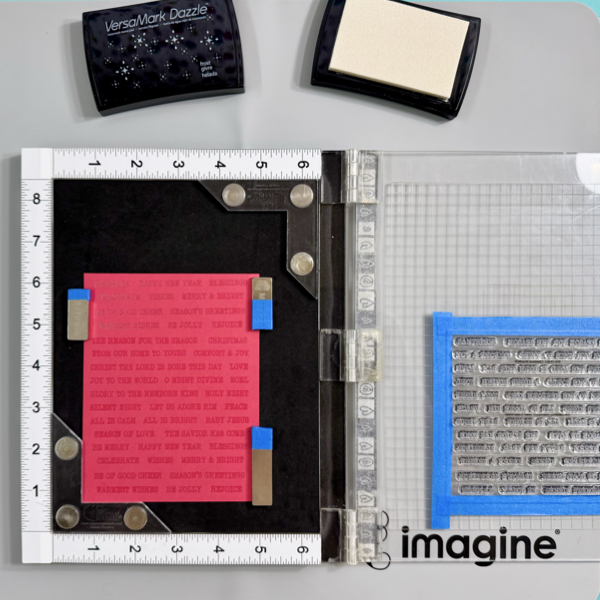
I used all the words on the stamp set I used so I taped the whole sheet on the stamping tool lid instead of taking it out one by one. You can use any word stamp set you have to create a similar background pattern.
Stamp the words on the cardstock using VersaMark Dazzle. Make sure to cover the whole panel.
Step 2
Add some darker shadow to the edges of the background panel using Memento Dew Drop ink pads and finger sponge dauber.
First, add the Lady Bug ink on the panel, then add the Rhubarb Stalk ink, and then add the Lady Bug ink again to blend them together.
Step 3
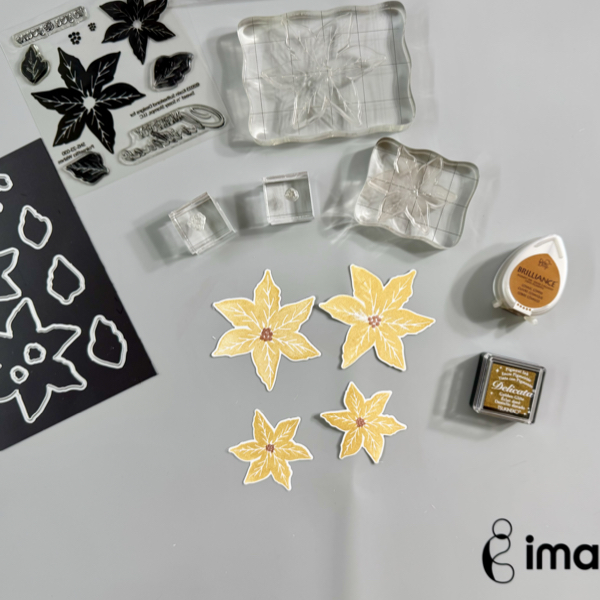
Stamp each layer of the poinsettia flower with the Delicata Golden Glitz ink.
Stamp the middle buds part of the poinsettia with the Brilliance Cosmic Copper ink. Dry the stamped images with a craft heat gun.
Cut each of the images with their matching dies, or you can fussy cut them if you don’t have the matching dies.
Step 4
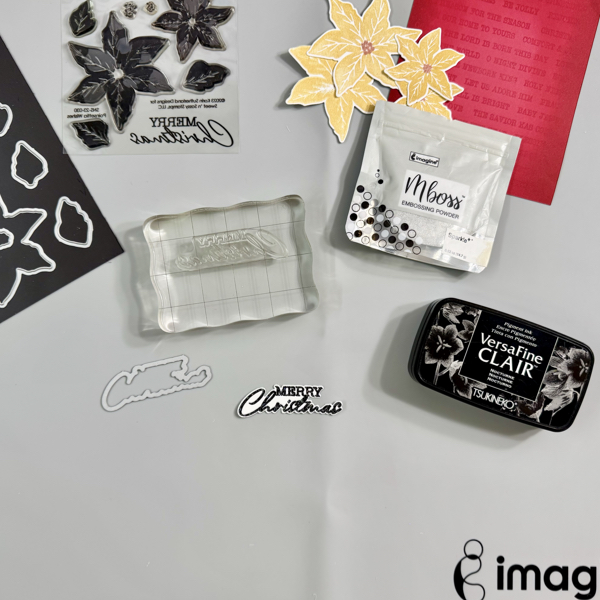
On a piece of white cardstock, stamp the sentiment with VersaFine Clair Nocturne, and then add some of the Sparkle Mboss Embossing Powder, then heat set it with a craft heat gun.
Cut the sentiment with the matching die set, or you can fussy cut it with scissors if you don’t have a matching die.
Step 5
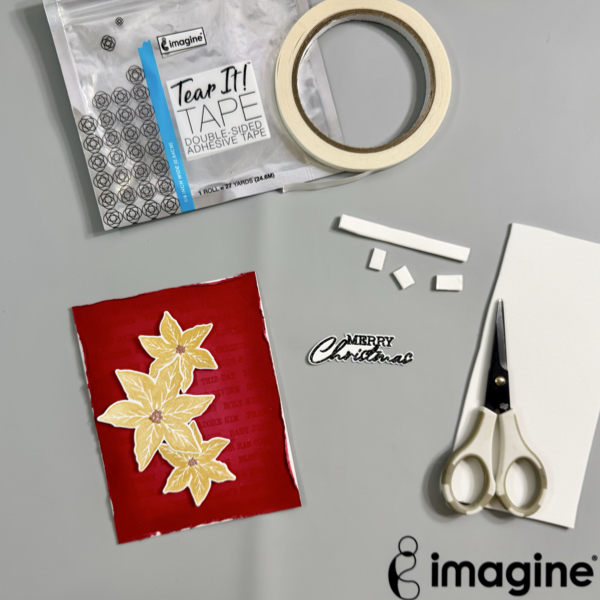
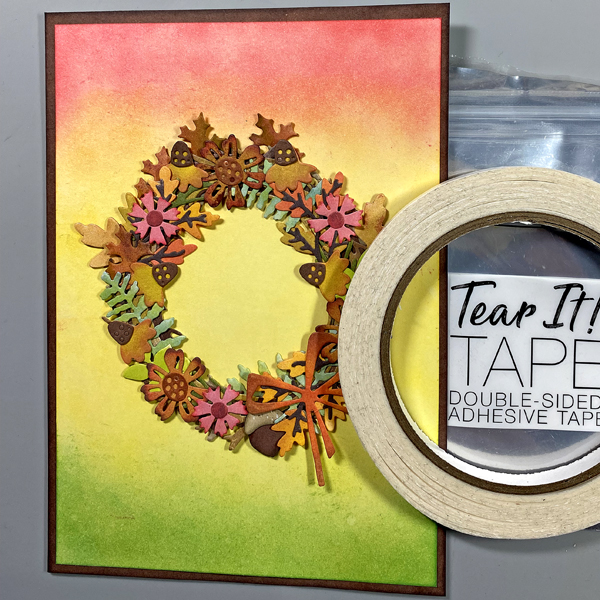
Distress all edges of the background panel with distresser tool or scissors. Add the background panel to the card base with some of the Tear It! Tape.
Add the poinsettia flowers and the sentiment to the card with some of the fun foam and Tear It! Tape for some dimension.
Step 6
For more extra sparkle to the Christmas card, add some splatters of the Sheer Shimmer Craft Spray using a fan brush.
Use the craft heat gun to dry the splatters.
Hope this Christmas card gives you an idea to start your Holiday projects. Thank you for stopping by our blog today. Have a fabulous day!
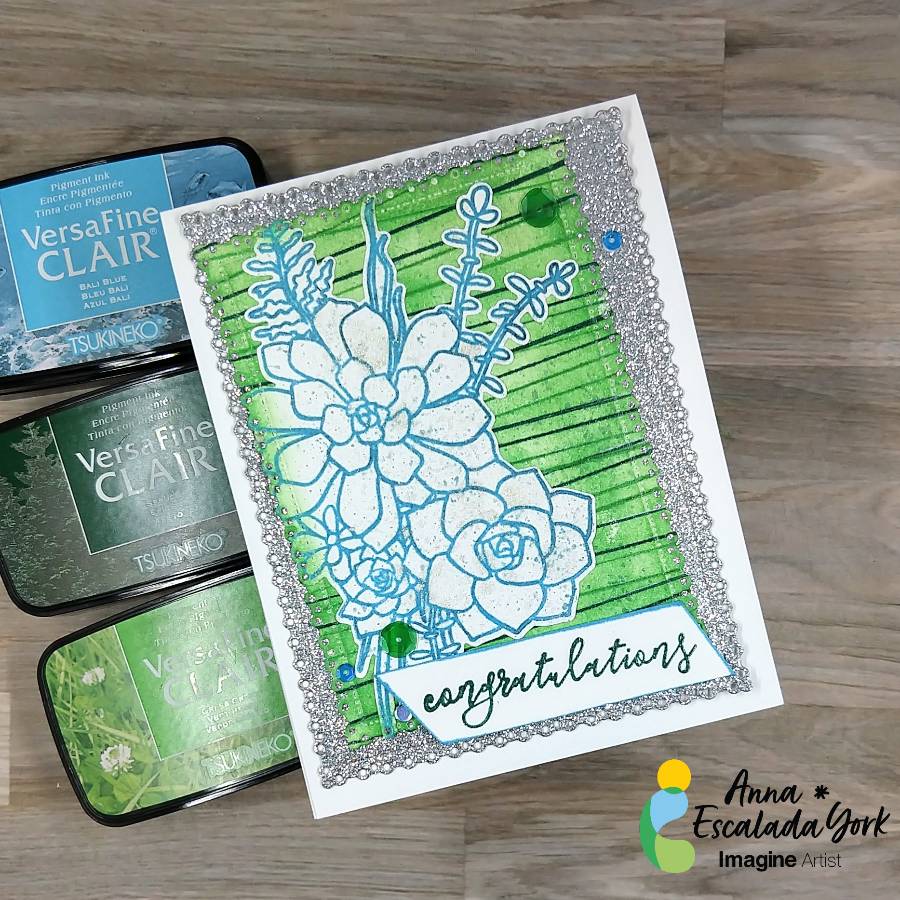
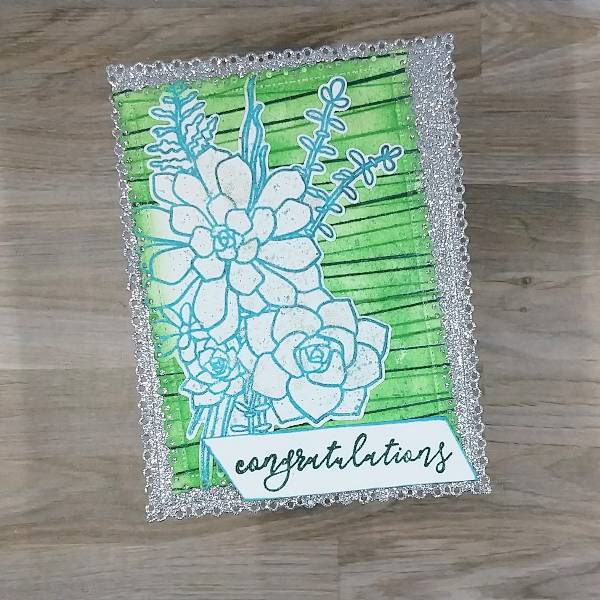
In today’s card, I made a congratulations card for a coworker who just had a baby using some of the beautiful new VersaFine Clair ink colors.
Skill: Intermediate Time: 1.5 hours
Directions:
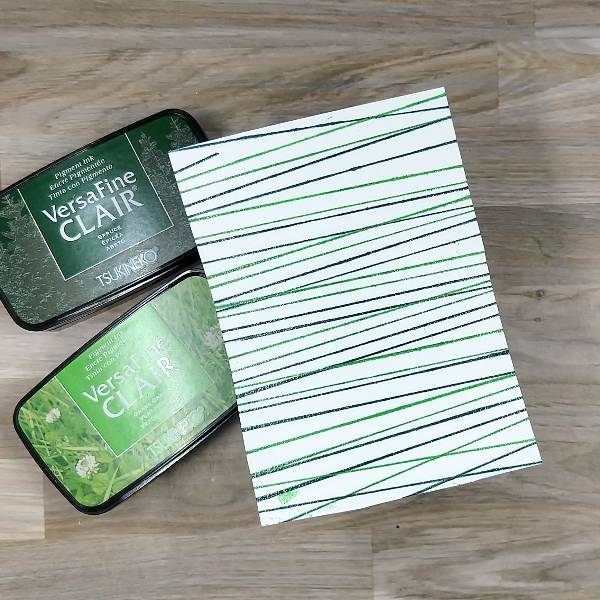
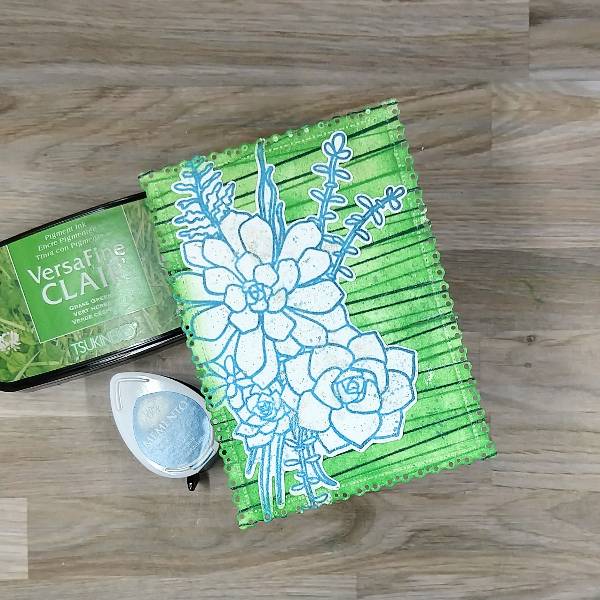
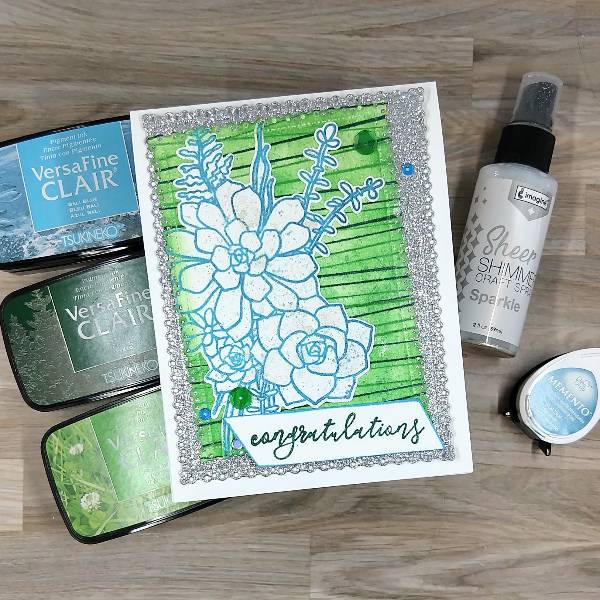
Step 1: Stamp a piece of watercolor paper with Grass Green VersaFine Clair ink using a background stamp with a variety of lines on it. Rotate the paper 180 degrees and repeat the process. Then move the stamp on the stamp positioning tool a little (so the lines don’t overlap) and repeat the process with Spruce VersaFine Clair ink. Heat emboss the whole thing with Clear Mbossing powder.
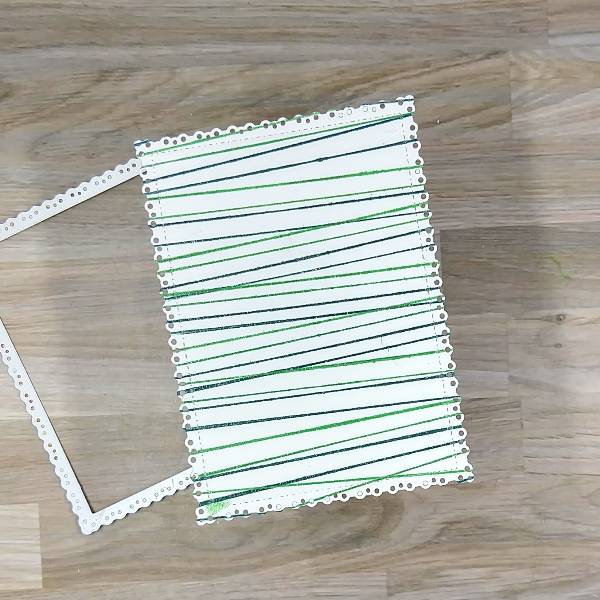
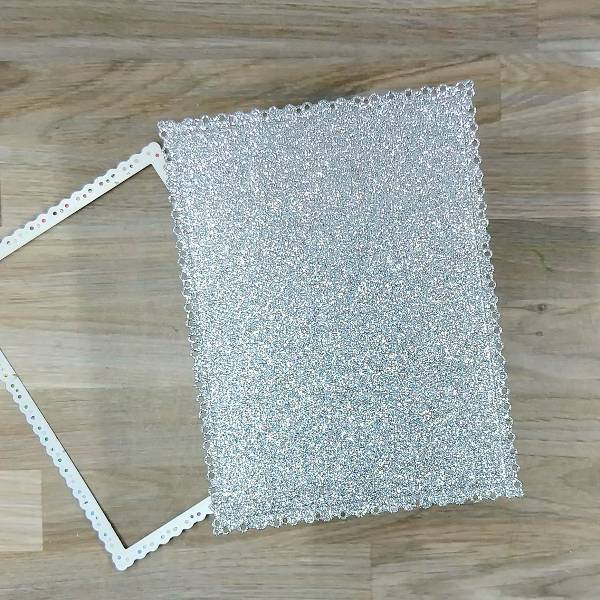
Step 2: Die cut the panel with the second-largest die from a nested die cutting set.
Step 3: Use a sponge dauber to ink blend the whole panel with Grass Green VersaFine Clair ink. (This doesn’t have to be done perfectly because it won’t matter on the final card.)
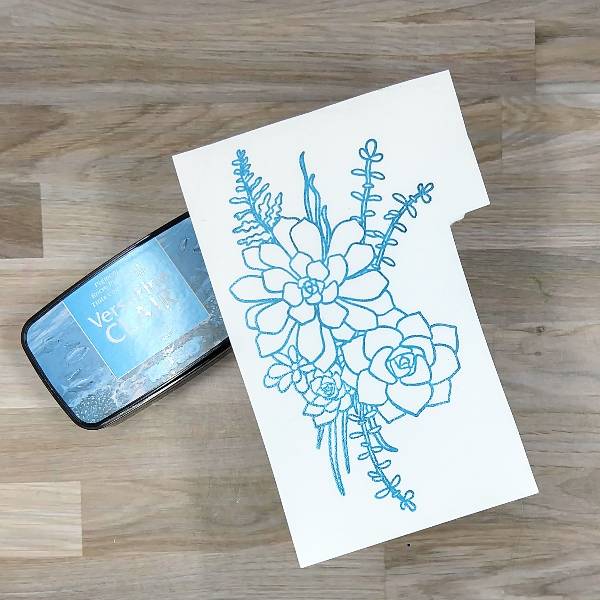
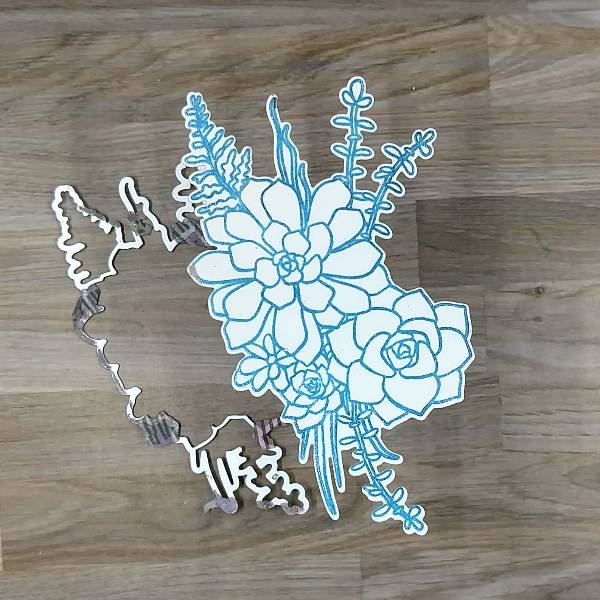
Step 4: Stamp the large floral image with Bali Blue VersaFine Clair ink on another piece of watercolor paper. Then heat emboss with more Clear Mboss powder.
Step 5: Die cut the floral image with the corresponding die.
Step 6: Die cut the left edge of the floral image with the same die used earlier, that way the decorative edge of the stamped image can line up with the edge of the green panel.
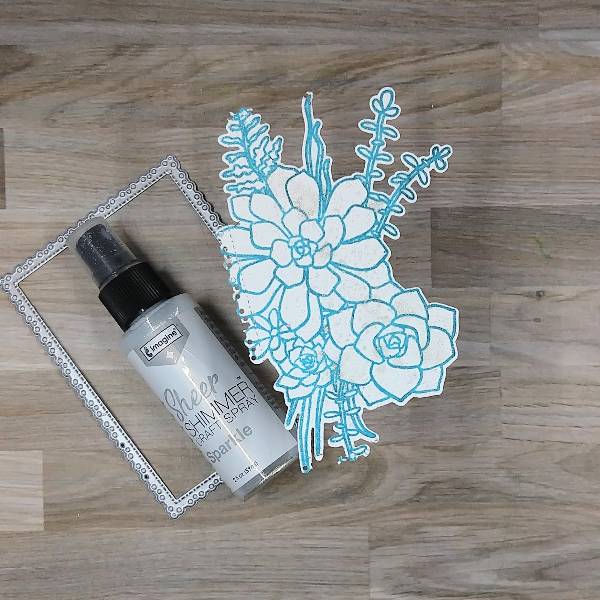
Since I smudged the floral image while die cutting, I decided to cover the smudge with some spray.
Spray the image with Sparkle Sheer Shimmer Craft Spray. Press the cap of the spray bottle down about half-way, allowing the spray to come out more in drips rather than as a mist. (I was able to cover the smudges with large splatters of spray.) Allow to dry.
Step 7: Glue the floral image onto the left side of the panel.
Press the Teal Zeal Memento Ink pad onto a piece of scrap acetate packaging and spray the packaging with water to create watercolor. Splatter it with a paint brush. After the splatter dried, ink blend the left side of the panel with more Grass Green VersaFine Clair ink.
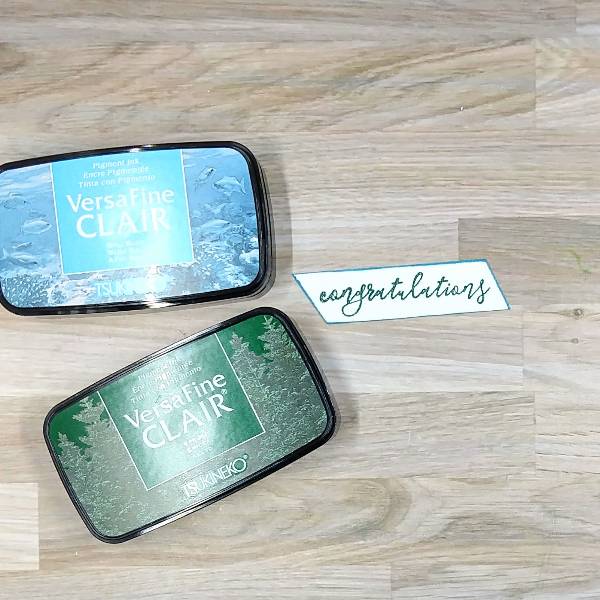
Steps 8 and 9: Stamp a sentiment from the same stamp set as the floral image with Spruce VersaFine Clair ink on watercolor paper and heat emboss with more clear Mboss powder. Trim the sentiment strip with a paper trimmer.
Then run the edges of the sentiment strip through the Bali Blue VersaFine Clair ink pad. Emboss the Bali Blue ink with more clear Mboss powder.
Step 10: Die cut a piece of silver glitter cardstock with the largest die from the same nesting die cut set.
Step 11: Glue the green panel onto the silver panel, orientating them at a diagonal. Glue the sentiment on the lower right corner of the green and silver panels. Set aside to dry.
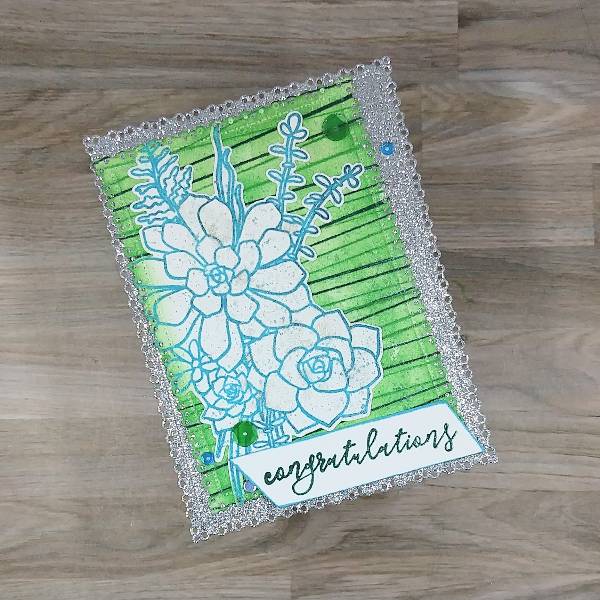
Step 12: Glue blue and green sequins onto the card–three on the lower left corner and two on the upper right corner.
Step 13: Finish the card by gluing the whole panel onto an A2-sized white card base.
Other • Catherine Pooler – sequins – Yukon • Gina Marie Designs – Die set – Pleated Lace Rectangles die set • Hero Arts – Stamp set – Succulent Bouquet • Hero Arts – Die set – Succulent Bouquet • Unknown stamp company – background stamp – diagonal lines (I don’t know the brand or name of this stamp) • Watercolor paper • Silver glitter cardstock • Die cutting machine • Paint brush • Paper trimmer • Scissors • Glue
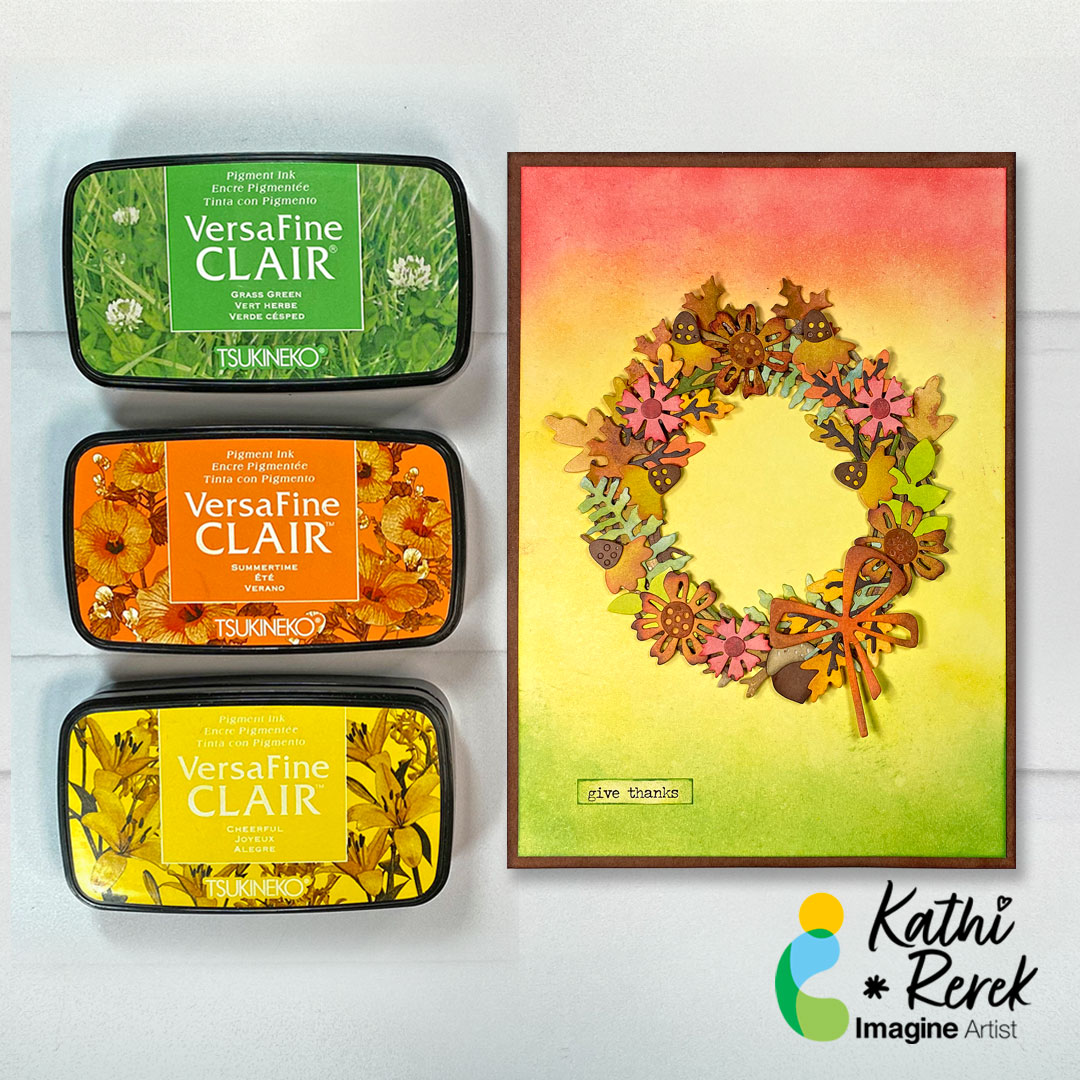
VersaFine Clair Ink is wonderful for coloring die-cuts easily. The VersaFine Clair Inks blend beautifully so you can create new colors to extend their versatility.
The method I used for all of the die-cuts was to place the die-cut(s) onto a Gel Press which will hold them in place while ink is being dabbed onto the die-cut(s) with Sponge Daubers.
I used a separate Sponge Dauber for each color to avoid contaminating the ink pads. I applied the lighter ink color onto the die-cut first and used a tissue to wipe excess ink off of the Gel Press. Darker ink was applied to the die-cut next and the same tissue was used to wipe up excess ink. If more ink was required to color the die-cut or to improve blending, this process was repeated. Photos below will illustrate my method.
Clean the Gel Press with hand sanitizer between colors and die-cuts.
Skill Level: Intermediate Time: 1 hour
Instructions:
Steps 1:
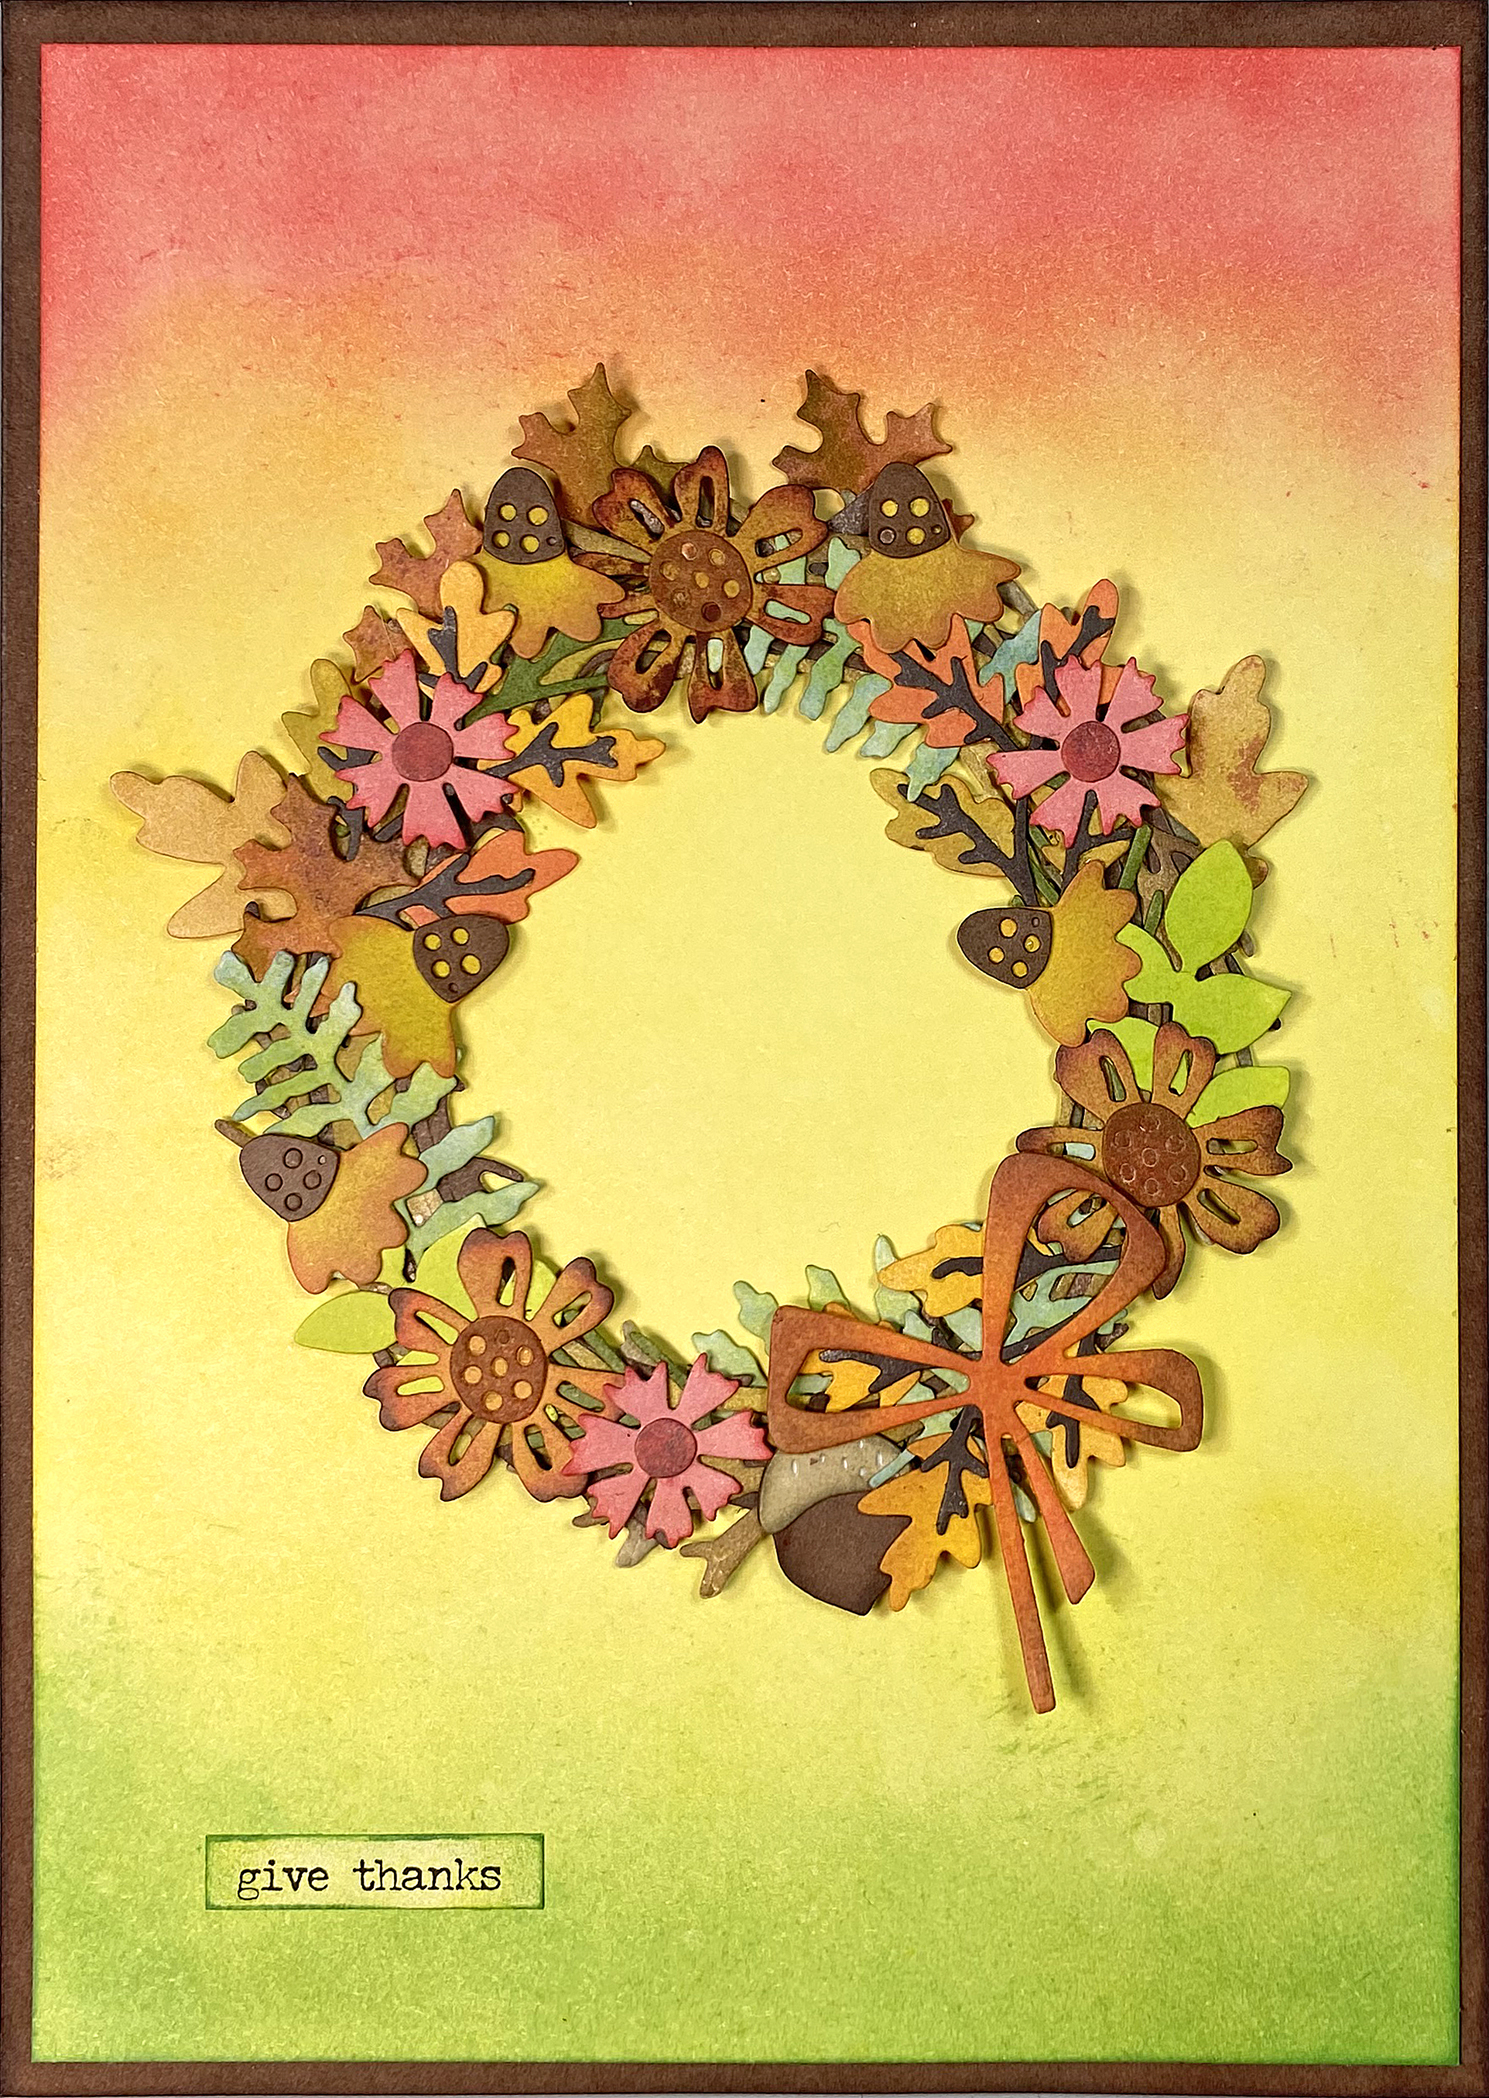
Use all the dies in the Vault Wreath set to cut all the dies from smooth white cardstock at least three times.
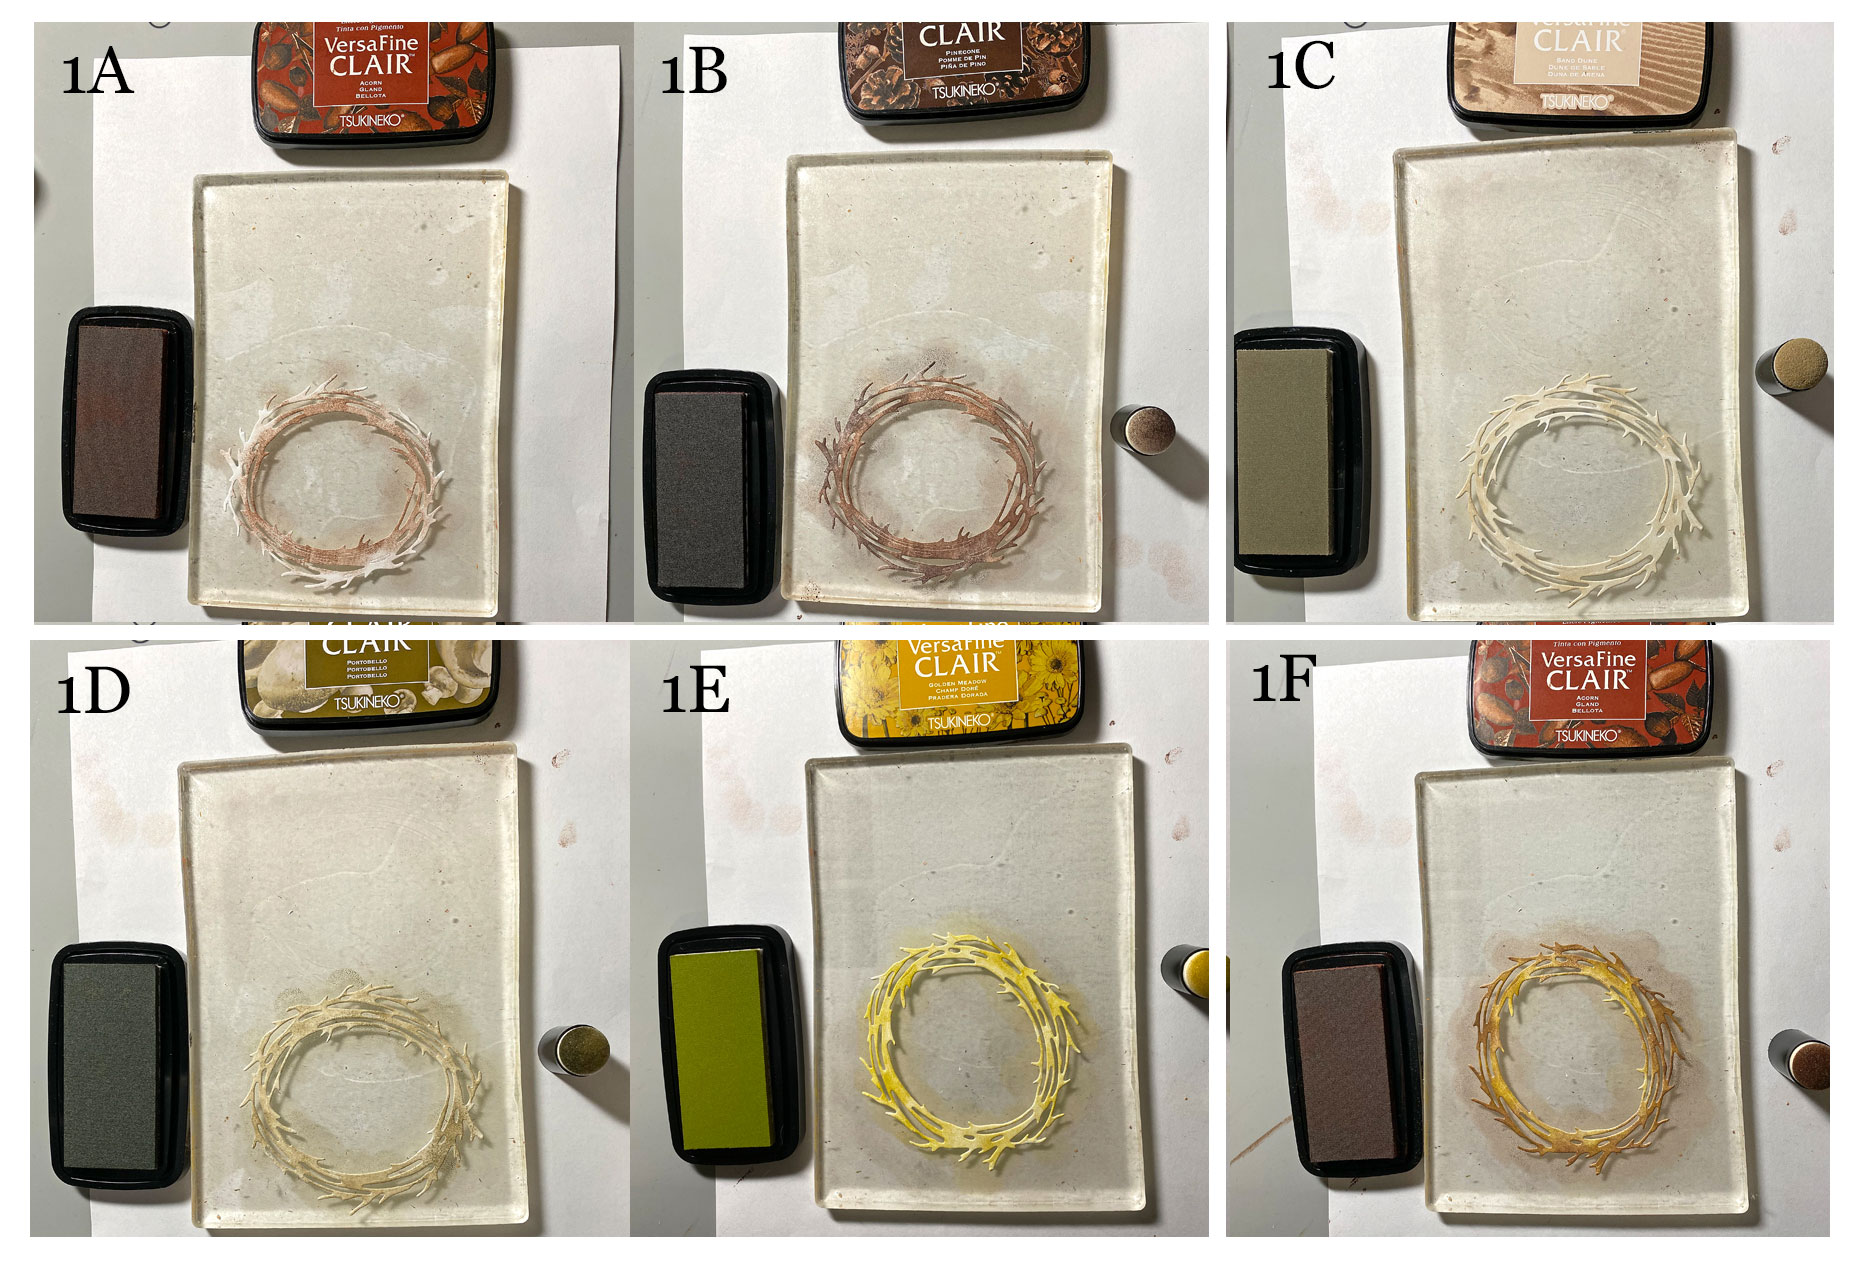
Place the wreath die-cut onto the Gel Press, which will keep it in place. Use a Sponge Dauber to dab Acorn VersaFine Clair Ink onto the wreath (1A). Use another Sponge Dauber to dab PineCone VersaFine Clair Ink onto the wreath blending as you go (1B). Remove the first wreath, set it aside, and wipe the Gel Press clean. You can use hand sanitizer if you like.
Place the second wreath die-cut onto the Gel Press. Use Sponge Daubers to dab Sand Dune (1C) then Portobello (1D) VersaFine Clair Inks onto the die-cut. Remove the second wreath, set it aside, and wipe the Gel Press clean.
Place the third wreath die-cut onto the Gel Press. Use Sponge Daubers to dab Golden Meadow (1E) and Acorn (1F) VersaFine Clair Inks onto the die-cut. Remove the second wreath, set it aside, and wipe the Gel Press clean.
Steps 2:
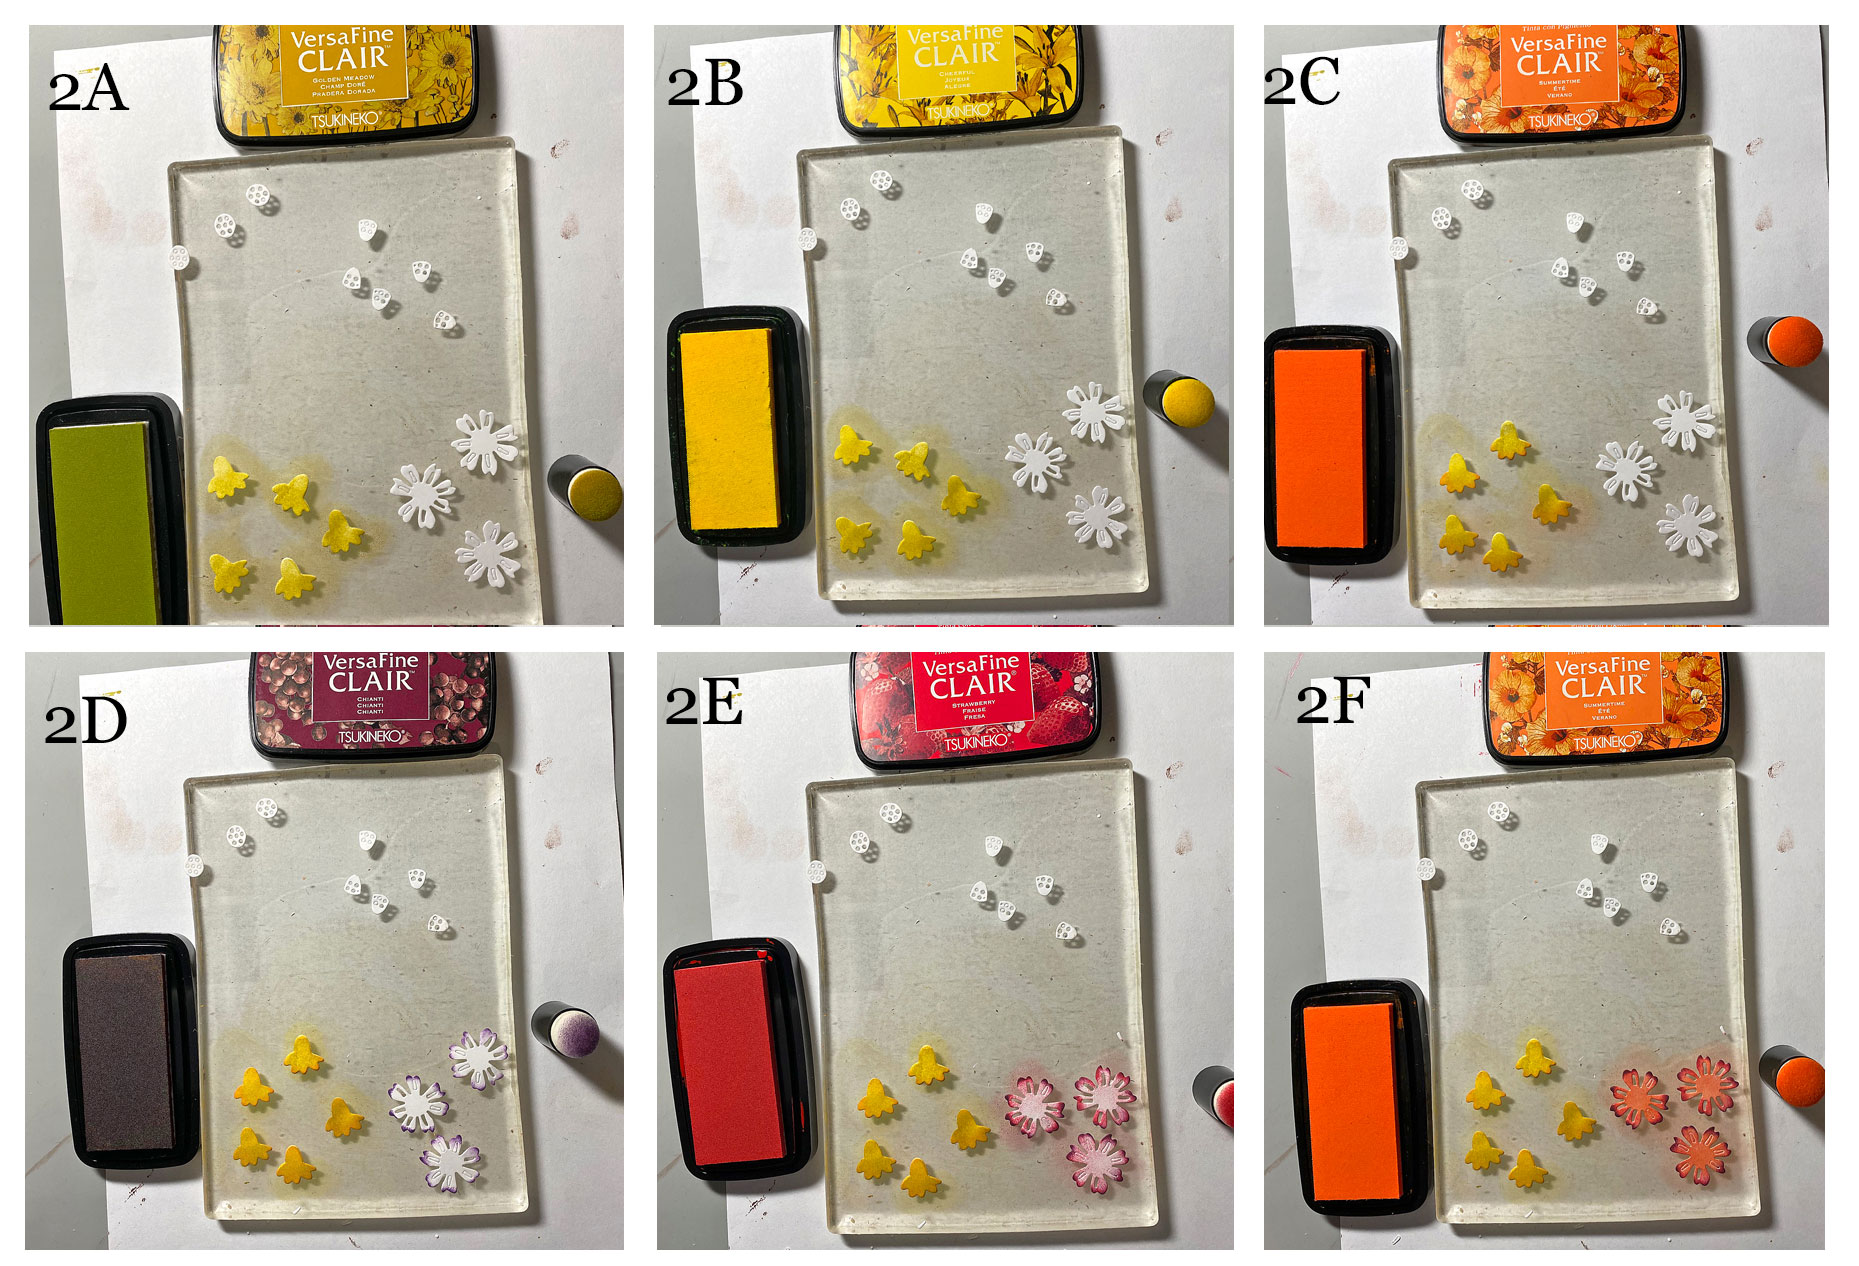
Place the cone flower (bottom left of the Gel Press), cone part (top right of the Gel Press), the small round center of the sunflower (top left of the Gel Press), and the sunflower (bottom right of the Gel Press) die-cuts onto the Gel Press.
Use Sponge Daubers to dab Golden Meadow (2A) and Cheerful (2B) to the Cone Flower die-cuts. Use Sponge Daubers to to apply Summertime (2C) and Chianti (2D) VersaFine Clair Inks to the bottom edges of the cone flowers. Use a Sponge Dauber to apply Summertime (2F) VersaFine Clair Ink to the spiky flower.
Remove the flower die-cuts and leave the centers on the top of the Gel Press. Wipe the Gel Press clean.
Here are the color combinations for the rest of the die-cuts. Remember to firmly place the die-cuts onto the Gel Press, use Sponge Daubers to dab the ink onto the die-cuts, and to clean the Gel Press between sets of die-cuts.
Top of the Cone Flowers: Use Acorn VersaFine Clair Ink.
Sunflower centers: Use Summer Meadow and Acorn VersaFine Clair Inks.
Spiky Flowers: Hawthorn Rose and Tulip Red VersaFine Clair Inks.
Five petal leaves: Verdant VersaFine Clair Ink
Ferns: Avocado and Arctic Blue VersaFine Clair Inks
Pointed Oval Leaves: Avocado VersaFine Clair Ink onto the die-cuts.
Branches: Shady Lane VersaFine Clair Ink
Oak Leaves: Golden Meadow, Cheerful, Summertime, and Chianti VersaFine Clair Inks
Bottom of Acorn: Acorn and Pinecone VersaFine Clair Inks
Top of Acorn: Portobello and Pinecone VersaFine Clair Ink
Bow: Summertime, Cheerful, Tulip Red, and Chianti VersaFine Clair Inks
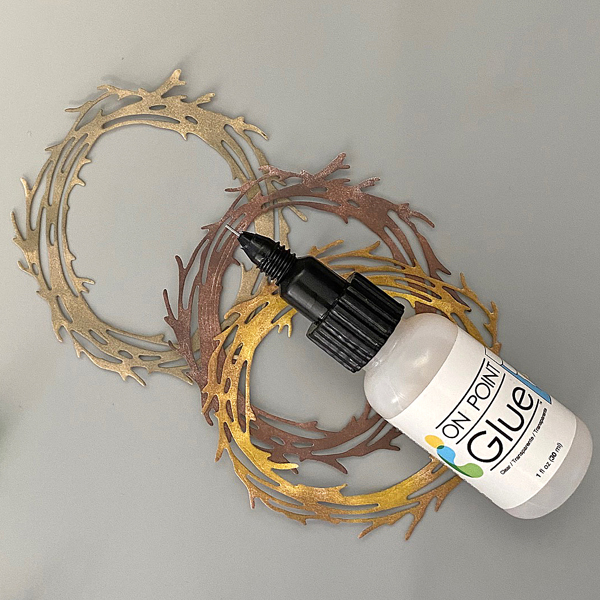
Step 3:
Use On-Point Glue to adhere the wreaths atop one another.
Step 4:
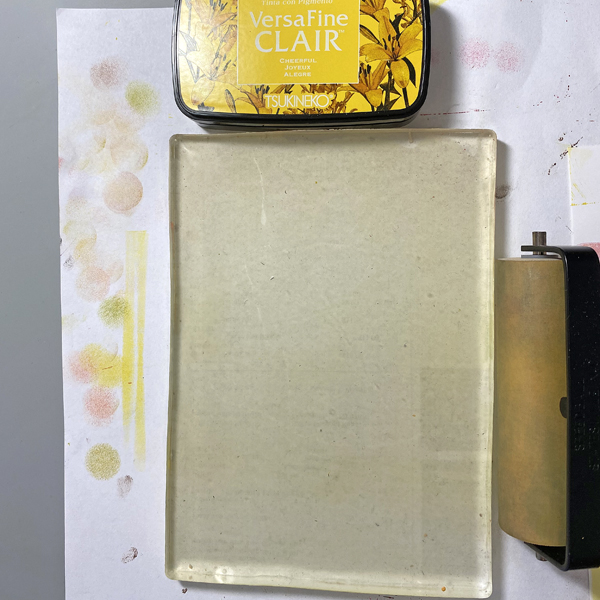
Roll a 4” brayer over the Cheerful VersaFine Clair Ink. Roll the brayer onto scrap paper to reduce the amount of ink on it. Roll the brayer to the Gel Press. Place a piece of 5” x 7” white cardstock onto the Gel Press and pull the print that will become the background panel.
Steps 5:
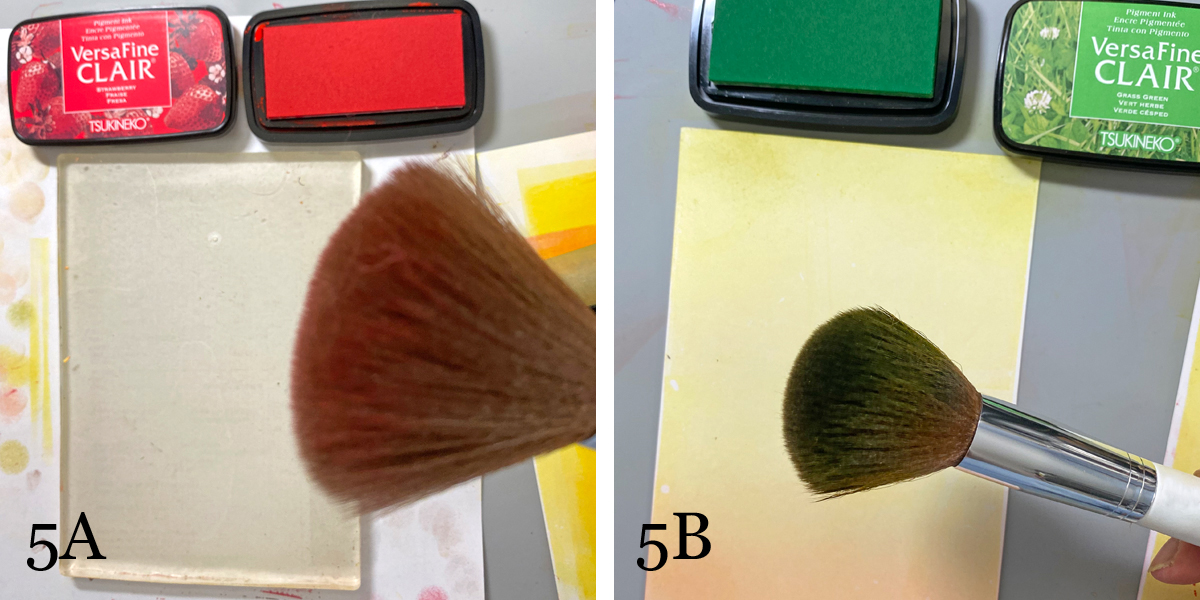
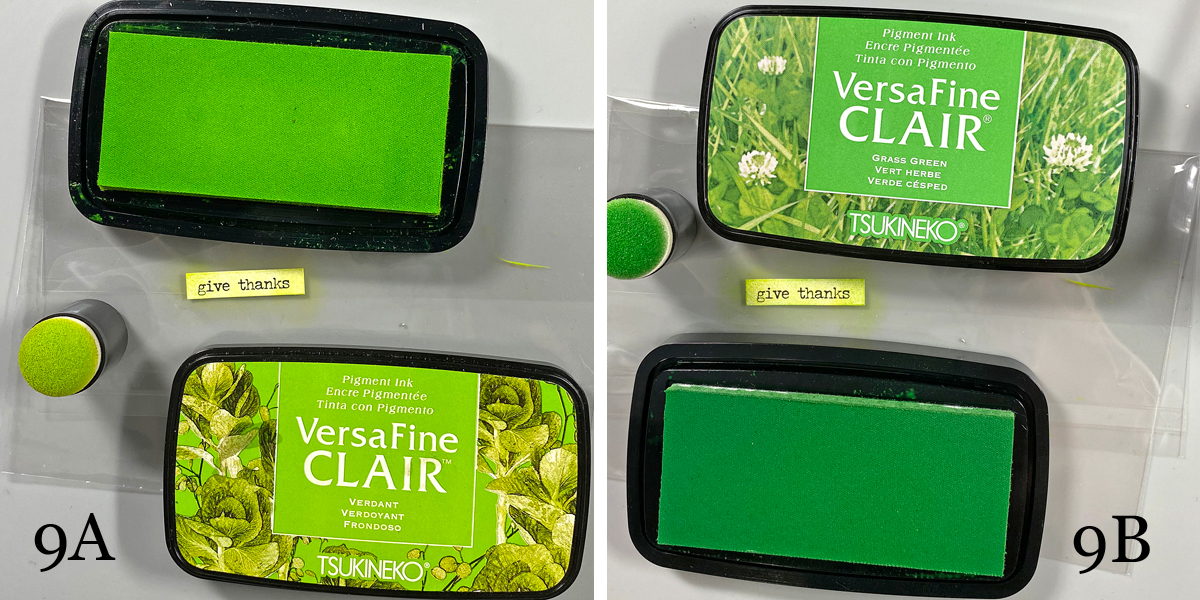
Use a make-up brush and tap lightly onto the Strawberry VersaFine Clair Inkpad. Brush off the excess onto the scrap paper. Brush the ink along the top of the Gel Press (5A). Place background panel on Gel Press and pull print. Take a second make-up brush and tap it lightly onto the Grass Green VersaFine Clair Inkpad. Brush off the excess onto the scrap paper. Brush the ink along the bottom of the background panel (5B)
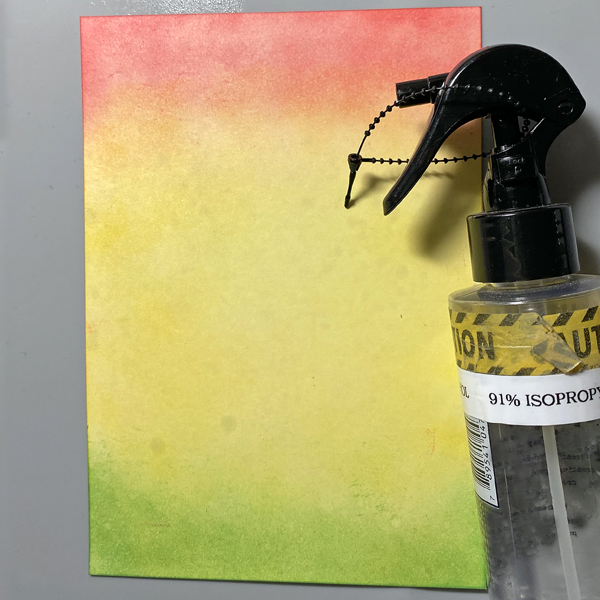
Step 6:
Spray with 91% Isopropyl Alcohol to slightly blend and mottle inked background.
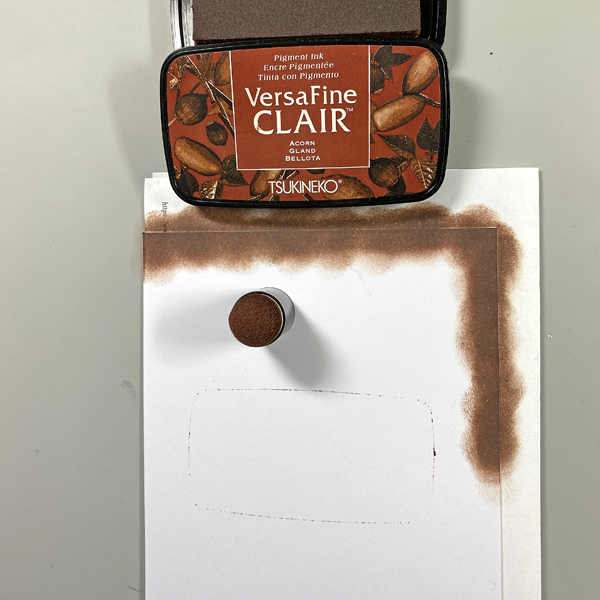
Step 7:
Use a Sponge Dauber to apply Acorn VersaFine Clair ink around the outer perimeter of a white 5” x 7” card. Heat set.
Step 8:
Use Tear It! Tape to adhere the layers of the card.
Steps 9:
Use Sponge Daubers to color an Idea-ology Sticker (9A). Use a second Sponge Dauber to edge the sticker (9B).
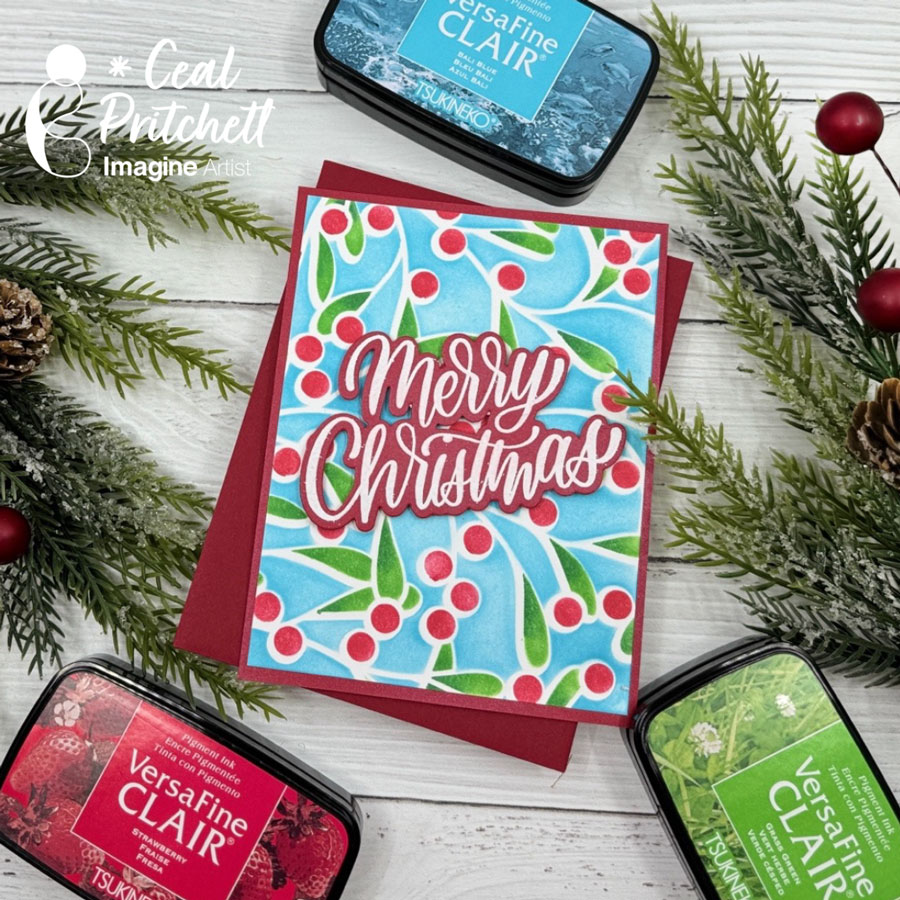
Hello crafty friends! Today I am sharing how to create this stenciled Christmas card that would be a quick and easy card to make multiples of.
Skill Level: Beginner Time: 15 to 20 minutes
Directions:
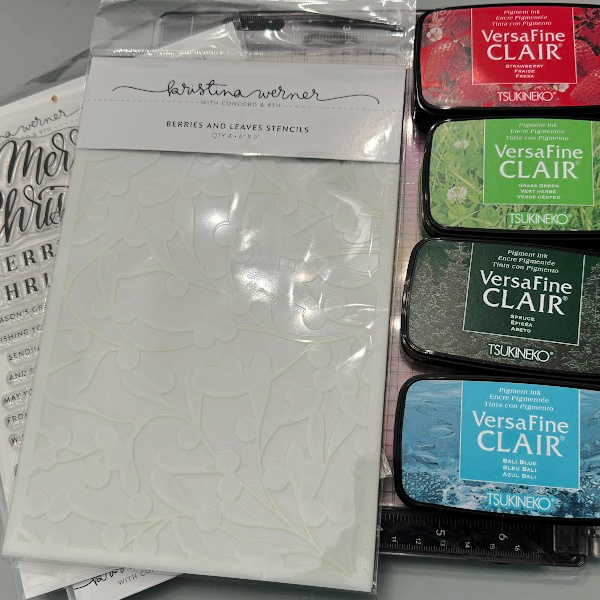
Gather your supplies. You will need several colors of ink; I used a nontraditional color along with the red and green. You will also need Layering stencils, some VersaMark ink, embossing powder and a die cut machine.
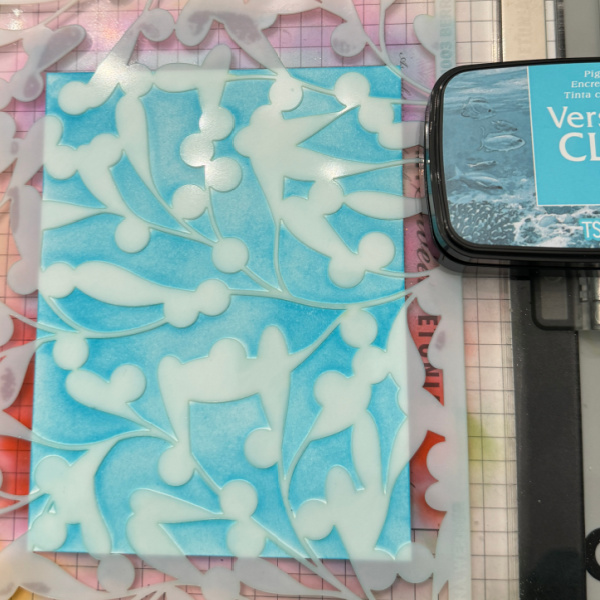
Step 1: Using a grip mat or other sticky mat to hold your panel of white cardstock. Lay you stencil over the panel and ink blend the background color.
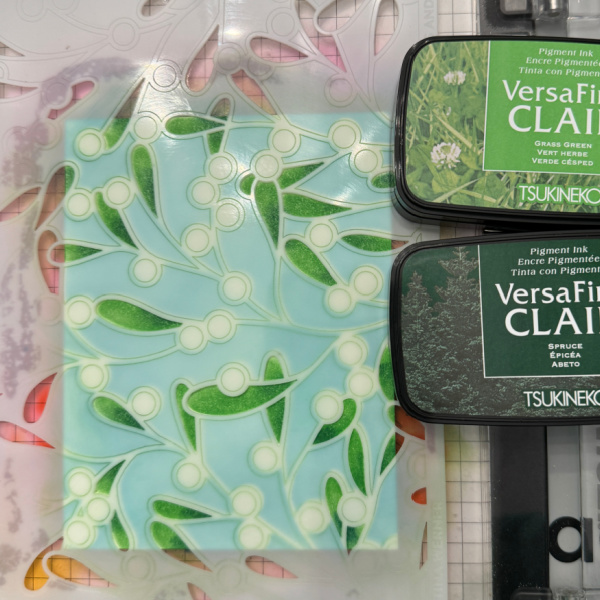
Step 2: Remove the first stencil and place the next stencil over the panel and apply the next color. Since the second stencil is leaves, I used two different colors of green.
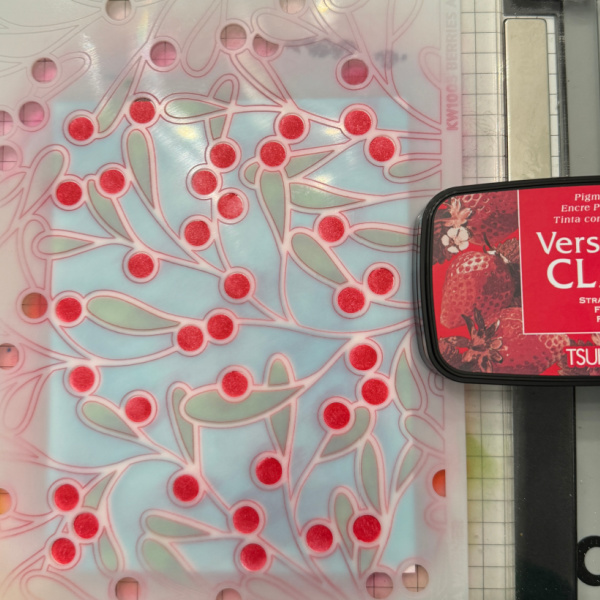
Step 3: Remove the second stencil and lay the next stencil over your panel and apply the next color. With it being berries I used our new color strawberry with is perfect for berries.
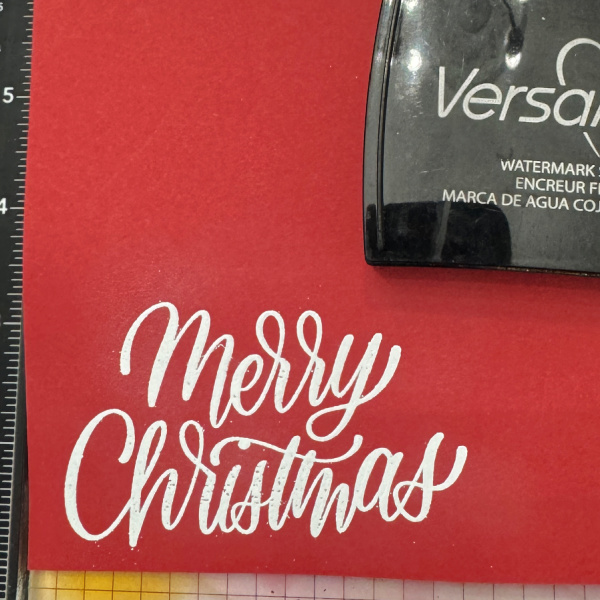
Step 4: Stamp the greeting in VersaMark ink and emboss with white powder. Die cut it out with coordinating die and assemble the card.
Other Products: Neenah Classic Crest Solar White 120lb – CutCardStock Neenah Classic Crest Solar White 80lb – CutcardStock Poppy Cardstock – PaperTrey Ink White Embossing Powder – Hero Arts Merry Christmas Stamp – Kristina Werner C9 Merry Christmas Die – Kristina Werner C9 Misti Stamping Tool – My Sweet Petunia Grip Mat – Waffle Flower crafts