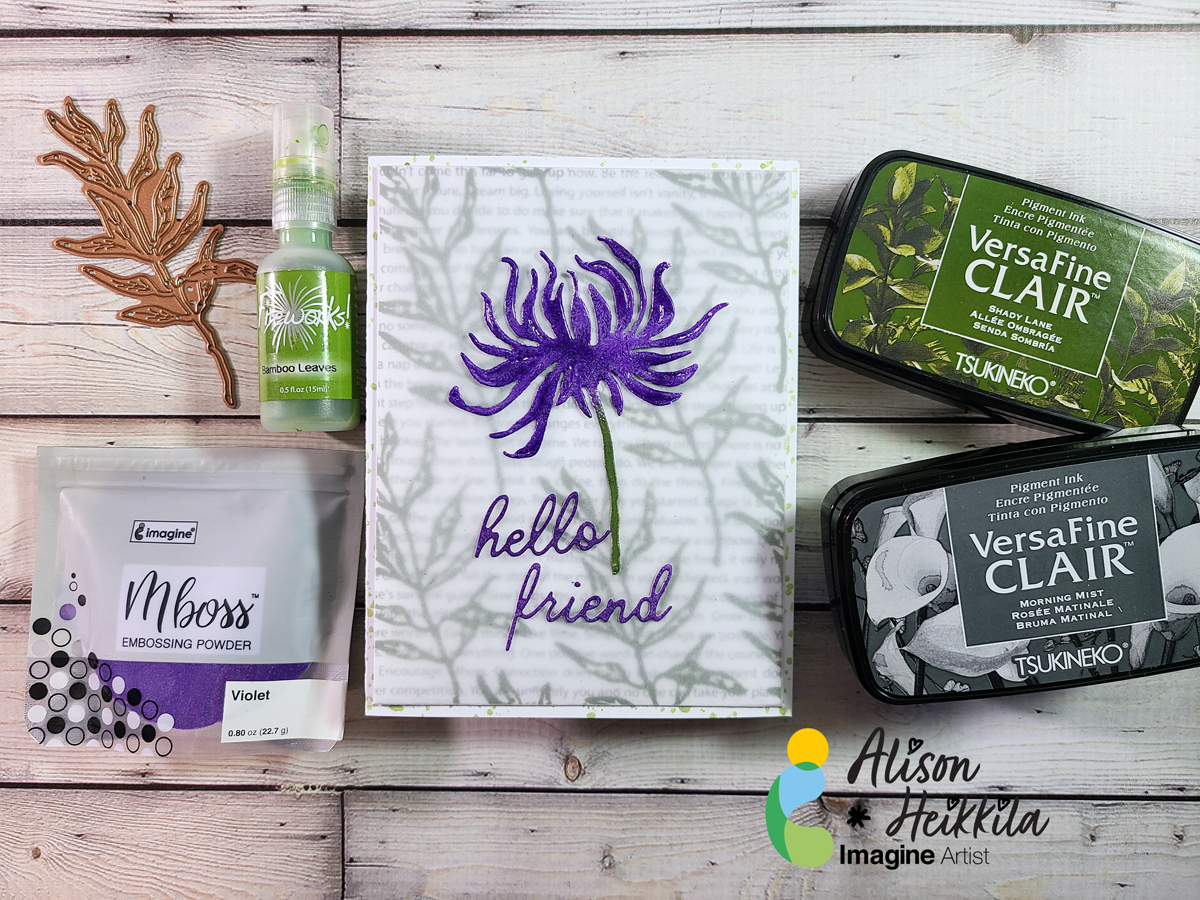
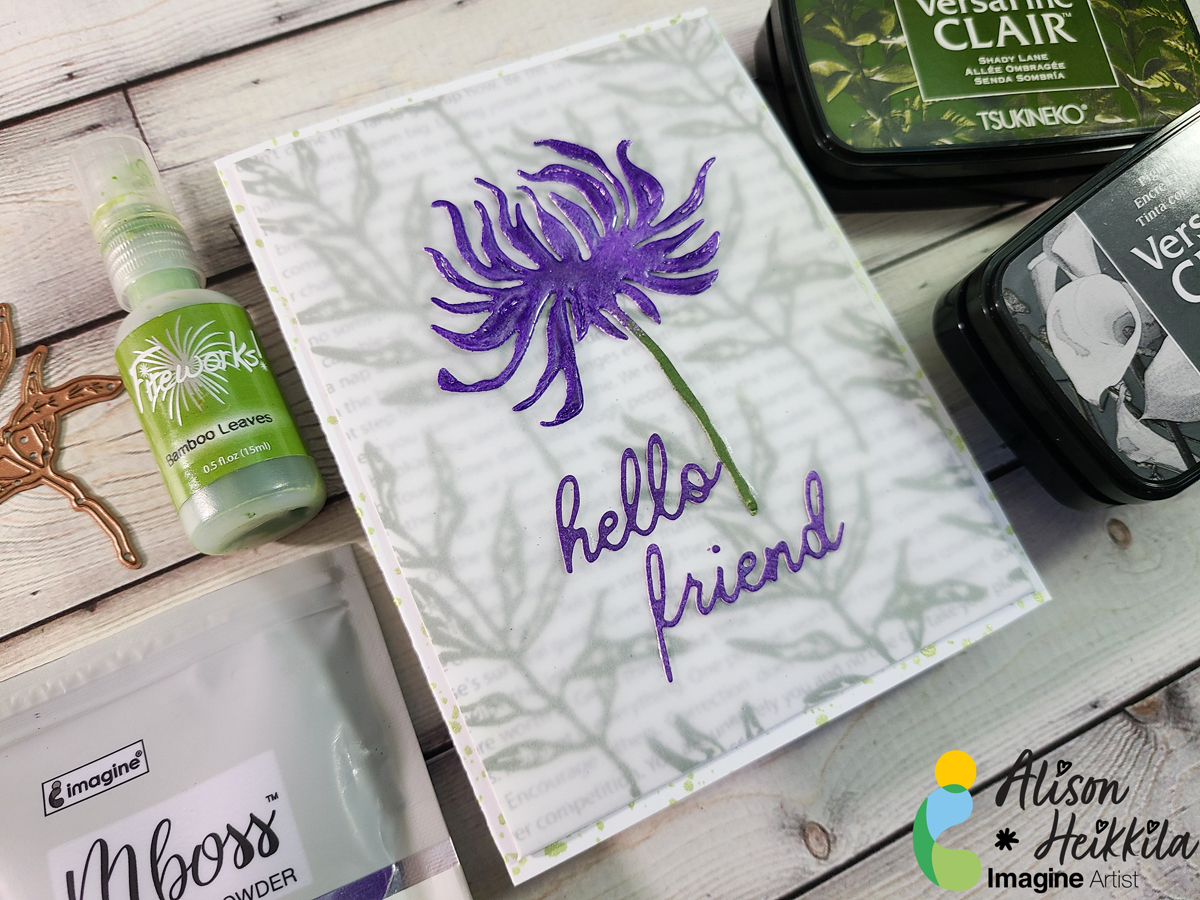
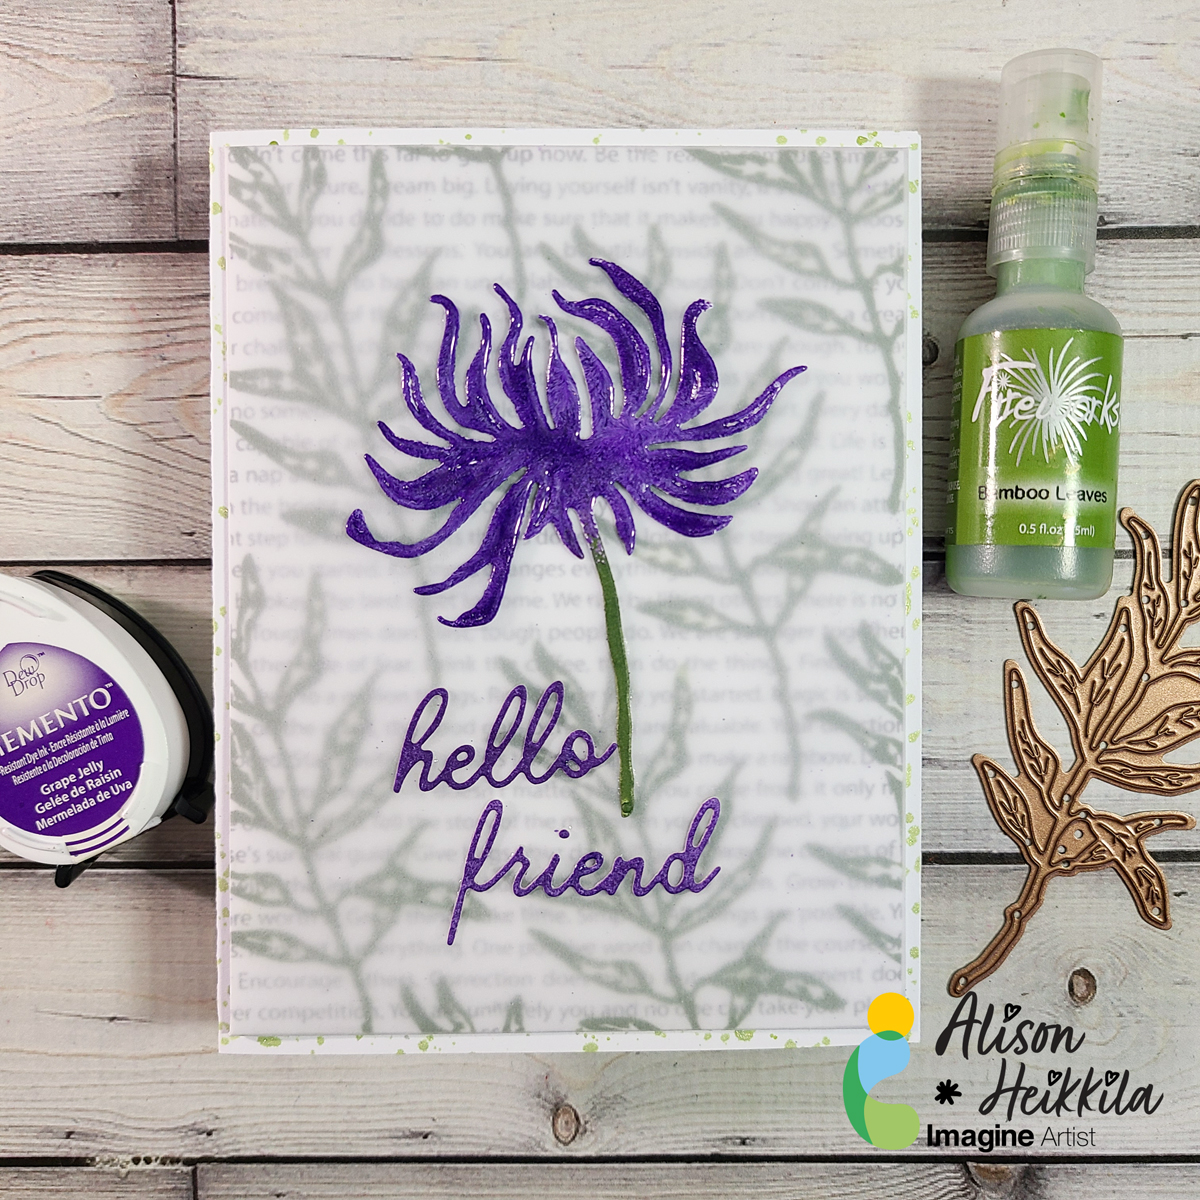
Hello! This is Alison Heikkila. My second video for Imagine this month once again focus on dies and how to use them creatively with inks. We’re making a pretty floral encouragement card, and I hope it gives you some ideas on how to use your dies and inks together.
*Some affiliate links are used in this post. That means that if you shop through these links, I may receive a small compensation, at no cost to you.
Skill Level: Intermediate Time to Complete: 20-30 minutes
I hope this inspires you to make stamps out of your dies. And don’t forget to try double-dipping into embossing powder! The effect is so pretty. Thanks so much for stopping by. Have an inspiring day!
Hello crafty friends, today I am sharing a spring card using a couple of blending techniques, one with Fabrico markers and one with the VersaMagic Dew Drops. I was so happy for spring to finally arrive. I live in the mountains and even though it is officially spring, sometimes we still get snow in April.
Skill: Intermediate to Advanced Time: 45 minutes to an hour
Directions:
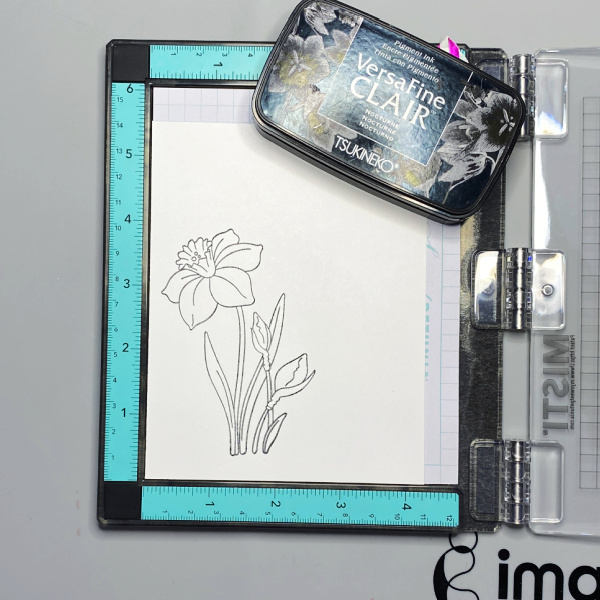
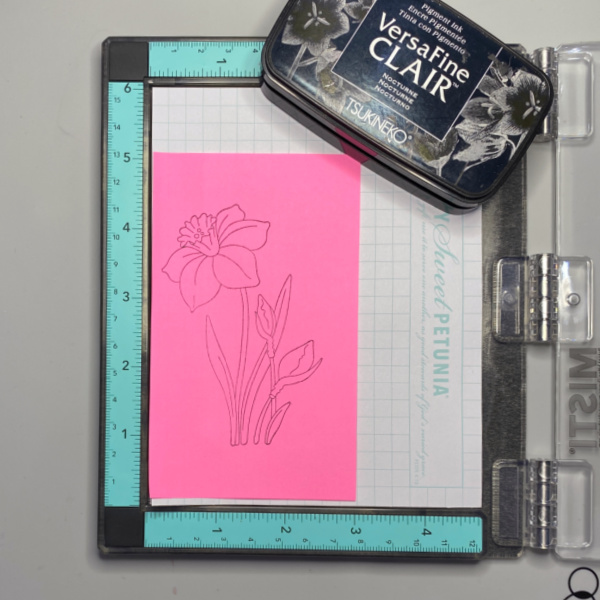
Step 1 Place a piece of white cardstock in the corner of a stamping platform and use Nocturne VersaFine Clair to add ink to the stamp.
Step 2 Stamp the image on a post-it note or masking paper using Nocturne VersaFine Claire ink, then fussy cut out the image.
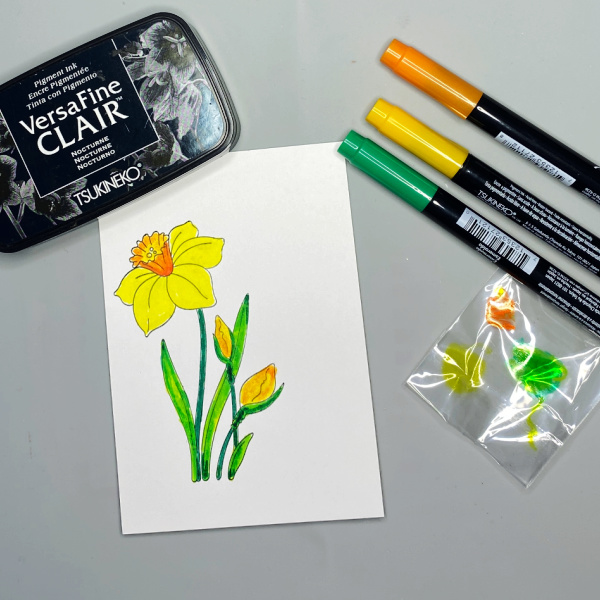
Step 3 Color the image using Fabrico markers. You can blend the colors using a piece of acetate as shown in the picture. The green marker I used is Emerald. I created a lighter green by scribbling some green on the piece of acetate and then picked it up with the yellow marker, creating a yellow green color. I also created a lighter orange by scribbling orange on the piece of acetate and then picking it up with the yellow marker. This doesn’t in any way contaminate your markers, all you do after you finish blending is scribble on a regular piece of paper until you get the true color back.
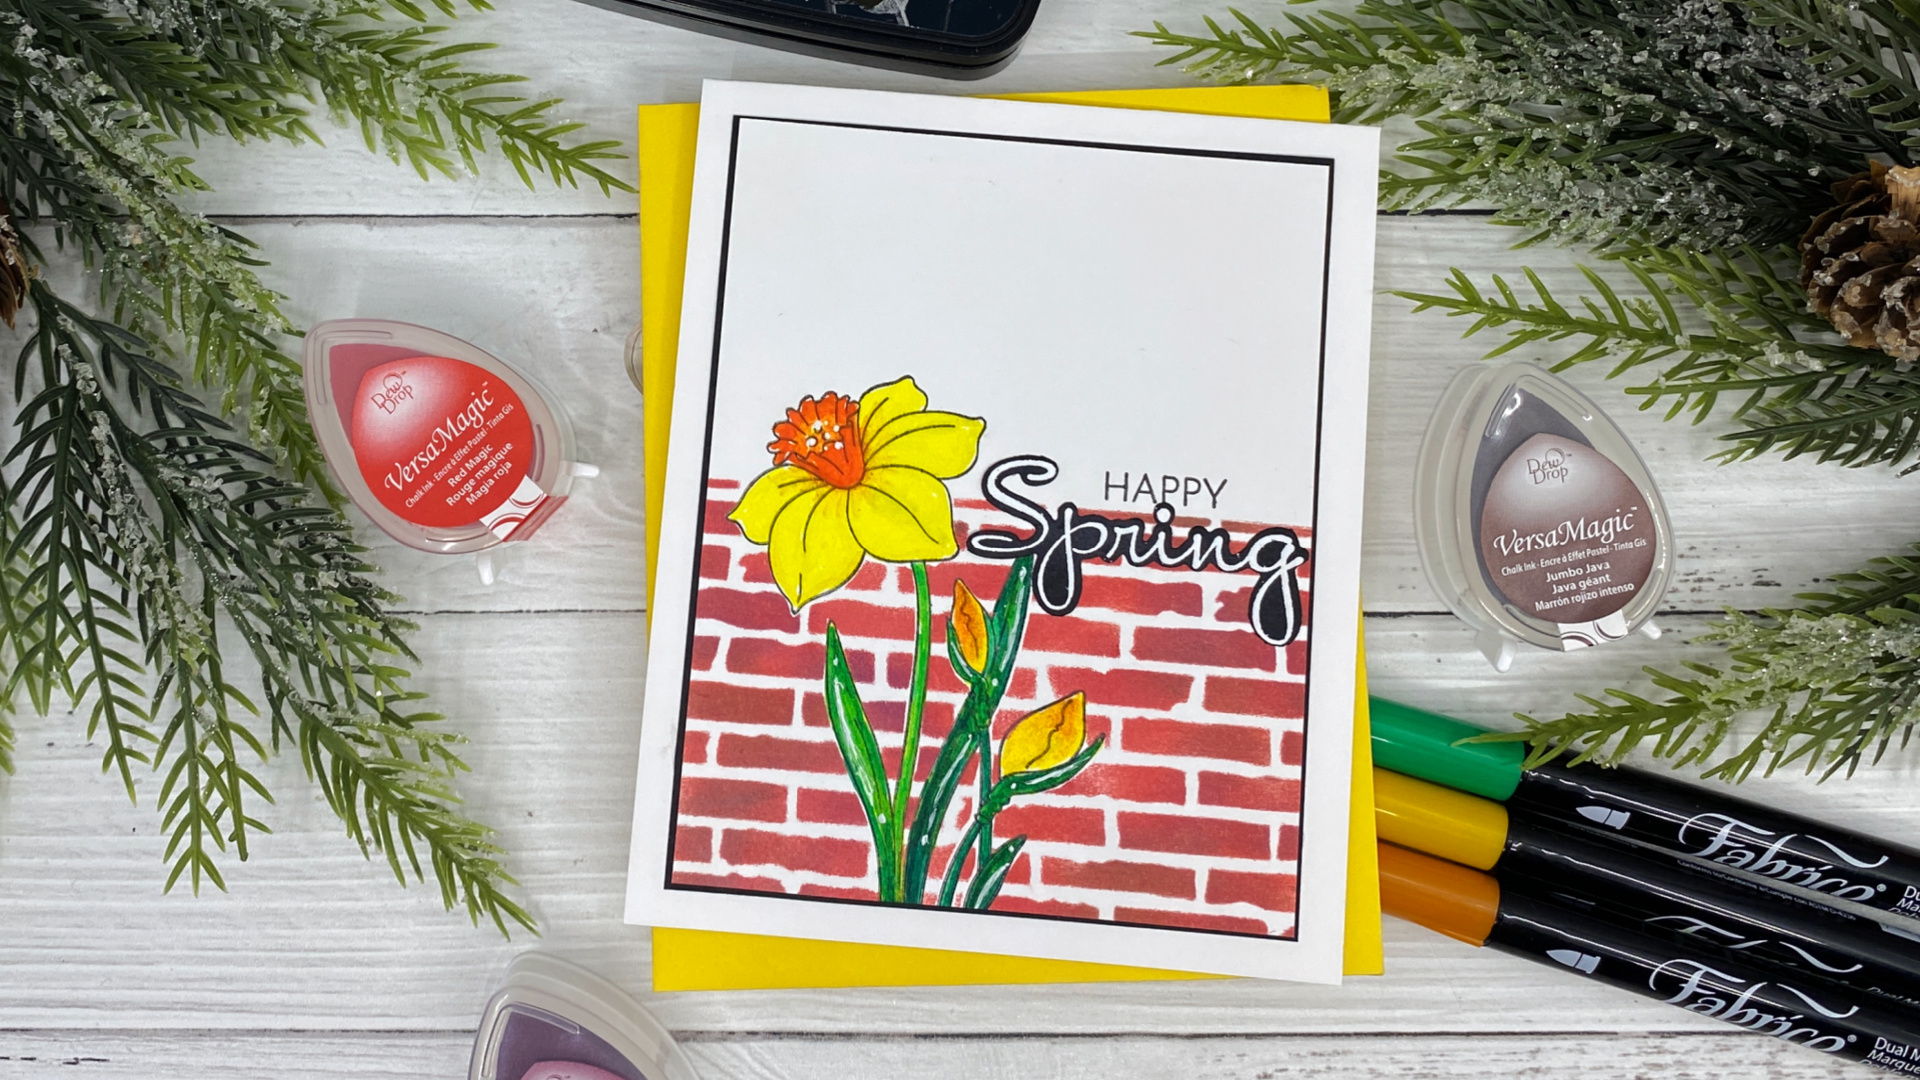
Step 4 Using the mask you created earlier, cover the daffodil image that you colored and then add the stencil over it. You will also need to mask off the top portion of your panel as well to keep it clean while you ink blend over the stencil. I used three different colors of VersaMagic Dew drops to give the bricks a more realistic look. They are listed below. I love how well the VersaMagic chalk inks blend together.
Step 5 Remove the stencil and mask from the panel and cut it down to 3.78 xX 4.78
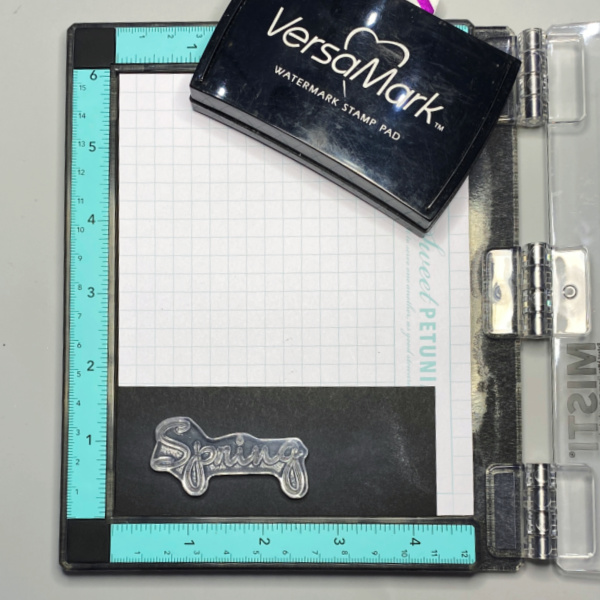
Step 6 Insert a piece of black cardstock into the corner of a stamping platform and use an anti-static tool to prep surface. Stamp the sentiment using VersaMark ink and heat emboss it with MBoss White Embossing Powder, then cut it out with the coordinating die.
Stamp the sentiment “happy” directly on the card front and add the embossed sentiment below it.
Step 7 Assemble your card by adhering the front panel to a black panel cut to 3.75 X 5 using On Point Glue and then adhering it to a card base cut to 4.25 X 11, scored at 5.5
I hop you will give these techniques a try. Thank you for stopping by our blog today. Until the next time, stay crafty!
Other Products: Daffodil Stamp Set + Dies – The Rabbit Hole Designs Back Ally Stencil – The Rabbit Hole Designs Teal Mini MISTI Hero Arts Pitch Black Cardstock Neenah Classic Solar White 120lb Cardstock – card base Neenah Classic Solar White 80lb – Cardstock panel
It’s Ceal, here. Today I am sharing my first post as an Imagine Artist In Residence. I am so excited to be a part of the Imagine team. I love all things snow related and with the groundhog not seeing his shadow and predicting an early spring, I had to make a couple more winter cards.
Here are the supplies I used:
Skill: Intermediate to Advanced. Time: 45 mins
Directions:
Step 1 Stamp the snowflake with VersaMark ink onto a piece of white cardstock cut to 4.25″ x 5.5″ . Emboss the snowflake with MBoss Sparkle embossing powder.
Step 2 Using a Sponge Dauber, Ink blend over it with Brilliance Pearlescent Purple Ink
Step 3 With a die cutting machine, run the snowflake cover plate through.
Step 4 Cut a piece of amethyst cardstock to 4.25” x 5.5” to back the snowflake cover plate.
Step 5 To make the snowflake more dimensional place foam adhesive dots in between the two snowflakes Tip: Apply a little On Point glue to each foam dot to allow you to move it as needed.
Step 6 Stamp and die cut the sentiment and add it to the card front.
Step 7 Using On Point Glue, layer and glue all the pieces together.
I made a second card using Mboss Hologram and silver foil paper with the same design.
Other Supplies: Misti 2.0 Neenah 110lb Solar White cardbase Neenah 80lb Solar White Lessebo Amethyst Cardstock Silver Foil Cardstock Pinkfresh Studio: Folk Snowflake Pinkfresh Studio: Folk Snowflake Coordinating Cuts Pinkfresh Studio: Snowflakes Coverplate die
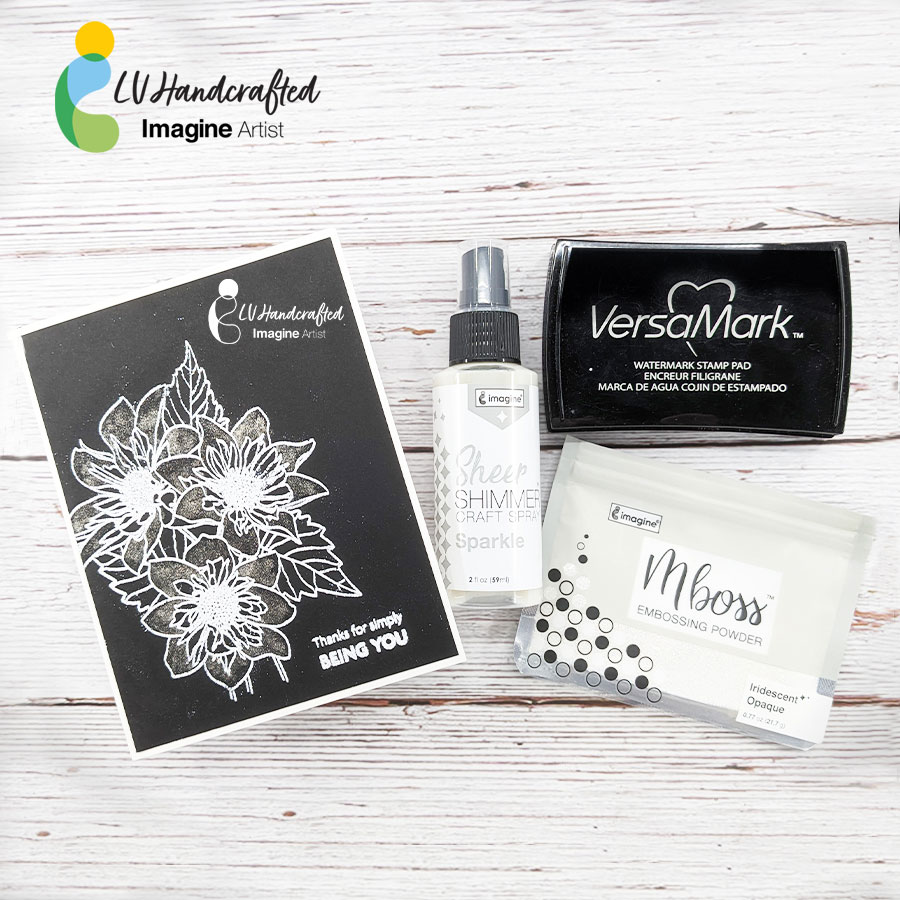
Hello friends! This is Linh (or LV Handcrafted on all the socials). Here’s a fun way to use Shimmer Sprays — paint with them! Shimmer Sprays are translucent, but the gorgeous glitter in them shine beautifully on dark card stock! I used the Sparkle Sheer Shimmer spray, which paired perfectly with the Iridescent Opaque Mboss powder. The combination of the two add a striking, sparkle to any card!
How familiar are you with Kaleidacolor inkpads and Mboss Embossing Powder? Let’s take a look at one of the Kaleidacolor pads I have had for many years and see how it does on the gel plate. Then we’ll play a bit and see how 4 different Mboss Embossing powders impact the same basic Gelli printed background.
Hello friends! This is Linh (or LV Handcrafted on all the socials). Even though I’m eager for summer, I’m starting to think ahead to the holidays. While this isn’t a holiday card, I thought it might be a fun “just because” winter themed card. In my video today, I’ll show how I made this emboss resist panel for my background.