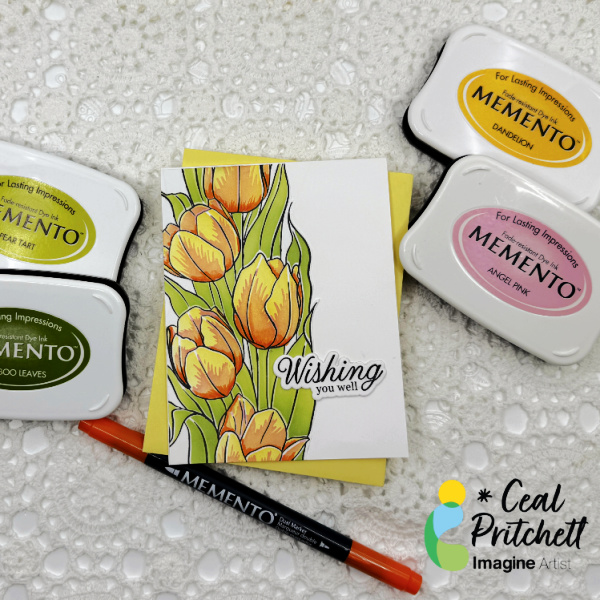
Hello everyone! It’s Ceal, here. Today I am sharing a spring get well card (you could make yours for any occasion) using a stamp and stencil combo. Stencils make it so easy to color.
Skill: Beginner to Intermediate Time: 30 Mins
Directions:
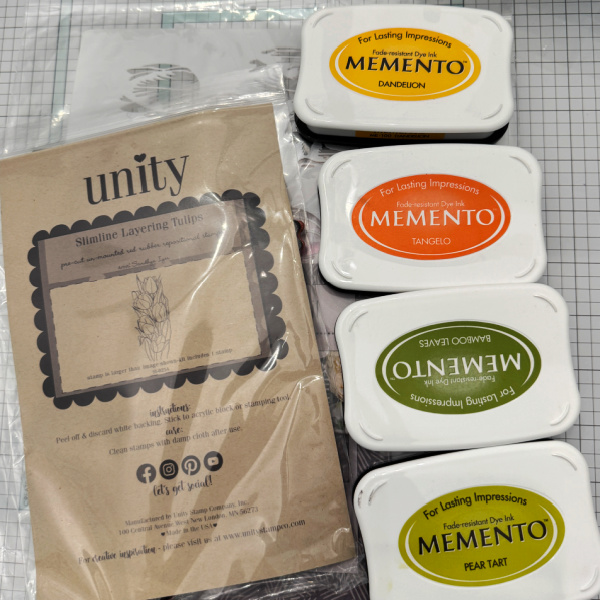
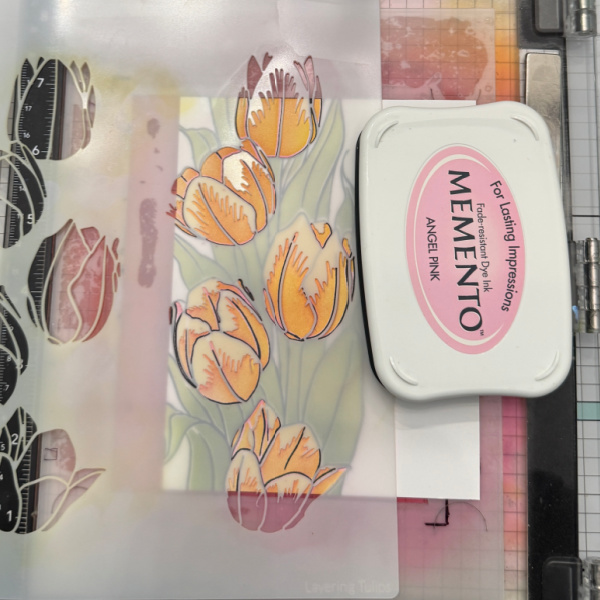
Gather your supplies. You will need a stamp/stencil combo, several colors of ink and a marker for details. In the photo I have an orange ink but I actually used a pink.
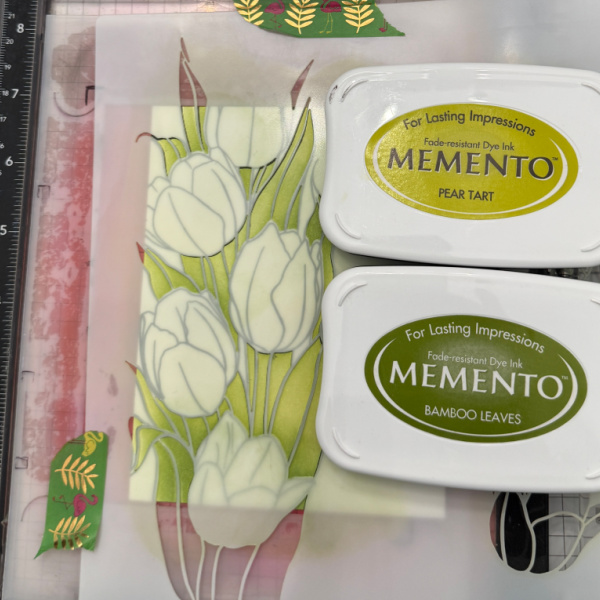
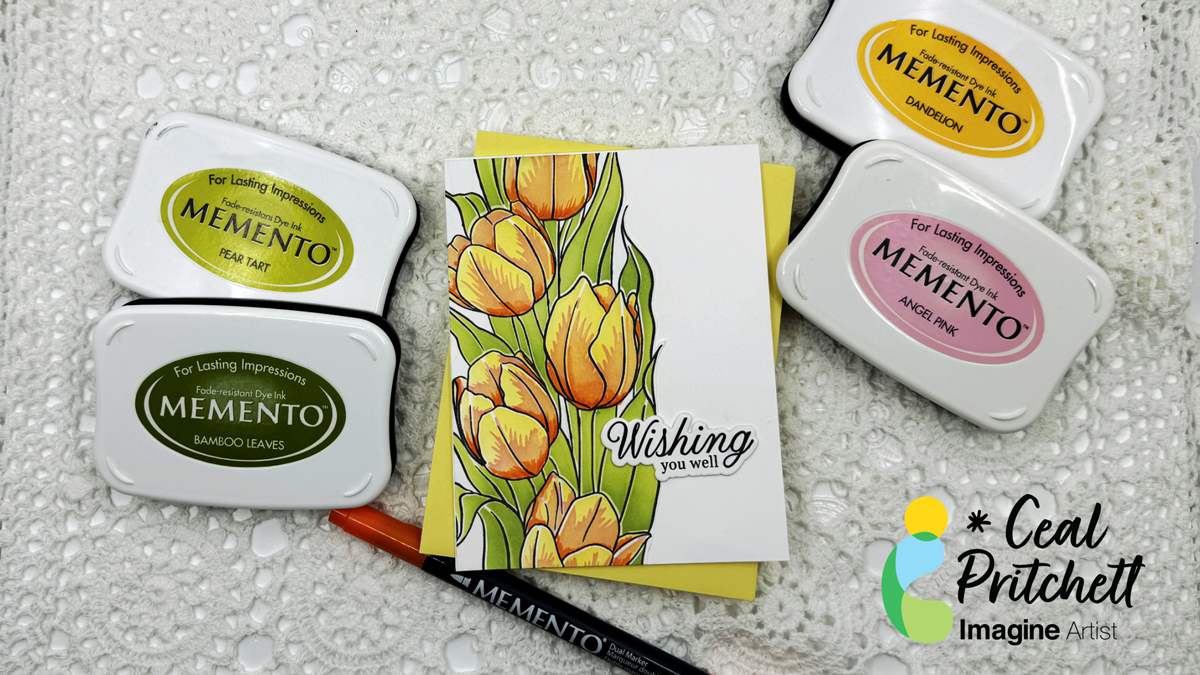
Step 1: Using a black ink stamp the floral image. I used Memento Tuxedo Black.
Step 2: Using the leaves portion of the stencil and two colors of green, color the leaves. I used Memento Pear Tart and Bamboo Leaves
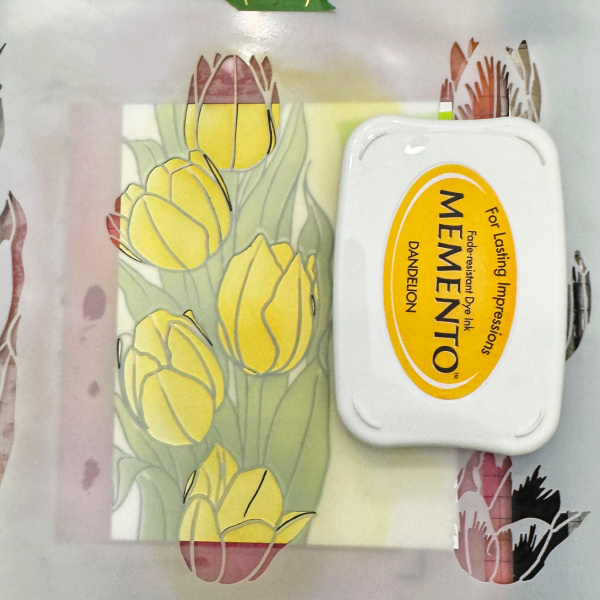
Step 3: Using the floral portion of the stencil, color the flowers yellow. I used Memento Dandelion.
Step 4: Using the detailed portion of the stencil color the area pink (which turns into a pretty peach) I used Memento Angel Pink.
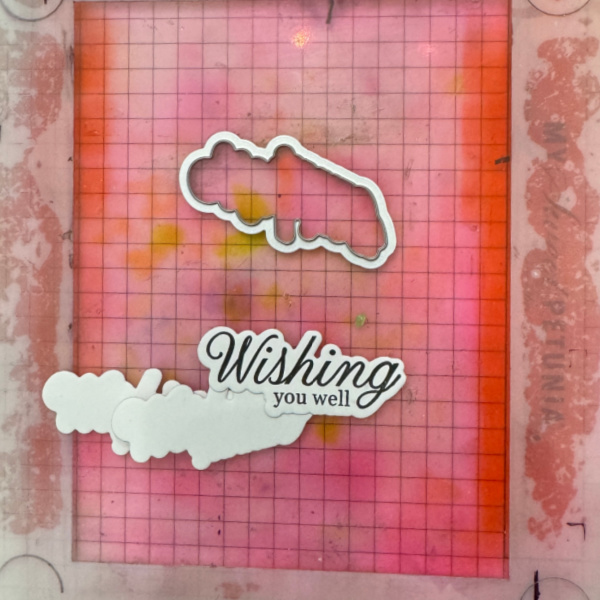
Step 5: Stamp and cut out the greeting and cut a couple extra pieces for dimension. Adhere the panel with the flowers to the card base and then adhere the greeting anywhere you’d like on the card front.
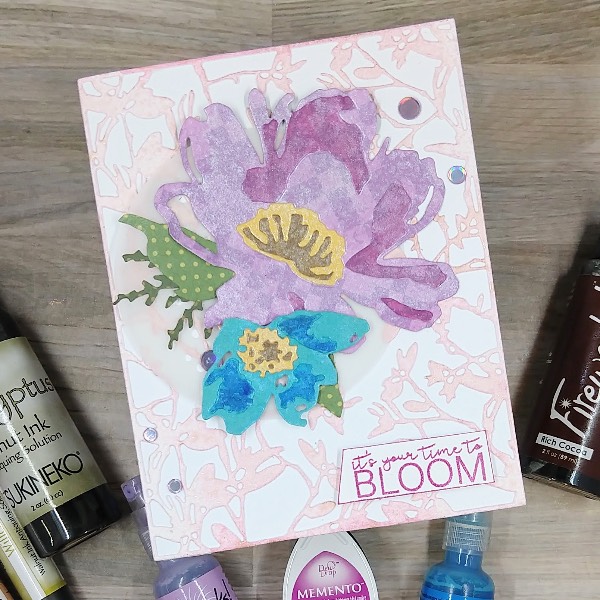
I don’t know about you, but I have so much patterned paper that I will probably never use it all. In an attempt to use at least some of it on a card, I turned to my Fireworks! Craft Sprays to enhance the paper to make a card celebrating the colors of spring.
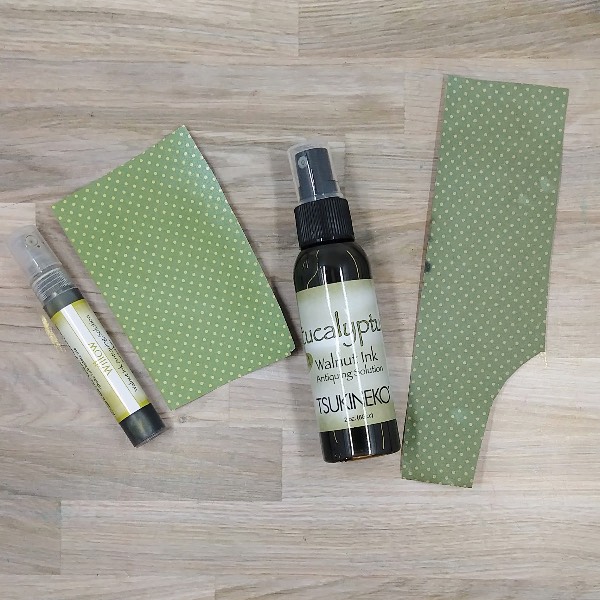
Step 1: Cut a piece of aqua patterned paper into two parts. Spray Spray one piece Eucalyptus Walnut Ink Antiquing Solution and the other with Willow Walnut Ink Antiquing Solution. After the spray dries, die cut the Willow-sprayed paper with leaf dies and the Eucalyptus-sprayed paper with the branch die and set aside.
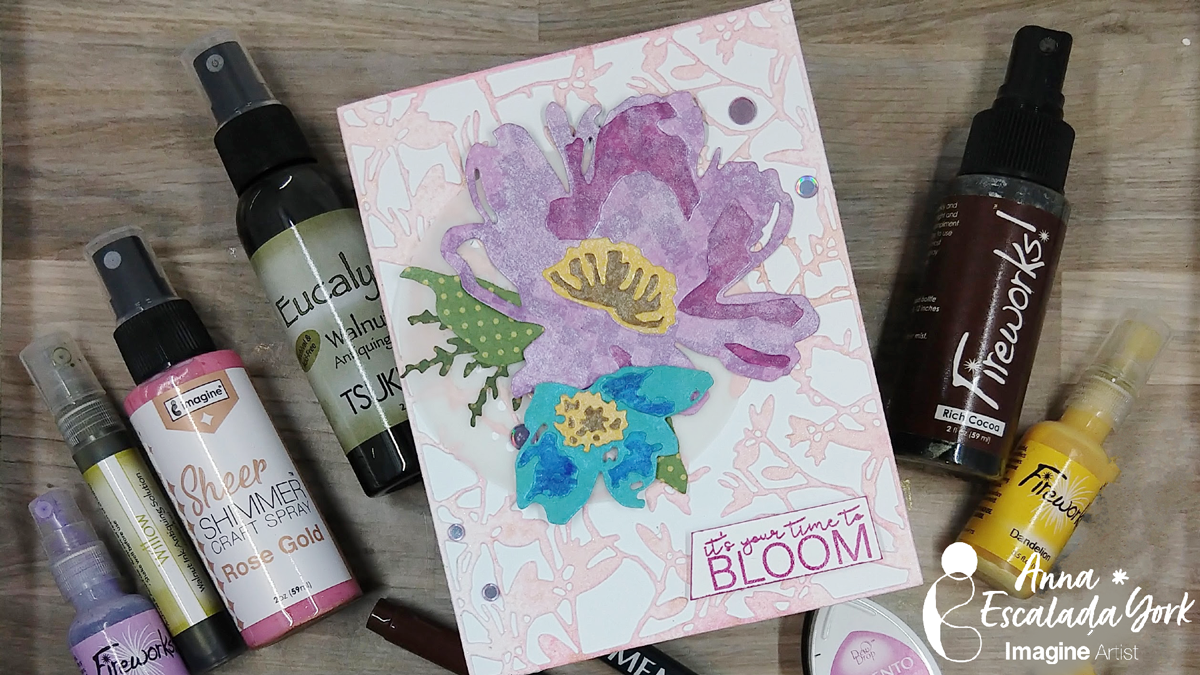
Step 2: Spray a piece of purple patterned paper with Lulu Lavender Fireworks! Craft Spray. After the spray dries, die cut the paper with the larger flower in the die set.
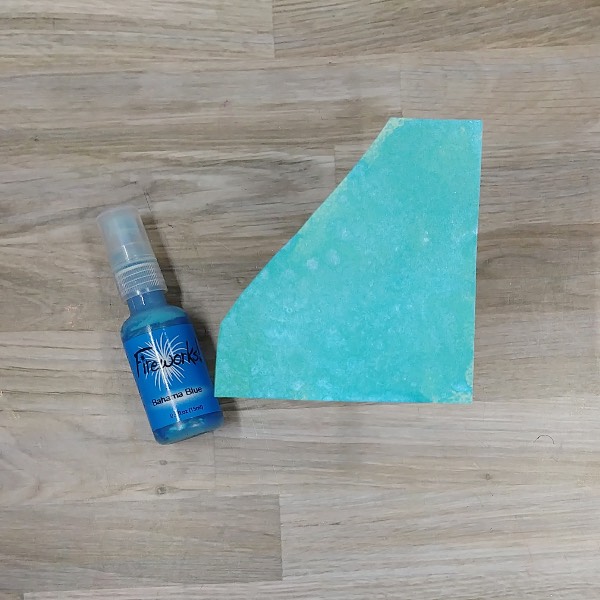
Step 3: Spray a piece of blue patterned paper with Bahama Blue Fireworks! Craft Spray. After the spray dries, die cut the paper with the smaller flower die cut.
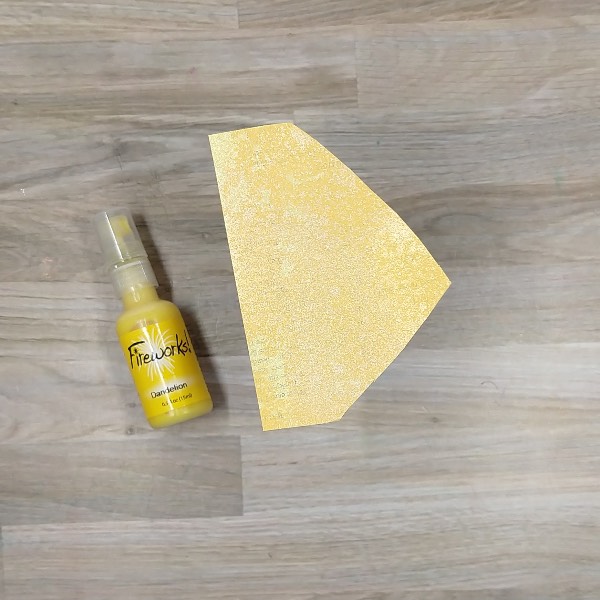
Step 4: Spray a yellow piece of patterned paper with Dandelion Fireworks! Craft Spray. After the spray dries, die cut the paper with both of the flowers’ central areas.
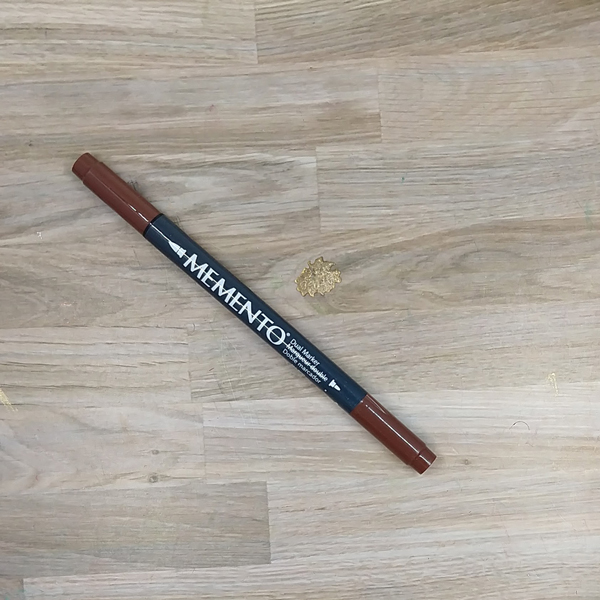
Step 5: Color the base layer of the smaller (blue) flower’s center with a Rich Cocoa Memento Dual Marker. Then repeat the process for the larger flower’s center (not pictured). Once the marker dried, glue each of these central parts of the flowers to the rest of flowers’ centers. Then glue both of the centers onto their respective flower’s centers.
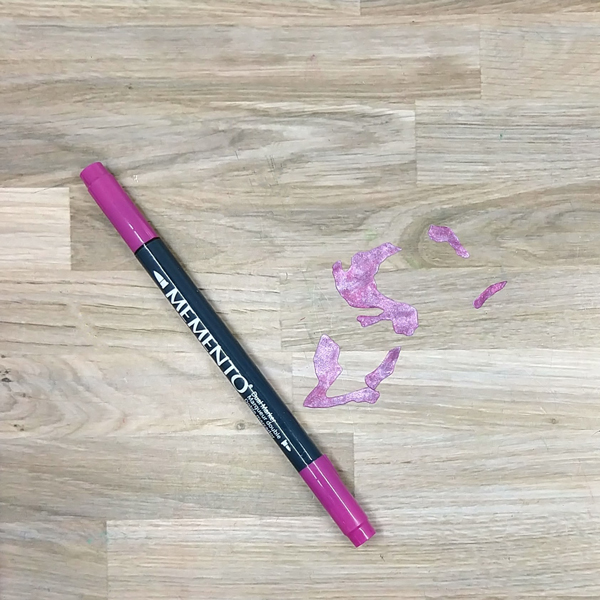
Step 6: Color the upper layers of the purple flower with Lilac Posies Memento Dual Marker to make them darker and stand out from the rest of the flower. After the marker dried, glue the small paper layers onto the rest of the flower.
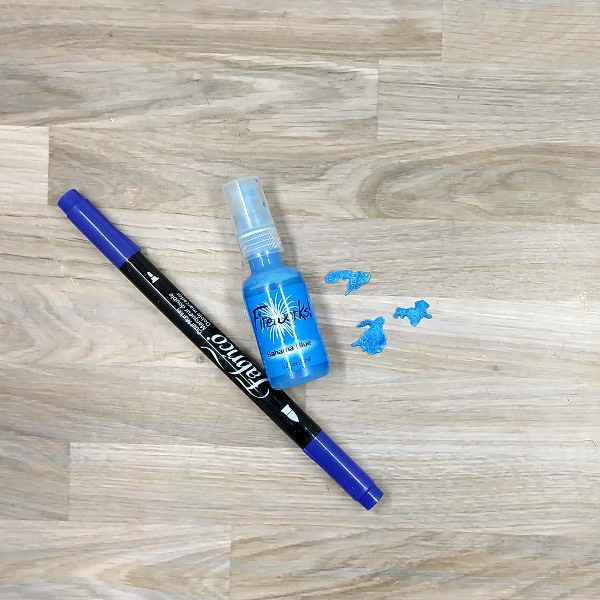
Step 7: Color the small blue upper layers of the blue flower with Ultramarine Fabrico Dual Marker. Then spray them with more Bahama Blue Fireworks! Craft Spray. After the spray dries, glue these small blue die cut layers onto the rest of the blue flower.
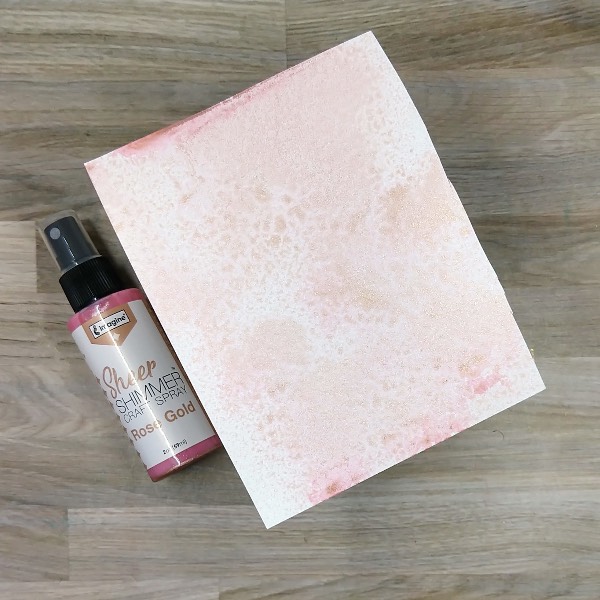
Step 8: Spray a piece of watercolor paper with Rose Gold Sheer Shimmer Craft Spray and allow to dry. Then die cut the watercolor paper with an A2-sized panel die to create a background for the card.
Not pictured: Die cut a piece of vellum with a mid-sized circular die.
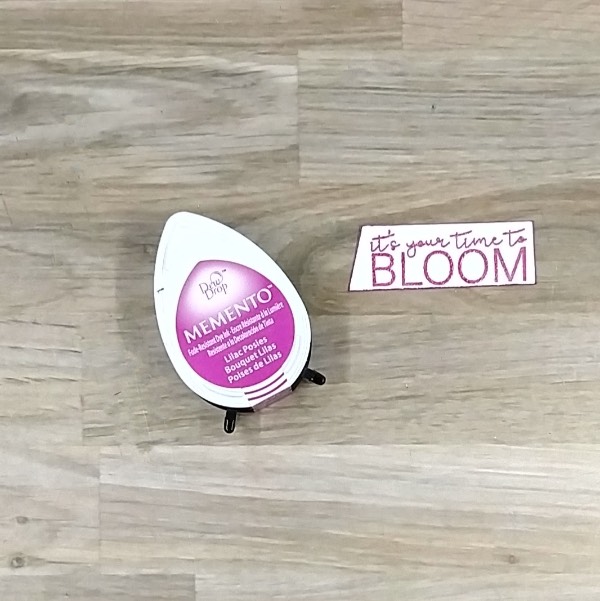
Step 9: Stamp the sentiment onto a scrap of watercolor paper with Lilac Posies Memento ink and heat emboss with clear embossing powder. Trim the sentiment into a thin strip and press the edges into the ink pad to color the edges. Set aside.
Step 10: Assemble the card. Glue the Rose Gold floral background onto an A2-sized white card base. Then glue down the circular die cut piece of vellum followed by the leaves and branch die cuts. Add foam tape behind the large upper central petal and the lower left petal on the purple flower as well as the whole blue flower. Then add glue behind the rest of the purple flower to attach it to the card base. Then attach the blue flower on top of the purple flower. Glue purple sequins around the card base. Finally, attach the sentiment with more foam tape to finish the card.
• Altenew – foam tape -Instant Dimension Foam Tape • Hero Arts – die set – Circle Infinity Dies • Pink and Main – stamp set – Spring Sayings • Simon Says Stamp – sequins – Lilac Embellishments • Sizzix and Tim Holtz – die set- Brushstroke Flowers • Sizzix and Tim Holtz – panel die – Leafy Twigs • Clear Embossing Powder • Heat tool • Scissors Glue • Watercolor paper • Vellum
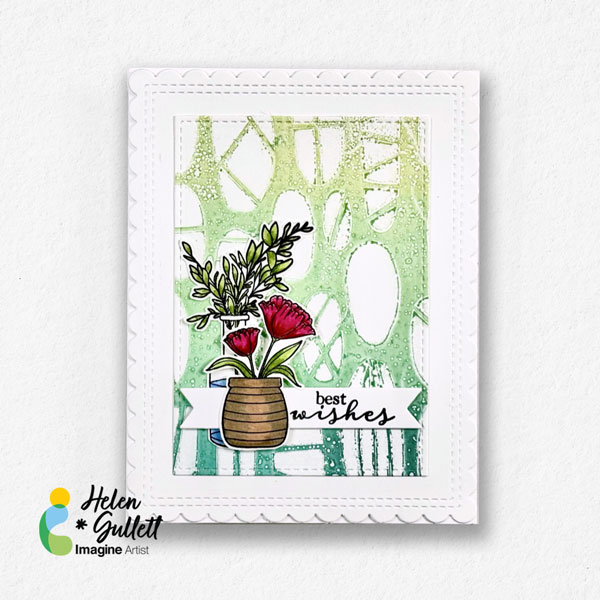
Hello crafty friends! Today we are going to do some monoprinting with VersaFine Clair inks and a gelli printing plate to create some fun backgrounds. And also, we will do some coloring with Memento Markers.
Let’s get crafting!
Skill: Intermediate Time: 30 Minutes
Direction:
Step 1 Put the gelli printing plate directly on the Imagine Craft Mat. Make sure it lays flat.
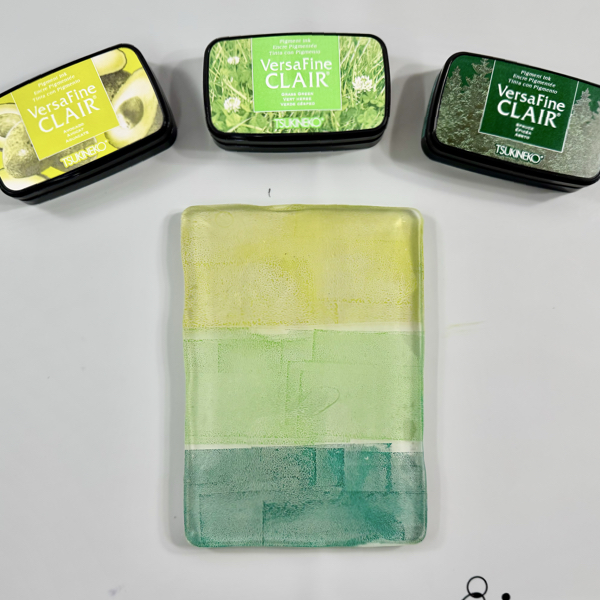
Dab some of the VersaFine Clair inks on the gelli printing plate, do this one color at a time and do not mix them together.
Step 2 Mix the inks on the gelli printing plate with the mini roller. Mix the color from top to bottom, gradually.
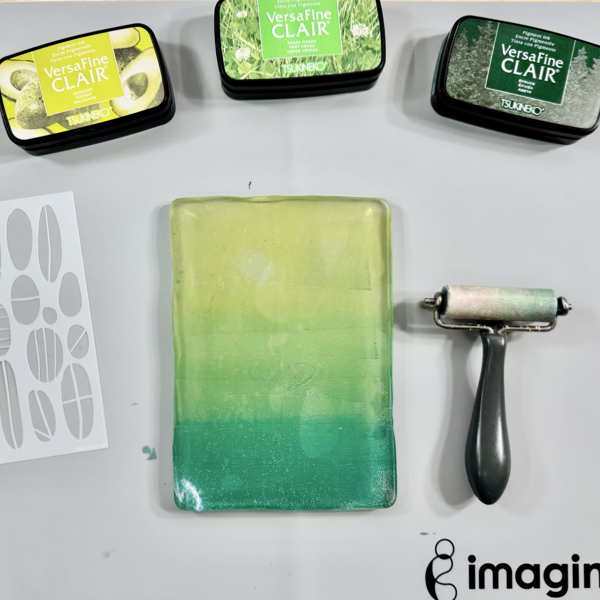
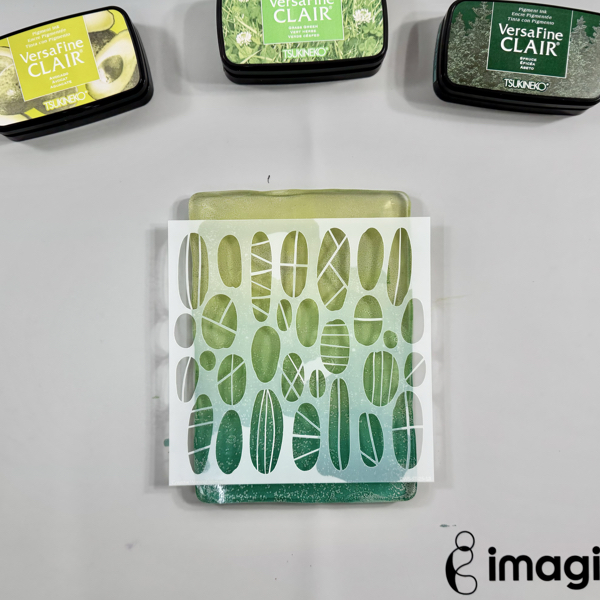
Step 3 Put the stencil on the gelli printing plate.
Gently press the stencil to the gelli printing plate.
Step 4 Get a piece of printing/copy paper (preferably thickness 24 lb or more), you can cut it in half or use full size.
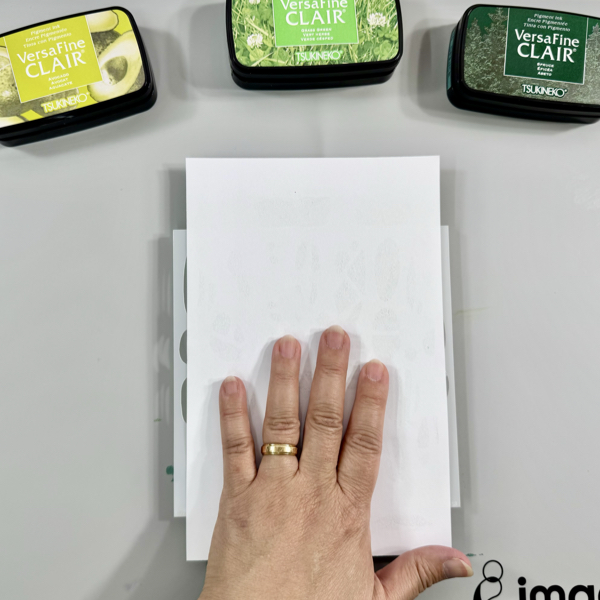
Add the paper to the gelli printing with stencil and gently press it down to get ink off the plate.
Step 5 Carefully pick up the paper off the gelli printing plate from one corner.
This is the first printing. For this time, you can keep it aside for future projects.
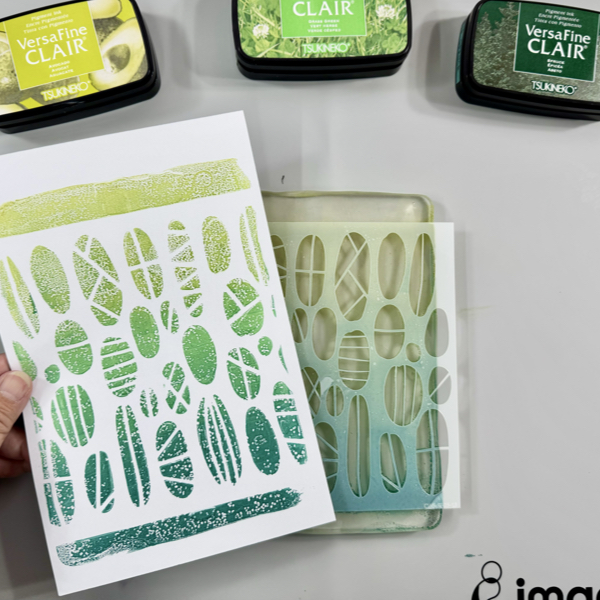
Step 6 Carefully remove the stencil off the gelli printing plate.
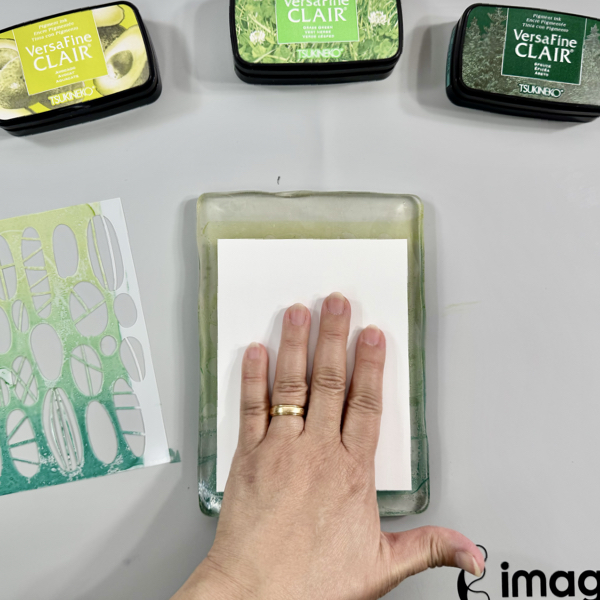
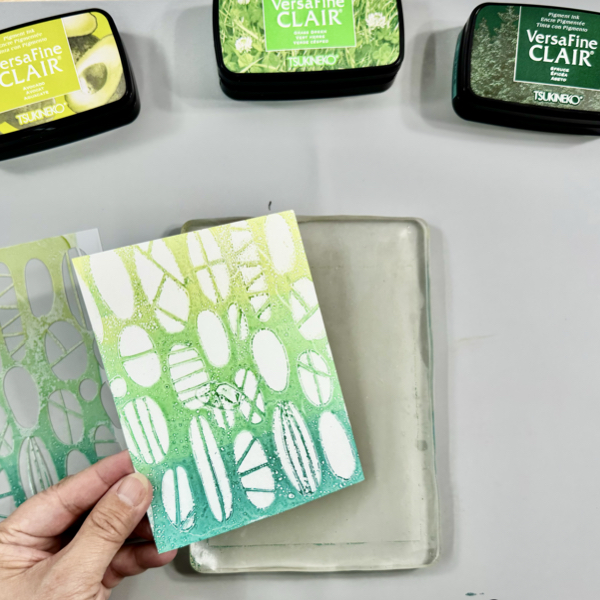
While the inks are still wet (this is why VersaFine Clair inks are the best for this project!), put a piece of white cardstock to the gelli printing plate and gently press down to pick up the ink off the plate.
Step 7 Carefully pick up the printed cardstock of the gelli printing plate.
You get the second print which is a different pattern than the first one.
Use a craft heat gut to dry the ink well.
This is the print that we will use for the background of the card.
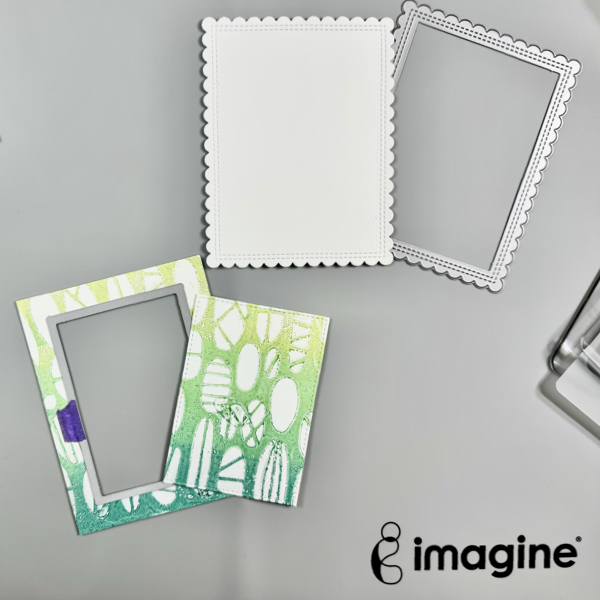
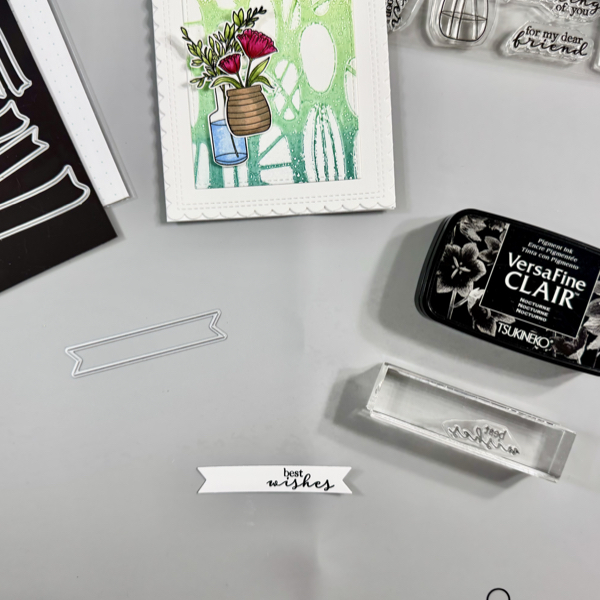
Step 8 Once the printed background dried well, cut it with a rectangle die form the Stitched Rectangle dies set.
Then cut another piece of white cardstock with the scallop rectangle die from the same set.
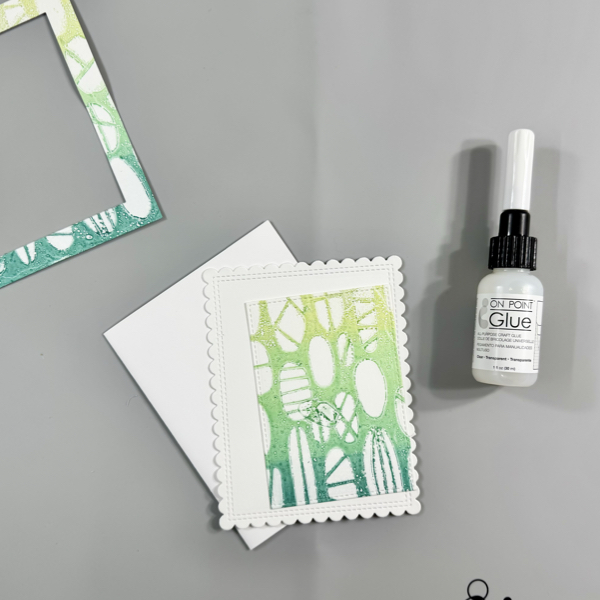
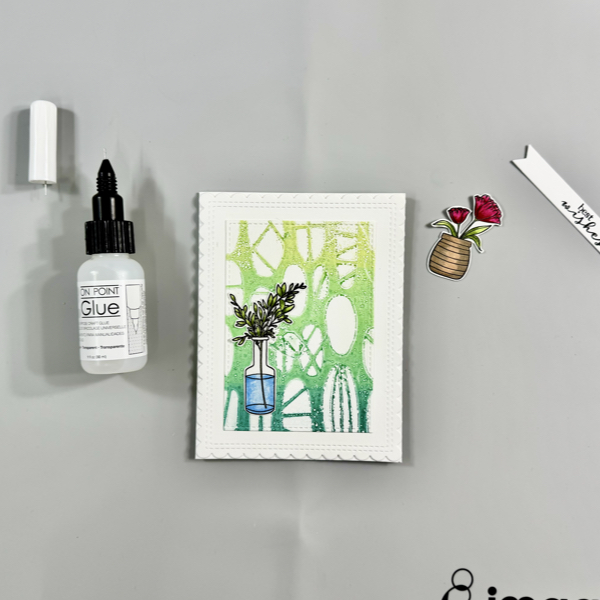
Step 9 Add the white scallop background panel to the card base using the On Point Glue.
And then, add the printed background panel to the card using the same glue.
Set it aside to dry (optional: you can put a couple of large acrylic stamping blocks on it to hold it down while drying).
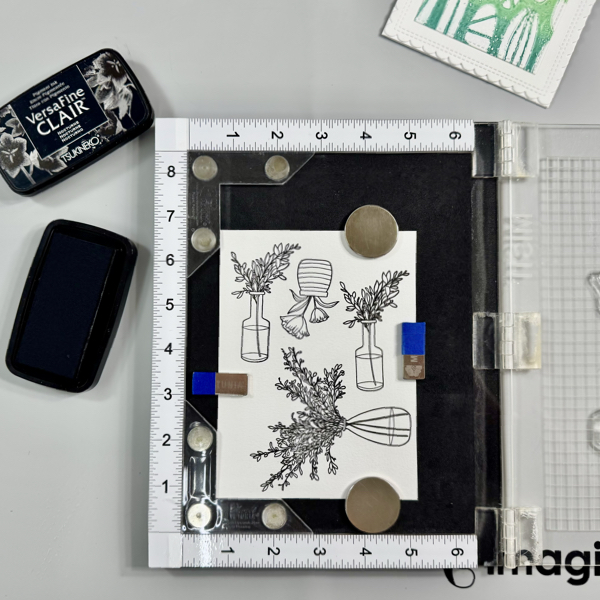
Step 10 Put a piece of white cardstock on a stamping platform and secure it with some magnets.
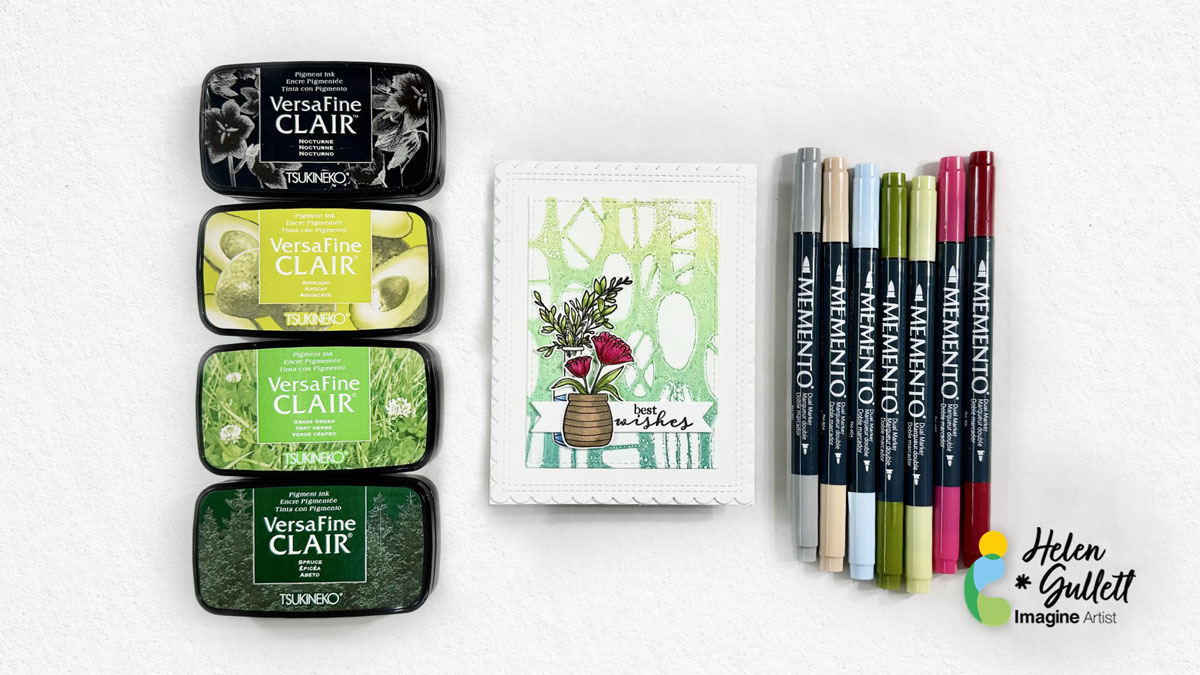
Arrange the flower stamps on it and stamp them with the VersaFine Clair Nocturne ink pad.
Remove it from the stamping platform.
Step 11 Dry the stamped images using a craft heat gun.
Color them using the Memento Markers.
Fussy cut the images with micro-tip scissors.
Step 12 Stamp the sentiment a white cardstock with VersaFine Clair Nocturne ink.
Dry the stamped sentiment with a craft heat gun.
Cut it with one of the banner die from the Banners die set.
Step 13 Add the first flower to the card with On Point Glue.
Using On Point Glue, add a piece of thin foam to the back of the sentiment banner and add it to the card with the same glue.
Then, add some of the thin foam to the second flower and add it to the card with the same glue.
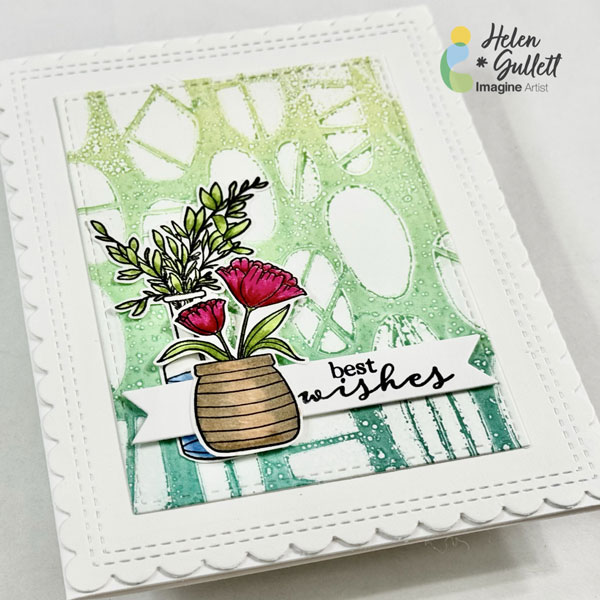
The card is done. Though it looks simple, yet it has some layers to it.
This gelli printing technique is one of a fun way to create pattern backgrounds other stamping.
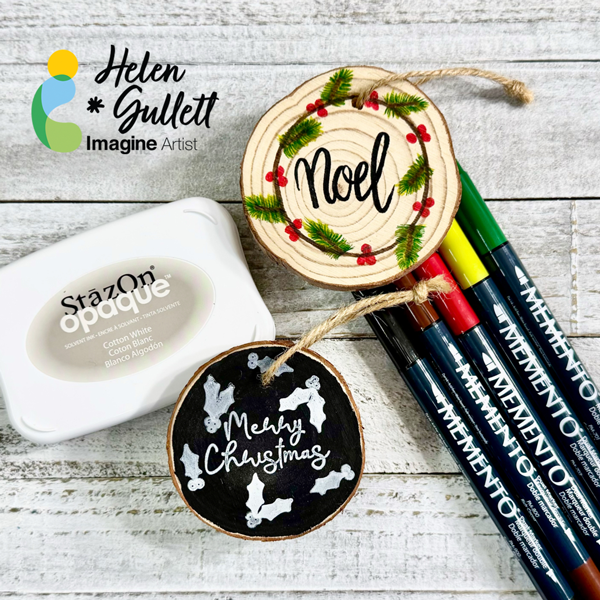
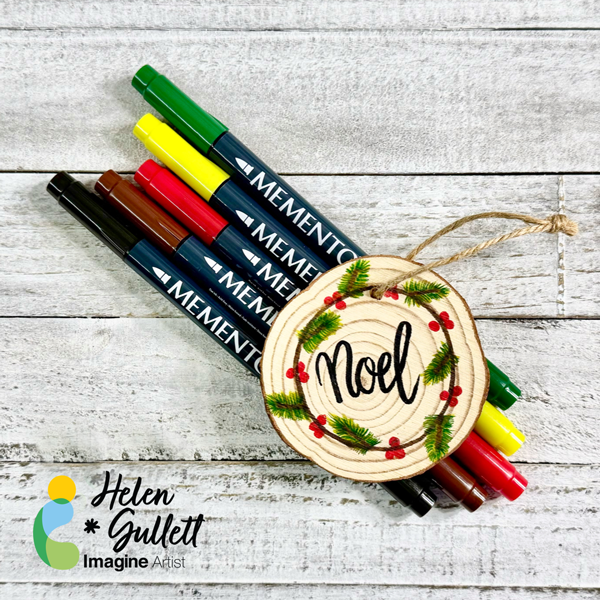
Hello crafty friends… Can you believe it? The holiday season is here!!! Making Christmas ornaments is one of my favorite things to do. Today let’s make some handmade ornaments together. These ornaments can be additions to your own Christmas tree or you can give them to your families and friends.
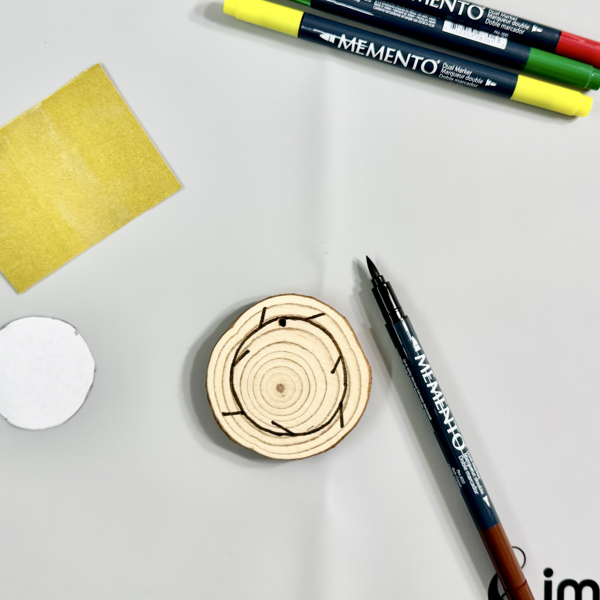
Step 1 First, make sure your wood slice surface is smooth and clean. There are pre-sanded wood slices available online, too. If your wood slices were not sanded yet, you can sand it with sanding paper. Use a dry paper towel to clean the surface well.
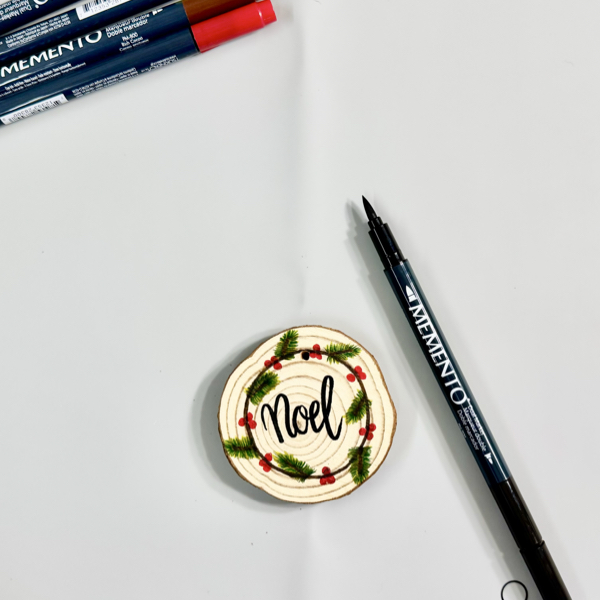
Draw a circle and branches with the Rich Cocoa Memento Marker brush tip. You also can use a circle template to draw the circle.
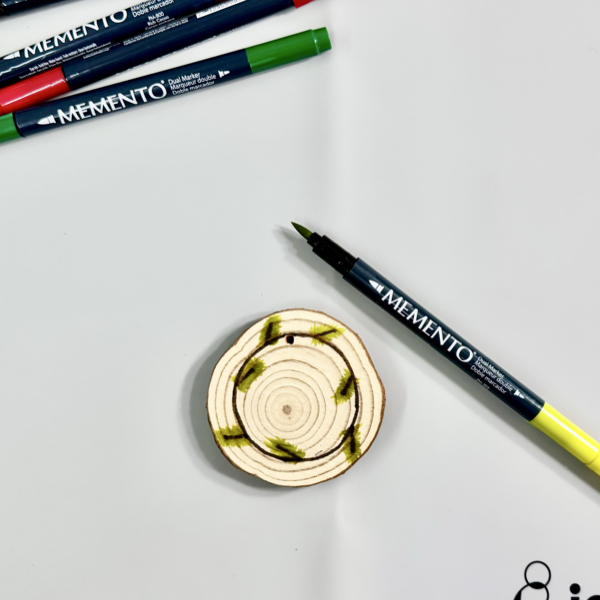
Step 2 Use the brush tip of the Pear Tart Memento Marker to draw the layer of pine needle leaves with outward flicking motion on each branch.
Step 3 Draw the second layer of the pine needle leaves on each branch using the fine tip of Cottage Ivy Memento Marker.
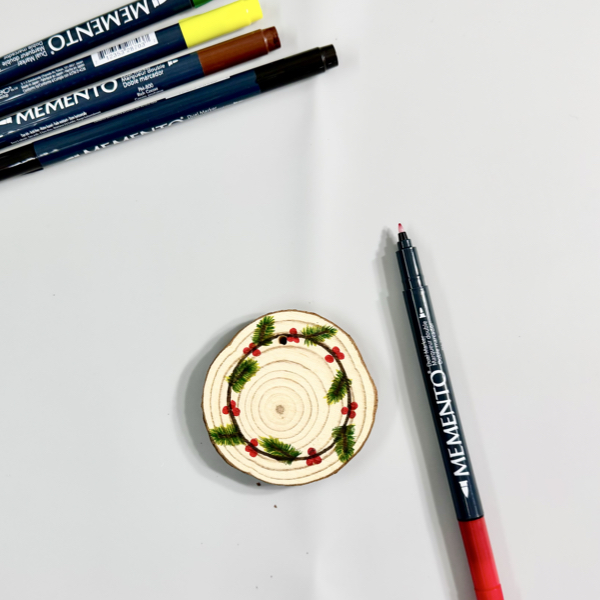
Step 4 Draw the berries on the wreath using the fine tip of the Lady Bug Memento Marker. Simple doodle 3 little circles.
Step 5 Write lightly the word “Noel” (or any word you want on your ornament) with pencil and then trace it with the Tuxedo Black Memento Marker brush tip. You can skip the pencil if you can do handlettering directly with the marker.
These Memento Markers dry quickly and the ink won’t smudge on the wood surface. Add a piece of burlap twine to the ornament and tie it up as the hanger.
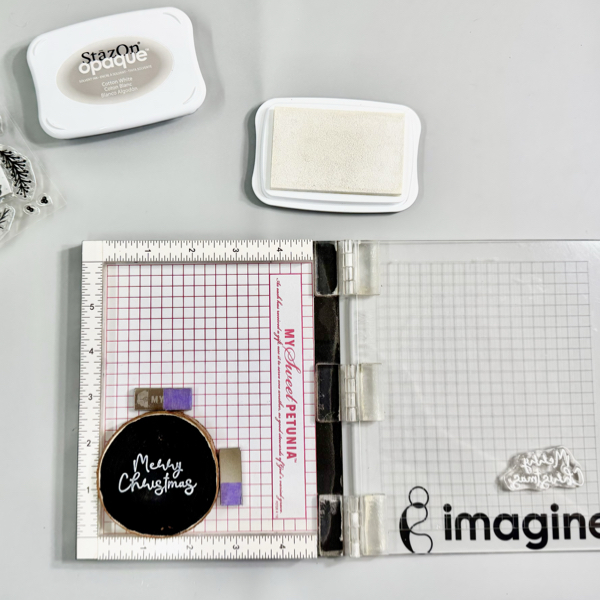
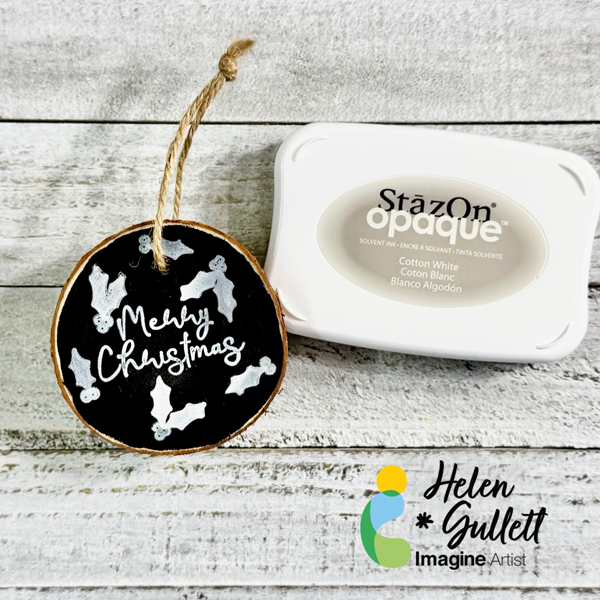
Ornament #2 – Faux Chalkboard Wood Slice Ornament
Directions: For the second ornament we are going to make today is a faux chalkboard wood slice ornament. There are a couple ways to do a faux chalkboard look on a wood slice, today we are going to do simply just painting and stamping.
Step 1 Paint the wood with chalkboard paint or multi-surface black acrylic paint. Usually one layer of paint will be enough. Make sure the paint dries well before you do the stamping.
On the wood on a stamping tool and use the magnets to keep it in place or you can use tape on the back of the wood slice and place it on the stamping tool.
On the dried painted surface, stamp the sentiment using StazON Opaque – Cotton White ink.
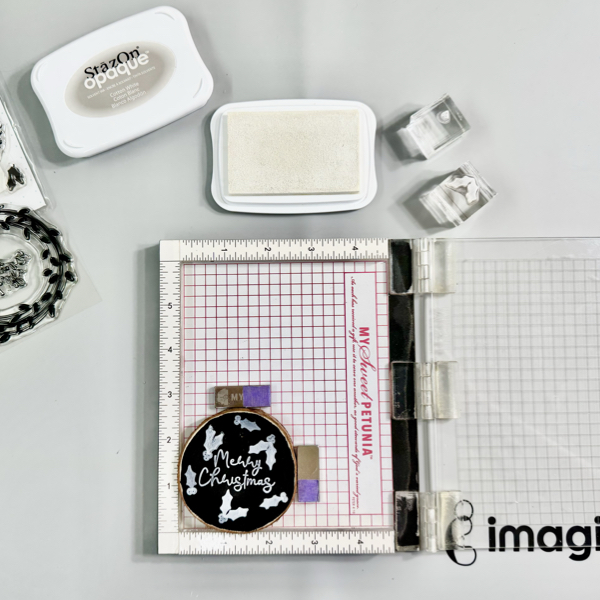
Step 2 Stamp the holly leaves and berries using StazOn Opaque – Cotton White on the ornament around the sentiment using the stamping tool or small stamping blocks.
When the ink dried well, add a piece of baker twine to the ornament as the hanger.
I hope you like these ornament ideas and you will find it easy to make your own ornaments. Also, making ornaments can be a fun Christmas craft party idea. I love both style ornaments, which one do you like?
Thank you for stopping by our blog today. Have a wonderful day!
Craft Supplies
Imagine Crafts:
Memento Markers (Tuxedo Black, Rich Cocoa, Cottage Ivy, Pear Tart, Lady Bug)
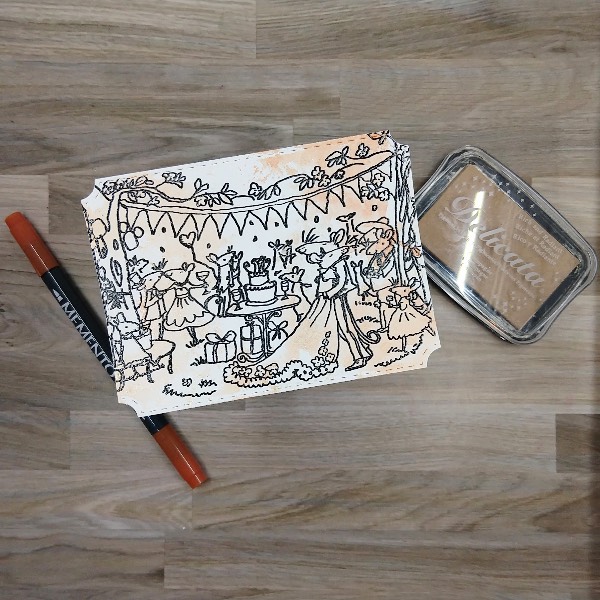
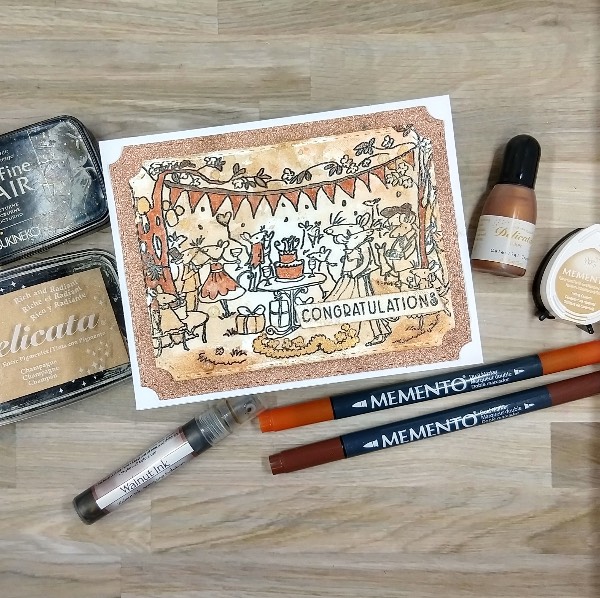
Before making this card, I had no idea all of the different winter wedding color palates there are! I needed to make a winter wedding card, and decided to use some products in a new way (at least for me). Before I share how I made this card, I wanted to share a winter wedding color palate that inspired me:
Skill: Intermediate Time: 2 hours
Directions:
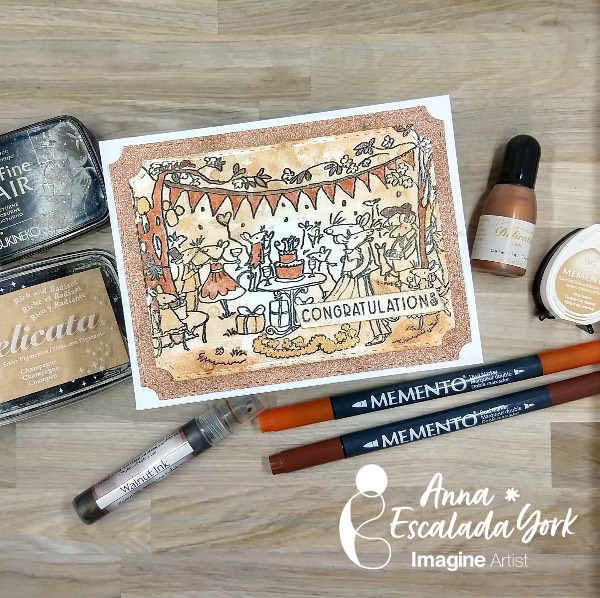
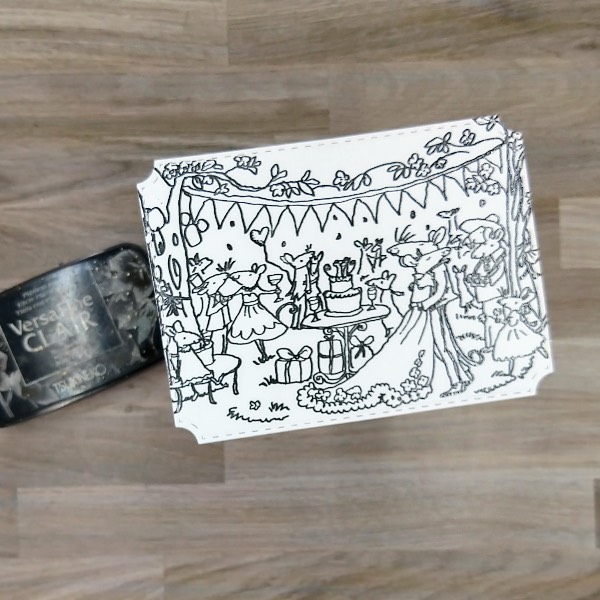
Step 1: I stamped a large wedding scene stamp on a die cut piece of watercolor paper with Nocturne VersaFine Clair ink and then heat embossed it with clear embossing powder.
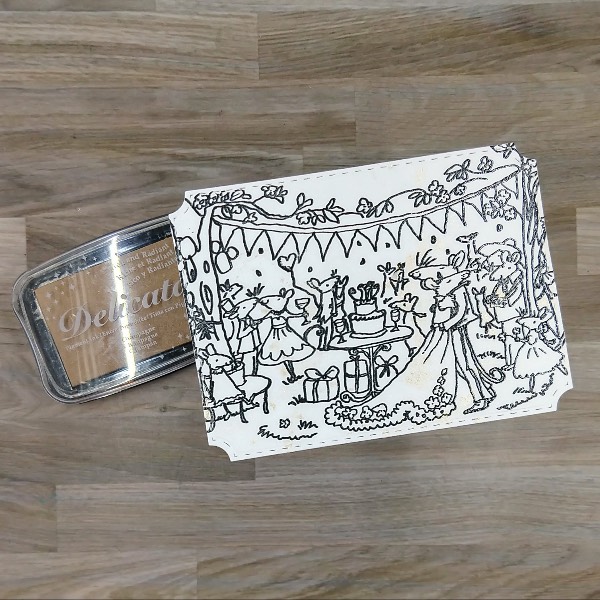
Step 2: Press a Champagne Delicata ink pad onto a piece of acetate packaging and then mix with water. Press the acetate onto the stamped wedding image. (This is very hard to see in the image, but there is a faint sheen on the wedding dress and in other parts of the panel.) Allow to dry.
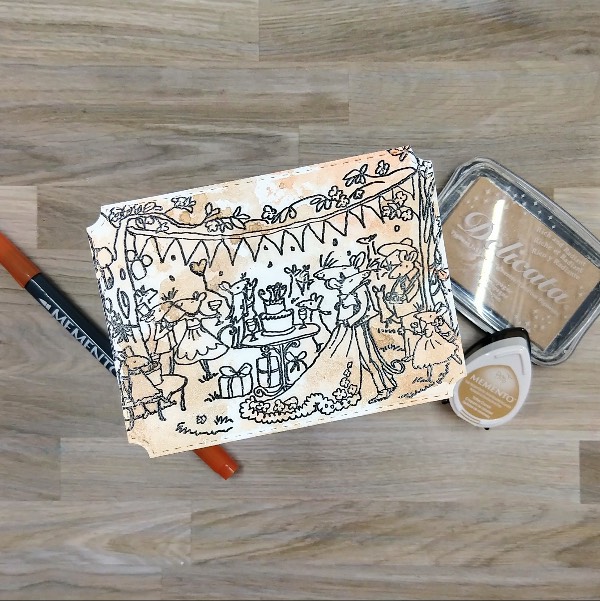
Step 3: Watercolor smoosh the panel with a second layer of the Champagne Delicata ink. Then scribble Potter’s Clay Memento Dual Marker onto the acetate and spray with water. Then press the acetate onto the panel. Allow these layers of color to dry on the panel.
Step 4: Press the Toffee Crunch Memento ink pad onto the same acetate, spray with more water and then watercolor smoosh the panel again.
Step 5: Color in parts of the panel with Potter’s Clay Memento Dual Marker.
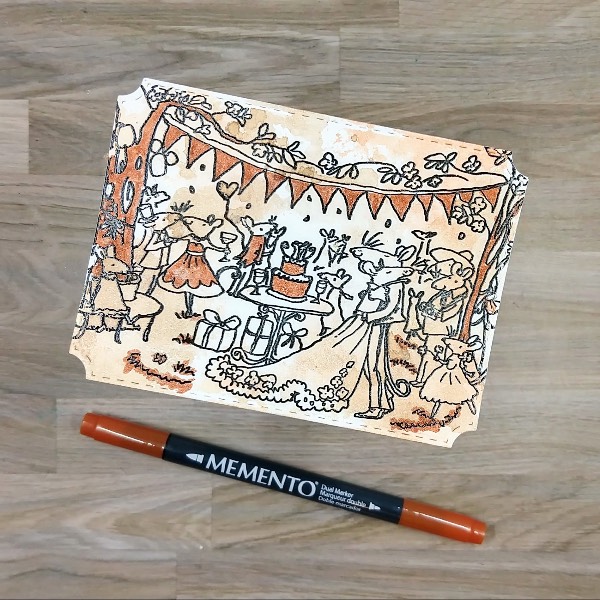
Step 6: Add a small amount of Celestial Copper Delicata Inker onto the same acetate packaging and use a small paintbrush to mix with water to thin out the reinker. Then use the paintbrush to paint the trim of the bride’s dress, some of the presents, and some other images with the coppery mix.
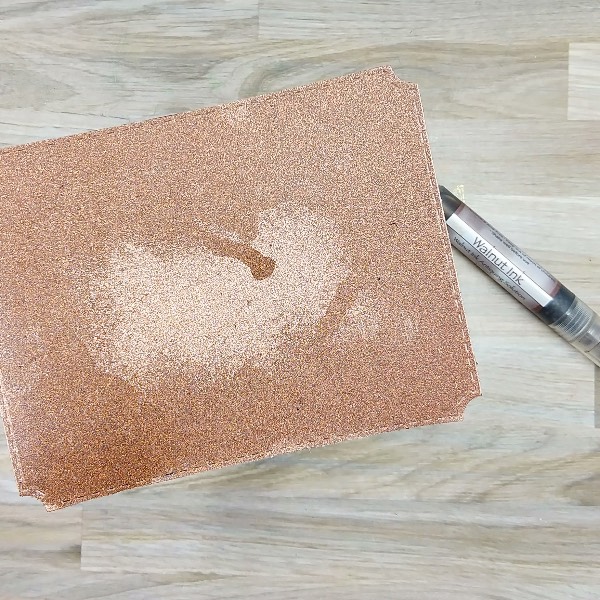
Step 7: Spray Walnut colored Walnut Ink Antiquing Solution onto die cut glitter cardstock to make it darker. (Please note that the panel took a long time to dry. The next time I do this, I plan on adding embossing powder to help it dry more quickly.
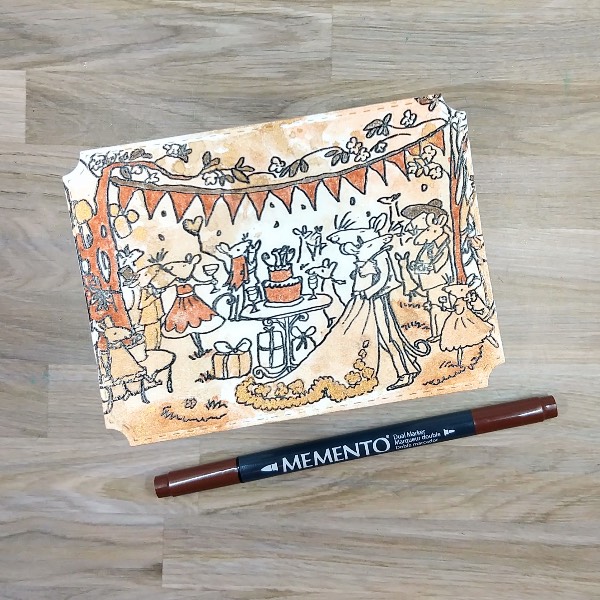
Step 8: Color the tree leaves, the pennant ribbon and a couple of the hats with Rich Cocoa Memento Dual Marker.
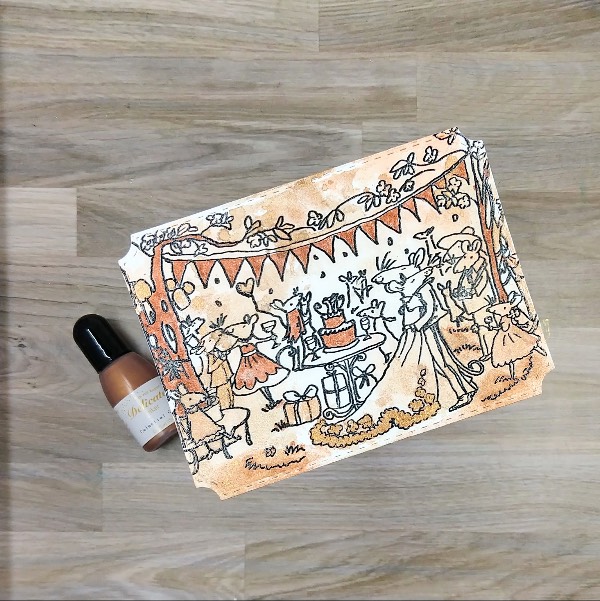
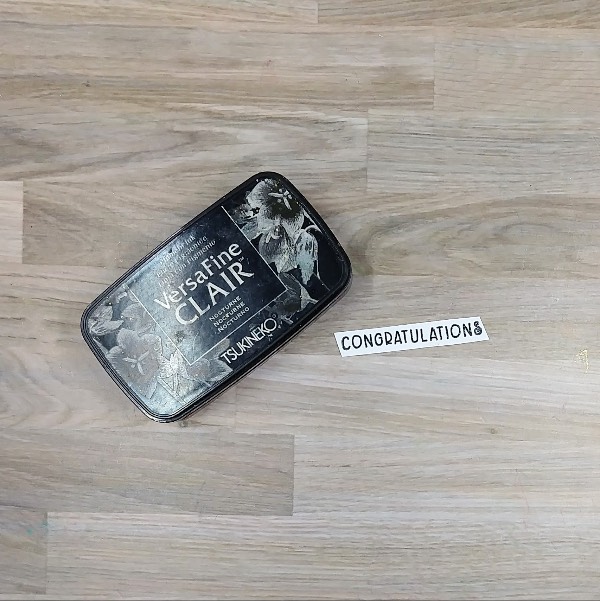
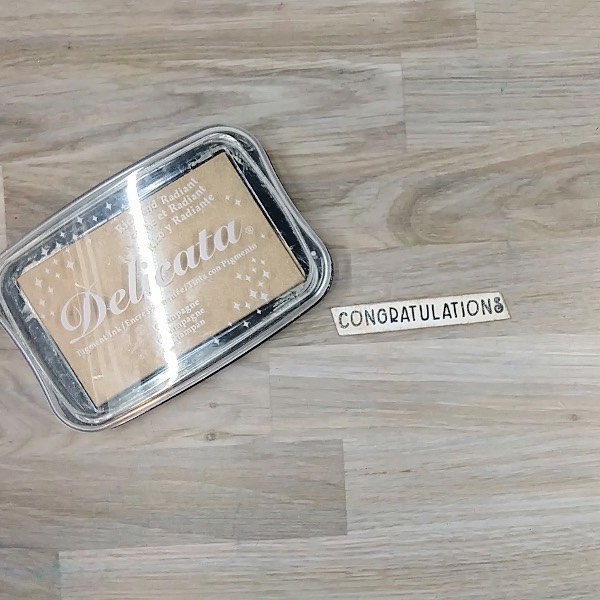
Step 9: Stamp the sentiment from the same stamp set with Nocturne VersaFine Clair ink and heat emboss with clear embossing powder. Trim the sentiment into a thin strip with the edges at an angle.
Step 10: Press the edges of the sentiment strip into a Toffee Crunch Memento ink pad to color the borders.
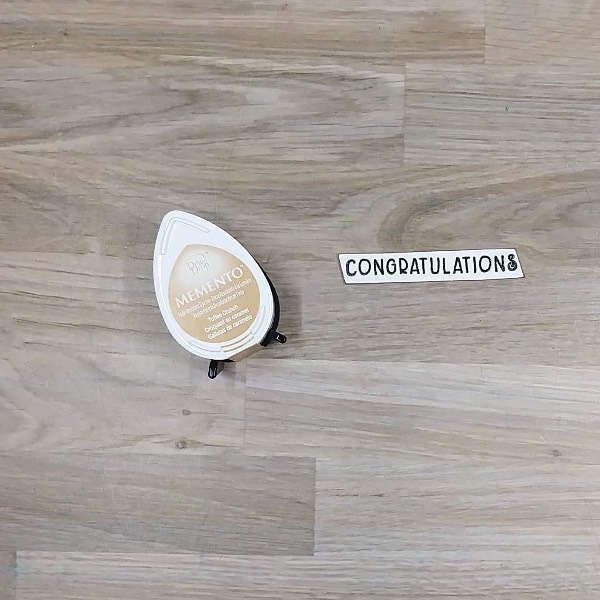
Step 11: Press a Champagne Delicata ink pad onto the acetate packaging and then spray with water. Watercolor smoosh the sentiment strip and allow to dry.
Step 12: Assemble the card. Glue 2 strips of scrap cardstock behind the sentiment and glue the sentiment on the lower right corner of the stamped panel. Then glued the stamped panel onto the sprayed glitter cardstock panel. Glue the whole thing onto an A2-sized white card base.
Glue gems on the bottom left and upper right corners of the card.
Other • Colorado Craft Company – stamp set – Happily Ever After by Anita Jeram • Pink and Main – die set – Notched Corners • Trinity Stamp Company – embellishments – Champagne Twinkle Stardust Rhinestone mix • A2-sized white card base • Clear Embossing Powder • Watercolor paper • Glitter cardstock • Die cutting machine • Paper trimmer Scissors • Glue
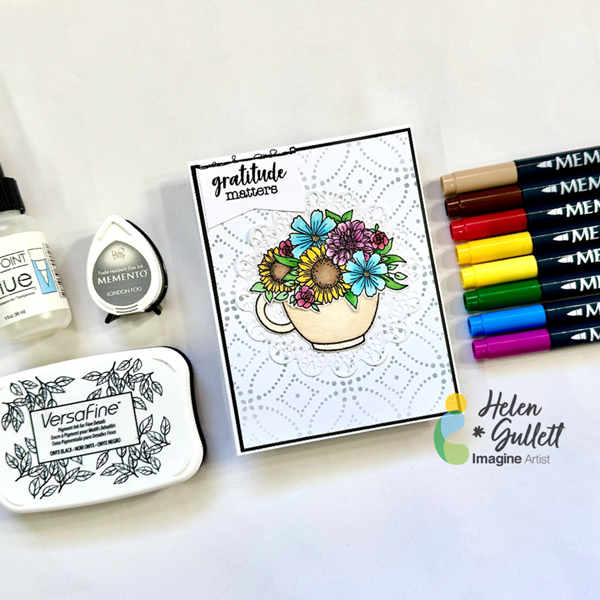
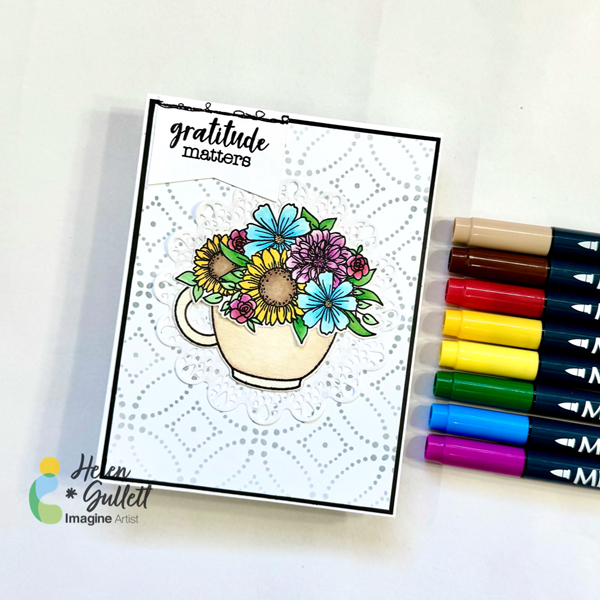
Hello crafty friends! Today, we are going to do some watercoloring with Memento markers, stenciling with Memento ink, and stamping with VersaFine ink to make this Fall floral coffee mug card. Let’s gather your supplies, grab a cup of coffee, and get crafting together!
Skill: Intermediate Time: 15-20 minutes
Direction:
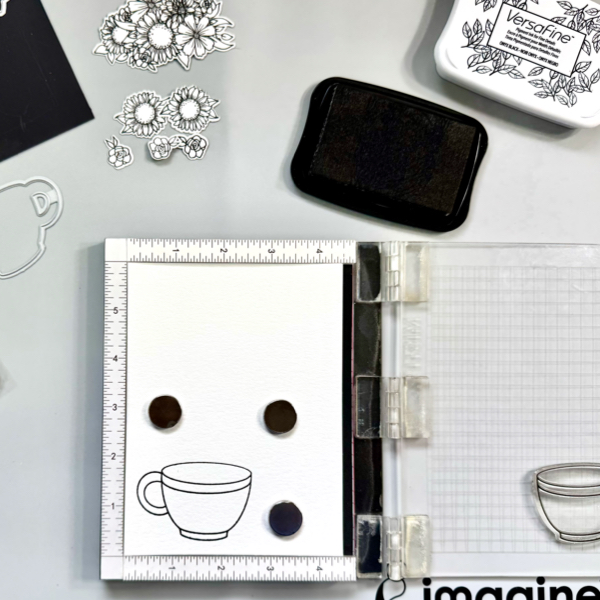
Step 1
Cut out a piece white cardstock into 4″ x 5 1/4″
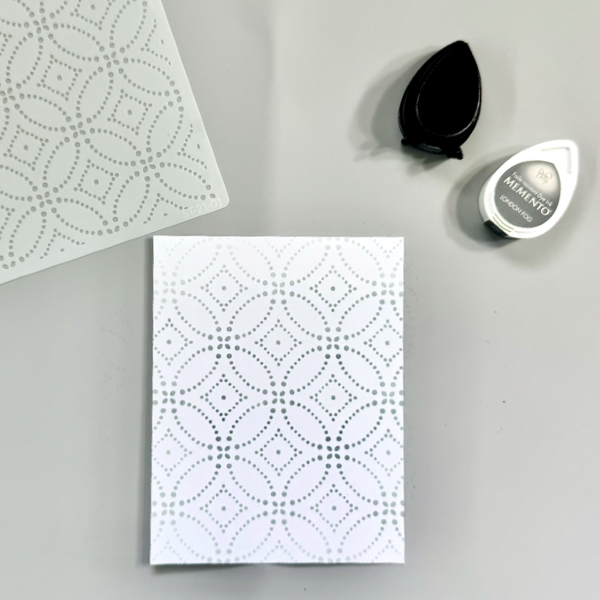
Put the stencil on top of the cardstock and secure it with some washi tape or removable tape.
Use a blending brush to add the Memento London Fog ink to the cardstock.
Remove the stencil and set aside for the ink to dry.
Step 2
On a piece of watercolor cardstock, stamp all the floral and cup images with the VersaFine Onyx Black ink.
Cut them with their matching die set or you can simply fussy cut them with scissors.
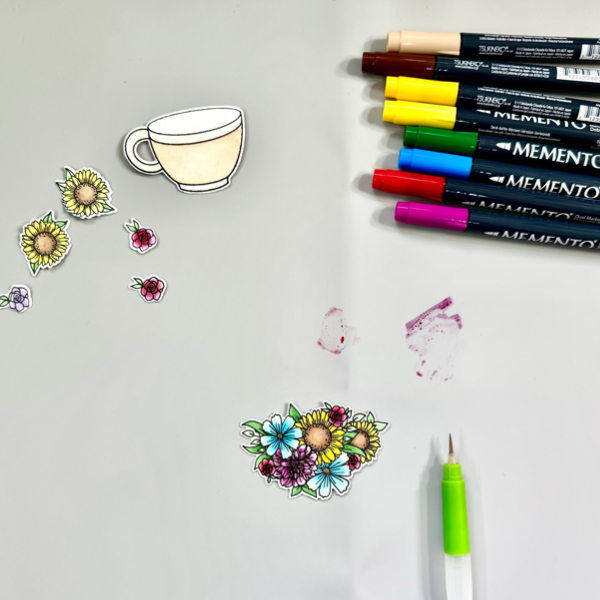
Step 3
There are two ways of watercoloring. The first option is you can do wet on wet technique by lightly wet the area where you want to add the watercolor paint, and then pick up the ink with a water brush and color on the wet watercolor paper. And the second option is called wet on dry technique where you add the watercolor paint directly on the dry watercolor paper. Both ways work well with these Memento Markers.
On this project, I used the wet on wet technique. First, scribble each color of the Memento Marker on the craft mat. Wet the stamped image, pick up the ink with a wet water brush, and then add the color to the image. Dry the watercolored image with a craft heat gun.
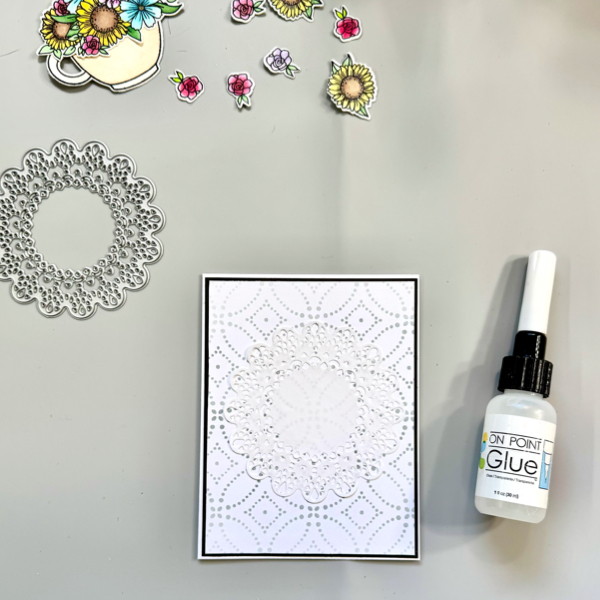
Step 4
Cut out a piece of copy paper with the doily die to make paper doily. Add it to the stenciled panel with On Point Glue.
Cut a piece of black cardstock into 4 1/8″ x 5 3/8″ mat, add the stenciled panel to it with On Point Glue.
Add the whole background panel to the card base with On Point Glue.
Put together the watercolored coffee mug and flower bouquet cluster with On Point Glue.
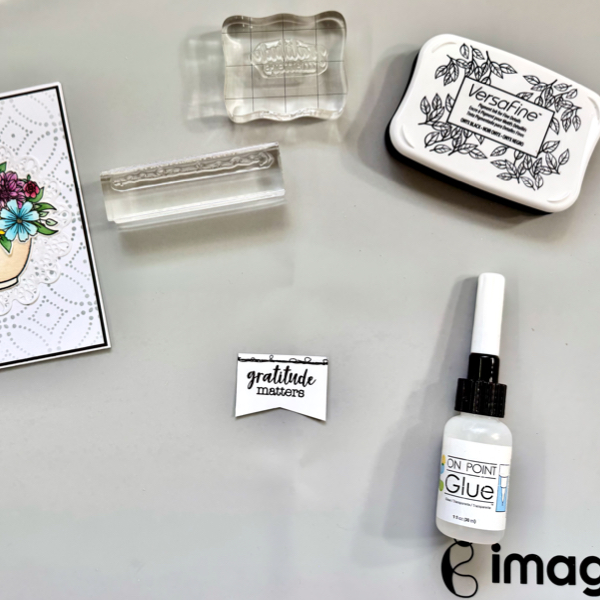
Step 5
Stamp the sentiment and faux stitch pattern on a piece of white cardstock with VersaFine Onyx Black, and then trim it into a sentiment banner.
Add the floral coffee mug in the middle of the card, on top of the doily with On Point Glue.
Add the sentiment banner on the left top of the card with On Point Glue.
Memento Markers are not only for coloring, but also watercoloring. I had fun making this card with a watercoloring technique using these markers. And I hope this Fall Floral Coffee mug card can perk you up!
Thank you for stopping by our blog today. Have a wonderful day!