Make a “Best Wishes To You” Stenciled Card

By LeeAnn McKinney

~ Hi there friends and fellow crafters, LeeAnn here with a fun wedding card that can really be adapted to any event.

Skill Level: Beginner-Intermediate Level

Time: 25 minutes 

Crafting Supplies:

Imagine

• On Point Glue

• Memento Grape Jelly Dye Ink

• Tear It! Tape

• VersaFine Clair Nocturne

• Memento Dew Drop Bamboo Leaves

• StazOn Stamp Cleaner

• Angel Pink Memento Ink

• LuLu Lavender Memento Ink

• New Sprout Memento Ink

Other Products Used:

STENCIL- Masks and Fillers by Gina K Designs

STENCIL- Curved Floral Layering Stencil by Gina K Designs

DIE- Curved Floral Banner by Gina K Designs

Paper- White and Black Heavyweight Cardstock by Gina K Designs

Quick and Easy Place Cards For Your Holiday Table Setting

Oct-2022_Katy-Ingram_Place-Cards-Group_IG-1

By Katy Ingram –

Hello Friends! Katy here and today I am creating place cards for my Thanksgiving table. Now I know some people may not do this, but I have added a bit of a twist to mine. On the inside I have included some encouraging and uplifting sentiments to let my loved ones know I appreciate and love them and that I am thankful and grateful to have them at my table for the holidays. Just a little something to make them smile this holiday season. 

In today’s video tutorial you will see how easily these cards came together using some Memento Inks and I also share where my inspiration came from. I also mention these would be great tombstones for Halloween!

I cut a piece of heavyweight white card stock 2 3/4 inches wide by 8 inches long and scored at 4 inches and then used the number 8 arch die within the Spellbinders Essential Arches layering dies. 

To create the card simply fold the card at the score line and place the arch of the die a bit above that folded line so the die is off the top of the card stock and then run it through your die cutting machine. 

The video below has all the details. I hope you enjoy and are inspired to add some inspirational place cards at your table this holiday season. 

Skill: Beginner, Intermediate, Advanced

Time: 10 minutes


Art Supplies:

Imagine:

• Memento Inks: 

– Northern Pine

– Peanut Brittle

– Rhubarb Stalk

– Angel Pink

– Sweet Plum

– Elderberry

– Cantaloupe

– New Sprout

• VersaFine Clair – Nocturne 

Other Products Used

• Spellbinders Essential Arches Die Set

• The Greenery Color Spots Stencil Set

• The Greenery Lovely Silhouettes Stamp Set

• Concord & 9th Perfectly Penned Stamp Set

• Blending Brushes

Other Products Used:

Follow Katy Here:

Youtube: https://youtube.com/c/eastwickspaperandink 

facebook: fb.me/eastwickspaper 

Instagram: https://www.instagram.com/eastwickspaperandink/ 

Blog: https://www.eastwickspaperandink.com/

Fall Themed Note Cards Using First and Second Generation Stamping With Memento Inks  

Sept-2022_Katy-Ingram_Fall-Thanks_Group-IG-1

By Katy Ingram –

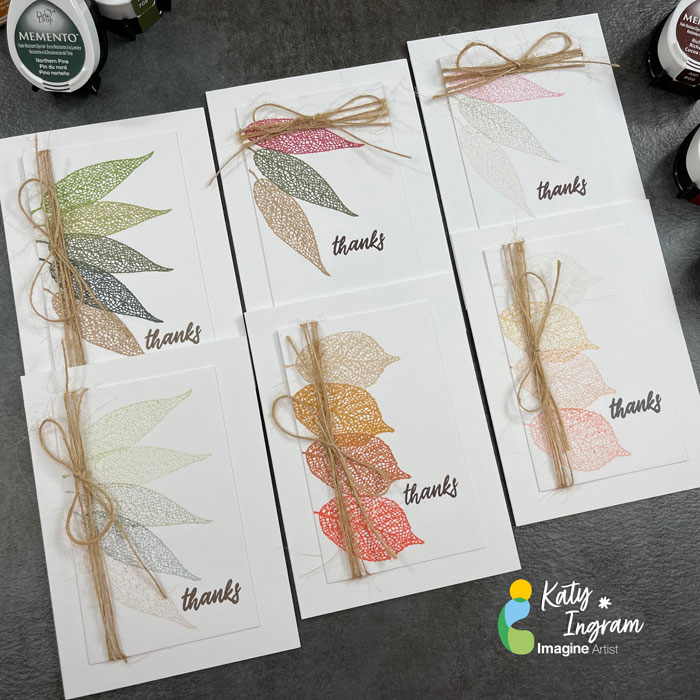
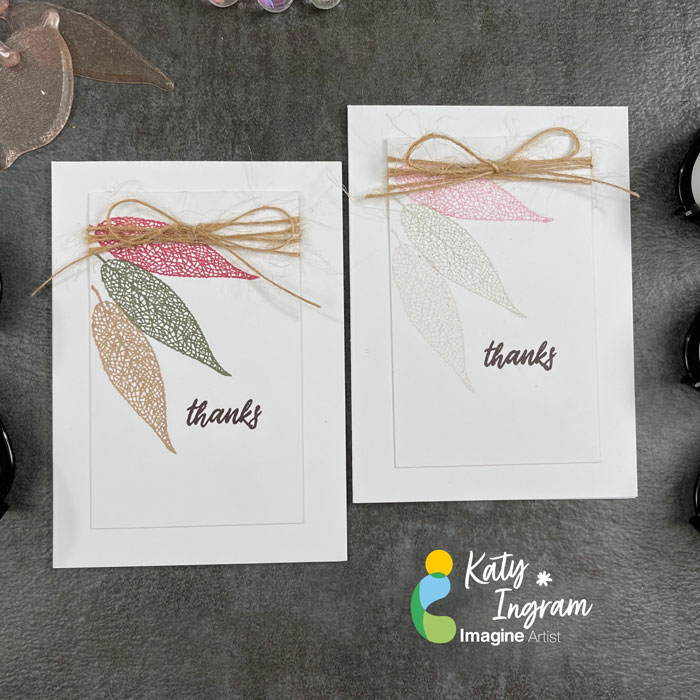
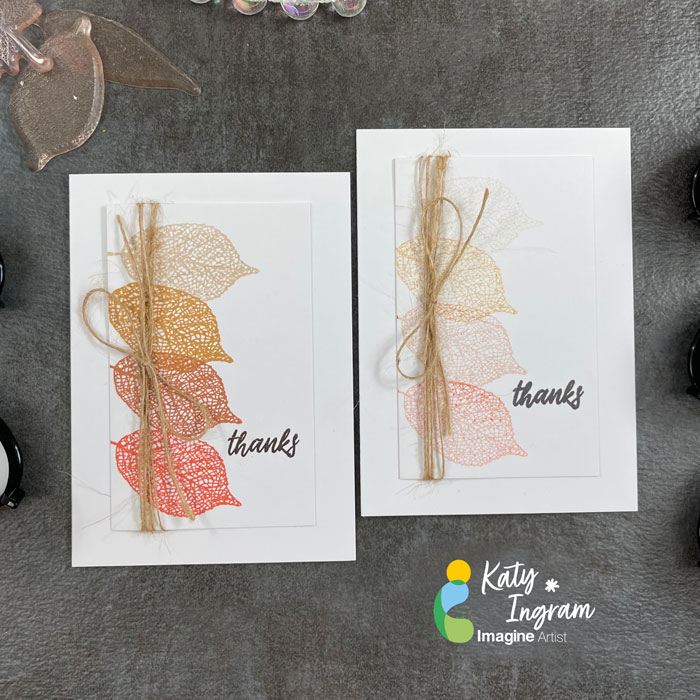
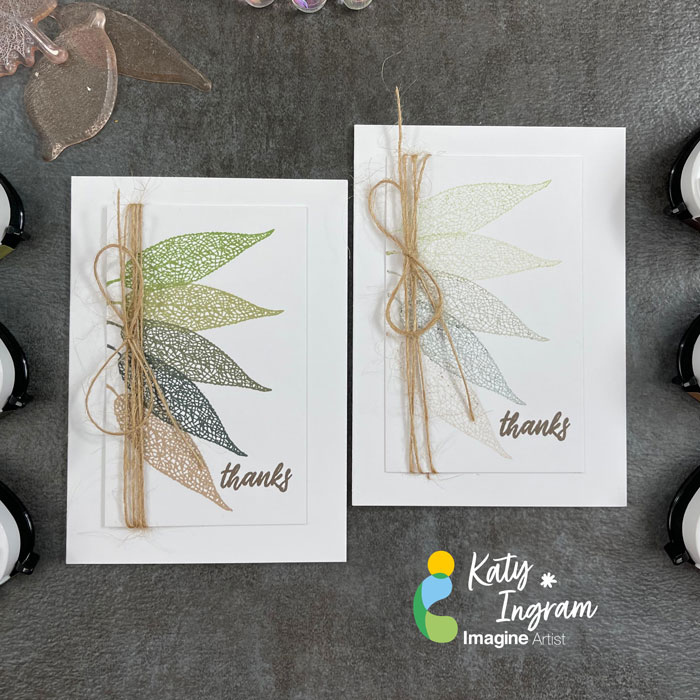
Hello Friends! Katy here and today I am creating some fall themed note cards with second generation stamping. This is a great way to get more from your inks and create a beautiful subtle look to your projects. 

In todays video tutorial you will see both first and second generations stamping with a variety of fall color Memento Inks and a quick way to add interest with a bit of twine. Video has all the details. Thanks for joining me today.

Skill: Intermediate
Time: 10 minutes

Sept-2022_Katy-Ingram_3-leaf-cards_4

Sept-2022_Katy-Ingram_4-leaf-cards_IG-2

Sept-2022_Katy-Ingram_5-Leaf-Cards_IG-3

Art Supplies:

Imagine:

• 5 Leaf Card 

– Memento Inks: Bamboo Leaves, Pistachio, Olive Grove, Northern Pine, Toffee Crunch

“Thanks” Sentiment: Memento Rich Cocoa

• 4 Leaf Card

– Memento Inks: Desert Sand, Peanut Brittle, Potters Clay, Morocco

“Thanks” Sentiment: Stamped with VersaFine Clair Pinecone and Memento EspressoTruffle

• 3  Leaf Card

Memento Inks: Rhubarb Stalk, Olive Grove, Toffee Crunch

“Thanks” Sentiment: VersaFine Clair Pinecone

– Tear It! Tape

Other Products Used:

• Gina K Designs Skeleton Leaves Stamp Set

• May Arts Jute Twine

• MISTI Stamping Tool

• Heavyweight White Cardstock panel 2 1/2 inches wide by 4 inches long

• Heavyweight White Cardstock Base 7 inches by 4 7/8 inches score at 3 1/2 inches on the 7 inch side.

Follow Katy Here:

Youtube: https://youtube.com/c/eastwickspaperandink 

facebook: fb.me/eastwickspaper 

Instagram: https://www.instagram.com/eastwickspaperandink/ 

Blog: https://www.eastwickspaperandink.com/

Learn to Make a Rose Themed Congratulations Card 

2022-Annie-Aug-700x700

By Annie Collins

– Hello Crafty Friends – Annie here with a fun summer themed card featuring a variety of Imagine Crafts products.

Skill Level: Beginner

Time to Complete: 30 Minutes

Art Supplies:

Imagine:

VersaMagic Inks: Pixie Dust, Pink Petunia, Red Brick, Sage, Oasis Green, & Hint of Pesto

• Memento Ink: Summer Sky

• magine Crafts: Tear It! Tape

• Imagine Crafts: On Point Glue

• Imagine Crafts: Craft Mat

Other products

• Hero Arts Stamps: Color Layering Set: Layering Rose CM243

• Recollections Brand 110# Cardstock: White

• Accent Ultra Smooth 80# Cardstock: Opaque White

• Lifestyle Crafts Embossing Folder: Lattice

• Blending Brush

• Tiny Acrylic Bubbles: Clear, Pink and Light Blue

Gorgeous Wedding Card with Memento and Ink Potion No. 9 


By Katy Ingram –

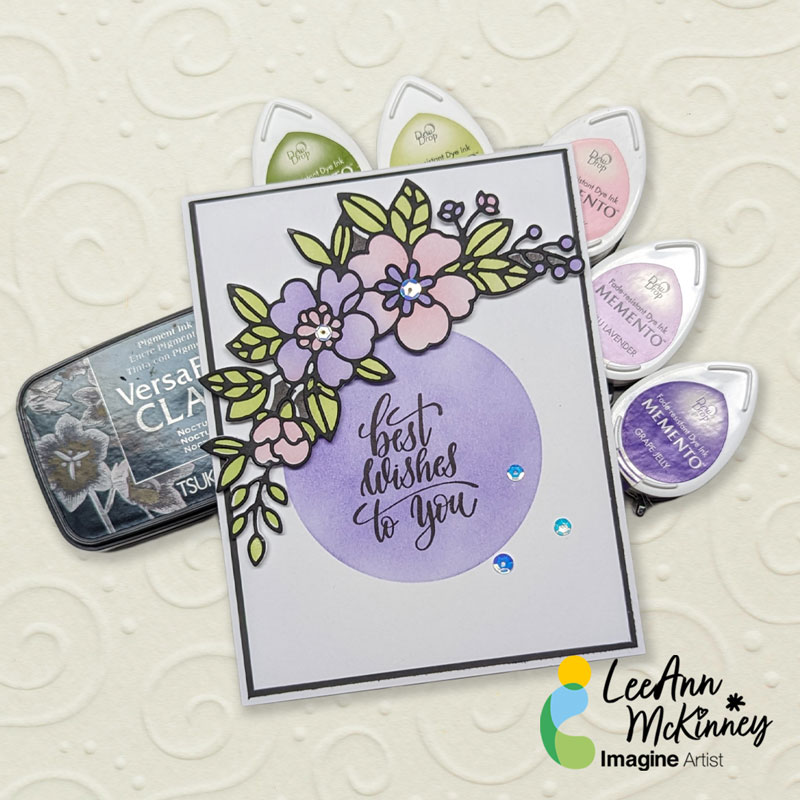
Hello Friends! Katy here and today I am sharing an easier way to color your own cardstock using Memento Inks andInk  Potion No. 9 blending solution. 

In todays video tutorial I use our newly colored cardstock to create some 3D flowers for a beautiful summer wedding card. Thanks for joining me today. I hope you enjoy.

Skill: Beginner, Intermediate, Advanced
Time: 30 minutes

Art Supplies:

Imagine:

Memento Inks – 

Angel Pink, Rose Bud, New Sprout, Cottage Ivy, Northern Pine, Bamboo Leaves and Dandelion

Ink Potion No. 9

1/4 inch Tear-It! Tape 

Other Products Used:

Spellbinders Double and Single Peonies Die 

Susan’s Garden Tool Kit

Watercolor Paper

PVA Glue or Hot Glue

Heavyweight White Cardstock

Kat Scrappiness Quilted Background Die

Essentials By Ellen Hutson Rectangle Dies

The Greetery Sentiments Suite Love Stamp Set

The Greetery Pretty Postmarks

Clear Box A2 Size  4 1/2 inches x 1 inch x 5 7/8 inches

Follow Katy Here:

Youtube: https://youtube.com/c/eastwickspaperandink 

facebook: fb.me/eastwickspaper 

Instagram: https://www.instagram.com/eastwickspaperandink/ 

Blog: https://www.eastwickspaperandink.com/

How To Create Nautical Theme Cards Using Memento Inks

2022_June_Katy-Ingram_Nautical-Theme-IG1

By Katy Ingram –

Hello Friends! Katy here with another quick project for you. I have started to create A1 size cards, I think they are the cutest size for note cards. Normally A1 size cards are used for R.S.V.P or Reception cards, but I have started creating them for my every day note cards, I hope you like them too. 

The theme is nautical and when I think of nautical I think navy and white, so for todays project I combine Bahama Blue, Nautical Blue and Teal Zeal Memento Inks. I have a video tutorial for you that shows how these cards came together. I hope you enjoy.

Card Panel Measurement 2 1/2 inches Wide 4 1/4 inches Long

Card Base Measurement 4 7/8 inches x 7 inches, Score on the 7 inch side at 3 1/2 inches. 

Skill: Beginner, Intermediate, Advanced
Time: 10 minutes

Art Supplies:

Imagine

• Memento Ink Bahama Breeze 

• Memento Ink Nautical Blue 

• Memento Ink Teal Zeal 

• Tear It! Tape 

Other Products Used:

• Honey Bee Stamps Zen Ocean Stamp Set (no longer available)

• Honey Bee Stamps Mermaid Song Stamp Set (no longer available)

• Hero Arts My Monthly Hero Kit (no longer available)

• 100 lb Accent Opaque Cardstock https://amzn.to/3qFj36v 

• Brush https://amzn.to/3KoVExK

Follow Katy Here:

Youtube: https://youtube.com/c/eastwickspaperandink 

facebook: fb.me/eastwickspaper 

Instagram: https://www.instagram.com/eastwickspaperandink/ 

Blog: https://www.eastwickspaperandink.com/