We Love Holiday Stamping On Kraft Cardstock

By Kathi Rerek

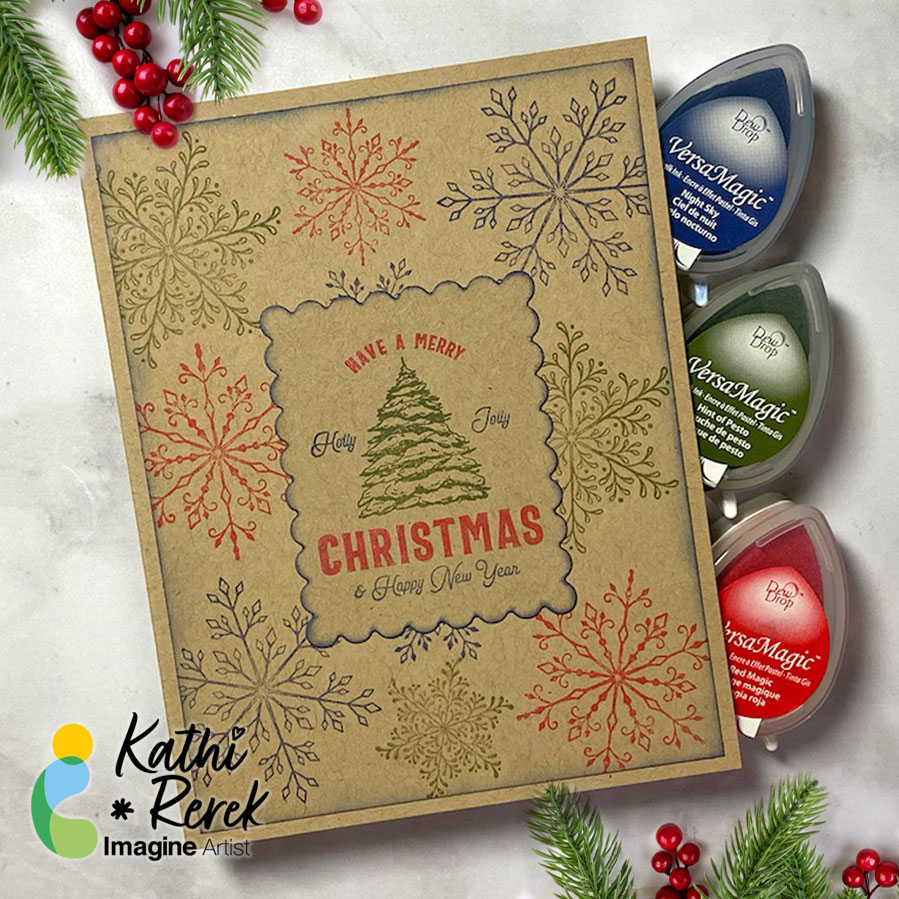
I recently saw a video on Unity Stamps’ Instagram that showed how to use colored inks to stamp snowflakes onto Kraft cardstock. I thought that it would be interesting to try VersaMagic Chalk Inks to see how it would work.

Skill Level: Beginner to Intermediate
Time: 1 hour
Step 1:
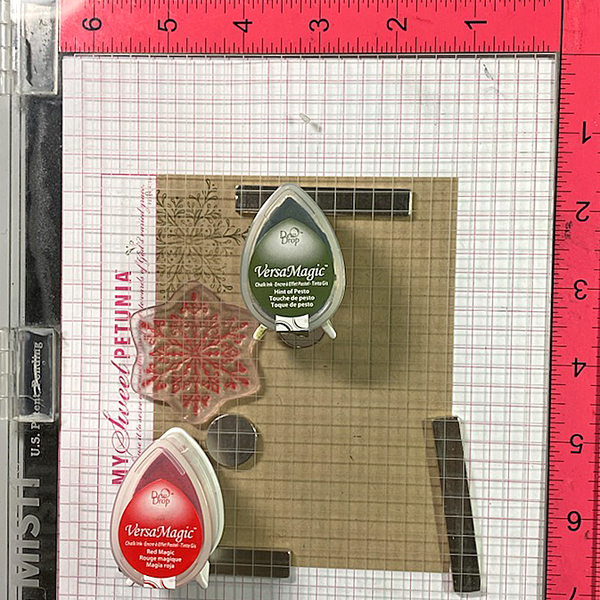
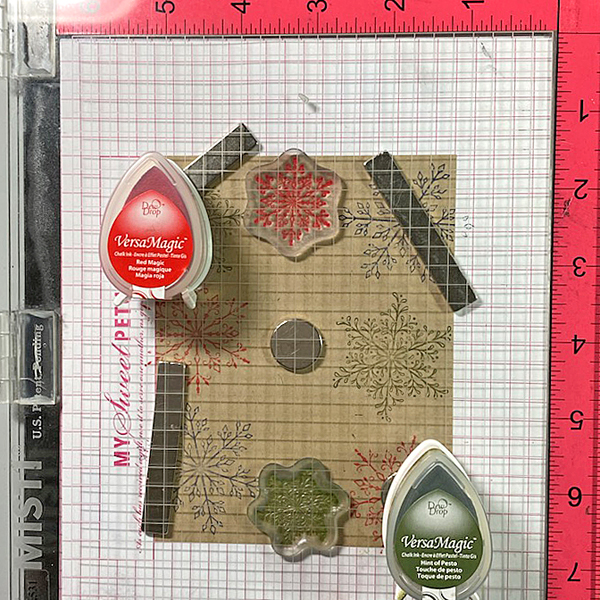
Use magnets to secure a 4” x 5.25” piece of Kraft cardstock onto the base of a stamping platform.

Use Hint of Pesto to stamp the leafy snowflake from the Snowflakes Large Clear Polymer Stamp Set on the top left. Re-ink and stamp again if necessary to create good impression.

Position the spiky snowflake from the set facedown on the image panel below green-stamped snowflake. Use Red Magic VersaMagic ink to stamp the snowflake. Re-ink and stamp again if necessary to create good images. Clean and dry both stamps.
Step 2:
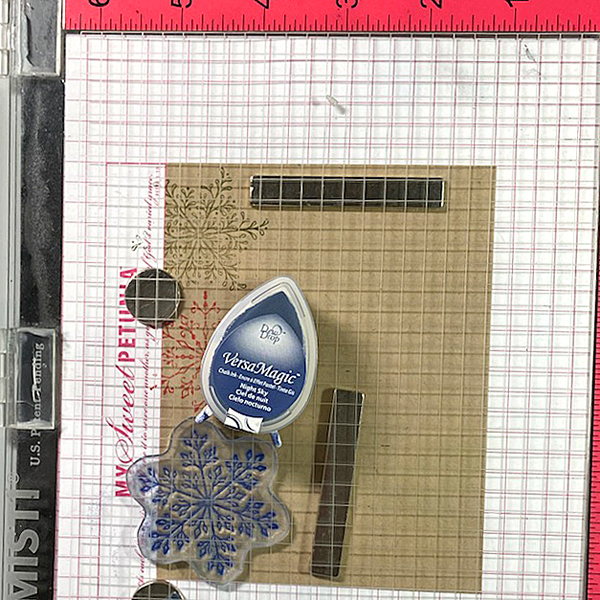
Position the third snowflake stamp from the stamp set facedown on the bottom left of the image panel. Ink the stamp with Night Sky VersaMagic Ink and stamp. Re-ink and stamp again if necessary to create a good impression. Clean and dry the stamp.

Repeat Steps 1 and 2 along the right edge of the image panel as shown in the card photo above.
Step 3:
Position one of the snowflake stamps from the Snowflakes Small Clear Polymer Stamp Set facedown in the center top of the image panel. ink the stamp with Red Magic VersaMatic Ink and stamp. Re-ink and stamp again if necessary to create a good impression. Clean and dry the stamp.

Continue the process of stamping snowflakes from the Snowflakes Small Stamp set with all three colors of VersaMagic Inks  taking care to clean and dry the stamps between colors. Remove the image panel from the stamping panel and heat set.
Step 4:
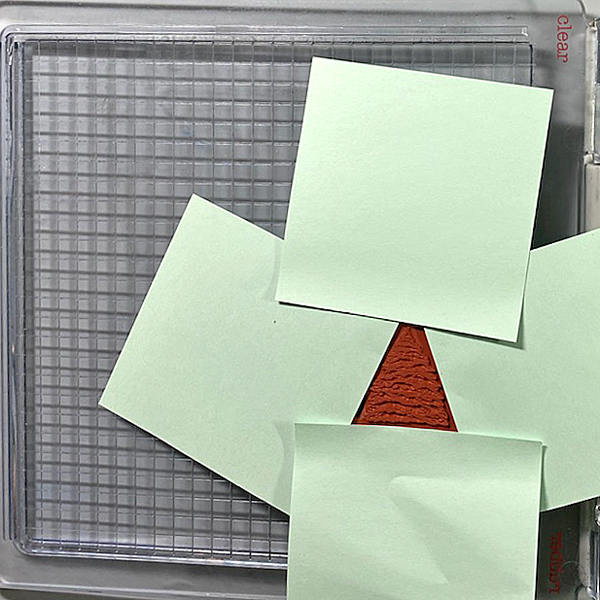
Secure a piece of Kraft cardstock to the base of the image panel. Position the Holiday Spruce Rubber Stamp face-down on the image panel. Press the platform’s lid onto the back of the stamp and lift.

Use Post-It Notes to cover all elements of the stamp except for the Christmas Tree. With the Post-It Notes in place, ink the stamp with Hint of Pesto VersaMagic Ink. Remove the Post-It Notes and stamp twice — once onto the image panel and once onto repositionable sticker paper. Fussy-cut the sticker paper version and place over the stamped tree on the image panel.

Use Post-It Notes to cover each element of the Holiday Spruce Rubber Stamp, ink with one of the the VersaMagic Inks, remove the Post-It Notes, and stamp.

Heat set when the image is completely stamped.
Step 5:
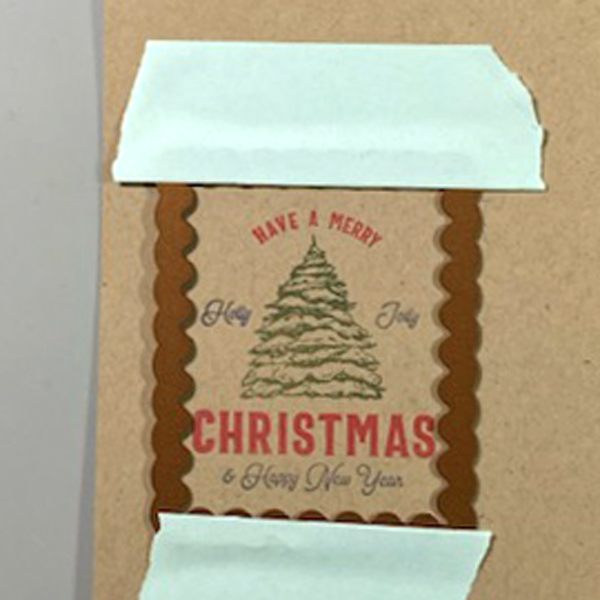
Use low-tack tape to secure a scalloped rectangle die to the sentiment panel. Run the sentiment panel through a die-cutting machine.
Step 6:
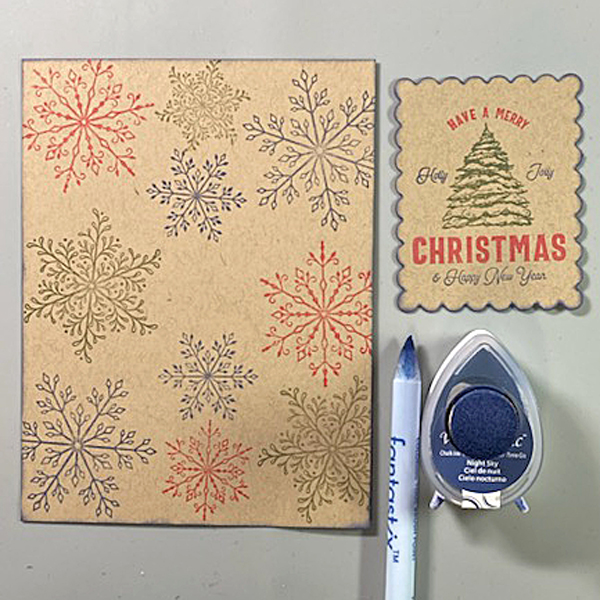
Use a sponge dauber and Night Sky VersaMagic Ink to edge both the image panel and the sentiment die-cut. Use a Fantastix to reach between the scallops! Heat set both panels.
Step 7:
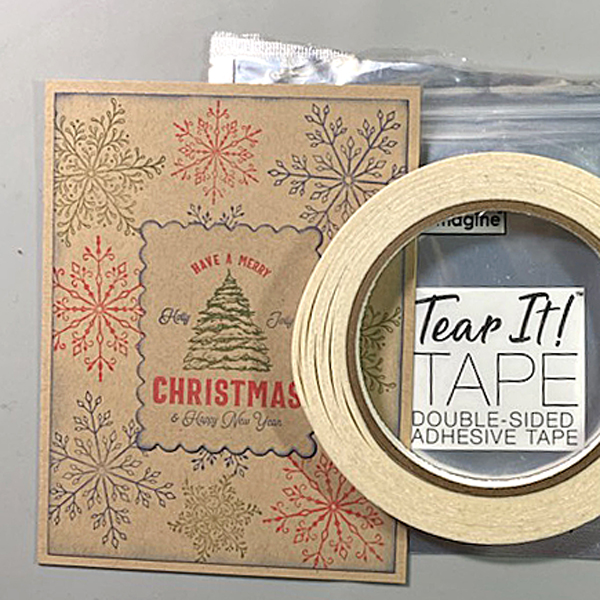
Use Tear It! Tape to adhere the image panel to a Kraft A2 Card. Use Tear-It Tape to adhere the sentiment die-cut to finish the card.

Imagine Crafts Supplies:

Other Supplies:

  • Kraft Cardstock by Bazzill Basics
  • Snowflakes Clear Polymer Stamp Set by Lavinia Stamps
  • Snowflakes Large Clear Polymer Stamp Set by Lavinia Stamps
  • Snowflakes Small Clear Polymer Stamp Set by Lavinia Stamps
  • Holiday Spruce Make a Tag Cling Rubber Stamp by Unity Stamps
  • Scalloped Rectangles Nestabilities by Spellbinders
  • Low-Tack Tape
  • Post-It Notes
  • Heat Gun by EK Success
  • Big Shot

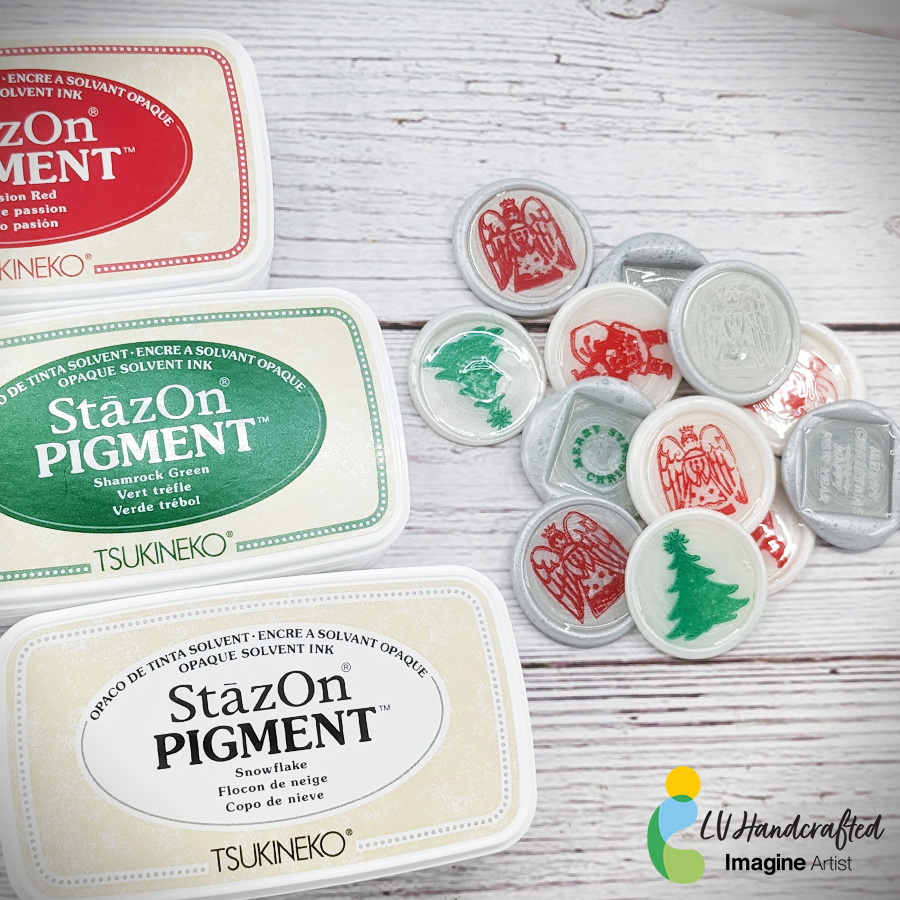
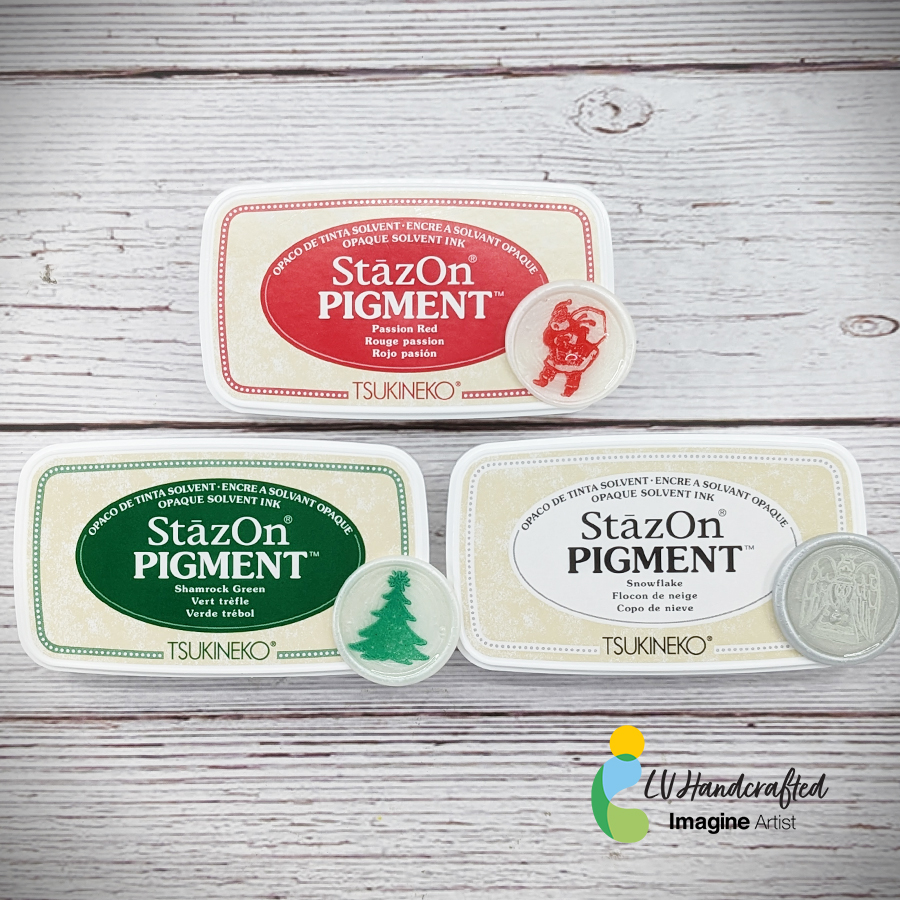
Create Custom Wax Seals with StazOn Pigment Inks

By LV Handcrafted

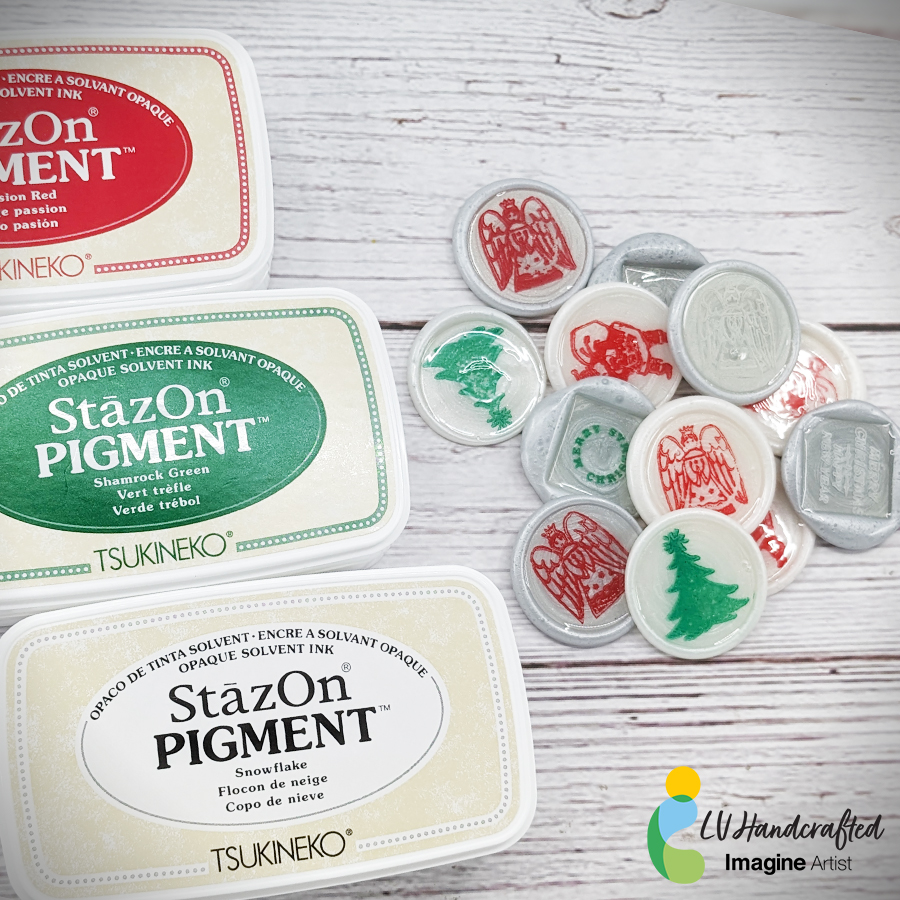
Hello friends! This is Linh (or LV Handcrafted on all the socials). Did you know you can customize wax seals with Imagine inks? This will have you looking at your stamps in a whole new light! Create fabulous wax seals for the holidays as envelop seals for your greeting cards, tag toppers or seal your gifts with these fun custom stamped wax seals!

Skill: Advance
Time: 5-10 minutes (depends on how many you make)

Supplies Used

Imagine

Other Products Used

StazOn Opaque Ink With BetterPress

By LV Handcrafted

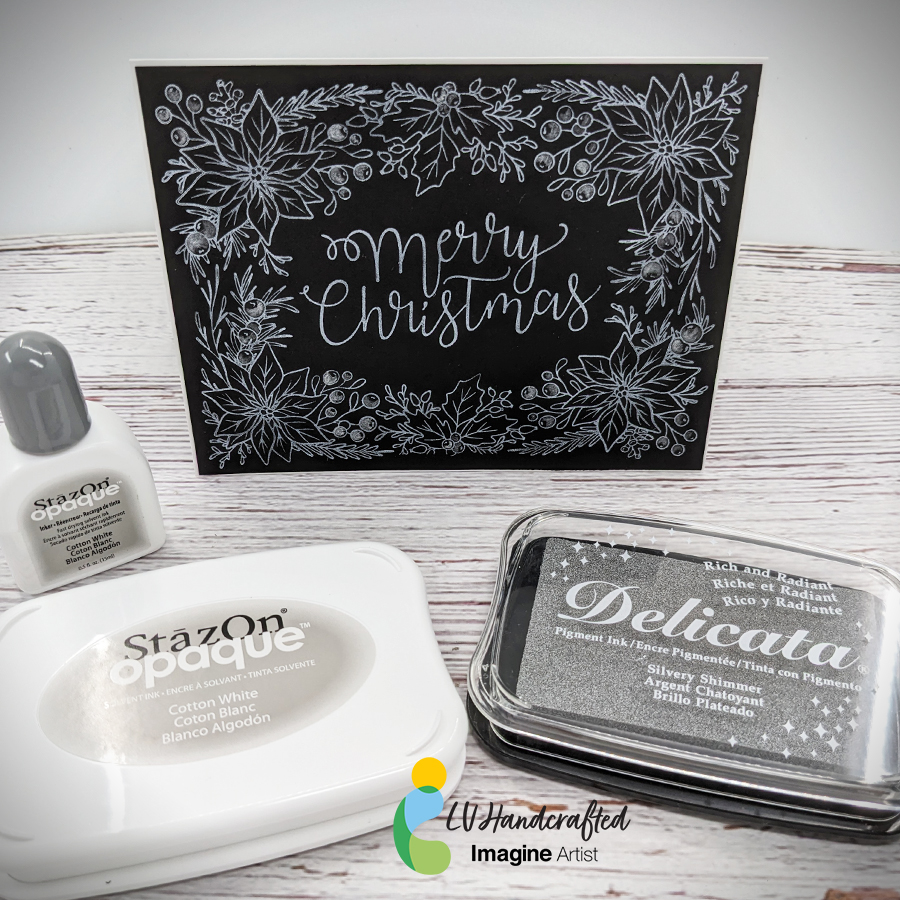
Hello friends! This is Linh (or LV Handcrafted on all the socials). I’m back again with more BetterPress fun!  This time I’m using StazOn Opaque ink in Cotton White and Delicata Silvery Shimmer ink.  The StazOn Opaque ink is wonderful because it’s a solvent based pigment ink that you can use on dark or black cardstock. Look how bright and white that is! It works beautifully with this BetterPress plate and makes a very beautiful holiday card. 

To elevate the design a little bit, I smooshed some Delicata ink onto an acrylic block, watered it down a smidge and painted with it. I did a little partial coloring of the holly berries to add a little contrast to the design. The shimmer is subtle but beautiful and perfect for that extra special touch during the holidays.

Skill: Beginner
Time: 5 minutes

Supplies Used

Other Products Used

  • Spellbinders BetterPress System
  • Spellbinders Note BetterPress Plate
  • Black Cardstock 80 lb Cover

Fun Snow Globe Christmas Card

By Kathi Rerek

– Let’s make a festive and fun Christmas card with ink, stamps, stencils, and minimal coloring.

Skill Level: Beginner to Intermediate
Time: 1 hour

Step 1.

Use a stamping platform and Nocturne VersaFine Clair ink, stamp the penguin from the Penguin Clear Stamp Set onto a panel 6” x 8” panel of Mixed Media cardstock. Re-ink and stamp a second time to ensure a good impression. Keep the image panel secured to the base of the stamping platform. Remove and clean the stamp.

Step 2:

Position the the penguin from the Frost Clear Stamp Set to the right of the previously stamped penguin. Ink the stamp with Nocturne VersaFine Clair Ink and stamp. Re-ink and stamp if necessary to ensure a good impression. Remove the image panel from the platform. Remove and clean the stamp.

Step 3:

Place a piece of repositionable sticker paper on the base of the stamping platform. Place both penguins facedown onto the sticker paper. Ink the stamps with Nocturne VersaFine Clair Ink and stamp. Remove the stamps and the sticker paper sheet from the platform. Heat set the image panel.

Step 4:

Fussy-cut the sticker paper versions of the penguins and place atop their counterparts on the image panel to mask them.

Step 5:

Position the Snow Globe stencil so that the opening is framing the penguins. Use low-tack tape to secure the stencil to the image panel and to cover the base of the image panel. Use a Sponge Dauber to apply Summer Sky Memento ink heavily around the edges of the Snow Globe fading inward over the masked penguins.

Step 6:

Keeping the Snow Globe stencil in place, remove some of the tape from below the globe area. Position the Snow Globe’s Base stencil below the snow globe on the image panel. Secure it with low-tack tape.

Position the circle mask, included with the Snow Globe stencil set, so that it covers the penguins. Secure it with low-tack tape as shown.

Use a Sponge Dauber to apply Rhubarb Stalk Memento ink along the top, bottom, and both sides of the Snow Globe Base stencil. Use the same Sponge Dauber to apply and blend Lady Bug Memento from the edges towards the center of the Snow Globe Base. When happy with the blending and coverage, remove, clean, and dry the Snow Globe  stencil, Snow Globe Base stencil, and the circle mask. Use Scarlet Red and Red Chalk pencils to add dimension and detail to the Snow Globe base. Use a white chalk pencil to add a highlight.

Step 7:

Place low-tack tape horizontally across the inked Snow Globe Base. Place the circle mask over the inked Snow Globe and masked penguins on the image panel. Use low-tack tape to secure the circle mask in place.

Use a Sponge Dauber to apply New Sprout Memento ink to the top part of the image panel as shown.

Step 8:

Place the Holly Background stencil over the circle mask onto the image panel. Secure the stencil in place with low-tack tape. Use a Sponge Dauber to apply Oasis VersaFine Clair ink over the stencil’s  holly leaves onto the image panel. Use a paper towel to remove as much ink as possible from the stencil.

Use a Fantastix to apply Tulip Red VersaFine Clair ink over the stencil’s holly berries onto the image panel. Remove, clean, and dry the stencils and the circle mask. Heat set the image panel.

Step 9:

Use the stenciled leaves and berries as a guide to re-position the Holly Background stencil onto the image panel. Secure with low-tack tape. Place the Snow Globe stencil over top so that the globe aperture is framing the snow globe on the image panel. Secure with low-tack tape.

Use a Fantastix to lightly apply green ink from the Fresh Greens Kaleidacolor inkpad (the second pad from the left) over the stencil’s holly leaves onto the snow globe on the image panel. Use another Fantastix to apply Lady Bug Memento ink over the stencil’s holly berries onto the image panel.

Remove, clean, and dry the stencils.

Step 10:

Place low-tack tape horizontally on the line separating the snow globe from the holly leaf background.

Use a Sponge Dauber to apply Acorn VersaFine Clair ink to the image panel. Use black chalk pencils to add shading and horizontal lines. Smudge the chalk slightly.

Step 11:

Smoosh Sparkle Sheer Shimmer Stix onto the craft mat. Use a paintbrush to apply to the ground under the penguins to make it look icy.

Step 12:

Apply Sparkle Sheer Shimmer Stix onto the craft mat. Add a drop of New Sprout Memento Inker to the sparkly puddle. Mix with a paintbrush, then use the brush to make the penguins’ eyes green. Clean the craft mat.

Apply Sparkle Sheer Shimmer Stix onto the craft mat. Add a drop of Danube Blue Memento Inker to the sparkly puddle. Mix with a paintbrush, then use the brush to add an outline to the white areas of the penguins’ bellies.  Clean the craft mat.

Step 13:

Apply Frost Shimmer Stix to the craft mat. Use a paint brush to add white to the beak of the compass penguin (on the left). Clean the craft mat.

Step 14:

Place the Snow Globe stencil back over the image panel. Cover the remainder of the background with a ruler or tape. Add a drop or two of Moonlight White Brilliance Inker to the craft mat. Spray with 91% Isopropyl Alcohol. Mix with a paint brush and splatter the penguins to add a snowy touch. Remove and clean the stencil. Clean the craft mat. Use a white chalk pencil to add highlights to the right and left side of the snow globe.

Step 15:

Use Tulip Red VersaFine ink to stamp the “Merry Christmas” stencil onto white cardstock. Use a sentiment cutting die to cut the sentiment.

Use a fancy tag cutting die to cut green cardstock. Adhere the sentiment to the green die-cut. Adhere the matted sentiment to the image panel as shown. Enhance the sentiment with rhinestones.

Step 16:

Trim the image panel to 4.625” x 6.625”. Cut a piece of black cardstock to 4.75” x 6.75”. Use Tear-It!Tape to adhere the image panel to the black mat. Use Tear-It! Tape to adhere the matted image panel to a 5” x 7” green card.

Imagine Crafts Supplies:

Other Supplies:

  • 140 lb. Mixed Media Paper by Strathmore
  • Penguin Clear Stamp Set 604 by AALL and Create
  • Frosty Clear Stamp Set 603 by AALL and Create
  • Snow Globe Stencil Set by Funky Fossil
  • Holly Background Stencil by Funky Fossil
  • Classic Sentiments Clear Stamp Set by Hefty Doodle
  • Cutting Dies by Spellbinders
  • Diamond Sparkles by Hunkydory Crafts
  • Scarlet Red, Red, White, and Black Chalk Pencils by General’s
  • Heat Gun by EK Success
  • Mini Guillotine Trimmer by Tim Holtz for Tonic
  • Big Shot

Learn How to Make a Merry Christmas Santa Card

by Annie Collins

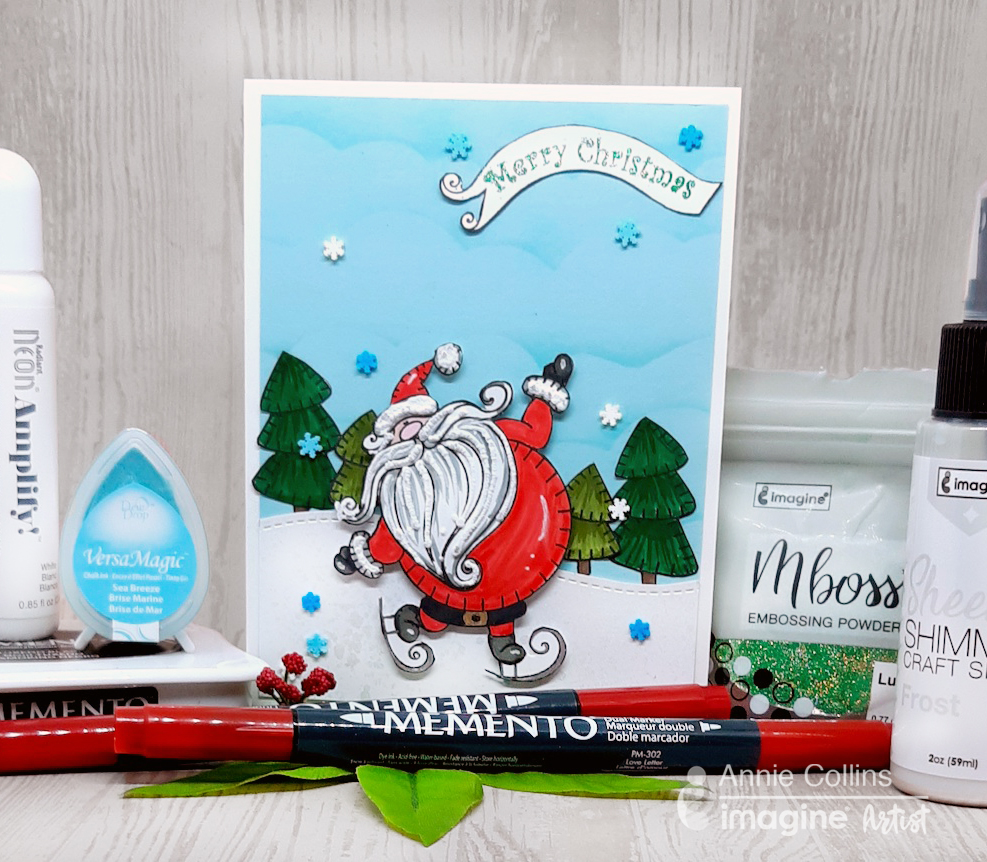
Hello Craft Friends! Today Annie creates a fun and playful Santa Christmas or Holiday card. This card uses a variety of card making supplies to create texture and shimmer throughout. Take a look at how to make Santa’s beard more life-like with Amplify to make a foam texture.

Skill: Intermediate
Time: 1 hour

Directions

Art Supplies

Imagine
Other
  • The Rabbit Hole Designs – Kringle Stamp Set 
  • Accent Opaque White 80# Cardstock – Ultra Smooth 
  • MFT Cloud Stencil
  • Sakura Gelly Roll Pens – Metallic Gold, Metallic Silver, White 
  • Maker’s Movement Shaker Sprinkles – Clay Snowflakes
  • Recollections Brand 110# Cardstock – White
  • Recollections Brand 65# Cardstock: Light Blue

Make Beautiful Holiday Cards with Watercolor Effects Using Memento Luxe Inkers

Make Beautiful Holiday Cards with Watercolor Effects Using Memento Luxe Inkers

by Jowilna Nolte

How to create the best watercolor effects using Memento Luxe pigment inkers in pink and green tones. In this tutorial, I show you how to make 2 card designs with modern backgrounds. These easy-to-use inks create vivid colors that are perfect for Christmas ad the festive season ahead.

Skill: Intermediate
Time: 20 minutes

Directions

Art Supplies

Imagine 
Other
  • Double-sided tape
  • Enamel dots
  • Diamante
  • Stamps – Kaisercraft