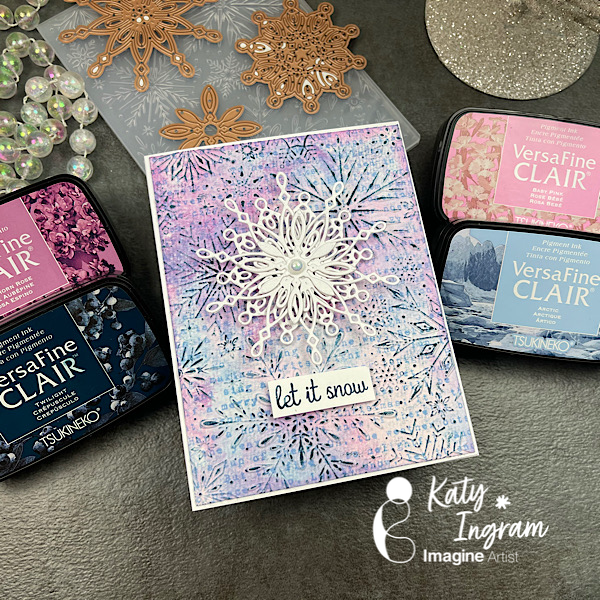
Hello Friends! Katy here with another holiday video using VersaFine Clair inks to create a beautiful mixed media looking snowflake card. Video has all the details. Thanks for watching.
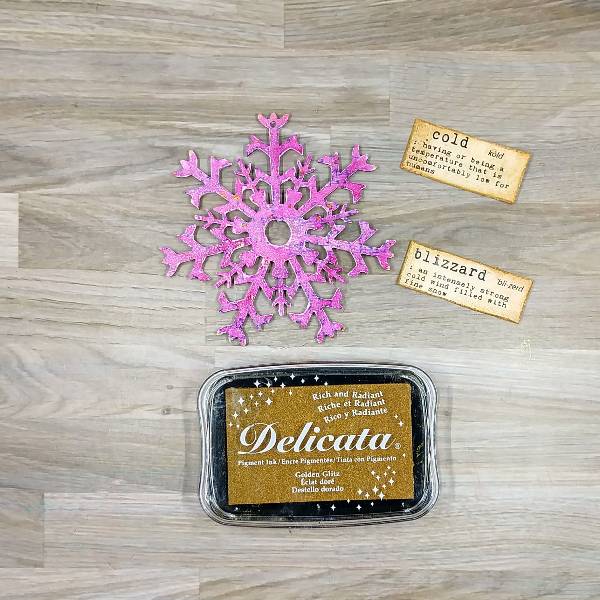
When I saw these fun chipboard snowflake ornaments in my local craft store, I knew I wanted use some Fireworks! spray to make them shine.
Skill: Intermediate Time: 2 hours (active time) + dry time
Directions:
Step 1: Cover the chipboard ornaments with a layer of Gesso. Allow to dry.
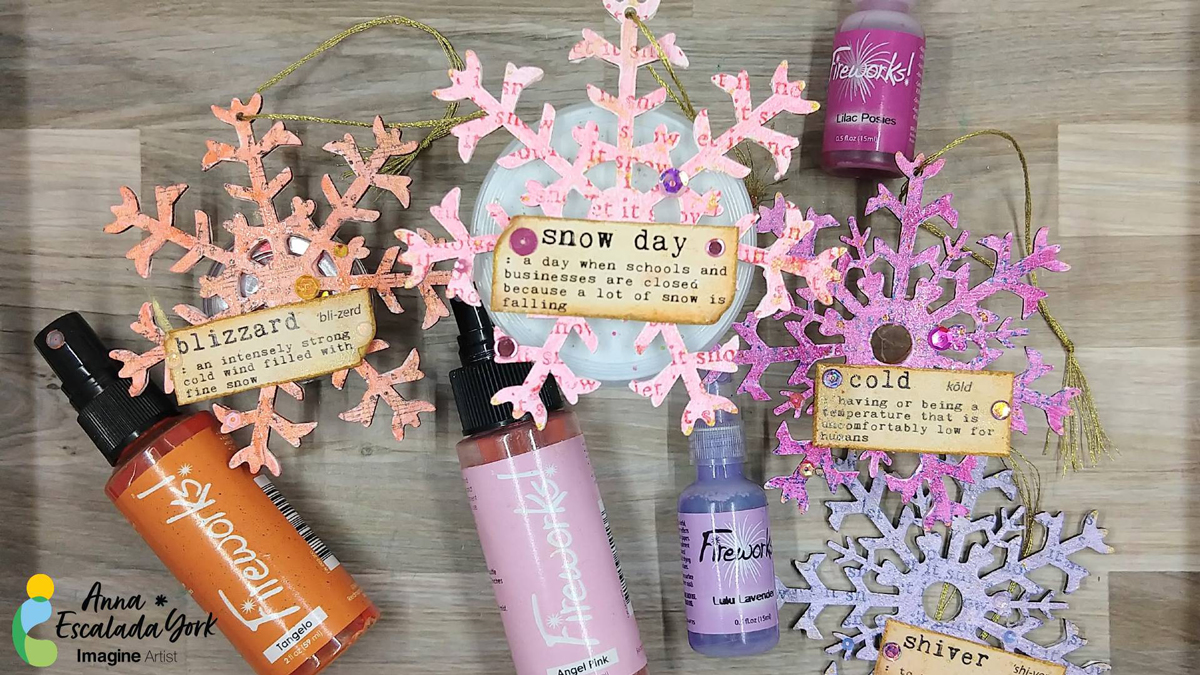
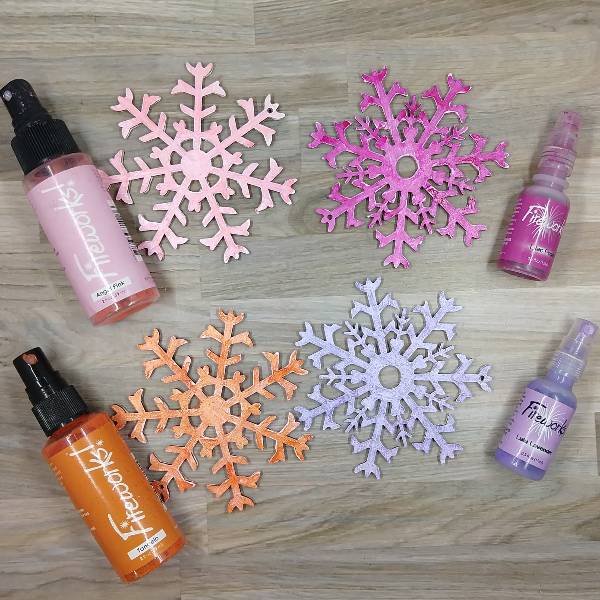
Step 2: Spray each of the ornaments with a different color of Fireworks! Craft Spray: Angel Pink, Lilac Posies, Lulu Lavender, and Tangelo. Allow the spray to dry, and then spray a second time to enhance the color. (I chose to dry the spray to speed up the process but you could allow it to air dry.)
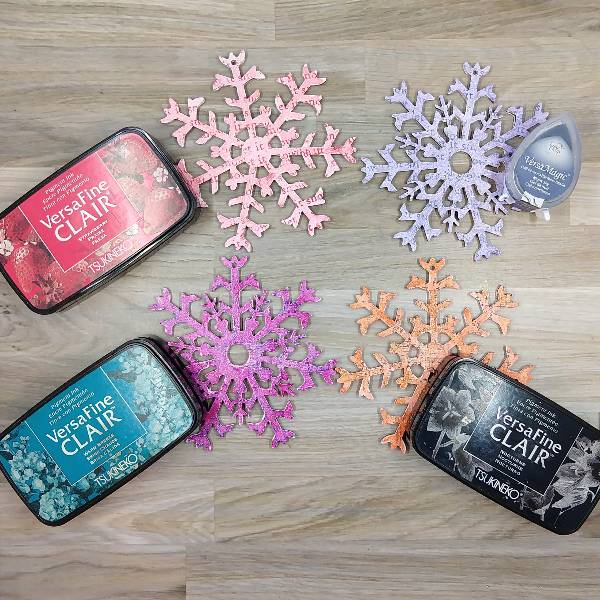
Step 3: Use one of two small stamps to add some texture and color to each of the ornaments: Warm Breeze VersaFine Clair ink (on the Lilac Posies Fireworks! Craft Spray), Nocturne VersaFine Clair ink (on the Tangelo Fireworks! Craft Spray), Strawberry VersaFine Clair ink (on the Angel Pink Fireworks! Craft Spray), and Night Sky VersaMagic Chalk ink (on Lulu Lavender Fireworks! Craft Spray). Heat emboss each of the snowflakes with clear embossing powder.
Step 4: Cut out and distress the edges of 4 pre-printed winter sentiments. Then press the edges into the Golden Glitz Delicata ink pad. Heat emboss each of the sentiments with clear embossing powder.
Then press the Golden Glitz Delicata ink pad onto a piece of acetate packaging and spray with water. Then press the acetate packaging onto each of the ornaments to add gold shimmer.
Allow to dry or dry with a heat tool. Then press the edges of the ornament into the ink pad. Allow to dry.
Step 5: Glue the sentiment strips onto the ornaments. Glue sequins onto the ornament and strips. Add a loop of golden embroidery thread through the hole in each ornament to finish the project.
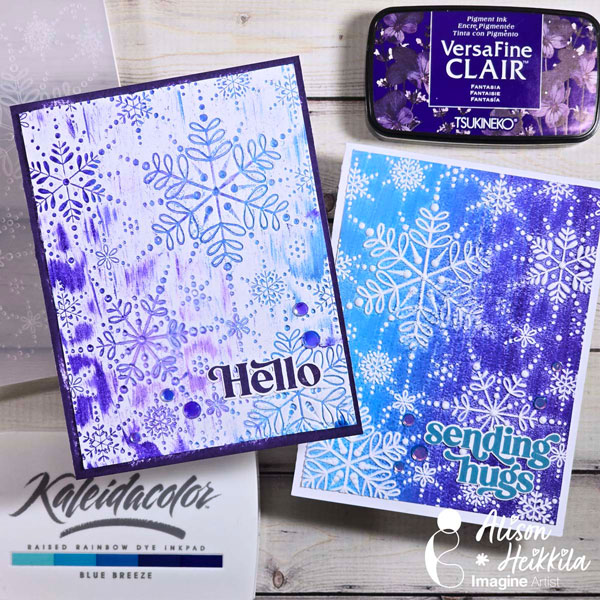
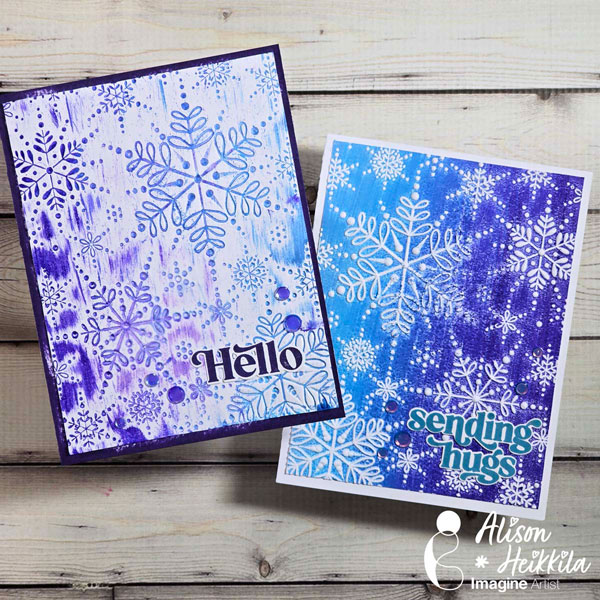
Hello! Alison Heikkila here. Let’s make 2 fun cards with 1 embossing folder and a Kaleidacolor Ink Pad lickety-split! This is so much fun, it’s perfect for beginners, and will work with pretty much any embossing folder you may have.
Skill Level: Beginner-Intermediate Time to Complete: 10-15 Minutes
*Some affiliate links are used in this post. That means that if you shop through these links, I may receive a small compensation, at no cost to you.
Here is the YouTube video. If it doesn’t play properly, please click HERE.
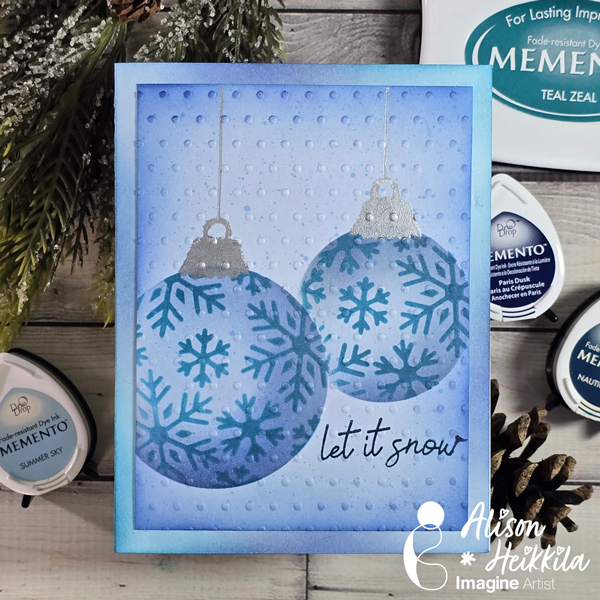
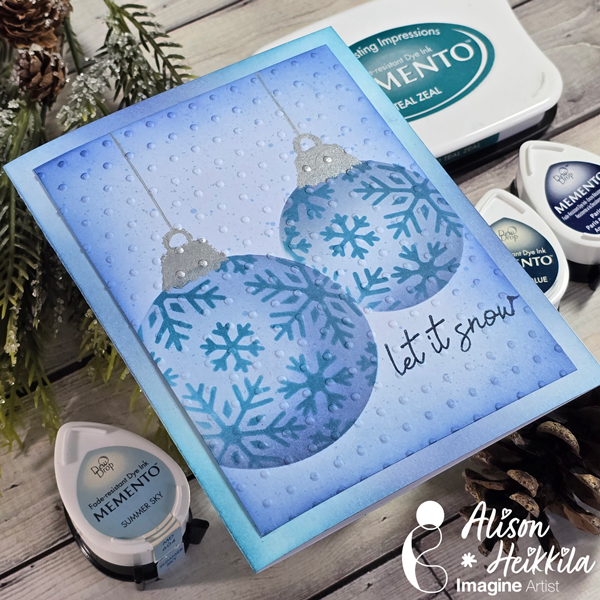
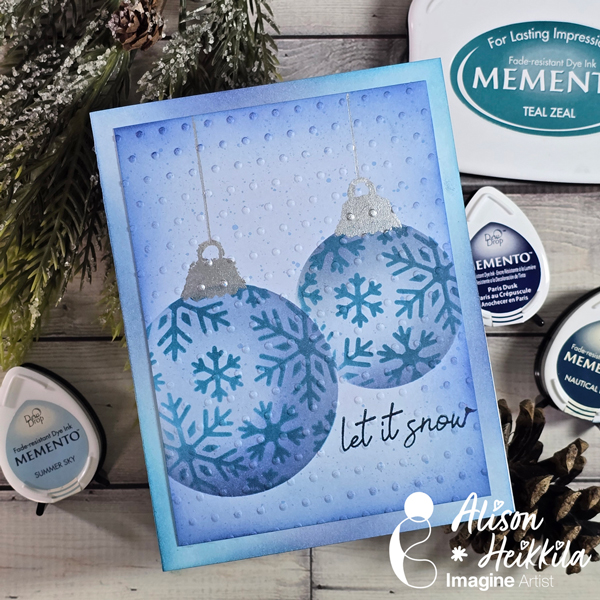
Hello! Alison Heikkila here. For my latest video for Imagine, we’re making a holiday card with snowflake ornaments. This is a great card for beginners, or for someone who likes to batch many cards. You can feel free to change up the colors as you like, but I love making cards with a limited palette from time to time.
Skill Level: Beginner Time to Complete: 15-20 Minutes
*Some affiliate links are used in this post. That means that if you shop through these links, I may receive a small compensation, at no cost to you.
Here is the YouTube video. If it doesn’t play properly, please click HERE.
I love the dimension we created by ink blending our colors a certain way. This is a really fun stencil set, and you can really play with different colors as much as you like. I’ll have another video for Imagine soon. Thanks so much for stopping by. Have an inspiring day!
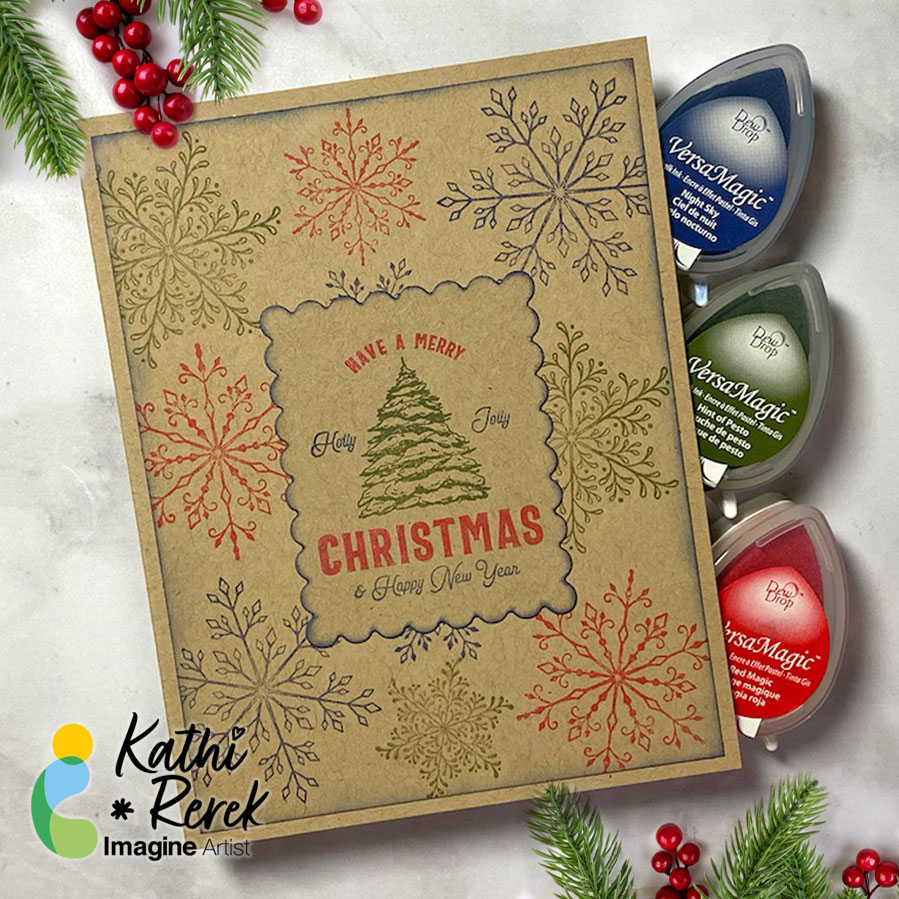
I recently saw a video on Unity Stamps’ Instagram that showed how to use colored inks to stamp snowflakes onto Kraft cardstock. I thought that it would be interesting to try VersaMagic Chalk Inks to see how it would work.
Skill Level: Beginner to Intermediate Time: 1 hour
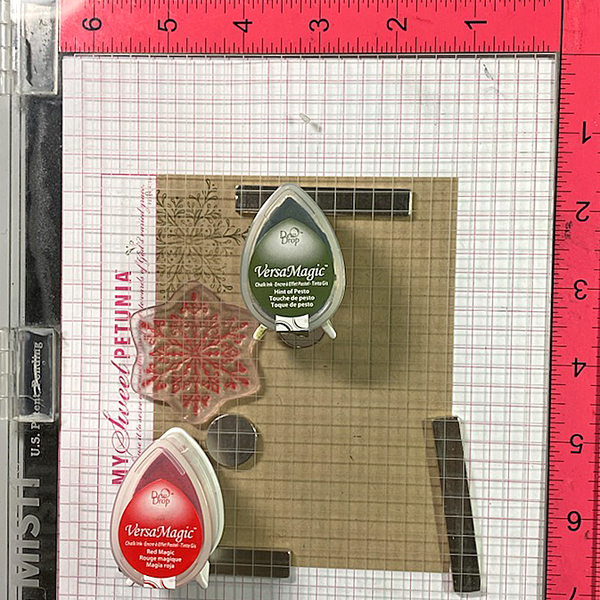
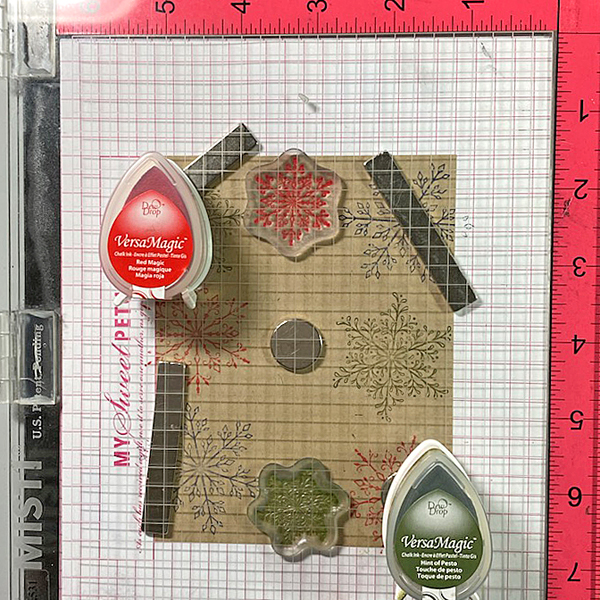
Step 1: Use magnets to secure a 4” x 5.25” piece of Kraft cardstock onto the base of a stamping platform.
Use Hint of Pesto to stamp the leafy snowflake from the Snowflakes Large Clear Polymer Stamp Set on the top left. Re-ink and stamp again if necessary to create good impression.
Position the spiky snowflake from the set facedown on the image panel below green-stamped snowflake. Use Red Magic VersaMagic ink to stamp the snowflake. Re-ink and stamp again if necessary to create good images. Clean and dry both stamps.
Step 2: Position the third snowflake stamp from the stamp set facedown on the bottom left of the image panel. Ink the stamp with Night Sky VersaMagic Ink and stamp. Re-ink and stamp again if necessary to create a good impression. Clean and dry the stamp.
Repeat Steps 1 and 2 along the right edge of the image panel as shown in the card photo above.
Step 3: Position one of the snowflake stamps from the Snowflakes Small Clear Polymer Stamp Set facedown in the center top of the image panel. ink the stamp with Red Magic VersaMatic Ink and stamp. Re-ink and stamp again if necessary to create a good impression. Clean and dry the stamp.
Continue the process of stamping snowflakes from the Snowflakes Small Stamp set with all three colors of VersaMagic Inks taking care to clean and dry the stamps between colors. Remove the image panel from the stamping panel and heat set.
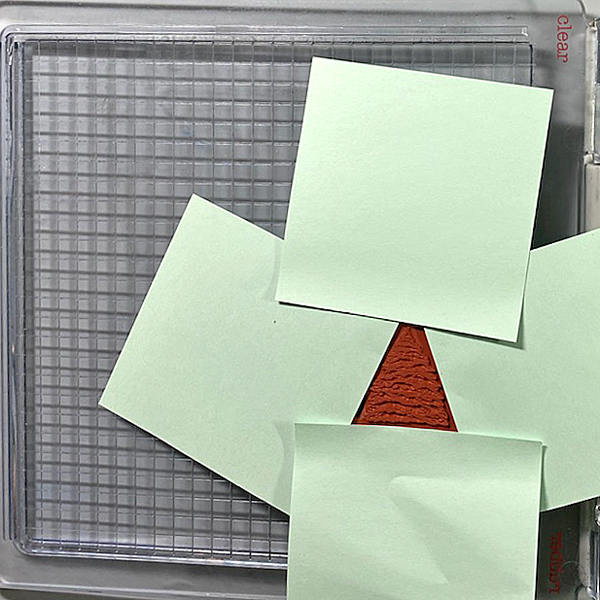
Step 4: Secure a piece of Kraft cardstock to the base of the image panel. Position the Holiday Spruce Rubber Stamp face-down on the image panel. Press the platform’s lid onto the back of the stamp and lift.
Use Post-It Notes to cover all elements of the stamp except for the Christmas Tree. With the Post-It Notes in place, ink the stamp with Hint of Pesto VersaMagic Ink. Remove the Post-It Notes and stamp twice — once onto the image panel and once onto repositionable sticker paper. Fussy-cut the sticker paper version and place over the stamped tree on the image panel.
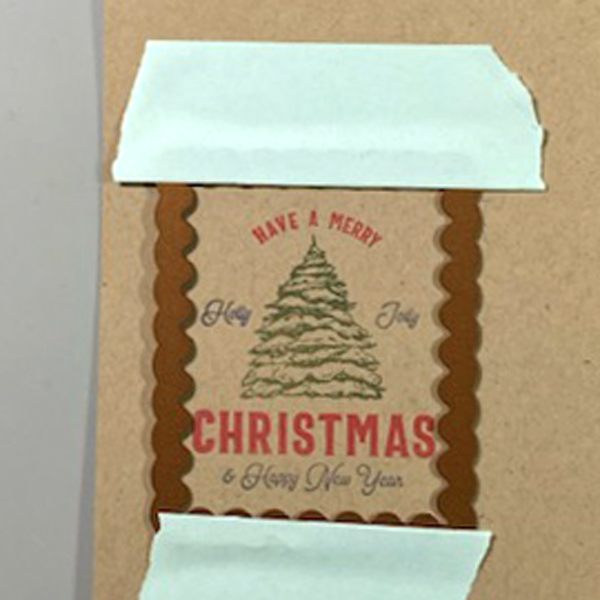
Use Post-It Notes to cover each element of the Holiday Spruce Rubber Stamp, ink with one of the the VersaMagic Inks, remove the Post-It Notes, and stamp.
Heat set when the image is completely stamped.
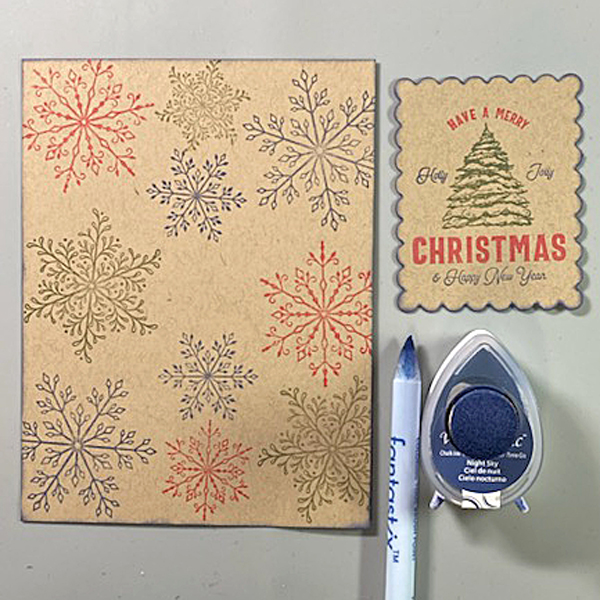
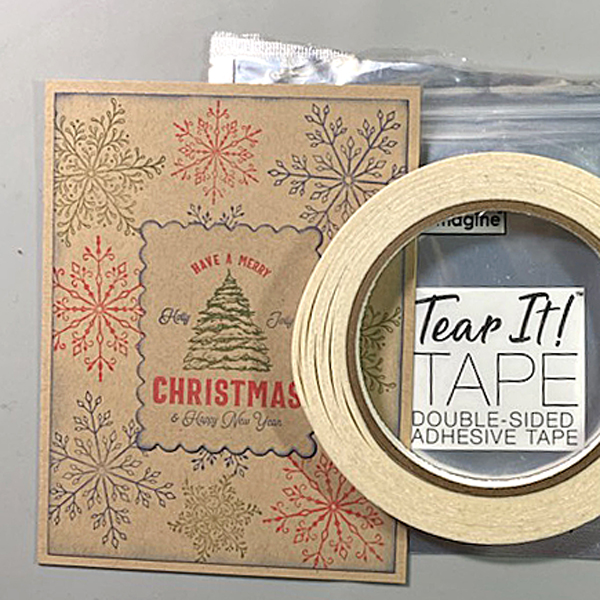
Step 5: Use low-tack tape to secure a scalloped rectangle die to the sentiment panel. Run the sentiment panel through a die-cutting machine.
Step 6: Use a sponge dauber and Night Sky VersaMagic Ink to edge both the image panel and the sentiment die-cut. Use a Fantastix to reach between the scallops! Heat set both panels.
Step 7: Use Tear It! Tape to adhere the image panel to a Kraft A2 Card. Use Tear-It Tape to adhere the sentiment die-cut to finish the card.
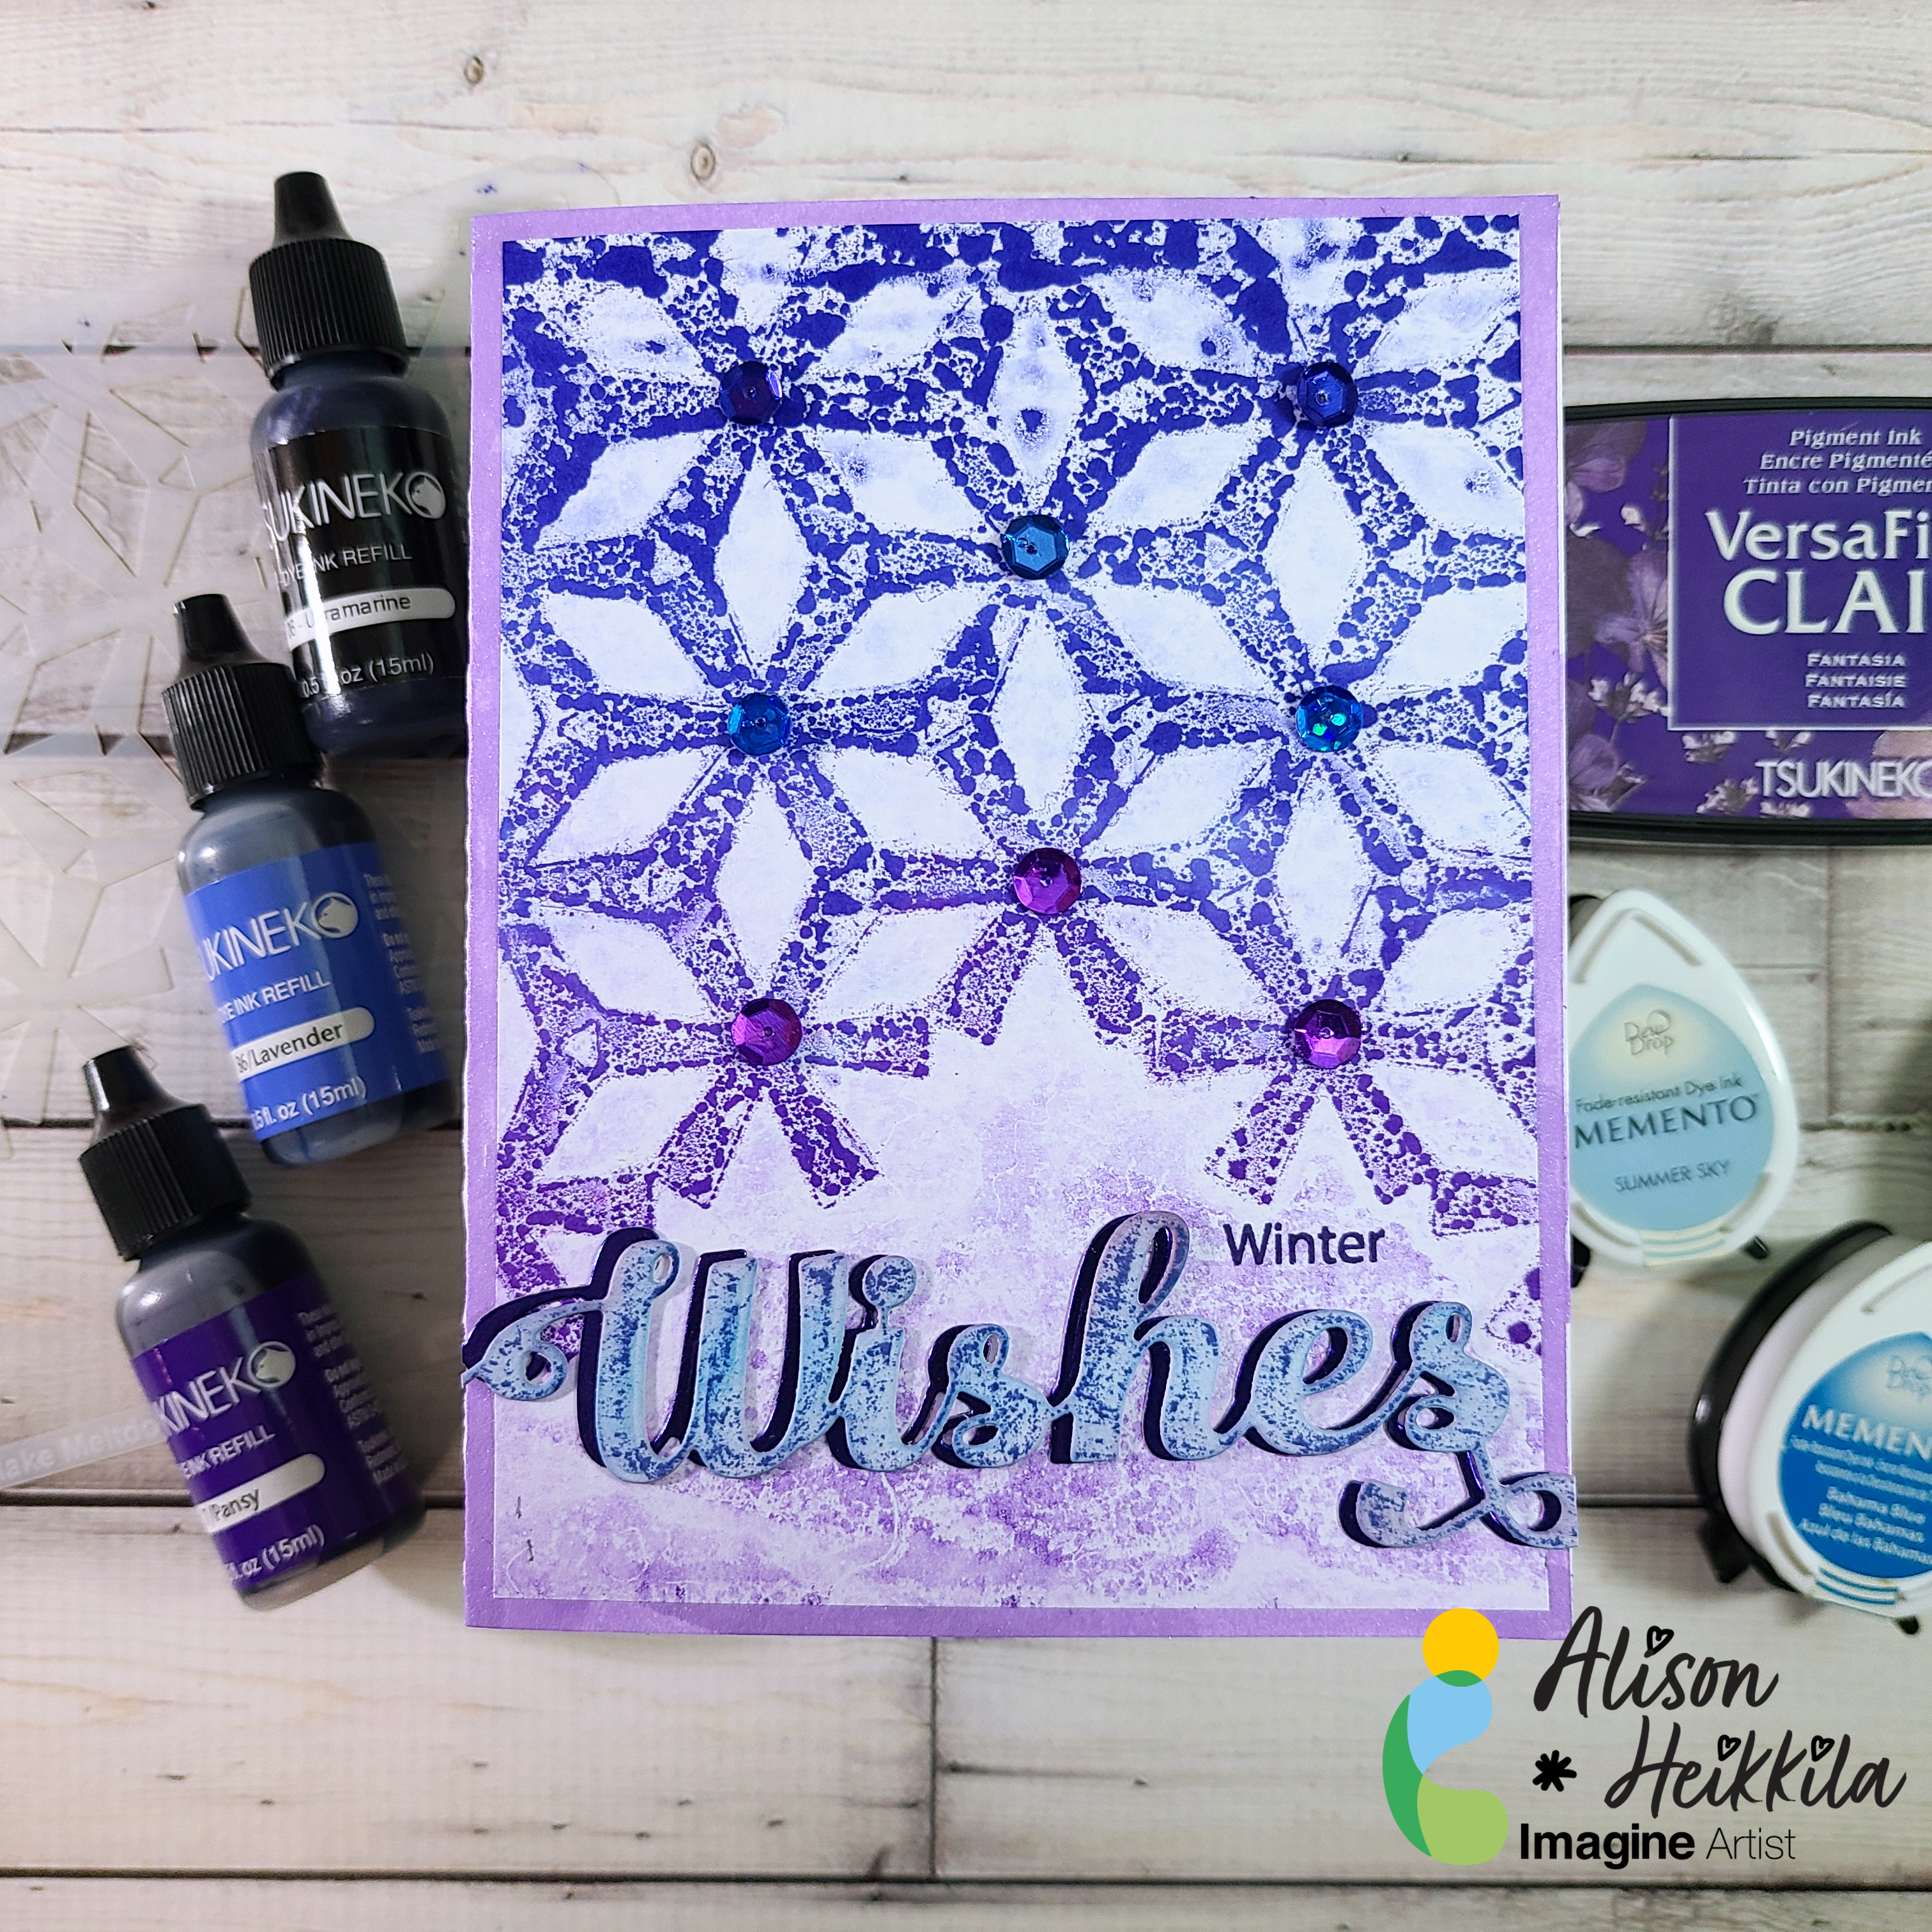
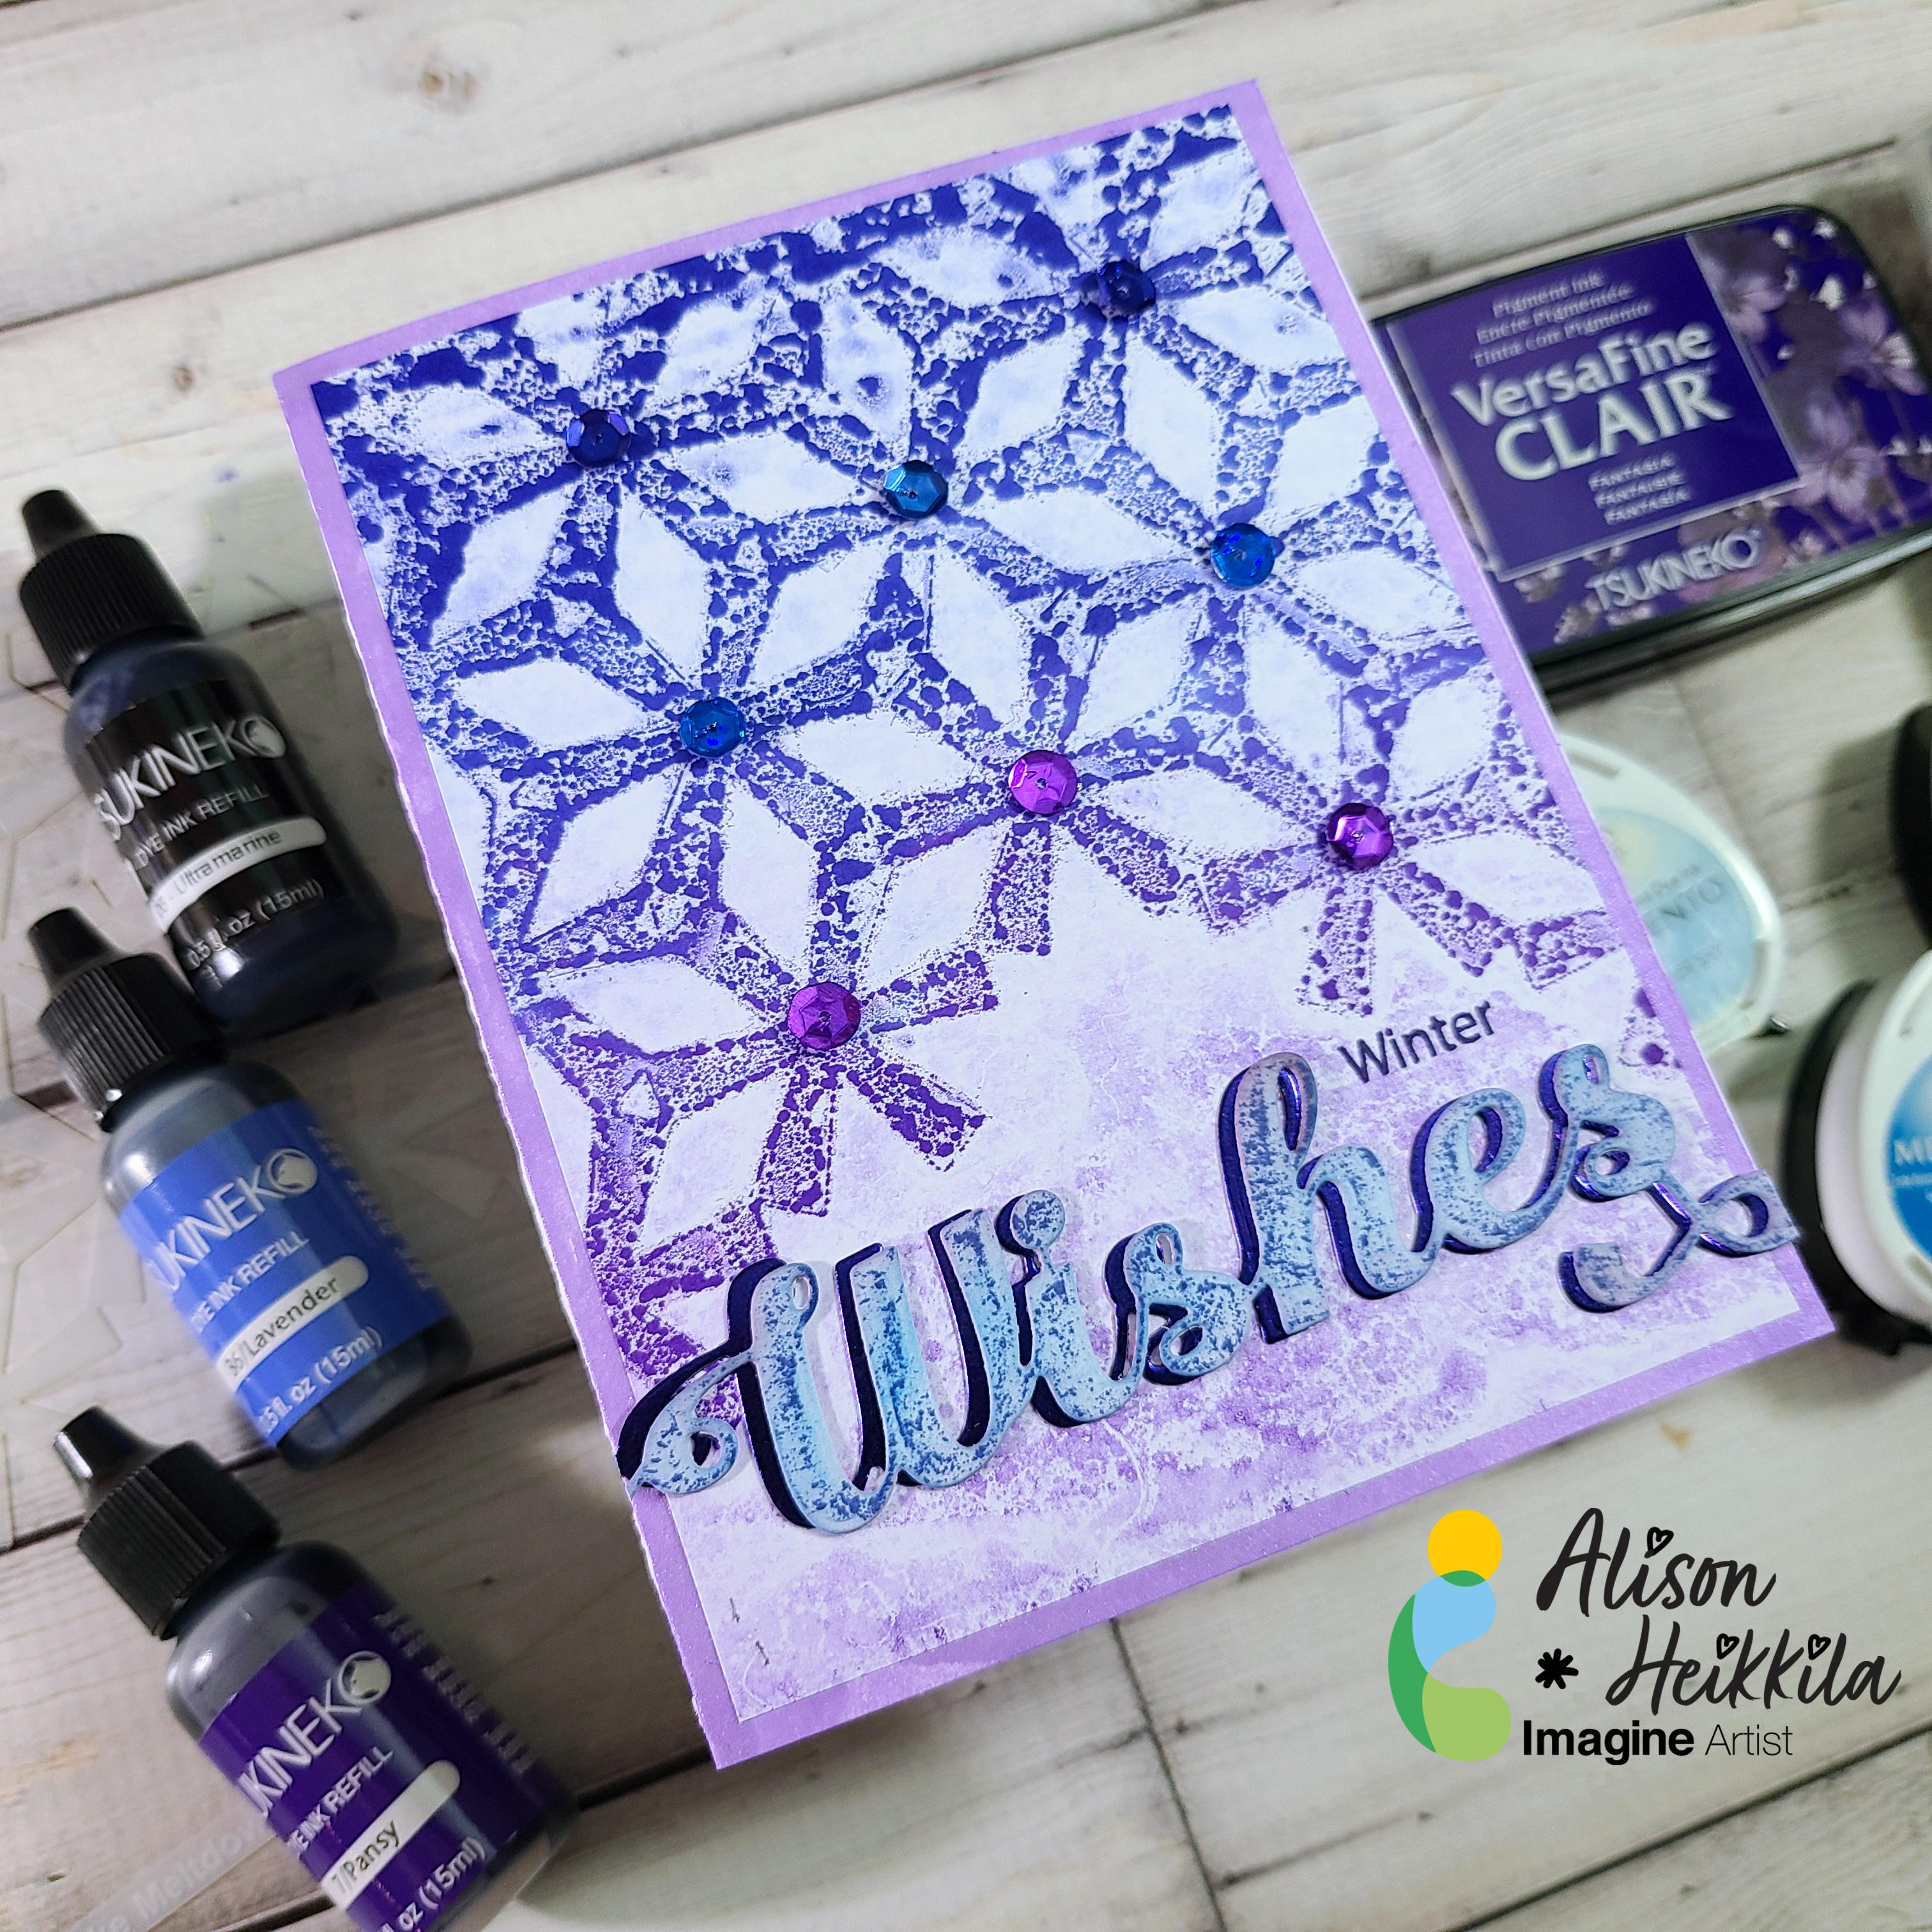
Hello! I’m Alison Heikkila and I’ve got my latest YouTube video for Imagine to share with you today. We’re going to use dye re-inkers on a Gel Press Plate with a pretty stencil to make some cool wintery monoprints. This is one of those instances where I wanted to just keep pulling prints, but I thought you’d want to see a finished card this time.
*Some affiliate links are used in this post. That means that if you shop through these links, I may receive a small compensation, at no cost to you. For more information, please see my Affiliates page, where I also have some coupon codes.
Skill Level: Basic to Intermediate Time to Complete: 20+ minutes, depending on how many prints you pull.
This is a great card for winter birthdays (like mine!), or perhaps you didn’t get around to sending all of your holiday cards. However, this would make a great holiday card too! I hope you pull out your re-inkers and give this a try with some of your stencils. Thanks so much for stopping by. Have an inspiring day!