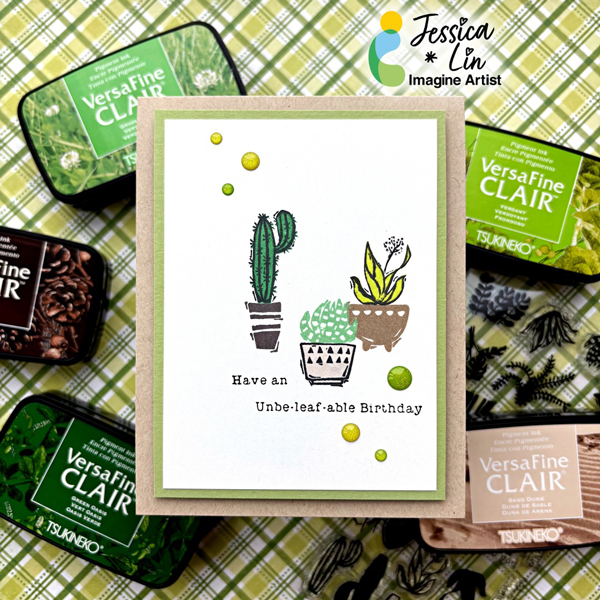
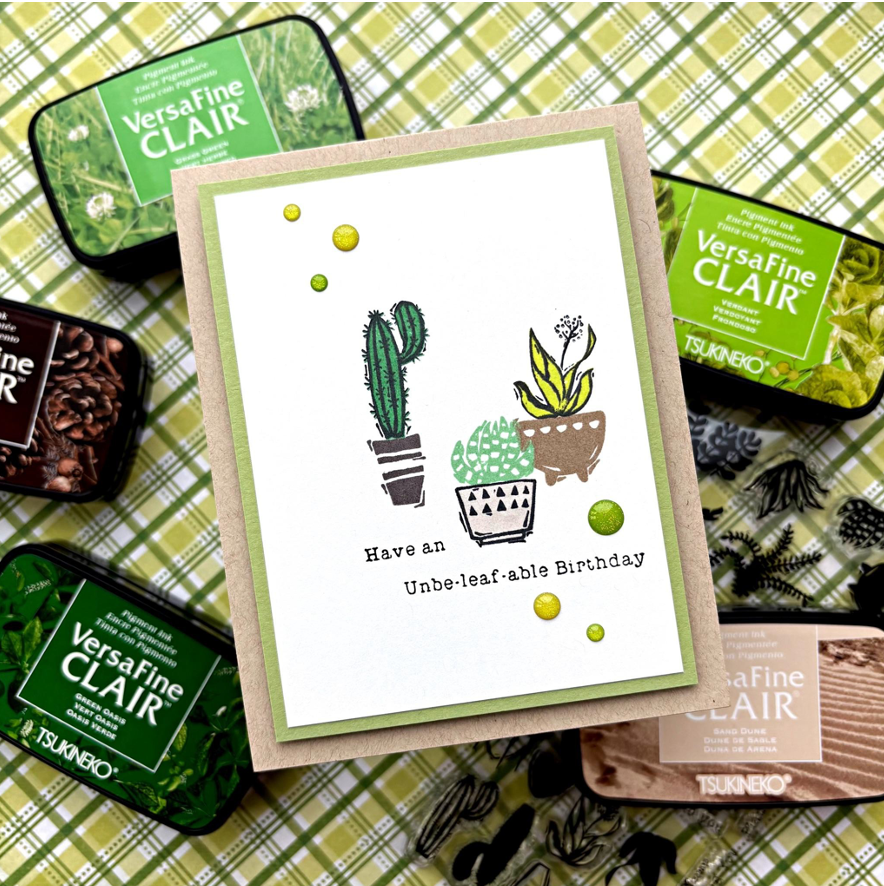
Hi everyone! It’s Jessica here. I am always looking for ways to create gender-neutral birthday cards, and I am so excited to share a beginner-friendly version today. This plant stamp set has some punny sentiments for Valentine’s Day, too. Some of the phrases are perfect for all-occasions, which makes this set so versatile to pair up with the potted plants images.
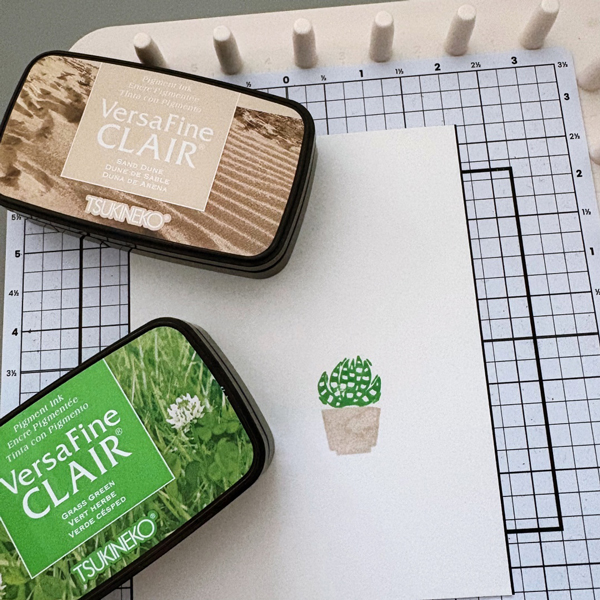
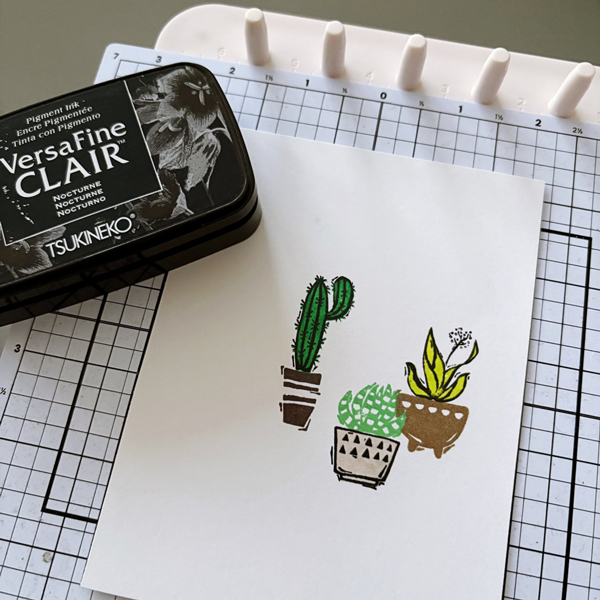
Step 1: Stamp the succulent plant with VersaFine Clair Grass Green ink pad. For the pot, use VersaFine Clair Sand Dune. Stamp another succulent image on a post-it note and fussy cut the image for masking in step 2. Tip: Stamp on the sticky edge of the post-it note so that the fussy cut image will turn into a temporary sticker
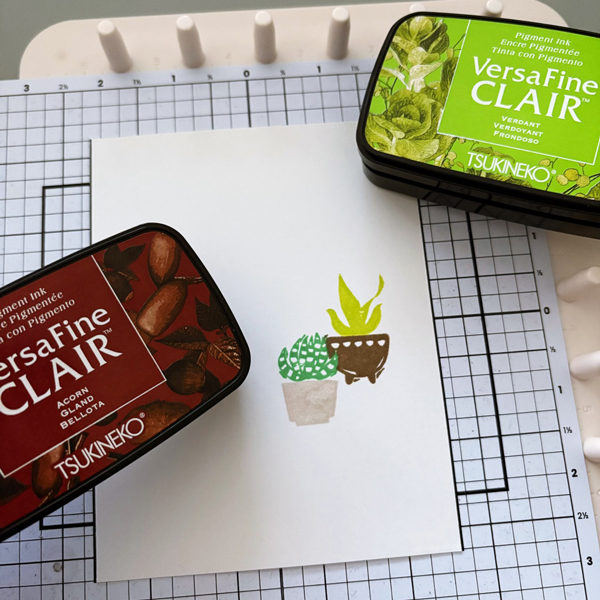
Step 2: Mask the stamped succulent image with the fussy cut sticky note. Then stamp the second plant pot with VersaFine Clair Verdant and Acorn. Masking the succulent plant creates the illusion that it sits in front of the second plant pot. I did not overlap the two plants very much, but you could stamp the two closer together to emphasize the spatial arrangement.
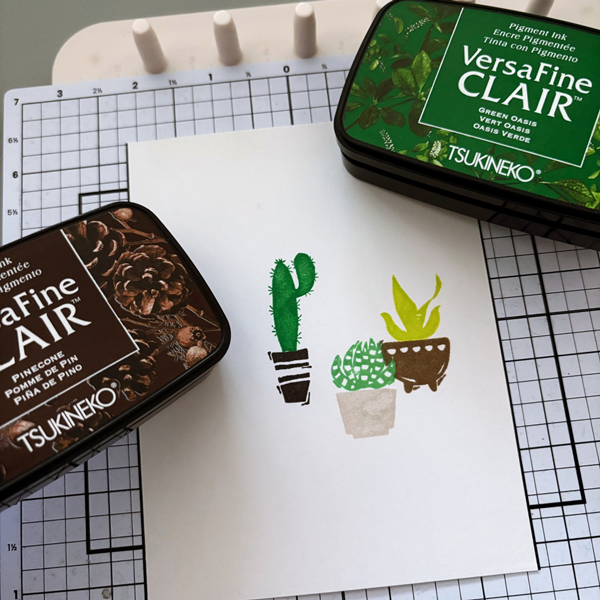
Step 3: For the third cactus plant, stamp with VersaFine Clair Green Oasis and Pinecone. I love the different shades of greens and browns in the VersaFine Clair line; they complement each other so well.
Step 4: Lastly, stamp the outline images with VersaFine Clair Nocturne ink pad. The super cute pun sentiment was also stamped with the same ink.
Step 5: Trim the stamped card panel to 3 ½’’ x 4 ¾’’. Adhere it to a 3 ¾’’ x 5’’ piece of green cardstock, then adhere both layers to a cardbase with foam tape.
Step 6: For the final finishing touch, add a few enamel drops from Doodlebug Sprinkles Limeade.
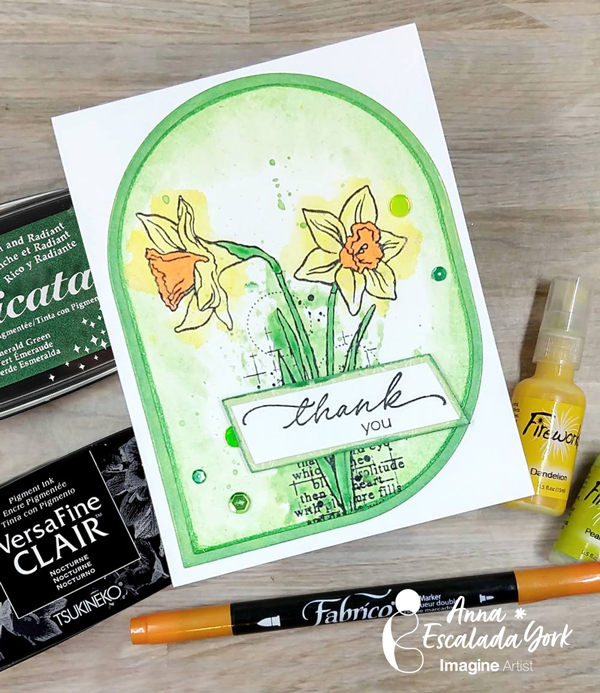
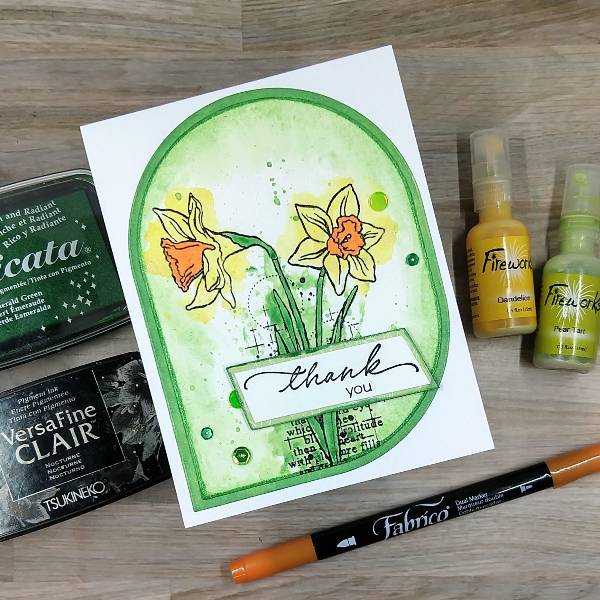
After winter holidays, my family always needs thank you notes. I really love this wonderful daffodils stamp set and wanted to use it to make one of those cards.
Skill: Intermediate Time: 1.5 hours
Directions:
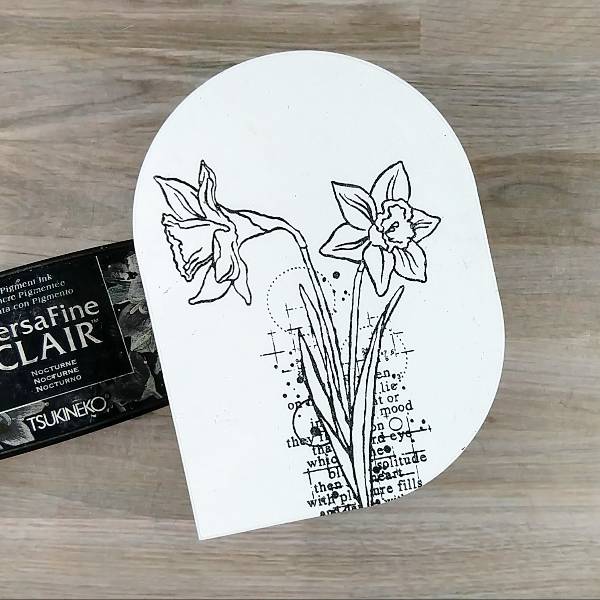
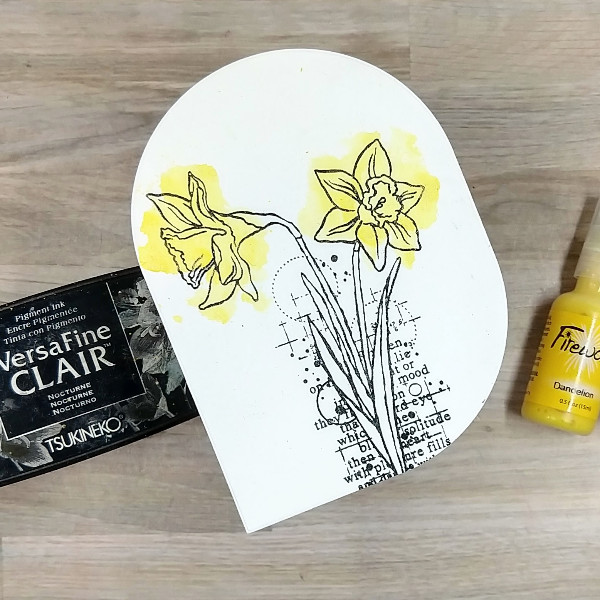
Step 1: Stamp the main floral stamp on a piece of watercolor paper with Nocturne VersaFine Clair ink. Heat emboss with clear embossing powder. Then die cut the image with a mid-sized background panel die
Step 2: Spray Dandelion Fireworks! Craft Spray onto acetate packaging and watercolor smoosh the two flowers.
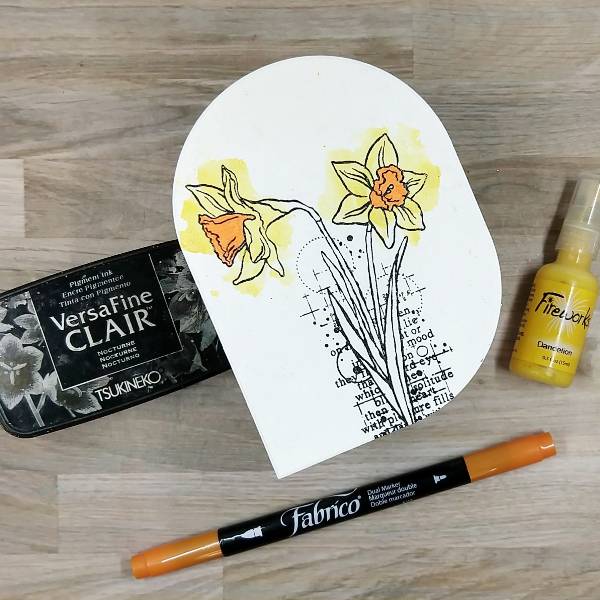
Step 3: Color the corona (the central part of the flower) with the Tangerine Fabrico Dual Marker.
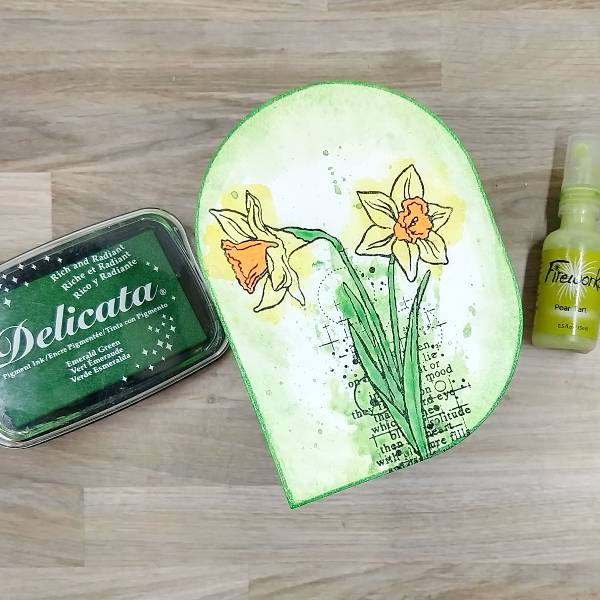
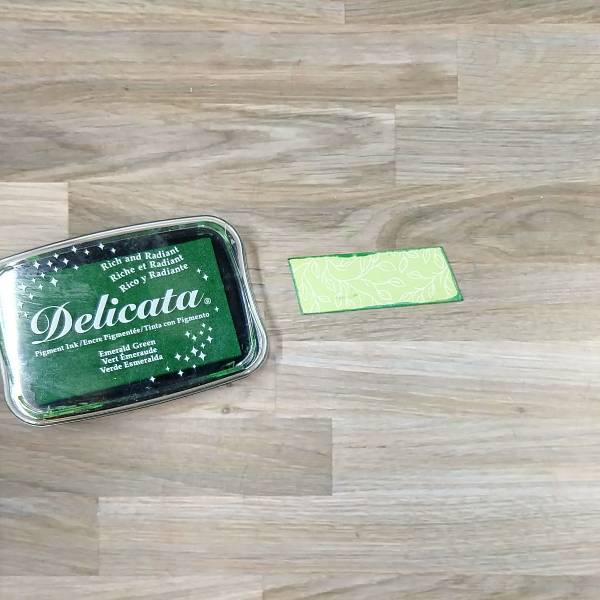
Step 4: Press the Emerald Green Delicata ink pad onto acetate. Then spray Pear Tart Fireworks! Craft Spray onto the same acetate. Mix the ink and spray together. Press the acetate onto the daffodil’s stem and leaf. Then paint the leaf and stem with the remaining green mix. After the image has dried, spray the mix with water to dilute the green. Paint the sides with this lighter color green watercolor. (I ended up using my finger to spread the watercolor the way I wanted, but I don’t mind getting messy!) After this layer dried, press the Emerald Green Delicata ink pad onto the edge of the die cut. Heat emboss the inked edge with more clear embossing powder.
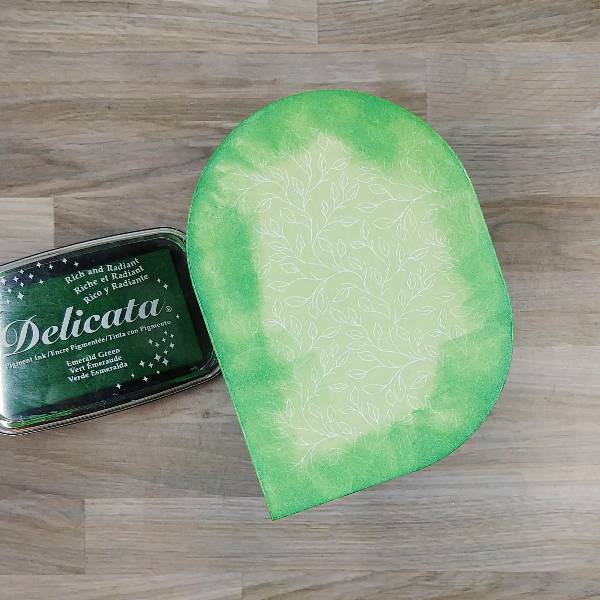
Step 5: Die cut light green patterned paper with the next-largest die from the background panel die cut set. Brush the Emerald Green Delicata ink around the edges of the panel to mask the pattern and make the green more intense.
Step 6: Stamp the sentiment with Nocturne VersaFine CLair ink and heat emboss with clear embossing powder. Then trim the sentiment with a paper trimmer.
Step 7: Trim a piece of the same light green patterned paper a little bit bigger than the sentiment strip with the paper trimmer. Press the edges into the Emerald Green Delicata ink pad and heat emboss with clear embossing powder.
Step 8: Assemble the card. Glue the two panels together. Glue the sentiment strip onto the light green, slightly bigger strip. Then attach the sentiment strip to the card panel with foam tape. Glue green and yellow sequins around the sentiment and daffodils. To finish the card, glue the whole thing onto an A2-sized white card base.
Other • Altenew – foam tape – Instant Dimension Foam Tape • Catherine Pooler – sequin mix – North Pole • Simon Says Stamp – die set – Squovals • Visible Images – stamp set – Golden Daffodils • Clear Embossing Powder • Glue • Green patterned paper • Watercolor paper • A2-sized white card base
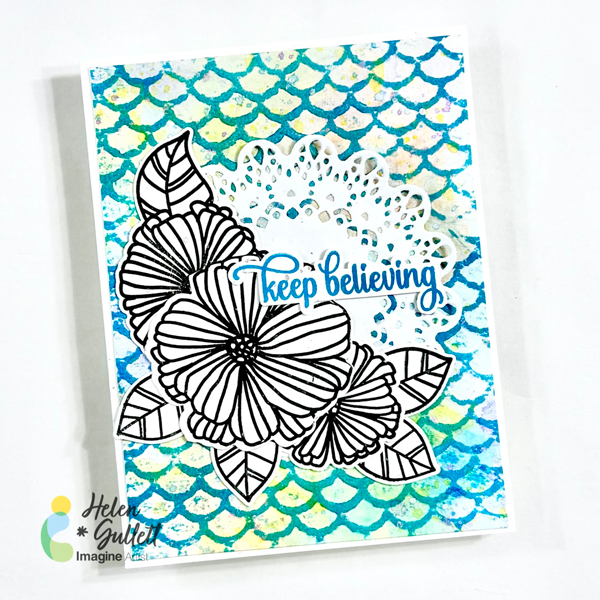
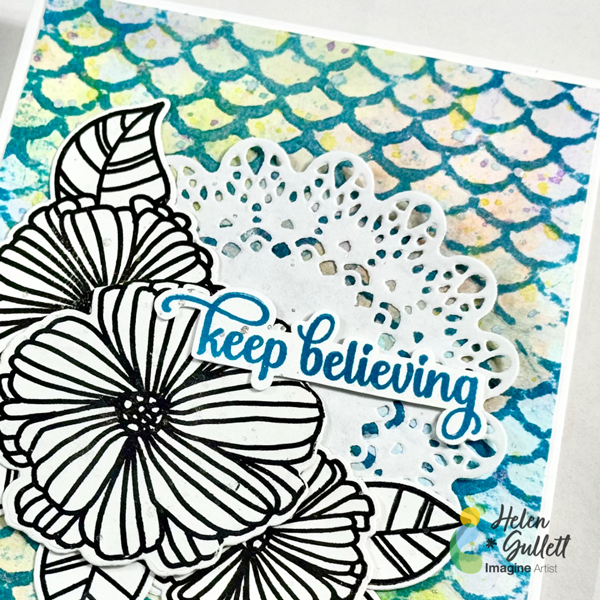
Hello crafty friends! Today we are going to make this floral mixed media card with some ink-smooshing, ink-swiping, ink-splattering, and embossing techniques.
Let’s get crafting!
Skill: Intermediate Time: 15-30 minutes
Direction:
Step 1
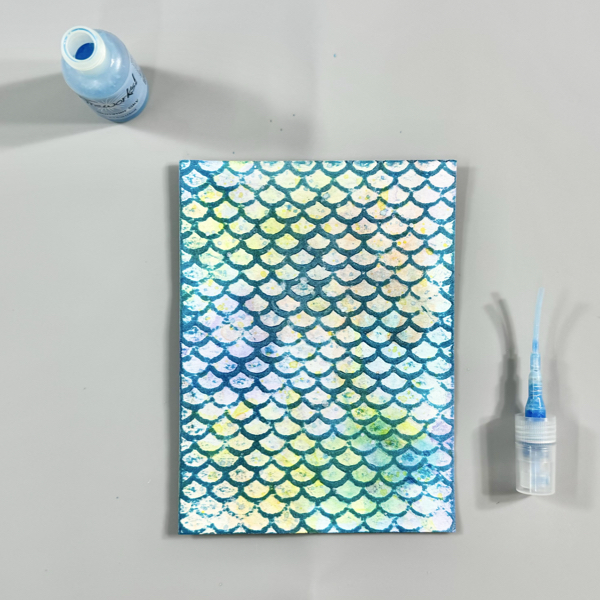
Starting with creating the watercolored background panel by cutting a piece of 140 lb watercolor cardstock into 4 ¼ inch x 5 ½ inch. To pick out the color combo, make sure you pick the colors that won’t turn into a muddy color when they are mixed together.
Scribble some of the Tropical Lagoon Fabrico Marker on the craft mat and then spray it lightly with some water. Then, smoosh the watercolor cardstock to the watercolor ink on the mat. Pick it up and dry the watercolor ink on the panel with a craft heat gun. Repeat it until you like the result.
Clean the craft mat with the Staz-On All Purpose Stamp Cleaner and paper towel.
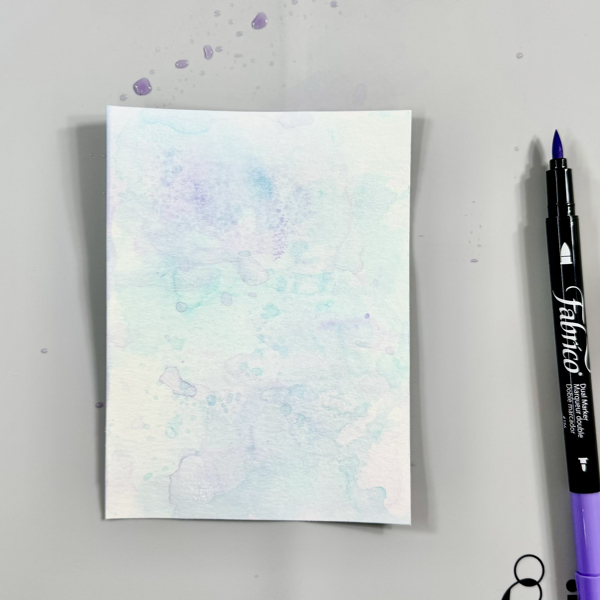
Step 2
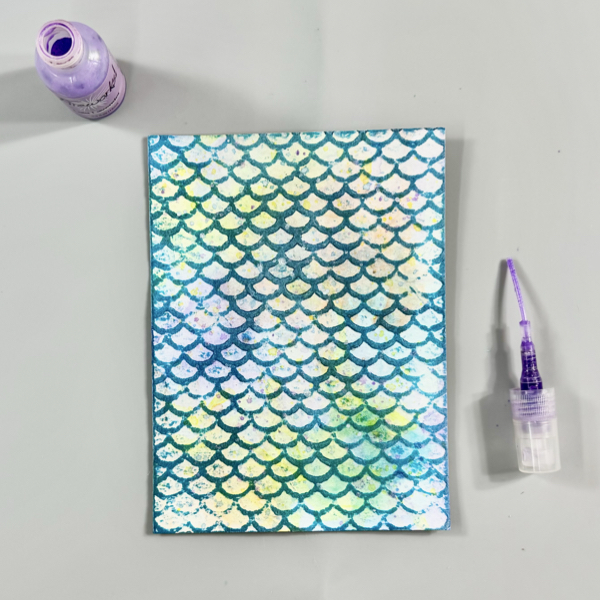
Scribble some of the Peony Purple Fabrico Marker on the craft mat and then spray it lightly with some water.
Then, smoosh the watercolor cardstock to the watercolor ink on the mat. Pick it up and dry the watercolor ink on the panel with a craft heat gun. Repeat it until you like the result.
Clean the craft mat with the Staz-On All Purpose Stamp Cleaner and paper towel.
Step 3
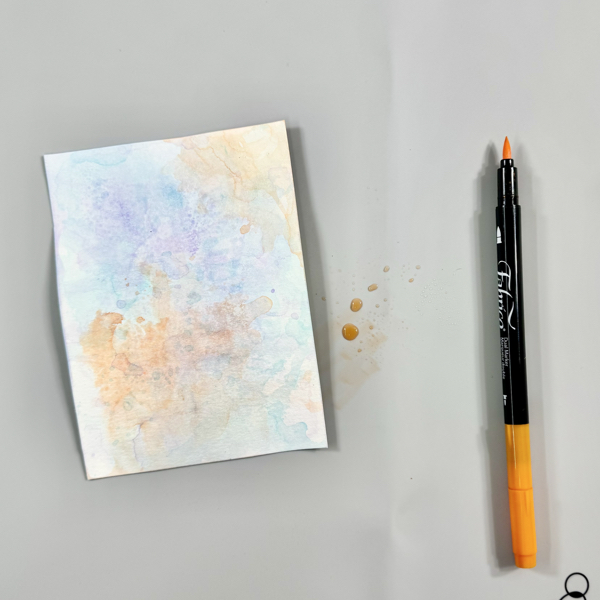
Scribble some of the Tangerine Fabrico Marker on the craft mat and then spray it lightly with some water.
Then, smoosh the watercolor cardstock to the watercolor ink on the mat. Pick it up and dry the watercolor ink on the panel with a craft heat gun. Repeat it until you like the result.
Clean the craft mat with the Staz-On All Purpose Stamp Cleaner and paper towel.
Step 4
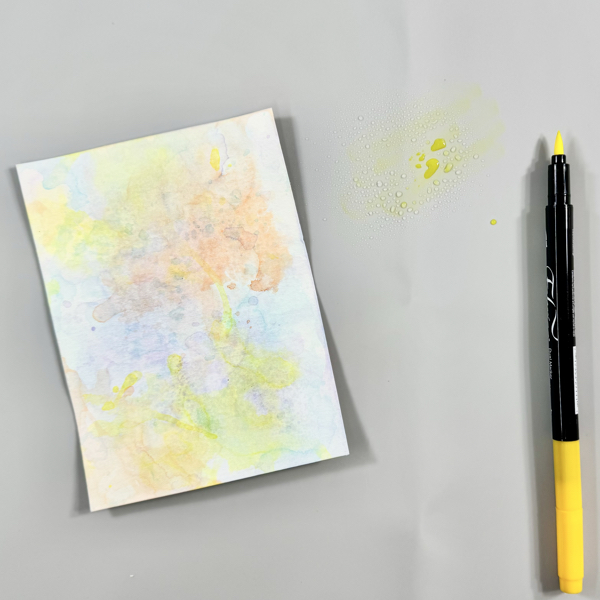
Scribble some of the Lemon Yellow Fabrico Marker on the craft mat and then spray it lightly with some water.
Then, smoosh the watercolor cardstock to the watercolor ink on the mat. Pick it up and dry the watercolor ink on the panel with a craft heat gun. Repeat it until you like the result.
Clean the craft mat with the Staz-On All Purpose Stamp Cleaner and paper towel.
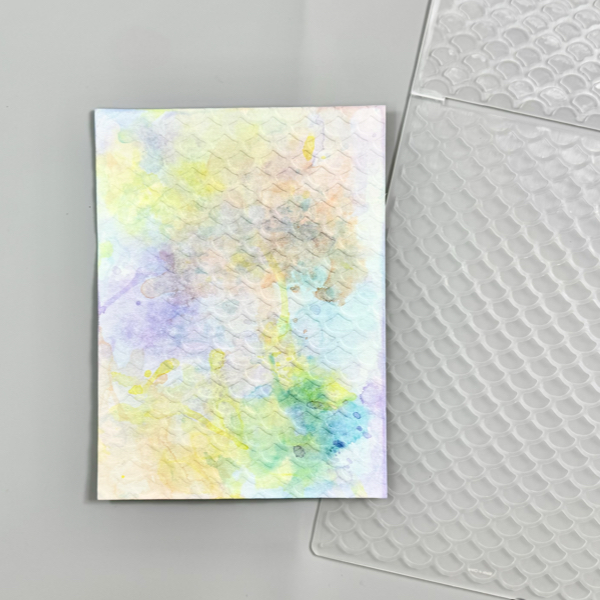
Step 5
Once the watercolored panel dried well, put it inside the embossing folder, and then run it through the machine.
Step 6
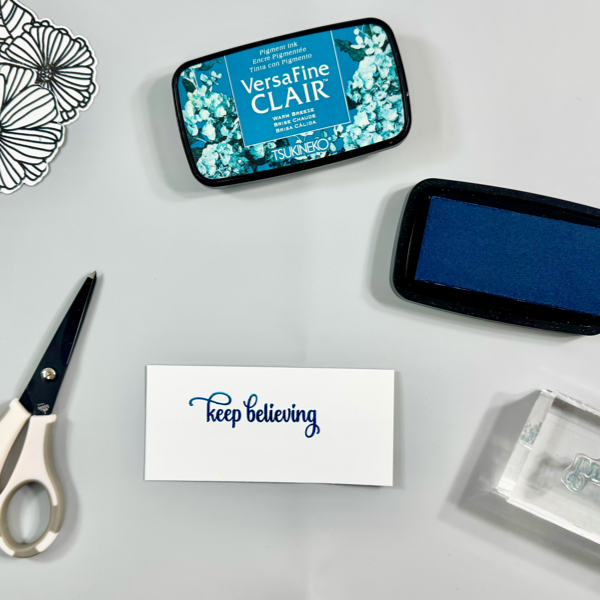
Swipe the VersaFine Clair Warm Breeze ink directly on the embossed part of the panel.
Make sure you swipe the ink lightly and smoothly, do not press down the ink pad to the paper. The juicer (good amount of ink) ink pad, the better.
Dry the ink on the panel with a craft heat gun.
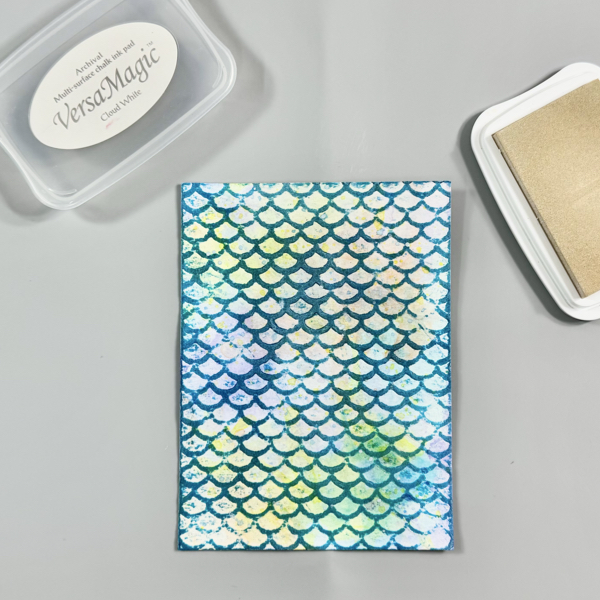
Step 7
To tone down the bright color, swipe some of the VersMagic Cloud White ink on the panel.
This is an optional step, if you prefer a more subtle color background instead of bright color.
Dry the ink on the panel with a craft heat gun.
Step 8
Shake the Fireworks! Shimmery Craft Sprays bottles before you use it to make sure the ink inside mixes well.
Open the top of the spray and use it (or small round brush) to add some splatters of the Summer Sky Fireworks! Shimmery Craft Spray on the panel.
Dry the splatters of ink on the panel with a craft heat gun.
Step 9
Next, open the top of the spray and use it (or small round brush) to add some splatters of the Lulu Lavender Fireworks! Shimmery Craft Spray on the panel.
Dry the splatters of ink on the panel with a craft heat gun.
Step 10
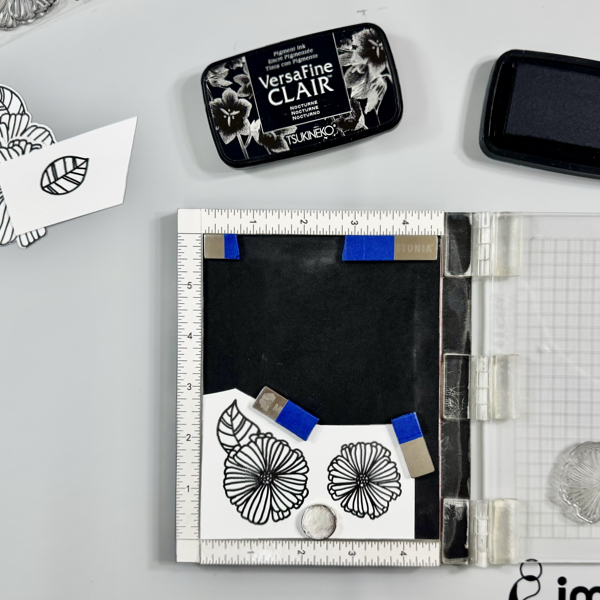
Stamp the flower and leaf images on a white cardstock using the VersaFine Clair Nocturne ink pad with a stamping tool (or acrylic stamping blocks).
Dry the stamped images with a craft heat gun.
Step 11
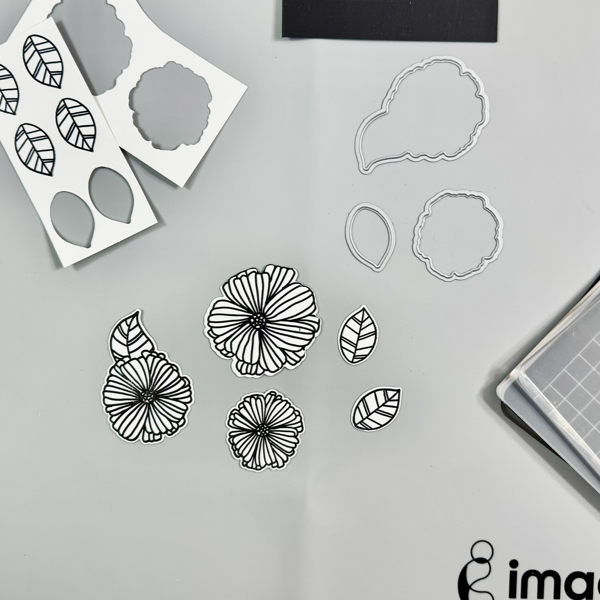
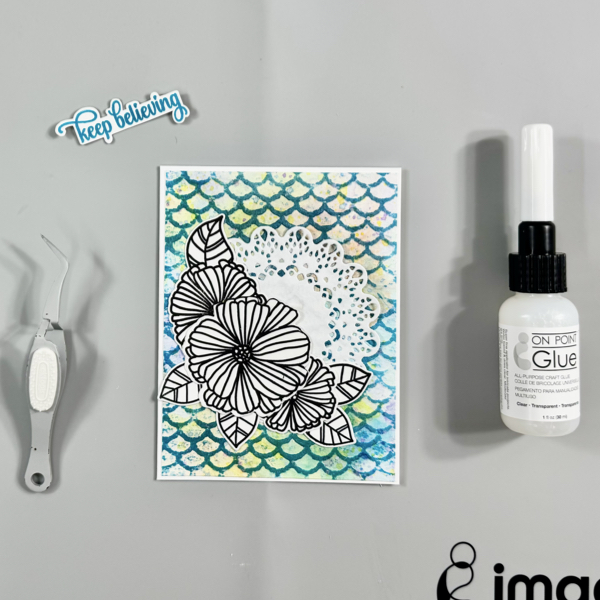
Cut all the stamped flowers and leaves with their matching die set, or you can fussy cut them using micro-tip scissors.
Step 12
Stamp the sentiment on a white card stock using the VersaFine Clair Warm Breeze ink pad with a stamping block.
Dry the stamped sentiment word with a craft heat gun and then fussy cut it with a micro-tip scissors.
Step 13
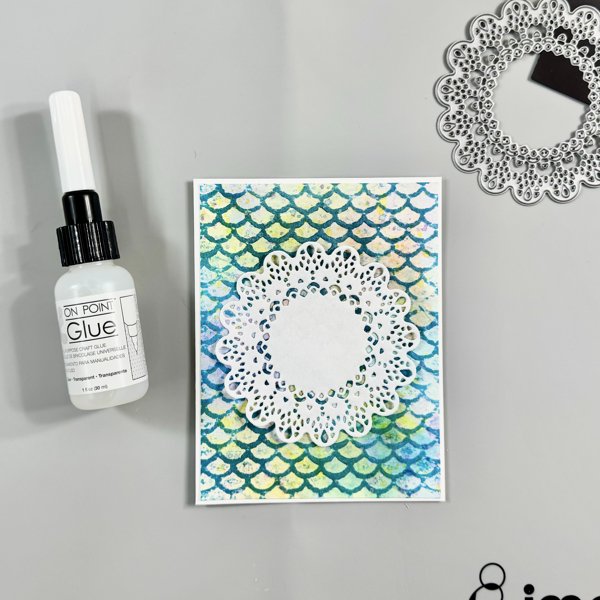
Trim the background panel into 4 inch x 5 ¼ inch using a paper trimmer.
Add the background panel to an A2 card base with the On Point Glue.
Step 14
Cut a piece of white paper (copy paper works great) with the Delicate Doily die to create your own doily paper mat.
Add the doily paper to the card with the On Point Glue.
Step 15
Add the flowers and leaves to the card with On Point Glue.
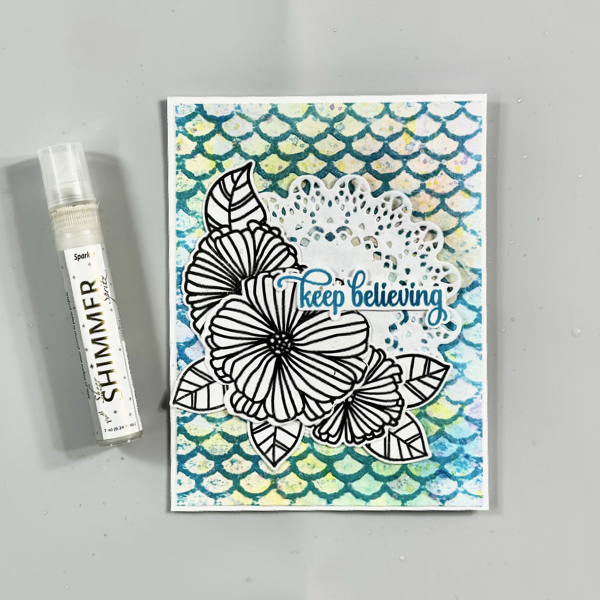
Then, add some of a thin foam to the sentiment with On Point Glue and add it to the card with the same glue.
Step 16
Add more shimmer to the card by spraying and splatting some of the Sheer Shimmer Spark Spray.
The ink-smooshing, embossing, ink-swiping, and ink-splattering techniques give an amazing texture look to the background of this card.
And those layers of doily, flowers, leaves, and sentiment add more dimension to this mixed media card.
I hope you will give this tutorial a try and play around with different colors to see the surprise you will get for your cards. Thanks so much for stopping by our blog today.
A new year brings fresh ideas, new techniques, and a wonderful group of designers we’re proud to introduce.
Each year, Imagine selects artists from across the country to join our Artists in Residence program. These talented creatives share thoughtful projects, along with step by step videos and tutorials on our blog so you can create right alongside them.
From clean and simple cards to layered mixed media and dimensional pieces, each designer brings a unique style, perspective, and voice. Together, they will fill the year with inspiration to spark your imagination and encourage you to try something new.
We’re excited for you to get to know them and follow their creative journey throughout 2026.
Let’s meet them:
Linh – LV Handcrafted
Hi! I’m Linh – or LV Handcrafted on social media. I live in Seattle, WA with my husband and our two dogs. I’ve been crafting since I was in high school but took a long break as I started my career. Now (many years later) I am my own boss working as a business consultant, so I can balance my time and do more of what I love – papercrafting! There’s always so much to learn in papercrafting, and I find great joy in adding my own twist and sharing what I’ve learned. I love Imagine products. There’s such a wide range of media supplies. It’s so fun to experiment, have a bit of a play and create something exciting. I’m honored to be a part of this amazing team.
Anna Escalada York grew up on a farm outside of Phoenix, Arizona and moved to Portland, Oregon to go to college, where she met her husband. They have two children (one in high school and the other in middle school), a cat and two guinea pigs. She is also a proud teacher at her local high school for almost 20 years in SE Portland, Oregon (go Lightning)! Her other hobbies are reading, riding her bike, nerding out to Star Wars, and reading.
Anna has been crafting (almost exclusively card making) since 2004, but stepped away for a while when it was too hard to juggle the demands of being a mom of little children and working full time. She returned to her craft room in 2019 and started blogging consistently in 2020. One of her recent crafty achievements has been creating 700 cards in 2021. Her favorite craft supplies include heat embossing, using splatter, and coloring with markers. Her favorite style is sparkle!.
I am Ceal Pritchett, and I reside in the mountains of western North Carolina with my husband and our little fur baby Shih Tzu. I have been a crafter in some form since childhood. I fell in love with cardmaking around 15 years ago. I am a clean and simple cardmaker who sometimes dabbles in other things like art journals, bible journaling, and painting.
Helen is a stay-at-home mom living in Ohio with her husband and their two daughters. She volunteers as a translator for several non-profit organizations and enjoys using her skills to support meaningful causes. In her free time, she loves Bible journaling, making cards, paper crafting, and mixed media projects. She also likes drinking coffee, spending time with her family, hiking, and traveling.
Hello crafty friends! My name is Jessica Lin. You may have recognized me or seen some of my previous projects, and I am so excited to be back on Imagine’s design team! I am a crafty gal in my late twenties, but my passion for cardmaking started a long time ago when I was 9. I was introduced to wooden stamps and I haven’t stopped stamping since. Some of my other hobbies include sewing, washi tape collaging, and I hope one day I’ll learn how to crochet, too.
I grew up in Taiwan and speak Mandarin as my mother tongue, so my YouTube channel is mostly filmed in Chinese. This year, I decided to create a bilingual Instagram account. If you are inspired by bold, vibrant colors and enjoy detailed projects with lots of layers, come have a visit! I look forward to meeting and crafting with all of you!
Hello Crafty Friends! My name is Katy Ingram — wife to a wonderful husband, mama to one amazing son, and caretaker to five kitties. I also care for my mother-in-law who lives with vascular dementia, which has deepened my appreciation for creativity as both joy and therapy.
We live off the coast of North Carolina, where I spend my time creating handmade cards and sharing my love for paper crafting. I began cardmaking in 2016, and in 2019 launched my YouTube channel and blog, Eastwicks Paper and Ink, as a place to inspire creativity and share tips, techniques, and inky fun. I’m thrilled to continue as an Artist in Residence with Imagine and look forward to creating alongside you!
Hello, my name is Von Marie. I’m a California native and have been cardmaking for about 15 years, starting when I was pregnant with my first child. Before cardmaking, I was a scrapbooker, and while I don’t create full pages as often anymore, I still enjoy it from time to time. I love photographing my family, food, and scenery and hope to do more scrapbooking again someday.
I’m always excited to learn new styles and techniques, and I love to play, get inky, and see where my cardmaking journey leads. Spending time in my craft room brings me so much joy, especially when I’ve created something special.
I love Tsukineko inks and I love using sprays. On Point Glue is a favorite. Embossing with ink and powder is especially satisfying, whether for images or sentiments. I don’t have a single defined style, but I’m currently enjoying learning to create more CAS cards. My motto is: Sometimes Less is More!
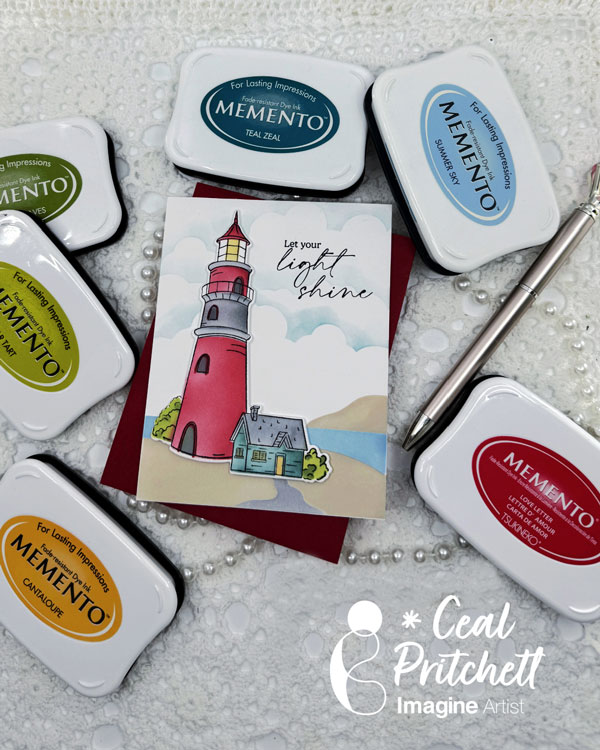
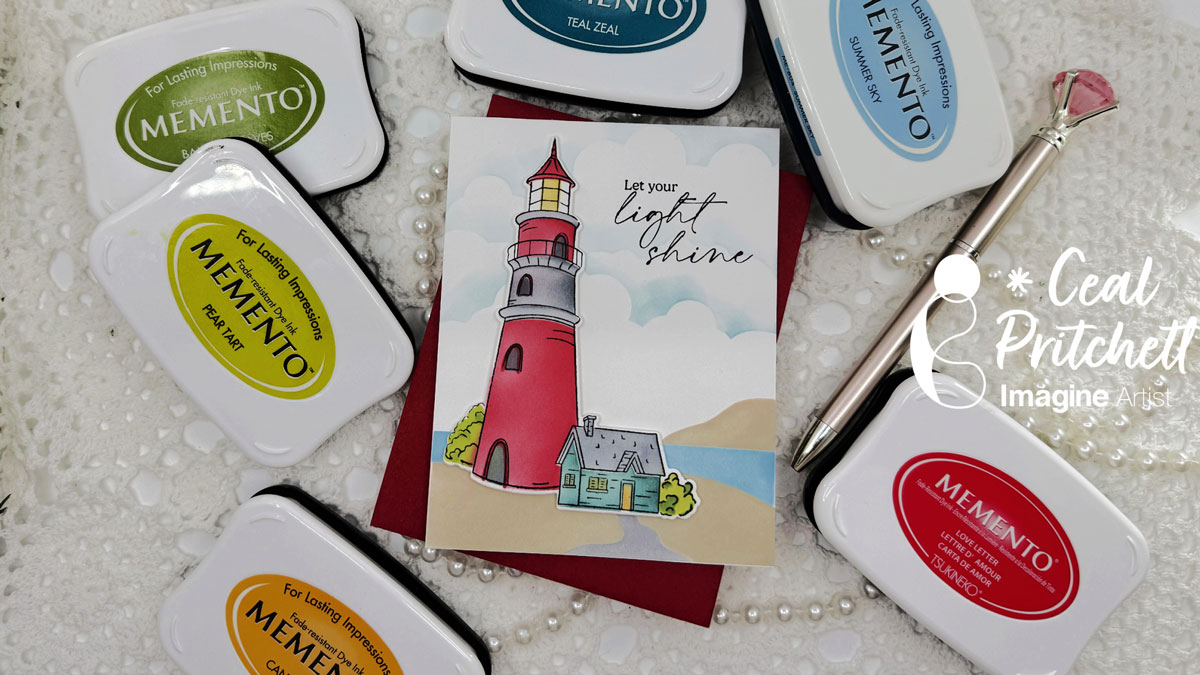
It’s Ceal, here. Today I am sharing how to make this beautiful light house card using supplies by Pinkfresh studio and Memento Inks.
Skill: Intermediate to Advanced Time: one hour
Directions:
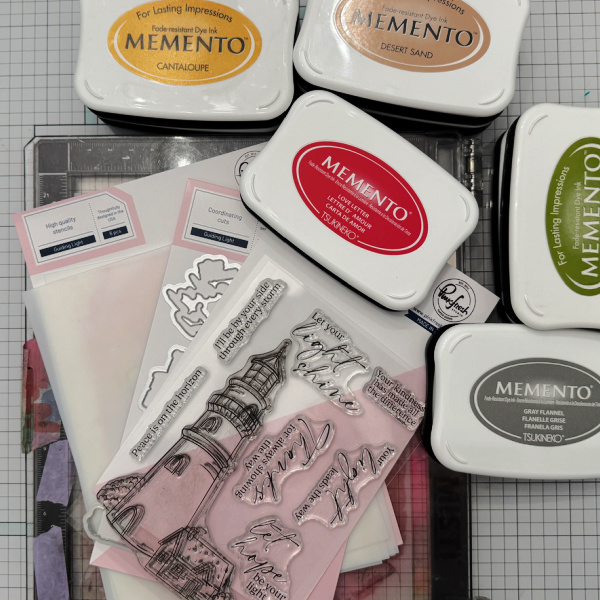
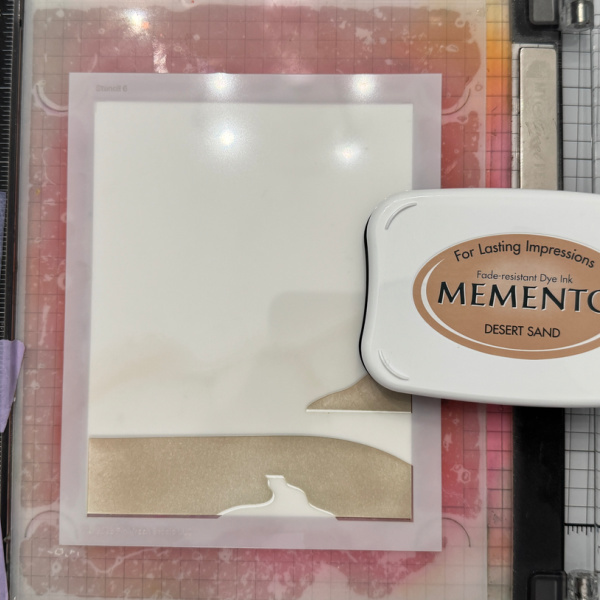
Gather your supplies. You will need a lighthouse or similar stamp set with coordinating stencils and dies. To make this card I started with a white top folding A2 card base and a white panel.
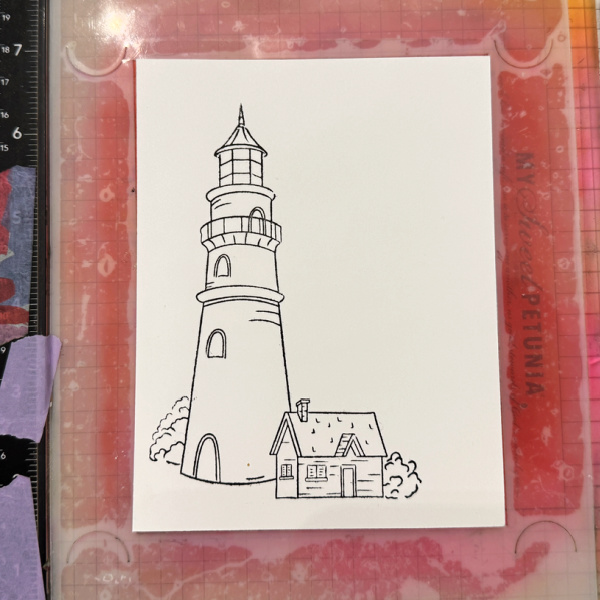
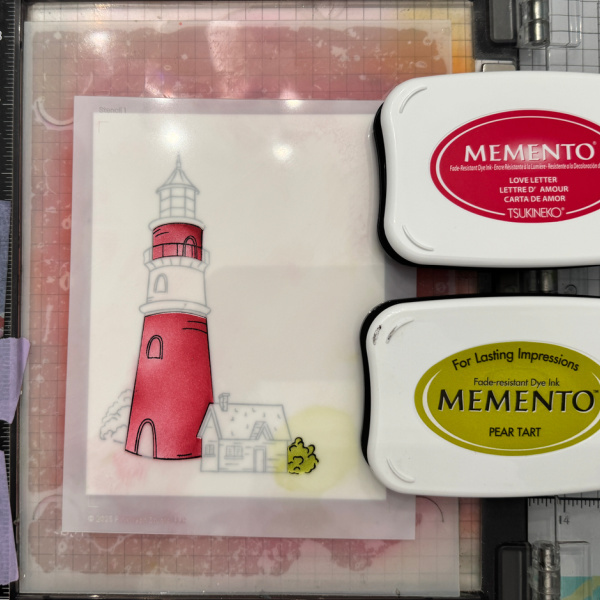
Step 1: Stamp the image with VersaFine Clair Nocturne ink on a white panel.
Step 2: Using the first stencil color the portion of the lighthouse and bush. I used Love Letter and Pear tart Memento ink.
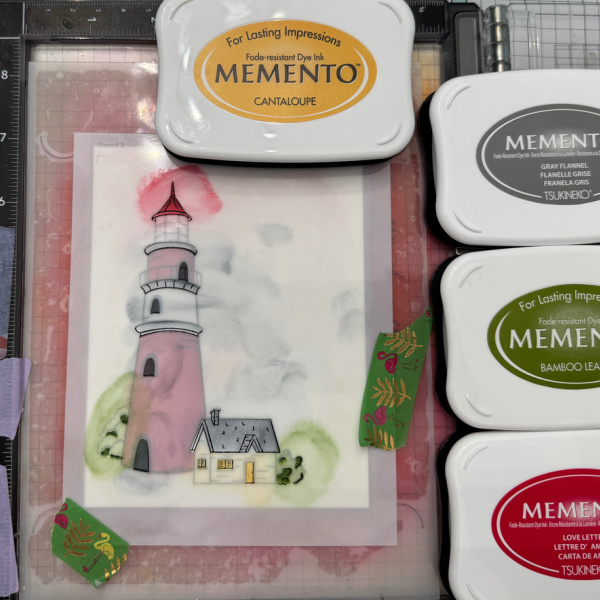
Step 3: Color the open portions of the second stencil. I used Gray Flannel, Love Letter, Cantaloupe, and Bamboo Leaves
Step 4: Color the open portions of the third stencil. I used Cantaloupe, Love Letter, Teal Zeal, Pear Tart and Gray Flannel. This will complete the coloring of the image.
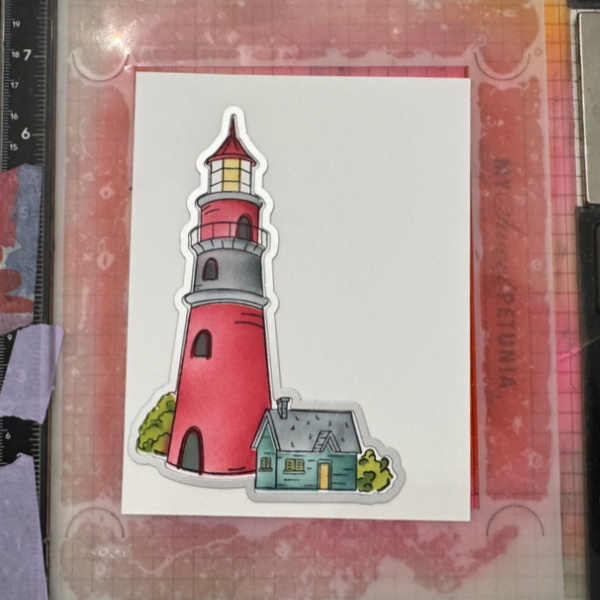
Step 5: Cut the image out with the cording die using a die cutting machine.
Step 6: Color the open portion of the fourth stencil creating the sand. I used Desert Sand. For the walkway/path I used Gray Flannel.
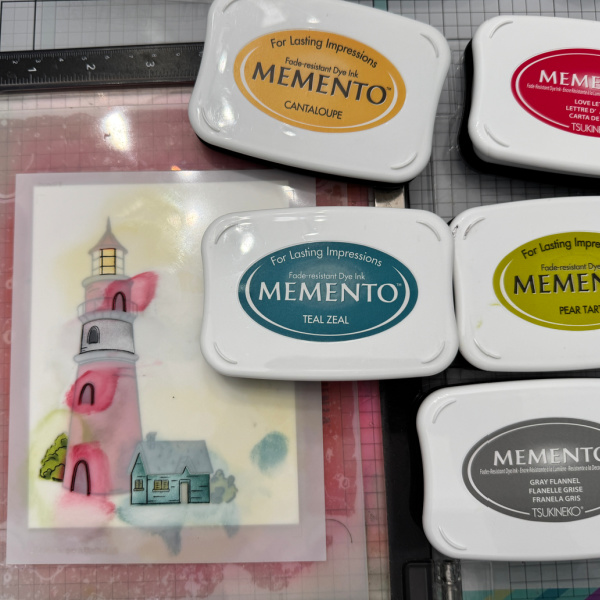
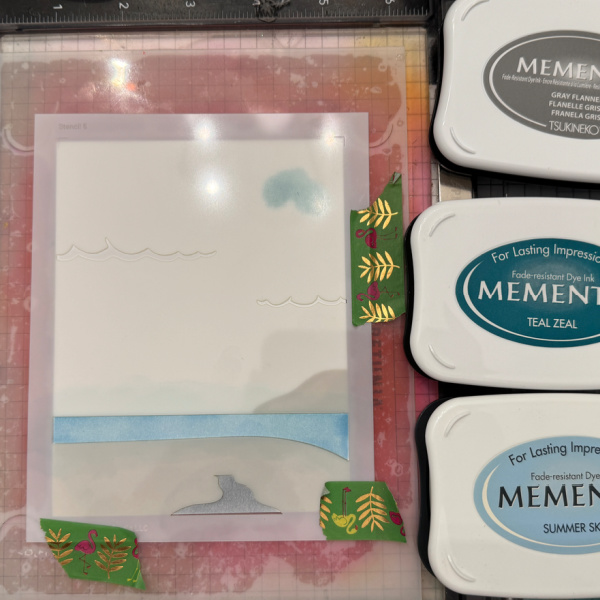
Step 7: Color the open portion of the stencil creating the water. I used a mixture of Summer Sky and Teal Zeal.
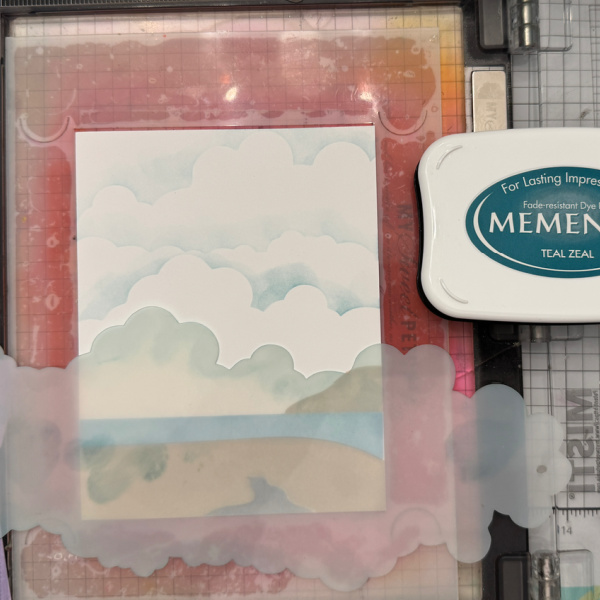
Step 8: Create clouds in the background by using a cloud stencil. The ink I used is Teal Zeal.
Step 9: Add a sentiment to the panel and adhere the finished panel to the card base popping up the lighthouse.
Products Used:
Imagine Products: Memento Inks in the following colors Teal Zeal Summer Sky Pear tart Bamboo Leaves Love Letter Cantaloupe Desert Sand Gray Flannel
Other Supplies:
Guiding Light by Pinkfresh Studio Stamp set Coordinating Coloring Stencils Coordinating Dies