Use a Ghosting Technique to Create a Unique Christmas Card

by Martha Lucia Gomez
Use a Ghosting Technique to Create a Unique Christmas Card

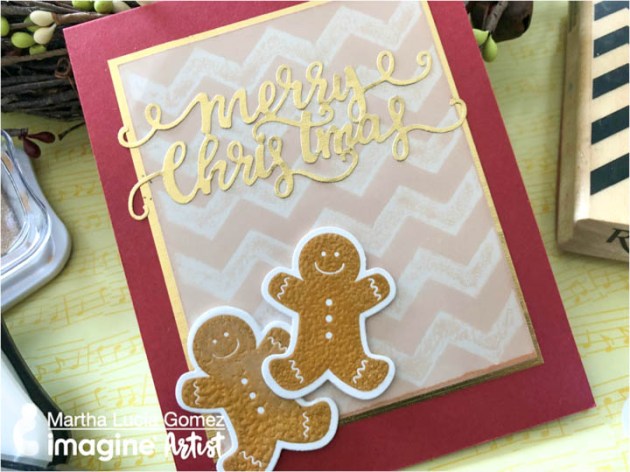
Hello everyone! Ghosting technique was one of the first techniques that I learned in cardmaking crafts and today I am sharing with you a lovely way to incorporate this ghosting technique in a Christmas Gingerbread Card. To realize this technique you only need glossy card stock and VersaMark ink to stamp the ghost image. In my project, I am using a Chevron Background from Recollections, but let me show you the process!

Skill: Intermediate
Time: 1 hour

Directions

Step 1

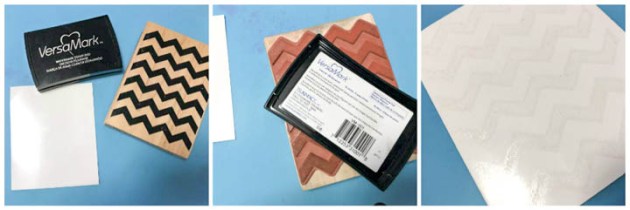
Take a piece of white glossy card stock and ink your stamp or stamps with VersaMark Ink and stamp directly over the glossy side and set this piece aside for a few minutes so the ink can dry.

Step 2

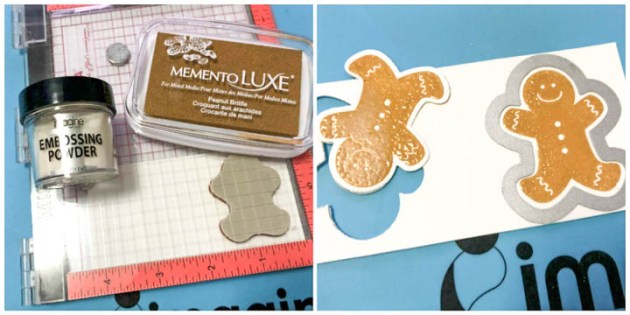
On a regular piece of cardstock, stamp the holiday-themed images that you want to use to decorate your card. I used a gingerbread image from a Stampin Up Set. I stamped the images with Memento Luxe Peanut Brittle and Clear Embossing Powder that I activated with the heat tool. Then I cut the gingerbread with the corresponding die cut.

Step 3

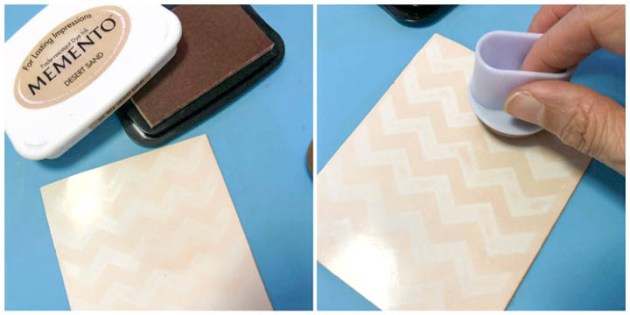
When the glossy card stock was totally dry, I sponged several times in circular motion with Desert Sand Memento Ink. If you want you can also use a brayer to create the resist effect.


Step 4

To finalize the card, I resized the glossy layer and created a gold mat using Gold Starstruck Rinea Foiled Paper and pasted this layer directly over the Cherry Cobbler card base. Then I cut the sentiment Merry Christmas using the same Gold Starstruck Rinea Foiled Paper with a Gina Marie Design Die Cut and pasted it over the chevron background and pasted the gingerbread using dimensional dots or tape. You can use any type the stamps to create this technique, not necessarily background stamps, all depends on the theme that you wanted to use in your card.

Supplies

Imagine
Other
  • Stampin Up – Scentsacional Season Stamp Set & die cut (retired)
  • Recollections – Chevron Background
  • Stampin Up – Cherry Cobbler Card Stock, White Glossy Card Stock
  • Rinea Foiled Paper – Gold Starstruck
  • Gina Marie Designs – Merry Christmas die cut
  • Dimensional tape or dots


How to Make a Gingerbread House Garland

by Jennifer Vanderbeek

How to Make a Gingerbread House Garland

Die cuts and a few choice supplies combine to create this darling little gingerbread house garland. Not only is it perfect for the holidays, it’s an ideal craft to let kids help decorate (after the embossing is done!) and it would also look super sweet at a fairy tale themed event—think Hansel and Gretel and the witch’s house in the woods. A fun technique used in this project is layering the StazOn Studio Glaze while still wet. Drawing the tip of the Claret StazOn Studio Glaze bottle over the Cotton White made for near-seamless candy cane stripes once dried. Also, I’ve found it helps to be very generous with the Cotton White, especially on darker papers or backgrounds, if you want it to retain some opacity.

Skill: Advanced
Time: 15 minutes per house

Directions

Supplies

Imagine
Other
  • Cardstock – Craft
  • Die-Versions – Tall Victorian Home die
  • Sizzix – Big Shot Plus
  • 1/8” Hole Punch
  • Darice – Heat Tool
  • Baker’s Twine
  • Clear Tape

Use Simple Shapes to Make Holiday Cards

by Jennifer Vanderbeek

Use Simple Shapes to Make Holiday Cards

There are so many cute and fun stamps and dies on the market these days for the holidays that it’s truly tough to resist them. I don’t know about you but there’s only so much room in the budget and the stamp storage to go around, so I’m always happy to come up with ways to use the things I already have and getting more mileage out of my tools and supplies. To that end, these cards use patterned stamps that are not holiday-specific and simple shapes you can cut with basic dies, punches, or even just scissors. These simple shape cards are also perfect for crafting with kids in preparation for the holidays!

Skill: Intermediate
Time: 1 hour depending on the number of cards

Directions

Supplies

Imagine

• Delicata – White Shimmer, Pink Shimmer, Ruby Red
• VersaFine – Olympia Green
• VersaMark – Champagne Dazzle
• Embossing Powder – Gold, Clear
• All-Purpose Ink – Vegas Gold
• StazOn Studio Glaze – Claret
• irRESISTibles Spray – Wedding Dress
• Fantastix – Brush Tip
• Creative Medium – Shimmer
• Palette Knives
• Tear It! Tape
• On Point Glue

Other

• Cardstock – Dark green, Green, Royal Blue, Burgundy, Cream, Yellow
• Patterned Paper – Red with White Dots
• Pencil
• Fiskars – Scissors
• Darice – Heat Tool
• Acrylic Blocks
• Stampers Anonymous – Doily Stamp
• Studio Calico – Make a Wish stamp set
• Joy Clair Stamps – Lovely Swirl Background stamp
• Our Daily Bread – Vine Background stamp
• Simon Says Stamp – Merry and Bright stamps
• Bo Bunny – Sentiments Stamp
• Marvy Uchida – Star Punch
• My Favorite Things – Pierced Oval Stax dies
• Lawn Fawn – Stitched Circle Frames dies
• Sizzix – Big Shot Plus
• Bone Folder
• Ribbons & Threads

We are Excited to be Hopping with Crackerbox + Suzy Stamps Day 2

We are Excited to be Hopping with Crackerbox + Suzy Stamps Day 2

It’s day 2 of blog hopping with Crackerbox + Suzy Stamps! We love blog hops because they are a super fun way for you to learn more about the individual blogs of design team members and it is also a great way to win some new products!

Thanks so much for stopping and be sure to leave comments (one per blog) during these two days of hopping so you can be entered to win a $25 Crackerbox + Suzy Stamps Gift Certificate or one $25 Gift Certificate from Imagine!!! Winners will be announced on the Crackerbox + Suzy Stamps and Imagine Blogs on Friday, October 26th, 2018.

Lindsay Andreon

Kyriakos Pachadiroglou

Teresa DeWitt

Nadine Carlier

Tracy McLennon

Roni Johnson

Giada Rigamonti

Steph Ackerman

Martha Lucia Gomez

Melissa Andrew

Subscribe to the Imagine Blog!

Learn more about Crackerbox + Suzy Stamps!

Create a Beautiful Mandala Thank You Card

by Martha Lucia Gomez

Create a Beautiful Mandala Thank You Card

Exploring is part of this creative world, but not all of our readers are experts or have been following us for a long time so today I’ll welcome you back to the basics. A few months ago, I told you that if I had to choose one ink pad (in a hypothetical world), I would choose the VersaMark Ink. Today I am sharing with you one of the multiple reasons why I consider it my must-have product. We have inks in almost all colors but with the VersaMark Ink you create a watermark effect that enhances the color of the paper. I love this effect and love the subtle appearance it creates. In my project, I am using Sahara Sand cardstock and if you notice on the above photo the ink is the same as the paper, just a little darker to create more emphasis over the stamped image.

Skill: Beginner
Time: 30 minutes

Directions


Step 1

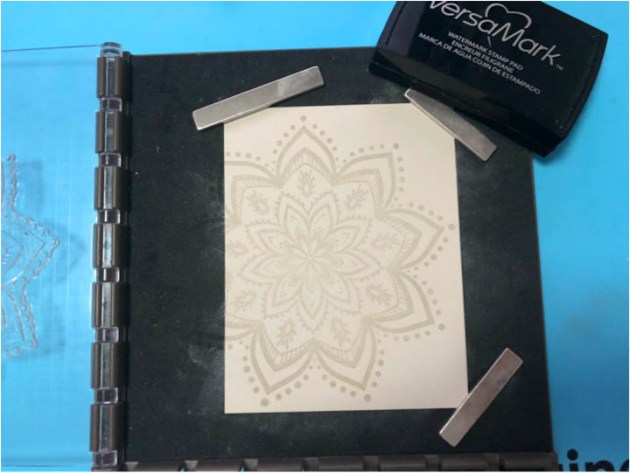
Select your color of cardstock and ink your stamp with VersaMark.


Step 2

Stamp your image once, twice or as many times that you need it to obtain all the details and a darker color. In my sample, I stamped twice. Let the ink dry for a few minutes. And this multiple stamping is easier with a stamping tool such as the Misti Stamping Tool.


Step 3

Repeat the process to stamp the “Thanks” sentiment. But this time you can create a totally different effect using the VersaMark with Embossing Powder. You only need to ink your stamp with the VersaMark and then cover the stamped image with Silver Embossing Powder in my case or with any other color of embossing powder and melt it with the heat tool. VersaMark is an excellent embossing ink.


Step 4

To make my card more special, I cut the stamped sentiment with the corresponding die cut and stamped the complement sentiment making the same process. If you want to obtain a major texture you can repeat the stamping process all the time that you wanted…just don’t burn your paper!

Supplies

Imagine
Other
  • Sahara Sand Card Stock
  • “Thanks” Stamps & Die cuts
  • Mandala stamp
  • Misti Stamping tool
  • Embossing powder anti-static bag
  • Die & embossing machine

Create a Mixed Media Holiday Card with Memento

by Melissa Andrew

It’s time to get ready for the holidays! Today Melissa creates a gorgeous watercolor background with Memento and VersaColor Ink. She finishes her holiday card with gorgeous gold embossing powder. This is a quick and easy holiday card that can be mass produced for sending to loved ones this season!

Skill: Advanced
Time: 1 hour

Directions

Supplies

Imagine
Other