Learn How to Build a Papercrafted Wreath with Dewlets

by Roni Johnson

Learn How to Build a Papercrafted Wreath with Dewlets

I love my Dew Drop ink pads…they are just the right size. They are small enough that they take up less space yet big enough to hold lots of ink for all of my projects. Imagine has come up with an ingenious idea of using these Dew Drops not only as ink but as the main component of a project using the brand new Dewlets dies! These little dew drop shaped cutting dies are perfect for all sorts of projects including the Laurel wreath I made for you today.

Skill: Advanced
Time: 4 hours

Directions

Step 1

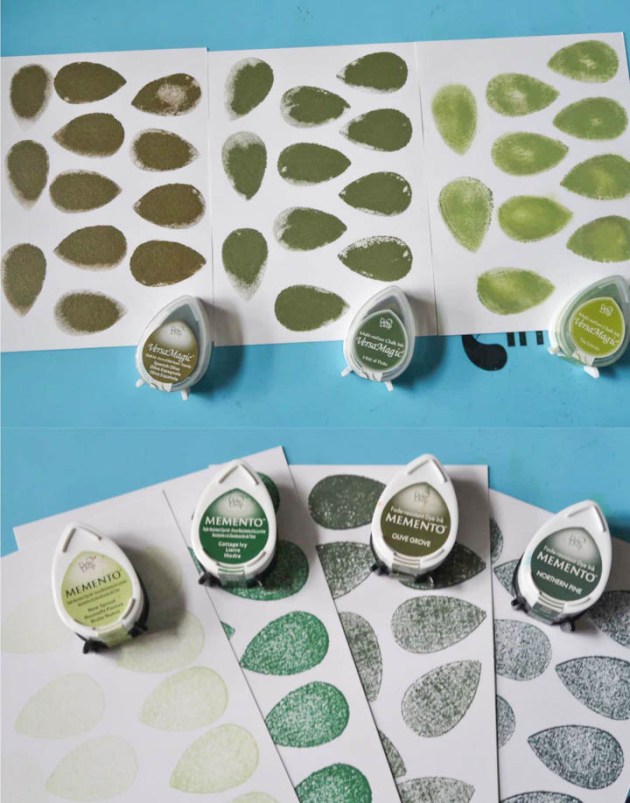
Stamp out dozens of dew drops using several colors of Memento and VersaMagic inks. In addition to these Dew Drop shapes, I also rubbed Delicata Golden Glitz and Emerald Green inks onto white cardstock.


Step 2

Die-cut all of the dew drops using the Dewlets dies. Cut out dew drops from the cardstock covered with Delicata inks as well.


Step 3

Rub VersaFine Clair in Shady Lane along the pointy edges of the Dew Drops to help “bring ‘em all together”.


Step 4

Tear strips of brown craft paper into 1.5 – 2” wide strips. Wrap these strips around a foam wreath until the whole wreath has been covered.
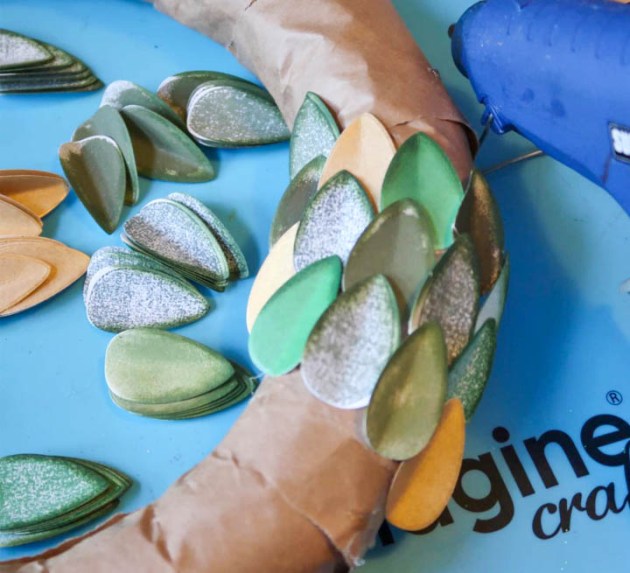

Step 5

Begin gluing the laurel leaves to the wreath in a diagonal line.
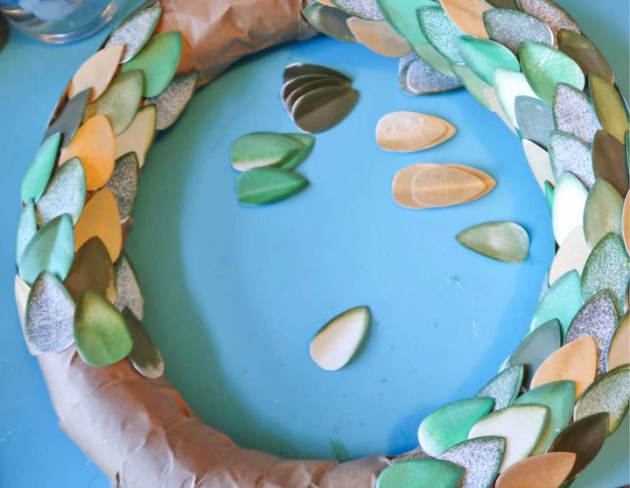

Step 6

Continue gluing on leaves until the wreath is covered.
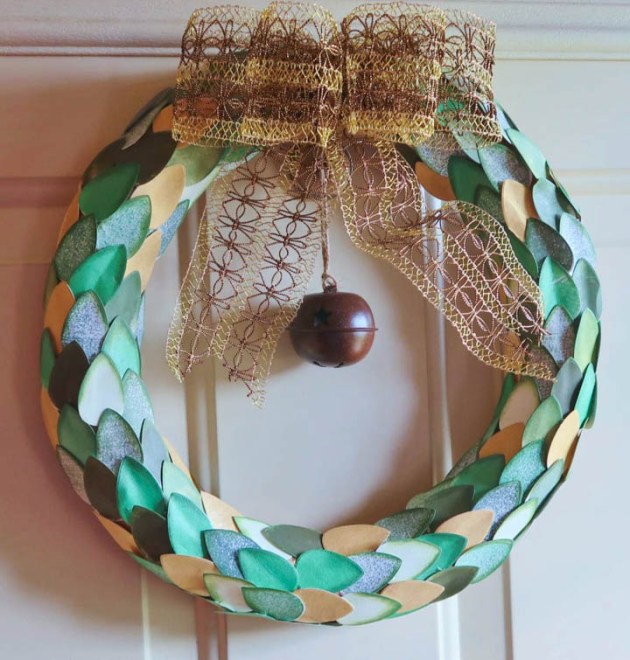

Step 7

Affix a bow and rusty jingle bell (if desired).

Supplies

Imagine
Other
  • Styrofoam Wreath
  • White Cardstock
  • Kraft Paper
  • Glue Gun & Glue Sticks
  • Ribbon
  • Rusty Bell
Learn How to Decorate Your Own Holiday Ornaments

by Steph Ackerman

Learn How to Decorate Your Own Holiday Ornaments

As we get closer to the holidays, it’s always fun to do handmade projects or get the kids involved with decorating the Christmas tree. This year, why not create Christmas ornaments for friends and family members. All you need are a set of glass ornaments and a selection of amazing colors of StazOn Studio Glaze to complete this project.

Skill: Beginner
Time: 1 hour + drying time

Directions


Step 1

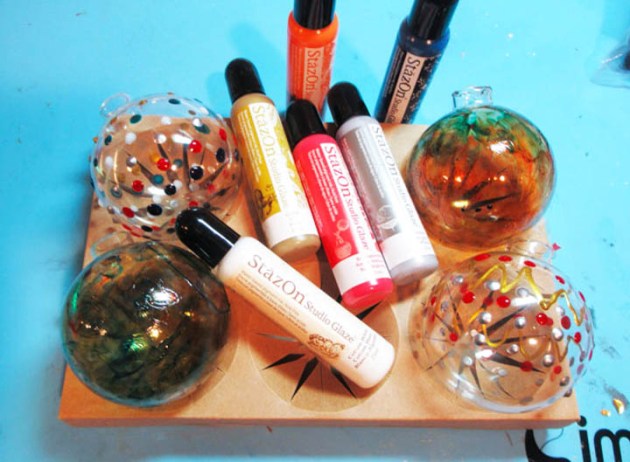
Remove the hanger from each ornament and put aside. Holding the ornament with 2 fingers, start by creating a zig-zag pattern using StazOn Studio Glaze in Gold.


Step 2

Add dots of color using StazOn Studio Glaze in St. Valentine, Silver, and Orange Zest. Continue adding dots of color around the ornament.


Step 3

Place another ornament on a dowel or craft stick and add StazOn Studio Glaze in St. Valentine, Emerald City, and Orange Zest in random patterns. Use a finger to mix the colors together creating a swirly pattern.


Step 4

Add rings of color on another ornament and mix them together creating another swirly pattern.


Step 5

Continue painting the ornaments with Studio Glaze until you have decorated all the ornaments you need.


Step 6

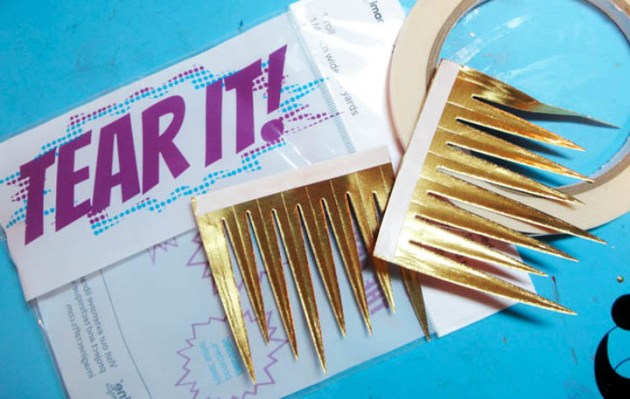
Using the RInea 3D Hyacinth die set, die cut assorted colors of Rinea Foils. Add Tear It Tape to the bottom edge of the die.


Step 7

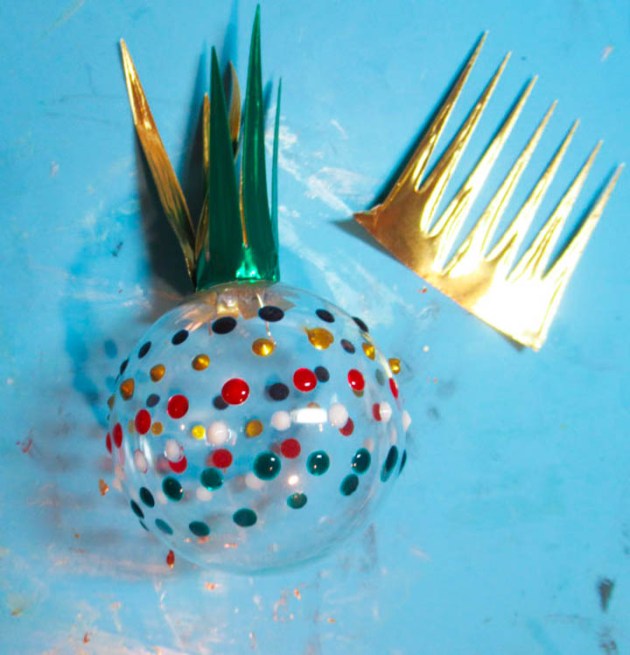
Put the hanger back in each ornament. Remove the backing from the Tear It Tape, then wrap the foil around the ornament top.


Step 8

Use a craft pick to curl the foil strips and continue decorating as you wish.


Supplies

Imagine
Other

Learn How to Create Foil Paper Christmas Ornaments

by Roni Johnson

Learn How to Create Foil Paper Christmas Ornaments

Oh My….Gingerbread! That is the color of the month for November 2018 here at Imagine. Gingerbread is not only one of my favorite holiday treats but it is also one of my favorite colors. I have paired it with another of my holiday favorites…handcrafted ornaments! These star ornaments are so elegant looking on the tree and by making them with Rinea Foiled Papers they add loads of extra sparkle and shine to the mix.

Skill: Intermediate to Advanced
Time: 1 hour per ornament

Directions


Step 1

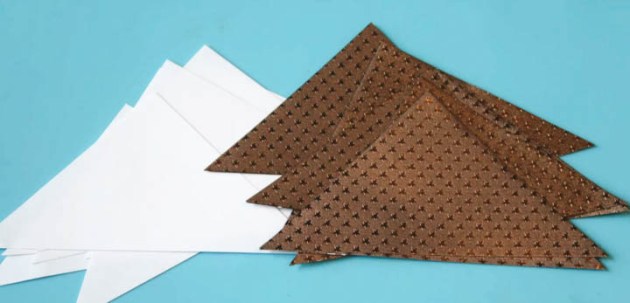
Cut copy weight white paper 4.75” x 4.75”; cut the square into triangles as shown.


Step 2

Cut Mocha/Mocha Starstruck Foiled Paper into 5” squares then into triangles. Note: You will need 9-10 triangles per ornament.


Step 3

Stamp each triangle with a variety of ornament peg stamps using VersaMagic Gingerbread and VersaFine Clair Acorn inks. Sponge edges with Dark Brown Shimmer Delicata ink.


Step 4

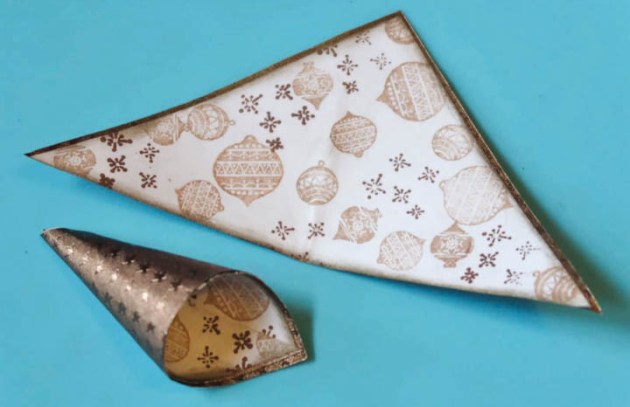
Mount each stamped triangle onto each foiled paper triangle. Roll one side point and affix it to the center point; roll the other point around the side to form a cone. Affix with your favorite adhesive. Repeat until you have 9-10 cones.


Step 5

Die-cut a circle from chipboard and one from gold foiled paper. Trim a 10” piece of stretch cord per ornament.


Step 6

Punch a hole in the chipboard circle. Adhere to 8-10 cones around the circle.


Step 7

Once all the cones are attached or glued down, insert a decorative brad in the center of the ornament to cover the tips of the cones.


Step 8

Cover the back of the ornament with the gold foiled paper circle (to hide the brad); affix the stretch cord hanger. In the photo above, you can see that I have used a different color scheme.


Step 9

Here I have made two versions of the same ornament one is using 10 cones in multiple colors and the other is 9 cones in gingerbread. Above is a comparison of the different looks. The 9 cone ornament is much wider/flatter look to it while the 10 cone ornament is more rounded with the original cone shape still intact. Both beautiful in their own way.

Supplies

Imagine
Other
  • Rinea Foiled Paper – Jolly Foiled Paper Pack; Mocha/Mocha Starstruck Foiled Paper
  • Rubber Stamp Tapestry – Embellished Holiday Wreath Peg Stamp Set; Happy Holidays Peg Stamp Set
  • Joy Clair – Ugly Sweater Background Stamps
  • White Copy Paper
  • Chipboard
  • MFT – Scallop Circle Dies
  • Fancy Brad
  • Stretch Cord

How to Make a Gingerbread House Garland

by Jennifer Vanderbeek

How to Make a Gingerbread House Garland

Die cuts and a few choice supplies combine to create this darling little gingerbread house garland. Not only is it perfect for the holidays, it’s an ideal craft to let kids help decorate (after the embossing is done!) and it would also look super sweet at a fairy tale themed event—think Hansel and Gretel and the witch’s house in the woods. A fun technique used in this project is layering the StazOn Studio Glaze while still wet. Drawing the tip of the Claret StazOn Studio Glaze bottle over the Cotton White made for near-seamless candy cane stripes once dried. Also, I’ve found it helps to be very generous with the Cotton White, especially on darker papers or backgrounds, if you want it to retain some opacity.

Skill: Advanced
Time: 15 minutes per house

Directions

Supplies

Imagine
Other
  • Cardstock – Craft
  • Die-Versions – Tall Victorian Home die
  • Sizzix – Big Shot Plus
  • 1/8” Hole Punch
  • Darice – Heat Tool
  • Baker’s Twine
  • Clear Tape

Make Gingerbread Ornaments with Clay and Memento Ink

by Kyriakos Pachadiroglou

 See How to Make Gingerbread Ornaments with Polymer Clay and Memento Ink

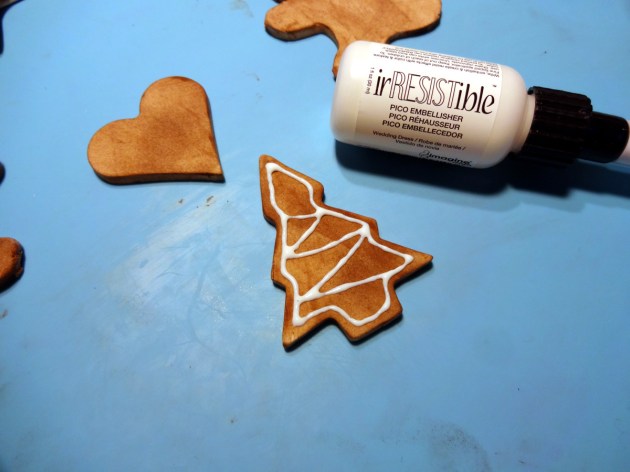
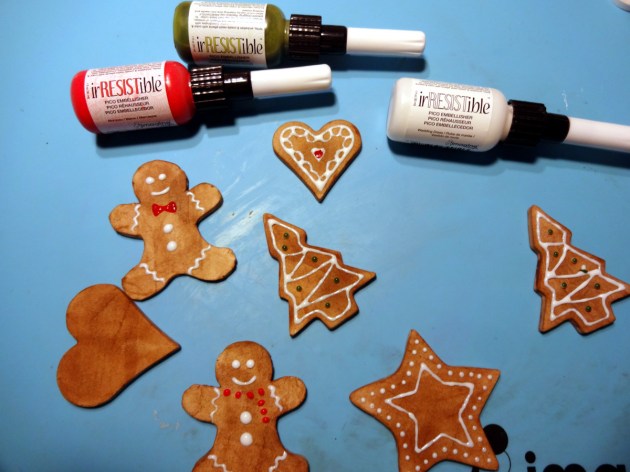
This holiday season, the best recipe for gingerbread cookies can be found right here! It takes only a few ingredients/materials and no baking, with a long-lasting fresh cookie look! The first ingredient is clay! I used an air dry one to avoid any “baking” at all. A nice match of Walnut Ink Crystals with Memento Rich Cocoa ink pad gives a beautiful gingerbread color that will make people think these cookies are baked to perfection. Decorate the cookies with easy glazing and fine detail provided by the thin nozzle of irRESISTible Pico Embellisher colors. See if you can trick someone into tasting them! (Ok, maybe don’t go that far…)

Skill: Beginner
Time: 1 hour + clay drying time

Directions


Step 1

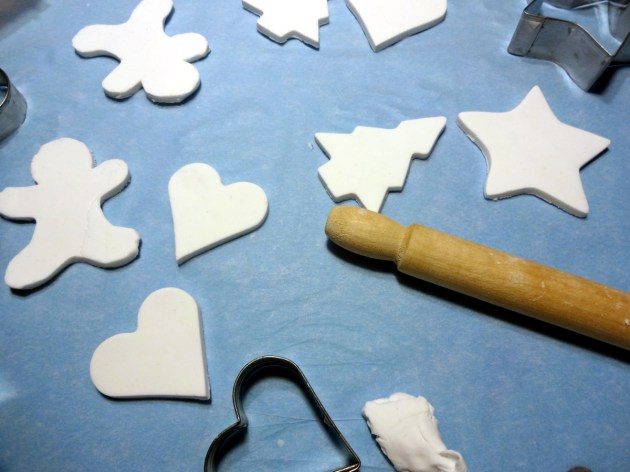
Use the rolling pin to flatten the clay in a thick layer. Cut shapes with the cookie cutters. Lay them on the parchment paper and set aside to dry.


Step 2

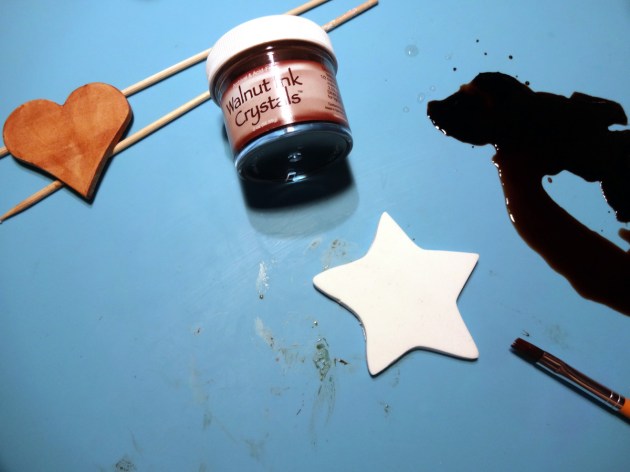
Dilute a few Walnut Ink Crystals in water and paint the clay shapes.


Step 3

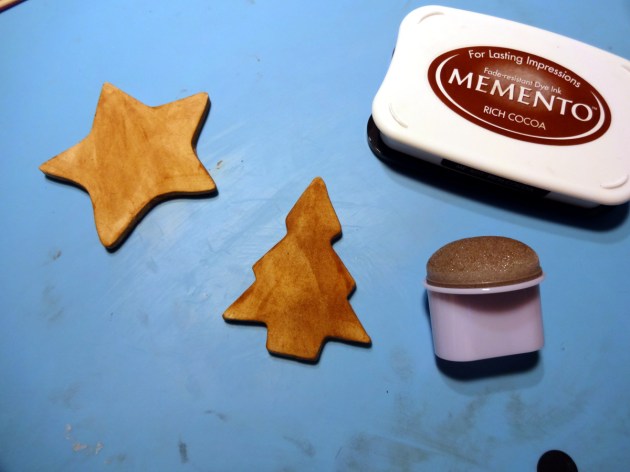
Use a jumbo sponge dauber to darken and add a bit of texture on the clay shapes with Memento Rich Cocoa ink.


Step 4

Use the irRESISTible Pico Embellisher in Wedding Dress as ‘sugar glaze’ to decorate the clay cookies.


Step 5

Add color and details on the clay cookies with the irRESISTible Pico Embellisher in Morocco and Pear Tart colors.

Supplies

Imagine
Walnut Ink Crystals
Walnut Ink Crystals
Memento Inkpad in Rich Cocoa
Memento Inkpad Rich Cocoa
irRESISTible Pico Embellisher Wedding Dress
irRESISTible Pico Embellisher Pear TartirRESISTible Pico Embellisher Pear Tart irRESISTible Pico Embellisher MoroccoirRESISTible Pico Embellisher Morocco Sponge DauberSponge Dauber
Other
  • Air dry clay
  • Cookie cutters
  • Rolling pin
  • Parchment paper
  • Paintbrush

How to Make Cornucopia Table Place Cards with Rinea Foil

by Jennifer Vanderbeek

How to Make a Cornucopia Table Place Cards with Rinea Foil

Since Rinea foil papers are gorgeous on both sides, I wanted to make something with them that showed off that feature. Paper “sculptures” are good for this, and with the Thanksgiving holidays approaching, a cornucopia seemed the best way to go. It’s a simple shape in that it’s mostly a cone, but to give it a little of a curve, the pattern I’ve devised shifts the “spine” bit by bit on the bottom half of the sheet to add just enough curve to keep things interesting. These place card holders work up quickly, so preparing a table-full will still leave you with plenty of time for holiday fun.

Skill: Intermediate
Time: 15 minutes per place card

Directions

Supplies

Imagine
Other
  • Rinea Foil Paper – Copper Star, Copper/Gold
  • Vintage – Utensils Stamp
  • Acrylic Block
  • Fiskars – Paper Trimmer, Scissors
  • Deco Mesh
  • Hemp Cord