
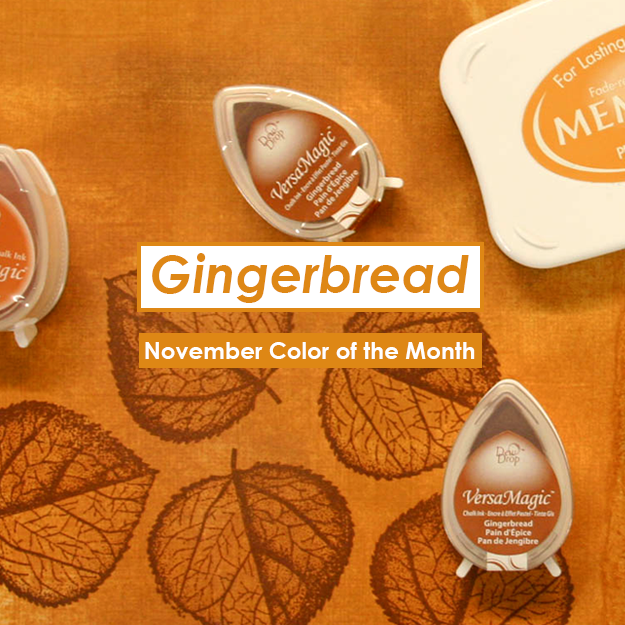
November Color of the Month is Gingerbread

November Color of the Month is Gingerbread

Color of the Month for November is Gingerbread. We love this toasty burnt orange-brown color that reminds us of the all the yummy treats and eats that are created for the holidays. For papercrafting, we have a collection of ink colors that perfectly compliment the Gingerbread color. Some of these inks include VersaMagic in (ready for it…) Gingerbread, Memento in Peanut Brittle, and VersaMagic in Pumpkin Spice. These dark orange colors are a great addition to your ink collection.

To start us out for the month of November, we have a super cute cardmaking tutorial by Elina Stromberg. Enjoy!

Cute Birthday Card by Elina Stromberg

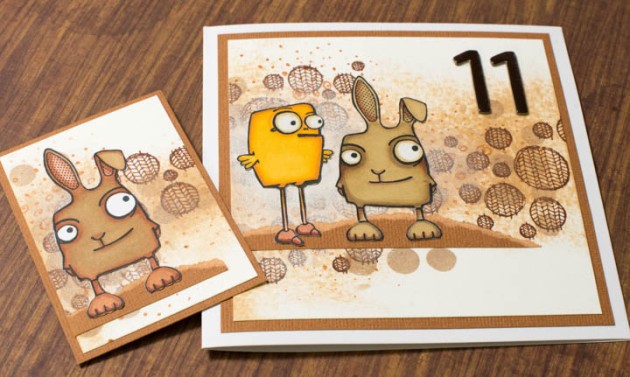
As a scrapbooker and card maker, I have lots and lots of beautiful patterned papers. However, very often I prefer using just plain white mixed media papers and creating the background patterns myself. That way I can both enjoy the creative process of inking, stamping, and stenciling but also create patterned papers that have exactly my needed colors. This cute birthday card was inspired by our November color ‘Gingerbread’. Even if I used only a limited color palette I think the card doesn’t look boring at all. Several layers of eye-catching patterns and cute stamped and colored images were a perfect combo!

Skill: Beginner
Time: 1 hour

Directions


Step 1

Stamp and fuzzy-cut the main images.

Step 2

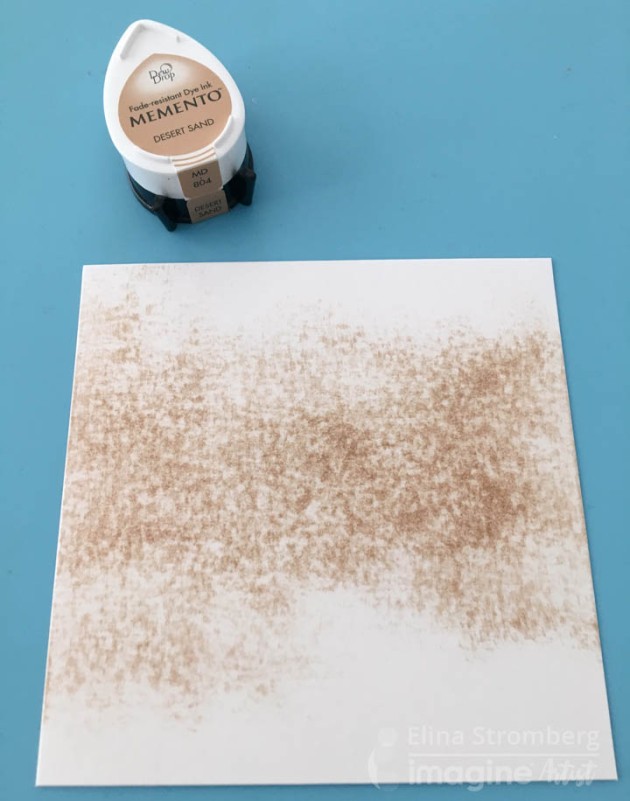
Apply Memento in Desert Sand (light brown) on a piece of mixed media cardstock/watercolor paper. Do not cover the entire sheet but leave some areas white.


Step 3

Stencil VersaMagic in Gingerbread on top of.

Step 4

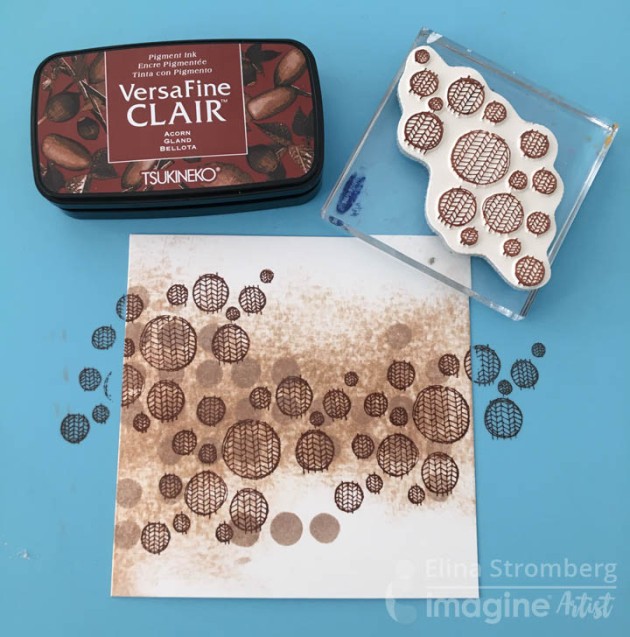
Stamp circle patterns with VersaFine Clair in Acorn.

Step 5

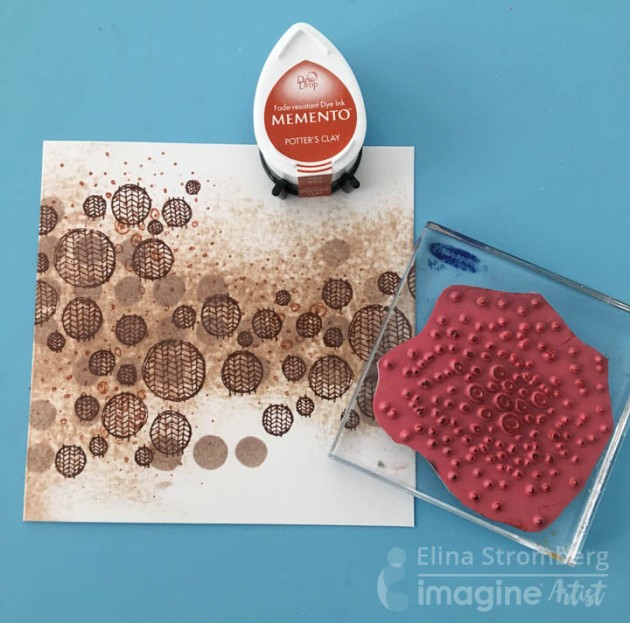
Add the final layer of patterns by stamping small dots with Memento in Potter’s Clay.


Step 6

Apply a thin layer of white gesso on those areas where the main images will be placed. This will highlight the fuzzy cut images, preventing them from blending into the busy background. Let dry.

Step 7

Glue main images on the card front. Mat card on brown cardstock and attach to white card base. I used the very same techniques for creating a matching ATC. I think it looks quite nice, too!

Supplies

Imagine
Other
  • White mixed media paper
  • Brown cardstock, white card base
  • White gesso
  • Carabelle Studio: ‘Les Mini OUF 2’ Stamp, Mini Textures
  • VivaLasVegaStamps! – Doodle Dots
  • Ranger Dyulusions – Fresh Dots Small Stencil
  • Promarkers for coloring the images
  • American Crafts – Number stickers

Use Walnut Crystals to Create Beautiful Handmade Cards

by Arjita Sepaha Singh

For today’s card, I used a swirly flourish stencil, Creative Medium, and Walnut Ink Crystals. I created a small rectangle mask using Post-It note and placed it on the watercolor paper. Then I placed the stencil on top and using a spatula I added the Creative Medium. I allowed the medium to dry completely then added diluted walnut ink crystals and few intense pigments. I finished the card with a sentiment stamped with Versafine Clair Ink. I love the vintage grungy look of the card.

Skill: Advanced
Time: 1 hour

Directions

Supplies

Imagine

Walnut Crystals
• Creative Medium – Clear
• VersaFine Clair – Pinecone
• Palette Knives

Other

• Strathmore – Watercolor Paper
• Flourish Stencil
• Paintbrush
• Sentiment stamp

“Wishing You a Merry Christmas” Treat Bags

by Steph Ackerman

"Wishing You a Merry Christmas" Treat Bags

As we near the holidays and time gets more elusive, consider creating your holiday projects in assembly-line style.  In this fashion, you can create your projects in stages and not get overwhelmed.  I love creating colorful gift bags, placing little goodies inside and giving them to friends and neighbors during the holidays.  A large background stamp inked with Onyx Black sets the stage for the addition of colorful images using Memento Markers.  Not only are gift bags fun to make, but they can also easily be customized using the wide assortment of inks and markers available from Imagine.

Skill: Intermediate
Time: 1 hour

Directions


Step 1

Ink background stamps with VersaFine Onyx Black Ink. Stamp onto gift bags. If the stamp is not wide enough to cover the gift bag, reink a portion of the stamp and stamp it again on the gift bags.


Step 2

Fold down the tops of the gift bags and ink the edges with VersaMagic Red Magic Ink.


Step 3

Stamp images with VersaFine Onyx Black Ink and use the coordinating dies to die cut the images. Using assorted Memento Markers, color the images. Die cut a larger green circle and adhere to each bag. Adhere the trucks and packages across the center of each bag. Stamp the phrases with VersaFine Onyx Black Ink and VersaMagic Red Magic. Mat the phrases with cardstock and adhere above the trucks.


Step 4

Fill the bags with assorted goodies. Punch holes in the tops and tie closed with twine.

Supplies

Imagine
  • VersaFine Inkpad – Onyx Black
  • VersaMagic – Red Magic
  • Memento Markers – Angel Pink, Bahama Blue, Cantaloupe, Dandelion, Desert Sand, Lady Bug, London Fog, Pear Tart, Rich Cocoa, Rhubarb Stalk, Summer Sky, Tuxedo Black
Other
  • Just For Fun Rubber Stamps – Background
  • Stampendous – Truck and Packages stamps and dies
  • Whisker Graphics Bags
  • Twine
  • Spellbinders – Circle dies
  • Cardstock – White, Green

Making the Most of Your Imagine Sprays and Inks

by Melissa Andrew

Making the Most of Your Imagine Sprays and Inks

Do you feel limited by the sprays and inks you have or want? If you feel like you get one look consistently and want something new with products you know and love, try switching up your paper. In today’s video, I show you how a simple change can make a large difference in the appearance of your creations.

Skill: Advanced
Time: 1 hour

Directions

Supplies

Imagine
Other
  • Whimsy Stamps – Shine Bright Stamp Set, Wavy Edger Die Set
  • Mini-Stencil Set – Tim Holtz set 31
  • Paper – Watercolor, Bristol Smooth, Hammermill
  • Paper Trimmer
  • Water bottle

Product Announcement: Dewlets Etched Metal Die

Product Announcement: Dewlets Etched Metal Die

Dewlet Etched Metal Dies are perfect for use with DewDrop inkpads! Use Memento, Brilliance, or VersaMagic DewDrop inkpads to stamp a droplet-shaped image, align the cutting die, and run the image through a die cutting machine to quickly cut it out. Arrange your Dewlets into daisy flowers, flip them for a poinsettia, use them as leaves or arrange them in any creative pattern you wish! Compatible with machines designed for use with a thin metal cutting die; they will cut through most stamping media.


Supplies

Create a Grey Plaid Poinsettia Handmade Christmas Card

by Martha Lucia Gomez

In this world, we want to buy everything we like and see, but sometimes experimenting and recreating is part of the fun. Today, I am sharing with you a card that I made using beautiful single pieces that I combined with “necessity” because I don’t have a plaid stamp! I am crazy with the fabulous plaid designer papers that I saw during this season but I decided to create my own pattern just using two colors of VersaFine Clair Ink and without embossing to make it more rustic.

Skill: Advanced
Time: 1 hour

Directions


Step 1

I took a stamp set from Peek-a-Boo Designs that includes a lot of different stripes and selected just two or three to be used on my card. I positioned the stripes in my Stamparatus and stamped stripe by stripe using for the wide strip VersaFine Clair Morning Mist and for the thin VersaFine Clair Nocturne.


Step 2

When I was satisfied with the vertical pattern I decided to add a horizontal different design to make the plaid more interesting. To stamp these lines I only used VersaFine Clair Nocturne. Since the top of the Stamparatus has grids, was very easy to follow the pattern just moving the paper and not the stamps. I left this stamped piece side for a few minutes.


Step 3

In a separate piece of whisper white cardstock, I stamped with VersaMark Ink one festive poinsettia included on the stamp set Poinsettia Tangle from Dare2B Artzy and covered it with Silver Embossing Powder that I melted with the heat tool. I fussy cut poinsettia with my scissors.


Step 4

With the leftover cardstock, I used three colors of Fireworks to create a soft green tone that at the same time show me a little shimmer. I used Fireworks Shimmery Craft Spray in Cottage Ivy, New Sprout, and Bamboo Leaves. After the piece of cardstock was totally dried and cut some leaves using a die cuts from Prima.


Step 5

To finalize my card, I resized the background and arranged all the pieces over Real Red cardstock and as a final touch, I die cut the word believe in Real Red cardstock and black foam. I pasted both die cuts using On Point Glue and sprayed with Sheer Shimmer Frost. With a Memento Marker, I colored the center of the poinsettia. Sometimes, by exploring and practicing, you can discover amazing things that you can do using only your inks and this card is a perfect example.

Supplies

Imagine
Other
  • Cardstock – Whisper White, Real Red
  • Peek a Boo Designs – It’s Plaid Time Stamp set
  • Dare2B Artzy – Poinsettia Tangle
  • Simon Says Stamps – Believe Die Cut
  • Foam Black