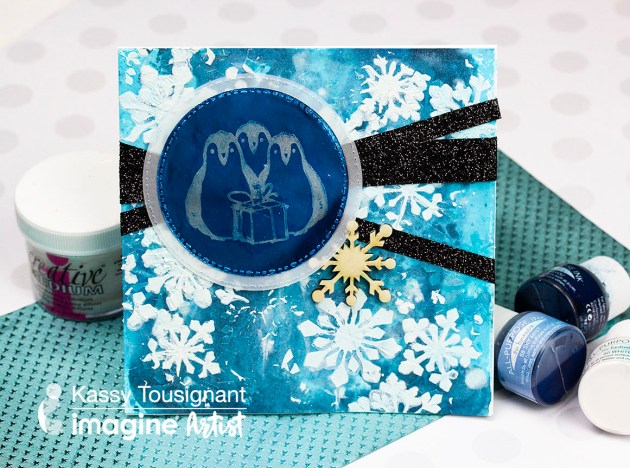
Learn How to Make a Holiday Card with a Gel Press and All-Purpose Ink

by Kassy Tousignant

Winter is right around the corner and I love when the snow covers the landscape! When I received the Frosted sampler pack of Rinea papers, I couldn’t resist making a winter card with a cute penguin stamp. I didn’t have white Creative Medium to make my snowflake background, so I mixed some All-Purpose Ink in the clear Creative Medium and achieved great results! I created a wintery background with Doodlestix, a Gelli Press, All-Purpose Inks, and Fireworks sprays from Imagine.

Skill: Advanced
Time: 1 hour + dry time

Directions

Supplies

Imagine

• StazOn – Blue Hawaii
• All-Purpose Ink – White, Blue Bayou, Sky Mist
• Creative Medium – Shimmer, Clear
• IrRESISTibles Pico embellisher – Shimmer
Fireworks Shimmery Craft Spray – Bahama Blue
Tear It! Tape
Doodlestix
Palette knife

Other

• Rinea Paper – Frosted variety pack
• Stacking metal dies – circle
• Vellum paper
• Unity Stamp Co – Penguin stamp
• Glitter
• Ribbon
• Echo Park – Snowflake stencil
Gel Press
• Pipette
• Wooden snowflake
• Cardstock – white
Use a Ghosting Technique to Create a Unique Christmas Card

by Martha Lucia Gomez

Use a Ghosting Technique to Create a Unique Christmas Card

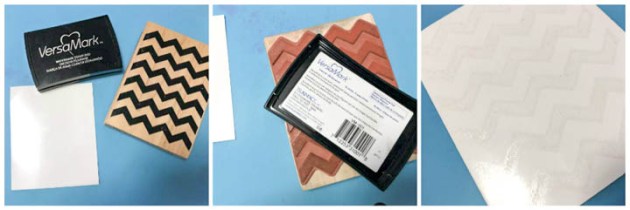
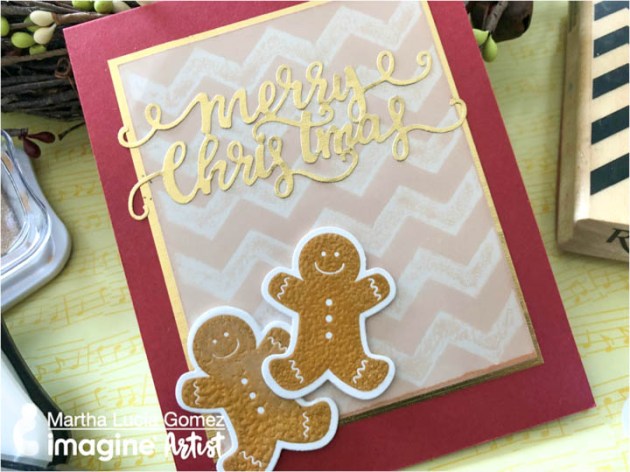
Hello everyone! Ghosting technique was one of the first techniques that I learned in cardmaking crafts and today I am sharing with you a lovely way to incorporate this ghosting technique in a Christmas Gingerbread Card. To realize this technique you only need glossy card stock and VersaMark ink to stamp the ghost image. In my project, I am using a Chevron Background from Recollections, but let me show you the process!

Skill: Intermediate
Time: 1 hour

Directions


Step 1

Take a piece of white glossy card stock and ink your stamp or stamps with VersaMark Ink and stamp directly over the glossy side and set this piece aside for a few minutes so the ink can dry.


Step 2

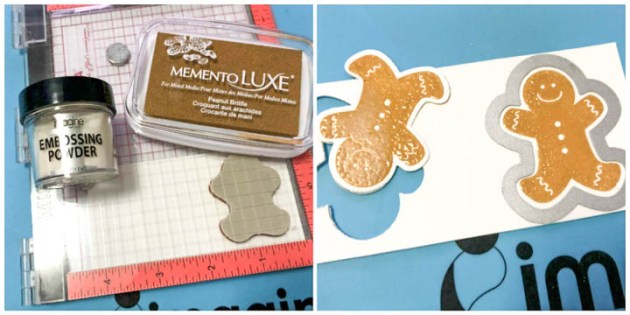
On a regular piece of cardstock, stamp the holiday-themed images that you want to use to decorate your card. I used a gingerbread image from a Stampin Up Set. I stamped the images with Memento Luxe Peanut Brittle and Clear Embossing Powder that I activated with the heat tool. Then I cut the gingerbread with the corresponding die cut.


Step 3

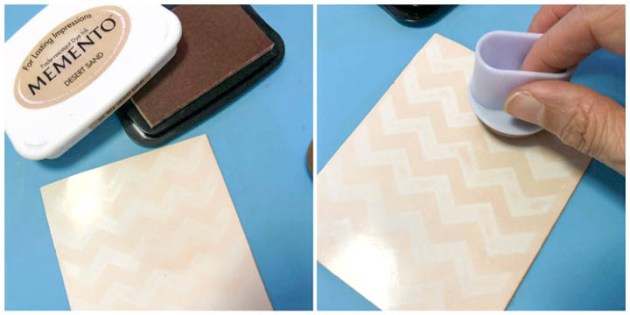
When the glossy card stock was totally dry, I sponged several times in circular motion with Desert Sand Memento Ink. If you want you can also use a brayer to create the resist effect.


Step 4

To finalize the card, I resized the glossy layer and created a gold mat using Gold Starstruck Rinea Foiled Paper and pasted this layer directly over the Cherry Cobbler card base. Then I cut the sentiment Merry Christmas using the same Gold Starstruck Rinea Foiled Paper with a Gina Marie Design Die Cut and pasted it over the chevron background and pasted the gingerbread using dimensional dots or tape. You can use any type the stamps to create this technique, not necessarily background stamps, all depends on the theme that you wanted to use in your card.

Supplies

Imagine
Other
  • Stampin Up – Scentsacional Season Stamp Set & die cut (retired)
  • Recollections – Chevron Background
  • Stampin Up – Cherry Cobbler Card Stock, White Glossy Card Stock
  • Rinea Foiled Paper – Gold Starstruck
  • Gina Marie Designs – Merry Christmas die cut
  • Dimensional tape or dots


See How to Create a Beautiful Autumn Nature ATC Card Set

by Elina Stromberg

See How to Create a Beautiful Autumn Nature ATC Card Set

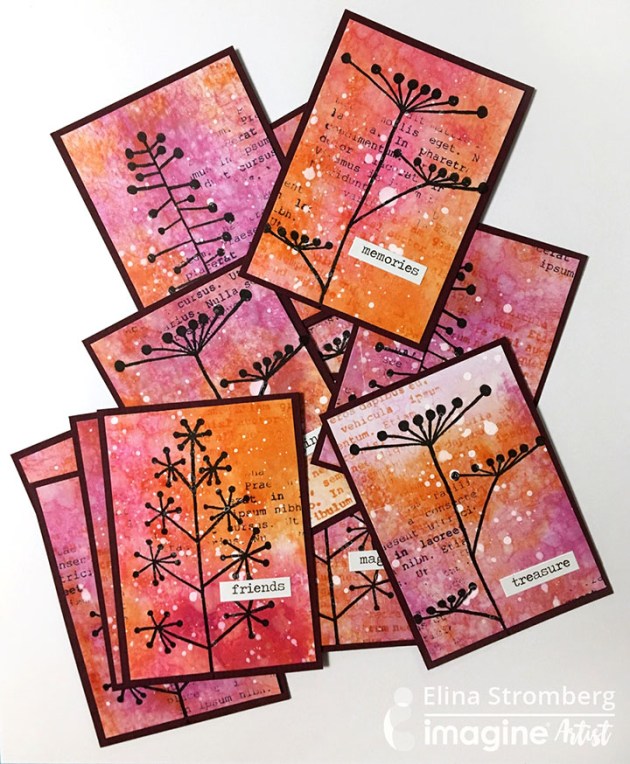
Artist Trading Cards aka ATC’s are wonderful little pieces of art. Their small 3.5” x 2.5” size doesn’t require too many materials nor too much time. Using just one single sheet of mixed media or watercolor paper you can create a pile of cards on one go. This set of ATC’s was inspired by the beautiful autumn nature. Bright, bold colors, and wilted garden flowers getting ready for winter. Simple but elegant, and so fun to create!

Skill: Beginner
Time: 1 hour

Directions


Step 1

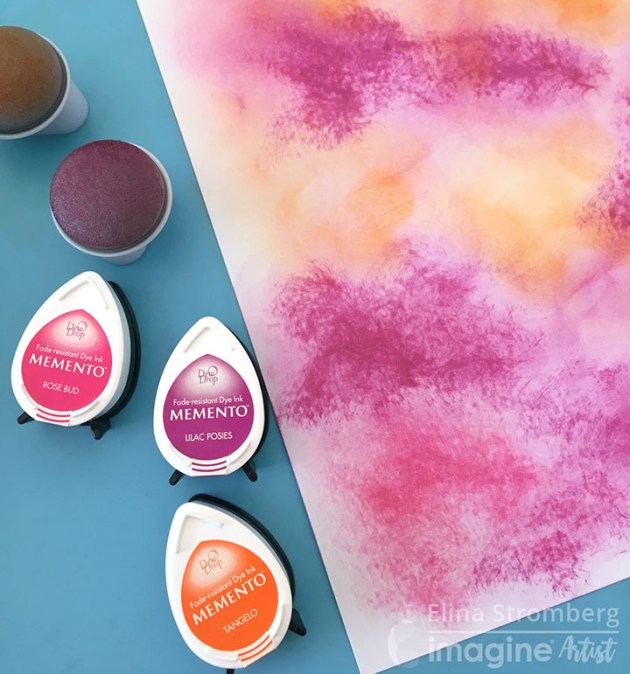
Apply purple, pink, and orange Memento DewDrops on a white mixed media paper with Jumbo Daubers. Sprinkle water on the inked paper, letting the colors to mix. Let dry or dry with a heat gun.


Step 2

Decorate paper by stamping random text patterns on the paper. Use only one pattern stamp, but two ink colors (orange Memento Tangelo and dark purple VersaFine Clair Fantasia). Cut several cards from the inked and stamped sheet. The standard size of ATC is 2.3” x 3.5”. If you want to mat the cards on a solid color cardstock, trim these foreground cards slightly smaller than ATC. Mix white acrylic paint with water, and sprinkle paint drops on the cards. Let dry.


Step 3

Cut ATC backgrounds from dark red cardstock. Attach card fronts on the backgrounds with two-sided tape. Stamp flower shapes on the cards using black VersaFine Clair. Decorate ATC’s with word stickers that express sentiments such as “friends,” “treasure,” and “inspiration.”

Supplies

Imagine
Other
  • White mixed media paper
  • Cardstock – Dark Red
  • Acrylic paint
  • Stamps – Text stamp (‘Tekst’ by Wycinanka); Flower stem stamps (Artemio)
  • Word stickers
  • Double-sided tape

Create Beautiful Designs with Gold Rinea Foil and StazOn Ink

by Iris Rodriguez

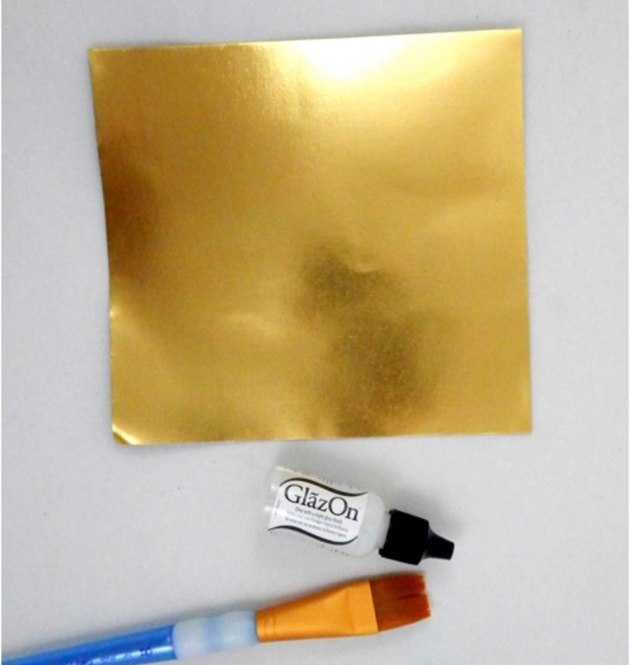
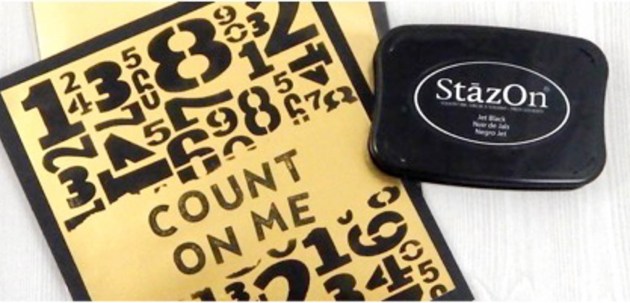
This month we have the fun challenge to make projects using Rinea foils. There are so many fun things you can do with these foils; you can stamp on it, paint, use with mediums or create 3D decorative projects. I like how the gold foil and black look together. For my card, I used Imagine’s GlazOn to seal the foil; it protects the foil and acts as a primer, which allows the ink to better adhere. I stenciled in my design with StazOn ink.

Skill: Beginner
Time: 30 minutes

Directions


Step 1

Seal the Gold Rinea foil with Light Gloss or Glossy GlazOn. It protects the foil and acts as a primer, which allows the ink to better adhere. Allow the GlazOn to dry, it dries very fast.


Step 2

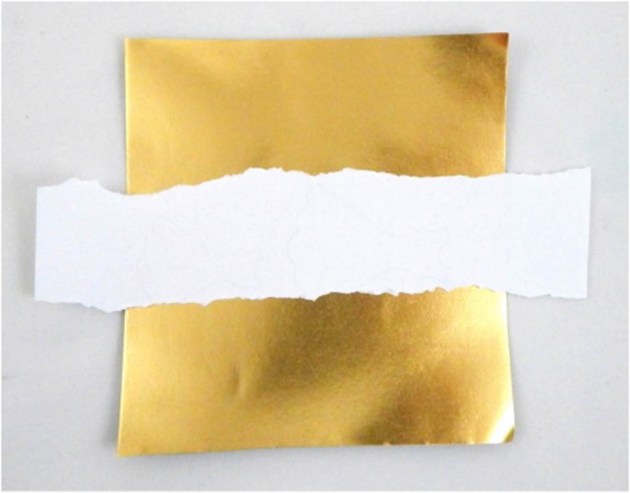
Determine the size of your sentiment. I stamped the sentiment with individual alphabet stamps. If you’re doing the same, stamp the whole on a scratch piece of paper to determine the size. Rip apart a scratch piece of paper to a size that will fit the height of the sentiment, plus a little space above and below it. Place the paper about 2/3 down from the top of the foil. The paper will protect the area where the sentiment will be stamped.


Step 3

Using an InkBlusher and Jet Black StazOn ink, stencil the design onto the foil.


Step 4

Stamp the sentiment. Assemble the card. I hope you enjoyed this project and will give it a try. You can count on us to keep bringing you card making and mixed media project ideas, keep visiting the Imagine blog.

Supplies

Imagine
Other
  • Rinea Foils – Glossy Ebony and Gold Pack
  • Cardstock paper-Black
  • Crafter’s Workshop stencils- Numbers – (6×6 inches)
  • Alphabet stamps

Make a “Sending You Autumn Blessings” Greeting Card

by Roni Johnson

Make a "Sending You Autumn Blessings" Greeting Card

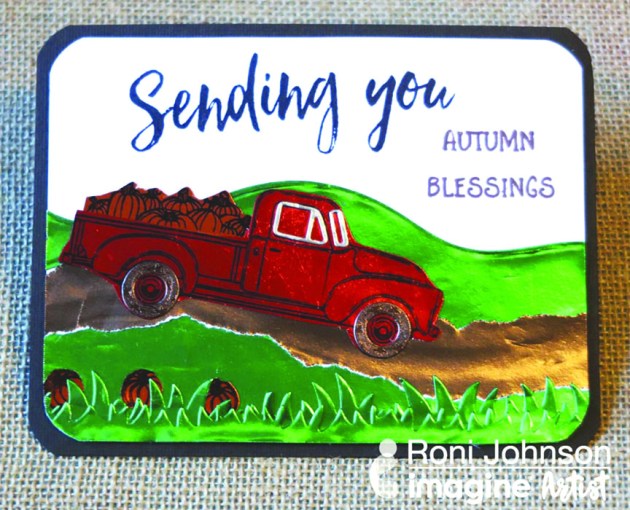
Autumn is my favorite time of the year so when I saw these fun stamps from Honey Bee I knew I had to have them. The pick-up is perfect for all sorts of fun scene cards. Rinea foiled papers make it that much more special. The foiled paper is so easy to stamp on using StazOn inks and can be torn, die-cut or trimmed with scissors as you see here. It’s just so much fun to add a bit of zing to your projects with Rinea Foiled Paper.

Skill: Beginner
Time: 30 minutes

Directions


Step 1

Stamp the truck onto Ruby/Gold Glossy Foiled Paper using Jet Black StazOn Ink. Fussy cut the truck; die-cut the tires from Mocha/Mocha Starstruck Foiled Paper and window detailing from Silver/Gold Glossy Foiled Paper. Adhere these accents to the pickup truck.


Step 2

Stamp pumpkin pile and individual pumpkins on Marigold/Gold Glossy Foiled Paper; fussy cut. Adhere the pumpkin pile to the truck and set the pumpkins aside. Tear a “dirt road” from Mocha/Gold Glossy Foiled Paper. Die-cut grass and hills from Emerald/Gold Glossy Foiled Paper. Adhere hills, grass and road pieces to a white card panel; affix the truck and pumpkins.


Step 3

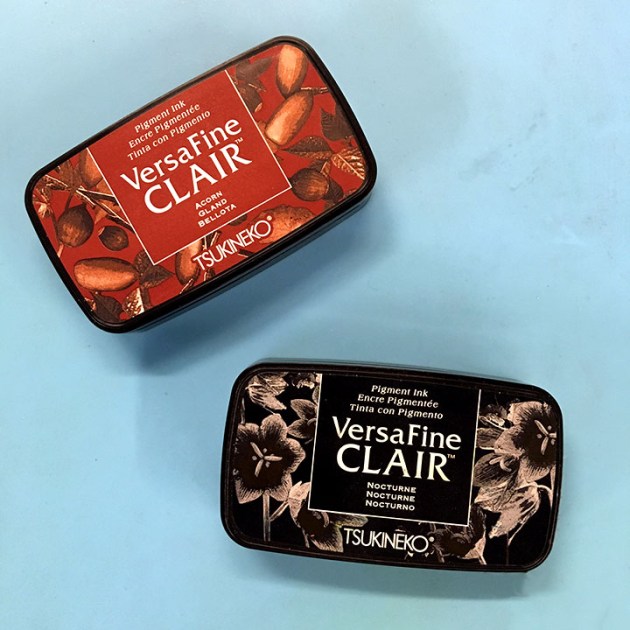
Stamp “Sending you” with VersaFine Clair Nocturne and “Autumn Blessings” with VersaFine Clair Acorn inks on the card panel. Affix the card panel to a dark brown card blank.

Supplies

Imagine
Other
  • Rinea Foiled Paper – Autumn Variety Pack; Emerald/Gold Glossy Foiled Paper; Silver/Gold Glossy Foiled Paper
  • Honey Bee Stamps – Sending You Sentiments; Little Pick Up Stamps; Little Pick Up Dies
  • White Cardstock
  • Dark Brown
  • Card Blank
  • Adhesive

See How to Create a Metallic and Distress Autumnal Greeting Card

by Kassy Tousignant

See How to Create a Metallic and Distress Autumnal Greeting Card

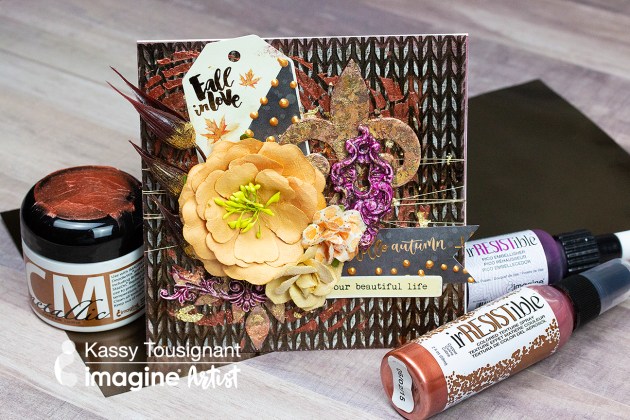
I love making mixed media cards! It is a smaller canvas to work with and you can experiment with different products together. Imagine always has just the right tools for this beautiful copper metallic and golden-hued theme! For November, Imagine is working with Rinea papers and I am having so much fun experimenting with how they emboss and handle ink products! I used the Walnut spray and Creative Medium on the Rinea paper and made a beautiful fall card.

Skill: Advanced
Time: 1 hour + dry time

Supplies

Imagine

• Fireworks! Shimmery Craft Spray – Rich Cocoa, Potter’s Clay
• Walnut Ink Spray – Walnut
• Brilliance ink – Crimson Copper
• Creative Medium – Gold, Copper, Clear
• IrRESISTibles Texture Spray – Copper
IrRESISTibles Pico Embellisher – Lilac Posies
On Point Glue
Tear It! Tape
Palette Knife

Other

• Rinea Paper – brown
• Gold flakes
• Gold glitter
• Gina Marie – wood ring stencil
• Sandpaper
• Sweater stencil
• White gesso
• Chipboard pieces
• Prima – flowers
• Nuvo drops
• Gold string
• Fall pod stem
• White cardstock