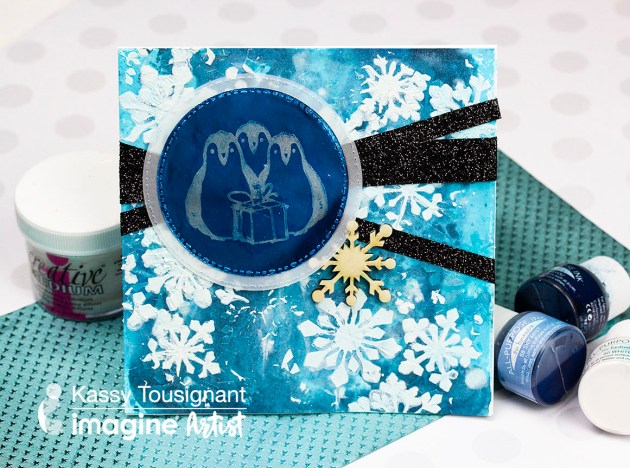
Learn How to Make a Holiday Card with a Gel Press and All-Purpose Ink

by Kassy Tousignant

Winter is right around the corner and I love when the snow covers the landscape! When I received the Frosted sampler pack of Rinea papers, I couldn’t resist making a winter card with a cute penguin stamp. I didn’t have white Creative Medium to make my snowflake background, so I mixed some All-Purpose Ink in the clear Creative Medium and achieved great results! I created a wintery background with Doodlestix, a Gelli Press, All-Purpose Inks, and Fireworks sprays from Imagine.

Skill: Advanced
Time: 1 hour + dry time

Directions

Supplies

Imagine

• StazOn – Blue Hawaii
• All-Purpose Ink – White, Blue Bayou, Sky Mist
• Creative Medium – Shimmer, Clear
• IrRESISTibles Pico embellisher – Shimmer
Fireworks Shimmery Craft Spray – Bahama Blue
Tear It! Tape
Doodlestix
Palette knife

Other

• Rinea Paper – Frosted variety pack
• Stacking metal dies – circle
• Vellum paper
• Unity Stamp Co – Penguin stamp
• Glitter
• Ribbon
• Echo Park – Snowflake stencil
Gel Press
• Pipette
• Wooden snowflake
• Cardstock – white

How to Make a Gingerbread House Garland

by Jennifer Vanderbeek

How to Make a Gingerbread House Garland

Die cuts and a few choice supplies combine to create this darling little gingerbread house garland. Not only is it perfect for the holidays, it’s an ideal craft to let kids help decorate (after the embossing is done!) and it would also look super sweet at a fairy tale themed event—think Hansel and Gretel and the witch’s house in the woods. A fun technique used in this project is layering the StazOn Studio Glaze while still wet. Drawing the tip of the Claret StazOn Studio Glaze bottle over the Cotton White made for near-seamless candy cane stripes once dried. Also, I’ve found it helps to be very generous with the Cotton White, especially on darker papers or backgrounds, if you want it to retain some opacity.

Skill: Advanced
Time: 15 minutes per house

Directions

Supplies

Imagine
Other
  • Cardstock – Craft
  • Die-Versions – Tall Victorian Home die
  • Sizzix – Big Shot Plus
  • 1/8” Hole Punch
  • Darice – Heat Tool
  • Baker’s Twine
  • Clear Tape

See How to Create a Gingerbread House with Rinea Paper and StazOn Studio Glaze

by Steph Ackerman

See How to Create a Gingerbread House with Rinea Paper and StazOn Studio Glaze

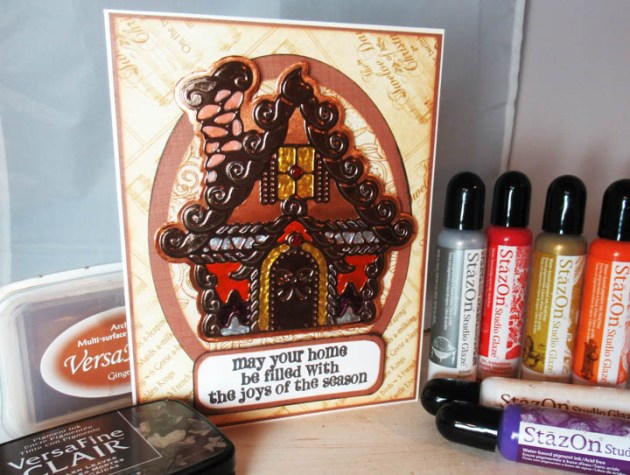
The holidays are almost here and there is nothing as iconic for Christmas as a gingerbread house during the holidays. When the kids have outgrown this tradition, it is still possible to recreate the fun by using your craft supplies. In today’s project, I used StazOn Studio Glaze to fill in some of the details of this gingerbread die.

Skill: Intermediate
Time: 1 hour

Directions

 Gingerbread House from Rinea's Glossy Mocha/Gold Foil
Step 1

Using Spellbinders dies which includes two layered pieces, die cut the Gingerbread House from Rinea’s Glossy Mocha/Gold Foil. Die cut the second Gingerbread House base piece from Rinea’s Glossy Copper/Gold Foil. Use On Point Glue to adhere the layers together.

StazOn Studio Glaze in Valentine
Step 2

Using StazOn Studio Glaze in Valentine, add color to the candy dots in the Gingerbread House.

color using assorted StazOn Studio Glaze colors
Step 3

Continue adding color using assorted StazOn Studio Glaze colors between the die cut elements of the Gingerbread House. Allow each color to dry before moving onto the next color.

VersaFine Clair in Fallen Leaves
Step 4

Cut cardstock and pattern paper to fit a 5″ x 6 1/2″ card base. Die cut large ovals from cardstock and pattern paper. Ink the edges with VersaMagic in Gingerbread, then adhere to the card. Stamp the phrase with VersaFine Clair in Fallen Leaves, cut to fit and mat with cardstock.

 Gingerbread House for Christmas card
Step 5

Adhere the Gingerbread House and phrase to the card with foam adhesives for dimension. Finish the card with any additional personal touches!

Supplies

Imagine

Other

  • Rinea Foiled Papers – Earth Tones Foiled Paper Variety Pack
  • Bazzill Cardstock – brown, white
  • Graphic 45 – Pattern Paper
  • Spellbinders Dies
  • Hero Arts Stamp
  • Foam Adhesives

Learn How To Make A Gingerbread Theme Gift Tag

by Jowilna Nolte

Learn How To Make A Gingerbread Theme Gift Tag

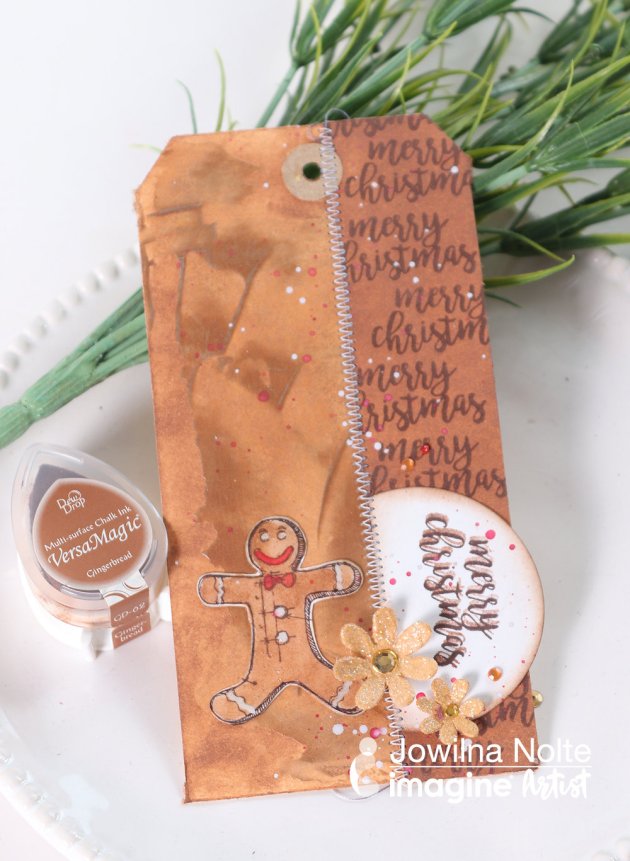
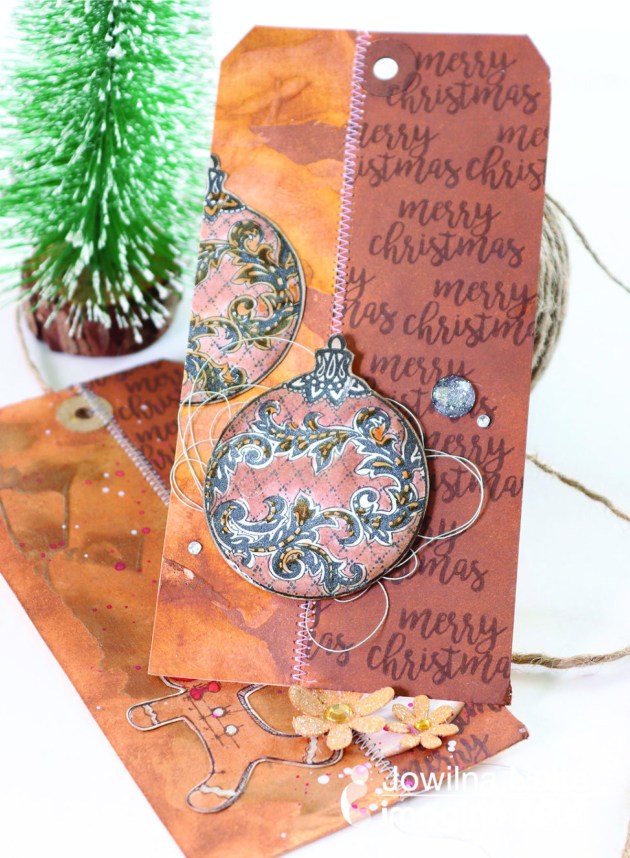
Make some cute gingerbread theme tags for your gift giving this holiday season. Inspired by the numerous light brown inks and products that fall into this color scheme, I created these holiday tags to inspire you. Enjoy!

Skill: Advanced
Time: 30 minutes per tag

Directions


Step 1

On your Craft Mat mix a small amount of glossy texture paste and Delicata Golden Glitz inker.


Step 2

With a palette knife, apply the colored paste to some white cardstock and leave to dry. A nice thin layer is all you need – add as much texture and dimension as you want.


Step 3

Once the texture paste is dry, use VersaMagic Gingerbread and color the entire piece of cardstock. Blend the ink over the texture paste, then cut a strip about 3cm wide and the length of you tag.


Step 4

Stamps some Christmas baubles (or ornaments) in VersaFine Clair Nocturne.


Step 5

Use a small paintbrush and VersaMagic Gingerbread to add color to your stamped baubles (ornaments). Add ink to your Craft Mat, mist with water and pick up the color to paint your images.


Step 6

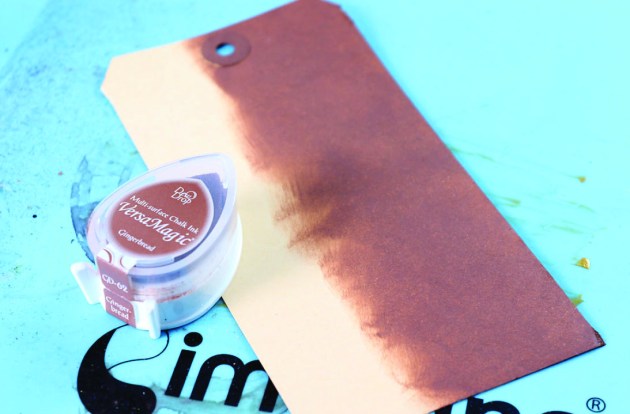
Use the direct to paper technique to color half of the length of your manilla tag using the VersaMagic ink pad.


Step 7

Add irRESISTible Pico embellisher in Shimmer and Desert Sand to your baubles (ornaments) and leave to dry.


Step 8

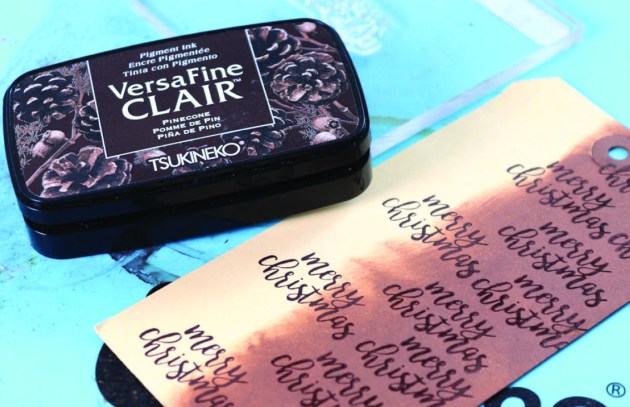
Use VersaFine Clair and a sentiment stamp, and stamp repeatedly down the colored side of the tag.


Step 9

Adhere the paper strip down the left side of the tag and add decorative sewing. Adhere the colored baubles (ornaments) using foam tape for dimension. Adhere one bauble (ornament) flat and cut off overlapping side. Add diamanté and other flourishes to finish it up.

Supplies

Imagine
Other
  • Tags
  • Cardstock – White
  • Stamps – PSX, Kaisercraft
  • Sewing machine
  • Diamante
  • Celebr8 flowers

Make Gingerbread Ornaments with Clay and Memento Ink

by Kyriakos Pachadiroglou

 See How to Make Gingerbread Ornaments with Polymer Clay and Memento Ink

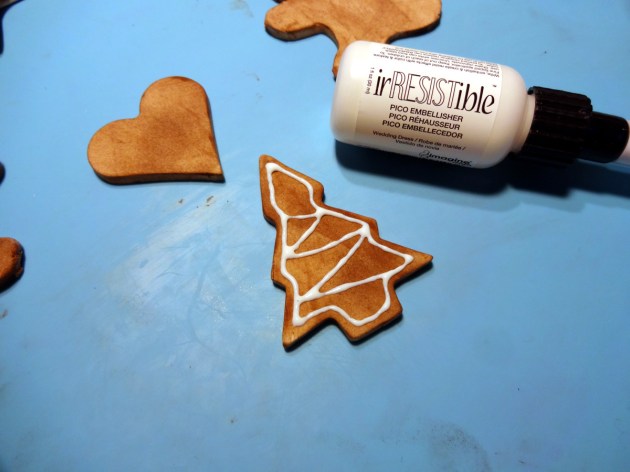
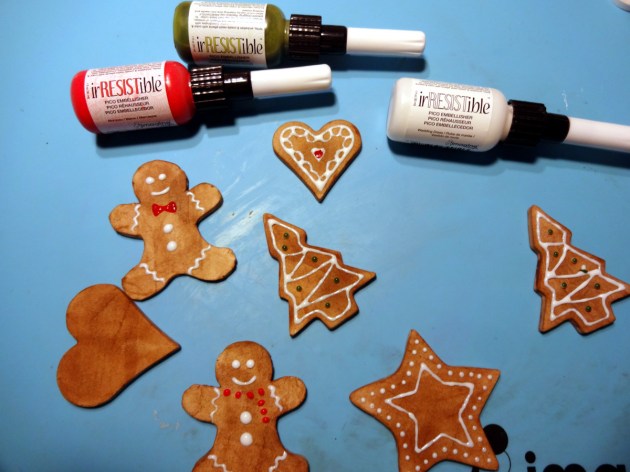
This holiday season, the best recipe for gingerbread cookies can be found right here! It takes only a few ingredients/materials and no baking, with a long-lasting fresh cookie look! The first ingredient is clay! I used an air dry one to avoid any “baking” at all. A nice match of Walnut Ink Crystals with Memento Rich Cocoa ink pad gives a beautiful gingerbread color that will make people think these cookies are baked to perfection. Decorate the cookies with easy glazing and fine detail provided by the thin nozzle of irRESISTible Pico Embellisher colors. See if you can trick someone into tasting them! (Ok, maybe don’t go that far…)

Skill: Beginner
Time: 1 hour + clay drying time

Directions


Step 1

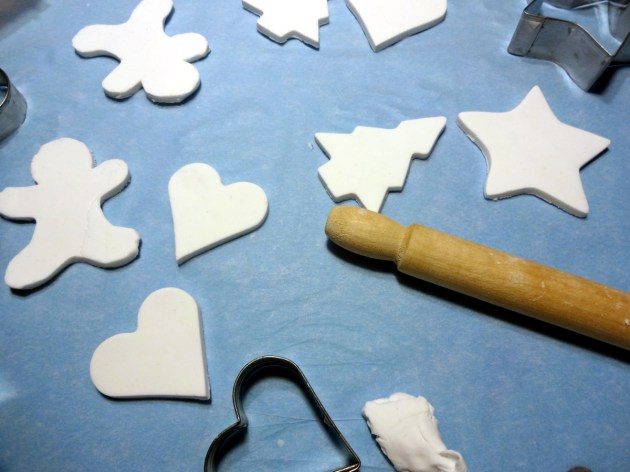
Use the rolling pin to flatten the clay in a thick layer. Cut shapes with the cookie cutters. Lay them on the parchment paper and set aside to dry.


Step 2

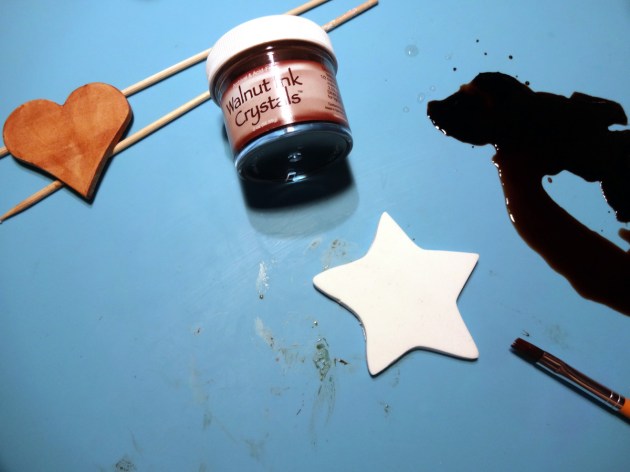
Dilute a few Walnut Ink Crystals in water and paint the clay shapes.


Step 3

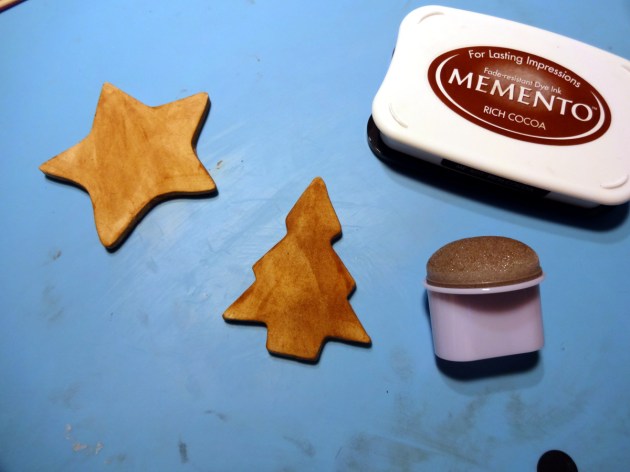
Use a jumbo sponge dauber to darken and add a bit of texture on the clay shapes with Memento Rich Cocoa ink.


Step 4

Use the irRESISTible Pico Embellisher in Wedding Dress as ‘sugar glaze’ to decorate the clay cookies.


Step 5

Add color and details on the clay cookies with the irRESISTible Pico Embellisher in Morocco and Pear Tart colors.

Supplies

Imagine
Walnut Ink Crystals
Walnut Ink Crystals
Memento Inkpad in Rich Cocoa
Memento Inkpad Rich Cocoa
irRESISTible Pico Embellisher Wedding Dress
irRESISTible Pico Embellisher Pear TartirRESISTible Pico Embellisher Pear Tart irRESISTible Pico Embellisher MoroccoirRESISTible Pico Embellisher Morocco Sponge DauberSponge Dauber
Other
  • Air dry clay
  • Cookie cutters
  • Rolling pin
  • Parchment paper
  • Paintbrush

See How to Create Fun Snowy Texture for a Christmas Card

by Roni Johnson

See How to Create Fun Snowy Texture for a Christmas Card with Radiant Neon Amplify in white

Winter is quickly approaching…at times it feels as if you’re looking at the world through the shroud of dingy grey gauze. The real beauty of winter can also be seen in the grey twilight when the pines have been darkened by an evening snowfall cutting you off from the worries of the outside world. This is what I look forward to in the coming months. I tried to capture that feeling in this Christmas card I’ve made for you today.

Skill: Beginner
Time: 30 minutes

Directions


Step 1

Pounce Grey Flannel and London Fog Memento Ink onto the craft mat. Pounce a bit of Niagara Mist VersaMagic ink as well.


Step 2

Spritz a bit of Ink Potion No.9 over the inks. Tap the mixture a bit to mix it up and eliminate some of the harsh lines.


Step 3

Press a white cardstock panel into the ink mixture several times until you are satisfied with the results.


Step 4

Stamp pine trees onto the inked panel using VersaFine Clair Morning Mist ink.


Step 5

Randomly dot Radiant Neon Amplify in White over the panel.


Step 6

Heat the Amplify medium to activate and puff it up.


Step 7

Trim and mat on black cardstock then adhere the panel to a grey card base. Stamp off the excess ink on the pine tree stamp on the inside of the card to create a ghostly grey pine forest. Add a bit of line work around the edge of the card to finish it off.


Step 8

Stamp sentiment on a scrap of white cardstock. Trim and adhere to the card front.

Supplies

Imagine
Other
  • Just For Fun Stamps – Pine Trees
  • Cardstock – White, Grey, Black
  • Heat Tool